


Chef niloc
-
Posts
147 -
Joined
-
Last visited
Content Type
Profiles
Forums
Events
Blogs
Gallery
Store
Everything posted by Chef niloc
-
That's great the mechanics that you came up with are impressive, did you come up with that yourself or is that part taken out from something else?
-
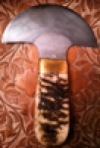
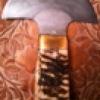
My 1st maul was a cheep 18oz tapered one from " wood is good" , I got I way back before I had even touched a piece of leather ( got I for wood working). Still like and use this maul and think for the mony they can't be beat. I have one or more mauls now from ever maker mentioned in this thread and will give bearman my vote for the best out there. There is a appeal to the "old classiness" of a rawhide maul but I can't think of any other reason to go with one over the polymer ones made today. Back to the tapered vs streaght, from what I have been told the tapered is sad to be easer on the elbows but most leather workers use a straght maul becouse it gives you a more even blow when hitting down from the side in a up and down or twisting motion. The tapered IMO is better for when you are striking down in a hammer like motion and nothing else. I can see the reasoning behind the first statement of being easer on the elbow but I have a bad radial nerve and have never noticed a difference. So I would just go with a streaght maul.
-
Bill IMHO is one of ( if not the) best makers out there today. From his hunting knives to his kitchen knives this maker turns out nothing but top end work.
-
Does anyone know of any good resources,tutoriales, or how to's on rebuilding a sewing machine? I have a 29-4 that I am wanting to fix up.
-
Yes these are just made from cheep steel etched to look like Damascus
-
I'm working right now on a 29-4 that had the same fine paint job yours had on it (: It's going to be very tricky to only remove the spray paint as I can only assume they used shaker can paint for the job? I just striped the whole thing down as i wanted a custom paint job done on it anyway. But you are right the original paint was tougher. Likely do to the fact that the shaker can paint was just sprayed over the original paint without any surface prep done 1st, he'll they likely didn't even clean the machine 1st?That sad the original paint likely was not in the best of shape, thus the prevents owners compel to paint it? As for how to try and just remove the "new paint" I can't say for sure as I did not go that route my self but here is how I would go about it if I was to try.Note: this will be time consuming and tedious work.1st I'd try a thin layer of paint striper. I applied a heavy amount 3 times and still had some trace amounts of old paint left! After that I'd follow up with lacquer thinner on a rag. That should do the trick. As for the type of stripper to use, I used this: http://www.google.com/products/catalog?q=paint+stripper&hl=en&client=safari&bav=on.2,or.r_gc.r_pw.,cf.osb&biw=1024&bih=672&um=1&ie=UTF-8&tbm=shop&cid=6258989088659257914&sa=X&ei=EU2ZT_y1CqTq0gGw7o37CQ&ved=0CD8Q8wIwCA I have used it before on a few projects and it workers very well, but maybe too well for what your trying to do, but I think you will be ok with just a thin coat? It's thik and jell like so it states in place, I'd wipe it down let it sit for a 1/2 hour then wipe it off, then follow up with the lacquer thinner on a rag. As for the badges: you can use a small chisel to cut the pins off then use brass or copper tacks to re set them, a dermal tool would also work. Mine were set in with decretive pins and I was on the fence to take them off or not. I left them on and then used a dermal buffer to clean them off, then gold leafed them. Before Good cleaning, lot of "new" paint came off. Striper on and working What one aplacation of stripper did What was still left after 3 applications, I went to 80 grit paper at this point. I should have taken more photos of the painting process but I didn't. I'm not done yet still wave some wet sanding and buffing to do to bring out the pearl in the paint, but here is what it looks like so far.
-
This would be a good thread to start, starting a thread that just showed the tool, name, size and impression made. Bob has never had a very user friendly impression photo list. Life would be easer ordering from him if he did. I don't have many but the few I do I'll take picks of and post. This is done with one of his Tri weave stamps. 1st time using it, so don't be to hard on my work (:
-
My avatar is a knife made for me by IMHO one of the most talented knife makers in the world, Master Blade Smith Bill Burke.
-
I just cleaned up and panted a 29-4. In order to get a good paint job i needed to clean the machine up pretty good, this involved using brake and part cleaner to remove oil and grease. Now its time to re-oil and grease the machine. I have the manual and it shows the oil spots but not where to put the grease. I know it go onto the gears and this is done behind the two round cover plates, but how much and where do I put the grease? Do I need to "pump" or push it up into the neck? It looks like the balance wheel has a grove for grease? Are there other spots ( like the bottom) that need grease? I have I-flow grease on hand to use
-
I know this is a old thread but I was hopping someone could confirm that the harbor freight peddle will work here? I was thinking of using it for a similar application but decided agent it as it states that it can not be used or motors that use a soft start capacitor, like the one shown.
-
Yes the flesh side is the side I make glass smooth. The only razor strop I have an thus used as reference is a kanayama strops, but from what I have been told they are high let regarded as being top quality? I use horse but straps but made one out of shell cordovan as well. Knowing that shell is the polished flesh side I only thought it logical to polish that side. To get leather glass smooth takes a lot of sanding to working the "rougher" side can only result in a more finished looking strop as the grain side is much much easer to get a nap like texture to. I like the draw of the velvet side too. If you only wanted a one sided glass like strop it would be easer to just polish the grain side, but I found it hard to get a truly flat uniform strop without finishing both sides. The way I did the above give you a strop that looks and feels like it was made from shell cordovan. I love horse hide and use it almost exclusively for all my leather work. I have not tried or worked with latigo leather at all, for anything, never had a pice p, been wanting to get some. I have herd that it makes for a great strop.
-
I haven't perfected it yet but here are some of the things I have learned both from reading very old leather working text and a lot if trial and error.Start with as thick and even piece as you can. Give yourself extra inches on all sides so you can trim to the right size when done. I have been working with 8x30" pieces, then trim to two 3x28" strops I case/quick 5 min soak in very warm water about 120-140 F Then I slick it to a piece of plate glass, grain side down bathroom shelf I bought at hardware store for $20. So far I have had the best luck with a random orbital sander, I have beef thinking a drum sander may be better but I don't have one. I start with 80 then , 120,220,400,600, 800, 1000Then I hot soak it again (note I have not let the leather dry all the way yet since the 1st soak) and slick it grin side up. Sad to 120 to get velvet texture. Now I have a French top stove that when off states about 140F so I put the leather on the glass grain (velvet Side) up and work 1 micron diamond mixed with Blick #3 considerer. I work it in with a 1" hard wood stick " bottle necking" the rubbing on a hot surface helps work the compound into the cells as well as giving the flush side a glass like look and finish. I then hit grain side ( still a little damp) with a brass brush to lift the cell back up. Then back to the sander with a 220 grit. It should be almost dry by nowLet it sit over night then "beam" it over something, back of chair, broom stick. This softens the strap up.Now trim to size
-
Another good place to get different diamond compounds http://www.advancedabrasives.com/
-
I got the diamond powder from the same place. I found mixing it into Blick #3 leather condisaner works great, you can really work it into the leather that way.
-
Are you doing any king of surfacing, or grain correction (sanding, boneing, carding, combing ext) to the leather?
-
I have acutely been experimenting and reading a lot on the subject lately. To give you my best advice I need to know one thing that is very important when making a strop, What is the strops intended use?I.E. straight razors, woodworking or leather tools, kitchen knives? "tool strops" this includes strops for most knives should always be mounted/ glued to a perfectly flat hard backing. The thickness of the leather depends greatly on what you are stropping, thicker softer leather will give a convex micro bevel to a blade, this is good for some knives ( hunting knives come to mind) but bad for others like kitchen knives and chisels. For those tools harder thinner leather is better. Also if the strop will be used with honing compound for a slight degree of sharpening or kept "clean" (no compound) for a truer form of stropping. If compound is used the type of leather is not as important, it doesn't even need to be leather at all! You see with compounds the abrasive is doing the work the leather is just a substrate to hold the abrasive, so something like balsa wood would work fine and be easer to make then a leather strop. Most important is that the leather or any substrate be completely flat! No leather I have ever come across right from the store or tannery has ever been flat enough to make a good strop. There are different ways to go about flatlining the leather, each creates a different surface to the leather that lends its self better in one way or another depending on what's being stropped. In general if the strop is to be mounted and abrasive compound used then the type of leather is not as important, good veg tan cow hide is fine. Straight razor hanging strops are a whole different ball game! Much harder to make and very little helpful info out there on how to make them. It's kind of a lost art, do to the disposable and safety razors that are now the norm these days. It's only been recently that "wet shaving" has come back in fad. I just spent a good 2 months of research, experimentation to figure it out, I'm close but still not 100% there. IMHO most of the straight razor strops being sold out there are compleat garbage and most people being new to wet shaving just don't know any better. I can think of only two or three makers out there that make a quality straight razor strop. All cost more the $100.00 and after making some I can see why. For a hanging razor strop I like horse hide. The best "old world" strops were known to be made from cordovan or Russian leather. From my research the "recipe" / art for making "true" russian leather has been lost, and shell cordovan is way to expensive for most to use for strop making. I have herd of people making good strops from latigo leather, i have not tried this my self yet but is sounds like it would make or a good strop. I bought a few expensive "old/antique" and new strops to see what was going on. I made one with true shell cordovan just to see if it made a big difference between using it and horse but straps. The answer I found was yes it made a better strop but not "better" enough to warrant the cost. But straps make great strops they just require a LOT more work to get into "good" strop condition compared to shell cordovan.
-
This is the stuff. http://www.goodboatgear.com/detail/7059/%20Waterproof%20Resorcinol%20Glue?sa=X&ei=zJ1iT7HgLcPh0QHO1tihCA&ved=0CF8QgwgwAA http://store.hamiltonmarine.com/browse.cfm/glue-resorcinol-quart-waterproof-2-part-736504/4,44474.html?sa=X&ei=zJ1iT7HgLcPh0QHO1tihCA&ved=0CGgQgwgwAw It's true that this stuff is marketed for wood, sad to be the best for oily woods like teak. I coins not find a formaldehyde glue marketed for leather but the liable on this reads very similar to the flesh binding glue my wife brought home from work. So I tryed it and it worked just as good if not better, only thing is the morgue stuff dryed fleshy pink color and this stuff drys purple.
-
 Artist oil paint I found works. Pigment mixed with linseed oil, can be thinned and airbrushed on. I think it gives a better smother less paint like color then acrylic.
 -
Thin Sewing Awls: I Need A Recommendation !
Chef niloc replied to swivelsphinx's topic in Leather Tools
Could sand, shape, and sharpen any size drill bit you like, that would work well -
I played around with this a lot then one day after many failed attempts my wife gave me some stuff she uses at work (pathologist) to fuse skin. So what it comes down to is a formaldehyde based glue works best. My guess is the formaldehyde cuts the oil/wax and let's the glue go to work?. So since then i have found that resorcinol glue like DAP Weldwood, the two part purple stuff( NOT the spray adhesives or contact cement) works the best. It holds up under a good deal of load (200lb of my weight) is completely water proof and is stable under heat as well. I made a "power strop" belt for a belt sander with it, worked great. however it is not "very" flexible I.E. don't bend it in half and it does dry a dark purple. The next best thing I found was Unibond 800, Cascamite, Extramite (UF or urea-formaldehyde) glue. Mind you both of these glues are very toxic...more so then the lovely fumes of barge contact cement (the good stuff when it was still yellow). Best "over the counter" non toxic stuff I found was Gorilla (polyurethane) glue. Works better if you scrub down the joint with acetone then wet it with water. It holds fine just don't heat it up at all or pull on it to much, will were out quick if its worked back and forth to much. Note: all three glues require clamping force for there cure time.Hope this helps some people?
-
Proper Angle For Tandy Professional Leather Splitter
Chef niloc replied to Joy's topic in Leather Tools
This might help? http://www3.telus.net/BrentBeach/Sharpen/other.html#leather -
Im trying to make suede texture on horsehide, like the look and feel of a straght razor strop.
-
I'm trying to get a suede texture on veg tanned horse straps. I tried a belt sander and got eggghh uneven results. So far the best results I have gotten is by casing the leather 1st than using a card scraper and brass wire brush. Just checking to see if anyone knows a better way/ proper way to do this? I know that tanners use big shaving, stacking, and carding type machines to do this type of work but how was it done back in the day before those big factory machines? I was thinking maybe a curriers knife might be the right tool for the job?
-
About 3 months.#1 , X, #2 are all about the same. The #3 and down get thinner (should be right for wallets), quality is the on all of them.
-
I wanted whiskeys, so I wound up with a few grades. 3 #1, 2#X 2#2 and one #3. The way I understand it is that the grading is by size #1 being the biggest.