

Chef niloc
-
Content Count
138 -
Joined
-
Last visited
Everything posted by Chef niloc
-
The two posts above have very valid points in regards to steel hardness, one that I touched on but probably didn’t take the average users or knife makers into consideration. I use a leather belt loaded with diamond compound to maintain my edge and find that I only need to actually sharpen the knife once a year ( this is under moderate use), to sharpen These days I am using a belt grinder That makes quick work of it, but I did and still I do Use the mouse pad method I described above when I don’t feel like breaking out the heavy machinery lol. On reflection I’d Have to agree with The two above members That a “softer steel” is easier and probably more practical. And as for the Rc Suggestion I posted, I was wrong chuck is right I should have double checked my “facts” before posting. Looking back at old correspondence the round knives I’ve had made are 58Rc not 68, And some other knives as high as 62. So it appears I was off by 10 which is actually a huge mistake. Again my apologies. as for the grind (convex) suggestion I made ill still stand behind that. It being a “axe” grind as chuck called it is absolutely true. That’s why the edge holds up the longest as it has “more meat” behind it. This grind is possibly why I don’t encounter any chipping problems?? As for it creating more drag this is also probably true in comparison to a flat grind. However I don’t “ slice” leather, Especially when using a round knife. My cutting technique may not be correct?? But I almost always use a “push cut” and sometimes maybe a little bit of a rocking motion at the end. The convex edge I find pushes the leather apart as I cut thus making it easier. Again just what I’ve found to be the case with the knives I’ve had made for me. what diamanté’s says about chef knives is probably a discussion best suited for a different forum as it’s a topic I’ve found myself in the center of many times and is a whole topic onto its own. But I will say as a professional Chef ( leatherwork is just a side thing) a hard steel is one I prefer and has definitely become more part of the norm over the past 10-15 years or so with many chefs. FDICK ( a very old school “ German kitchen knife company) started making “butchers steel “ especially designed for this reason,, it’s called there “ Dickoron“ line Absolutely gorgeous and works fantastic IMO. However I’m in the a Minority in that I also prefer a convex grind or at the lest a convex edge on kitchen knives. this is something I have tested and done extensive reports, articles, presentations on, but again it’s off subject here. as for the hardening of Thinner steel I am not a knife maker or blade Smith But I have had some amazingly thin and extremely durable knives made for me by the makers Bill Burke, Michael Rader, and Murray Carter. again off topic I just though I’d mention them though Incase some were looking for some posable research references, or excellent custom knife makers
-
Gorgeous work man! Love the way you Did the Transition From the horn to bolster to blade, very “ Organic“ beautiful flow to it. the file work is A nice touch (And came out great), not something you see much these days, and your right it definitely makes it look like you know what you’re doing .
-
I see this is a somewhat old post but just in case your still looking and or if someone finds this thread in a search looking for similar information: I’ve had a lot of custom knives made from many different makers over the years, it’s kind of “my thing lol’. Hers what I would do: ‘tell him you want a convex grind right to the edge, that’s the most important part. Convex edge will cut better and more importantly hold up longer. A bit more tricky to sharpen yourself but easy to maintain on a leather strop and to resharpen just serch “mouse pad knife sharpening” Which is basically using as you guessed it a mouse pad and wet dry sandpaper, I’d recommend this way of sharpening a round knife to anyone and everyone, there may even be a post or two on this sight about it, dont remember ? Tell him to make it as thin as possible, trust me it won’t be able to make it “ too thin“, most (all in my experience) knife makers tend go to thick, telling them to go as thin as they can has given me the best results over the years. 5 1/4 to 6” tip to tip is kind of a big knife IMO but if you have one that size and like it then great, I personally prefer mine about 4-4.5”; again just my preference. 2nd best bit of advice (next to the convex grind) is give the maker a knife that you like, you can talk with him about any changes to that design you may want but at lest he has something to work off of. At the very least some pictures (make sure they are to scale in size) I don’t want to discourage you (or anyone reading this ) but I thought I’d mention that in my experiences a maker who has never made (or even used) a leather round knife has very little luck making a good one there 1st time out. The good/great ones I’ve had made were from makers who already had experience with them, and most were master Blade smiths with years and years of experience under there belts. They are kind of tricky to grind as they are different from most other types of knives a maker would be use to making. best of luck oh you/ he didn’t mention what type of steel (or I missed that) 52100 is without a doubt the best steel for the job. It is carbon so it could rust and the tannins in the leather will make maintaining the edge (leather strop) more frequently necessary, but 52100 is the best cutter, go about 68-72 Rc. If a stainless steel blade is a must, and or a blade that won’t require as much maintenance I’d go with AEB-L it’s the steel used to make razor blades, very very close to 52100 in cutting performance, may even be a better choice if you’re doing a lot of cutting at one time/ production work.
-
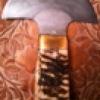
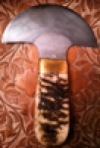
Someone please tell me whats the name of this ??
Chef niloc replied to wang369's topic in Leather Tools
Absolutely fantastic, very nice looking. $200 is a good price. You remember the website? I’d like one of those -
Is there a difference in the yellow color cement vs the somewhat clear color? Both cans look the same ( yellow and red) but this time the clue is yellow and last time I got a gallon of it ‘ it was clear? Does barge came two different types/colors? Again same original looking can ‘thank you.
-
Cut tacks ( may be the same a a clinch nail?) is what those are, see them on a lot of old sheaths. Not the best thing to use IMO but if your trying to " copy" that look that's what you need brettunsvillage sells them http://www.brettunsvillage.com/trunks/howto/parts/nails/
-
Very cool, looks like you've have a copy of the $50 knife shop on hand, great book. I made my first few knives with a similar setup. Leatherworking and knife makeing hobbies made to go together.
-
Medieval/renaissance/fantasy Pattern Pack
Chef niloc replied to mrdabeetle's topic in Patterns and Templates
Very nice thanks for taking the time to do this. I adapted some of this to a piece I'm working on. -
Opaque Projector For Transfering Patterns?
Chef niloc replied to chriscraft's topic in Patterns and Templates
I bought one about 20 years ago when an art school still have it but if I've used it a dozen times that would be a generous statement. I have always found it to be most effective at transferring a photograph, kind of like an aid to making a sketch or a under painting. It's also great if you want to scale an image, especially if you want to project a smaller image onto a larger one bigger than your computer printer can handle. I think the tool would work fine my holdup is that taking things like that out of the closet setting them up to use always seems to be more trouble than it's worth, maybe I'm just a little lazy? Two thing I've done for transferring patterns that you might find useful for creating a finer line? 1: I trace over the backside of the transfer sheet (I used to use very thin paper here) with a "red copy pencil" also called a "indelible pencil". These types of pencil turn into an ink mark when they get wet, I use red because it basically disappears and blends into the leather after carving or stamping, finishing ext.. I then place the paper on top of a damp piece of leather and simply rub the top side with a damp sponge, it's kind of like transferring a tattoo, that's where I got the idea from. 2) very similar to the first method but this time I use Thin velum paper as it's somewhat waterproof and easier to trace/draw on then plastic transparency mylar sheets...and it's thinner thus avoiding as much of the widening of the transfer pattern when using the stylus tool. I still dampen the leather and then press the transfer sheet to it, avoiding air bubbles if possible. To trace over the top side I use a sharp pencil or Barry kings " small long stylus" The lighter you press the center your transfer lines will be with either of these methods. -
Rivet Setting Press/foot Press/die Press- Help Please!
Chef niloc replied to Julesinnola's topic in Leather Tools
I think your both kind of right, metric tools work with SAE parts often, think about wrenches sockets and nuts. -
Pvc pipe caped off works great for "controlled dipping/submerging" I use pvc pipe when etching knife blades.
-
I'm glad you bumped it, thank you! This is seriously a very good tip someone should make it sticky on top
-
Just Got My Cobra 4 Home And It Does Not Work At All
Chef niloc replied to Aycrith's topic in Leather Sewing Machines
I ran into A similar problem the other day, the motor just stopped working? I have had the Machine for just over a year and like you experienced shipping nightmares! It looked ok all wrapped up when it was delivered, once unwrapped it was apparent it had had a rough ride. Plastic motor housing smashed few dings and dents, accessories missing, and the whole thing was all out of whack. Customer support (IMHO) does not quite living up to the hype this board creates for it, I gave up after about 6 months of never seeing the replacement motor housing and missing parts after numerous phone calls...was given a $100 Store credit but I've never tried to use it. Anyway back to the motor issue. Just like you explained in your post the motor was cycling so it was obviously getting power but when the pedal was pressed the machine didn't work. So today I took off the side plate ( the side with the springs and lever) and was surprised to see how simple the problem was. I must admit I was a little afraid that when I removed the place all sorts of springs wires parts etc. would come flying out, but I was surprised. the lever is connected to some sort of "laser scanner" (excuse the lack of technical terms here), there is a piece of paper with a printed gradation on it. As the paper divides the laserbeam, the less light that passes through the faster the machine goes, hence the darker part of the gradation causes the machine to operate the fastest. This piece of paper somehow got loose, bent up and damaged. It actually took me a few minutes to figure out if the laser was scanning the gradation or if it work by how much light passed through the piece of paper? It was fairly easy to figure out that it worked by the amount of light that passes through rather than a scanning action. So I played around with a few different pieces of material (paper, transparency film, vellum)and printed a gradation on useing my computers printer. To be honest not only that I fix the machine but by playing around with the gradation I've got the motor running smoother than it did it new! Extremely easy to control the speed now, smooth as can be. Here's a picture of the gradation square that I'm referring to. Note if anyone has a similar problem it might not be necessary to replace this piece but rather just secured back in place. However in my case replacing it was necessary and turned out to improve the performance of the machine. Stock: My replacement: -
I have 3 mauls and 2 leather burnishers all bought separately over the years, no complaints about product or service, some of the best tools out there.
-
Good article, thanks But: Soak bone in pure bleach and you get the "magical rubber bone trick". A relatively weak solution will whiten bone, will repeated bleaching shorten the life of the bone yes. Hydrogen peroxide would definitely be my first choice but I find a 3% solution (the kind most ratably available) to be too weak to be effective and the stronger solutions (reagin grade 30%) are harder fine (get it online) but much more expensive than bleach which most people have around the house anyway. So I guess it depends on how far you're willing to go, if it's a tool with sentimental value or not replaceable then yes bleach would not be the best choice.
-
Utility or snap of type Chuck? However a useful thing that I just came across just now looking for these blades is this: http://www.personnablades.com/ProductCatalog/Detail.aspx?prodid=615&brand=Personna&item=Stainless+Steel+Coated+Injector+Blade+Dispenser+20 From what I always read on blades for a strap cutter is that you need the Schick injector blades for them to work right. Schick doesn't make them anymore so I've always had to search eBay for them.
-
I use planes like this ( link below) all the time. The Japanese style smoothing & polishing plains work on the pull rather then the push so there's more control, the small "mini" ones work great for skiving. I also use them to polish the edges before burnishing. I clamp the leather item in a stitching pony edge to be smoothed facing up and work on it this way, a lot less noise and dust then a belt sander. The irons are pretty easy sharpen (at least I think so) & they also get crazy sharp. To the best of my knowledge (but I'm no expert) the difference between a smoothing & polishing planes is how thick the plane iron is polishing iron being thiner. http://www.japanwoodworker.com/Product/155966/1-12-(36mm)-40-Degree-Polishing-Plane---Hiroetsu.aspx http://www.japanwoodworker.com/product/156209/12mm-Uchimaru-Plane-13.aspx http://www.japanwoodworker.com/product/156450/2-50mm-Smoothing-Plane--Kanehide.aspx
-
3 TB bleach :1 cup warm water. Let it soak overnight should be pure white again. Bone is bleached white to begin with, natural bone is yellow.
-
Thanks I should have thought of that, as I know a few
-
Anyone know if they come this big & if so were I can find them. I'm looking for 3"-4" round end (English point would be ok, but I'd rather it be round) punches.
-
A trick I learned from a old Italian (as in he was from there) was to hold the stamp between your fingers rather then between you thumb a finger. Your middle two fingers on the out side and your 1st finger and pinkey finger on the inside. Took a little geting use to but definitely gives more control .
-
Mine didn't, come with a instruction book, at least I don't think so? all I got was a quick setup sheet of paper and a part list with part numbers on it, no instructions? I ordered and bought the instruction manual for the Juki TSN- 421 / TSC-441 ( one book) directly from Juki (not as easy to do {order, get your hands on} as one might think ). It has been very helpful and insightful on how to operate and set up the machine but it of course doesn't offer any information on the custom parts you guys make for your machines. After reading this post I don't believe I got the fabric for with my machine either, don't know if it was supposed to come with it, but I think it was?There's a YouTube video out there somewhere I'll look for the link that some guy made that's pretty good as well on how to set up and troubleshoot some possible issues
-
I would love it if cobra would do a video on changing out and using these plates and accessories. I got mine about a year and a half ago and have never used any of the plate attachments mainly because I couldn't figure out how they fit or work. Example I didn't know that the fee dog needed to be removed in order to use the holster plate.
-
I tried the HF one a few years ago and while I'll bet that it would do a fine job if done right I would recommend having a machine shop or at least someone proficient with the right tools drill the hole. My idea was to drill the hole that would accept a drillpress chuck so I could easily switch out Tools punches etc. but I never could get the hole drilled straight so it never works right. From further reading I believe fabricating a "ram" I believe they're called that just attach to the amber shaft is the correct way to go about this, because the pressure exerted on the tools could cause them to get stuck in a hole that was directly drilled into the arbors shaft. As far as drill presses go I have some insight as well. First they're not meant for punching meaning you shouldn't just put a tool in the chuck and push down on the drill presses. drill presses are meant to be running/drilling to do the job, the gears and hardware in most drill presses won't handle the force of simply punching let alone repeated stamping for long periods of time, the machine simply wasn't meant to do so. 2nd I know a lot of guys that do drill holes in order to sew through. However I have read posts and articles stating that this is not the ideal way of making holes. The hole a awe makes is self closing so it has a gripping action that holds the thread in place. They also make a diamond shaped hole as opposed to a round one giving what many would consider a more attractive stitch. I'm not making a argument here for which method is better I'm just telling both sides of it. That sad Cambell Bosworth has a "twist press" that is pre setup for many leather working jobs. I don't have one but I have been wanting one for some time. Without getting into the physics of this (because I'm no expert on that subject either) from a what I have read and experienced myself using a fly press (for mettle work) the twisting motion allows for better control of force as well as a greater range of pressure.
-
Bruce is great! While I have bought things from him from time the majority of my interaction with him has been me asking him various questions usually regarding antique tools. Bruce is more then generous with his time by all standards.