Bob Blea
-
Posts
1,771 -
Joined
-
Last visited
Content Type
Profiles
Forums
Events
Blogs
Gallery
Store
Everything posted by Bob Blea
-
Hello Cheryl, When making small fine cuts with a swivel knife I tilt the knife at an angle so only the tip of the blade is in contact with the leather. It makes it easier to make small details and sharp turns. Hope this helps, Bob
-
Hello, I think you're doing a good job with your decorative cuts. They look like they flow smoothly out from the leaves and follow the flow of the pattern. I think your work looks really good. The only thing I notice is that you shaded the leaves that point out of the pattern but not the ones that flow into the flowers. Just my opinion but I think it would look better if those leaves were shaded too. Maybe that's the style you are looking for (which is fine.) Also, you often see the stems of the flowers decorated differently so they stand out from the leaves in the pattern. Often this is done with a veiner and decorative cuts that simulate small leaves, like at the base of a rose. Hope that makes sense. Also, often you see people put a single seeder mark in the pod the flower opens from, though I'm not sure what part of the flower that represents Very nice work! Bob
-
So, the carving part is done, and I'm pretty happy with how it turned out. Next it will be dyed. The customer wants it all black. Personally I would antique this and have more contrast between the carving and the untooled leather surface, but he has a specific look in mind and wants it all black. We tried a small sample and you actually do still see the carving pretty well, so I'm not trying to talk him out of it. Still, I like it better like this. Thanks, Bob
-
They look really nice. And thank you for posting. You are inspiring me too. I'd like to try making Chaps someday... Bob
-
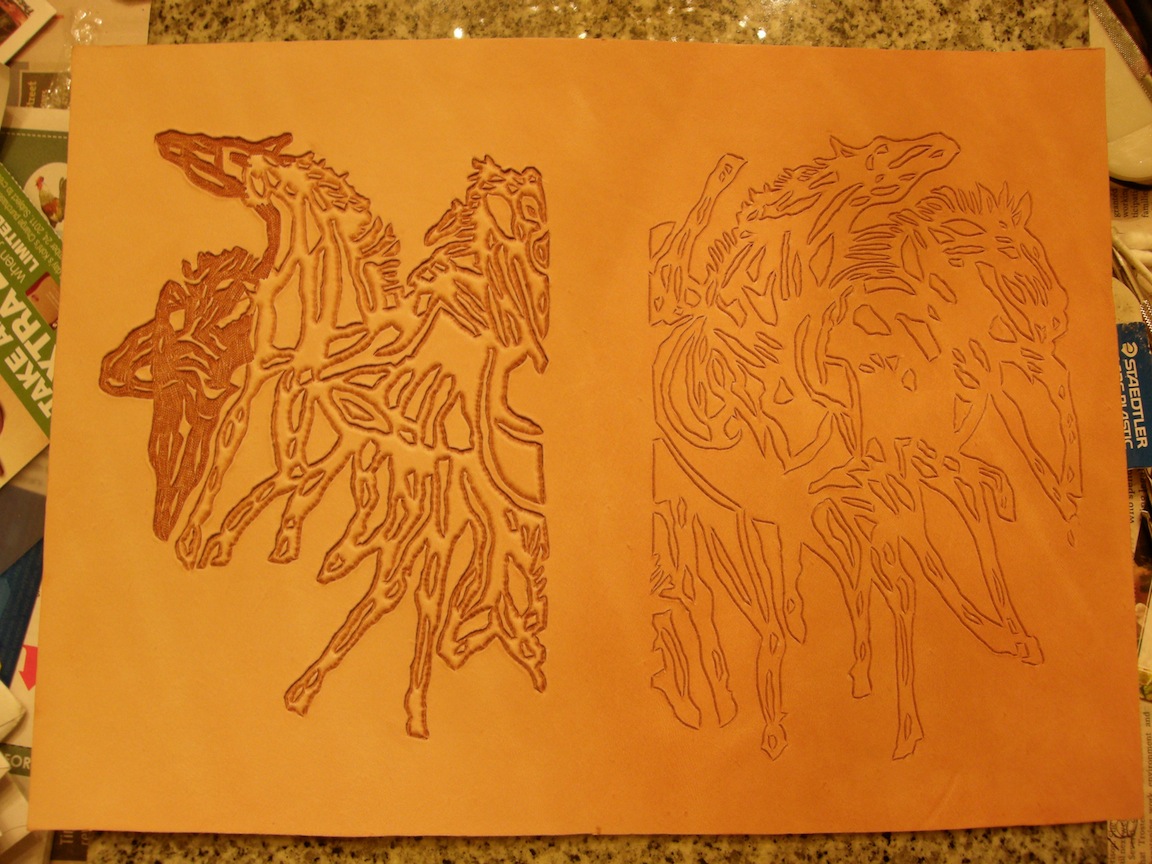
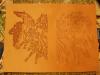
Here's the work in progress. The left side is beveled and the bargrounding has started. Usually my beveling is better than this, but in this case I am using the smallest beveler I have and I'm not trying to make a smooth edge. I'm trying to duplicate the very irregular edge of the original print, and marks left by the beveler will be covered by the bar grounder anyway. Thanks, Bob
-
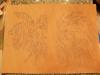
Thanks OdinUK and McJeep. I haven't needed glasses yet but I could use a tiny bever to get into some of those spaces. It's coming along. I only get about an hour each night to work on it but I have the left side beveled and I've started bar grounding. I'm not near the bench now but I'll get a picture of it tonight before I do any more work and post it. Bob
-
Bobocat- I think that might be the best carving I have ever seen. It is absolutely amazing. Bob
-

My First Attempt On Christmas Present
Bob Blea replied to utspanishmustang's topic in Floral and Sheridan Carving
That looks really good for a first attempt! Keep it up, you're on the right track. Bob -
Beautiful work! I love the way the leaves are carved on the case, and I love that it works as a holster for the camera too. Very nice design! Bob
-
Thanks for the compliment Rohn, I started beveling tonight. It's great beveling practice and it takes a lot of patience. I'll post a picture once I have the bar grounding done. Bob
-
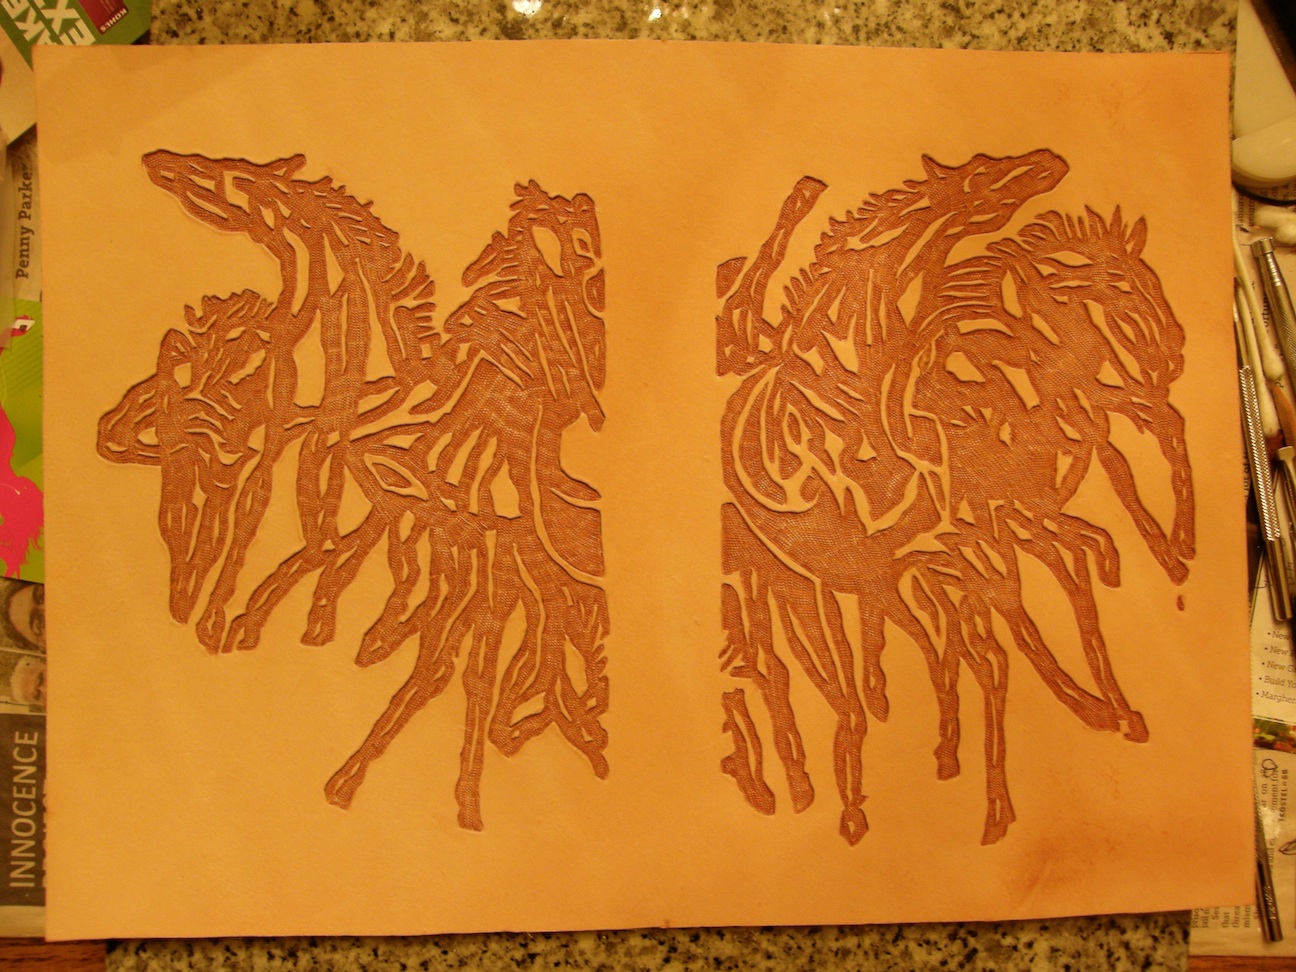
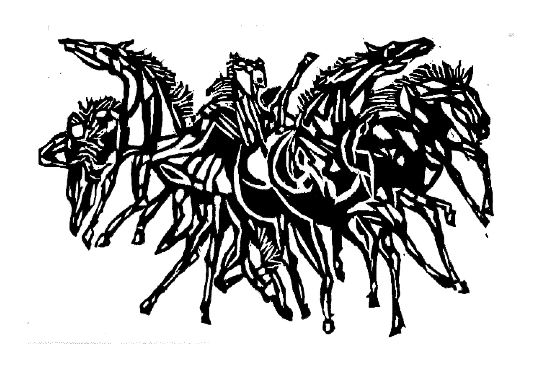
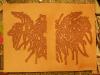
I'm working on a notepad for a friend. The artwork is based on a print from a wood block print his uncle made back in the 70's. It's a very stylized rendering of a herd of horses galloping towards the viewer. It's something he's always liked and when he showed it to me I felt it could be rendered as a inverted carving. The picture is only carved with the swivel knife at this point, but I liked how well it turned out I just had to share. This is easily the most detailed swivel knife work I've done to date, and it took two hours to carve the whole thing. Next I'll bevel the interior parts before bar grounding the whole thing. I know from a practice run that it will probably take me twice as long to bevel as it did to carve, but I'm not a fast beveler by any means. Below are the original print and the carved leather. The leather measures roughly 9"x13" Thanks for looking. Bob

-
Ornamental Stamping
Bob Blea replied to King's X's topic in Purses, Wallets, Belts and Miscellaneous Pocket Items
Wow, very nice. Gives me some ideas I would like to try. Thanks for getting the creative juices flowing! Bob -
Using Petal Lifters / Undershot Bevelers
Bob Blea replied to Bob Blea's topic in Floral and Sheridan Carving
Thanks for the suggestion Barry. I did try that and I like how it allows me one final tweak to make sure it all looks good. Bob -
Hello, I am not an expert and I have not tried this, but I'm pretty sure you won't be able to carve the belt. It probably has a finish on it that will prevent it from casing properly, and that finish may interfere with the burnishing (shading) the tools would normally make. However, if I am wrong hopefully someone here will set us both straight. Bob
-
Hello, I paid a subscription to LW.net via paypal back on the 14th, but it's not showing up under my membership here on LW.net. I know the charge went through because I can see if on my credit card, I just wanted to make sure you got it. I sent a message about this over the weekend (or maybe last Friday) but hadn't heard anything back. Thanks, Bob Blea Name: Bob Blea UserName: Bob Blea IP Address: 216.17.175.138 Email Address: bobblea@frii.com
-
Hello, About a week ago I renewed by subscription with a Paypal donation to LW.net, but it hasn't shown up in my profile that I'm a contributing member. I wanted to make sure you had got the donation. Let me know if there is additional info you need to track this down. Thanks, Bob Name: Bob Blea UserName: Bob Blea IP Address: 216.17.175.138 Email Address: bobblea@frii.com
-
Forgive my ignorance, but is this used as a cutting surface or a tooling surface? I have a large kitchen cutting board that I use when cutting leather from the hide. It sounds like it may be HDPE and if it is, I would probably like to get a bigger piece to cut on. Thanks in advance, Bob
-
Just as a follow up, when I was working on my card case last night I came a little too close to the edge on the back side as I was pushing the awl through, and the leather actually tore a bit. I couldn't use the hole as it was and had to 'correct' for it by making a new hole lower and to the side so it would hold the thread. So, that probably shows the experience and wisdom of using the 'two thicknesses of leather' rule that Al Stohlman mentions in the hand sewing book. My only problem is that on some of the holes you can see a little of the hole and thread from the inside of the case. I didn't do a really good job when skiving the mitered edge (it doesn't come down to a feathered edge like it's supposed to) so that might account for the problems I'm seeing inside the box. More things to try and improve on with the next case..... Bob
-
I've been trying to learn to do this just today. I'm certainly not an expert, but it looks like you might be a little too close to the edge of the leather and that is causing the fibers of the leather to bulge as you push the awl through. Also, as you pull the thread tight it would cause the leather to buckle. In the Stohlman book he recommends grooving a line back from the edge that is same distance from the edge as the thickness of two leathers. In his example the thickness of the two leathers combined is 3/16 so the grooved line is 3/16 from the edge. I've just done this on a card case I'm making and it seems a little too far in, but it's working and not buckling. Bob
-
Using Petal Lifters / Undershot Bevelers
Bob Blea replied to Bob Blea's topic in Floral and Sheridan Carving
Thank you both. Sounds like you came to the conclusions I did too. Bob -
Hello, I'm hoping to find out some opinions..... I'm wondering when the 'right' time to use undershot bevelers or petal lifters is? I was originally shown to do this as one of the first steps in floral carving, if not the first step. But, I've had trouble keeping the 'lifts' in as I bevel and shade the leaves afterwords. I tried using the undershot after doing all the other tooling on the flower or leaf and I liked the result much better, so I am leaving the undershot until last now. I like the effect, but I wonder if there is something I'm overlooking? Is there a good reason to do it first versus last? Is there a technique to beveling around the lifted parts of a petal or flower without messing up the clean look of the lifted part? Any and all opinions are welcome. Thanks, Bob
-
Another First Attempt At Sheridan Style...
Bob Blea replied to tatehunt's topic in Floral and Sheridan Carving
Hello tatehunt, Your off to a good start, and all the points that Randy made are very good ones. It is hard to do Sheridan style without the smaller tools that the fine detail calls for. However, keep at it. Try doing this same pattern again keeping in mind what you've learned from your first try. You might be surprised how much it improves just from this first experience. You might also try scaling the pattern up so it's better suited to the tools you have. If you keep trying to improve you are going to improve. Just keep it up. Bob -
That's really beautiful work. You should be proud. Bob
-
Thanks Chris, your work looks really nice. After trying this a few times I've learned (the hard way) that it's important to keep this chisel in a straight line as any deviation from your line will really show up. It's shows up more with this tool than it does with the angled chisel (IMO). I see what you mean about the linear border it creates, it does look very good. Bob
-
Hello all, This weekend I bought 3/32" lacing chisels because I have some smaller projects and I wanted to use thiner lace than the 1/8" stuff I typically use. For the 1/8" lace I have a four prong lacing chisel that is angled and I like that look. But when I bought the 3/32" chisel I accidentally bought a straight four prong chisel. I've seen the straight chisel used on some projects and it looks good, and I'm trying it on a business card case and I'm getting the hang of it, so I think it will work for me. My question though, is there a situation or application that people use the straight versus angled chisels for lacing? Is it only a matter of personal preference or are their situations that you use the straight instead of the angled chisel? Thanks in advance for any and all advice. Bob