TapTapTap
-
Posts
137 -
Joined
-
Last visited
Content Type
Profiles
Forums
Events
Blogs
Gallery
Everything posted by TapTapTap
-
Hi Doc, My experience with the ceramic blades is the same as the Chief. I keep a small strop on my bench and after a few cuts with the blade i give it a few strokes on both sides. I am also a wood carver and use the same technique with my chisels - cut for a while and then strop. It does make a difference. regards, TapTapTap
-
Hi there Bigfoot, as we say in OZ -" I'm flat out like a lizard drinking" otherwise I would have the Tutorial finished. In the meantime here is the method without images. 1. Lace both edges with the double cordovan edge braid ( sometimes called the double loop braid) leaving about 6 inches of thong at the start and the finish. This is to join the top and bottom braid into the vertical seams.. It is optional to braid the top of the quiver at this time. 2. When you have completed the edge braid on both sides of the quiver use a hammer to "set" the lace. 3. Cut some small lengths of thong to tie the edges tightly together every 6 inches or so. I use very small plastic ties which can be cut with nippers as you reach them. 4. Line up the holes on the top and bottom of each side and join them with a tie. Do this about every 6 inches. As you braid the sides together you cut the temporary tie. 5. Make yourself a practice piece by edge braiding 2 X 6 inch scraps of belt leather. Then study the first image in my original post and practice makes perfect. You've got me thinking now - "Must finish that Tutorial" and place it on my website. regards, TapTapTap
-
 I use rubber cement and the plastic flexible cutting sheets (about 1mm thick) found in kitchen supply stores. Apply the glue to the plastic, spread thinly and immediately place on the leather. The important thing when the project is completed is to pull on the plastic and hold the leather down as you separate otherwise you end up stretching the leather. I have used 50mm painters tape on the back of belt blanks. (Thanks Rawhide, my 72 year old body has been x-rayed so many times I will have an endless supply of backing material) Never thought of it before your post.
 -
Welcome to the best leatherwork forum on the web. I live on the NSW Central Coast and have been a leatherworker for 50 years. Check out my profile and my website. There are a lot of Aussies in the group. regards, TapTaptap
-
G'Day Mate, I note that you have checked out my profile. Is there anything I can help you with regarding leatherwork. I live on the NSW Central Coast so if you are anywhere close to there I can help you with your interest in carving and stamping. Have you checked out my website? You can contact me through the website if you need to discuss anything about leatherwork. Regards, TapTapTap
-
Show Off! Request. Lets See Your Work Space!
TapTapTap replied to Ronin101's topic in All About Us and Off Topic
Hi there Mojoewrkn, Started out as a hobby 50 years ago, became a business, now back to a hobby. I still do the odd commission. Check out my profile and website. Thanks for the comments. regards, TapTapTap -
Show Off! Request. Lets See Your Work Space!
TapTapTap replied to Ronin101's topic in All About Us and Off Topic
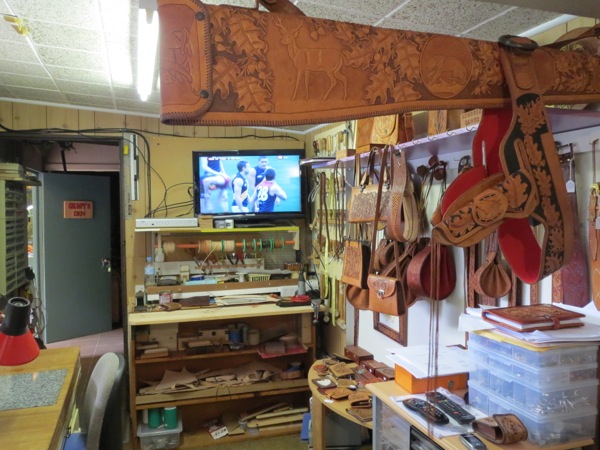
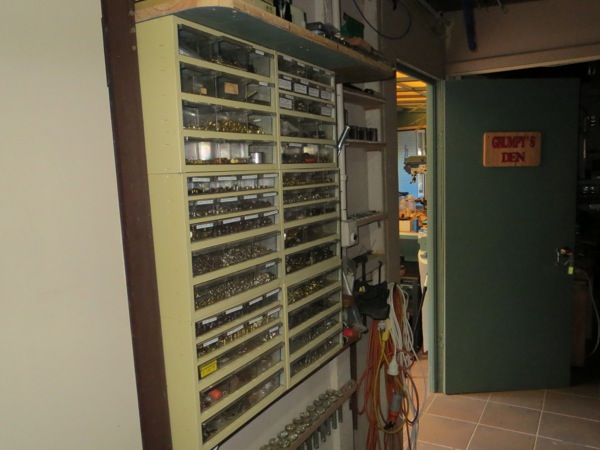
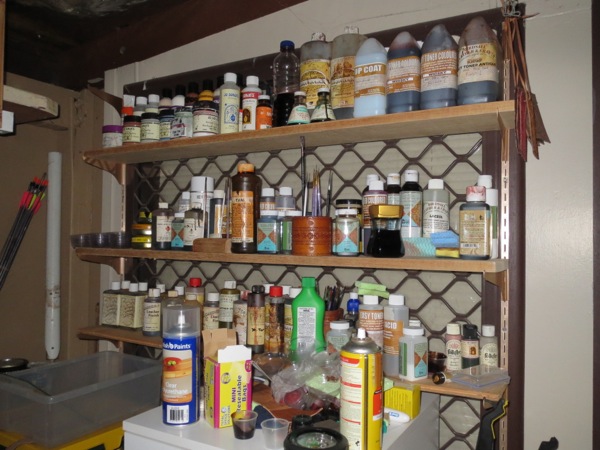
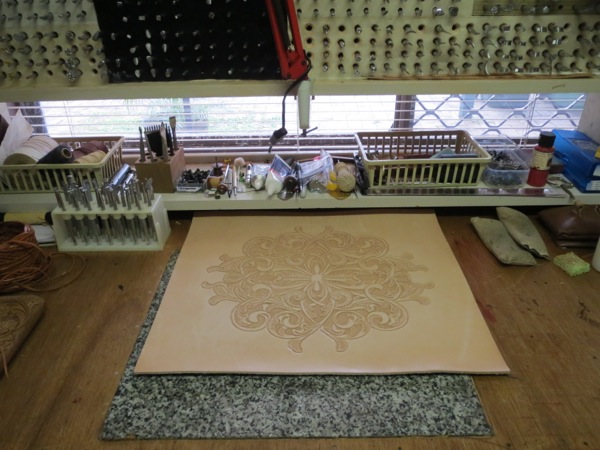
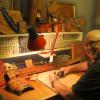
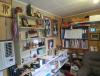
='Ronin101' timestamp='1341584751' post='255432'] Having alot of fun checking out people's projects, lately. I am in the middle of remodeling my basement this summer, so not a lot of time to start leatherworking! I was checking out this project and was impressed with the work area. http://leatherworker...showtopic=40955 So please show off your shop/work area's in this thread. Thanks! It may give me some ideas for my work area. G'Day Ronin101, This is an interesting thread. I am one of the lucky leatherworkers who now has a dedicated work area. When i was in the Navy and we were living in rented accommodation, it was a case of having to make do with a portable work station . When i retired i converted a garage and carport to my 'man cave'. I have a reverse cycle air conditioner, a flat screen TV with Foxtel, A Jason Reclining chair and a iMac connected to the Internet. I have attached a number of images and am glad to be of assistance if you need details on anything.[quote name Regards, TapTapTap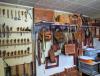


-
Bob, I don't think I have enough years left to reach the standard you have set. Thanks for the inspiration.
-
Hi there Razith, this forum has a section on archery . I myself am an archer and make all my own gear and also make stuff for my club members. If you have a look at my profile you will see the URL for my website. I have just uploaded some photos of my latest quivers. If you need any tips just ask. Welcome to leather net.com. TapTapTap
-

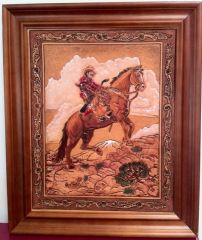
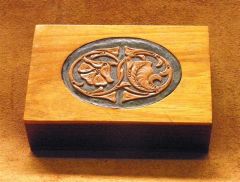
From the album: Barrie Bailey's Leatherwork - 2
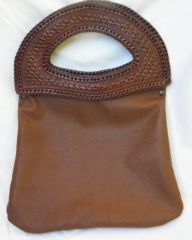
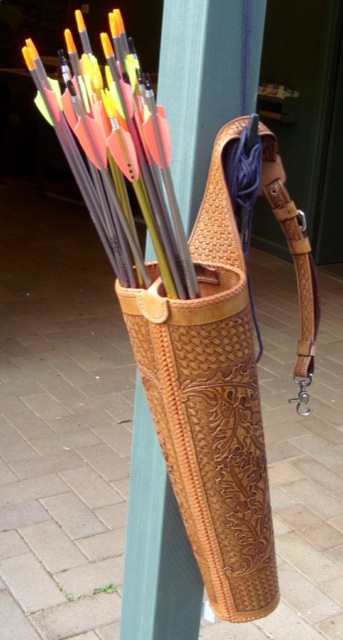
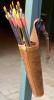
This is a back quiver carved and tooled and lined with pigskin. You can see the method I use for separating arrows.© © leatherworker.net
-
Barrie Bailey's Leatherwork - 2
Images added to a gallery album owned by TapTapTap in Our Leatherwork Galleries
This album contains examples of leatherwork items I have made over the past couple of years. Please feel free to comment. -
-
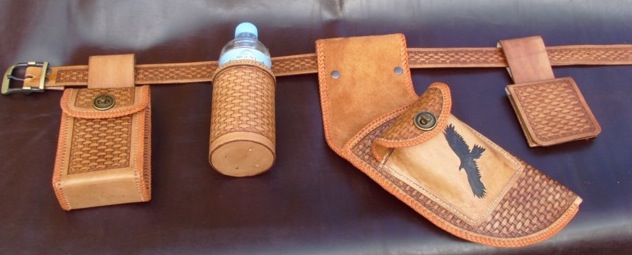
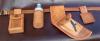
 This is a matching set of gear for archery. A Utility Pouch for Phone/Camera or whatever. A water bottle carrier which holds a 600ml bottle. My standard Type 1 Hip Quiver which holds up to 24 arrows and a Powder Pouch which holds the talc used by some Recurve and Longbow Archers on their finger tabs.
 -
From the album: Barrie Bailey's Leatherwork - 2
© © leatherworker.net
-
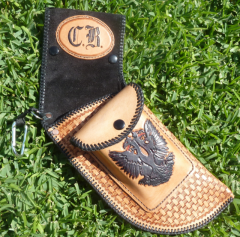
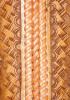
This is a matching set of gear using basket weave as the main decoration. The only carving was the silhouette of a soaring Wedge Tail Eagle. The set consists of a Utility Pouch for mobile phones, small cameras, or whatever. The water bottle carrier holds a 600ml bottle of water. The Hip Quiver has four arrow tubes inside allowing you to carry up to 16 aluminium arrows (1916's) Of course, if you use the thinner AC's you can get more than 24 arrows in the quiver. The final pouch is a Powder Pouch, used by some Recurve and Long Bow shooters to hold talc powder for their finger tabs. There is more detailed information on my website. Regards, TapTapTap myleatherwork.com
-
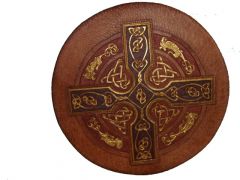
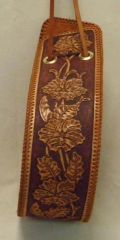
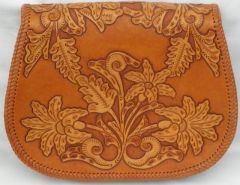
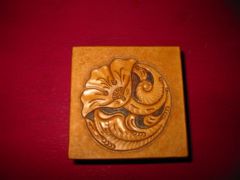
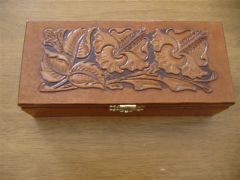
John, The colouring is a local Australian product made by Birdsall's in Sydney. The colour I use most often is called "Whisky". I have achieved the same effect with Fiebings Antique paste however the technique is slightly different. The Birdsall,s antique can be poured from the container into a small bowl whereas Fiebings is a paste. After cleaning up the article and making sure it is absolutely dry I apply the Antique with a paint brush ensuring that the dye is worked into all the impressions. I then use a dry lint free cloth to rub over the surface which removes the excess dye. I always have on hand a damp cloth so that if the dye dries too quickly in some areas I can wipe it off and redo it where required. As with anything in leatherwork, try the technique on a practice piece of leather before you commit yourself to the finished article. I have not yet tried the new Tandy Leather Factory Eco-Flo Gel Antiques. They seem to have the same consistency as Birdsall,s so I will have to give them a try. The other technique I use is to colour the background of a floral type carving to emphasise the antique process. This was done on the acorn leaf carving on the quiver. You need a steady hand for this. Hope this helps you John. I checked your website and realised that since 1964 I have been collecting antique tools lol. regards, TapTapTap myleatherwork.com
-
Hi ReneeCanady, I noticed you visited my profile recently. Welcome to the best leatherwork information forum on the net. If it is not here it doesn't exist. If you need any assistance at any time please ask. Regards, TapTapTap
-
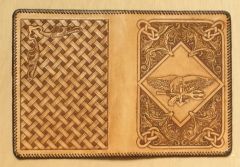
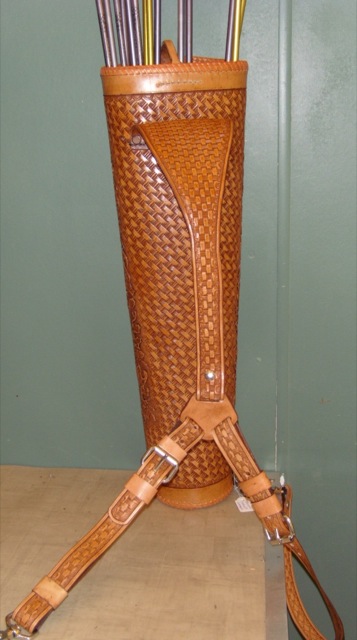
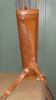
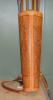
This is my latest Back Quiver. Image 1 shows the carving and tooling (basket weave X510). You can also see the arrow separation and the adjustable harness. Image 2 is a close-up of the harness assembly. The harness can be changed to left or right. Image 3 is another view of the acorn carving and the joining method. Image 4 is a close-up of the joining method. The edges are laced with the double cordovan braid then another length of lace is used to join the two together by stitching through the top loop of the edge braid. I will be putting together a Tutorial on my website as soon as I can. As usual, I would appreciate any comment. regards, TapTapTap
-
Welcome PD186. I am just one of many Aussies on this forum. If you go to my profile and visit my website you will find more information. I have been thumping dead cow skins for nearly 50 years and am always willing to pass on my knowledge. I live on the NSW Central Coast. Regards,TapTapTap
-
Hi there Chavez, I have been teaching myself the Sheridan style using the following publications. "Sheridan Style Carving" with Bill Gardner & Clinton Fay. Plenty of illustrations of completed work. The next book I tried was "Sheridan Style" by Chan Geer. The book that really did it for me though was "Floral Pattern Drawing for the Artistically Impaired" by Pete Gorrell. He must have had me in mind when he wrote it. I personally found it to be easy to follow. At the end of the book there is a collection of line drawings (7 pages). As I also dabble in scroll saw work I made a set of templates that I could place in the basic forms. Regards, TapTapTap
-
Justin, The last time I was in Tasmania the national flag was the same as the one we use here on the mainland LOL. I live on the NSW Central Coast and have been thumping dead cow skins for nearly 50 years. If you are still having trouble finding a mentor go to my website and send me an email and I will help you on your way. I learnt by reading the lucky 7 book and practicing until I got it right. With digital cameras and emails the task is a lot easier. Welcome to Leatherworker.net where you will find heaps of information and the friendliest folks around. There are many members from Australia and perhaps some from Tassie. Regards, TapTapTap
-
Hi Tinneal, The tubing I use in the quivers is one inch PVC used by electricians to carry wires when building a house. I think that plumbers might use a slightly bigger size in their work. regards, TapTapTap
-
Hi there Teresa, Welcome to the best resource on the Web for leatherworkers. You will be surprised just how many members come from OZ. I live on the NSW Central Coast and have been thumping dead cow skins since 1964. I started off my journey into leatherwork braiding lanyards for fellow crewmen on the ships I served on in the R.A.N. There are some excellent books available on the subject. You mentioned that the book you ordered from Tandy is out of stock. If you contact Tracy at Birdsall's you may find that she has the series of braiding books by Ron Edwards. These are well illustrated and easy to follow. There are a number of suppliers that I use depending on what i need at the time. I can give you details if you contact me through my website (listed in my profile). I am retired and have plenty of time to talk about leatherwork so feel free to contact me at any time. Regards, TapTapTap