-
Posts
1,313 -
Joined
-
Last visited
Content Type
Profiles
Forums
Events
Blogs
Gallery
Store
Everything posted by chancey77
-
From the album: Shots From The Road
© © leatherworker.net
-
From the album: Shots From The Road
-
From the album: Shots From The Road
© © leatherworker.net
-
From the album: Shots From The Road
-
From the album: Shots From The Road
© © leatherworker.net
-
From the album: Shots From The Road
© © leatherworker.net
-
From the album: Shots From The Road
© © leatherworker.net
-

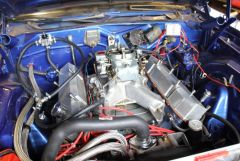
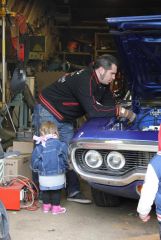
SOME HELP FROM THE KIDS TUNING THE MOPAR 500 STROKER
chancey77 posted a gallery image in Our Leatherwork Galleries
From the album: Shots From The Road
© © leatherworker.net
-

BUSTIN' OUT THE LEATHER GEAR AFTER A GIG:)
chancey77 posted a gallery image in Our Leatherwork Galleries
From the album: Shots From The Road
© © leatherworker.net
-

Old Ugly Seat Gets A Facelift And New Guts!
chancey77 replied to chancey77's topic in Motorcycles and Biker Gear
Thanks Bobby! It is just one of those things:) LOL -
I just started the art work, trying a free hand approach to a tribal Polynesian, mayan kind of look. Kind of like a Maori Tattoo. It isn't perfect, but this is the front under the flap. I will take more time to plan out the front. I just went straight at it with the knife, no drawing, or pre scribed lines, just a ruler and the SW.KFE. I think it is a good simple design and the lay out is all mapped out. It was very easy to come up with, and like a good song sometimes the thing that only takes 10 minuets to write is a hit:) hahahah
-
LIKE YOUR THE FRIKIN DICTIONARY OVER THERE AND NEVER MAKE SPELLING MISTAKES...LOL HAHAHAHAHAHA
-
I started a small bag today for the rear left side. Very simple and I wrote down all the measurements in mm and cm. I did cut down the 9.5cm width to 8.6cm/86mm to account for the thickness of the leather. He only wanted it no more than 10cm, so it is just under that width. But do it how you like, and if you want it for the right side, just make it the opposite, this will attach where the chain cover bolts are. VERY SIMPLE DESIGN! Cheers, C
-
I do like the Axe, but Arm is right, AXE THE BLEEDING COWBOYS FONT. I think everyone has said enough to confuse you and I won't continue:) LOL I know it is tuff...but sometimes you should maybe be careful what you wish for.LMAO! hahahaha
-
It looks like a piece of 4-5oz leather which is very thin, so you can't really get to deep with the knife. It juts looks to me that the beveling and spoon smashed the knife marks. I know very well cause that is what I ended up using for the door panels, but the trick with leather that thin is not to do to much other than the cuts and a light bevel. Thanks for participating! I am way to swamped this month to do this challenge but I will enjoy the back seat:) LOL
-
No it worked pretty good and didn't crumble, the wood antique is bees wax, it came out pretty good I must say. But I would be interested to see how this powder your buddy makes works as well.
-

Old Ugly Seat Gets A Facelift And New Guts!
chancey77 replied to chancey77's topic in Motorcycles and Biker Gear
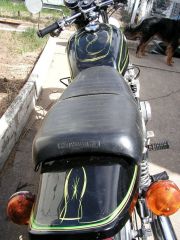
Well my original plan was to do a multi color design. The girl is tied to a target, like at the circus. She is looking up at the arrow in her hair. For some reason in the picture her left eye didn't look colored but closed, but it is just like the other one...weird camera matrix i guess. I dyed the seat black first then applied a heavy coat of gold to the lines and took off the access with water and paint thinner while it was still wet. There is some flake left over after the wipe down, but they just kind of sparkle a little in the sunlight, very minor. I tried everything I could to remove them, but no luck. That is the thing about metal flakes, they tend to dig in and stay put....oh well, it looks good, and adds a little character. I think after a couple seasons of riding they will wear off. But only time will tell. -
You know us musician biker types...WE ARE THE MOST FUN!!!!!!!! You have to go spend another 15 bucks and get the Keen Edge Sharpener...after you do and you sharpen that hollow ground for 10 seconds you will be kicking your self so hard that you didn't just get it before right now! I have heard you cussing that poor awesome knife blade for months now...all it takes is 15 bucks! And a few strokes and you will be rockin'!
-
-

The Next Victim! Vintage Tele Wrap And Tool!
chancey77 replied to chancey77's topic in Musical Instruments
I've been carving other things as well...that have been taken off this site...BTW... -
Wow that may be the best piece I have seen from you yet! YOU GO GIRL! Yes I did actually just say that...and I zig zagged my snap too! hahahah I thought you where making it a guitar strap...or is this part of it?
-

The Next Victim! Vintage Tele Wrap And Tool!
chancey77 replied to chancey77's topic in Musical Instruments
Stop looking at guys butts Pete...hahahaha -

The Next Victim! Vintage Tele Wrap And Tool!
chancey77 replied to chancey77's topic in Musical Instruments
Aren't you guys glad I aint like that...hahahaha What is wrong with people?? Never mind I know the answer...LOL Thanks Kevin! -

The Next Victim! Vintage Tele Wrap And Tool!
chancey77 replied to chancey77's topic in Musical Instruments
Ok so I have been doing some more work to the Tele... I have been so busy with motorcycle stuff the last 2 months, this was put on the back burner, but now I have had some more time the last couple days to start adding the details and making it pop. There is still SOOOOOO much to do! Including the back that is going to be all carved as well....wowsers, I know how to bite off a big chunk...LOL This is my first guitar wrap job, I have been wanting to do one for so long, but never had the chance. I have sent out emails to people that do this all the time; but as usual, no reply or any help at all. I was hoping someone who has done this a few times could have given me some tips, but NO AS PER USEUAL...NO REPLY! Oh well....I will learn myself ...THE HARD WAY...AS ALWAYS! -

Old Ugly Seat Gets A Facelift And New Guts!
chancey77 replied to chancey77's topic in Motorcycles and Biker Gear
JUST WET THE BACKSIDE ENOUGH TO MAKE IT PLIABLE. AND IT IS 10OZ LEATHER SO NOT MUCH COULD MESS THAT UP:)


