-
Posts
174 -
Joined
-
Last visited
Content Type
Profiles
Forums
Events
Blogs
Gallery
Store
Everything posted by BHPshooter
-
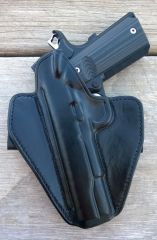
From the album: Various Holsters
-
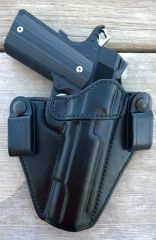
From the album: Various Holsters
-
From the album: Various Holsters
-
From the album: Various Holsters
-
From the album: Various Holsters
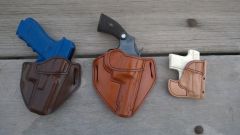
Group order. "Corsair" pancake for Glock 17, "Corsair" pancake for S&W Model 10, and "Stowaway" pocket holster for Colt Vest Pocket .25 -
From the album: Various Holsters
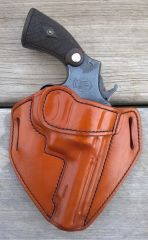
Pancake holster for S&W pre-Model 10 M&P -
Why Did This Happen?
BHPshooter replied to BHPshooter's topic in Gun Holsters, Rifle Slings and Knife Sheathes
Yes, that's what I meant -- the glued areas, not the glue itself. I understand what you mean. I have yet to try Lincoln dyes (can't find anyplace that carries them), but I have had far fewer headaches since I started using Angelus dyes. I actually ordered Angelus' Tan color to try this project again, I just haven't had the spare time to re-make the holster. I'll post the results when I get the chance. -

Why Did This Happen?
BHPshooter replied to BHPshooter's topic in Gun Holsters, Rifle Slings and Knife Sheathes
Thanks very much for all of the feedback, folks. I really appreciate it. I agree, I have had much less frustration with Angelus products. I have already switched over to Angelus dyes almost exclusively -- with the exception of this one Fiebing's dye, because I liked the color so much. However, this kind of throws a big wrench in the works. Looks like I'll be replacing that color with the Angelus equivalent. I've had this bottle for about a year and a half, so I doubt they're from the same batch. After this mess, I dyed a couple of scraps to mess around with, and it seems to be the water that causes the discoloration. If I had to guess, the areas that are glued don't let the water penetrate the leather as readily, which might explain why those areas don't discolor as badly. -

Why Did This Happen?
BHPshooter replied to BHPshooter's topic in Gun Holsters, Rifle Slings and Knife Sheathes
The Resolene actually seems to have made it look a little bit better. This is what it looked like before the resolene: This is the kind of result I usually get from this color (center): -
I attempted to make my first two-tone holster recently, and I'm not sure why it turned out like this. My construction process has always been to glue, stitch, mold, then dye and finish, but two-tone finishes are impossible that way. This is the first time that I have dyed the pieces first, and then glued, stitched, etc. When I got the holster wet to do the molding, it darkened. I expected that to happen, but what I didn't expect is that it didn't completely lighten when it dried. The "wings" sort of returned to the proper shade, but the pocket didn't... For those of you who dye the leather before molding, is this normal? Or is it something particular to that color, maybe? The mouth reinforcement piece is Angelus Pro Oil Black, and the body is Fiebing's Pro Oil Saddle Tan. Luckily, this holster is for me. It's still functional, and I can live with the blemish... but I really want to figure this out before I offer two-tone finishes to customers. If anyone can offer any help, I'd greatly appreciate it. Wes
-
I'm not sure what to think about the sight rail. It would save about 60 seconds, but I like being able to use different sized dowel rods for different sized sights, etc. I would definitely want the ejection port and trigger guard to NOT be filled in. I guess I'd prefer not to have the sight rail either, when it comes right down to it. I really like that Multi-Mold makes models that Ring's doesn't, but not being able to mold the trigger guard or ejection port has always been a deal breaker for me.
-
From the album: Various Holsters
-
From the album: Various Holsters
-
From the album: Various Holsters
-
From the album: Various Holsters
-
From the album: Various Holsters
-
Thanks very much for the advice, everyone. I think I may have it sorted out. The top thread tension was way too tight, and it was in fact jerking the needle sideways. I never did find what the needle was hitting, because I don't have any visible scars on anything, but you could actually see the needle jerk to the left. Right you are!!! Thanks, that helps a ton. You're not kidding, the instructions are pretty vague. Thank you for the video -- very helpful! So far, things are a TON better. I'm very surprised how smooth and quiet the machine is. This forum is awesome! Thanks again, everyone. I truly appreciate all of the help.
-
Before I get into this, a few warnings: At this point, I'm a little bit frustrated. I don't know an awful lot about sewing machines. My Cowboy CB3200 got here this week, and I managed to get it put together. I gathered some scraps to practice with, and attempted to start sewing. The first thing I noticed is that the flywheel is REALLY hard to turn. Is that generally the case with these? I started running a few test stitches, and I would only get a few stitches in before it started to skip stitches. For some reason is isn't always picking up the thread from the bobbin. I noticed the needle that was in the machine had a blunt tip. I changed it and tried to stitch two more test scraps (same results -- skipping about 1 in 5 stitches), and then noticed that the tip of the new needle had again been blunted. I can't see what the tip of the needle could be contacting to cause this. Can anyone offer some help to a sewing machine newbie? In the meantime, I guess I'll be riding the stitching pony again. Wes
-
I had that happen with bargain-bin leather, tanned in Mexico. That particular piece was also not tanned all the way through... there was a layer of rawhide running through the center of the leather. That piece was what finally convinced me to try Hermann Oak, so I guess something good came out of it.
-
I am fairly inexperienced with making holsters for revolvers. Nearly all of my holsters have been for autoloaders. I have someone that wants me to make a holster for their model 19-5 Smith in .357. Ring's makes a mold for a K-frame in .38 special, but I don't know if there is a difference in cylinder length between .38 and .357 models, and if so, I don't know if that difference is significant enough that I should be looking for a different mold. Can anyone shed some light on this for me? Wes
-
From the album: Various Holsters
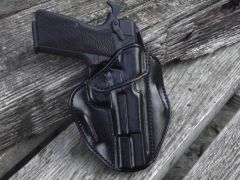
By request, this one's body shield was made to cover the entire hammer. -
From the album: Various Holsters
-
From the album: Various Holsters
-

Sweat Resistant Iwb
BHPshooter replied to JDM's topic in Gun Holsters, Rifle Slings and Knife Sheathes
I also sweat heavily, especially in the summer, and I've gone to some fairly ridiculous extremes to try to mitigate that. I've even tried applying Rustoleum Never Wet (search for it on YouTube) to the side of the holster that goes against the body. Although it did help, the coating is very fragile, and ugly as sin. For me, the best thing I've found is to make sure that the holster dries completely. I have a "carry rotation" of holsters. I'll wear one for a day, and then set it aside to dry while I wear the next one in the rotation. It means I have several identical holsters, but it was good practice. Wes


