CowboyDan
-
Posts
80 -
Joined
-
Last visited
Content Type
Profiles
Forums
Events
Blogs
Gallery
Store
Everything posted by CowboyDan
-
Perfect!! I've been trying to draw this by hand for a few days now and getting nowhere!
-

Three Questions About Tools And Benches
CowboyDan replied to SimonJester753's topic in Leather Tools
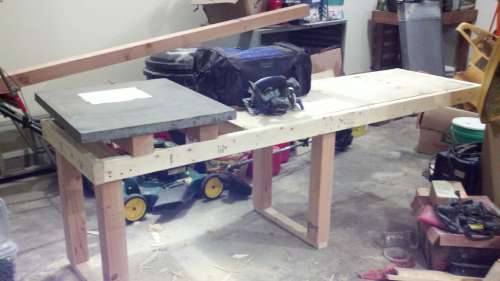
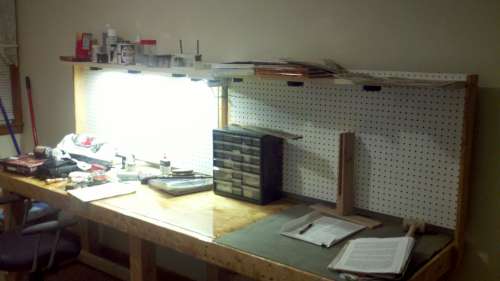
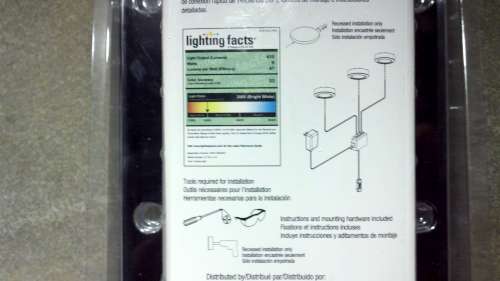
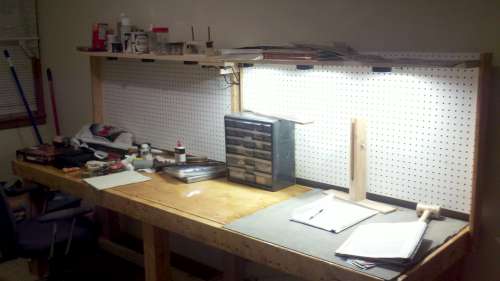
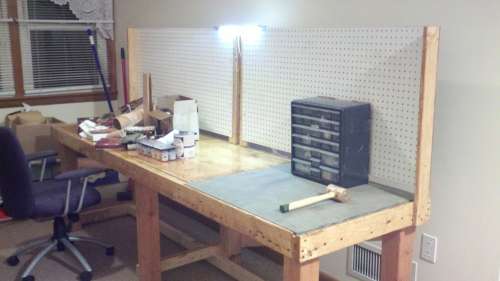
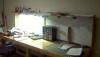
My old 'bench' was kinda like yours. Putting the granite on a piece of the rubber mat works pretty well, and keeps it from walking too much. I tried the swing arm lamp, but soon got fed up with it. I never could seem to get it at the right angle for me. Maybe I was just being too picky. Anyway, I finally got to make a bench, and I searched high & low for some inexpensive LED lights. I found some fairly nice one at lowes, and they work really well. A lot of light reflects off the back board onto the work. Here's my bench: http://leatherworker...35 -
I dunno. I kinda like that look. It's just a little different from what you normally see, and it works well on that wallet. Or at least I think so.
-
I've noticed that there seems to be two distinct styles of stitching horses. 1. Screw operated. These ones use a screw or bolt to pull the two jaws together. Usually has a plate to slip under the user's legs while sitting in a normal chair, or long jaws to rest on the floor. 2. Foot operated. These ones use a foot-operated lever to pull a strap that pulls on one (or both) of the jaws. Usually has some sort of latching mechanism to latch the lever into place. My idea is a derivation of the foot operated stitching horse. What I thought of was using a hinged seat instead of a foot lever to pull on the strap. This way there's no latching & unlatching. To loosen the jams, just stand up a little bit. For rough tension adjustments, have a belt buckle. And for fine tension adjustments, have a stop-bolt underneath the rear of the seat. Another way to do this (would require some inventive wood working), is to allow the jaws to slide vertically, and be lifted by the seat as the person sits down. In this iteration, the strap is a fixed length and the tension is adjusted by the stop bolt length on the other end under the operator's posterior. The last iteration I can think of is similar to the 2nd, except the jaws are once again fixed, but the raw-end of the seat actually pushes up on the inclined jaw sides, forcing the jaws closed. This would take some trial & error to get the incline of the jaw sides correct. Again, tension is adjusted using the bolt under the operator's end of the seat. I have the 1st type (cheap from tandy), and it works alright. But doesn't have clearance between the jaws at the top, so working something into clamping position can be tricky. I'm just thinking how to build a better (stitching) horse, without beating a dead horse. Any thoughts on any of those, or am I over-thinking this?
-
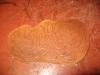
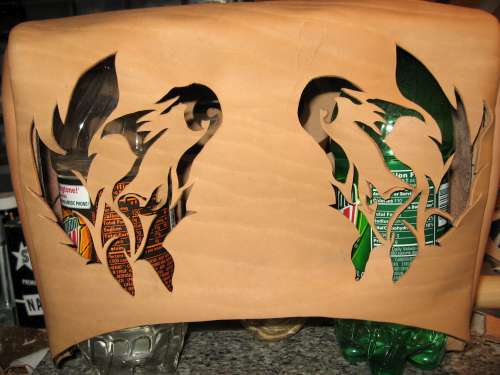
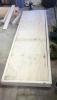
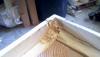
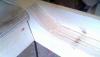
Well, it appears I have to eat a few of my words. I just stumbled across my construction photos of the purse I made, and discovered how I supported the bag purse while it dried.... As you can see from the picture, my memory is what I forget with. The picture tells the truth. My most sincere apologies to any who have been mislead by my faulty memory. Now where did I put my glasses.........
-
Thanks for the laugh. That just made my day.
-
As far as what you have so far, I can only say that if you intend to use that holster with the pliers pointing down, they will probably wear a hole in the bottom of the holster quite quickly. I did a holster for my gerber tool about a month ago. It was just a quick & dirty one I threw together because my nylon sheath was in tatters. I wet formed the leather around the pliers, then let it dry, put a snap on the outside of the holster, sewed a loop on the back, laced the back to the back, put a snap on the flap, threw some neatsfoot on it, and wore it. The wet forming was the hardest part because I was in a hurry. One tip on the belt loop: make it a true loop, not a slit. By that I mean when you sew the loop on, start at the end that will be at the top of the belt, with the loop pointing even further up. Once the top is sewn on, fold the loop down and sew the bottom end. This makes it a little more flexible and forgiving when you snag it on something. I made cellphone holster that had a piece of leather on the back to form a belt slit, and almost gave myself a wedgie when the phone got caught on a grab bar as I was jumping off some machinery. I ended up hanging by the holster at some really crazy angle until I could stop swinging and get ahold of something to right myself. I've snagged my gerber holster several times already, and this loop has enough give to it that I don't get hung up.
-
Any tips / instructions / pointers you could give?
-
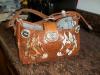
I don't know if you necessarily want to minimize how wet the leather is when turning it. When I did a purse for my sister, I did all the cut-outs on the bench with the pieces flat, then stitched it inside-out. Then SOAKED it until it absolutely wouldn't take any more water. Then I took it out of the bucket and started turning it. Now the one I made had a lot of very intricate cuts that made for some extremely fragile 'threads' of leather, so I was being extraordinarily cautious as I turned it. I think I found a round container of some sort and slid the (now turned right-side out) purse over it to dry. It wasn't a very tight fit, but I made sure it was sitting smoothly as it dried. I thought it turned out pretty well. You can see the (now very worn) purse here; http://leatherworker.net/forum/index.php?showtopic=39160
-
Wow. That looks pretty good. Did you start with a kit or some sort of instructions? I ask because the holes look machine punched, like from a kit. I've been studying the wheel on my truck as I drive to & from work, trying to figure out the best way to tackle it. The 16 year old leather is finally wearing through.
-
Thanks to all the others for their ideas. I'm planning on using a deer-tanned hide treated with mink oil to form the pocket, with an elastic around the top to keep the bottle/cup from falling out, and also to make it as easy as possible to get it in & out of the bag. I'm going to start with the outside front part at the bottom of the pocket, bring it up to where I want the top of the pocket to be, then fold over and down. take the leather almost as far down as the piece started, then fold back up. This way the only seams will be on the sides. The insulation (what ever I decide to use) will wrap around the actual pocket in a U-shape, with the bottom of the U being at the bottom of the pocket, and the ends being in the pocket seam. For the seams, I'm planning on making the edges of the front piece wrap around all the way behind the last layer of insulation. This way I have 4 layers of leather, and 2 layers of insulation to compress and hopefully make it water-tight. I'll probably also use a really short stitch. I may even do an inner stitch with just the two inner layers of the pocket and the insulation, then another stitch outside of that with all 6 layers of material. Or if I feel really ambitious, a stitch on just the inner pocket leather, a stitch just outside of that with the insulation and inner leather, then another one outside that with all 6 layers. I envision at least 2 of these for each diaperbag, and I have 2 bags to make.
-
You're awesome! I don't care what anyone else says. Now the engineer in me wants to know more about the ambient temperature in the room, humidity level, and water bottle size & construction to determine the heat flux through the carrier. That way I can calculate how much insulation I need to keep sippy-cups and bottles at the correct temperature. But, I don't think I'll go there. The lazy bone in my body has been getting the better of me today.
-
Thanks. That sounds like the ideal stuff.
-
Reminder :D
-
Mother's New Purse
CowboyDan replied to TABcustomleather's topic in Purses, Wallets, Belts and Miscellaneous Pocket Items
You weren't wrong, that snake is bright! Darn good job there. -
Is there a particularly good material to use for insulation? I'm planning to make some diaperbags, and one thing everyone said when I asked about features, was insulated pockets for bottles & sippy-cups. I think I know how to make the pocket so it's almost waterproof, but I need some insulation and am not sure what to use. I have zero background in regular cloth sewing & such like, so I have no clue what is even out there. And the search of google and LW didn't really help (although I found a lot of bunnie-trails on LW!!!)
-
Mother's New Purse
CowboyDan replied to TABcustomleather's topic in Purses, Wallets, Belts and Miscellaneous Pocket Items
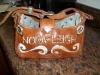
Looks good. I think there might not be enough contrast to tell what exactly the pattern is from more than a few feet away. But within a few feet, yeah, I think folks are going to want one too. I made a purse for my sister some years ago, and was constantly getting requests from other girls & women for me to make them a purse similar to it. -
There is a 'quilting with leather' book that I got from Tandy, and that's where I got the pattern. It's quite intricate. Took FOREVER to sew. The whole purse was sewn by hand.
-
How about Pictures of Your Workshops
CowboyDan replied to Jordan's topic in Leatherwork Conversation
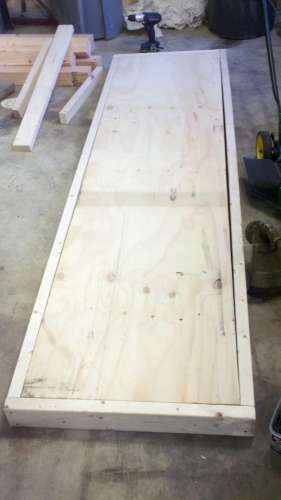
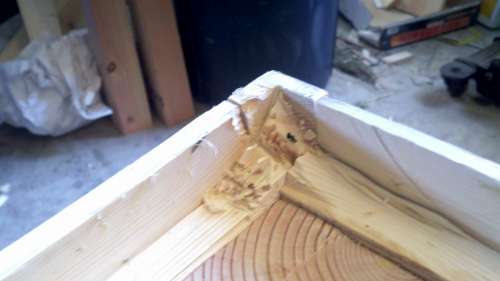
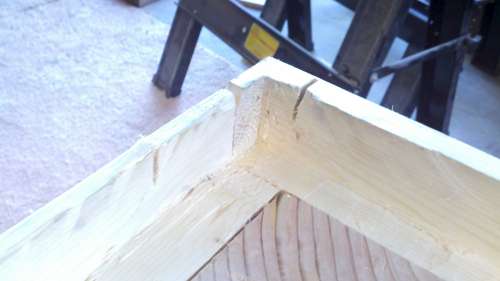
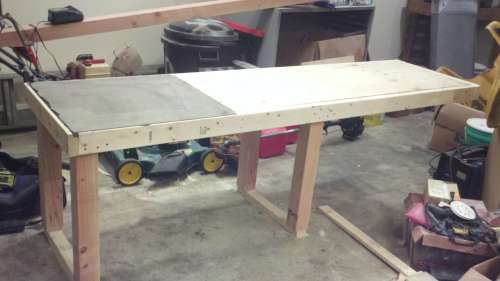
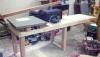
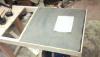
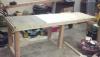
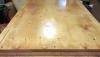
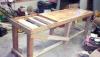
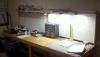
Hey all! I remembered this thread from when I was lurking on here looking for ideas for a workbench. The outer frame is 2x4, the legs are 4x4, the plywood top is 23/32" (Can't seem to be able to get 3/4" any more). The granite is a piece from a local monument company that he was a leftover from making pavers for his patio. Under the granite and the plywood is 2x3s. There are 10 2x3s under the granite, as well as sitting directly on the tops of the legs. The 2x3s under the plywood are spaced about 15" on center. Leg bracing is 2x4 on the bottom, and the diagonal is a 1x4 left over from another project. Finish is minnwax ipswich pine, and several coats of polyurethane on the top. Just one or two coats of poly everywhere else. The LED lights are a $30 set from Lowes, their number 354846. A cheap extension cord runs from the wall to the back of my bench. The switches are hot-glued to the underside of the shelf in the middle. Well, here's what resulted. It's a mess, as any good workbench should be. I'm in the process of making organizers and hangers for the tools. For anyone making a bench, it doesn't take a lot of tools. I did this with a cordless drill, cordless circluar saw, chisels, tape measure, framing square, a 4' straight edge, two c-clamps, and a 5" random-orbit sander. A shop-vac (even a small one) makes a really great dust collector for sanding. I have a 1x1 that I use.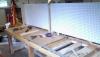


-
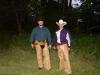
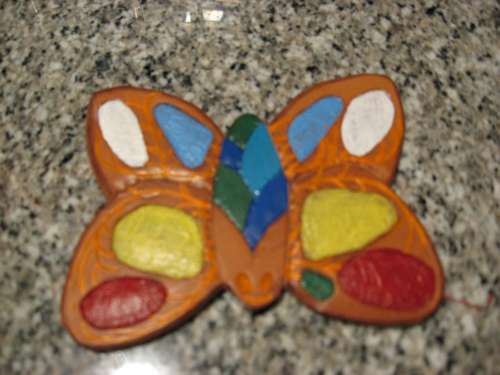
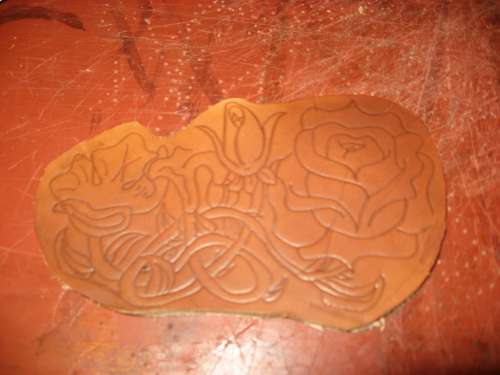
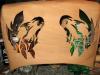
Howdy from Pennsylvania. I've done a few projects in leather a few years ago, and am just getting back into it. My parents got me the Basic Kit from Tandy for Christmas one year while I was in college. I think they ended up regretting that! There was many an evening where the rest of the family endured my pounding as a live background soundtrack to their movie. Anyway, I've done some smaller carving projects, and some sewing/lacing projects. I've attached a few pictures of some things I've done. The butterfly became a hair thingy for a friend's baby sister. The flower is something I drew up and cut, but never got a chance to stamp. The chaps were something I made for a friend and I. (I'm the bearded one) My masterpiece (thus far) is a purse I made for my sister. She used it every day for 6 years up till about 6 months ago. The hair-on hide started losing the hair, so she doesn't use it every day now. I've done a few other things; guitar strap, knife holster, cell phone cases, and most recently a multi-tool case. After about a 5 year hiatus, I'm getting back in this saddle. Got a leather-working bench built, and am trying to figure out how I want to do diaper bags. I have two bags to do for my brothers wives before the end of the year. Apparently there's something in the air!