CowboyDan
-
Posts
80 -
Joined
-
Last visited
Content Type
Profiles
Forums
Events
Blogs
Gallery
Store
Everything posted by CowboyDan
-
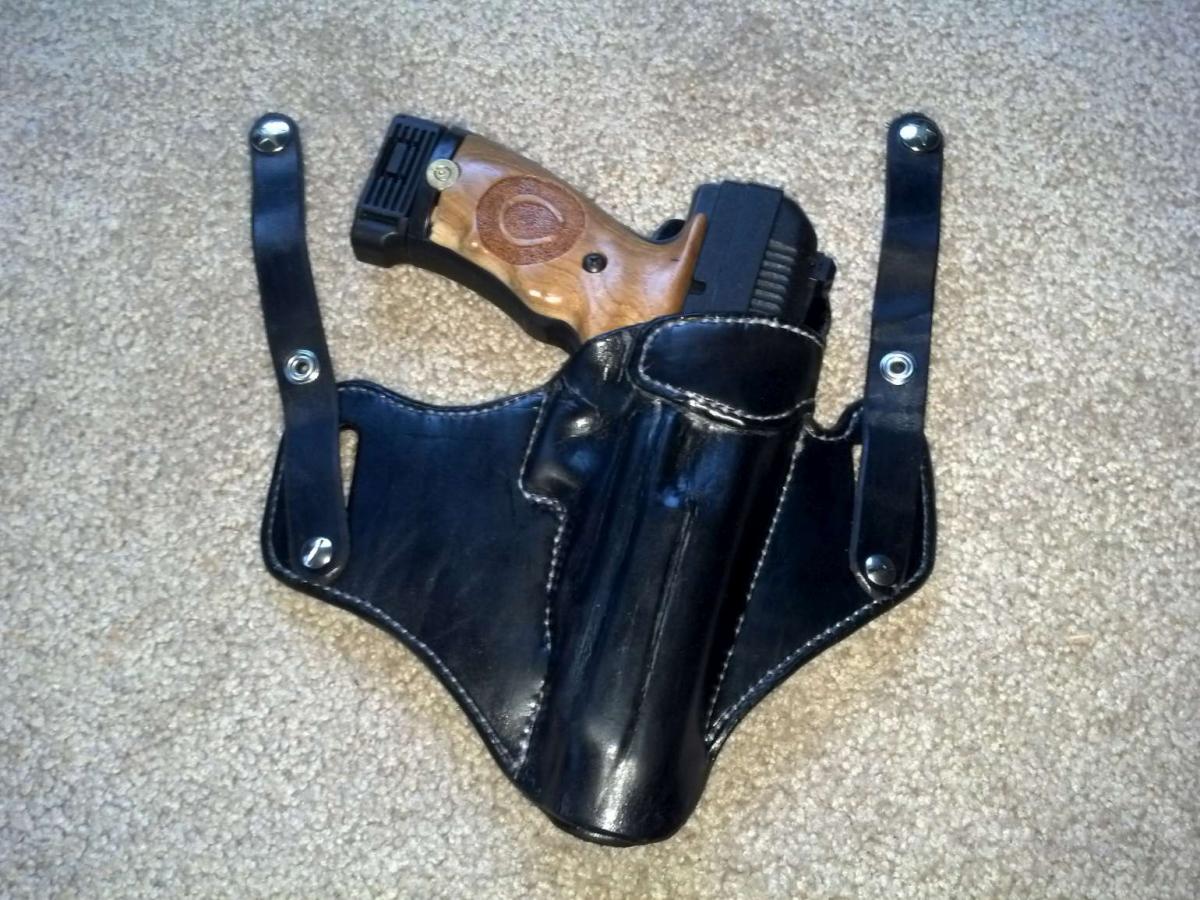
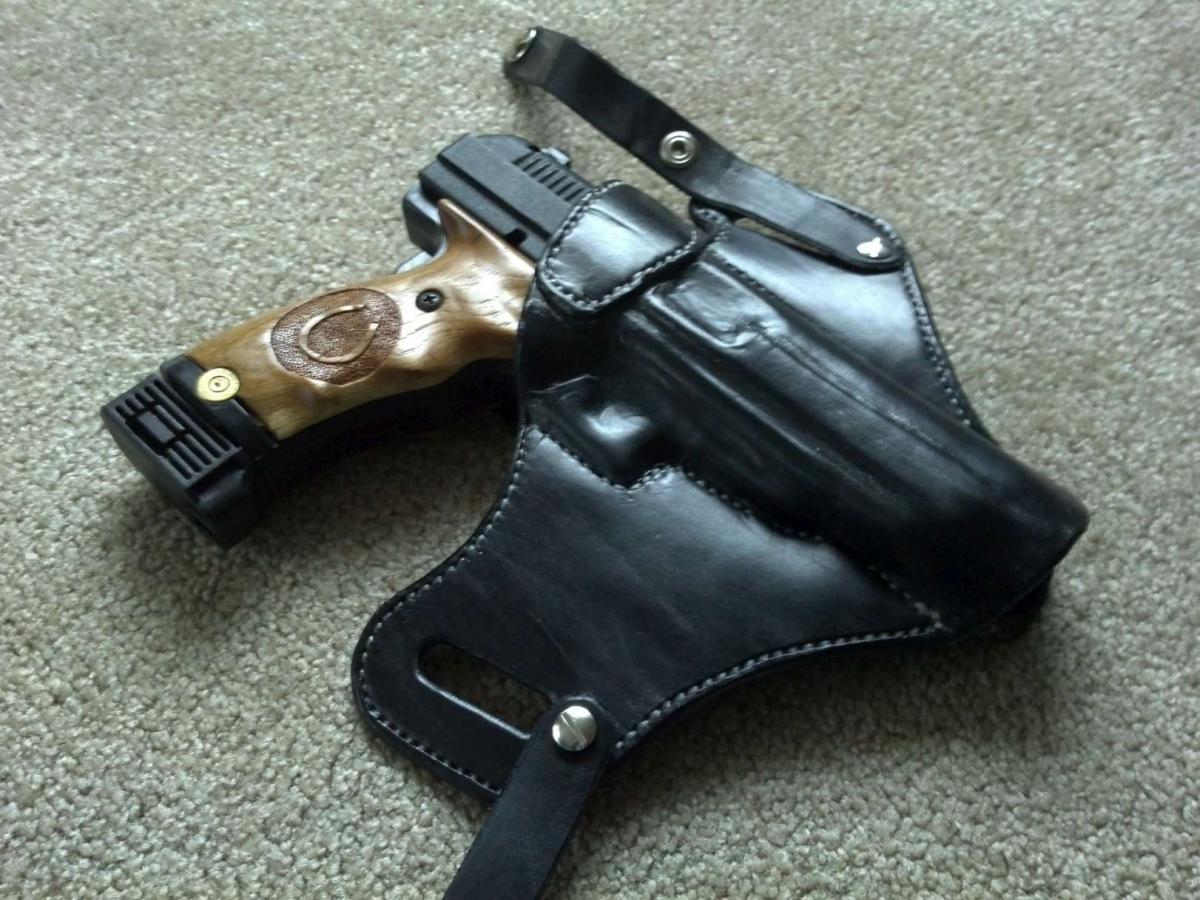
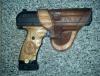
 I fastened the strap down under the belt slot so it would be tuckable. Can't tuck a shirt in outside the gun with the strap mounted above the belt slot. I may add a hole above each slot and make a shorter set of straps when I want it IWB but not tucked in.
 -
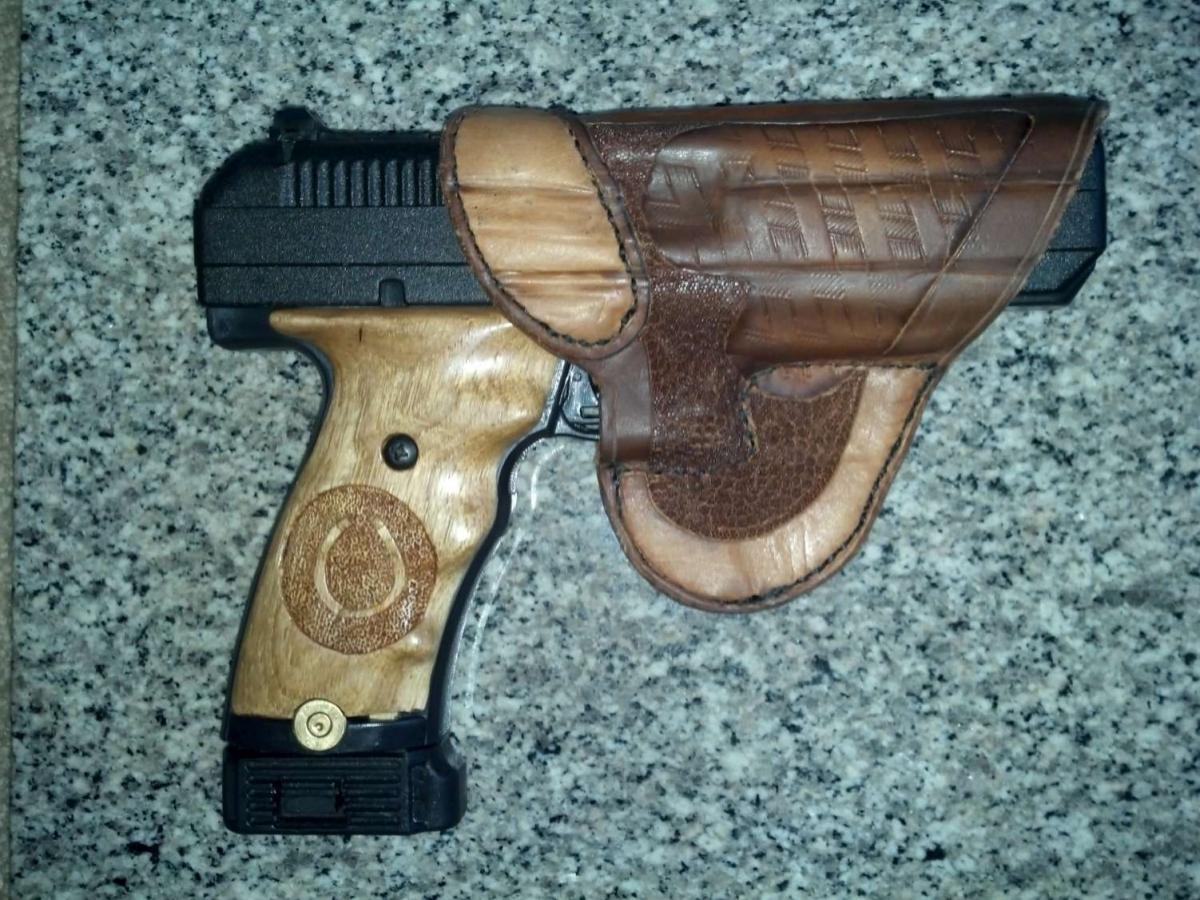
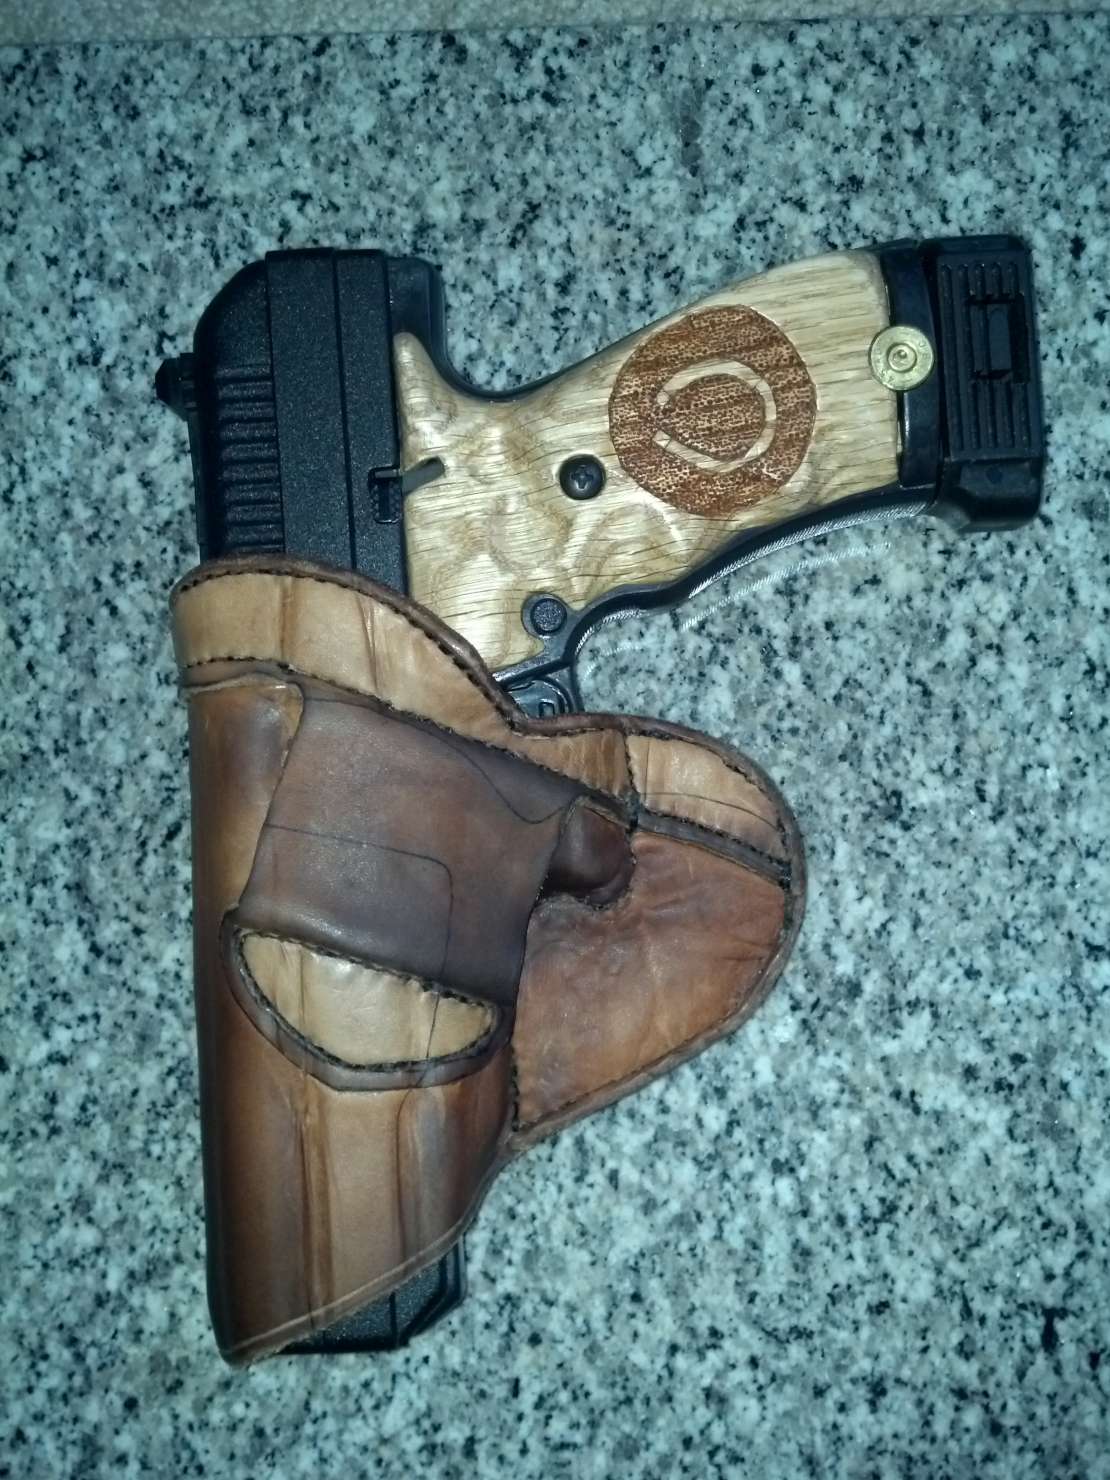
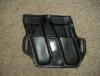
I made the mag pouch with the rounds pointing rearward. I haven't tried to insert the mags with rounds forward, I don't think they will sit down as far because of the stitching around the one corner of the mag. I intentionally didn't make it to easily take the mag in either direction. That may have been a mistake. The next pouch may keep the mags vertical, I haven't decided. I think the soft look of the heart holster is from the oil. I got a little bit much on it. That's when I learned to trim the hair on the shearling shorter to help keep that from happening near as easily. All parts of both holsters and mag pouch are from the same piece of leather. It's vegtan, I think it's 6 oz. Like I said, it's a first try, and I didn't expect it to turn out 'right' the first time, so I wasn't picky about the leather and used what I had. The black one is double thickness except around the gun.
-
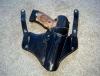
OK, I finally got some pictures. Hear-shaped holster. I made this one first, the stitching lines were laid out after wet-forming. Double mag pouch: Yeah, I know the mags are backwards. For some reason when I was trying to decide which way to put them, I thought it worked well drawing them from that orientation. Plus, the Hi-point has a really large base on the bottom of the mag, and I didn't want it poking me in the ribs in the normal orientation. I'm going to try it at the range and see how I like it. I suspect I'll have to turn the mags around. Combo holster: I did have to make one change to this, the rear belt loop is too far back in the pic, letting (in OWB wearing) the pistol slide around on the belt and hang loose from my side. I moved the slot forward and trimmed off the excess, it works much better now. Just don't have a picture. As a tuckable holster, it isn't bad. I tried putting spacers in at the bottom of the straps, but it didn't seem to need them. Maybe it's because how I was putting it on. This holster I laid out the stitching lines, but they were too close, so when I stuck the gun in the first time, it actually tore the stitches out in two spots. Lesson learned there!


-
So I got my first semi-auto hand gun, and wanted to make a holster & mag pouch for it. Not having made a non-kit holster before, and never one for a semi-auto, I knew it would be interesting. In browsing around, I found two general designs that I liked; a tuckable/OWB pancake, and the weeping heart for the 1911. The weeping heart was hard! I deviated from what it looks like on the 1911, and also tried out some other things on it at the same time. So it doesn't look good, but I learned a few things from it. I forget exactly where it was on here I found out about the vinegaroon, but I have to say, I love it! Cheap & easy black 'dye'. Dunk in the 'groon, dunk in baking soda water, rinse, & let dry. Then some really grumpy old guy kept on about cleaning floors with his leather finish, so I tried that too (on the holster, though I do need to clean the floor). And I really like it! 50/50 with water in a spray bottle, spread it out with a piece of shearling, dry for a while, then buff with the same piece of shearling, and it looks REALLY nice. I don't think I'm going to bother with the neutral shoe polish for now. I had tried the tan-kote, and I have to say I wasn't impressed. There seemed to be almost no shine to it where the mop-n-glo buffs out to a nice shine pretty easily. The holster & pouch aren't pretty, but I think they'll be servicable. I'll try to get pictures up.
-
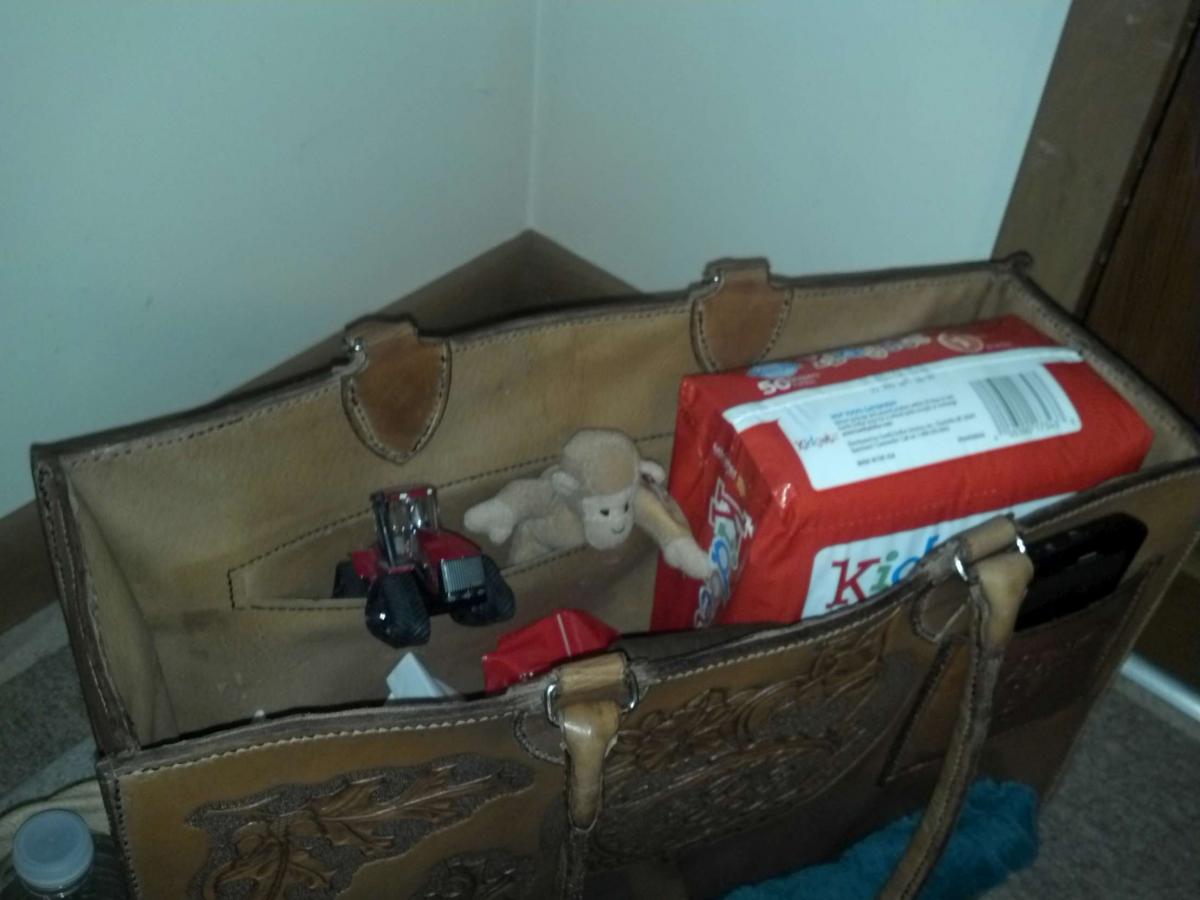
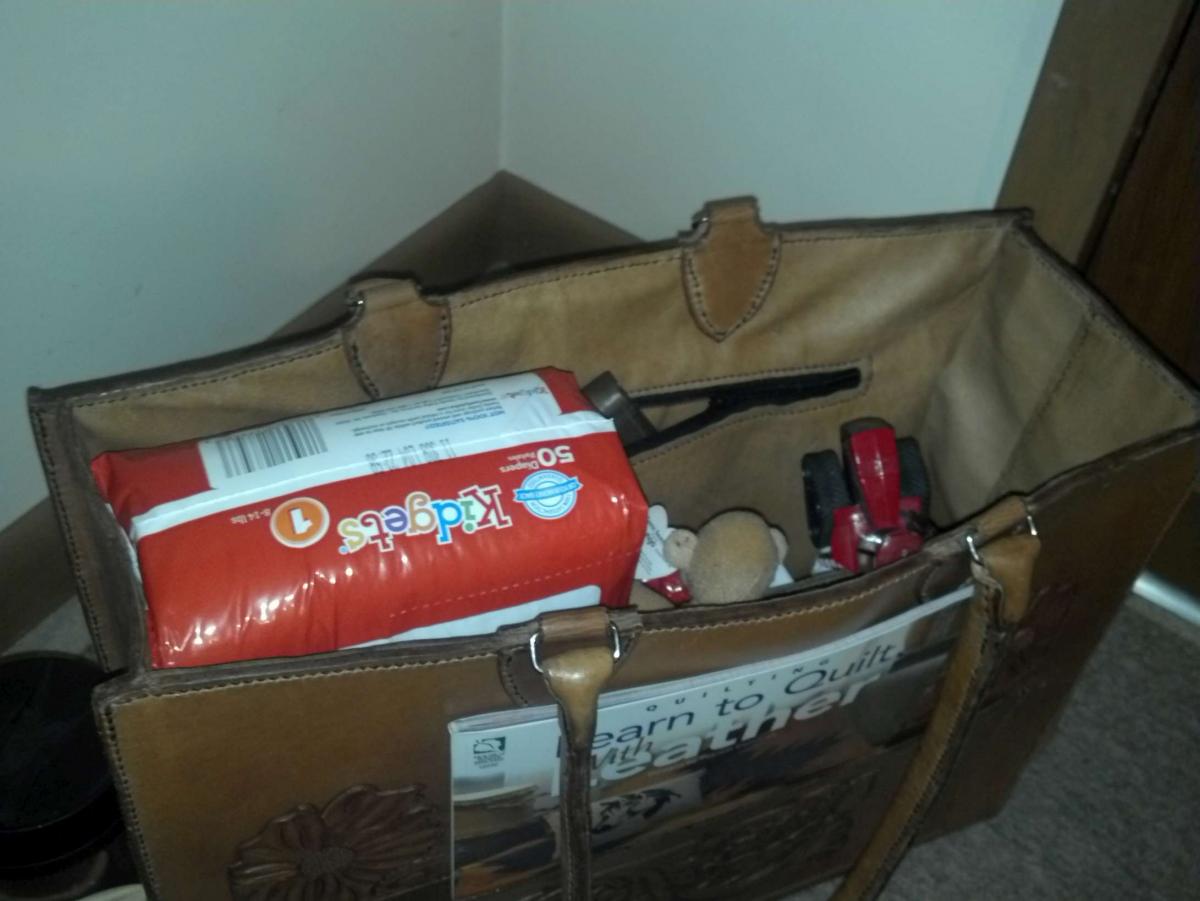
Diaperbag!
CowboyDan replied to CowboyDan's topic in Purses, Wallets, Belts and Miscellaneous Pocket Items
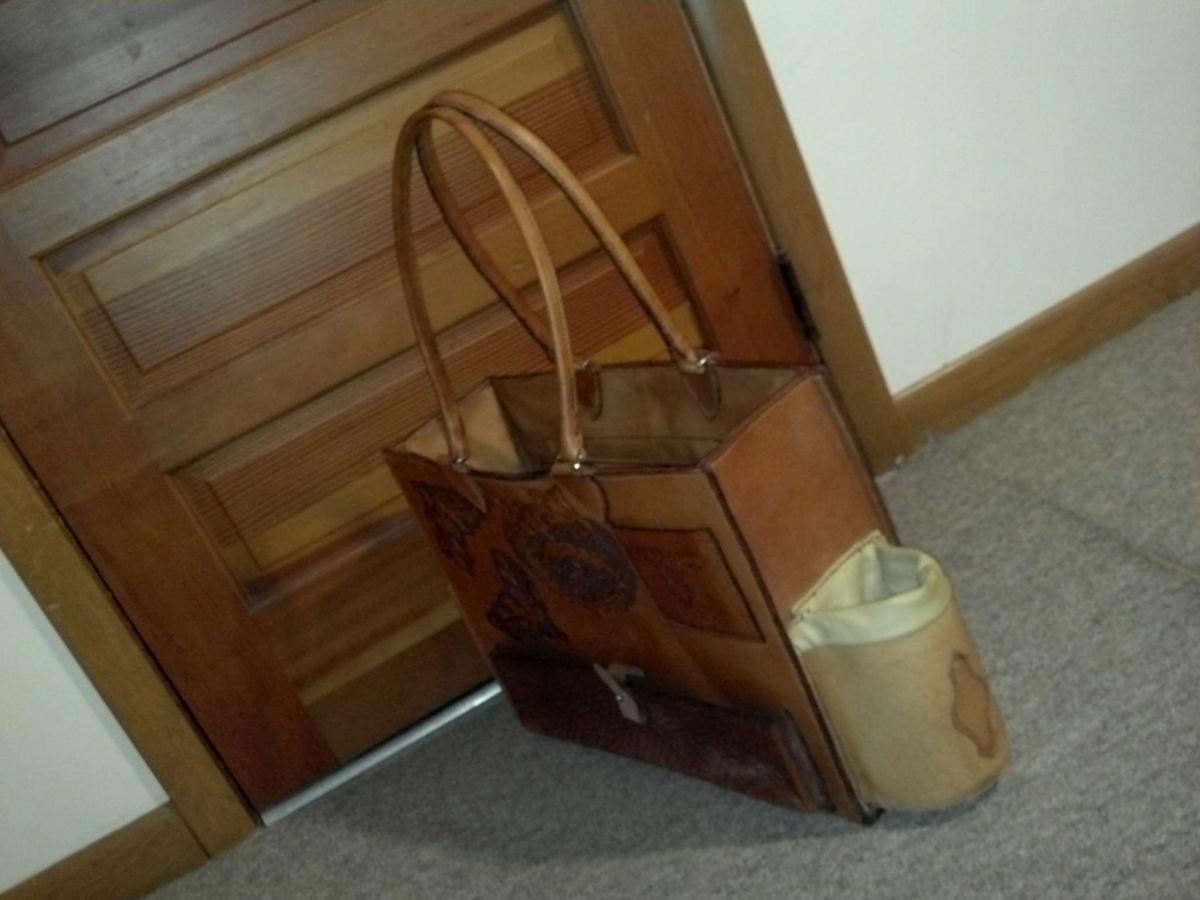
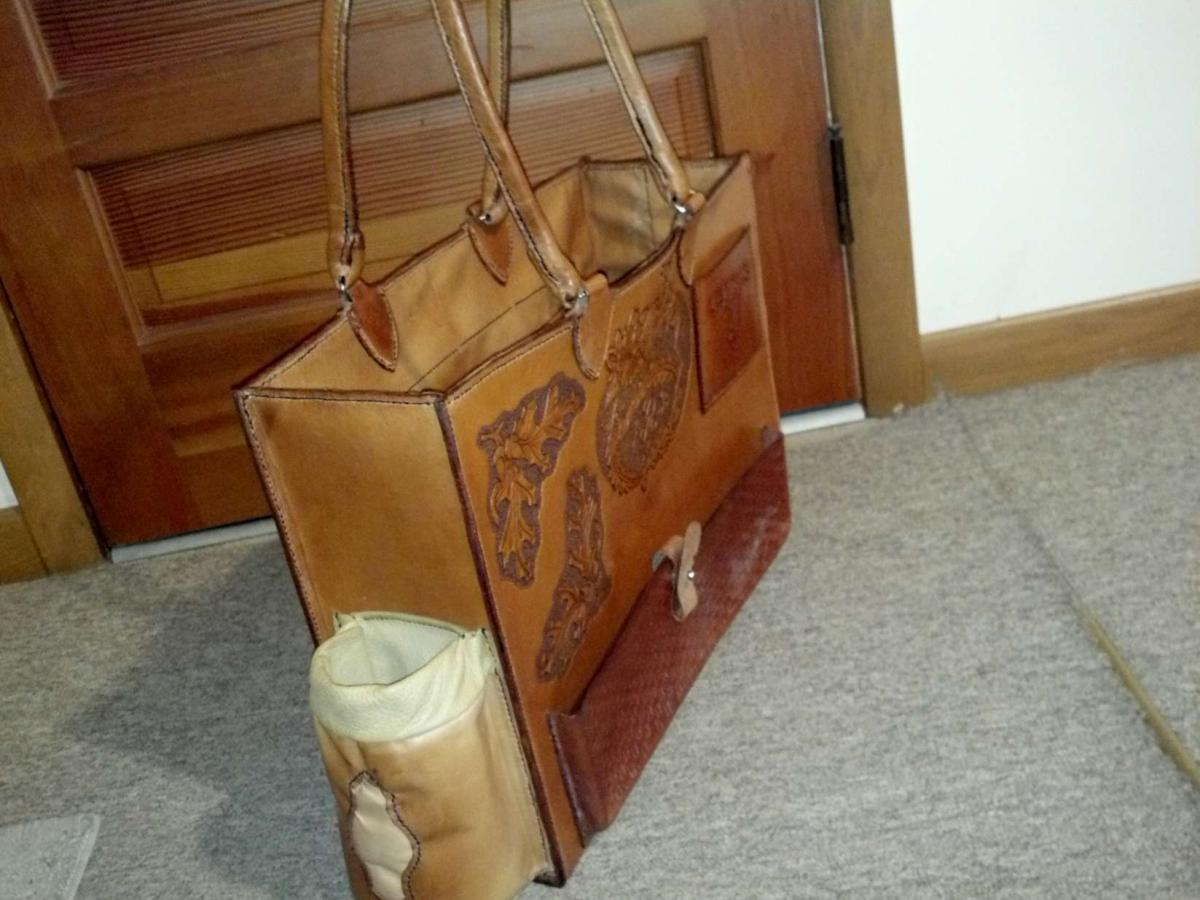
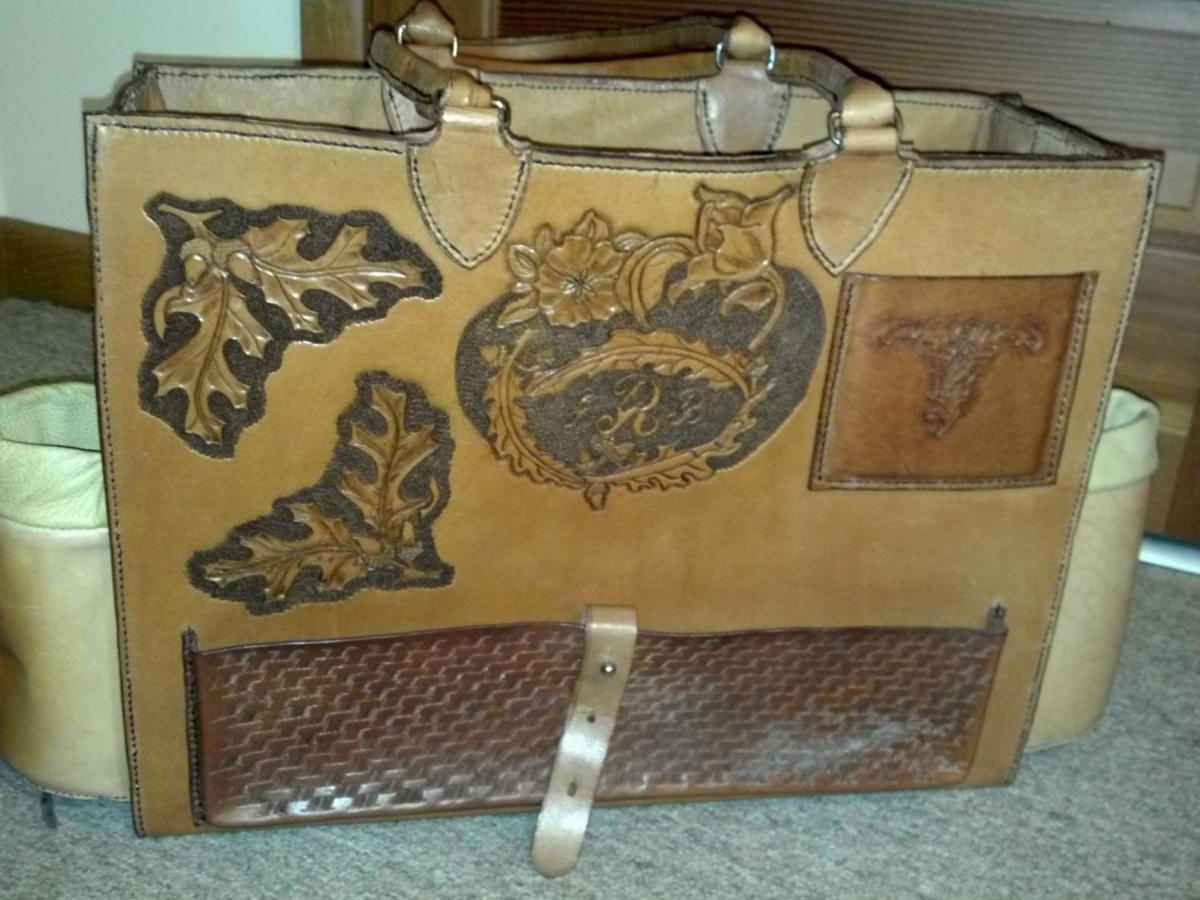
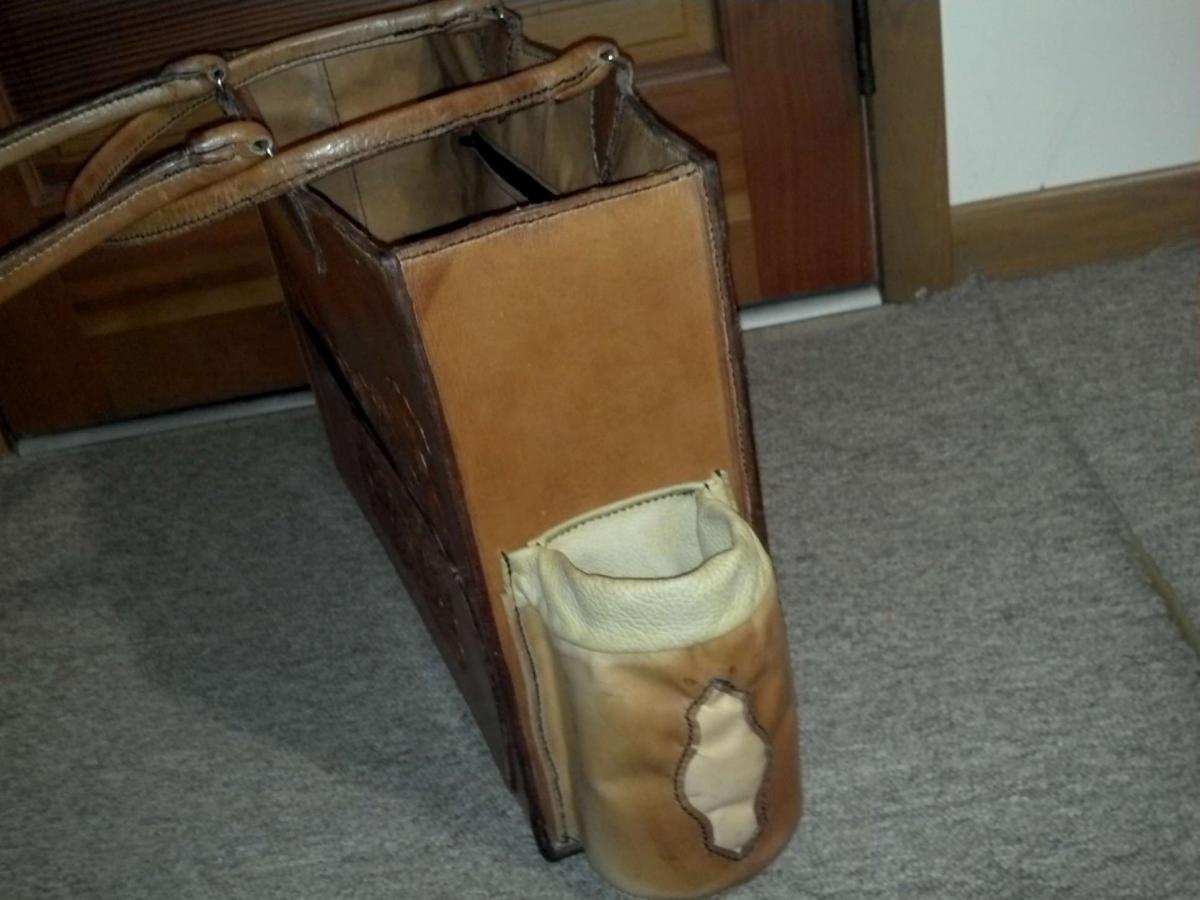
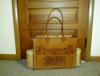
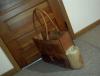
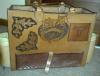
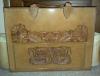
Yep, ALL hand stitched. Having not stitched for several years, my fingers are still recovering!!! Weight varied by piece, and I don't remember exactly which piece was what weight. Side panels and the main panel (main panel wraps all the way around the bottom) were the same weight. That was the heaviest. I think the straps came out something a little lighter except for the billet on the inside. The billet was heavy like the sides & main panel. The handle mounting shields were from the same as the handles. The vegtan part of the bottle pocket was pretty light, as was the molded pocket with the basket weave. The other large pocket was about the same weight as the handles. The inside of the bottle pockets was a deer tan hide. The inner liner & associated pockets is pigskin. -
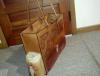
I LOVE the way you used the basketweave stamp on the back in curved sections! I may have to do something like that on some future project. What did you do for the inside? I'd like to make a notebook, but haven't seen a good design for the inside to start with. And I don't know exactly what I want to be able to draw one up.
-
The finished product: http://leatherworker.net/forum/index.php?showtopic=43828
-
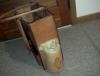
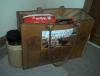
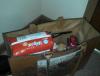
Well, I finally finished the first of two diaperbags a few weeks ago. Finally getting around to posting a few pictures. Thanks for all the help folks here have given. There's no way I'd have done it without the suggestions on here. It's my first foray into leather in several years, and the largest project i've ever done by far. It didn't turn out quite as well as I wanted, but it was better than I thought it would be! Without further ado, here are the pictures: Both inner pockets are 7 inches deep and the opening is about 12 inches wide. The inside of the pocket is slightly wider than the opening. The bottle pockets are large enough you can put a 20oz coke bottle in them, or (what they were formed around) a large Pringles can! The bottle pockets are insulated using a single layer of the Warm Windows material. http://leatherworker.net/forum/index.php?showtopic=39228


-
I had this exact problem a few weeks ago. I found that if I laid the leather down on my stamping stone, use the overstitch wheel (PRESS HARD!!!!), it would leave usually visible marks. Then go over it with a ultra fine point sharpie and put a dot the size of the marker tip where each overstitch mark is. Once the awl goes through, the little marker dot disappears. Then once it's shown, it's totally covered. I tried doing the overstitch wheel with the leather on a piece of wood, but there was just enough give in the wood that it didn't work as well. Note: The sharpie needs to be the "Ultra Fine Point" version, not the extra fine point. The Ultra Fine Point has a little non-mettalic tip with the ink at the end of a small metal tube. This is perfect for getting a little dot exactly in the mark left by the overstitch wheel. Here's the ones I mean: http://www.staples.com/Sharpie-Ultra-Fine-Point-Permanent-Markers-Black-5-Pack/product_282566 The ones you don't want have a taper on the whole tip: http://www.staples.com/Sharpie-Extra-Fine-Point-Permanent-Markers-Black-Dozen/product_125443
-
If you have a ruler with fine markings, you can draw it out by hand. A Sine wave is a mathematical function, so you can use a spreadsheet program to create the numbers quickly & easily. 1. Draw a long straight line on a paper. 2. Draw a line through that line. Where the lines cross is your 'zero' point. 3. Make a column of numbers, 0-4 for example. Make sure to include decimal numbers. Ideally the numbers should be even increments. This will be the distance along the long line from your 'zero' point. Label this column so you know what it is. I used X. 4. Write a number at the top of the next column, and a letter. I used Y. This is the max height of the sine wave. Let's use 2 since this is a gun belt. 5. Your math function will be: Height = Y* sin(X) where X is the number in the 1st column, and Y is the max height. Here's what the chart looks like: 2.00 X Y 0.00 0.00 0.10 0.20 0.20 0.40 0.30 0.59 0.40 0.78 0.50 0.96 0.60 1.13 0.70 1.29 0.80 1.43 0.90 1.57 1.00 1.68 1.10 1.78 1.20 1.86 1.30 1.93 1.40 1.97 1.50 1.99 1.60 2.00 1.70 1.98 1.80 1.95 1.90 1.89 2.00 1.82 2.10 1.73 2.20 1.62 2.30 1.49 2.40 1.35 2.50 1.20 2.60 1.03 2.70 0.85 2.80 0.67 2.90 0.48 3.00 0.28 3.10 0.08 3.20 -0.12 3.30 -0.32 3.40 -0.51 3.50 -0.70 3.60 -0.89 3.70 -1.06 3.80 -1.22 3.90 -1.38 4.00 -1.51 In this case, I used inches, and it starts at 0, crests to 2 inches high (as measured up from the long line) at 1.6 inches from 0, and goes back to the long line at 3.14 inches, then it starts to go below the long line. If you want to keep the same height but stretch the sine wave out, add a multiplier to the X value inside the equation. For instance, to stretch the wave out to twice the length, use the formula Height = Y* sin(0.5 * X). Once you get it where you want it, you can trace over the graph onto the tracing paper and then onto the leather. If you want to get really fancy with it, you can use other math functions. I refer you to a good highschool trig or geometry textbook for that, though.
-
I've finally got to use these on a project, and so far they're far & away better than the Tandy tools I started with. Definitely worth the $150. Anybody looking to get a starter set of tools should look at this set before looking anywhere else. Especially if you like well made tools. The bevellers are truly awesome. The set has three, and I've found that I really like the smallest one because it has the steepest angle. The backgrounders are very nice also. it just takes some practice to keep the background from getting patters in it when doing larger areas. Just have to think RANDOM!!!
-
My First Purse
CowboyDan replied to volpert's topic in Purses, Wallets, Belts and Miscellaneous Pocket Items
Short of stitching a plastic or glass cover over it, I don't know of any. Higher quality hide may help retain the hair a little longer, but remember that hair is not meant to be permanent. If you ever think it is, just look at your brush or comb after you use it. At least the one you made is simple enough to replace without too much headache. Here's the one I made some time back: http://leatherworker.net/forum/index.php?showtopic=39160&st=0&p=243187entry243187 -
My First Purse
CowboyDan replied to volpert's topic in Purses, Wallets, Belts and Miscellaneous Pocket Items
That looks really good. I probably should warn you though, in a few years (assuming it will be her daily usage purse) the hair is going to rub off and the purse will be bald. Then of course, she'll probably want a new one. And of course she'll have to get a new pair of shoes to match her new purse.... -
Making Patterns From An Image/picture
CowboyDan replied to CowboyDan's topic in Patterns and Templates
Lol. I hate small pictures. This is actually the first forum I've seen in recent years that didn't automatically resize the image to fit the screen. The devil's in the details, and that's where the real work is. So I like to be able to see details. I get a lot of folks commenting on my details at my day job. Thanks Chancey. I may take you up on that in a few weeks. This week is insanely busy, and I'll be out & about for a bit after that. -
Making Patterns From An Image/picture
CowboyDan replied to CowboyDan's topic in Patterns and Templates
Well, for some reason I can't get the original picture to upload. It's less than 600k, so I'm not sure what's wrong. I'll try again later. -
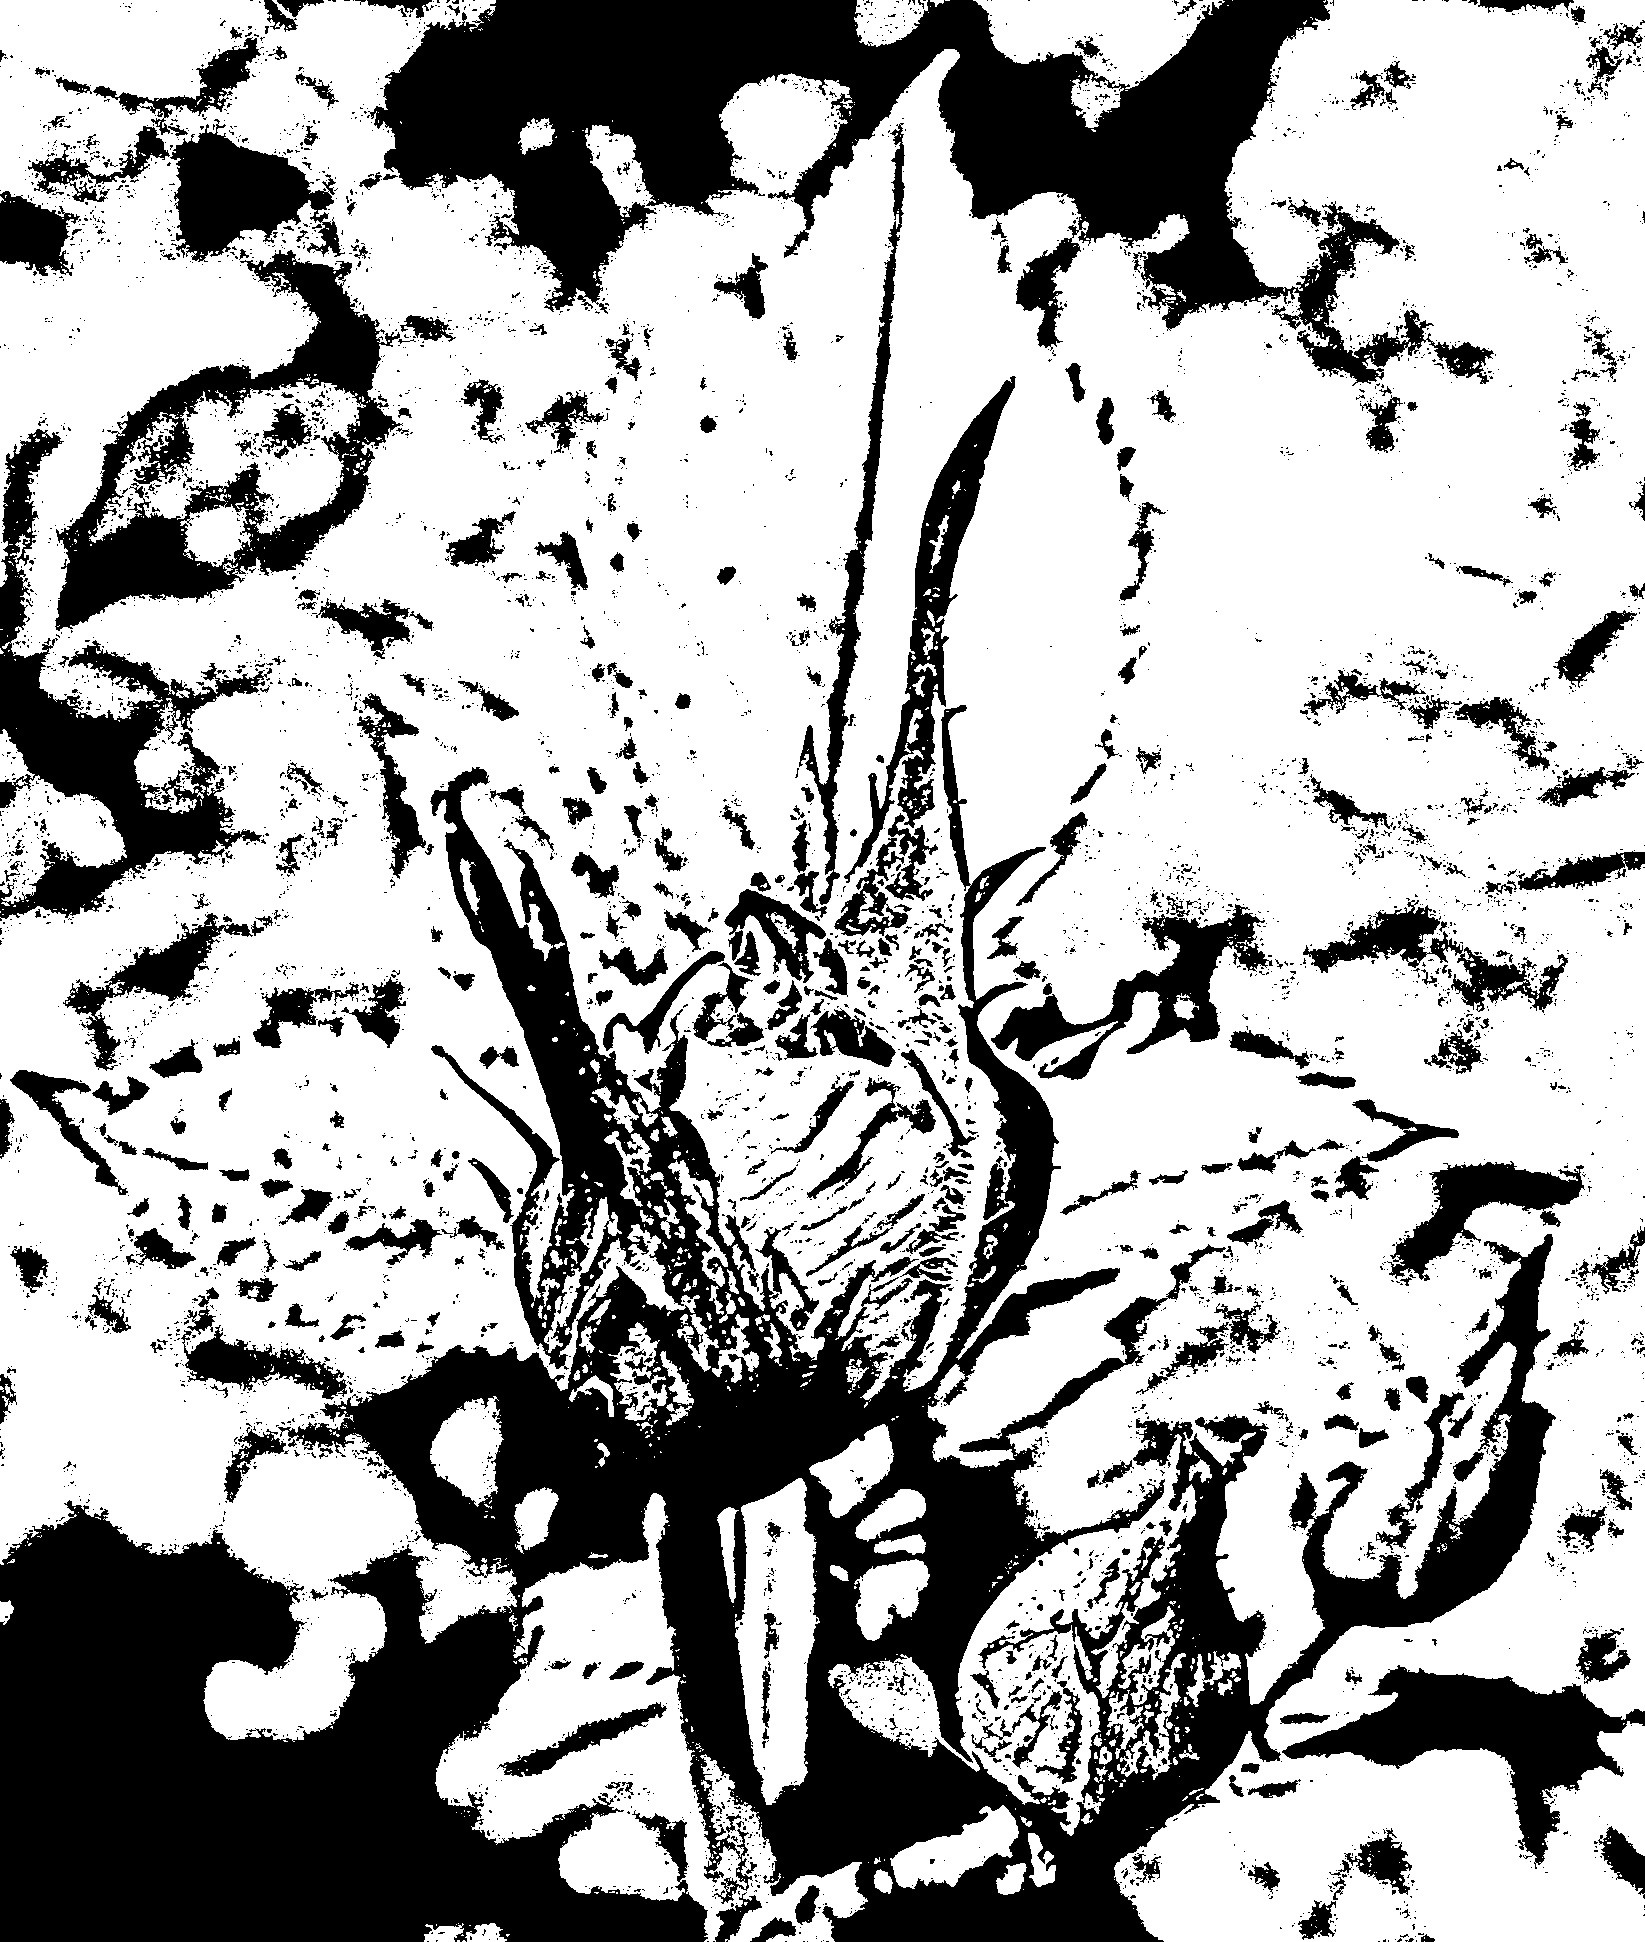
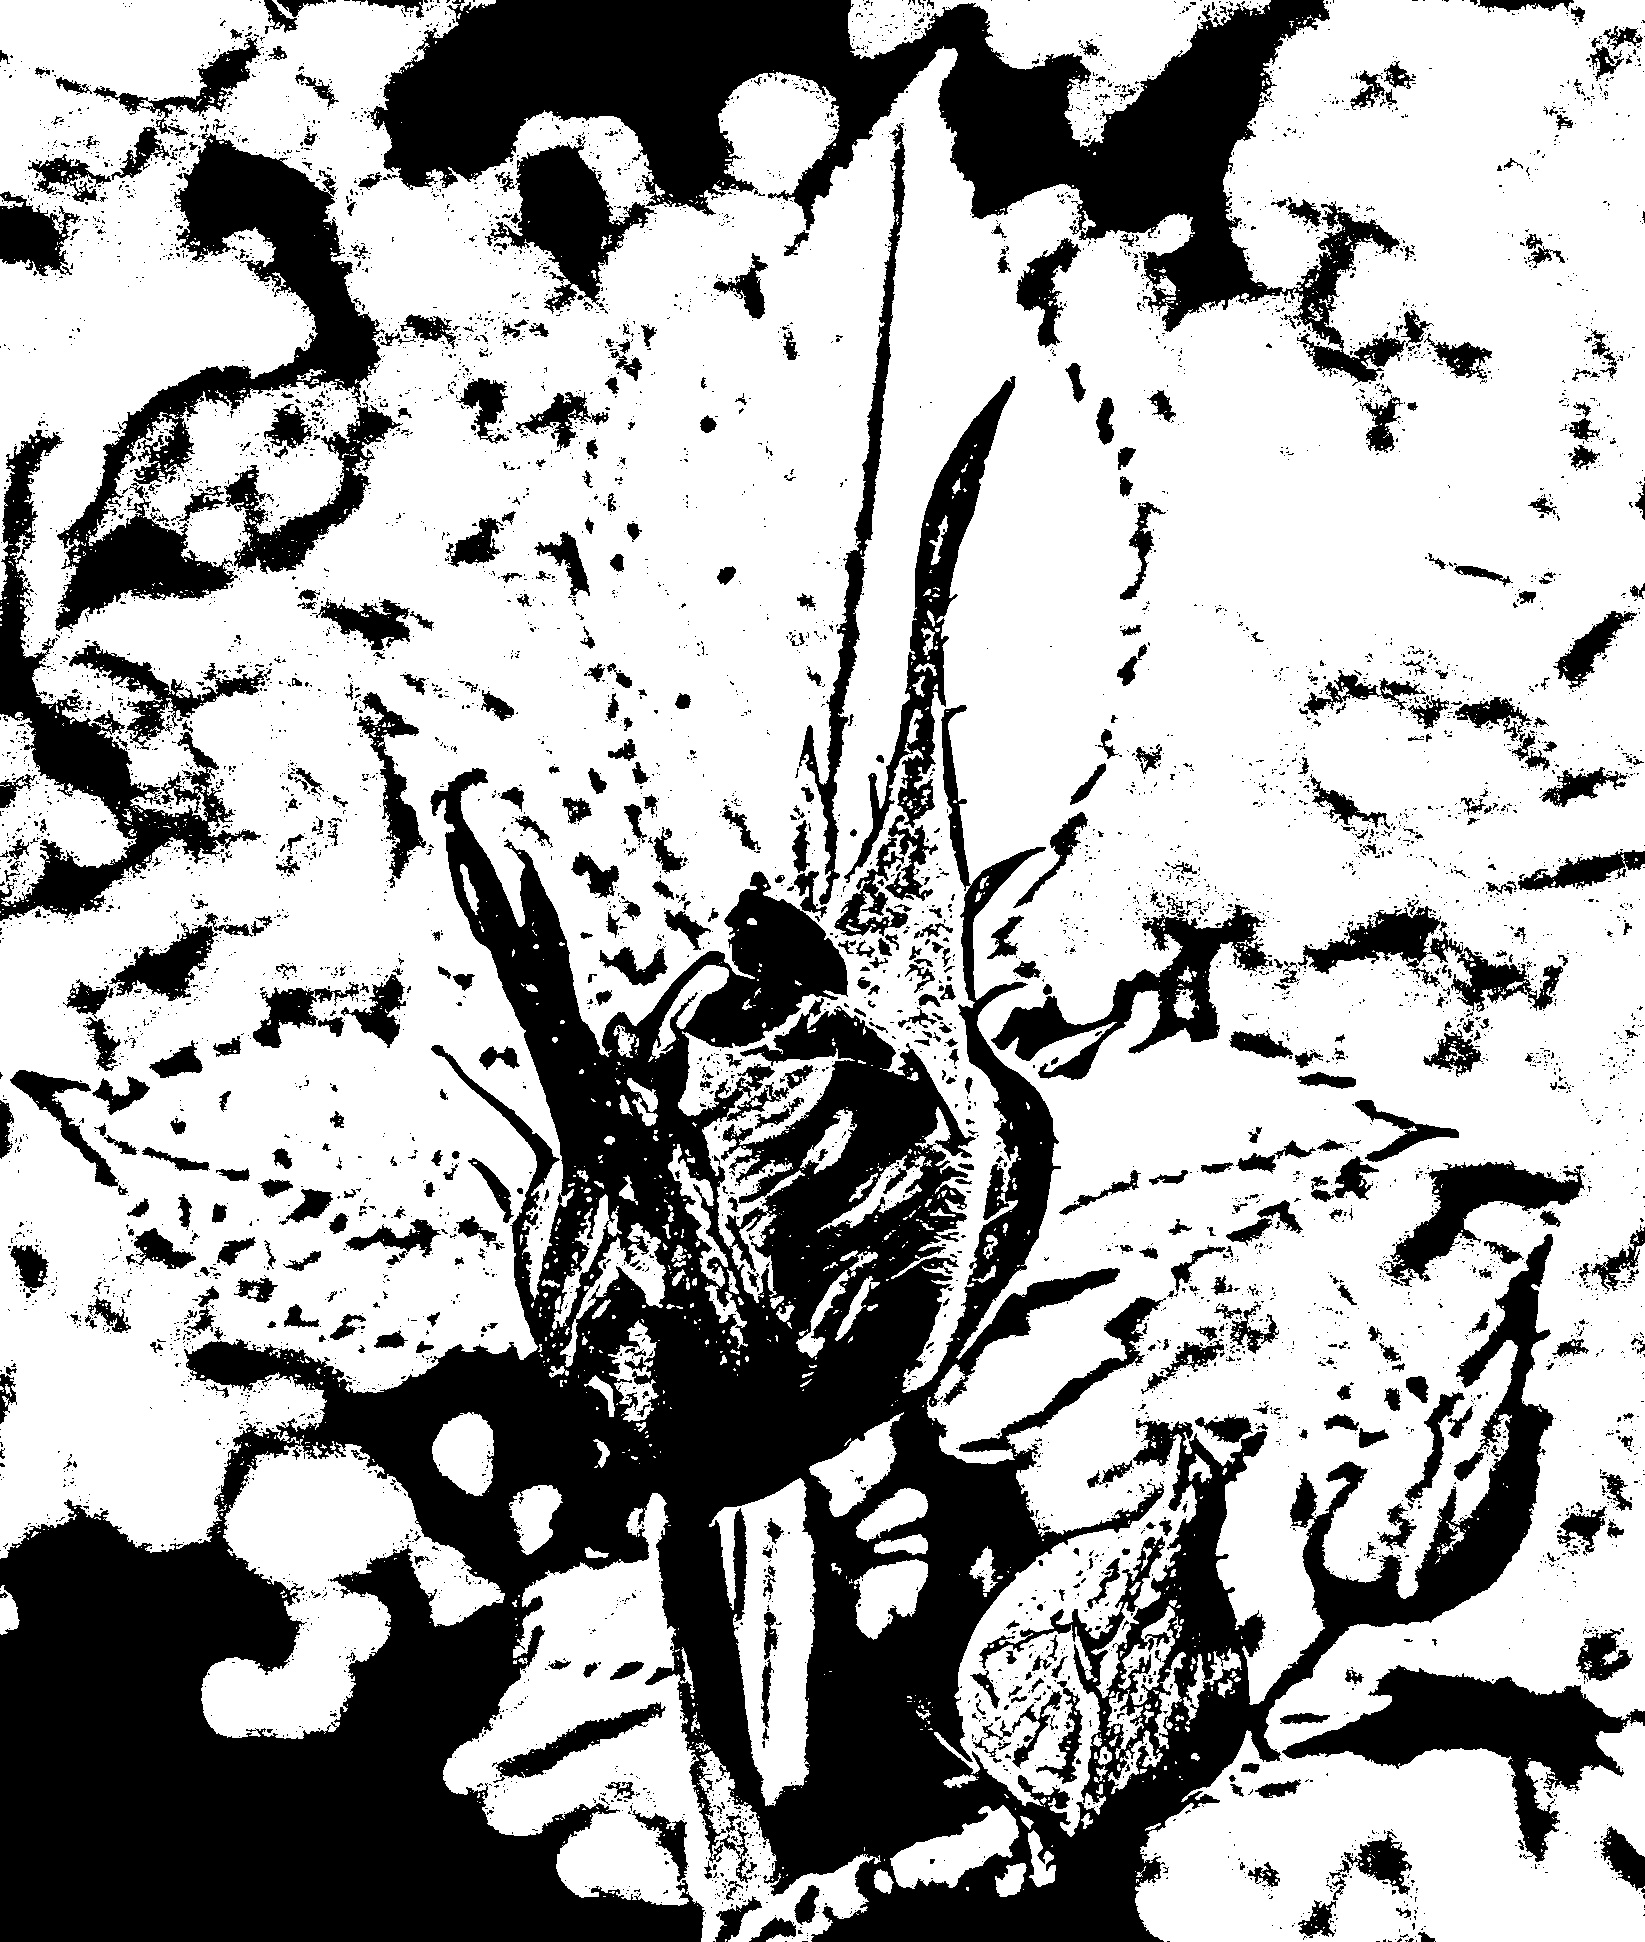
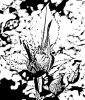
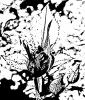
Ok, you know how it goes... looking for something to use as a tracing pattern, but can't find any decent ones like what I'm looking for. So, found an image that seems like it might work, but I want to convert it to a black & white image first to make the pattern. Lo & behold, my favorite editing software doesn't do something like this, so it's off to research on the internet..... A few days later, I haven't found anything near detailed enough to tell me what I need to know, but eventually I figure something out. Sooo, I wrote the steps up. Hopefully it should help someone else. Start by downloading and installing GIMP. GIMP is a free, opensource image editing software. This instruction was written using GIMP 2.8.0, windows version. 1. Open an image. For this instruction, I’m using a picture I took in the flower bed outside my house. 2. Use the Crop tool to outline only the part of the image you want as a pattern. 3. Then press the ENTER key on the keyboard. 4. Now, hold down the control button (CTRL), and use the mouse scroll wheel to zoom in. That way you can see the changes better. 5. Navigate to Filters>>Artistic>>Cartoon 6. Use the mouse to drag the preview window around until you can see the main part of the image. 7. Then adjust the Mask Radius and the Percent Black until you get good black lines. These will become the pattern lines. For these instructions, I used a Mask Radius of 25.90 and Percent Black of 0.230. Once you get the lines where they look okay, press the OK button. If you don’t like the results, you can press Ctrl + Z to undo the filter, and try again. The actual values will change depending on the image you're using, so don't expect my values to work for any other image. 8. Navigate to Colors>>Value Invert. This is important because it flips the color values instead of the colors themselves. To understand this, think in terms of binary numbers instead of decimal numbers. 9. Now navigate to Image>>Mode>>Indexed. 10. Select ‘Use black and white (1-bit) palette. Then click ‘Convert’. 11. Once more, Navigate to Colors>>Value Invert. This will change the colors to black lines on a white background. 12. Navigate to File>>export to save the pattern image (JPG). I recommend using the default values, they seem to be pretty common values. Any further clean-up (connecting broken lines, etc…) can be accomplished in GIMP, or in your favorite image editing program, or by hand as you trace the pattern. Note: I know it seems silly to value invert the colors before indexing the color, then value invert it back. But I think it turns out better that way, more like a pattern than a B&W picture. Notice in the non-inverted image that there are several large black splotches that don’t appear in the inverted image in the instructions. For making a tracing pattern, I think the lack of splotches is better. Adding non-inverted version of the pattern.
-
The very next line of that paragraph says (and I think it's not worded as clearly as it could be): "instructions explain joining threads, using short ends, etc." In other words, he is saying that among the instructions in the book are explanations on how to join See page 18, that's showing how to join ends. Page 19 shows how to start a stitch using the joined threads. For short ends, think a small project that has a baseball stitch, page 48-50. Also see page 65 for other uses of short ends.
-
Something like this would be a good begining (and cheap) sharpening stone: http://www.harborfreight.com/combination-sharpening-stone-7345.html A local hardware store should have something similar for about the same price. For a maul, you could try a brass hammer. They're used when you want to make sure you don't marr what ever you're hitting, and also where a spark is a very bad thing. Usually pretty cheap, they come in different sizes. When you get the money, get a better sharpening stone: http://www.amazon.com/TRI-6-Arkansas-TRI-HONE-Sharpening-System/dp/B00062BIT4 something like this is usually a good place to start. You have three grits, so you can go from nasty bench-grinder marks to almost no marks at all, all on the same set. Then hit whatever it is you're sharpening with the strop. I took an ultra cheap pair of scissors from nasty dull (couldn't cut flesh at all) to ultrasharp (I ended up with at least a dozen nicks in my hands) in a short Sunday afternoon with that stone set, and that was before the strop.
-
All the time. There are a lot of smaller businesses that don't have the ability to easily accept credit/debit cards, as well as small utility companies that don't have an online bill pay system. Then there are the local (city/township/county) taxes that don't accept credit cards or cash. Around where I live, there are a lot of Amish folks, and they don't take plastic. Cash or check only. I know of some people that use checks as a way to control their spending, too. It's too easy for them to just slide the card and not feel the pain. But if they have to write out the amount, they think twice (or more) about the purchase.
-
I think this has sat here unanswered for long enough. I looked at those tools too. For $21 each (for most of them), they weren't much less than the really nice tools (Most of the Barry King tools are $25-35) when comparing what appeared to be the same size/shape/texture stamp. If $10 means that much to you, then go ahead and try them. BUT I will say that Lonnie Height has a set of 15 tools for $145 + shipping. See here: http://leatherworker.net/forum/index.php?showtopic=39899&st=0&p=247961entry247961 So basically with shipping (in US) it averages out to just a few pennies over $10/tool from Lonnie, that's less than half the price of buying 15 Japan tools from SLC. I figured that would be the most economical route for me to get a set of 'good' tools. The tandy ones my parents got me a few years ago have served me well enough, but I want better results from my stamps. Even if (God forbid) Lonnies tools turn out worse than my tandy tools, I have a cheap set of tools to modify that will be at least a good metal to start with, rather than cast and then plated. Please note that I am in no way bashing, demeaning, or belittling any tool or vendor (I've never tried the Japan tools, or dealt with SLC). I'm simply trying to get the most 'good' tool for my money.
-
This thread, much like grandma, rocks.

-
See here: http://leatherworker.net/forum/index.php?showtopic=15216&view=findpost&p=94437 That's the set I ordered.
-
I finally called up Lonnie Height to order my 15 piece set. ($145 USD + $6 shipping to my house in Pa). Heck of a guy. I'm going to try to get down to the IFLG show in Nashville (http://southcentralleathercraftersguild.com/sclg-2012-ifolg-show/) this year, primarily to meet him. Somehow we got onto the subject of critters, and his old shepherd dog (which has cataracts) likes to chase cats, but chased a polecat the other day. Lonnie kindly offered to send me some skunk scent for free with my tools. I declined, naturally. Just thought I'd throw that out just in case someone happens to like the odor of fresh skunk. He said he'll be out for the Sheridan show, and he'll have to make a couple tools to finish out my set, so I'll probably be getting them the week of the 21st. i can't wait......
-
It might be just you. I see an 'M' there. I noticed that the lowercase m has a leading 'tail' that quite connect to the trailing 'tail' of the uppercase A, so it makes the first part of the M almost look like an N. But, neither 'tail' is quite as tall as the full height of the lowercase letter. I probably just made things more confusing.... X2
-
Apparently he's welding in a blinding snowstorm!!!!!!