bushpilotmexico
-
Posts
107 -
Joined
-
Last visited
Content Type
Profiles
Forums
Events
Blogs
Gallery
Store
Everything posted by bushpilotmexico
-
I would appreciate a copy as well corcliff@telus.net many thanks
-
 I'm using Fiebings alcohol dyes and I have noticed it doesn't penetrate deeply.
 -
It was a stupid question. After finishing hand sewing the liner to my 2 3/4" x 53" Ranger sytyle belt (thanks to Jim Simmons for the patterns)after 6 hours of stitching I decided to take the bull by the horns so to speak. I took my piece of sheepskin fleece, dipped it into the dye, took the majority of the dye off using paper towel and rubbed over the exterior of the belt. When it dried it was perfect all the exposed shards of leather were dyed British Tan and invisable.
-
Just wondering if there is a quick way of masking of those annoying tufts of undyed leather that sometimes comes to the surface when hand sewing? I use British Tan mostly and it's not bad if you're using a white contrasting thread but shows up with brown. I always dye my leather before stitching if I can. I kind of hate to hit the leather surface with a light coat of dye after stitching to cover them up.
-
I must be doing something wrong, I tried every tip you mentioned and still get the streaking? I guess i will stick to my Super Sheen. I had heard so much about Bag Kote i just wanted to try it out. The worst streaking I got was when I was using it full strength and let it dry naturally. Thx
-
Thanks for the tip I will give it a try on some scrap leather before I screw up a project. As you know the Super Sheen looks like skim milk and is also water based. The Tan Coat reminds me of liquid honey it's so viscous it doesn't seem to naturally run and smooth itself out. I don't even know if I could thin it enough to use my air brush, I guess I could be it would be mostly water by that time. It's weird stuff and I'm thankful I'm just experimenting on scraps. Thx
-
I have always used Super Sheen but decided to try some Fiebings Tan Coat. I've tried every type or method of applying short of air brushing it on. I even cut the Tan Coat 50/50 with water but regardless of how I apply it it doesn't dry evenly and you can see the swirl marks of what ever applicator I use. The Super Sheen dries so evenly the finish coat looks like glass. Any secrets? Thx
-
Straight Gun Belt Versus Buscadero
bushpilotmexico replied to bushpilotmexico's topic in How Do I Do That?
Thx to everyone you have been a great help as always. Cliff -
I got my Bianchi videos on making a buscadero belt and holster. John shows how to cut the pattern out using a curve. Would the same curve apply to a straight gun belt? Kind of seems logical that it would. The pattern that I got from Slickbald Custom Leather and the subsequent belt I made was completely straight. Thx
-
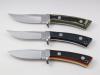
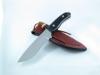
Just wondering what the majority of SASS type holster makers use when a customer contacts you and wants a particular holster for a particular firearm. If he lives next door he could supply the firearm but if they live hundreds or thousands of miles away what do you do to insure a custom fit? I was checking out "blue guns" but they are all for Glocks, etc. It's not difficult when I make a custom knife to make and fit a sheath.
-
Wet Forming My Cowboy Fast Draw Holster
bushpilotmexico replied to bushpilotmexico's topic in How Do I Do That?
Well I got the holster molded and finished today. -
Wet Forming My Cowboy Fast Draw Holster
bushpilotmexico replied to bushpilotmexico's topic in How Do I Do That?
Thanks Dwight, kind of what I was thinking because I don't want my stamping to disappear either. I was reading that someone did the 10 to 15 second dunk and then walked away from the leather for an hour or so before starting to form. Never having formed one before i'm just a little nervous....I have ordered Bianchi's videos and even though the Uberti 1973 Cattleman arrived Friday I can wait a few more days before starting. I'm more concerned about the loop as I don't want it to stretch out of shape but it also has to adapt to the holsters new form. Thx Thx -
I appreciate all the help and hints I have gotten so far on my cowboy action holster and belt. With the belt finished, the holster is now ready to wet form. The holster is sewn with two 8 oz pieces of veg tanned leather glued together. Mongo gave me some excellent hints on the actual forming. This will be a fast draw holster so it's not going to be a friction fit rather just the opposite friction less. My dilemma is how much to soak or better to say wet the leather. Building knife sheaths and quivers I have cased and stamped leather before and even wet formed a few knives to fit the sheath. I am open for suggestions as to how long I should wet the leather for my holster before I attempt the forming process. Thx

-
Tightening And Loosing Chicago Screws
bushpilotmexico replied to bushpilotmexico's topic in How Do I Do That?
Thanks guys that Weaver tool looks like it should work, in fact I may be able to modify a set of vice grips myself. -
Just looking for some hints with Chicago screws. I know if I made them I would put a couple of little sharp dogs underneath the cap on the female side so you could get a little bite into the leather. The cap on the female part is so smooth that when you try and tighten from the male slotted side it just spins and if you do succeed in getting it reasonably tight you can't loosen it because it spins again. Any hints or suggestions? Thx
-
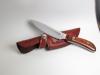
Gluing Rawhide To Leather For Cowboy Holster
bushpilotmexico replied to bushpilotmexico's topic in How Do I Do That?
-
Gluing Rawhide To Leather For Cowboy Holster
bushpilotmexico replied to bushpilotmexico's topic in How Do I Do That?
Much appreciated. When I first started this thread I had figured I was going to use rawhide between the layers on the holster but Chris Andre ( Slickbald) from where I bought the pattern just relies on the two layers for rigidlity after wet forming and drying. He uses 7 oz for both layers but all I had available was 8/9 oz that I use for my knife sheaths. It will be a little tougher to wet form but not impossible. My understanding for fast draw is that the holster has to be frictionless and the cylinder should be able to turn inside the holster. The trigger guard actually sits on the welt and is outside the actual holster. When you tip the holster upside down it should actually fall out. I picked up a glass 6 oz Coke bottle that I'm going to use initially to begin the forming process then I'll refine it with the pistol. I've also got a friend who's making a drying box for me using two light bulbs, a dimmer switch and a thermometer. I read on Google that 130 degrees is the best temperature to dry leather to get maximum hardness. Pistol should be here next week. -
Gluing Rawhide To Leather For Cowboy Holster
bushpilotmexico replied to bushpilotmexico's topic in How Do I Do That?
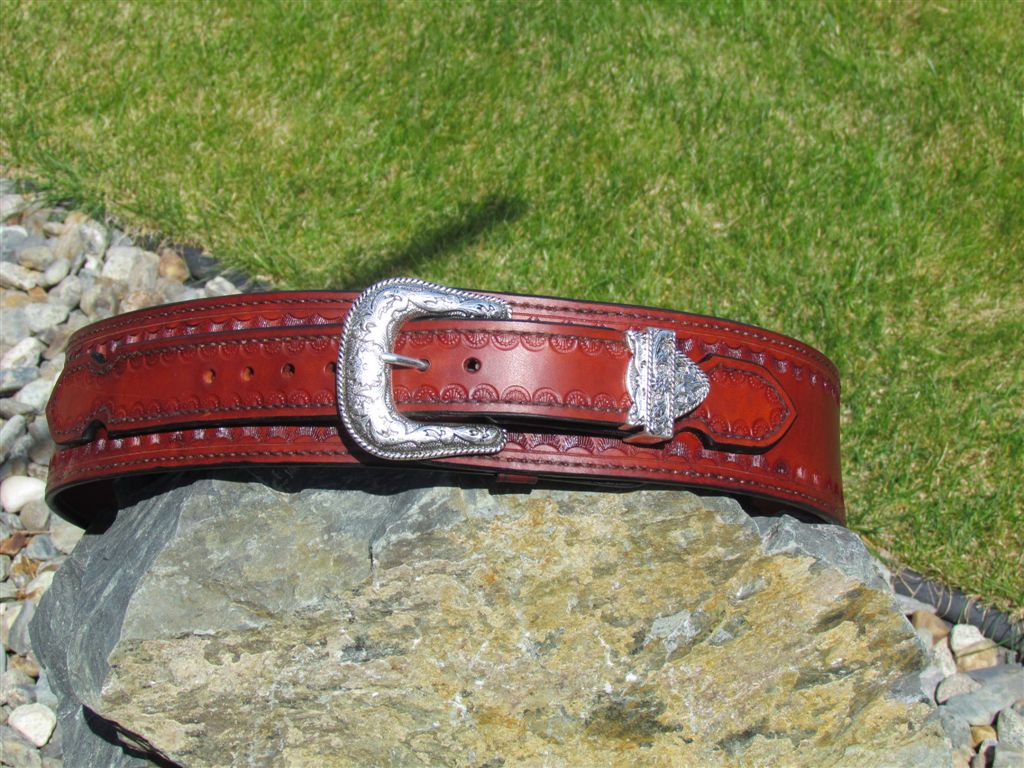
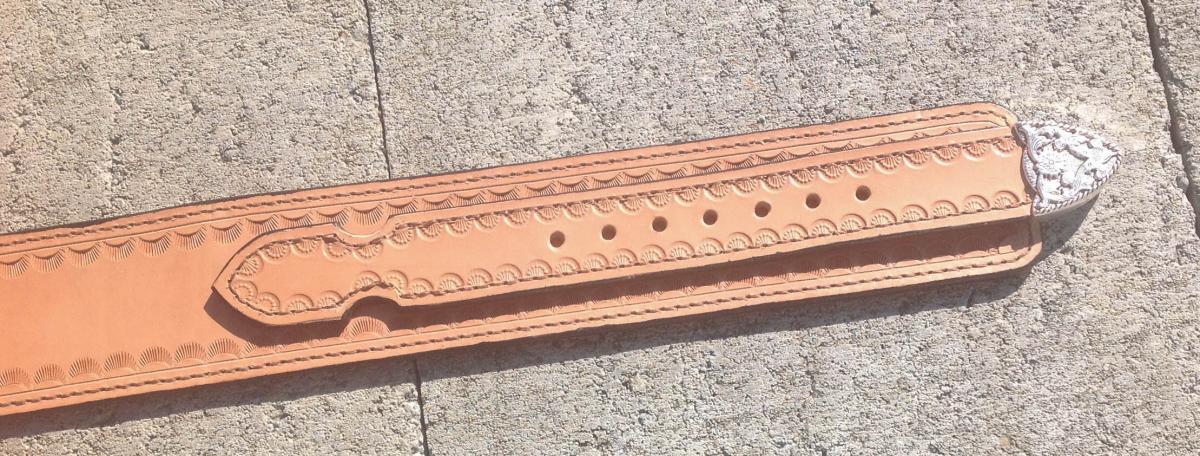
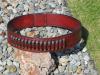
Thanks to all I dyed the belt today.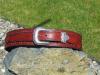
-
Gluing Rawhide To Leather For Cowboy Holster
bushpilotmexico replied to bushpilotmexico's topic in How Do I Do That?
Got the belt finished, a learning experience and room for improvement on the next one. When I was hand sewing the liner to the belt I kind of wished I had a sewing machine with over 600 stitches, took about 4 hours by hand. Generally pleased with the way it has worked out. Once my pistol arrives and I wet form the holster I will gate everything dyed. I appreciate all the help that members gave me.
-
Has anyone found that neatsfoot oil before dying or even after darkens your dye effect considerably? I had a nice quiver that I made with a nice Fiebings British Tan finish, I used the neatsfoot and it turned considerably darker, kind of it ruined my piece color wise.
-
Gluing Rawhide To Leather For Cowboy Holster
bushpilotmexico replied to bushpilotmexico's topic in How Do I Do That?
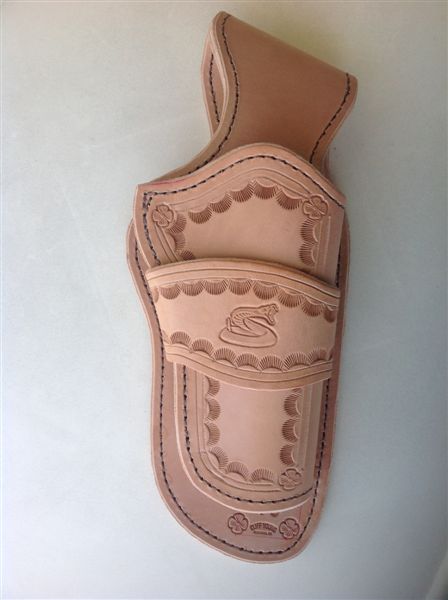
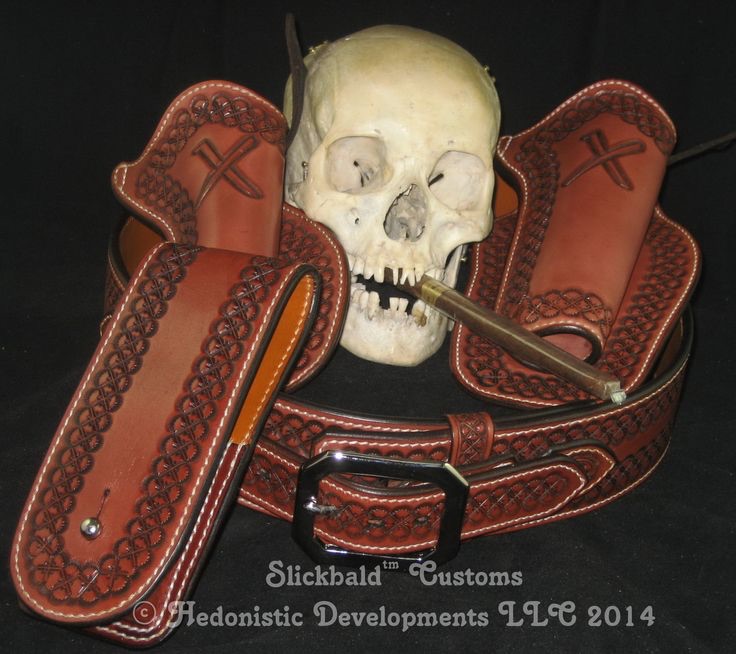
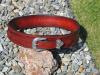
Hi Dwight, Thanks for all your help you are a real gentleman. The belt that I have the pattern for from Slickbald (Chris Andre) is a ranger style belt with your help I think I have figured out the length. The photo is one of Chris two gun rigs but it shows the ranger style. I apologize for the skull. As you said it's a learning experience and I'll plug away at it this weekend and keep you updated. Chris doesn't use either rawhide or metal just relies on the veg tanned leather. I'm going to build myself a drying box. I saw one where the guy used a large plastic garbage pail with a heat bulb inside and kept the drying temperature around 130 degrees. Thanks, Cliff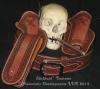
-
Gluing Rawhide To Leather For Cowboy Holster
bushpilotmexico replied to bushpilotmexico's topic in How Do I Do That?
Hi Dwight, I appreciate your comments and support. This is what Chris Andre calls "shrinkage factor" (it's why his directions are confusing) and I quote him: DETERMINE WAIST SIZE C. SHRINKAGE FACTOR: Any material will shrink (proportional to it's thickness) as it bends; belts are no exception. I estimate 3/4" to an 1-1/2" up to a 58" waist, assuming a 12/14 oz (.20") total belt thickness. Remember to add it on! 1. You say I should measure from the hole it was latched in to the edge of the buckle. I assume you mean the front edge or is from where the buckle prong swivels on the buckle? 2. 2-1/2" or 3 inches from front pocket around to the other front pocket....what is the front pocket? Do you line your cowboy belts? Chris Andre does and this may be why he adds the additional measurement for "shrinkage factor". Thanks, Cliff -
Gluing Rawhide To Leather For Cowboy Holster
bushpilotmexico replied to bushpilotmexico's topic in How Do I Do That?
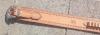
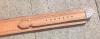
Got the retaining strap stamped so now I'm waiting for the pistol I ordered so I can wet form and dye. I have Chris Andre's holster and belt patterns but I find the directions a little confusing at times. Just started on the belt trying to figure out his sizing instructions and the shrinkage factor he talks about taking into account the belt wrapping around your waist. Would anyone have some suggestions? Thanks -
Gluing Rawhide To Leather For Cowboy Holster
bushpilotmexico replied to bushpilotmexico's topic in How Do I Do That?
Just an update on the holster, I have been using the Slickbald Custom Leather holster pack and Chris Andre doesn't use rawhide for a liner just two pieces of 7 oz leather glued together. I'm at the wet forming stage and will do so once my pistol arrives. I didn't have any 7 oz so used the 8 oz that I use in my knife sheaths and archery quivers. Might be a challenge to wet form but we'll see. It was quite a learning experience making the holster and there will be room for improvement on the next one. No sewing machine so all hand stitched. I doubled stitched the holster because of the forces applied by the forming. -
Gluing Rawhide To Leather For Cowboy Holster
bushpilotmexico replied to bushpilotmexico's topic in How Do I Do That?
Good point Dwight, Leather armor in the old days was made using the cuirboulli process. At the moment I'm just tossing ideas around looking for someone who might want to share their secret. Sounds like some holster makers use thin metal between the two layers. Sounds like these competition fast draw competitors want and expect a zero retention holster with absolutely no friction to slow down their time. With the amount of work making a rig because all stitching is by hand i kind of want it to work out the first time with no maybes or try this.