KurseD
-
Posts
89 -
Joined
-
Last visited
Content Type
Profiles
Forums
Events
Blogs
Gallery
Store
Everything posted by KurseD
-
Cool, I hope it works. If not, like I said as well, check some of the hardware places around town and see if you can find another suitable rubber.... wait... those last three words did not sound right at all...
-

Middle Street Garage (Finland) Build
KurseD replied to chancey77's topic in Motorcycles and Biker Gear
Looks like he used a stylus for the dots. -
Not 100% sure here, but to me it almost looks the same thickness and consistency of mud flaps off of a truck. Maybe check the local hardware stores (small mom n' pop shops as well as big box stores) for rubber sheeting rubber mats?
-
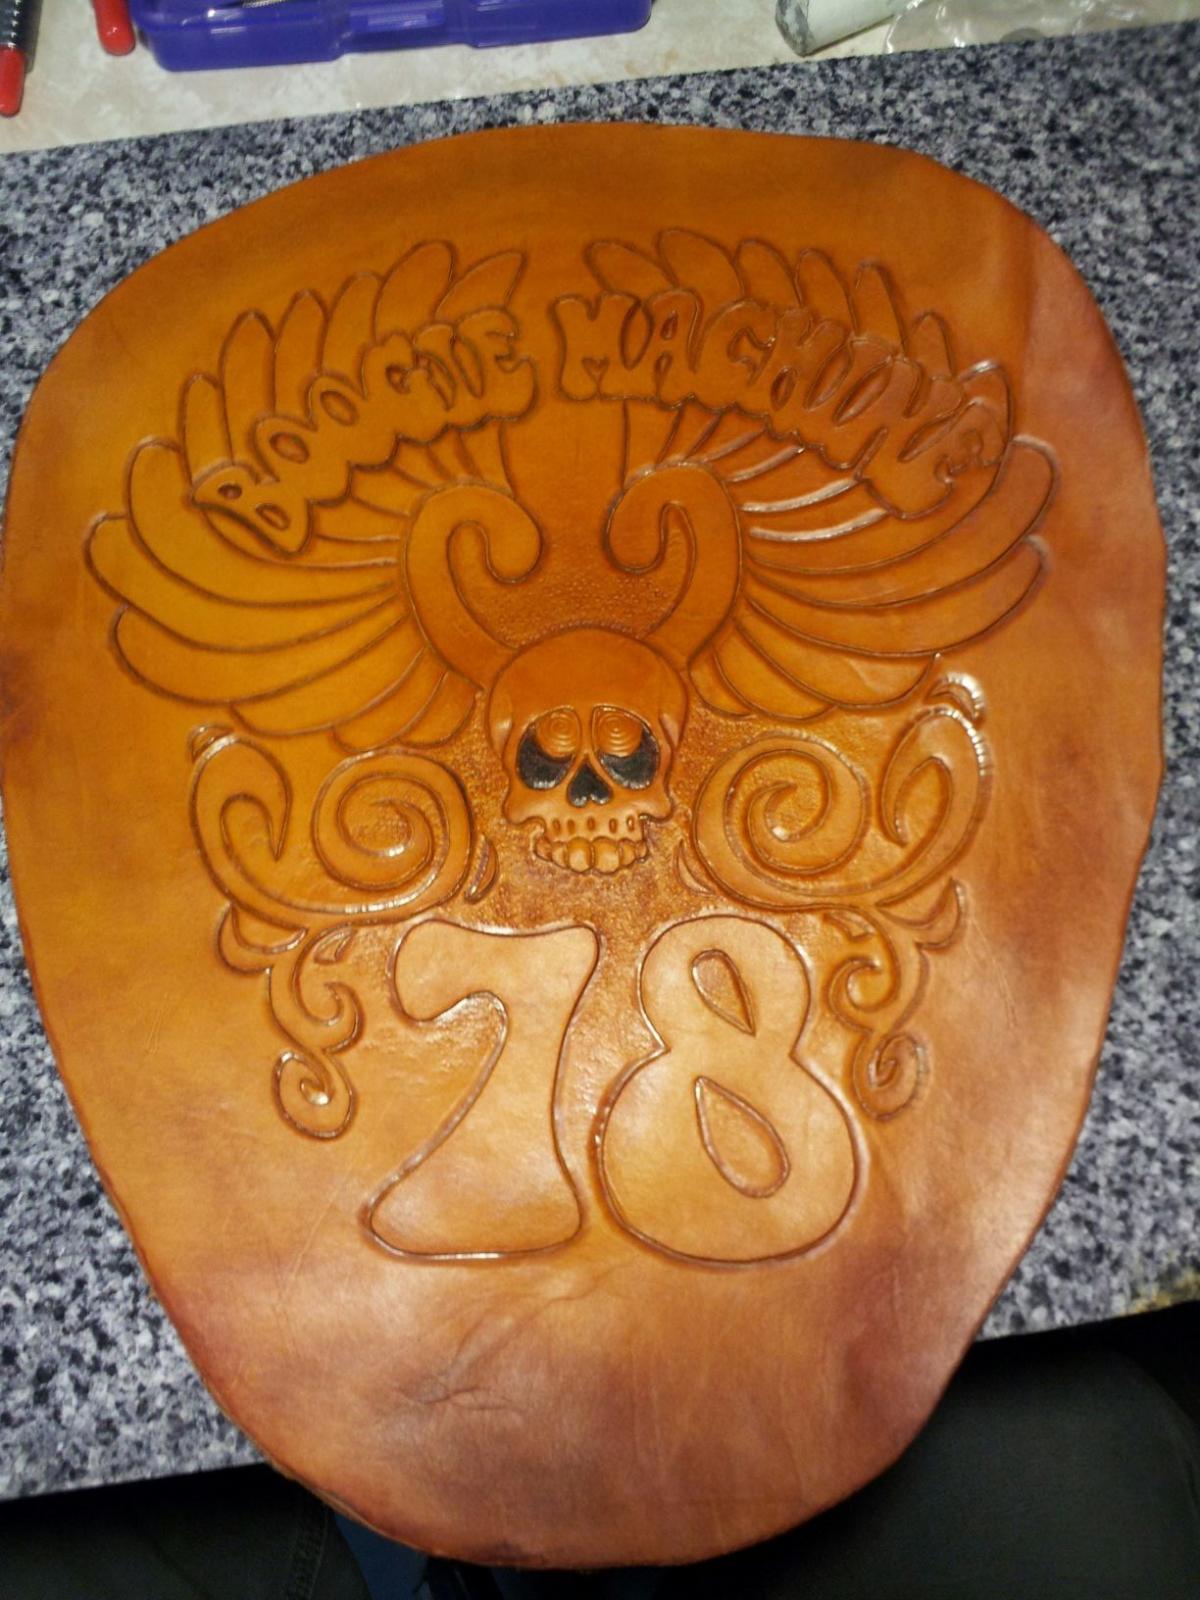
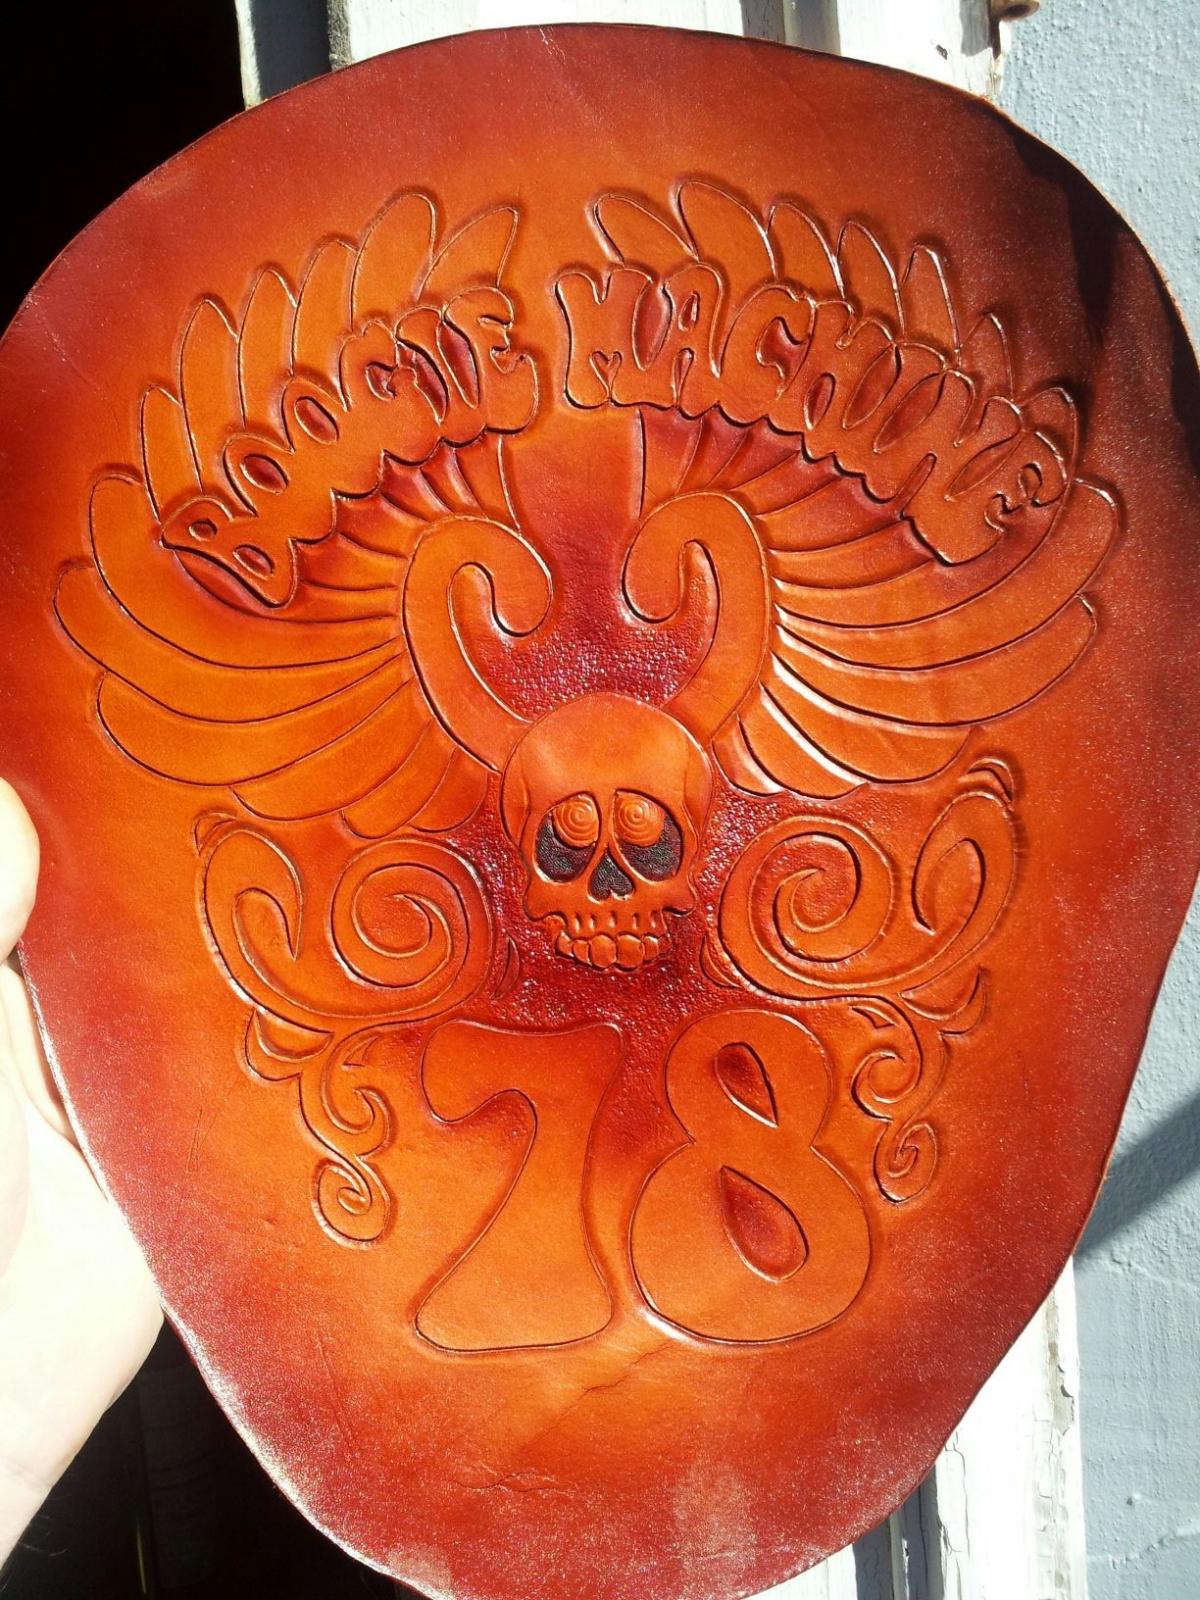
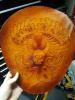
*Edit* I said earlier that I used "medium brown" for the darker areas, I actually used uncut "saddle tan". Well, I let it dry for a few hours and went back to apply the next coat of resolene. OOPS! The new coat of resolene wiped off the darker areas of dye. So I wiped the whole thing down with denatured alcohol really well, let that dry for a bit, then I went back over it with "medium brown" this time to see what that looked like. So I'll let it set a couple days to dry this time, then try the resolene again.


-
Ahhhh. ok, thanks.
-
Yeah, I was a lot happier once I got some color on it. Already thinking of things to do differently. Clean out my airbrush for one.
-
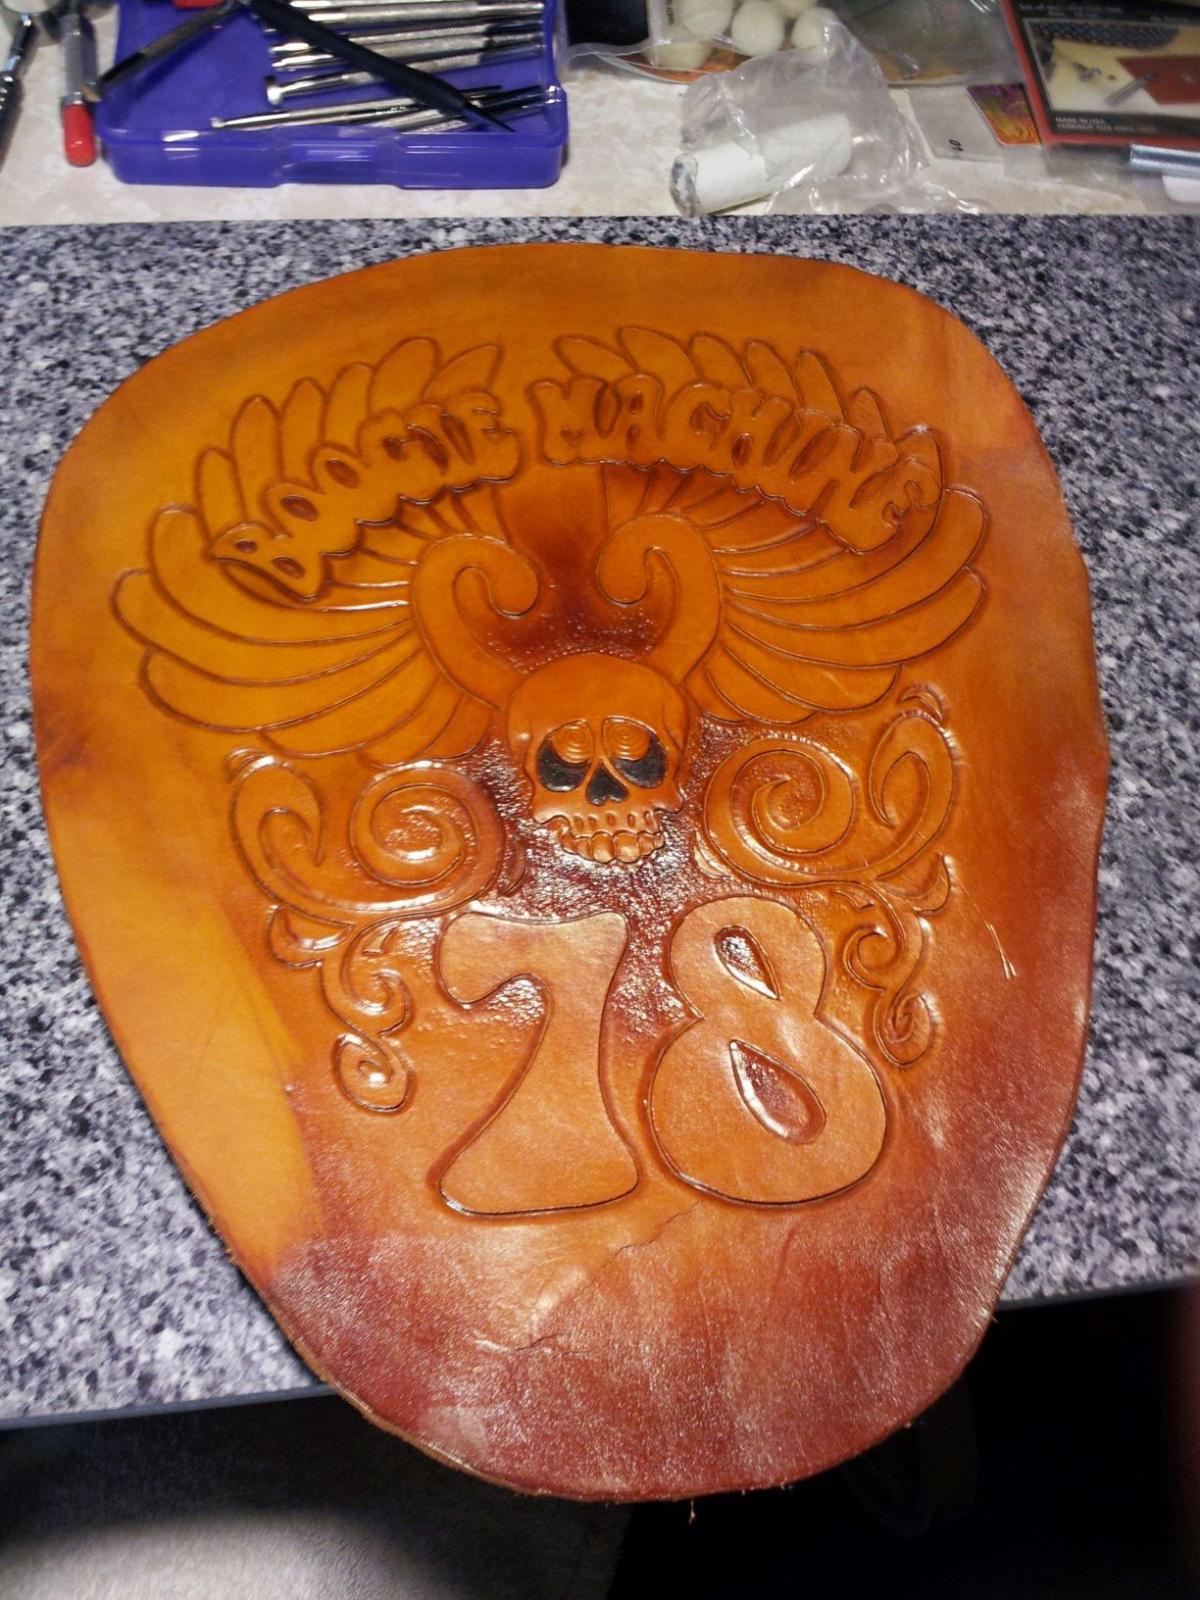
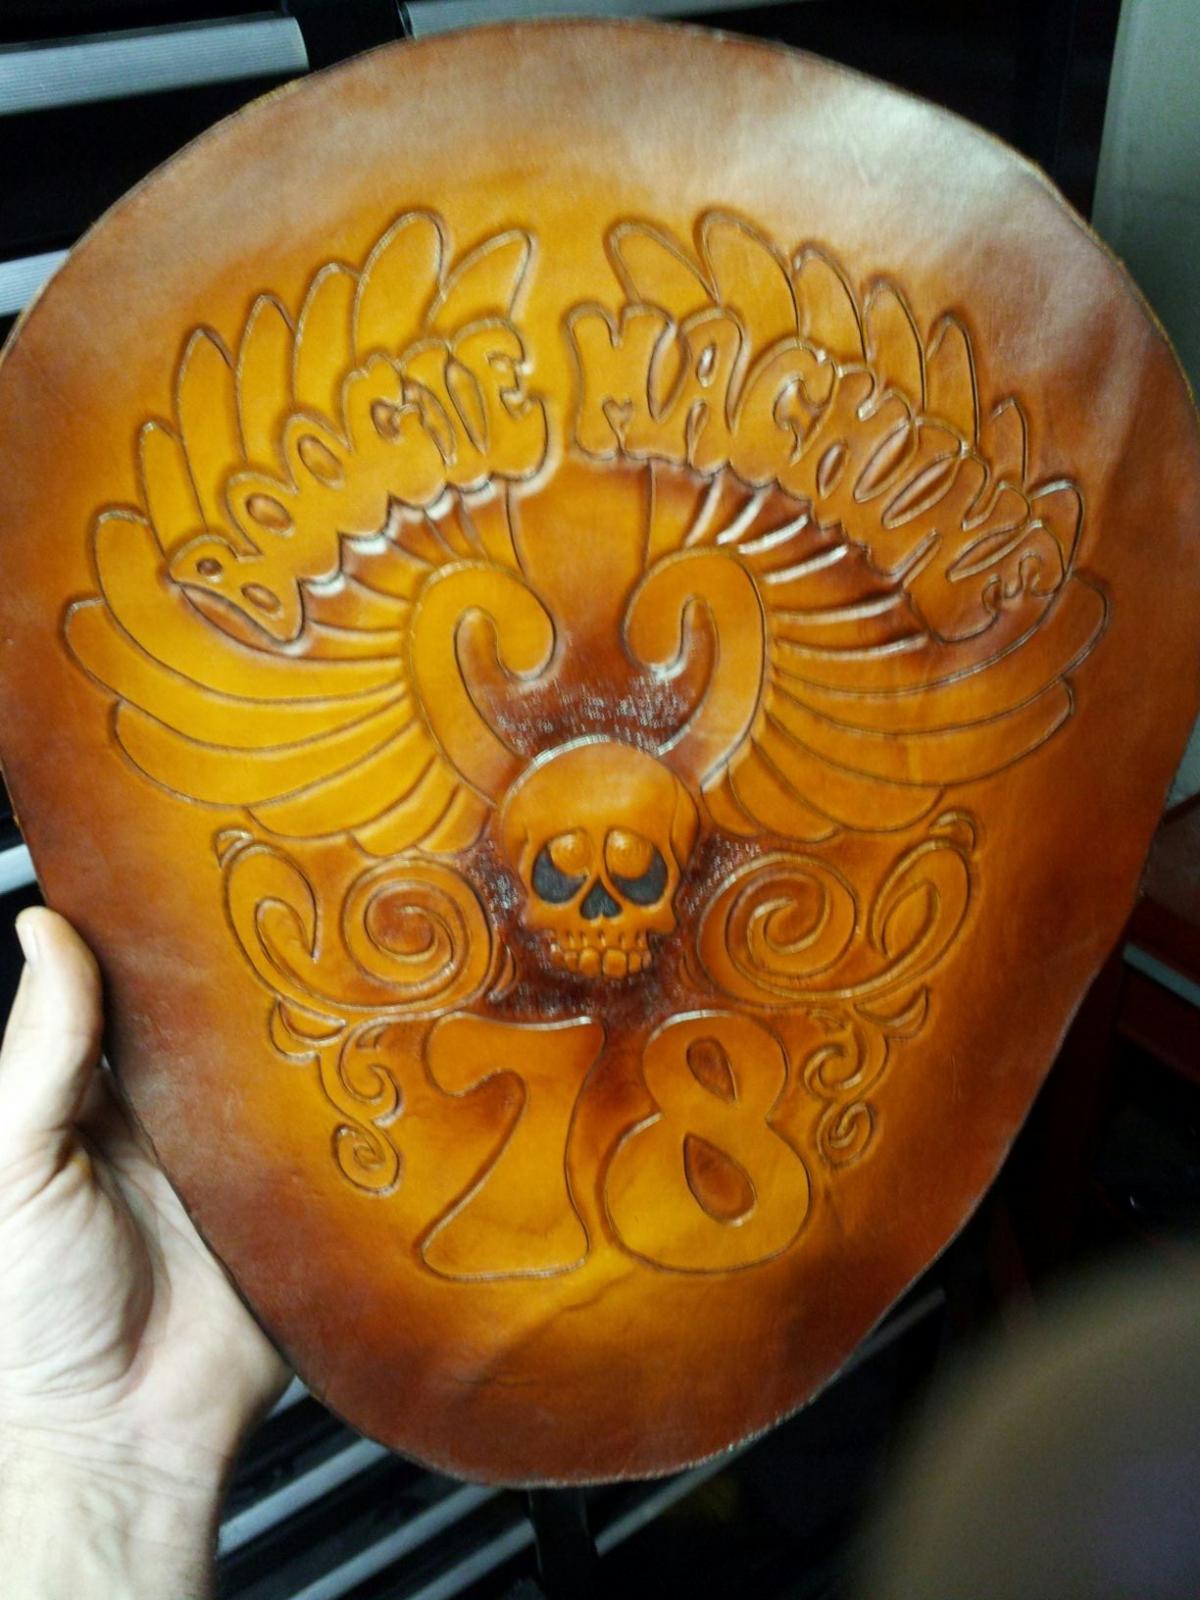
Sprayed the dye on. I'd DEFINITELY recommend NOT using the resolene until AFTER the dye process. Gave me some splattering issues. A quick wipe with a wet rag usually helped a lot though. Also having a ton of trouble with my airbrush since it seems I didn't remember to clean it last time I used it, don't know what that was all about. Used the saddle tan first, then the med brown, then I brush painted the eyes and nose on the skull. Letting it dry, then lots more resolene, and on to the antiquing.
-
FID ?
-
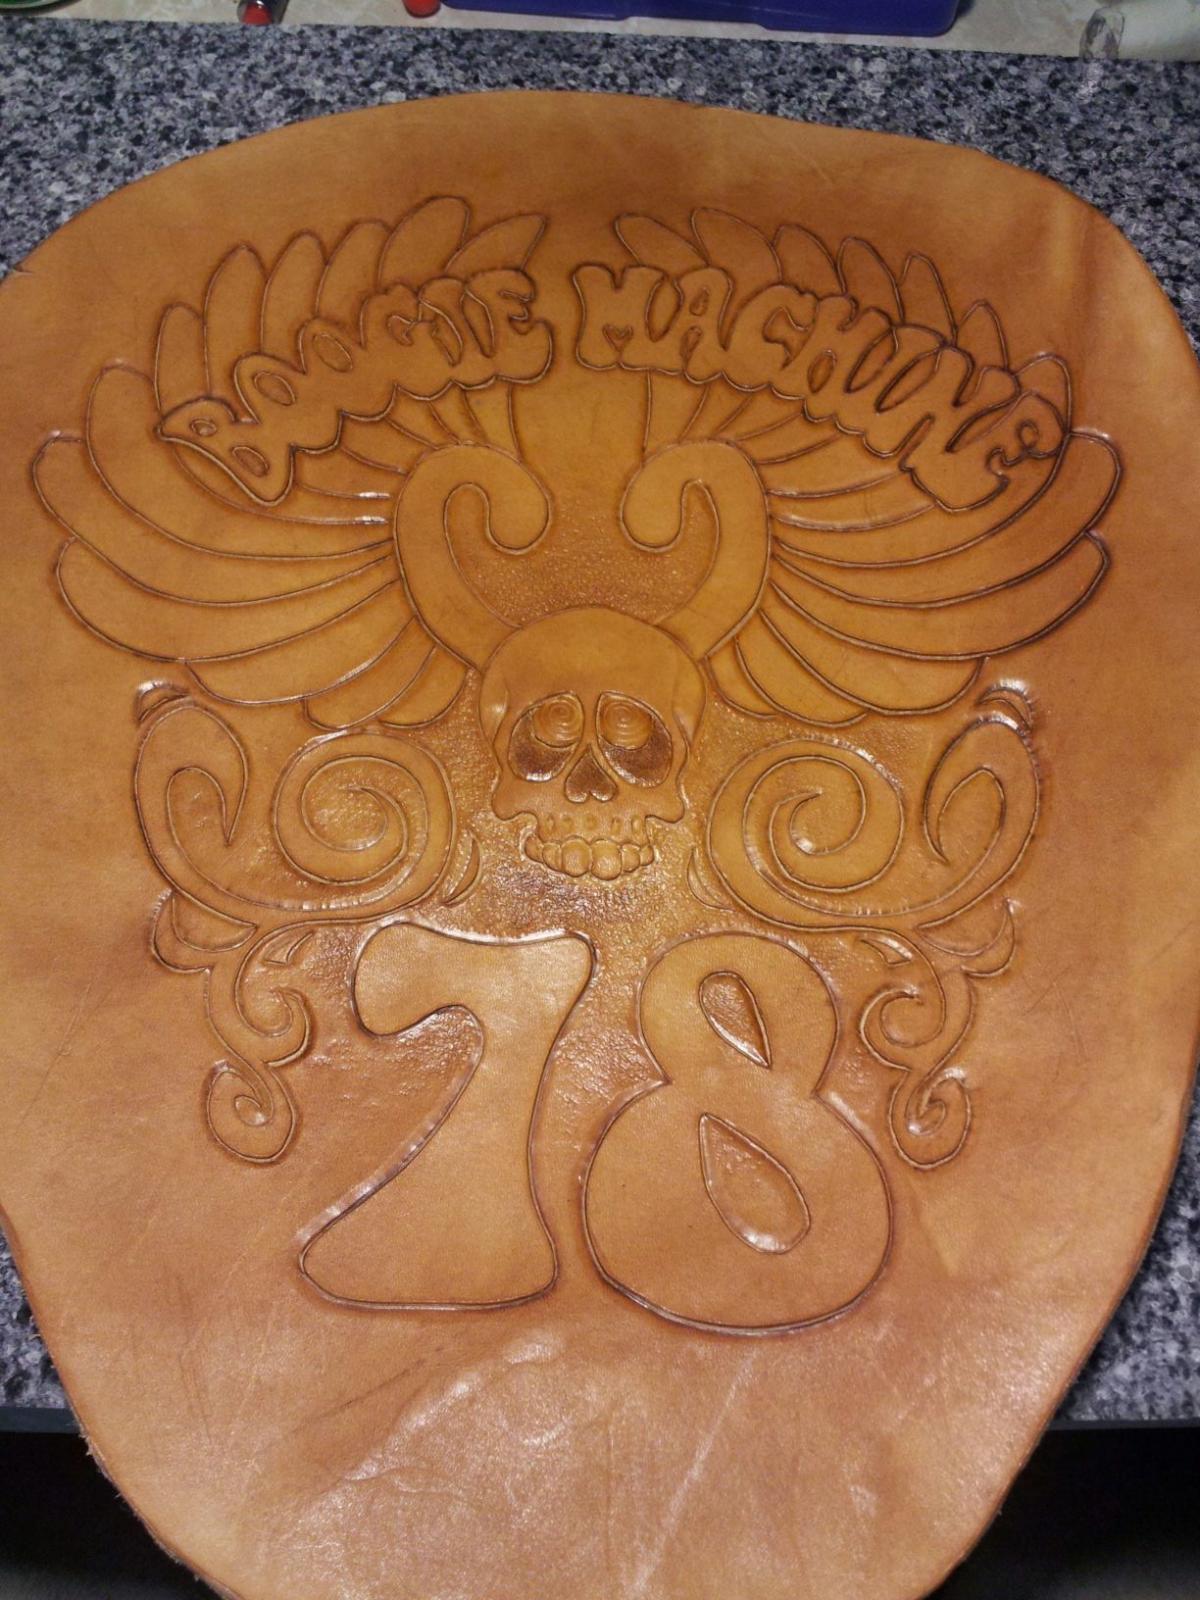
That should have been a common sense I guess, don't know where my head has been. Ugh, hope this comes out right. On a side note, I think the wings may be too wide so this might not work on the seat in the end. Oh well, learning experiences all the way around.
-
I did one coat of resolene at about 4PM and another coat around 6PM. So I should have dyed it first, then resolene, then antiqued? Oops.
-
Solo Seat For Black Widow Shadow
KurseD replied to shadowryder's topic in Motorcycles and Biker Gear
Newer versions of MS Paint have a re-size function as well. Seat looks great! -
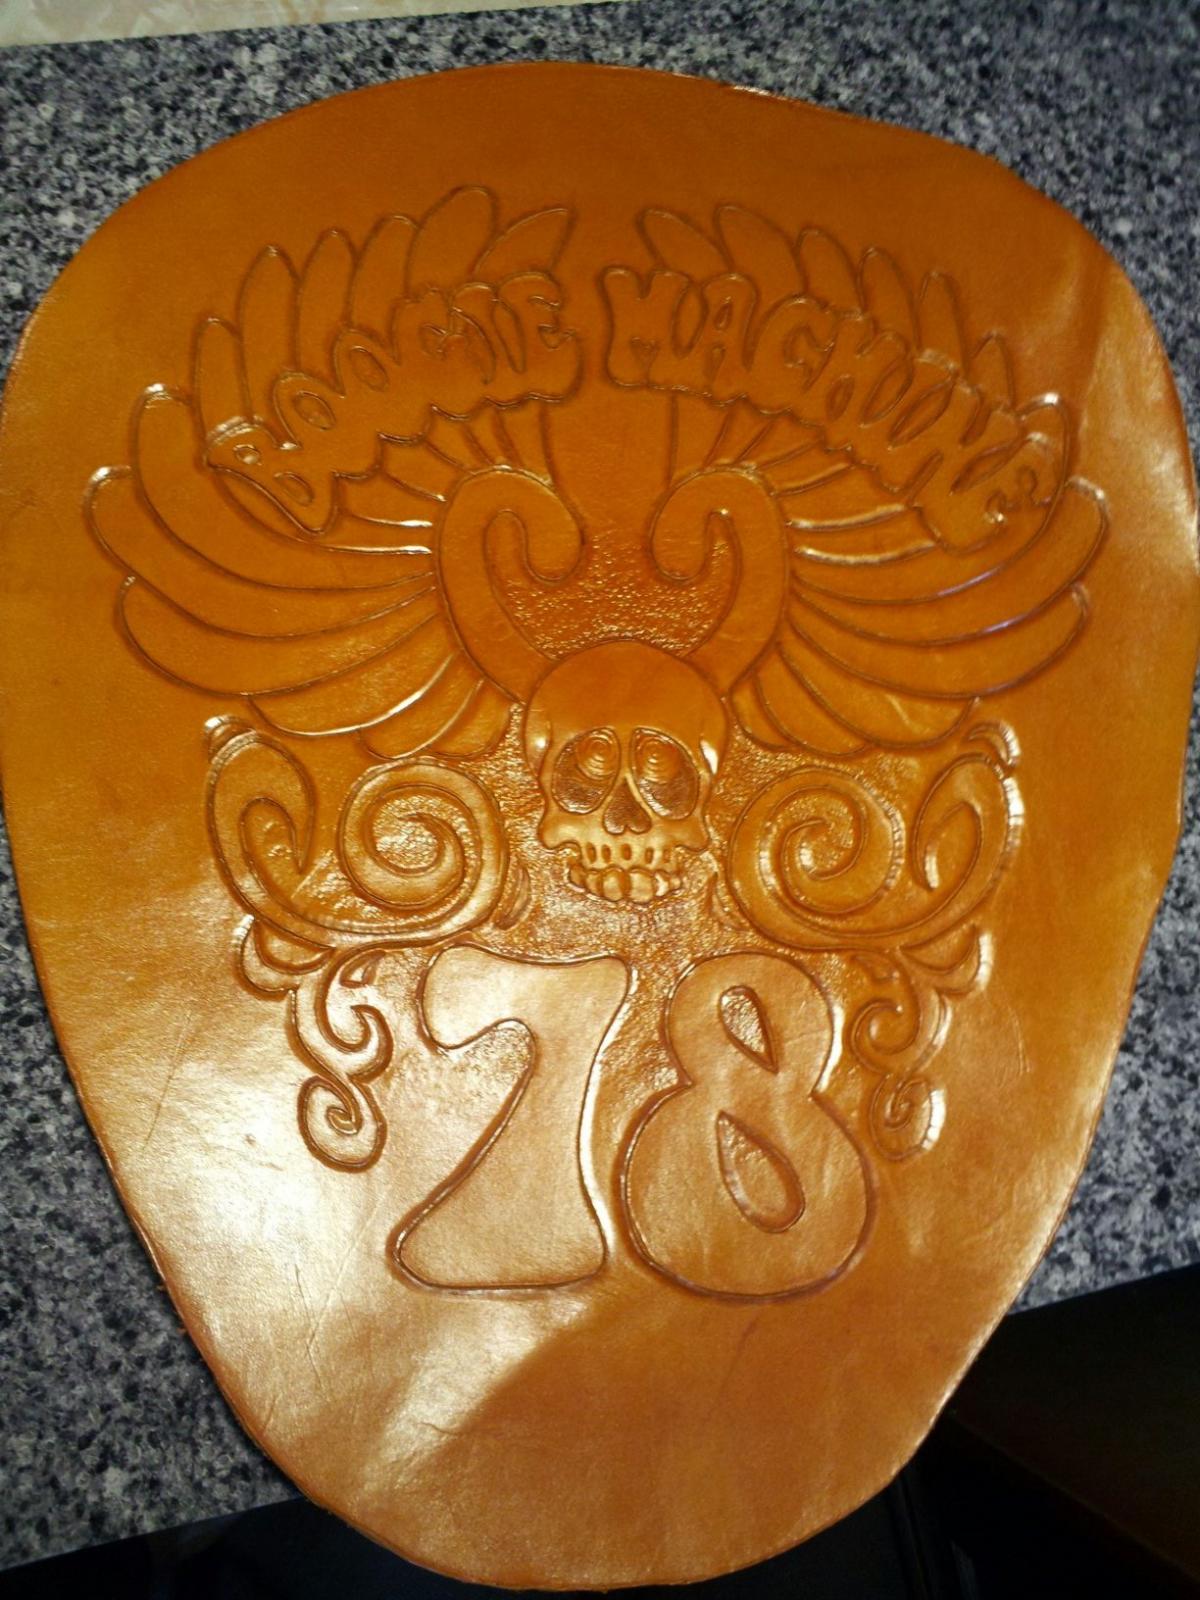
Done tooling. Got it coated in oil then the resolene. Will try my hand at antiquing and then dye soon.
-
I'm down for a peek. Open Sasame!
-
Nice work.
-
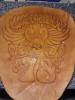
So I got a little more beveling done. Been really busy at home lately. I'm having a hard time with this leather warping and wanting to sit up off the granite in certain places. I get to those areas where it's kind of bubbled or just warped and not laying flat on the granite and I have a really hard time keeping them flat while trying to get a good stamp. I even tried to case the leather and leave it under the granite for a while to flatten things out, but still no luck. Is it just because it's a lower quality piece or am I doing something wrong? I thought about maybe glueing it to a piece of heavy weight cardboard or something to try to keep it flat, but not sure what kind of glue to use. I watched the video on stamping and it was a bit of an AH HA moment for me as well. I was definitely pecking too hard. Also, leaning the beveler back a bit towards me helps quite a bit too. I am finding that the very small beveler doesn't give me the deepness I want, and the larger beveler doesn't give me the defined edge at the cut that I want, so I've mixed the two. I'm now running the small beveler around my cuts first to get my edge sharp first, then coming back around with my large beveler to get more bevel and a darker stamp. Does any of that make sense? Don't know how well you can see the "warping" I'm talking about in this picture, but the wide part of the seat is sitting higher and the center is kind of bubbling up. If you've ever made fried bologna, that's exactly what it feels like. Well, dangit, wish I hadn't thought of that as an example... Now I want a fried bologna sandwich...
-
Middle Street Garage (Finland) Build
KurseD replied to chancey77's topic in Motorcycles and Biker Gear
Beautiful craftsmanship all around. Do they have a website? I'm looking, but can't find anything. -
Very nice. This one has me thinking about recovering my "Fat Elvis" model Mustang seat on my softail. I like the seat form, just don't like the studs and conchos on it (that's why I nicknamed it my "Fat Elvis" seat). Think I should try it? What advise would you give a leather noob on re-doing stock seats?
-
Middle Street Garage (Finland) Build
KurseD replied to chancey77's topic in Motorcycles and Biker Gear
NICE! Are those grips a wooden base? -
Been wanting to check out the "Wheels Through Time" museum myself. Belt looks great, and definitely looks like something from back in the day. Check out this video of a 1940 Crocker Special at the "Wheels Through Time" museum. One of the best sounding motorcycle engines EVER! ;}~
-
Also called a "Dash" or "Dash Cover". Looks great, love the lettering.
-
Old Leatherworker Might Attempt First Motorcycle Seat
KurseD replied to REDTAILHAWK's topic in Motorcycles and Biker Gear
Not sure if it's actually closed cell neoprene or not, but I bought some foam padding a while back at Lowes. The kind that is used at stores for cashiers to stand on. I ran it on a Yamaha chop with NO cover. I just used double sided tape to hold it to the made in Taiwan seat pan that came with the bike and away I went. It has now been on that seat pan and is dealing with my friend's rump and is still holding up great. If I remember correctly it was a bit on the thin side, but could always be layered. It also had a ribbed texture to one side, so maybe face two ribbed pieces towards each other when layering to get a smooth finish that wouldn't affect the leather seat? -
Finally got my "lightbox" going. Well, the lid to it anyway. Used the picture frame and two under cabinet floursecent fixtures from the home hardware shop. So finished the artwork and on to the leather work. I'm getting some "folding" or "wrinkling" around some of the tight edges when cutting as seen in the pictures. Also having a hard time with tool marks from the small beveler I'm using. Not sure what I'm doing wrong with either of those areas. Feel free to chime in with suggestions. Here's what I've got so far. Final design Starting the cutting Wrinkling around the tight edges Tool marks
-
Middle Street Garage (Finland) Build
KurseD replied to chancey77's topic in Motorcycles and Biker Gear
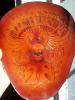
Outstanding man. Did you use an airbrush for the red inside the skull? -
Middle Street Garage (Finland) Build
KurseD replied to chancey77's topic in Motorcycles and Biker Gear
Nice! -
Chancey, those pans look bitchin'. I'll probably end up with a couple eventually.