-
Posts
48 -
Joined
-
Last visited
Profile Information
-
Gender
Male
-
Location
Vienna, Austria
LW Info
-
Interested in learning about
carving, dyeing
-
How did you find leatherworker.net?
google
Recent Profile Visitors
2,204 profile views
alamp1360's Achievements

Member (2/4)
-

Purse "bull"
alamp1360 replied to Tatyana's topic in Purses, Wallets, Belts and Miscellaneous Pocket Items
Very nice! I especially like the free-hand cuts. -

3 Bags
alamp1360 replied to alamp1360's topic in Purses, Wallets, Belts and Miscellaneous Pocket Items
Thank you all for the nice words. The story behind the logo is: My mum's first name was Walburga and when she died a few months ago (she was 92) i decided to take her name and her way of writing it as my brand. So on the second bag i tried to cut my new "logo" with the swivel knive which turned out "somehow" and on the third one i wrote it free-handed with white arcyl, which also was not too satisfactioning. But for my next projects i already created a pattern and just need to find someone with a laser cutter Greetings! -
I've finished my third ladies bag yesterday and thought i could share some pictures. Those bags are my first ones and i decided not to mess around with the design. So i tried to learn from the masters and sort of copied the design from a famous bag brand. I was also lucky to find the lock similar to the original one at some online shop. The bags are all the same size, but i played with different materials and decoration. For one of them i used a great basket wave stamp from Barry King. I always wanted to use the stingray i bought some months ago, so the last one is with a singray inlay on the cover. It was hard to figure out how to do it, but i am quite happy with the result. All sewing is done by hand. Sewing the straps was the hardest and longest work, but with the help of the great Al Stohlman, i am now able to sew without laying down the awl The only problem i have with sewing is that on one side the stitches form a straight line while on the other side they are a bit angled. I do not know if this is the way it should be. Maybe someone can give some advice? Ok, here are the pictures. Hope you enjoy. This is the first one without any decoration except the white thread. The second one with the basket wavel and a nicely machine-stamped interior. And the last one with the stingray inlay. This one also has an extra pocket for credit cards etc. If someone is interested to do the same kind of bag, here are the measurments. Modell.pdf Greetings!
-
How about using "Chicago screws"? This webshop seems to have them in all kind of sizes an colours: http://www.chicagoscrews.com/
-
That's really impressive, thanks for showing! The stiching must have taken a very long time. And the mounting of the zipper would be an impossible task for me Just a few questions: Did you put anything on the flesh side of the leather to "stiffen" the bag? Or is the leather thick enough? Did you put some cardboard on the bottom? And did you do the design as well? Greetings!
-
-
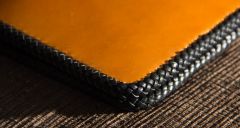
As promised, here are some pictures from the finished project. The lacing took very long, but i think it's worth the effort. Doing the holes with the rotary punch was hard and the punch does not make straight holes for some reason. I think i need to get something better. But it was the right decision to punch the holes from inside out. I did not lace two times through the same hole at the edges, but i think it is ok like this Hope you like it as much as i do ))
-
Thanks guys for your suggestions! I did a little test piece and it turned out that the best measures for my project are: The center of the holes are 1/8 inch (3.2 mm) from the edge. The 5 mm distance between the center of the holes is perfect. And 2.5 mm diameter for the holes seems to be perfect as well (I use Tandy "Superior Calf Lace" which is 1mm thick and (measured) 2.5mm wide). For the corners: I rounded the corners with a 25mm diameter and the holes which go along the rounded corner are punched in 4mm distance. This way i think i can just "lace around the corner" and avoid the double-lacing, which i do not like. And i might have to punch the holes from the "inside" of the project, because the holes tend to frazzle on the side where the rotary punch met the anvil. And if i lace through the holes the same direction as they were punched, they frazzle even more. Maybe my rotary punch is crap ... Man, that hole punching will turn me into a one-sided Popeye ... OK, i think i'm well prepared now for the job. When it's finished, i'll post some pictures.
-
Hi! For my newest project, a briefcase, i would like to cover the edges with a mexican basketwave. I already saw some videos, bought the book "Lacing and stiching" and should be well prepared for the lacing However, I am still unsure about the most basic thing in lacing: The holes/slits. So i ask you guys for help and hope that someone is willing to share her/his knowledge with me. First of all, i do not have such a fancy "thonging chisel" of any kind, i only have some punches in different sizes and a rotary punch. My lace measures 3/32 inch, so since i have to go twice through every hole, i guess i should use a 2.5 mm punch. Right? But how far from the edge of the project shall i place the holes? All i have from the books is "1/8 inch". I cannot believe that 1/8 inch is sufficient for every project, every lacing technique and every kind of lace. Is there a rule of thumb or any other way of figuring that out? And the other question is: Which interval should i use for the holes? Those thonging chisels seem to leave the same space between the holes as the width of the holes, so for a 2.5 mm punch this would mean a hole every 10mm. Am i right? Thanks in advance for any help you can provide. Greetings from Austria! Andreas
-
I've recently finished the education for the boating certificate and decided to make a briefcase where all the documents and certificates will fit in. The design was made on the computer using an architectural program named "Rhino". I printed it out, sprayed some "Re-Mount" glue on the paper, glued it onto the leather (0.8 mm cow) and cut it out. I decided to put my name on the front, tried different fonts and designs and finally came up with this. This shows how it should all fit together After some glueing and saddle-stiching, and after putting some antique onto the leather, the briefcase was finished. And it seems everything fits! My wife likes it, too ) Now i can go sailing. Thanks for watching!
-
I tried to use the antique paste several times, with and without Tan Kote, but finally gave it up. No matter how hard i tried, once it was dry, the whole paste flaked off. Any tips what i might have done wrong?
-
-
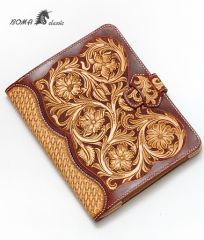
Hi! I made an Ipad case using a very thick leather. At this time i did not know that leather could be thinned out, so my solution was to stamp a lot of holes I also oiled that part of the case and it bent quite well. Maybe my solution could be used in your project as well? Here's a rough picture, hope you understand what i mean Greetings Andreas
-
Hi! I think the adult section is the perfect place for me. Would you please let me in? Thanks
-


