cmantz
-
Posts
175 -
Joined
-
Last visited
Content Type
Profiles
Forums
Events
Blogs
Gallery
Store
Everything posted by cmantz
-
Yeah...boy that always comes up!. I once did some shirts for them with a drop shadow around the lettering and then stacked the year underneath. That really made you look twice. That is one of those instances in which I knew what it said but didn't take a step back and SEE how others might see it. Talk about being too close to the work to see the big picture. I never hear the end of it...in fact some of the kids got in trouble for wearing it them school! Also, one little old lady in church questioned one of the kids shirts!!!!! Really? In church? Yeah..the maul is the next purchase. Any recommendations on style or weight?
-
It is probably more like "user error ". I am using an OLD wooden mallet my husband made in like 7th grade LOL. I did figure out that I was holding it too close to the mallet end. When I moved my hand more to the end of the handle, it seemed better. Also, it might be that I am not holding the stamp correct and not hitting square. Definitely need to practice. Question: when holding a stamp like the cam tool...should I hold it vertical or slightly tipped back? Also, what about the depth of the impressions. What is "just right"?
-

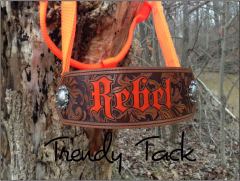
Making First Headstall...what Order Do I Do What?
cmantz replied to cmantz's topic in Saddle and Tack Accessory Items
JJ Wow...36 views and one response Thank you for that!!! I truly appreciate your offer to share some tips to me. It sometimes seems as if I am asking for the recipe for Bush's Baked Beans LOL!!! I know some of the more seasoned tack makers probably read it and thought "not this question AGAIN" but I did attempt to search the forum before I posted. Man...how I wish I could find a mentor. How nice would that be if you could just shot someone an email with the silly questions asked by most newbies? Edges....yeah, I can see now that I need to edge after I sand I edged the top pieces (cheeks and browband) and then glued them. Then I sanded them. I hadn't edged the back so did that after I sanded and that worked out much better. So today I learned...sand and then edge! As far as leather weights. A friend had a tack set that she bought from Heritage Leather when she was at the NFR and I used that as my "inspiration". From what I can tell they used two layers of 8oz leather and then had some hair-on overlay. The leather I am using seems to be fairly soft so hopefully it won't be too thick. The overlay will be glued and then sewn and then spots added to the edge so I will have to add the spots at the end. I have a Standard Rivet spot setter so hopefully they will stay in place pretty good. I will be happy to post pics when I am done. I need all the critiques I can get so I can learn and improve. Believe me, I am my biggest critic...but I suppose I am no different that most. -
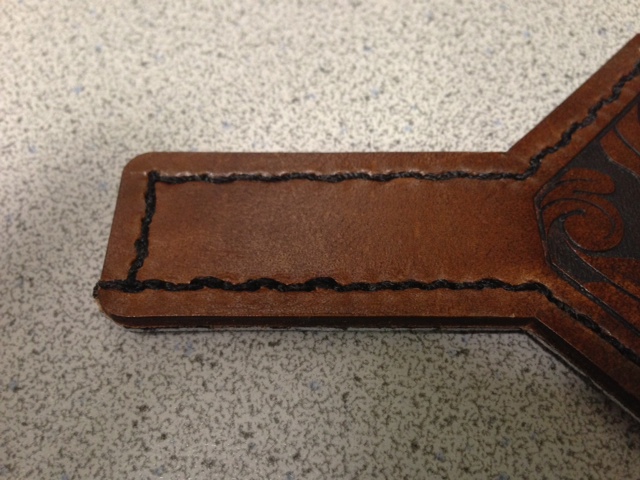
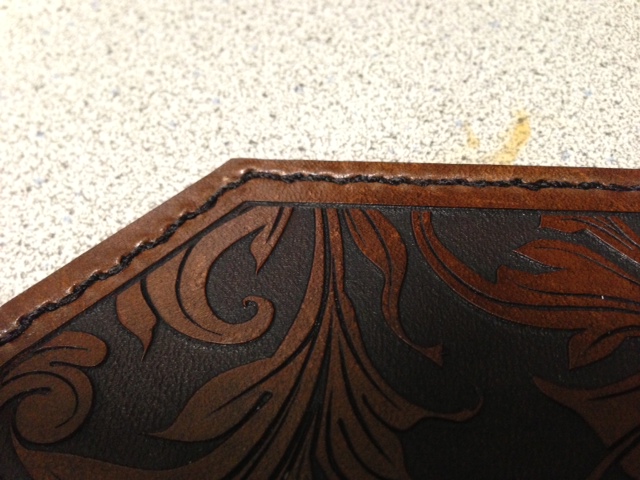
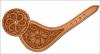
Here is the finished product...at least one pair. Six more to go. I still need to put the holes in for the spurs but waiting for a larger hole punch to arrive. They didn't turn out too bad. The was my first stamping attempt...figured an decorative edge wouldn't be too hard. But I had a problem with my stamp "walking". I need a better mallet I think. Recommendations? I was thinking about waiting until mid April as Tandy is having a sale on a Al Stohlman mallet. I think she said it will be $48 with the Elite membership. Any advice or critiques welcome...
-
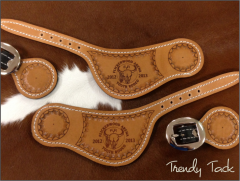
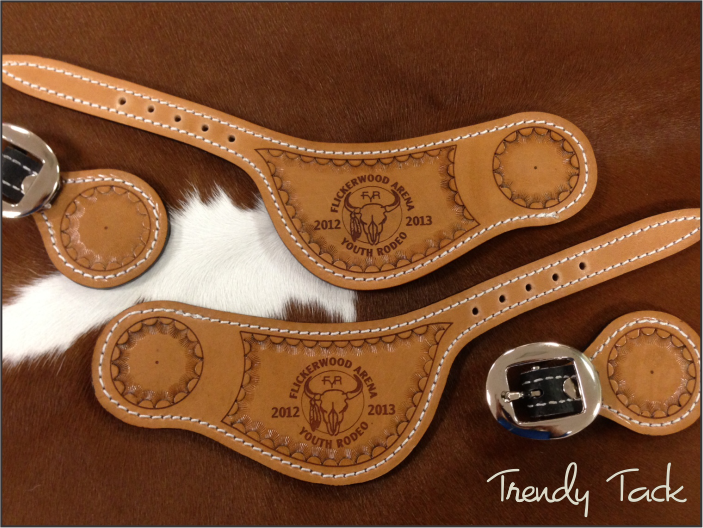
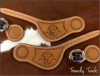
From the album: Spur Straps
Laser engraved and stamped. 6/7 oz veg tan w/ pigskin lining. Antiqued with Fiebings Hi-Liter and two coats of Leather Sheen© TrendyTack 2013
-
So, I am making my first headstall...and then breast collar. Pieces are cut out for the headstall. I am using a 8 oz. bridle leather that does not require any stain or dye. I am planning on doubling the cheek pieces, the browband and possible the crown strap. The cheeks and browband will have a lightweight (2-3 oz) overlay on them with spots along the edge. So, what is the best order of attack? I am assuming I do in this order: glue bevel edges (not sure when to do this...before they are glued, after they are glued, before the edges are sanded, after sanding???) sand edges burnish edges condition stain edges sew apply overlay sew add spots add hardware Is this correct? I don't have to dye the leather for the above set but I am assuming if I do, I would dye the pieces after they are cut out and before they are glued, correct?
-
I agree with Mike. I learned in my years running commercial embroidery machines...always start with the simple things like needles and thread path. Take the thread out and re-thread it. It is amazing how something so simple can cause you the most headaches.
-
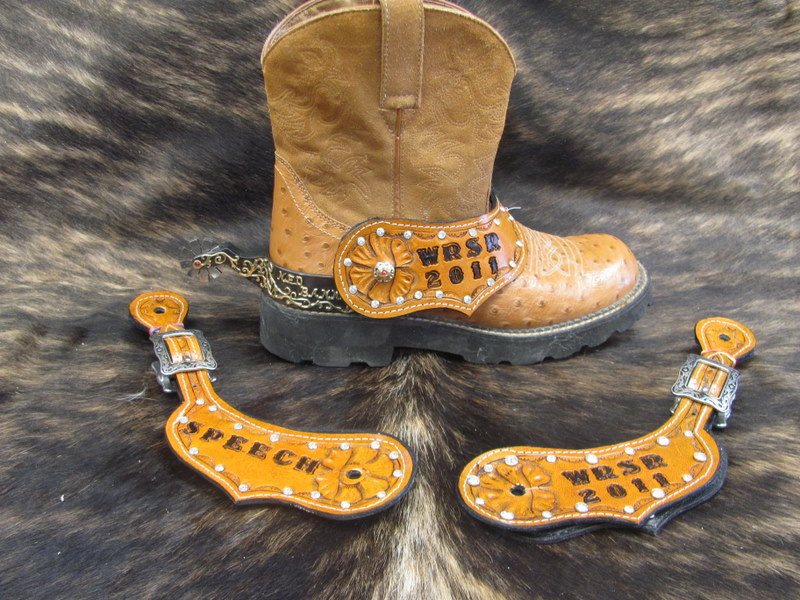
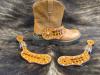
That's the problem...everyone that I have talked to that actually wears spurs while riding (so the straps serve a purpose...not just an accessory) say buckle on the outside!!! This coming from a pro-rodeo calf roper all the way down to my daughter who barrel races. The buckles on the inside are not fun when it is time to ride as they just pushed against the ankle when spurring the horse. I did talk to another tack maker and her's are the same design and she confirmed that the buckle is supposed to be on the outside however many chose to wear them backwards. So really the only way to get the buckle and the design area on the outside of the boot would be to do a "buckaroo" style strap and this customer doesn't have the budget for those as they would be more expensive. Although this style does look better with the buckle on the inside and the design on the outside, that is not how they function best for the rider.
-
Not ready to tackle the buckaroo straps yet ...and they don't seem to leave much room for putting award information on them. As far as the wt of the leather...thanks for the info. Somewhere else I saw 8-9 oz but that seemed really heavy to me.
-
Well said Ken! I am the one that turned this into a "debate" on slaughter...sorry about that. I guess I misunderstood the point of the original post. Isn't it interesting that the people that claim the people that are against slaughter are the ones that are proclaimed "horse lovers" and probably have never owned a horse (Cheryl...this is not to be directed at you in any way If they only knew what these animals must face now being sent to Mexico or Canada. It is sad. I have a horse now that we are trying to sell. Bought her as a barrel prospect and she is probably going to require more maintenance in terms of injections and such than what she is worth and probably wouldn't hold up to the amount of riding my daughter does. But I can't take her to a sale barn as she won't bring ANYTHING and she probably would end up on a trailer to Mexico. So, in the pasture she stands until I can find that right buyer that just wants a decent horse to either do fun shows or trail ride. She will make someone a great companion as she is such a sweet mare...unless you are another horse messing with her at feeding time LOL
-
simply amazing.
-
 Thank you very much!
 -
yeah..she looks like an "easy keeper"
-
I agree with you about breeding. Unfortunately many breed just to breed. My daughter wanted to breed her mini so she could have a baby out of her and I wouldn't let her. She isn't registered and we didn't need another mini horse. I don't have a problem breeding for a "job". And interestingly enough...our 3 foaling experiences have been when we have bought a mare that we didn't know was bred! First one wasn't suppose to be able to breed anymore. Second we bought at an auction as a trail horse and called previous owners on papers and turns out she wasn't a trail horse but a broodmare and was in foal (but we got lucky on this one as the filly turned out to be a great horse but we can't get her registered as stallion owner won't sign registration papers!). And third was the same as the first...19 year old mare that got in with their stud but they didn't think there was anyway that she could have been bred. I have quickly learned that it is MUCH cheaper to buy a weanling or a yearling than it is to breed! At least my daughter has had one good foal experience so that will have to make due for her until she is on her own.
-
I am a HUGE horse lover. We currently have 4 and I love nothing more than to go down and love on them, put my nose to their neck and just breath. Nothing beats the smell of a horse! We have had triumphs (when I was there to pull a filly when she was foaling and now to watch my daughter start to compete on her and the bond between them) to tragedies (going to the barn to check on another pregnant mare only to find she had foaled twins early that morning and neither survived...we had no indication she was having twins...ultrasound only showed one).....however, I don't have an issue using horse leather. It is a by product. Why not utilize what you can from them? No different than using cowhide. But then again, I also believe there is a need and a place for horse slaughter in the US. And closing the slaughter houses was the most inhuman thing that was done for these animals. It has driven the prices of horse so low and when people can no longer feed them and they can't afford to put them down and bury them, they are left to starve. Rescues are overrun! Not to mention, what do you do with a lame horse. It is very sad. Just my opinion...
-
Thank you. It didn't seem right with the buckle on the inside but then I found this picture and thought that was the way it supposed to be. I did a prototype with some inexpensive leather and I think I finally have my sizing down for my pattern. One thing I am still not sure on is the size of my "circle" on the buckle end of the strap. Seems like it should be the same size as the one on the inside of the boot. But from the pictures I have seen online, it seems it doesn't really matter. Now for the question of leather...what weight leather should I use on these? I plan on lining them with something lightweight. Thanks again for your response! Chris
-
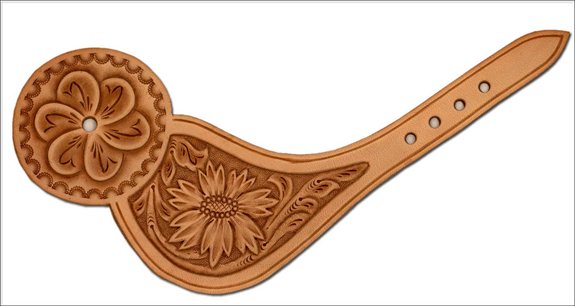
I need to make some spur straps. I have the Tandy patterns and am going to make something that looks like the attached. These will be award straps...so they will have the rodeo logo on them. So does that go to the outside when worn? If so, that means the buckle will be on the inside and my daughter says the buckle is always on the outside so they don't rub together. So..which way are they supposed to be worn? I can't find any images of trophy spur straps similar to this ON a pair of boots ...so I apologize in advance for the question that to many will seem pretty obvious! LOL
-
For someone that has only 6 Tandy tools (the basic starter pack) and a basketweave tool (I think the one I bought as too small)...what would you recommend as good BK tools to buy? I have only played with the tools from Tandy and honestly gave up. But I would LOVE to learn how to tool and don't mind investing in a couple good tools to start with in order to try it.
-
I am trying to come up with a "recipe" for nosebands...and maybe I am over-thinking this and trying to make an "exact" rule in a not so exact world. I have been using pre-click horse butts from SLC and I LOVE the way they laser and I love the final color you get without the need to dye the leather....however I wish they were heavier. I have lined them with pigskin, deertan, 3 oz. economy tooling leather, and even 5/6 oz. HO shoulder. I like the "feel" of the finished product when it is thicker (ie: w/ the 5/6 oz. lining for example) but I like the flexibility of the light weight lining like the deertan. I have also used the veg tanned pre-click nosebands made from 7-9 oz leather but not as happy with how they laser as compared to the horse but I like the weight of them. But here is my issue....seems a little silly to me to have more money into the backside of the piece than I do the front side So, is there a general rule as far as combining leather? How much heavier should the top be vs the bottom? Can they be equal weights? What about with tack such as headstalls or breastcollars?
-
thanks for the post. I tried some Weldwood and after setting in my heat press all night to be good even pressure, it was still able to pull them about. HOWEVER, I don't think I let them dry. Also, I am gluing two horse butts together and it really seemed to soak in very quickly. I reglued them again, let them stand for 10 mins and then put them together. We shall see if this works better. Now, I just need to figure out how to get two layers of horse butts (around 5 oz. each ) to fold over (ie: the tabs on my bronc halters) without cracking the surface of the leather. Suggestions???
-
I have been using Ever Tack from SLC to glue my lining to my leather. Seems to work good. But I am out and I need something TODAY so I can't order. Any suggestions on what to buy that might be available locally (Hobby Lobby for example)? I tried regular contact cement and that didn't work at all. I was able to pull apart the two layers of horse butt that I glue and put in my heat press (not turned on of course) overnight.
-
Good point...I know my daughter changed out all the hardware on a headstall she had when she wanted to put her blinged out conchos and buckles on it.
-
Thanks for the tips. The shop guy that was sewing my items before also thought it looked like it was too tight on the top. I checked the thread tension on his machine (Weaver Lockstitch) and you could easily pull the top thread through with the pressure foot up. I am used to balancing tensions on my embroidery machine but it makes it easier on those as I have a tension gauge for the bobbin tensions so I adjust that and then just tweek the top tensions. I am assuming you want the same on these machines as I would want on my embroidery machines...the loosest possible balanced tensions that give you a good stitch.
-
The top tension seems REALLY tight...at least tighter than any other machine I have sewn on. Are you supposed to be able pull the thread through the needle when you lift the pressure foot to remove the item (of course when the needle is in the correct position)? I can NOT pull any thread through the needle. I have to pull some through the first tension disks and then pull through the second and then through the needle. Is this correct? If not, where do I do my primary tension adjustments for the top thread? On the first tensioner or the second? I find the manual a little lacking in explaining how to adjust tensions. I didn't play at all with the bobbin tension as it said that rarely needs to be adjusted. I am going to try again tonight (machine is not at my main shop but at home) with the same weight of leather now that I have 207 in the top and bottom and see if there is any difference.
-
It didn't seem like my leather was flagging. In fact, there was some minor indentations on the top of the leather from the pressure foot. I did have some birdsnesting on one of the items...had done several nosebands and then at the end of the fourth one, the machine just didn't sound right but then seemed to correct itself and when it was done I turned it over and there was a birdsnest on the backside....not bad but something was off. Then next one sewed fine in some areas..and just looks off in others. But this leather is a little thinner and lined with pigskin so maybe that had something to do with it. Or it could be that I had the wrong thread in the bobbin. When I went to switch thread colors I realized that I put 137 in the bobbin and 207 on the top on the first batch