SmilinJim
-
Posts
317 -
Joined
-
Last visited
Content Type
Profiles
Forums
Events
Blogs
Gallery
Store
Everything posted by SmilinJim
-

Dog harness and short leash
SmilinJim replied to SmilinJim's topic in Collars, Cuffs, Leashes and Leads
Repo stays happy I think. I've done several of the harnesses and they were all cut and paste (sort of), had access to the dog so could custom fit. I didn't like just a collar as he, and our other dogs, will pull sometimes and cause the collar to choke the dog. A harness won't choke them. I'm going to be 'out of town' in the wilds of south Mississippi for a couple of days but when I get back I'll post some pics of the harness and the measurements I took from Repo the get what I wanted. Seems to fit well enough and doesn't rub (couldn't spell irratate or irriatate or .... ) in the wrong places. Keep on Smilin Jim -
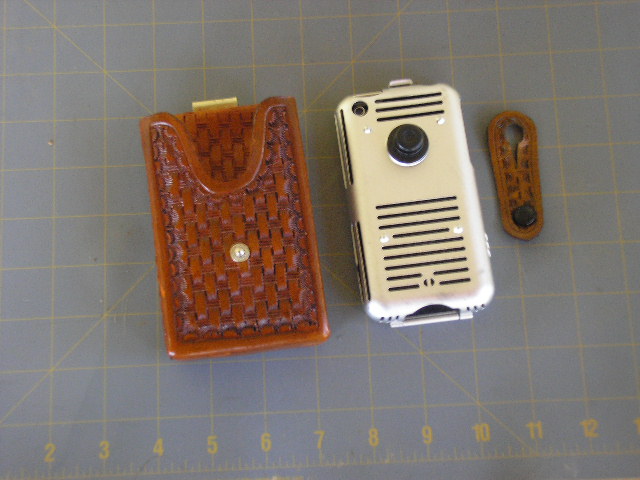
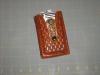
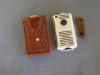
Thanks to my daughter I have an Iphone, which means a new phone case. Since I work in construction and am in various and sundry places, I wanted to protect my new phone as much as possible. I inherited a metal case along with the phone. The case has a clip on the back for a belt clip but that doesn't protect the screen from rebar, 2X4's and other normal everyday things you have to deal with at work. She works in a daycare, still dangerous, just in a different way. I wanted to keep the metal case and belt clip so I could hang phone from my truck dash while driving. This is what I came up with. The phone faces towards my body and I have a thin metal plate in the back of the case to protect from flexing. The strap slips over the clip and snaps to the case so its held in place. Just unstap and answer. Unclip and hang from the dash while driving. Simple solution from a simple mind. Keep on Smilin' Jim
-
I think it looks great. Something she would pass down to the kids or grandkids. Jim
-
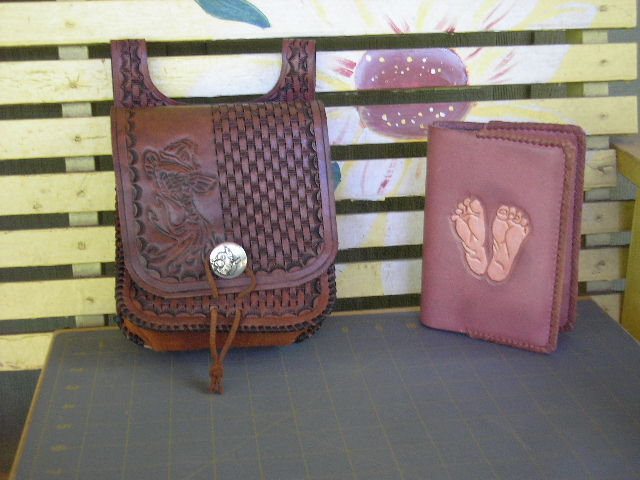
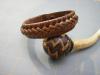
Hi Folks, I did a small belt bag for myself to use in the field, it carries my notebook(also pictured) my camera and my data collector. And usually other assorted 'stuff'. I had to use the closure that Andyl1 used, that's neat. Hope he doesn't mind. And thanks to Tom(carr52) I did myself an Indy bag. Something I've been wanting/needing to do for a while. It ain't pretty but it works like it's supposed to. I made it a little larger than his pattern and used snaps in places. The thing to the right of the bag snaps inside and holds my coffee thermos upright. The box to the left fits inside and holds whatever is needed at the time. I also attached a knife to the side and there are other rings and snaps not visible that I have added as needed. Its been wet when camping and I use as to carry my lunch when not off in the woods somewhere. Working on a pair of suspenders with rings so I can use it as a backpack too. New GPS requires 2 hands and carring more 'stuff' too. Check out the bags Tom(carr52) did in the specialty section. His are much, much better. But this may give ya some ideas of your own. Keep on Smilin Jim

-
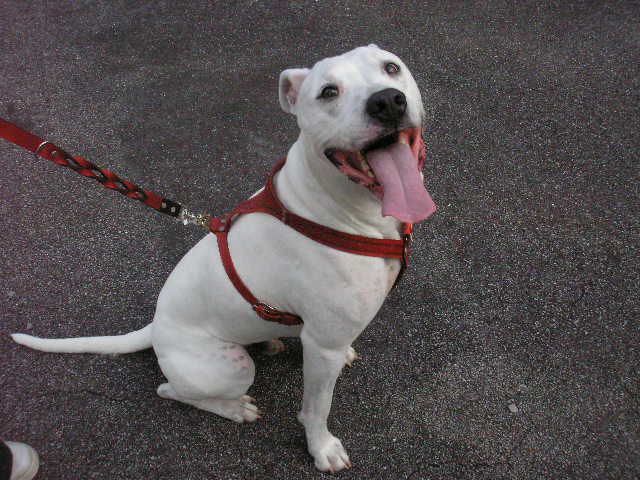
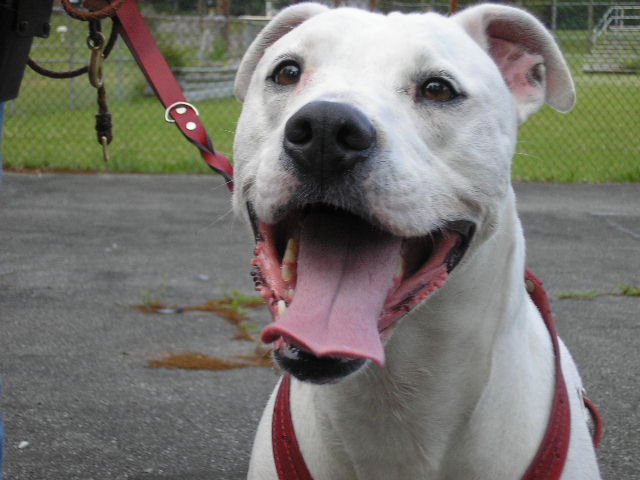
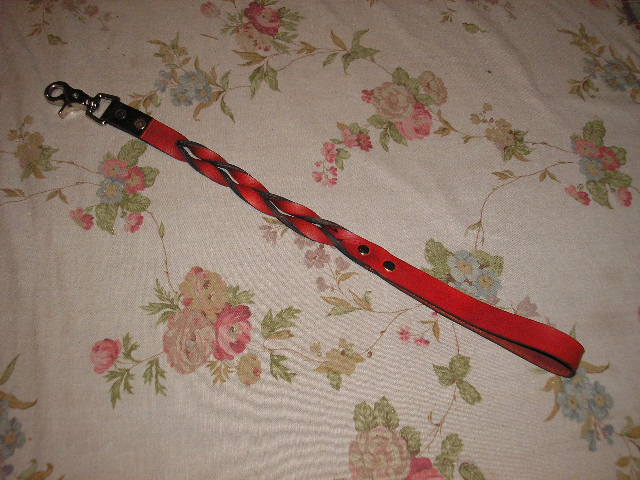
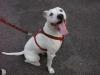
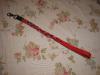
We have a mixed Pit we got from a rescue shelter about 4 years ago, we call him Repo since he went through several owners before chosing us. Each year in Birmingham Alabama there is an animal shelter fund raiser called Do Da Day at a couple of the local parks. Bring your pet and show him/her off. It's mostly for dogs but I have seen cats, ocelots, pigs, snakes etc. A great time to listen to bands, drink beer, talk to folks that love animals. And I have to admit I don't really mind the short shorts and bikini tops either, LOL. Anyway Repo's harness was getting well used looking so I made him some more clothes and a short traffic leash. Did it in Oxblood so it contrasts against his white coat. Hmmm, did I mention I also handed out some cards and got orders for 8 of the leashes and 2 harnesses. But we had a good time and so did Repo. Keep on Smilin Jim

-
Another box and a knife sheath
SmilinJim replied to SmilinJim's topic in Gun Holsters, Rifle Slings and Knife Sheathes
Mean a guard. Sorry about that. See what happens when ya get old. Ya forget and can't type and talk or is it talk and type at the same time. Jim -
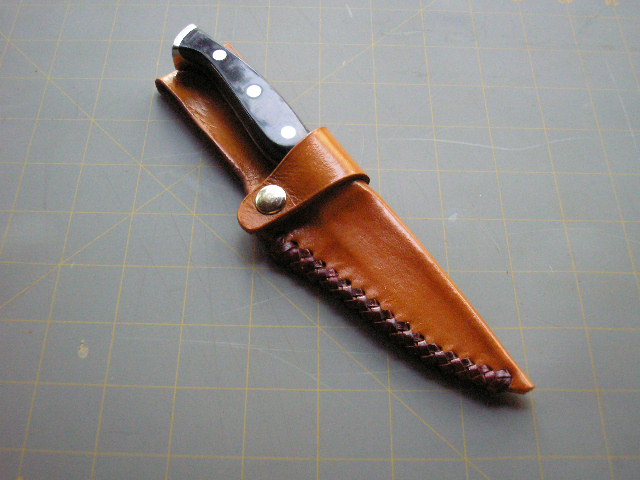
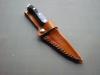
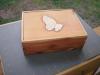
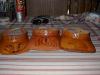
Co-worker brought me the leather and a knife and said he wanted a sheath. Just simple no carving or tooling of any kind. Tan with an oxblood lace. Used a hidden pin to hold the tangless knife in place. The other is another cedar box. Bad photo of praying hands, from a Tandy craftaid. Not what I'll use again. Not saying I can do better but I can try. The boxes are doing well and they are from scrap. As a tip for the woodworkers. I used Fiebings Aussie Leather conditioner on the cedar boxes once they were sanded. Brought out the colors in the wood. Looks good up close. Keep on Smilin Jim
-
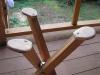
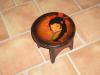
A 3 legged stool and bracelets
SmilinJim replied to SmilinJim's topic in Furniture: Inlays and Upholstery
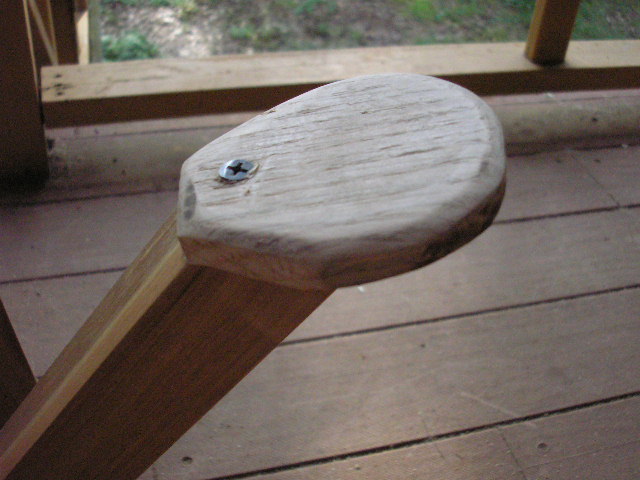
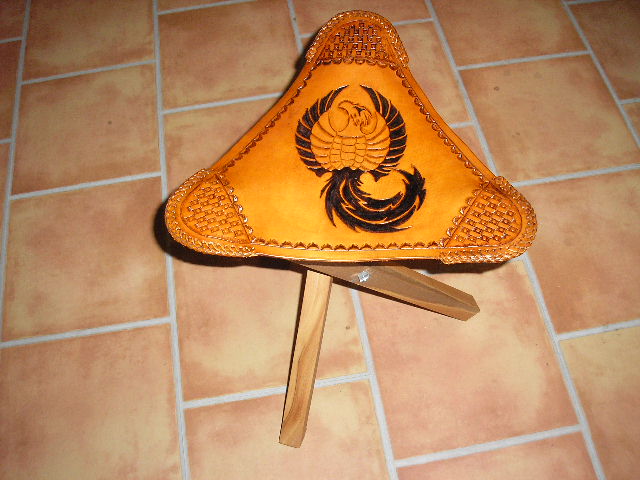
Hi folks, thanks for the good words. As for the seat size I'll be a southern gent and just say if it's comfortable wear it. My seat corners are rounded and measure 13 1/2 inches across each side. I'm 225 pounds and it sort of fits me better. As for the legs this is a first project and trial and error. I first made the legs 1 1/2 inches and tapered to fit the corner pockets but when I fit the leather to the legs the spread was too wide and the seat was too low and the tapered legs seemed to stress the leather too much. I didn't think it would hold. Next incarnation I added some pads to the top of the legs to get more contact area inside the pockets. This also made the legs not spread as much and raised the height to 18 inches. Feels about right. I've took some shots of the version. And since I can't leave well enough alone I've got another idea in the works. I'll post results of that try if it works okay. Remember, if you make a tri-bolt like I did with the eyehooks you need to drill the holes in the legs to compensate for the difference in height of the pivot points of the legs. I made my legs 22" long and drilled the first 12" from the bottom then added 5/16" for each of the next holes. Since I didn't center the holes it increased the width of the base wider than the seat and hopefully makes it a little more stable. Guess that also depends on how many Corona's or Modelo's you just may have drank. Let me know if this helps and post your work too. How about a little feedback from some of the folks already making these. What am I doing wrong? Us first timers need help. Keep on Smilin Jim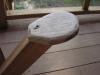
-
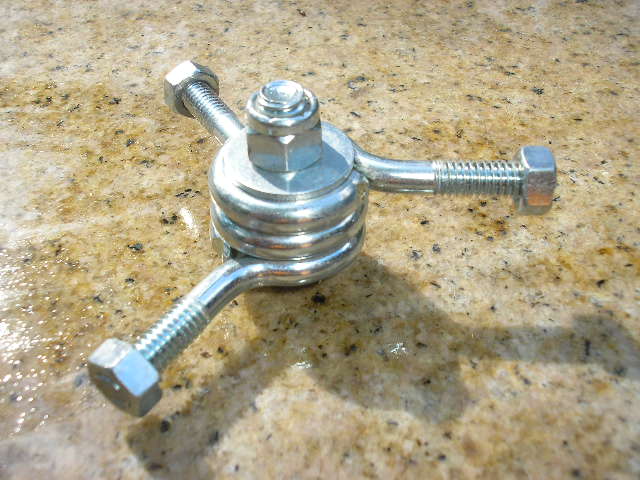
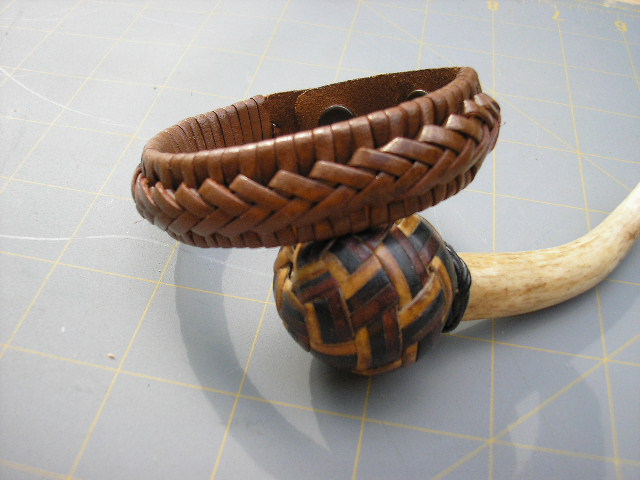
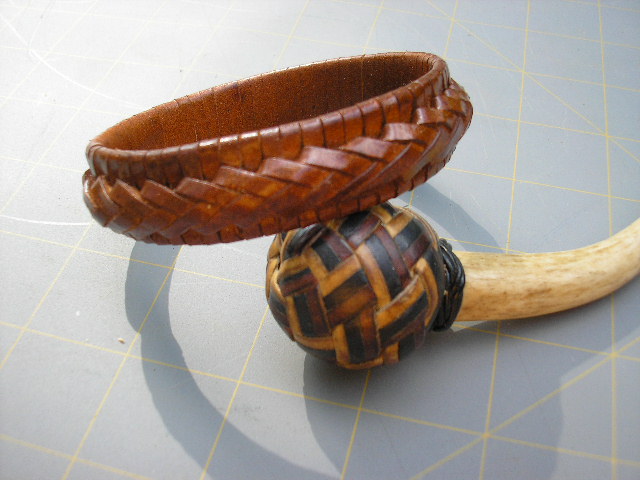
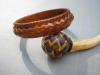
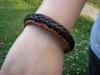
My first collapseable camp stool. Couldn't find a lot of info on doing it so its sorta rough. A pic of my version of the tri-bolt. I used a piece of plastic in the center of the eyebolts to stabilize. Also a couple of braided bracelets. Did the one with snaps first and didn't like the look so I just did a solid braid around. Give me some feedback on the stool, what's the correct way to make the pockets? Any help is appreciated. Keep on Smilin Jim


-
That is so good. Leatherwork is a hobby for me but you are a true artist at leatherworking. Again, great work. Jim
-
Thanks Ken, I'm a 'Bama' guy too. Jim
-
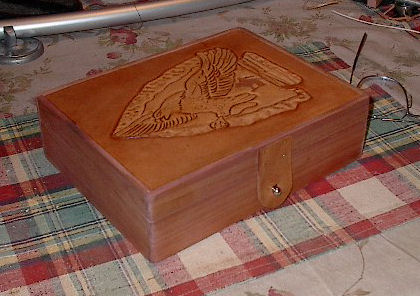
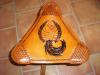
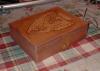
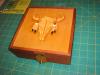
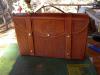
Hi folks, finally got time for a little relaxation and built a box. Learned a lot from doing it too but thats another story. Got some rough cut cedar from a friend and had to cut and plane and sand and cut and plane and sand and ... still got a lot to learn. Anyway. did the leather a year or so ago and though it would be a good place to put it. Comments and critisism(don't think I spelled that right and don't have spell check yet) welcome. Can't learn if ya don't have feedback. Keep on Smilin Jim
-
That's really nice. The design is great. And I like the inside stamping also. Keep up the great works Jim
-
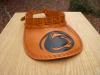
I don't think I've posted these here before. Posted on Deviantart back in the fall. The box got picked to be in an article by a Deviant on the site. I felt honored because there were only 20 picked from all posted. I did the stool just as a weekend project to play with the airbrush and now I've got orders for 3 more of 'different' themes. If you have seen them here before just chalk it up the the failing memory of us old folk, I can now get senior discounts for morning coffee. Keep on Smilin Jim
-
Missed a couple. Hope not too much


-
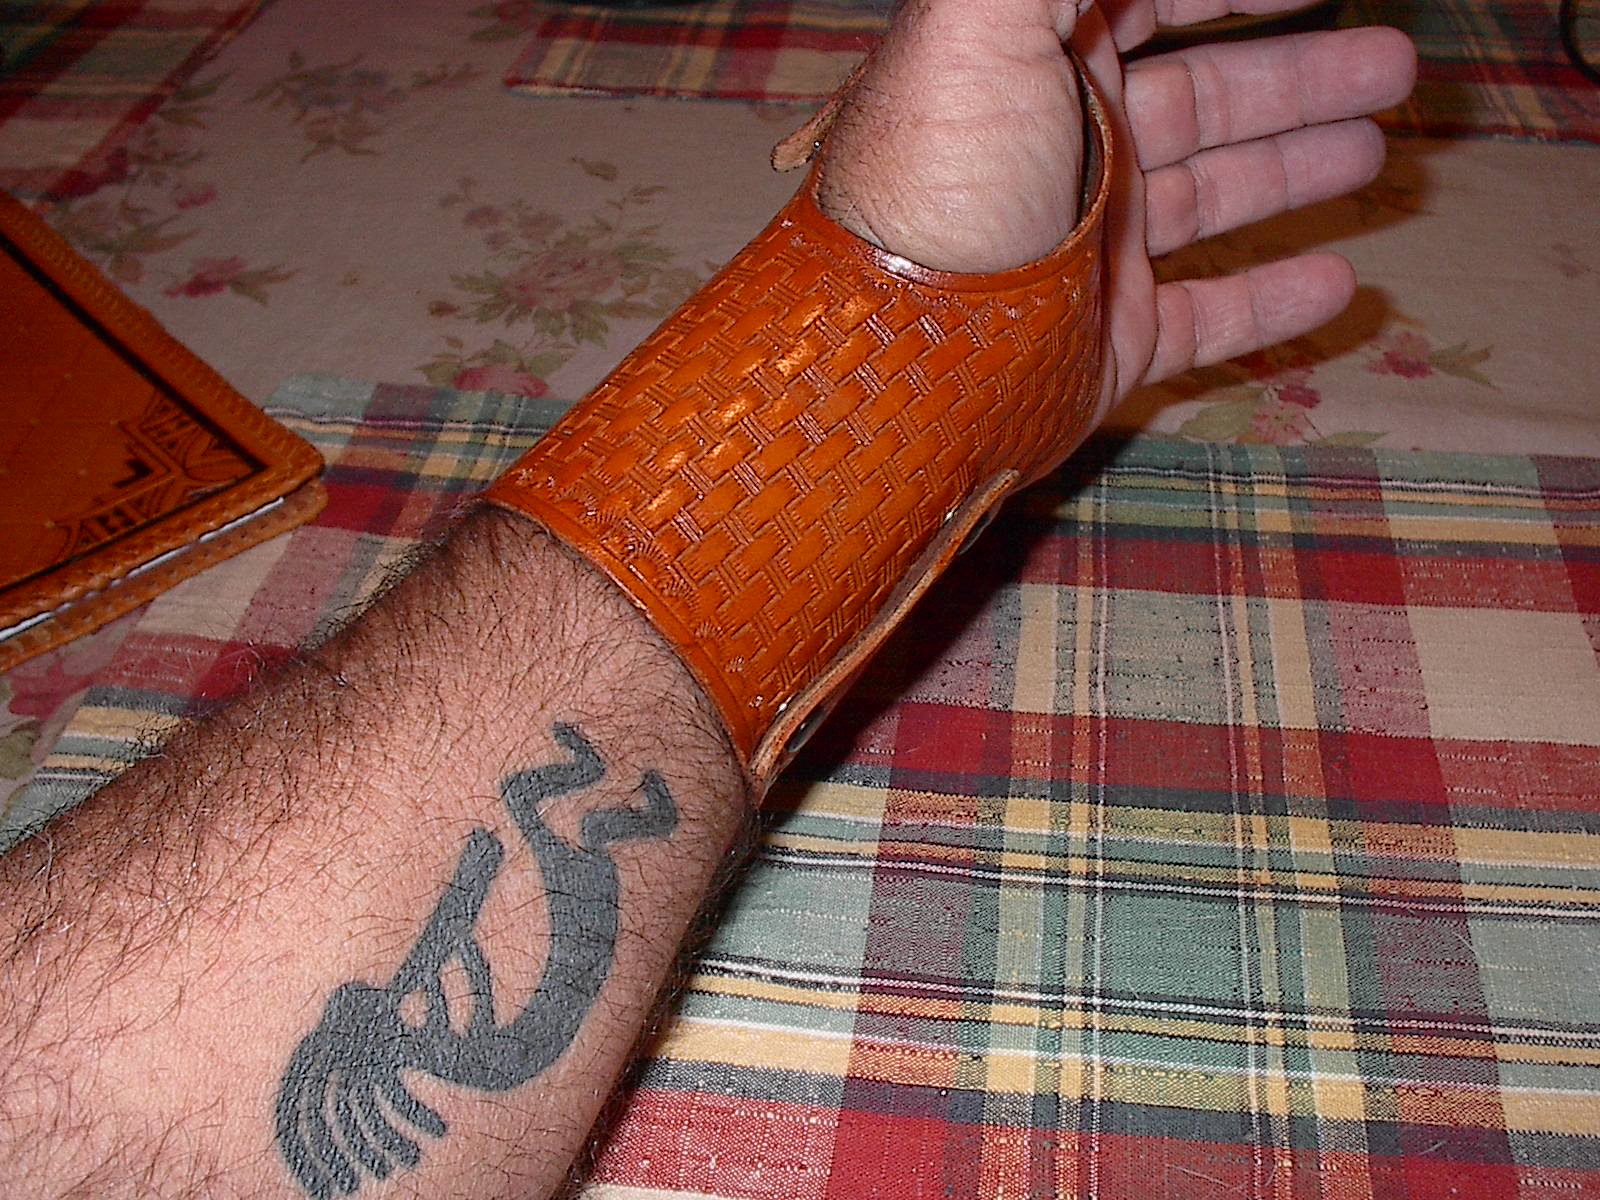
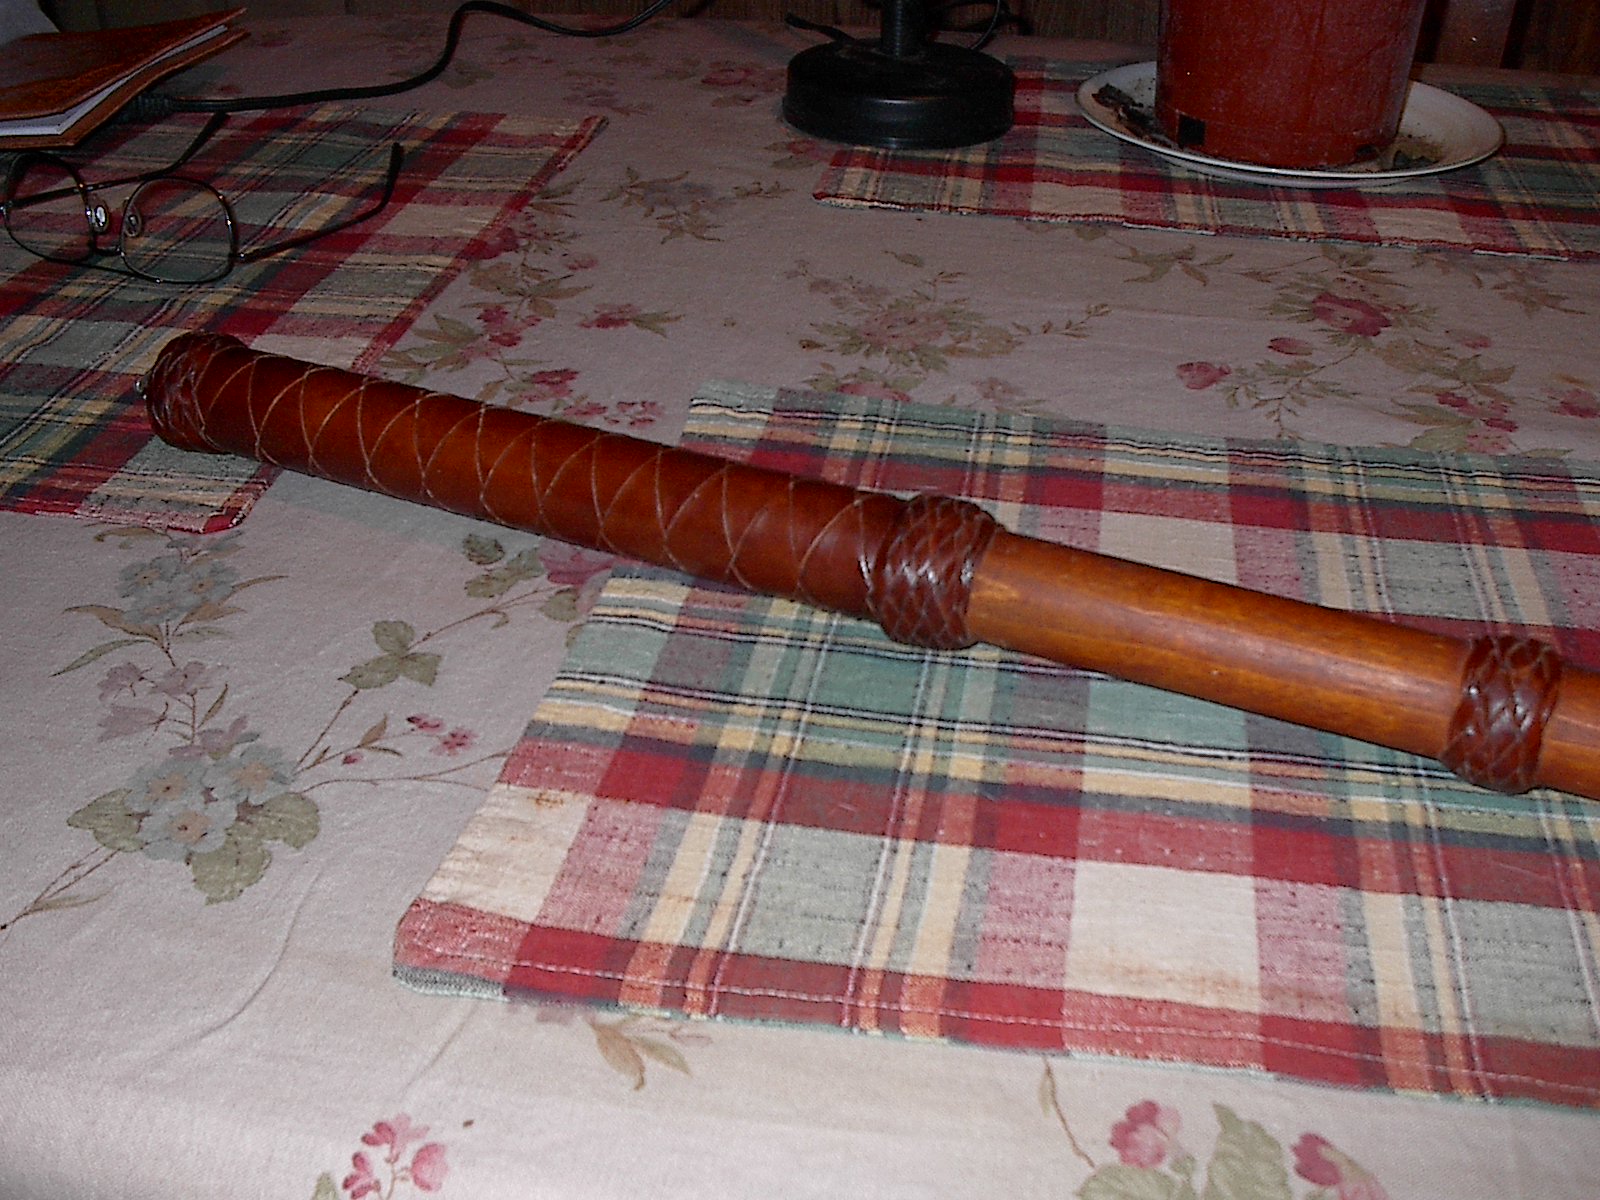
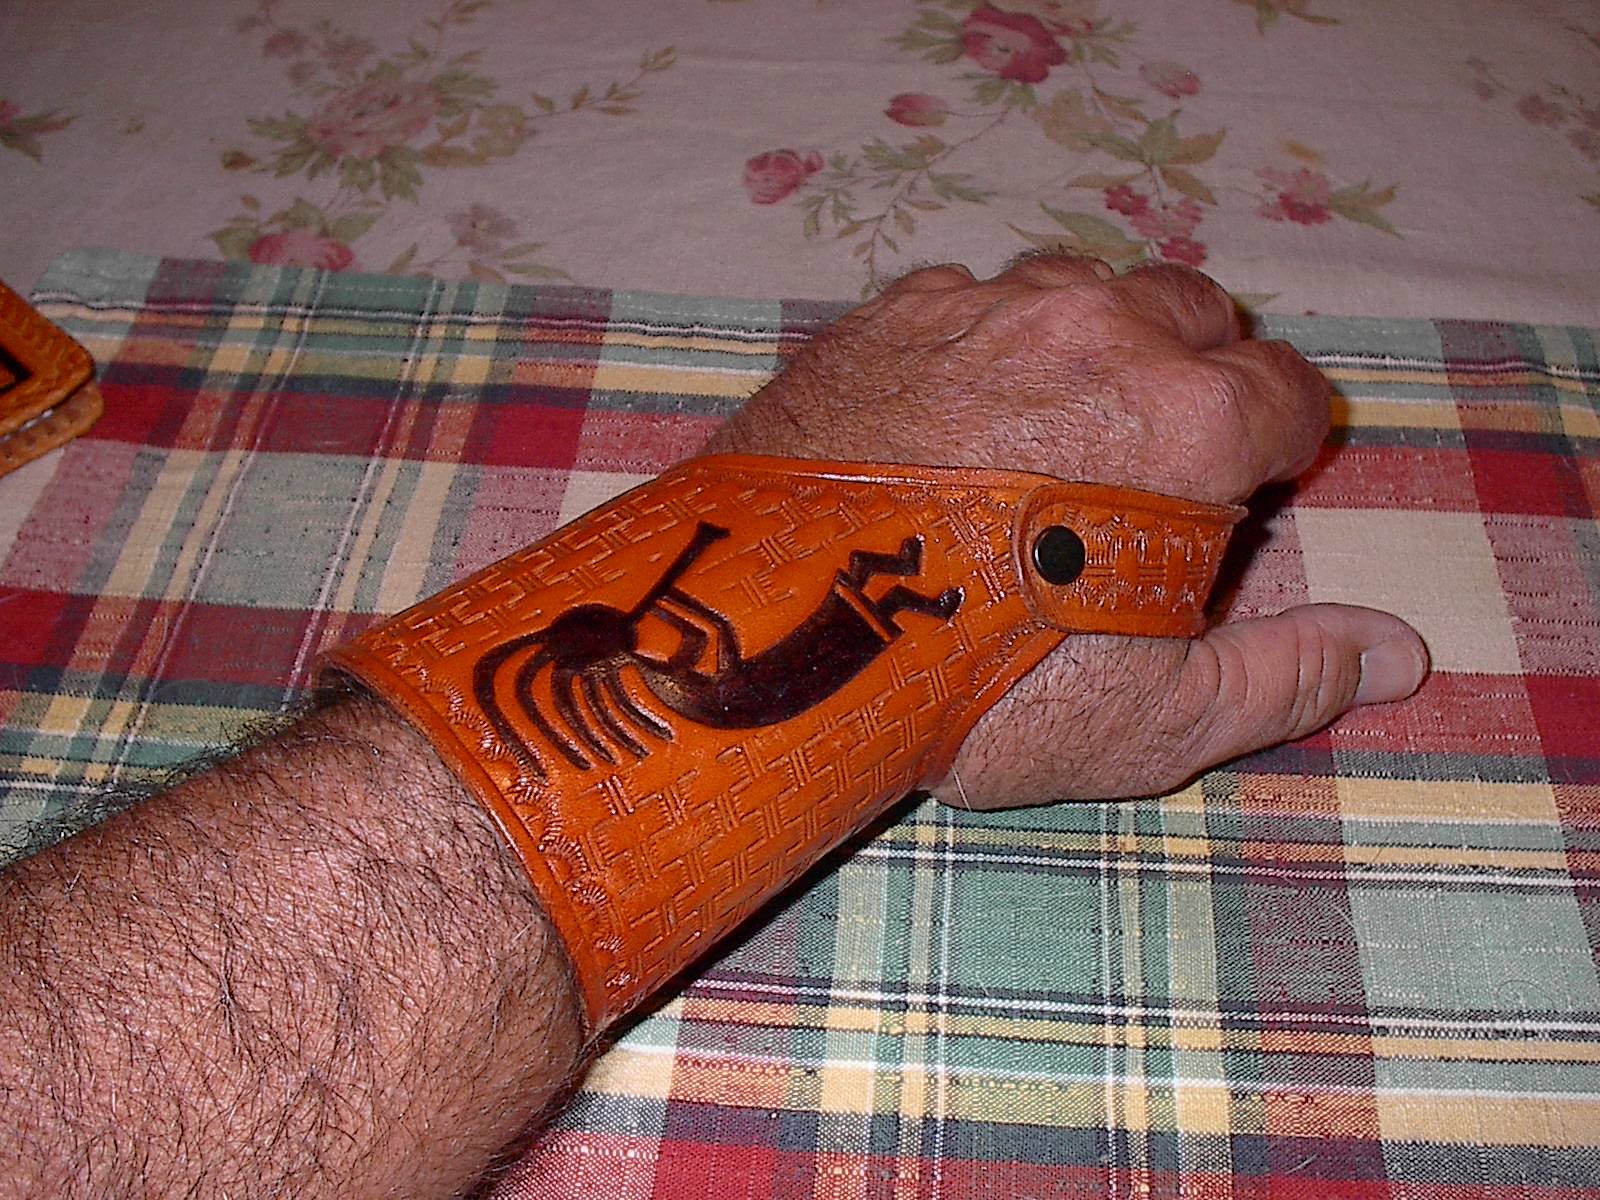
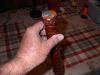
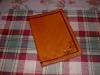
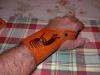
Hi folks, how's the world been treatin ya? Got a few projects I've worked on lately. A couple of journal covers. I needed some wrist support and went to Walmart and bought a brace. Didn't fit right so I took out the metal and made my own. I know there's probably 15 reasons why it won't work but seems to do okay. Lined it with kidskin and it supports and doesn't bind. Been taking my dog out walking in the woods so I made me a walking stick. Got a piece of 1 1/4" dowel and put a copper end on it then did a leather handle. Will post the halter I made for him next time. Carries his own water and it doesn't choke him when he pulls. A few other projects in the works but just haven't had time to complete. Keep on Smilin Jim
-
That's a great piece Harvey, I just wish I could manage to keep my basketweave so even. Jim
-
A few projects
SmilinJim replied to SmilinJim's topic in Purses, Wallets, Belts and Miscellaneous Pocket Items
Just one more. A purse and wallet combo. Cameraphone and unsteady hand. All I had time for. Jim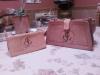
-
A few projects
SmilinJim replied to SmilinJim's topic in Purses, Wallets, Belts and Miscellaneous Pocket Items
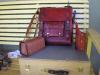
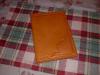
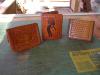
Sorry about that, dropped a few pics. The wallets are based on an old Tandy pattern called a 'fishermans wallet'. Just room for a few dollars and your fishing liscense. Since I don't have a lot of money or credit cards either, I carry the Kokopelli as my regular wallet. The large case is my computer case. As you can see from the dings and dents, it's been in the backseat and the back of my truck for nearly a year. It's leather over a plywood liner. I lined the plywood then covered it. It offers a little more protection. Got some more projects somewhere if I can just find the memory cards. Jim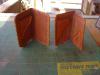
-
Hi folks, been awhile since I've been on here. Here's a few projects, nothing great or wonderful. Daughter has my good camera so this is with an older job and my camera phone. But you get the ideas. Keep on Smilin Jim
-
An update on the maul. Finally cracked it. Was pounding on some basketweave for a computer case and the pvc finally cracked a little. I had used gorilla glue inside to keep the metal washers in place. It is an expanding type of glue. So when I cracked the maul a little of the glue seeped out. Had not hardened in 3 months. The glue sealed the crack and I sanded off the excess and started back pounding the next day. Still very little wear on the surface. So far a great deal for about $4.00. Jim
-
I am sorry, I must offer an apology. Had to check my old messages One lady did offer to send me money as soon as she received the tools and I told her to wait and try them first. I think that was January. Another lady said she had some wood to send in March. Just still nothing has arrived. At least they did reply. Again I apologize. Car troubles Monday and someone stole my laptop on a jobsite Tuesday. Still no reason to not have all the facts. Keep on Smilin Jim
-
Hey folks, thanks for the replies. I'm not really angry( well maybe a little) and I'm not asking for tools or any such. Just letting off a little steam. Used to have a sticker on my hard hat that sums up my attitude. "Deal With It" . If I don't get anything back so what, I'm not in it for money. And I'm still the same me. If anyone wants a set of tools I'll still send them. Just got to feeling down and ... well, no need to go into that. Keep on Smilin Jim
-
I admit, I've had a bad couple of weeks but ... I've posted some info on making some tools on another part of the board, particularly a lace cutter and a small splitter, had pretty good response too. Had some folks here that couldn't make their own for whatever reason and they requested a set of made tools, no problem. Had them posted in a couple of other places too. So I finally got some made and sent them out. Sent to quite a few states and even a couple of other countries. With them I sent an invoice. Told them what I wanted for a set but also said 'you don't have to send money, just send me something in return, maybe a rock, or a odd piece of wood, maybe a piece of metal. Something trivial. I thought it would be a neat way to collect some knick knacks from places I probably wouldn't get to go. Got some neat trinkets but ... Of all the folks on the board that requested tools I have received nothing. 100% no return. So here's the deal. I spent my time and money and sent you the tools. All you have to do is repack them and mail them back, include a stamped envelope and I'll even return your postage. I no longer want anything in trade just return my tools and I'll send them to someone else. Hard to keep smilin sometimes Jim
-
Hey Tazz, I know the feelings. Decided I wanted to learn to braid. Thought the 4 strand round was a good beginning. So I went to the net. All the 'easy instructions' seemed to deal with folks that already knew what was going to happen. Didn't want to spend the money on books if I couldn't learn. Searched hi and low for instructions that could satisfy my simple mind. Then went to the all purpose all knowing store. Go to walmart look in the craft section at the plastic lacing. There will be bags of colored lace with simple, the kind I can understand, instructions for about $5. Got me hooked. Then bought the grant books. Also at tandy there is a book called something like Fun with braiding and lacing, about $6. Not for everyone. But I can sit on the back poarch with a cup of coffee(morning) or a beer(evening) and listen to the birds and braid for hours, relaxing. Keep on Smilin Jim