-
Posts
56 -
Joined
-
Last visited
About Icho
- Birthday 07/11/1977
Profile Information
-
Gender
Male
-
Location
Windsor, Ontario, Canada
-
Interests
Hunting, fishing, camping, trap shooting, knifemaking
LW Info
-
Leatherwork Specialty
Too new to have a specialty
-
Interested in learning about
everything leather
-
How did you find leatherworker.net?
Google
Icho's Achievements

Member (2/4)
-
That is the easy part. I'm not at home right now so I can't verify that it is correct but I have definitely had it set correctly and it doesn't make any difference either way with the problem I'm having. It is tight all the way up to the point that I can see the lever and internals flexing until it gets around the bobbin. I didn't replace the hook. Just the hook gears. The hook looks likely to be original. The whole thread path looks to be in excellent condition with no wear spots. I'm not sure if you saw the attached video but it shows how it is tight until it passes the bobbin case to the point that you can hear a snap when it does pass. Loosen my tension makes it less severe of a snap but then the stitch looks loose. The machine sewing pretty good but I want to get it better because it is causing unnecessary stress on the lever and attached components in the head.
-
I can't tell for sure by the pic either but it has been moved around since. Unfortunately it has nothing to do with when the thread passes the hook. I'm kind of glad you guys committed. It may have gave me the motivation to get back at it today. Lol
-
Not fully resolved yet but it is better than it was. I have a theory I want to test out but haven't had tome or motivation to mess with it for a while.
-
-
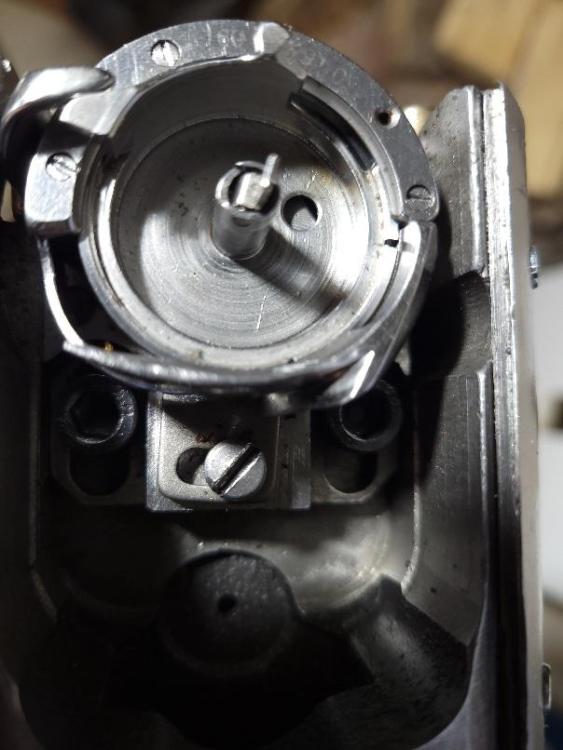
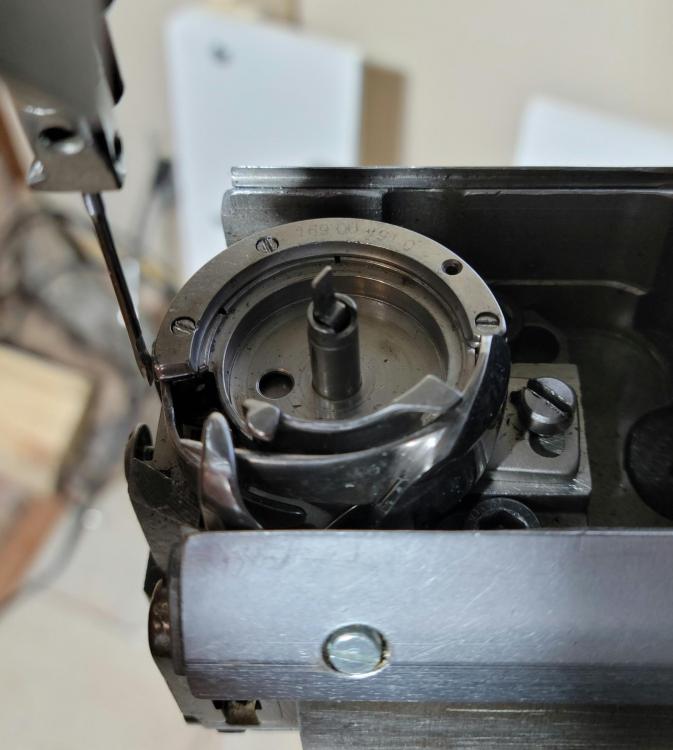
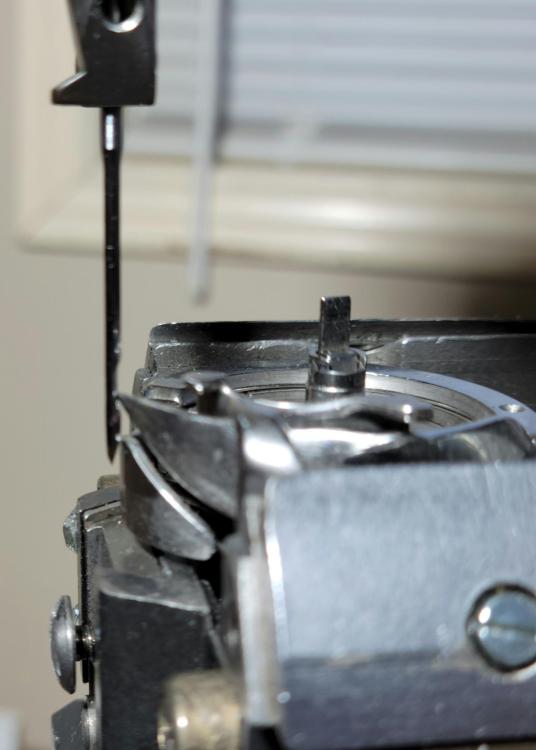
I was kind of thinking that the belt just changes the timing but was also hoping it was a part of the problem. I can't say for sure if the hook is original or not but it I can tell it hasn't been recently replaced and does look to be in decent condition. I won't be able to mess with the machine until later in the evening but I did manage to take a few pictures. It is as I left it after getting pretty good stitches and less thread snap. The 1st pic is needle bar on bottom. 2nd pic is tip of hook at needle and I threw in a 3rd just as the take-up lever starts to lift. I hope they are at the angle you were looking for.
-
I am at work so i won't be able to post any pics until later today but I did adjust the needle bar height after I advanced the timing. I also rechecked hook to needle clearance etc. Before I mention what I did next, here is a quick history on the machine. I bought it knowing it had timing issues and the price definitely reflected that. It needed a new gear set for the bobbin case which is crazy expensive but luckily I was able to get used along with a lot of other extras. I had lots of cleaning, oiling, replacing beat up screws, a couple stripped holes etc but I'm thru that. I have had most of the machine apart in the process. I am actually very comfortable getting into any part of it now. This is why I just went for it. So last night just before I ran out of time for the night I decided to move the tim belt a tooth...possibly 2. I then quickly re timed it and gave it a try. It is not perfect but definitely the best it's been. I am considering jumping 1 more tooth to see what happens. I couldn't do much more last night because it was getting late but thinking about it today, I am wondering if I should look more into the timing belt and checking if there are any marks on the gears that should be aligned. I will be back at it tonight and will add any relevant pictures.
-
Been there done that. I used dial indicators and digital calipers among other precision tools. I'm actually a tool and die maker/designer so settingand measuringisthe easy. There is just no info on the take-up lever that i can see.
-
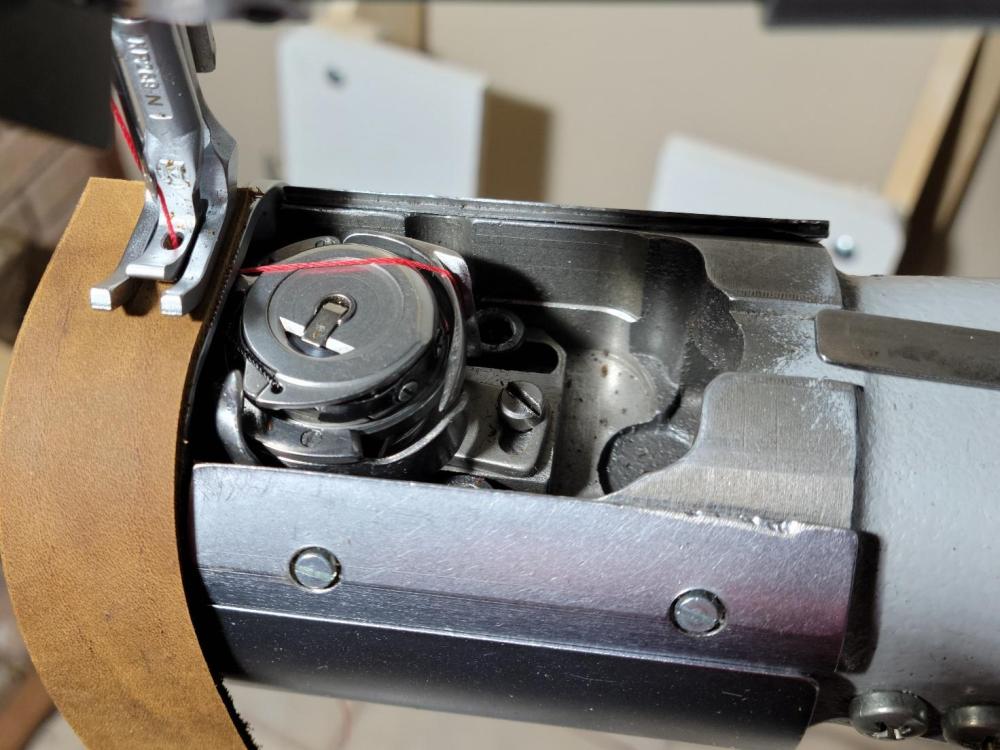
Thanks for the info and video. I was looking for a video like that. I saved it so I can keep going back to it. I will go thru your write up and try advancing the timing to see how it works out. Here is a pic showing the moment the take-up arm starts moving up. I changed to red thread so that it is easier to see. To me it seems like the arm starts moving just a bit too soon. I feel that the tension created at that point is what is causing the the thread to pop around the farthest point around the case. Update I advanced the timing to the point where the take-up lever lifts closer to the correct hook position and the hook does not catch the thread because it is too far aadvanced.im pretty sure that if there was a separate adjustment for the lever, it would have been an easy fix.
-
So I uploaded my first video to YouTube. Sorry it's pretty bad but hopefully it shows what's going on. You can hear the ping when the thread gets past the farthest point around the bobbin case. The take-up arm starts pulling hard just before it reaches that point. I am turning the wheel bu hand. https://youtu.be/Amp5oKp6TXU
-
When I get home from work, I will stare at it for a bit and check anything I can think of. Maybe even take a video and go from there. I hope I am just missing something simple.
-
I was looking at that on my machine and even came close to trying it out but I wasn't sure so I didn't touch it....yet. unless some other idea comes up I will go for it tonight. Just to verify, at what point in the needle cycle should the take-up bar be at its highest point. From what I understand, needle and take-up leaver both max height at the same time.
-
Those screws were tight but I did tried to loosen those screws to see if I can correct it that way but the only thing that did is change the needle height. I figured that was the only thing it would do but I tried anyway just in case there was some other geometry in there I wasn't seeing. I left it at that and figured I'd ask around in case I was missing anything else. I will adjust it back tonight and maybe take some videos of what is going on. I'm usually pretty good at figuring out how mechanical things work but this is messing with me.
-
This is actually causing the safety clutch to trip. I did slightly tighten up the safety clutch last night. In the past I had to take it apart because it was dirty and stuck. Now it works properly and I started out "softer" on it knowing I would have to create up on it until it is tight enough. The timing pulleys are definitely not slipping.
-
Yes. That was my first thought when I was setting up and tuning. I tried the settings from one extreme to the other and everything in between so I thought it was just the way it is. The other day I just realized that there is definitely something up with the take-up lever. The popping is happening just as it gets pulled to the farthest point and makes it over the right side of the shuttle. The take-up arm is already pulling it tight. I hope I'm explaining it clearly and correctly.
-
The hook is where it should be on the needle and it sews without skipping. The take-up leaver just seems to be pulling way too soon to the point that I can see the slides, rods and bushings in the head stressing to get the thread past the bobbin shuttle. I'd bet the thread would break every time if I used smaller or weaker thread. The take-up arm doesn't reach the top until the needle bar is well into the down position.


