-
Posts
76 -
Joined
-
Last visited
Content Type
Profiles
Forums
Events
Blogs
Gallery
Store
Everything posted by Mizzy
-
Thanks for your responses! I’ve found some information on adjusting a Bernina here https://www.picuki.com/tag/bernina117 but not sure how relevant it is to my Singer 307g2, but here’s part of it in case you don’t want to read the whole article. I use a dial indicator mounted on a flexible arm magnetic base to adjust the straight stitch on a zigzag Bernina 117. I was getting a slight zigzag while the machine was set to straight stitch. A dial indicator is a basic measuring tool that has a plunger on one end. As the plunger moves in and out of the indicator, a needle on the dial shows the measurement of the distance. Each line on this dial indicates .001 of an inch (one thousandth of inch = .0254mm). After mounting the indicator on to the flexible arm I set the plunger against the block that holds the needle bar, depressing it until I get a reading on the dial. I then zero the dial by rotating the face. As the needle bar moves back and forth it depresses the plunger causing the needle on the dial to move. Using a 5mm screwdriver I loosen the limit stop and slide it to the center of the shaft. Then I turn the zigzag lever to maximum zigzag to get access to the adjustment screw. Then I loosen the screw with a 2mm screwdriver and then move the zigzag lever VERY SLIGHTLY, then tighten screw and move the zigzag lever back to straight stitch. Rotate the hand wheel and watch the dial indicator if the needle moves more than it did when I started I readjust moving the zigzag lever in opposite direction after loosing the adjustment screw. I repeat this adjustment procedure several times until there is very little movement of the needle on the dial indicator. I was able get the movement down to less than one thousandth of an inch. Then I readjust the limit stop so that the zigzag lever can move between straight stitch and full zigzag. You will need to swipe to watch part 2 and 3 of the video. I apologize to the machinists that follow me but most of my followers do not know how to use a dial indicator.
-
That’s so kind of you Constabulary, I’ve sent you a private message with my email address.
-
Thank you Tegas, I’ll give that a go. I plan to start restoring this one too and part of that is usually a good clean with kero to remove all the sanding residue, but I’ve never soaked the inside before. Thanks Constabulary, I didn’t know about that set screw and now the needle is dead centre when straight, but as you said, the zigzag problem remains. Great tip, thank you. Yes I’ve played with those black setting knobs but nothing changes. Another thing that happens is if the lever is at 0 and does a 2 mm zigzag it will only do so with central needle position. If it’s set to left, the needle strikes the plate on the left side. If it’s set to right, the needle strikes left on the plate. But only in zigzag, if it’s sewing straight the needle penetrates the hole exactly left, centre, or right depending on where it’s set to. And also when the lever is set to 6 it does a perfect 4mm zigzag no mater which position the needle is in. At the back of the machine is a screw that seems to go through to the front (guessing actually). Does that screw play a part in adjusting the zigzag lever? I haven’t touched it as I can’t find any information about it.
-
My apologies if this has been covered already, however, I can’t find it if it has. I recently had to replace my original Singer 307g2 with one that doesn’t zigzag properly. It’s a shame but I had no choice (see below). When the lever of this new machine is at 0 on the extreme left, the machine does a small zigzag but it’s supposed to be straight. When the lever is moved to nearly the middle it does a straight stitch, and when the lever is at the extreme right at 6, it does a wider zigzag but only 4mm wide, not 6. Can anyone please tell me why this might be? Ok so here’s what happened. If you’ve seen my previous posts you might remember how much work I put into restoring my original 307g2. Anyway, during the summer here in Australia our house was slowing becoming surrounded by bush fires and so we evacuated along with our most precious possessions, one of which was my 307g2 head. Unfortunately, once the danger had passed and we were returning to our property, my husbands ute side gate failed and the crate holding my machine fell out, the head bouncing along the bitumen road like a ball. Destroyed. I was gutted but my husband found another one and had it shipped in, yet it’s not working properly. That’s the old one below. Can anyone help please?
-
Thanks everyone!
-
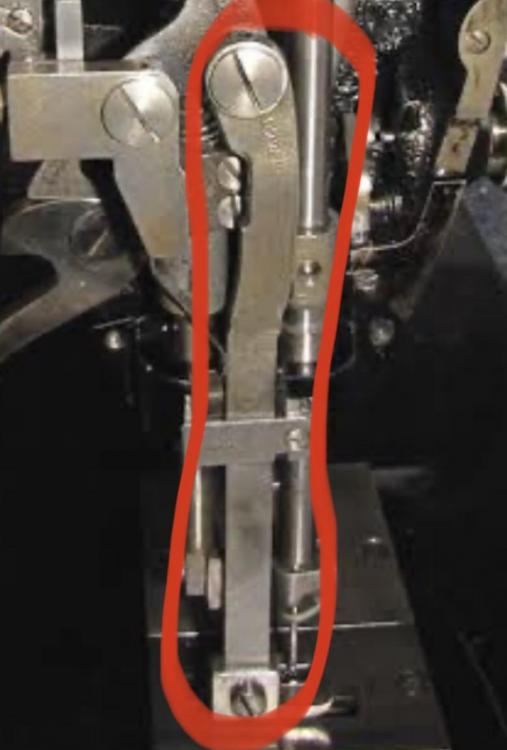
Can I have your opinion please? I’m after a vibrating presser bar for my k6 (part number 97739) but can’t find any for sale. My question is, would it be possible to take that same part off my other k6 and get someone to copy/manufacture a replacement part? Has anyone successfully done this? I know the part would need to be precisely cut so as to not disrupt the smooth operation of moving parts when reinstalled. I found a picture here on the forum of the part I need (thanks constabulary), and it seems to be not overly complicated. What do you think?
-

Size of servo motor for Singer 132k6 please?
Mizzy replied to Mizzy's topic in Leather Sewing Machines
Awesome, thank you. Knew you’d come through for me x -
Hello everyone, what an awesome site this is. Whenever I need otherwise unobtainable information I’m guaranteed to find it here! I have recently purchased a Singer 132k6 that had an old noisy clutch motor fitted (left it with the seller) as I want to run it with a servo motor. The old motor was huge and heavy, but it powered through the thick leather as he demonstrated the machine’s capabilities (wow!!!!). I’ve seen adds here in Australia for 1,500 watt servo motors but they cost a fortune. Would an 800 watt motor suffice?
-
You’ve really done a top job there, and I love the slide show. Talented! When you took the needlebar assembly out did you only remove the bracket at the bottom in order to free it? I’m following the military handbook on disassembly instructions for needlebar removal and according to this booklet once that bracket is removed the unit just slides out. Mine doesn’t. Can you please tell me, did you have to do anything else to get it out? I really appreciate the advice I get on this forum, I couldn’t work on my machines otherwise. Thank you
-
That’s beautiful! Can you post a few more pictures of the cleaned internals please?
-
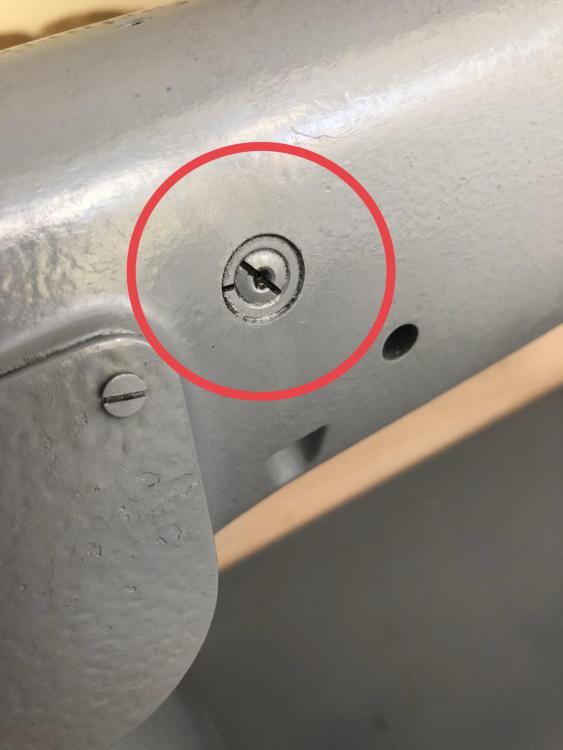
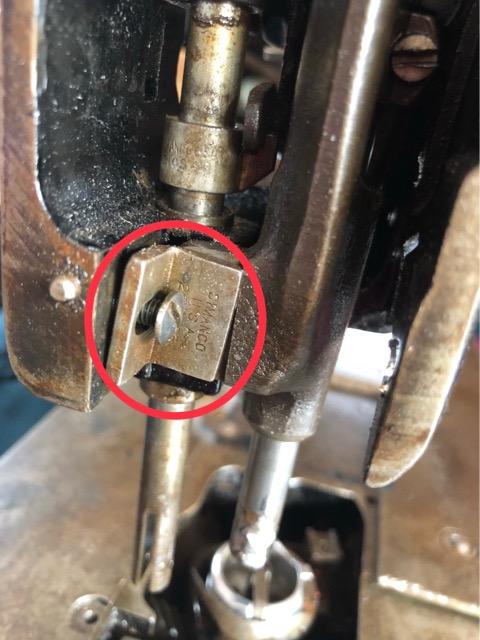
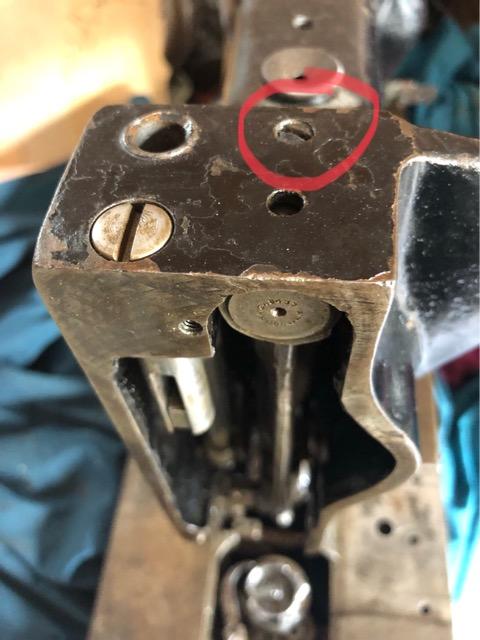
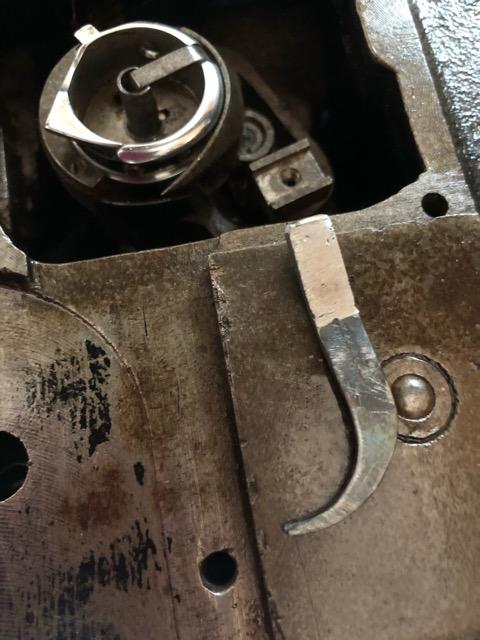
Thank you for your help, much appreciated! My husband tig welded that broken piece back together, just have to drill a hole now. But first, I’m trying to remove the needle bar assembly which is the first step in replacing the take-up lever. Picture 1 shows the bracket screw and positioning bracket, which I removed, but apparently the needle bar assembly just slides out. It doesn’t. Picture 2 shows a screw that isn’t mentioned in the military handbook disassembly instructions for a similar machine. Maybe that’s keeping the bracket from sliding out? Anyone please? Picture 3 shows the bobbin case opener tig weld job. I think this is a good option when replacing broken parts that are near impossible to find.
-

juki Thread take up replacement Juki 562/563
Mizzy replied to KCB346's topic in Leather Sewing Machines
Thanks Cowboy -

juki Thread take up replacement Juki 562/563
Mizzy replied to KCB346's topic in Leather Sewing Machines
Hi Uwe, thank you for putting that page up. I’m going to attempt replacing a take-up lever in a Singer 112g141 and I’m wondering if those instructions might be applicable for my machine? -
Apart from antihistamines and an epi pen on standby (for when my throat is affected), the very best solution is prevention with protective gear as you have all wisely noted. Thank you. I hope others take heed, seeing is believing, as they say. The reaction lasts for about two weeks; imagine the looks my poor husband gets when we walk around our small country town together with this face?
-
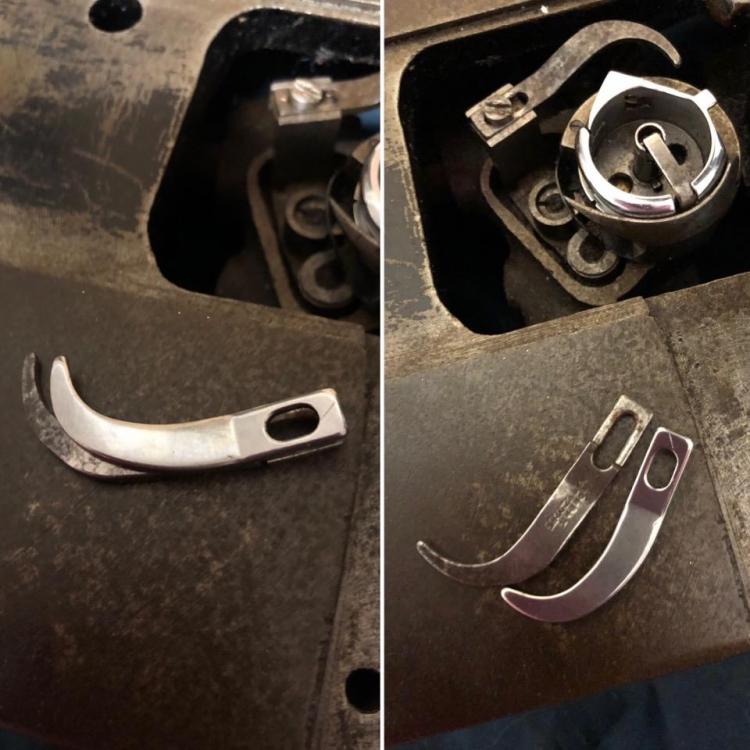
Oh Simanco hahaha damn blonde hair I got the take-up lever from Sewing Parts Online, and I’ve already purchased the opener. But yeah, guess what, it’s wrong too. I queried it and the seller says you have to “adjust” it to fit. Really? The new one shown here with the old are totally different lengths. Thanks for the info Constabulary, you’re always so helpful.
-
That’s right Dikman. The aluminium one looks out of place to me, and it has Simanco on it rather than Singer. The end flywheel screw is missing too but the wheel doesn’t seem to need it in order to stay in place. Should I be worried? Thanks Mikesc, I’ll have a go at that once I can set a needle. See, that’s another problem right there. The 1/2 inch spaced dual needle holder was welded onto the needle bar, but I hacksawed the weld off carefully and removed the holder only to discover my newly purchased 1/4 inch double needle holder is a tad too small when screwing it up into the needle bar. It falls out! So I won’t be getting another one off eBay ... maybe someone on here sells one? I have multiple challenges ahead that I know of. A broken bobbin case opener, changing the 1/2 inch spacing to 1/4 inch for the rotary hooks, and replacing a broken take-up lever (which just cost me $120 with shipping). So I’m committed seeing the machine head and parts have already set me back $260. Changing that take-up lever is going to be hard!
-
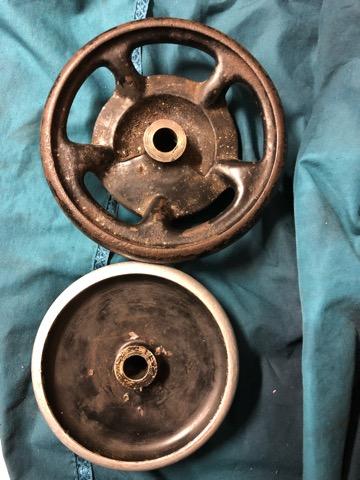
Can you please advise me? If I wanted to change the flywheel from the current aluminium to an older steel one that fits, can I? This flywheel that I prefer isn’t symmetrical though, and I can’t find out why it would be so. I have several and they’re all the same. Does anyone know the significance of it being different?
-

Singer Machine With Table and Motor
Mizzy replied to Sheilajeanne's topic in Leather Sewing Machines
Thanks Wiz. My Singer 107w1 managed sewing bike vest patches on quite well, but for multiple overlapped layers of suede, as in the pink eagle on my own bike vest (in my cover pic), I had to take it easy. I upgraded to a 111g156, which is excellent so far, but when I come across a patcher I’ll give it a try. -
Thank you for that link, great job!
-
I should have added this before. Something in the old Singer paint (dust when you sand), the cleaning chemicals, or the paint/resin applications causes severe allergies if contact with my skin occurs. So gloves, mask, and complete coverall clothing is a must. Check out my face when this happens.
-
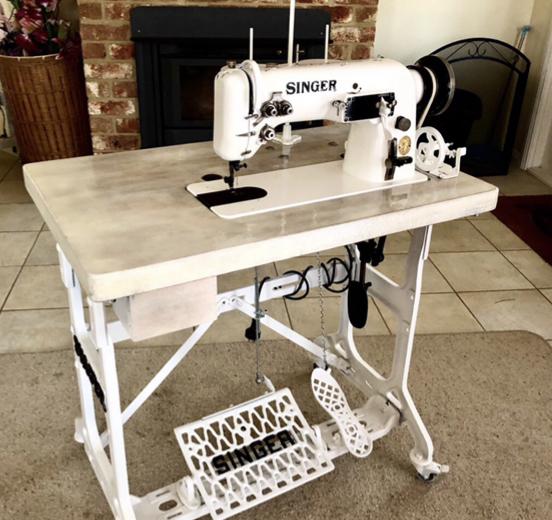
After removing all bits externally that can be removed, I use a wire brush and kerosene to degrease and remove rust if heavily affected, otherwise turps and stiff brush. I “rinse” internal parts with WD40, wipe clean, then use Singer oil to lubricate again and bearing grease where applicable. I also slip a very thin tool (knife, screwdriver) behind the model and Singer badge on the body and gently, evenly, prise them off along with the pins. Take your time, you don’t want to kink them or rip the plates off without the pins. The pins CAN be removed from the inside with magical hands and tools, none of which I have. The machine looks so much nicer when repainted with everything removed first. Once cleaned, primed, repainted and with new decals in place (Keelers USA, approximately $20 Australian) I use a two-pack polyethylene clear coat, very sparsely, to keep the decals intact and provide a hard wearing barrier. It doesn’t yellow with age, unlike two-pack epoxy resin. But resin is tougher, so if yellowing isn’t going to be noticeable use that.
-
Mikesc thank you. I also have some in the living room on individual tables - 5 actually. There’s several in the garage and about 10 loose heads floating around. My poor dear husband. He puts up with all this and still treats me like a queen.
-
Thank you Chrisash, I’ll add another picture when she’s done. I’m currently resining the table top with lots of pink glitter.
-
Thank you Dikman! Yes for a hobby, and I sell them occasionally so that I can buy more parts. But I also love sewing and prefer working with Singers dressed up nicely. I keep the 6 most precious ones in my bedroom (very tolerant husband who also lifts, welds, cuts table tops, routes hinge holes etc), so they have to look pretty. I’ve always made everything I could from simple clothes to leather projects and of course countless heavy duty repair work. Old Singers are simply gorgeous.


