AdamTill
-
Posts
112 -
Joined
-
Last visited
Content Type
Profiles
Forums
Events
Blogs
Gallery
Store
Everything posted by AdamTill
-
Lacing Help For Carved Hotdog Roasting Stick Covers
AdamTill replied to AdamTill's topic in How Do I Do That?
They're the Tandy ones, and thanks for the pointers. I think I probably should have no issues now. I may do the same, but I thought it'd be worth trying to make use of what I have at first. Super, thanks! I googled the title, and found that Tandy actually has that on their website: http://www.tandyleat...ft-ABC-pg3.aspx Yeah, I don't need to practice that language if I can avoid it It's bad enough that working with folks in the oil patch corrupts my language as it is! Immensely, thanks a ton! You bet. She's the kind of lady you keep happy because you want to, not because you have to. Thanks again! Adam -
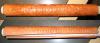
Hi folks, Was hoping for a little advice about how to go about lacing some leather covers onto dowels that will be the core for some fancy hotdog roasting sticks. These are a Christmas present that my girlfriend with be giving to her dad, so I'd like to get them looking nice! Any suggestions on patterns, or even how to go about this? I was originally going to lace them on like the back jockeys of a saddle, but the dowel makes that difficult. I have sides of latigo and chap leather, and was hoping to use either of those to make the lace. I tried splitting down some chap leather to use with lacing needles, but I can't get them to stay stuck to the needles, so I'm missing something there. Sorry for the overexposed photo, but the camera batteries were about to die. The carving came out decently, but I was disappointed to lose most of the burnishing when I needed to form the leather over the dowel immediately after the tool work. I didn't want to have to tool them in place over the dowel, since the radius is so tight. Still, they don't look too bad, and she's thrilled so far (which is the most important part!) Any help gratefully appreciated! Cheers, Adam
-
Good job on the saddles, and nice pics! I'm envious of the amount of room you have on that Icelandic back when you're not trying to fit a full-sized Wade there! (I have an Icelandic as well). Cheers, Adam
-
Weaver carries them.
-
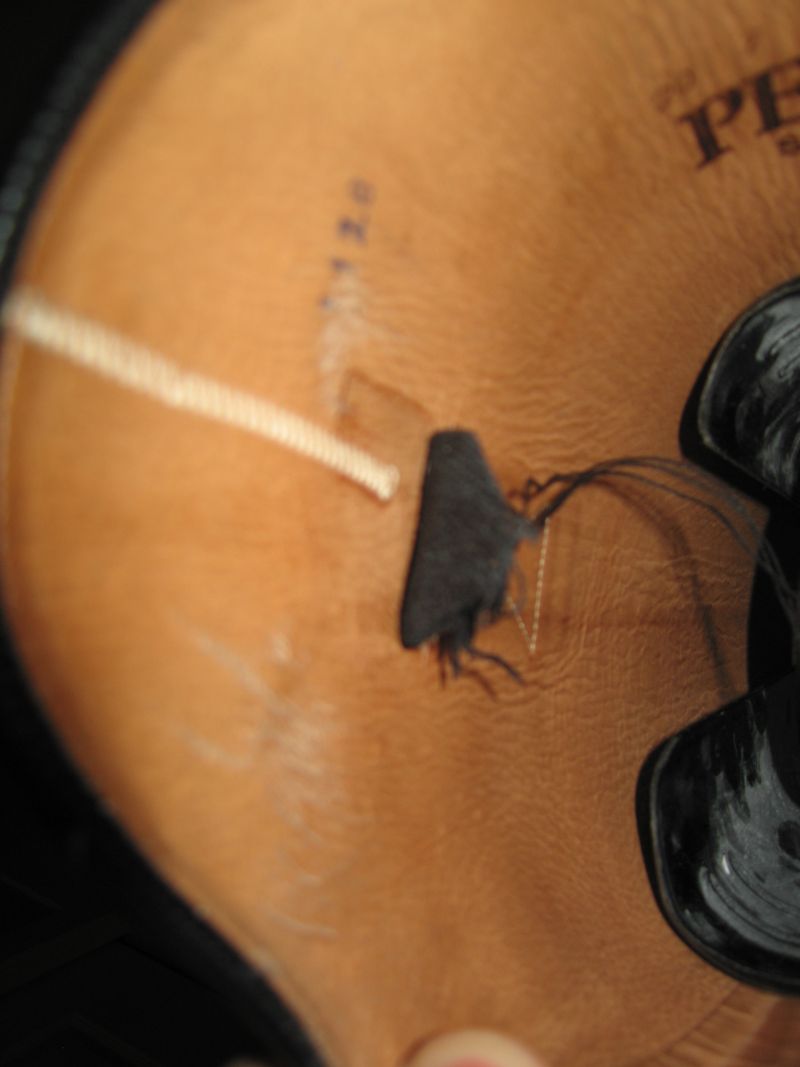
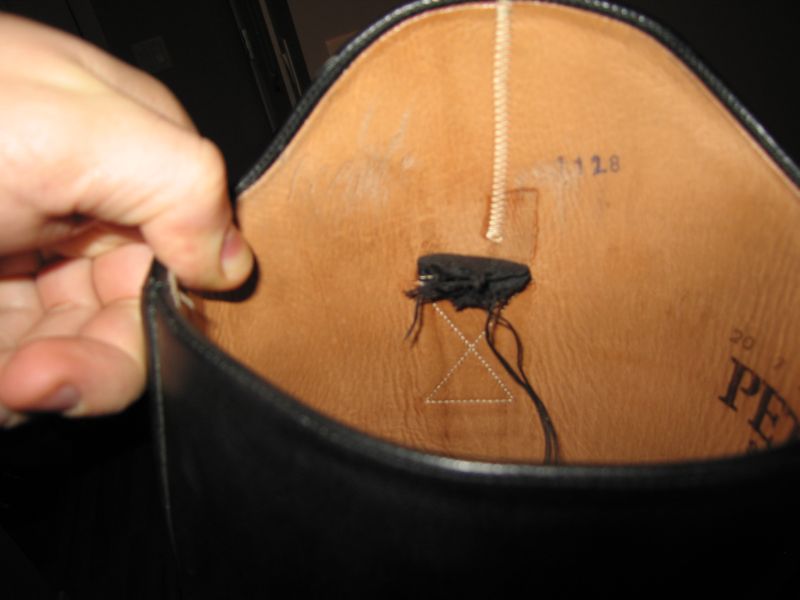
Hi folks, The boot pulls on my girlfriend's dressage tall boots have both failed, and she's hoping to get them repaired. Any chance any of the bootmakers here could tell me how it would be properly done? The original pulls were stitched only to the lining leather, and so replacing the whole pull seems like a huge job. She got a quote from a local person who said that he'd have to stitch all the way through the outside layer to fix them since this isn't machine accessible, and she doesn't like that thought at all due to the aesthetics. Her other option was to put zippers in the back (what she'd originally wanted when she ordered these), but that sounds like major surgery as well. My only thought was that it might be possible to hand stitch something to the remnant tab, but my skills are limited to saddle stitching larger items. Thoughts? I'm going to take them to another place in town that deals with military dress boots and such, since they might have someone who can help. Thanks folks! Adam


-
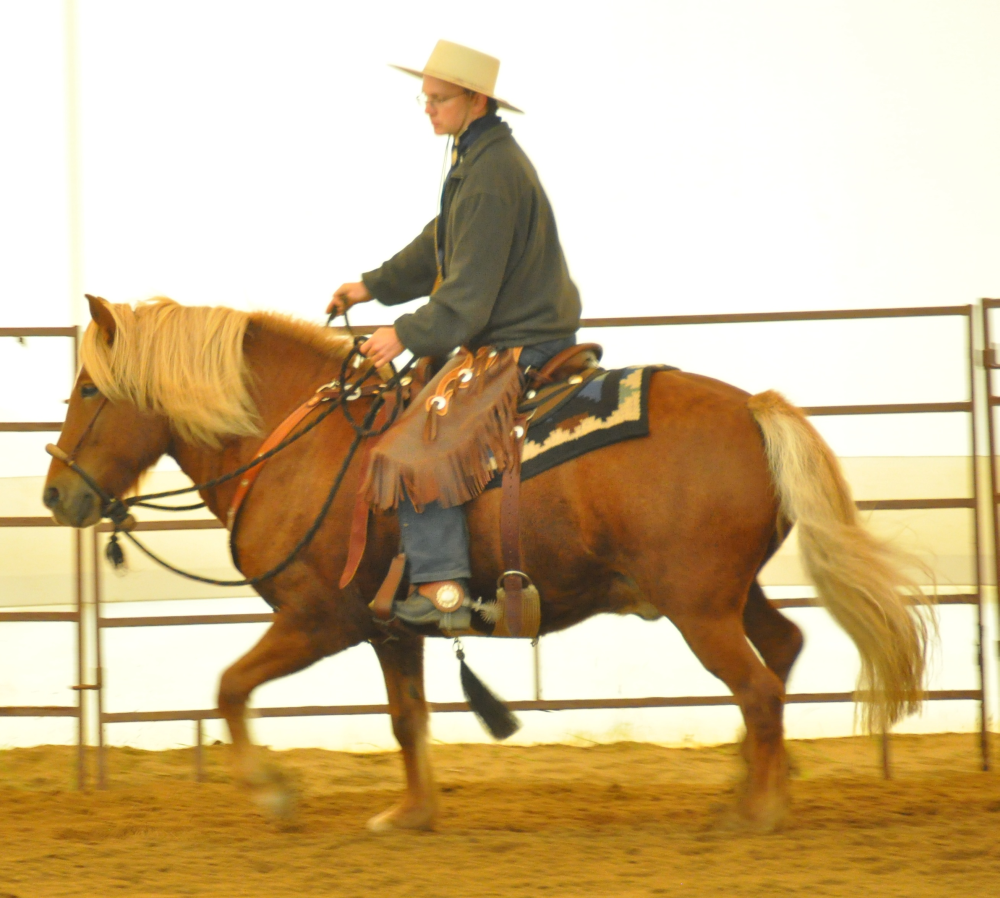
"Gaited" horses are basically any horse that have ways of moving in addition to the standard gaits of walk, trot, canter, and gallop. There are dozens of such breeds all over the world. My Icelandic, for example, has a good running walk, tolt, and probably a flying pace as well. You can see a little bit of the running walk in this old video: http://www.youtube.com/watch?v=vn2DCQQcN4E IMHO, the concept of a gaited horse saddle is marketing nonsense. The usual excuse is that somehow gaited horses need a greater range of shoulder movement then a normal horse, but I don't see how that's possible. You build a saddle to fit the horse in front of you, and it's not like a long trotting ranch QH needs less freedom of movement then a Tennesee Walking horse. Lots of gaited horses like mine tend to be a little shorter backed or more compact, but the fact that they're gaited is just interesting information...not useful for making saddles. Cheers, Adam
-
Hey Kevin, Their site is a fraction of what they actually sell, I'd give them a call. Cheers, Adam
-
I work on a bunch of horses, and I modified mine to have three pockets - left and right handed hoof knife + hoof pick. I then added a 2" deep pocket at the base and a tie strap at the top to allow me to hang a rasp while I work with the nippers. Maybe a magnet to allow you to hold old horseshoe nails. Just a thought. The three pockets vs two would be welcome, at the minimum.
-
I get mine from Caledon in Calgary. Cheers, Adam
-
Hi gents, I apologize if my comments came across a little harsh, but I wanted to give the unvarnished truth because I believed that's what was being asked for. I know I always appreciate getting it from others. Unfortunately the horse world seems to be more full of nonsense and pointless tradition then anything else I've ever been involved with and it colors how people think, so I thought I could help with the owner's side of things a little. As an example, back a bunch of years ago I was selling a 17hh warmblood horse for about $3500. I'd bought him lame for that price, rehabbed him, and was going to sell him. I figured he was sound and well trained now, but since he was a few years older, I offered him for sale at the same price that I'd paid. A friend strongly encouraged me to price him at $10k instead, saying that people from the jumper world generally assume that there's something very wrong with a horse that's less then $10k and wouldn't come out to see him. Boggles the mind. I did want to commend Jerry for being this concerned about doing things right, since it's nice to see! It must especially be very satisfying to be able to help people who can't afford the really expensive gear, but please don't shortchange yourself. If the market can bear it, be proud of the quality you bring to the table, and charge accordingly. Best of luck! Adam
-
Bob Douglas seems to make the best ones out there from most reports. Ken @ Caldeon in Calgary is where I got mine from. Tried a few others first, but won't go back now. They weren't cheap ($25? Can't remember), but worth every penny.
-
Hey Jerry! I'm speaking here as a customer rather then a saddlemaker, since I wouldn't be qualified to do otherwise. I will say that while I think it's ridiculous to choose a saddle based solely on price, I do let price be somewhat of a guide in narrowing ranges down for quality purposes. I'll be perfectly honest, I just had a conversation with a friend a couple of days ago where she sent me a link to a saddlery website, and my recommendation was to avoid it specifically due to their use of inexpensive trees and the sub-$1k price of their new saddles. I've done enough leatherwork to have an appreciation for the sunk cost of tooling and shop space, and when added to the cost of good leather sides and hardware, I don't see how you can feed your family on a $750 saddle? Likewise, I don't know that I feel I could trust my neck to a saddle built to a price. Having recently found a wonderful lady who's made my life a whole bunch better then it already was, I'd hate to lose the chance to spend more time with her after a saddle contributed to a preventable wreck for either of us. Not meaning to denegrate your product at ALL, let me emphasize, but that's just what I feel when I know folks are trying to make profit out of a low-margin item. I've also been a big believer in charging what you think your time is worth, so do be aware that people will judge your opinion of yourself accordingly. I guess it largely depends on what segment of the market you're looking to trap. Nothing wrong with a production environment, but don't try to do custom work at production rates. As a customer I'm coming from the perspective of wanting a saddle that will hold up to a full day's work and outlive a few horses, mind you. The saddle I've ridden most often was $1500 new, but has a good rawhide tree in it and strong rigging which I went in and modified a bit. The cost savings come in that it's not a roping saddle, the covering is about 50% cordura, and made production-style. I recently got a $5k ranch saddle from one of the members here, and I can see where the added value comes from pretty easily. Likewise, when I look at my lady's dressage saddle (which is worth about the same), it's pretty obvious why it cost what it did. The other thing I considered was, like the Nissan pickup I drive, I wanted to be able to have some safety in my investment financially in case it didn't work out. Every time I've had to trade in a domestically branded vehicle, I've lost my shirt. Likewise, while I fully expect I could resell my $5k saddle for the same price I bought it for, I doubt I'd get much more then 50-75% of the price of the less expensive saddle. Food for thought, anyway, hope it helps. Cheers, Adam
-
Help With Coloring Dark Sheridan Halter Noseband
AdamTill replied to AdamTill's topic in Floral and Sheridan Carving
Hi Keith, Thanks VERY much, that's exactly the sort of effect I was hoping to create. That gives me a minds-eye picture to shoot for now. Thanks also on the pattern front as well. I'm getting a little more confident on the execution side of things, but I'm still very green on developing anything different. That pattern was just adapted from one of Chan Geer's belt patterns (I'm still very much standing on the shoulders of the folks like yourself who've been doing this), but I can really see what you're getting at in terms of minimizing backgrounding. Anything I can do to increase the carving area on straps this small is very welcome, so as much as my hand drawing skills need help, I'll give your suggestions a go. My halter hardware should be coming in soon, so I'm going to get started in the near future. That should be enough time to redraw some patterns. Much obliged! Adam -
Hi folks, Would appreciate thoughts on a halter project I'm going to be starting in the near future. This is intended as a gift for a special lady in my life who has a grey Arabian, and as such, I was hoping to do it in a very dark colours (grey's typically looking best in black tack). The problem is, as you all know, black annihilates most carving, especially of the more delicate variety. As such, I was thinking of dyeing the edges to the border line with black oil dye, then using a black antique on the tooling. I've no idea how it would look, however, and while I'm going to attempt some test pieces I thought I'd ask here for some advice. Dyeing the background black would work too, but it would be nice if the border and backing leather was black since that's the dominant structure. Any thoughts? I'll attach the noseband pattern here, but I was going to fully carve everything. Cheers, Adam

-
Modifying A Saddle Tree, After It's Finished?
AdamTill replied to HorseGirl98's topic in Saddle Construction
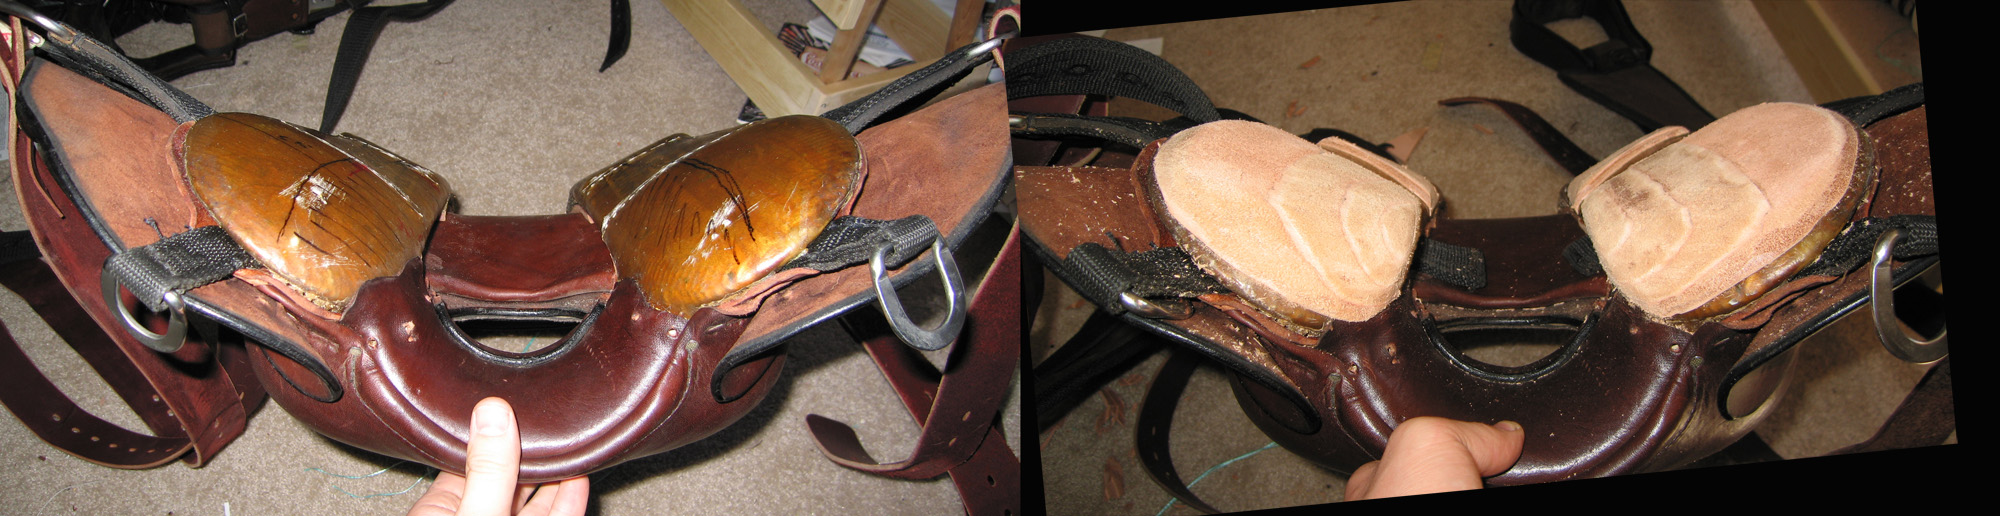
There are ways of getting around actually modifying the bars themselves if you're feeling brave, but they do involve lots of work and a working knowledge of fit. I have a saddle that I wanted to modify to fit a different gelding, since it generally fit but tended to slide back a bit and dive down in front. I used layers of skivved leather added to the tree to modify pretty much the whole bar, and have been riding that quite successfully for a few months now. I like the leather option because, while it adds a bit of weight, it's reversible later on. One tricky part of modifying the tree is that the skirts may not cooperate when you go to put them back on as well, so do be careful if you try this in the future. This particular saddle had cordura skirts, so it wasn't a big deal at all. Adam
-
One of the saddles in the latest TCAA catalog was done this way too, if memory serves. (Yep, Pedro Pedrini pg 60 http://www.nationalcowboymuseum.org/events/tcaa/catalog.html)
-
Issues With First Pair Of Chinks
AdamTill replied to AdamTill's topic in Saddle & Tack Maker Gallery
That's a good point, but I was actually doing that before unfortunately. Prior to the alterations the issue was the front parts of the belt digging into my sides above the points of my hips whenever I'd turn in the saddle, but it seems that the extra inch or so of beltline to top leg curve was to blame. I've since put in about 30 hours in the saddle riding them, and life is good. I've all but forgotten I'm wearing them, which is exactly what I wanted.

-
Police Saddle For My Bfb Mare? Other Suggestions.
AdamTill replied to Newfman's topic in General Saddlery Discussion
<br /><br /><br />Just as a bit of a terminology point, your saddle is actually just bar-less, not truly treeless, since it has fiberglass pommel arches and some sort of rubber cantle insert. I sympathize with your plight, since my Icelandic is wider then any of the fork or cantle templates from the Dennis Lane system. Glad to hear things are working out for you, but you had better luck with those types of saddles then I ever did. My horse never complained, but I found the lateral stability to be lacking with the model I used for a while, and the soft seat was miserable to sit in for more then a couple of hours (I can ride hard seat saddles for much longer). In the end I had a custom Wade done up for him and modified the tree on another saddle with a few leather shims skivved to shape (skirts went back on fine), so I now have a couple of saddles that fit. Both of us are much more comfortable in those, so if you can save up for a custom saddle that would be my recommendation. That said, if it ain't broke, don't fix it. To your point above, I'm just as picky about fit with my custom saddle as I was with my cheaper ones. My "cheaper" saddle is just less expensive, not lower quality - as an endurance saddle it's cordura for weight reduction, but still has a good rawhide covered tree. If Ray Hunt wouldn't call himself a horseman I'm nowhere close to worthy of the title yet either, but no horseman ever blamed his horse for a tack problem. -
Issues With First Pair Of Chinks
AdamTill replied to AdamTill's topic in Saddle & Tack Maker Gallery
Hi Mark, Thanks, and no worries...I had a couple of threads going. Life seems to be good now, so all that's left is to get them good and dirty! Thanks again for the DVD, and sign me up if you ever do an armita pattern. Cheers, Adam -
Issues With First Pair Of Chinks
AdamTill replied to AdamTill's topic in Saddle & Tack Maker Gallery
Hi folks, Took a while to get back around to these since I've been working on a couple of saddles in the mean time, but I finally had a chance this weekend to make the alterations I mentioned above. I restitched the belt panels 1" lower down, and shortened the leg bands so that they fit on the leg strap's middle hole. Grinding the heads off 14 copper rivets was a pain, as was picking the bits of stitching out of the separated pieces, but but it was pretty quick to resew everything together and they don't look any the worse for wear from the front. With those alterations, they rode really nicely last night, so that just confirms that I should have followed Mark's directions better in the first place! When I went back and rewatched the DVD, I'd made the beltline too high, and that's why they were riding up so badly I think. Thanks for the help BTW, most appreciated! Adam -
Floral Carving Large Areas...practice Or Technique?
AdamTill replied to AdamTill's topic in Saddle Construction
Ah...there seems to have been a fundamental flaw in my education somewhere! I think I read the part about losing tooling depth when you rewet, and generalized it to be "never rewet". This will make life considerably easier. I must confess, having seen some of the TCAA work, I was trying to picture doing those pieces in a single sitting with great admiration. The admiration is still there, but there's a sense of relief now on my end! I've had Jeremiah Watt's carving DVDs on order from my local leather supply place for about 6 months now...maybe I'll bug them again to see if those are finally in... Thanks all, much appreciated. Adam -
Hi folks, Over this last year I've been working on my floral carving skills in order to move towards being able to do saddle work. So far, so good, and I have a good selection of belts and nice pair of chinks that I'm pretty happy with. I also have a great cordura saddle built on a good rawhided tree that I'd like to rebuild in all-leather slowly, and so I'm starting to think about doing a fender or set of taps as my next project. The only thing I'm a little concerned about is having enough time to get the work done. When you go to do a large area of tooling (like a fender or eagle bill tap), do you work in sections or do all of one step at once? (like bevelling or thumbprinting, for example) I think I've read here that some people will use glass sheets to keep moisture in or to case, and is it a question of doing all the carving from swivel knife work through to finish cuts in one section then moving on, or do you do ALL of the swivel knife work before moving to bevelling etc? I seem to have a working time of about 4 hours before I'm starting to lose appropriate moisture levels. I'd rather not have to rewet areas to avoid water marks and wrecking work that's already done, but I also don't think I could tool an entire 22" tap in four hours. Am I biting off more then I can chew right now and just need to learn to run the tools quicker, or is there a technique for doing larger areas here that I'm not aware of? Thanks for your help, Adam
-
Computer Drawing Software For Making Leather Patterns
AdamTill replied to Blackey Cole's topic in Computer Help
I confess, I clearly haven't that far. I know AutoCAD too well to bother duplicating the effort in PS, though I shoudn't have said that it wasn't possible if it is. I still don't think PS has the same grips, snaps and intersects that CAD allows though, and the measuring functions aren't quite as developed (ie, sometimes it's nice to snap a quick angle dimension to know that you need to rotate something by 1.6 degrees). Most people I've talked to say that creating things in Photoshop is a lot more effort then in other programs, in that it's really optimized as a means of editing or modifying images. Good word to the wise for folks that might be wanting to chose one or the other though. -
Computer Drawing Software For Making Leather Patterns
AdamTill replied to Blackey Cole's topic in Computer Help
I don't have heaps of free time at the moment, but I'll try if I can. You'll need to be able to explain what you'd like to someone whose knowledge of firearms is limited to finding "Top Shot" entertaining, however...never even handled a gun before. Pictures of construction and/or final products would be most helpful so I can get my mind around the geometry involved. It's lazy, but I don't bother with scales, actually. I just work in generic units (I assume 1 unit = 1 inch). To make sure I don't exceed the print boundaries, I draw a rectangle the size of my output paper (11x17, 8.5x11 etc), then set the print extents by snapping to the corners of the box. If you make a bunch of copies of the rectangle on a different drawing layers, that makes it easy to see how your pages will tile out. When you print, you then just set the printing scale to be 1 unit = 1 inch, and you're done. Getting into scales is important for engineering drawings, but we print everything full size, so there isn't the same need. -
Computer Drawing Software For Making Leather Patterns
AdamTill replied to Blackey Cole's topic in Computer Help
Hi folks, I've used AutoCAD for work for the last 15 years or so, so that's my preference when it comes down to making patterns. I still use a VERY old copy of R14, which you should be able to pick up on ebay or the like for less then $100 (I've seen 2008 on there for about that). I'm also quite fluent in PhotosShop, but less so in Illustrator so I'm not sure how they compare. The advantage of a CAD program over a photo editing program is that in CAD the lines are "alive", and you can interact them with one another. As such, if you want to clip one line where it intersects another, that's pretty easy. Likwise, if you want to extend a line to meet another, meet one perpendicular to another, or blend a curve through a series of points, all are straightforward. In Photoshop you can use layers and overlay things, but the lines don't really interact. It's also very easy to identify the areas where backgrounding is required, because you can get the program to fill those spots with color. Where I love to integrate Photoshop is in distorting and stretching images, which is does like a champ. Oftentimes I'll start with a base image, manipulate it as I like in Photoshop, then import and trace it in CAD. The lines are then live in CAD, and I can proceed as I'd like from there. Scanner-wise, I have to admit that I cheat in that I have easy access to the photocopier at work which they don't mind me using. I'll use the scanning bed to scan large objects in sections, then stitch the images back together in photoshop. If I didn't have that, I'd go out an buy a bed scanner that would handle 11x17s (which are becoming harder to find). Likewise, I print everything on 11x17s, though I just do that at home on an ancient color inkjet. I can them tile them back together with a strip of tape back and front, and I use those directly on the leather. They don't survive more then a single project, but it's easy to just print another rather then having patterns around the shop. The learning curve is steep with CAD, but with a good book it's not TOO bad if you're a little computer savvy. I'm self-taught, for example, and it created a skill set that I then use at the office too. I'll attach an example of a pattern I'm developing as my first attempt at a saddle fender, which hopefully is somewhat along the right lines (my first effort from scratch). I scan everything I like, and this one started with the Hape saddle fender shown in a Sheridan carving book along with a set of flower and element patterns included with one of Chan Geer's DVDs. Even though the saddle fender in the book isn't a scan and so everything is a little distorted due to perspective, it provided a nice means of learning how to flow one grouping into another. Then I arranged the groupings with the proper spacings, and arranged the flowers with their stems blending in properly. I then added in flow lines (red), and adjusted the groupings accordingly (I don't know if it's verboten to use circles of different sizes, but I quite like the effect). Next the leaves got added, and I'm starting to blend their stems into the vines. I've slowly started removing the overlapping lines, and filling in areas of backgrounding in yellow. Blending the vines together seems like it would be easier to do by handso I've printed this out and will do that in the next few days, and then I'll re-scan it and digitize those transitions. Last will be to print a final copy to use as a tracing pattern, and a second as a cheat sheet in where the backgrounding will go (I find that after 5 hours of carving my bleary eyes and tired arms appreciate a cheat sheet there). Anyways, hope that helps, Adam