


MG513
-
Content Count
206 -
Joined
-
Last visited
Posts posted by MG513
-
-
Hey guys, long time no talk!
Been ghost the past few months but I've made considerable progress in my sewing and shoemaking ventures. Photos to follow in another post!
Anyway, I have a Consew 206rb. After having my machine for over 6 months, I up and decided to change out my needle, as I thought maybe it was dull and could help me avoid the occasional skipped stitch. Low and behold, I had been stitching everything with a size 22 organ needle! Now, I wasn't too upset about this, as all my work up until that point looked fairly decent. The issue comes in when I input a size 16 needle, which from my understanding is the correct needle for sewing leather, which is what I do pretty exclusively. Smaller needle = smaller hole, which gives a cleaner looking stitch. I thought I was winning, until the needle refused to actually "stitch". I'm using white 69 bonded nylon thread on some white cow leather about 3oz thick. The needle is feeding in the upper tension and the bobbin, but it's not locking the stitch, so when I stop sewing, there is just holes in my leather but no thread, on the top or bottom. Even more interesting, when I went to see on a different piece of scrap Horween leather about the same thickness, it worked fine!
Any ideas on why this is? Does my needle really just not like this leather, or should I be making an adjustment somewhere? Stitching about 8 spi.
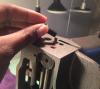
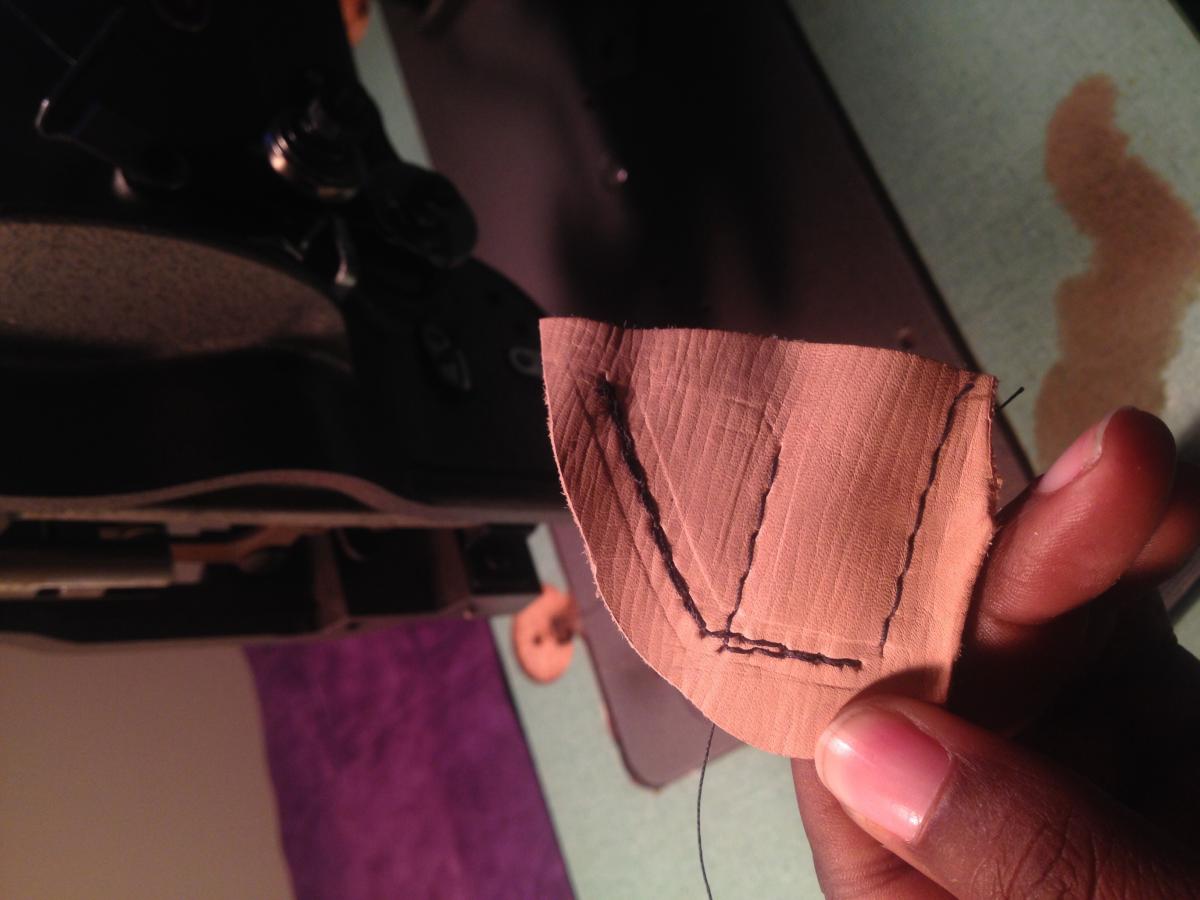
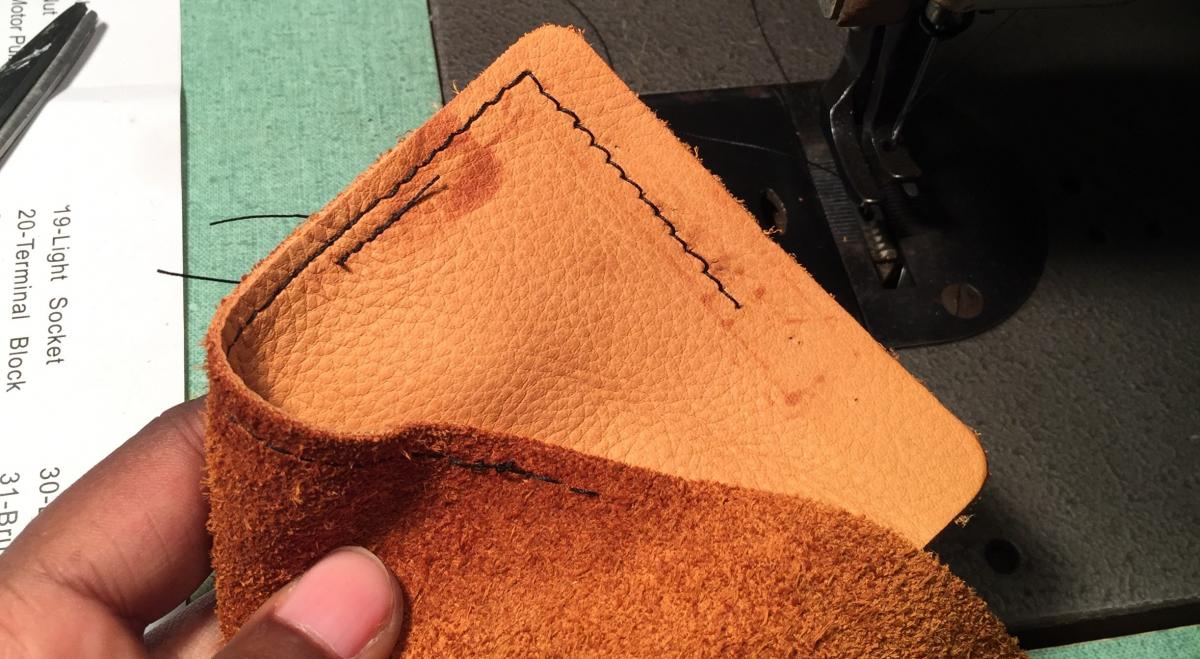
Attached a photo of the leather I'm sewing with the size 22 needle just to give you an idea of what it looks like. Thanks
-
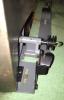
14 hours ago, Uwe said:Old posts seems have lost some images after the recent upgrade, so I'm not sure if this was covered already. In any case, I came across a needle feed conversion foot on ebay today and thought I'd share it. Apologies if it's a duplicate of a previous post.


Thanks so much!!! Unfortunately somebody bought the last one!! Just my luck!
Its unbelievable how difficult this foot is to find. You find it and it's gone that quick. Smh. Well. I have taken the advice on how to relieve the pressure and I think it did get much better. I just think I need to stay away from veg tan leathers until this part pops up again, or until I get more comfortable with my machine to try other things. I just finished my first project a few weeks ago but I've been so busy I haven't posted it yet! Thanks for all your help as you've answered so many of my questions!!!
-
No. That is the inside foot spring.
The outside foot is about half way along the arm towards the back. It contacts a flat spring that is the spring for the outside foot. You can see the spring from the back of the machine. If you follow it, you will see it connects to the linkage for the outside presser foot.
You really need to get the manuals for this machine so you can see what the parts are, and how they are used or adjusted. I downloaded the manuals from keystone some time in the past, but can't find them on his site anymore. Consew used to have a good site too, but I looked there as well, but didn't find the right link. Gregg's is a clean copy, easier to read than the others I've found.
Tom
Thank u guys so much. Sorry for the late reply been slammed with work. I'm gonna try all of this today after work at see if it helps.
Also would you guys suggest that I don't use veg tan? Since it does mark so easily anyway?? Maybe I should stick to 3-4 chrome or oil tanned leathers?? Thx!
-
Hi.
On the top of the machine there is a screw that you need to wind back a few turns. The screw is about midway on the top of the machines arm,and towards the rear. It's a screw that's recessed into the casting.
Also,if the centre foot is the one causing marks,you could remove the foot and take a sander to the teeth and take the sharpness from the teeth. I've done this on a few of my machines with great success. It's trial and error,so just take a bit off at a time and give it a whirl on some scrap material.
Thanks for the response!!! Actually, my feet do not have teeth. They are completely smooth on the bottom.
And that screw you described, it is is this one yes??
-
I forgot about this one, if you can find it. I don't have and called a few suppliers, so stock may be limited.
This is direct bolt on, no mods needed to make this presser foot work.
Ok thanks!! IS that a universal part number? Meaning if they recognize the number than I've found the right thing?
Also Tom suggested something with the spring? If I can't find this foot should doing something to the spring be the next step? Thank you!!
-
Ask Gregg at Keystone for a link to his parts list and manual. Both are identified in the parts list.
Tom
Ok I will, thank you again!
-
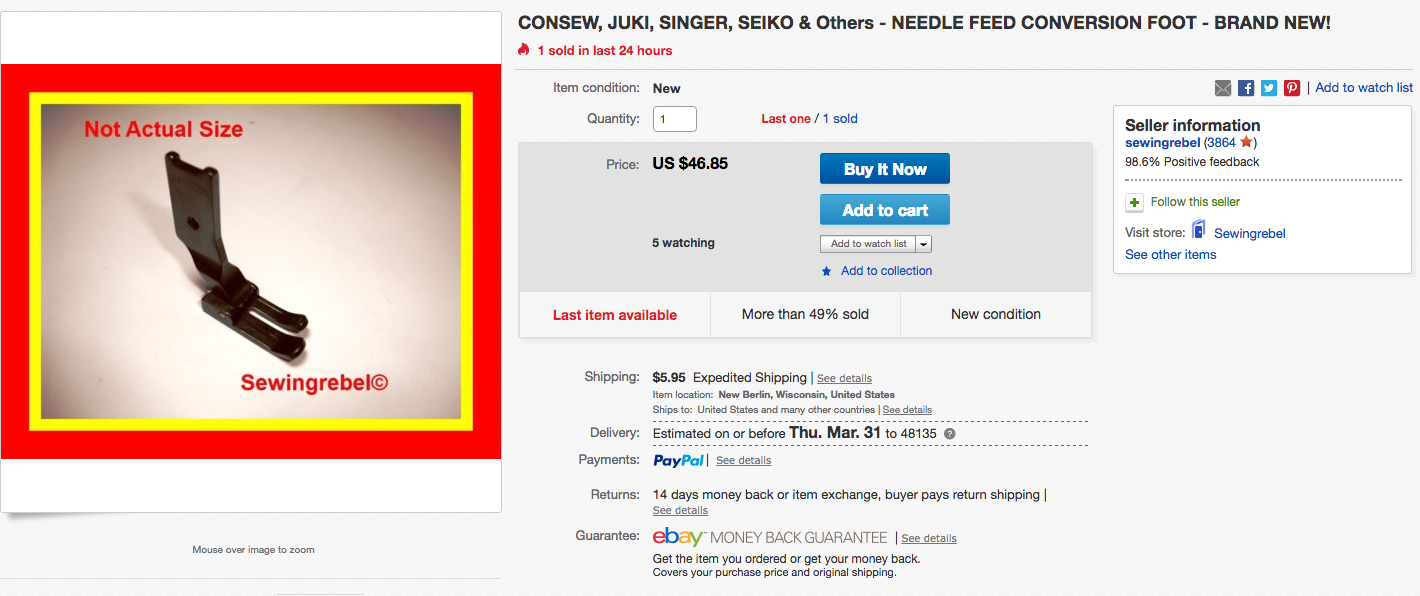
The adjustment for the middle foot is the one you were pointing to in your photo. It is vertically above middle presser foot shaft. Maybe it has the wrong spring. Could cut part of it off. Seems to me there was another thread here somewhere about different lengths of springs. You could check with Gregg from Keystone.
Tom
Thx for trying to help me! I made a separate post about it as I still haven't gotten an answer.
-
I'm pretty new to sewing. I have a consew 206RB in very good shape. The main purpose for me getting into the field is for shoe making. Before anybody goes there, I am aware that a post roller foot is the best machine for such work, but I didn't have post bed money. I bought a good machine that I could afford. I also plan to venture to other things which will require a flat bed.
Anyways, the foot marks my leather. I have already read the manual and loosened the screw at the very top to relieve some pressure, which did help. But I was told that there is a screw to loosen for the outer foot and inner foot, and since I'm a rookie I really don't know which one I loosened. It's the inner or "walking foot" that leaves marks, they can easily be rubbed out of suede, but not leather.
Anybody have some suggestions?? Even on tools that can rub marks out? Also, if you're interested in this machine shoot me a pm. If I can't figure out how to get this to stop marking my leather I MAY be looking to sell it to buy a machine that can. Located in Ohio. Thanks!!

-
There are separate adjustments for the inside and outside foot. Determine which one is marking the leather first.
Tom
Ok it's the inside foot that's doing the marking. The outside doesn't leave any marks, its the one in the middle that puts the most pressure. What should I be loosening for that?
-
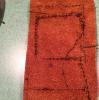
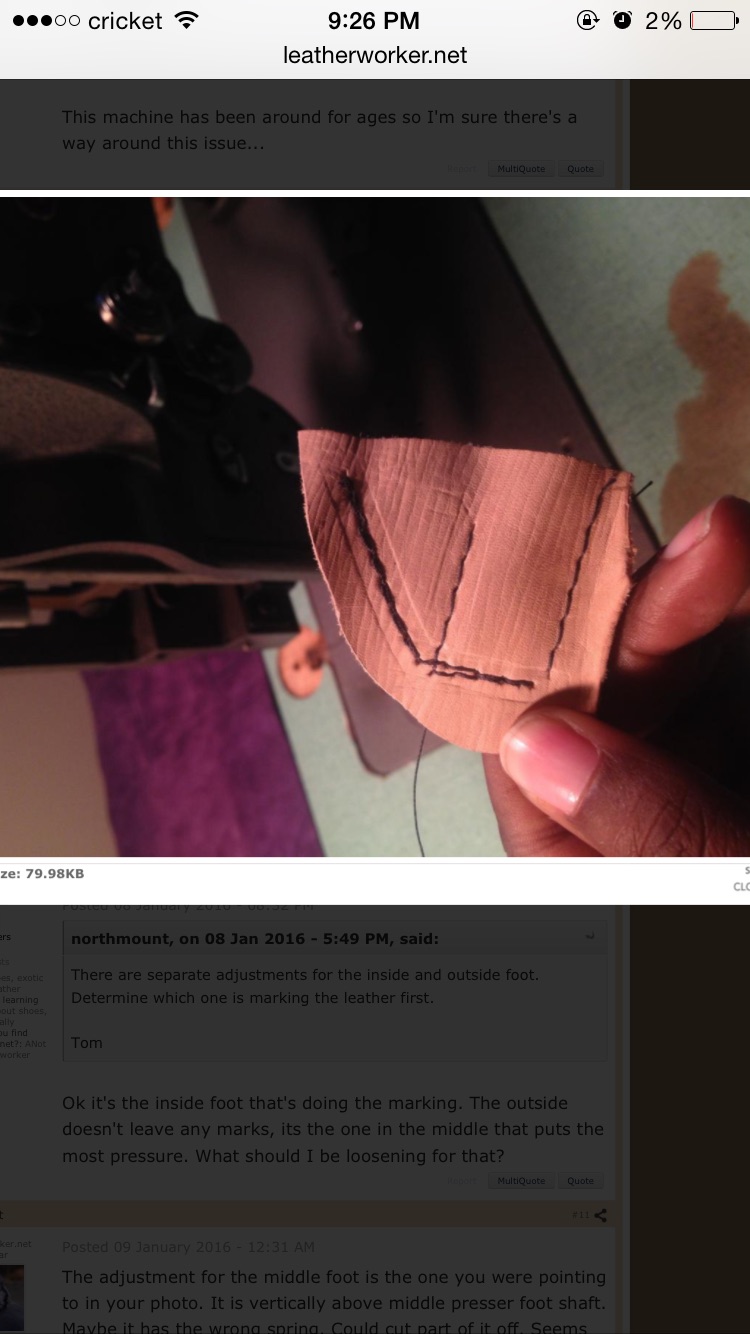
Ok here is a photo... Is that black screw that I loosened the correct one to relieve the pressure on the press or foot? At one point I had it all the out... Still marking the leather. Suggestions?
Here is a photo of the marks left on the leather... Not very attractive.


-
19412C is the standard factory inside foot with slot in front for threading. This has been the standard 206RB inside presser foot from the beginning.
That's what I thought. So that won't do me any good.
This machine has been around for ages so I'm sure there's a way around this issue...
-
No, straight stitch feet won't fit into the slotted presser bar. Walking foot machine mechanisms are usually too strong for thin garments. You might try buying a wider set of feet, then back off the pressure screw until the adjust is almost all the way up. You can reduce the alternating lift to a minimum ratio by loosening and moving the crank arm coming out the back all the way either up or down (I don't remember which way lowers the lift and I am at home now) in the curved slot that drives the presser feet. The combination of reduced lift and pressure on the feet may allow it to sew cloth.
Also, use the smallest round point needle you can get, with standard cotton or polycore garment thread. A #14 needle will do fine with polycore 40 weight thread, or a #12 needle with regular 50 weight cotton thread. Shorten the stitches to 10 or 12 per inch to reduce puckering and back off the upper tension to try to lower the knots into the cloth. You may or may not also have to reduce the tension on the check spring to get it to move with thin, soft thread.
Lynda,
Yes, you can, but why or if you should may be a different story, but for sure, yes.
It's not easy, and you have to take your machine apart a bit, and it's not recommend to do this if you wish to go back and forth.
229882 Press foot can be installed, by turning the outside lifting presser foot bar 90 degrees. You should, again, really know what you are doing before you go in to do this; you have to loosen three clamp screws that are on the outside lifting presser bar, and then simply removing the inside, vibrating presser foot. This will now be a needle feed machine.
Again, going from setup to setup, even if you are good and know what you are doing, is time consuming, and not recommended to go back and forth with.
Thank god I found this thread. I too have a Consew 206 rb and the foot leaves marks on my leather. I can rub it out of the suede, but I can't get it out of the leather. I know some flat beds (like the older singers) can have a roller foot installed, but I have since learned this isn't one of them. About a week ago I went through an online manual and called myself doing exactly as wiz said and attempting to remove some of the pressure on the foot. I'm only assuming that I did the right thing, as I noticed lifting my pressure foot did become a little easier than before, but alas, still making marks. I will be using a mix of garment leathers and leathers up to about 6oz... Right now I'm working on a project that is about a 1 oz veg tan... Can anybody post a photo of what screw I should be loosening so I know I'm doing it right?
I'm currently at work, but I can post photos of what I did unscrew when I get home as well!
Greg I actually called there like 20 mins ago and spoke to a nice lady, she said you guys had feet online so I went to look. I saw a foot listed as a flat presser foot 19412C, will that foot help alleviate the issues I'm having with my current foot??
Thanks!!
-
Do you guys have any info on if there is a roller foot available for the consew 206 rb? The original foot I have leaves indents on my leather... Ive been looking for a roller foot searching under COnsew and Juki 562-3 and havent been able to find anything! WHat other foot options is there that wont mark leather, especially veg tan? Will be sewing up to 6 maybe 7 oz
Thanks! -
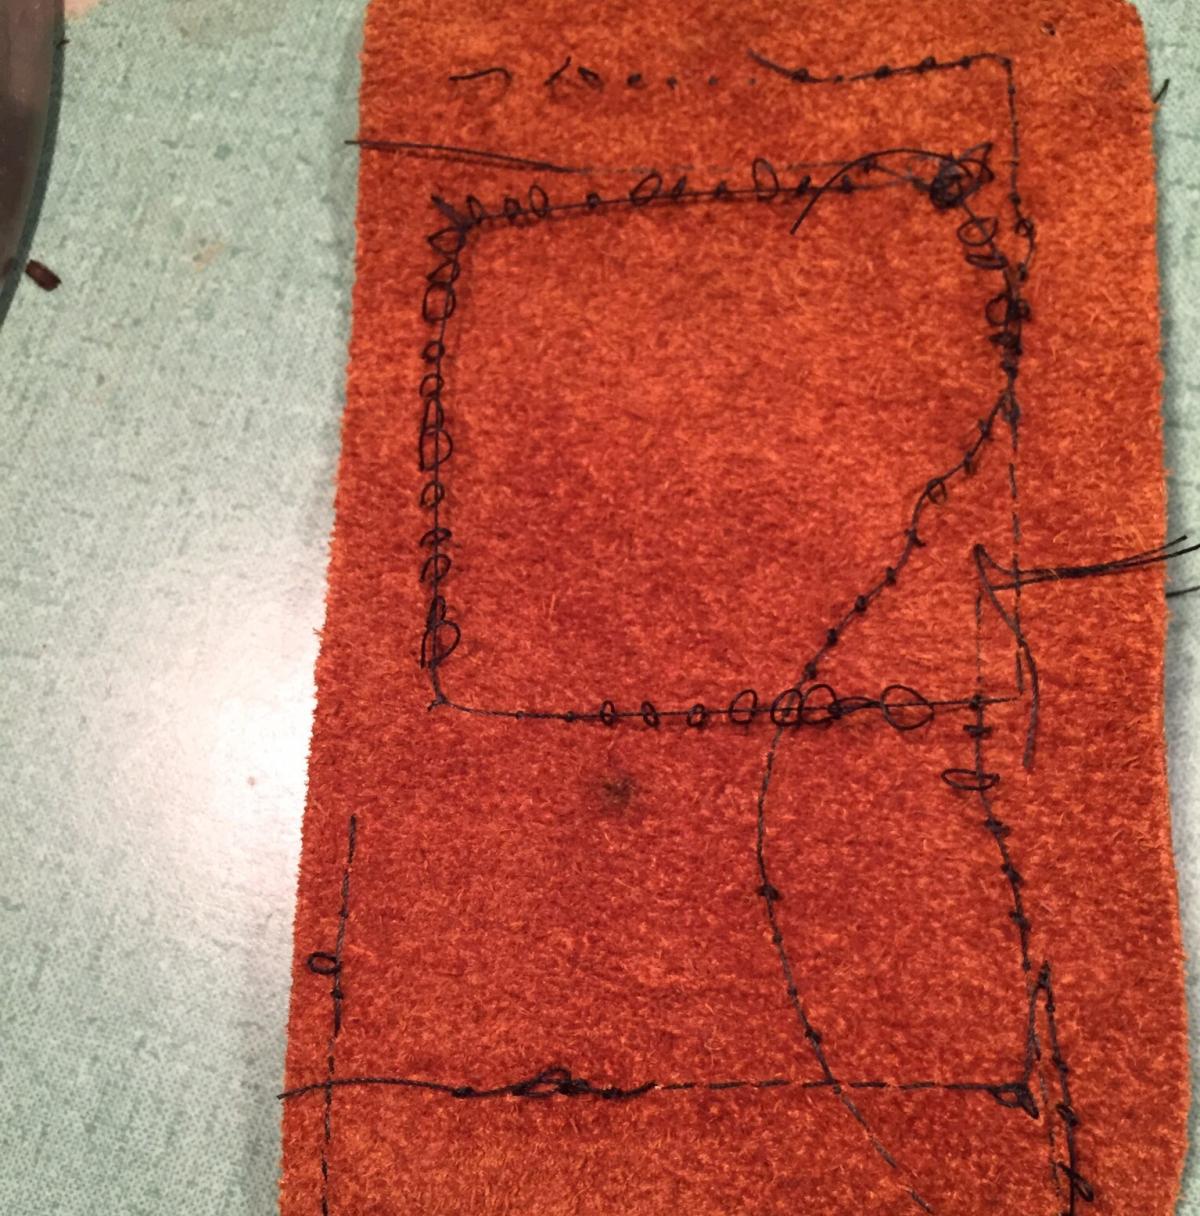
To be honest I don't think the tension is set correctly either lol. I still have a lot of play between my tension disks, even when my presser foot is down, and the knob is turned as tight as it will go. I'm still trying to figure that out. Did some back tacking as suggested, stitches are much better but still came out after a strong tug. Left me with just holes in the material and no stitchesI don't think you have the tensions set right on your machine. I see a lot of knots pulling to the top, and a lot of loose top threads.
Even if the machine is set correctly, and you go pulling on thread ends that are not lock stitched in, they will the knots loose.

-
I gave you guys a long enough break I hope! Can u believe I've been waiting on parts this whole time? Long story short, don't ship USPS TIL next year.
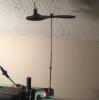
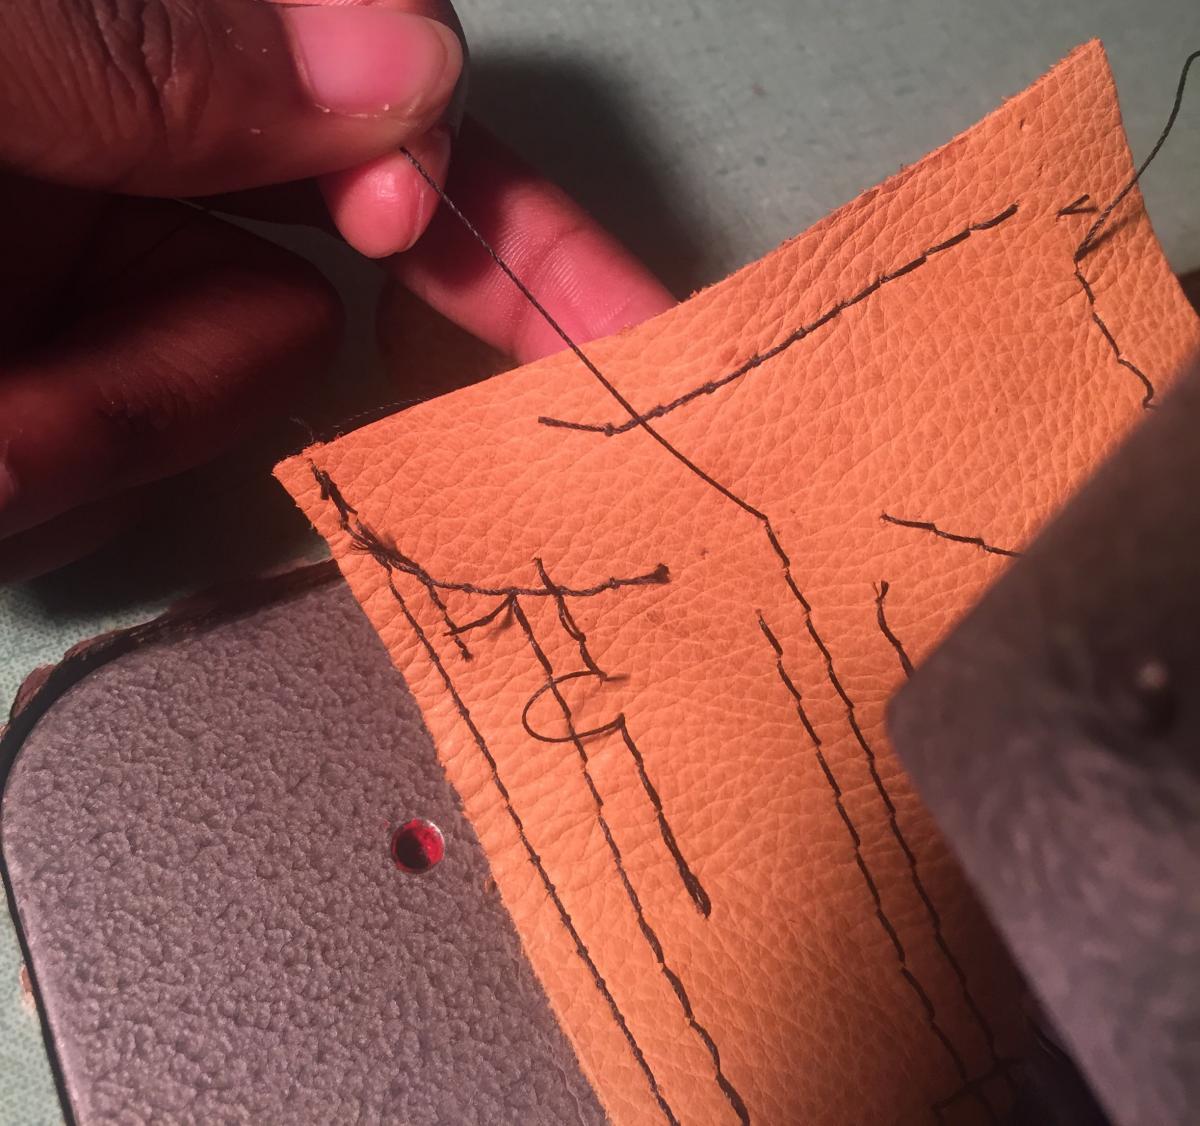
Anyway, quick question. Got my thread stand, all set up. But if u look at the photo, is that long piece of thread suppose to hang off my first stitch?? (This is the top side), bottom looks ok. But when I snip that long thread and give it a slight pull, in undoes the first stitch which I'm sure isn't right. I'm thinking I've threaded it wrong or its not catching the bobbin correctly, but I've redone all that the past 3 days and nothing, so I'm asking.
Have I been overthinking this (again) and everything is fine?
Thanks everyone

-
Great I will look at those other threads regarding tension. Thanks! Thx Bob, it's time for me to re oil the machine anyway, but I will take that advice to keep it from staining my leather...
Hey tinker, I think there is a hole there! But. I just broke my bobbin casing trying to get the dang thing out. My only one.
Now I know my needle position needs to be all the way up to make the bobbin come out easier. Spent a half hour trying to get the thing off... Broke the lever right off. Lesson learned.
So since I have to buy a new bobbin casing Ill get th thread stand too.
Also gonna get a new belt - again. I noticed the original has a v shape protruding from the back, the belt I have now is rather flat. I've had a several instances where I press the pedal and the motor pulley is spinning, but it won't "go". I have to spin the handwheel myself to get it going then the pedal takes over. I've concluded its because I don't have anything in the groove of the 2 pulleys to really keep contact... Thx yal
-
Ok yal. This is a tension issue, right?? Could this be related to my lack of a thread stand? Right now I'm pretty much taking the thread off the spool myself...
Lastly. How long does it take for the oil to drain from the machine? Every time I sew on my little test piece of leather the foot leaves oil on the material...
-
I'm glad to hear ur making some stitches.The spool isn't supposed to spin.You are supposed to pull the thread off the top of the spool so it doesn't have any drag.
Make sure the thread guide on the spool stand is directly above the spool. This should allow the thread to come off the spool evenly.
I look forward to seeing your first project.
Another member also sent me a link, oh as this thread spool ALL WRONG LOL. I'm still gonna buy a new one though, the original is missing some parts, including the piece at the very top to stick the thread through... Thx you guys!
-
GUESS WHO JUST MADE HER FIRST STITCH!!!! Victory!!!!!!! Thank you all so much!!! I have to work on putting the bobbin casing in correctly. For a while I could t figure out why it wasn't catching the thread lol.
So now I think I need a new thread stand. The spool does not spin freely, which makes the machine make this struggling noise as to say "hey I can't pull thread off of here" plus I can't seem to adjust the height which is a problem because I'm in the attic - weird ceilings. Also, I think my take up lever really struggles to take up. Makes loud noise when I try to use it I'm not sure if it's because I have the head placed in a weird spot or what...
Lastly. The bobbin wonder kicked back! I wasn't letting it get far enough to do so. Who'd a thunk?
-
It is great to see all of the help and encouragement from all of the members to help get these problems solved
Great community here
Yes i totally agree. Im very appreciative I would have been lost in the sauce without all of there help!
-
Never seen a key to hold on the bobbin, must be the deluxe version. There are three screws holding your winder onto the table, loosen them, then push the whole winder into (toward) the belt a bit. Then tighten the screws. This should move the winder wheel into the belt a little further for better contact.
You're getting there; take it step by step, we're here and will leave the light on for you.
Art
You're nearly at the fun part now.
Hang on in there.
Thanks a lot yal. Really appreciate the encouragement. I get frazzled easily when I feel like I can't figure out something basic. I fooled around with it a fews more hours last night and still didn't get anywhere (with it kicking off), but Im thinking that since i at least have it filling the bobbin I should just move on to threading the machine…
Im gonna do that after work and hopefully that will be problem free! Quick question though, how do you guys gauge when the bobbin is about to run out?? To catch it before it does?PS: I tried lifting up the machine to get the plate on and almost lost my fingers. I lost my hinges in transport so i can't lean the machine back… Even when the hinges were on there I couldn't lean the machine head back it was way too heavy. A member sent me a link to a new plate, but with those springs on the back I'm gonna have the same problem Im having now, this thing just doesn't fit, I need just a flat piece to easily slide in and out of there, so Im gonna look for one.Thanks again
-
To increase the friction on the bobbin winder wheel, you should be able to loosen the screws that hold your bobbin winder onto the table, and just shove the whole unit along a bit.
But if when put the spool on the winder, press the tag/lever which shoves the tongue looking thing up onto the bobbin, I take it it doesn't spring back when the bobbin is full?
Never seen a key to hold on the bobbin, must be the deluxe version. There are three screws holding your winder onto the table, loosen them, then push the whole winder into (toward) the belt a bit. Then tighten the screws. This should move the winder wheel into the belt a little further for better contact.
You're getting there; take it step by step, we're here and will leave the light on for you.
Art
I did guys. I've gotten in pushed up as far as I can get it. As a matter of fact the belt still touches it (barely) when its I pushed forward... Still didn't kick back properly. Argh... Thx for sticking it out with me guys... I'm gonna keep fooling around with it. I'm ready to start threading the machine and actually sewing lol.
-
I did the screw driver thing, helped but didn't work well. Found this little piece hanging around and that seemed to really help. I feel like the thread is too tight in the tensioner but I can't loosen it anymore or the whole thing comes flying apart. I got the bobbin to fill (whether it's filled correctly is a different story) but there is no kick back. Th thing just stops spinning. I'm wondering if I should get another belt, just a tad bit shorter... Maybe that will increase the friction on the bobbin winder wheel or something? I don't know I'm grasping at straws here... This should not be this difficult to figure out. *exhales*
Thanks everybody for the help thus far!!
-
Can't even get the thread started until the bobbin is wound......
Don't worry, there's always a gremlin waiting in the wings.
You mght need to lift the machine just clear of the table surface, then slide the plate in from left to right. Sometimes, with the machine hinged over on its side, you can lever the plate spring into place with a screwdriver, then push the plate home.
Other machines, you have to feed the plate into the space at an angle fron right to left.
Problem is, I've got so involved in reading about your belt, and winder, I've forgotten what machine you have.
Yes I plan on getting the bobbin winding down pat once I get to the house, then I'm gonna work on threading the machine. Luckily there are several YouTube vids for that so I shouldn't have to bombard you all with questions on that!!
And yes Lumpen I'm sorry I've been all over the place lol. I have a consew 206rb


Consew won't "stitch" with smaller needle
in Leather Sewing Machines
Posted · Report reply
Thanks a lot Eric! So is this something that can easily be adjusted? When you say timing that makes me think off lots of tedious work, not that I don't think I'm capable, but I just don't know what I'm doing.
also, this still leaves the question of why did it sew one type of leather just fine and not at all for this one?
In short, do I basically need to stick to needles size 20 and up?