


Scary Leatherworks
-
Content Count
324 -
Joined
-
Last visited
Posts posted by Scary Leatherworks
-
-
Yup I'm dying veg tanned. i've never heard of RIT dye. What is it? where do you get it. Thanks Harry I'll try the red.
-
I am looking for a deep red dye sort of a dark blood red. I ordered Fiebings spirit dye "ox blood" and am very dissapointed it is very pink. it's hard to tell the color when buying online. Anyone have a suggestion for a spirit based dye?
thanks, scott
-
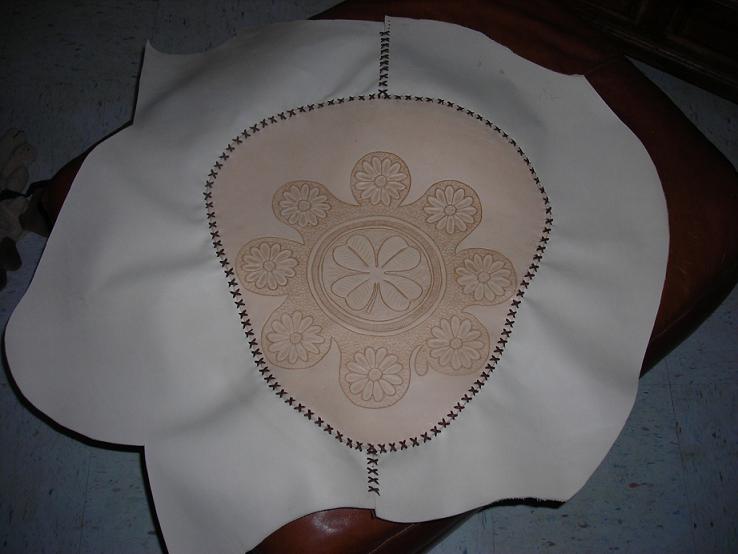
Randy, I also use 6oz for the top and 3-4oz for the sides. I try to get the sides really wet before forming to the seat. I try not to get the top wet. Yes wetting the leather makes it more workable and it does shrink a bit making it tighter. Unfortunatley it's been my experience that even if you don't have any tight curves the leather will still bunch some especially in the front of the seat. one of the tips I picked up here is to wet form the seat riveting it in place stretching it evenly. You will probably find that there will be some areas that you can't get the bunched up leather to smooth out. Let the seat dry out for a day then remove the rivets in the area that is bunched up then re-wet that area and stretch it some more. If I'm working with a steel pan I use sheet metal screws the first time I form the seat that way I can remove them easily when I re-wet and rivet for final fit. Not sure if that will work for fiberglass. here's a pic of a cover I made that eventually was wet formed
I used two pieces for the sides because that's what I had but one piece works just as well
Scott
-
Randy, I am very new to this myself but will kick things off here. 1) I allow 3/8" to 1/2" for overlap on top to overlap all sides. 2) For laying out the hole spacing I measure around the seat top (in from the perimeter where the lacing holes will be) then I try and divide my rough hole spacing into it. I like to have an even number of lacing holes approx. 1/2" apart. Depending on the seat sometimes the holes are closer/farther apart. The hole spacing also depends on lacing style. Mine is only for simple cross lacing. 3) I use a wing divider to mark the holes for punching. First I try it out on the backside to see if it comes out right. 4) I use a rotary punch and make my holes a bit smaller than the lace I'm using. Again this depends on the lacing style. 5) As for dye I use Fiebings spirit based dye and finish with "Leather Balm with Atom wax" (thanks David)
What style seat are you doing? Are you going to do a seat with a top and bottom or a seat with a top and sides and wet from it?
hope this helps
Scott
-
Tom, Don't discount Tandy to quickly. Since you are just wanting to start out I feel that Tandy is a great place to start. First you can buy a "starter kit" that will include the necessary tools for a beginner along with some beginner kits, such as a wallet, belt, and checkbook cover. This is how I got started for a minimal fee. Then you can invest in more tools etc... Their leather is fine for most projects and when starting out you don't want to pay big bucks for leather that may end up getting hacked, chopped, dyed wrong, and experimented with. If you didn't like the store check out the website. Plenty of tools, patterns, and kits for us newbie's.
By the way I'm not affiliated in any way with Tandy but I did stay in a Holiday Inn Express last night.
Scott
-
hey Rickey is that seat for a chop-off contestant for the next smokeout. The seats look cool were the pans supplied by the owners. If not where are you getting your pans from?
Scott
-
got 25 sq ft of 4/5 oz leather and a 3/4" alphabet set. Now I just gotta figure out what to do with it
Scott
-
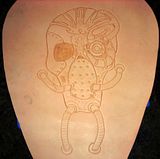
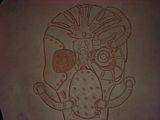
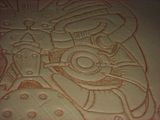
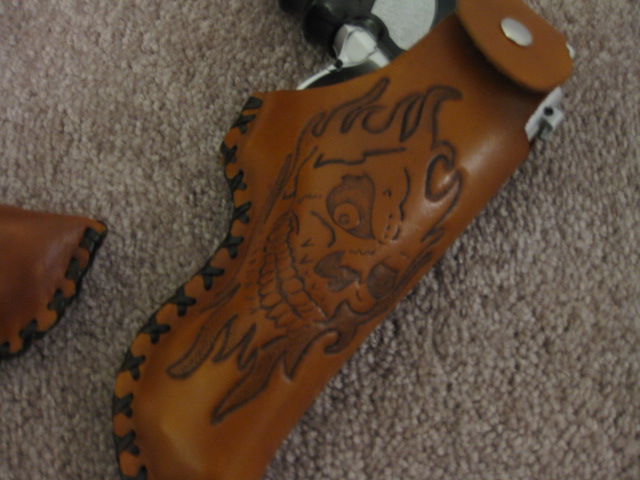
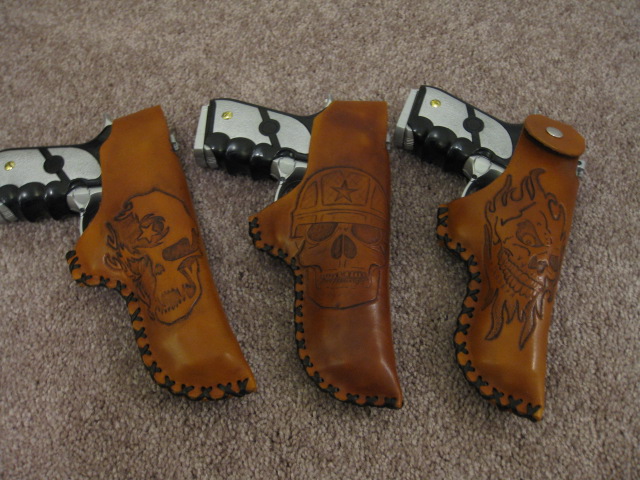
Knifenut, I wish I had alot of artistic talent. It takes me awhile to draw out my patterns and sometimes I have an artist friend draw some for me. I got these from a Google Image search. I changed them some to fit the holsters. I wish I could give credit to the artists but images get linked and sent all over and you never seem to see the original source.
Scott
-
I have always had excellent service at the Chelmsford Mass. Tandy. I've gone in and all my newbie questions are answered. Also since I am along ways from the store I have even called a few times and explained my needs/wants and the employees and manager always take their time to help.
Scott
-
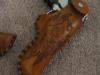
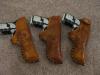
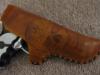
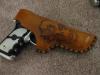
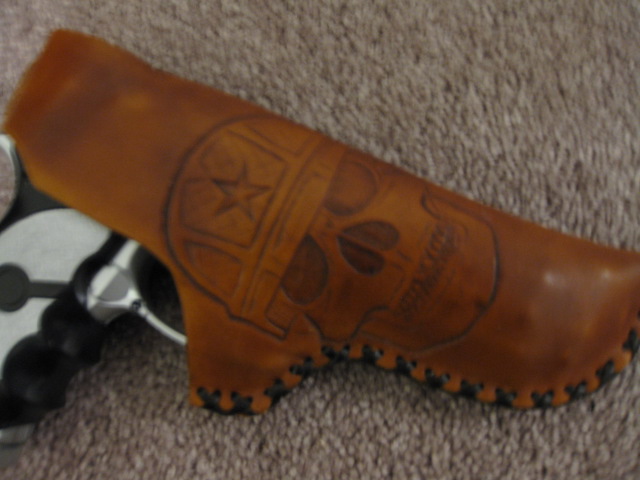
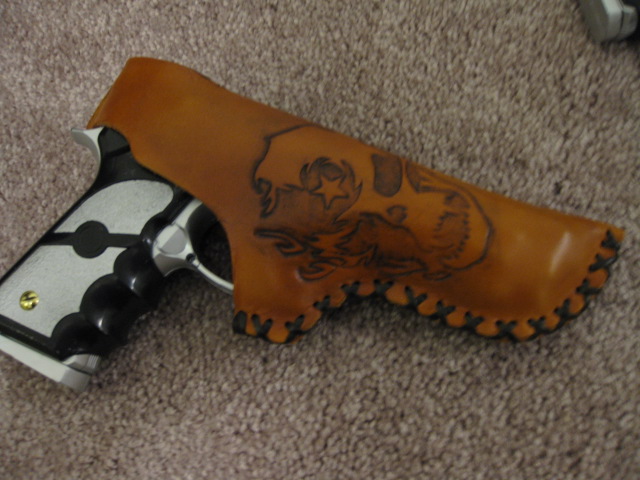
Thought I'd try and practice making a holster by making these three for my nephew's airsoft guns. Yes they are into skulls also. I didn't want to spend alot of time on them but I did learn alot. Critiques are always welcome
Scott
-
in the words of Napolean Dynamite "That's flippin sweet" I'd say you are ready to tackle your mc seat
Scott
-
OK I can't seem to upload to LW using the browse/upload button. It says the Image is to big and I can't resize with my pic program so I'll just try to make them bigger with photobucket.


-
Kustomizer, I use 5-6oz for the top of the seat and if I am wet wrapping the seat I use 3-4oz for the sides I like to get it closer to the 3oz because it forms easier. I think if you were making a seat where you were just riveting the leather to the pan (the bustedlifter style) 7-8oz would appropriate.
Scott
-
Some of the hospitals have started switching from Fahrenheit to Celcius. I've gotten used to it but it was difficult at first trying to think 98.6F = 37C. And a 2 degree rise in C to 39 = 102.2F (bad). Also when a patient is admitted they are weighed in pounds but some of the medication is based on mg per kg so another conversion is needed. it would be easier if we used all metric but I can't think of someone as 80kg as opposed to 176lbs.
Scott
-
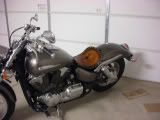
hey MattD I can try and post a bigger pic which one. not sure how they appear on other computers but on mine the are 4"x5" No I didn't use the original pan I had one made. my bike is a Honda VTX1300C.
-
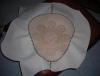
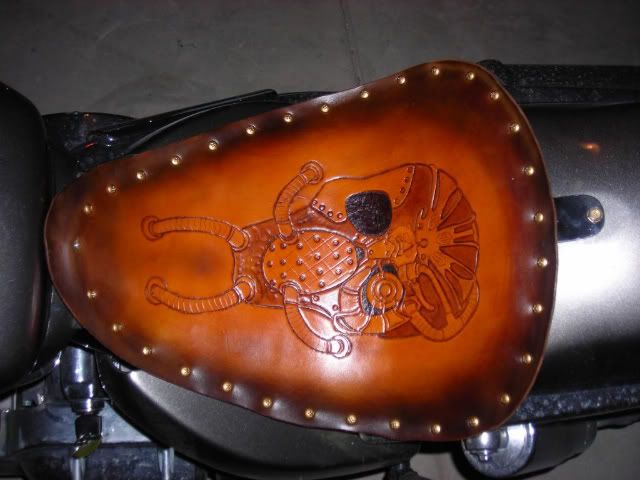
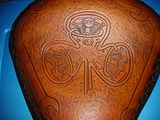
finally finishd this seat for myself. my camera isn't very good so the pic's aren't the best. I used Bustedlifter's seat style with 2 layers of walmart yoga mat ($10.00). I used screws and locknuts to secure it to the pan to kep with the mechanical theme. it's dyed with oil dye. saddle tan center, chocolate brown outer, medium brown to highlight the skull, and tan antique. Thanks for looking. Scott


-
Cool! I like the overhead view of the skull.
Scott
-
Again thanks for the reply. I just finished and sent this seat to my brother and I wanted to ensure it lasts.
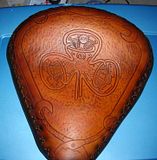
Thanks, Scott
-
Thanks David. do you feel that the leather balm with atom wax is sufficient for long term protection or should I also advise the seat owner to apply a waterproofer again at a later date?
Scott
-
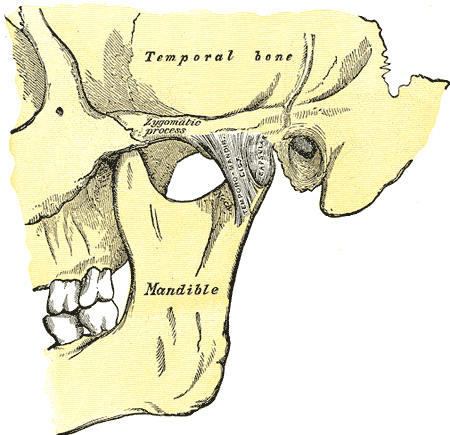
notice how the mandible is attatched to the temporal bone at the temporol mandibular joint (TMJ) behind the zygomatic arch. the rest of your skull is looking good though. I always have a hard time drawing skulls to.
Scott
-
David, just wondering if you use the Leather Balm with Atom Wax as your last and final finish/sealer or if you apply something else for waterproofing, such as Pecards. I know where you are rain is not a big worry but it can be for some back east.
Advise from all welcome.
Thanks Scott
-
I don't know where the pics went. I'm not to computer savy so I'll try again. My airbrush part arrived so I will add the picture of my first sprayed seat now that it's finished.
and this is a seat for my brother. I had posted pics after I tooled it awhile back.
Thanks for looking
Scott
-
ahh! thanks for the speedy reply. I wasn't using the upload I was pasting directly into the text.
-
I posted some pics in the show off section a few days ago of a mc seat and I just noticed that the pics have been removed. they were put in using photobucket. The pics were kind of big, since I can't seem to figure out how to make them smaller. anyway just wondering what could of happened to them. Am I posting them wrong?
thanks Scott


what do you do for a living
in All About Us and Off Topic
Posted · Report reply
I'm just what my forum name says. murse= Male NURSE. Of course my brother calls me Fokker after the movie "Meet the Parents"
Scott