BearMan
-
Posts
710 -
Joined
-
Last visited
Content Type
Profiles
Forums
Events
Blogs
Gallery
Everything posted by BearMan
-
Hello, from one South Carolinian to another. I live in Beaufort, what part of SC are you in? I'm looking for somebody to share some of my leather working knowledge with. Thanks, Ed the"BearMan"
-
Hello, from one South Carolinian to another. I live in Beaufort, what part of SC are you in? I'm looking for somebody to share some of my leather working knowledge with. Thanks, Ed the"BearMan"
-
Hello, from one South Carolinian to another. I live in Beaufort, what part of SC are you in? I'm looking for somebody to share some of my leather working knowledge with. Thanks, Ed the"BearMan"
-
Hi Everybody, Just an update on the testing, with the new handle material. So far,,, over the past couple weeks, I've noticed that the material, is not slippery at all, even when wet. It cleans up with just some spray cleaner,,, even though it doesn't get as dirty as you'd think. So far, I like it! Ed the"BearMan"
-
Great Job Casey!! Your engraving is Very Very Nice!! Ed
-
Hi Everybody, I just listed the tool holder on EBay. Here is the link: http://cgi.ebay.com/ws/eBayISAPI.dll?ViewItem&item=330463476607 I listed it pretty cheap,,, so somebody should get a good deal. Thanks,,, Ed the"BearMan"
-
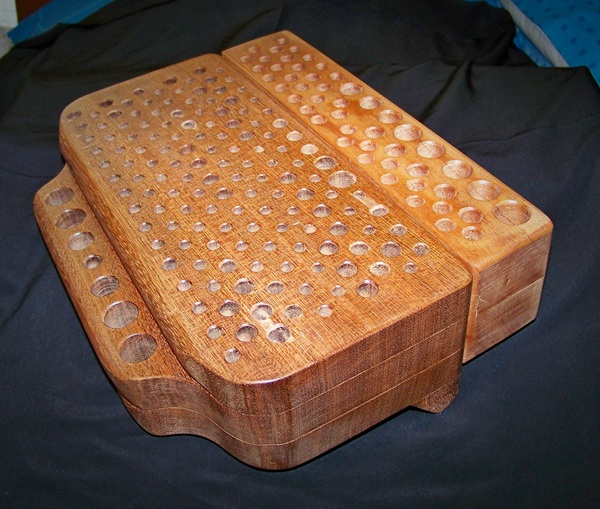
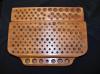
Hi Everybody, Just wanted to let everybody know that I'm going to be putting my old tool block on EBay this weekend. I have no idea what it might go for,,, so it might go pretty cheap. Shipping weight is around 9 lbs. It measures 12.5" wide, 9.5" ft to back, & about 4" tall. May be able to squeeze it into a large Flat Rate box. It has 195 tool holes of differnt sizes, & 6 holes up front for swivel knives. It has a few chips here & there,,, but it's solid. Here are a few pictures,,, Thanks for looking,, Ed the"BearMan"
-
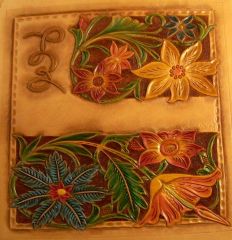
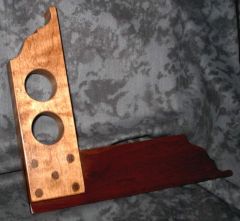
Hi Marlon,,,, Thanks!! The paw print is really pretty easy. Basically, the base/ backing is 1/8" aircraft plywood, covered with 1/4" thick high density crafting foam. That's the kind of foam that comes in all kinds of different colors, it's similar to what flip flops are made out of. Find a GOOD realistic paw print on the Internet, or printing program. Re-size it, to fit your needs, & print 2 copies. I take the first copy, with each of the little areas cut out, to use as a placement pattern. Tape that in place, then cut out the same areas on the other copy, only this time, you want to save the paw pieces, to rubber cement onto another sheet of the 1/4" foam. Once you have those pieces cut out, glue them in their spots, with contact cement. Once they are very secure, trim the corners off, to round them a little. Select your piece of leather covering,,, you are wanting a piece from an area where there are lots of wrinkles. This helps with the stretching & gluing process. Apply a good coat of contact cement, to both surfaces. Once ready, I try to start from an edge, of from the center, & work out, working & stretching, to get everything worked in, without an wrinkles. I had to do that paw 4 times, before I was satisfied with it. The other tool recesses, were made using 1/2" thick foam board, 2 pieces. Peter Main told me about the 1/2" foam board,,, it works very nice!! Thanks Peter!! Basically, once you figure out the spots, you draw around them, & then hollow out the areas to the depth you want. Make the reccesses, a little bigger than the tool, because the leather will take up soome room. Then it's basically the same proceedure as the paw,,,, glue,,, stretch,,, & smooth. It will take some time,,, & you'll probably have to do it more than once, to get it the way you want,,, But,,, I'm sure you can do it!! Ed the"BearMan"
-
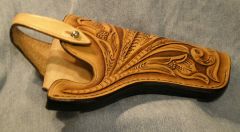
Hi Meleck, Yes, that's the slicker. I usually like a 5" wide slicker,,,, but there just wasn't enough room.
-
"the Gathering Of The Masters Carving Class"
BearMan replied to hidepounder's topic in Special Events, Contests and Classes
What an opportunity!! To be in a classroom, learning from all these Masters,,, is something we all should be lining up for!! -
Good Morning Tim & Dustin, Thanks Dustin & Tim,,, Tim, if I can get my supplier to cast the handles in a rough cast form, so that less material is actually being used, I should be able to add them at a good price. I may even be able to get them to color match the head material. I'll try to keep you informed. Ed
-
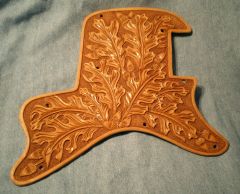
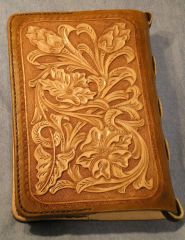
Good Morning Clay, I wonder where you've seen it before??? I really liked your Bird design the best,,,, so,, I hope my interpretation is ok. Your work makes me work harder to do better all the time,,, Thanks,,, Ed
-
Thank You so much John,,,, What a story!! But,,, you are NOT a "Hack",,, in any way! The cases you make are some of the best I've seen. Thanks to everybody for all the very kind compliments!! Ed the"BearMan"
-
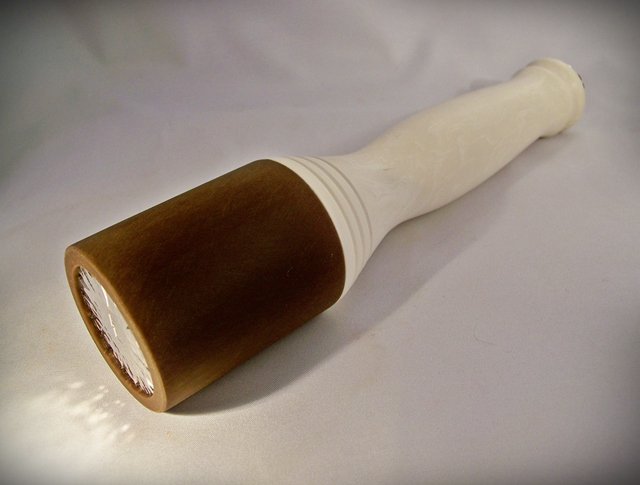
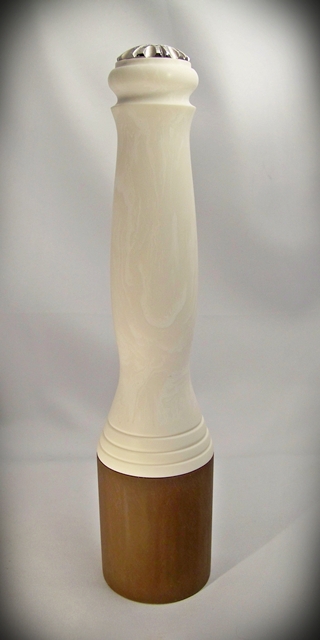
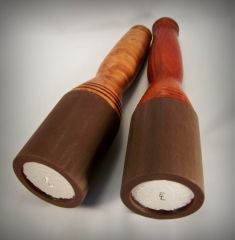
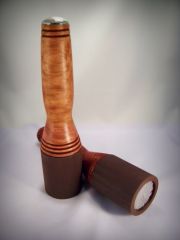
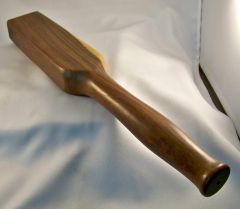
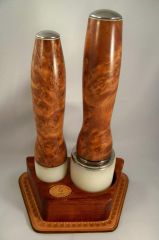
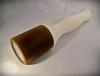
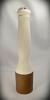
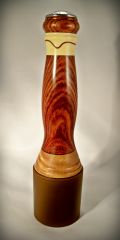
Hi Everybody, Here is something I've been considering for a while now. This handle is made with a strong polymer, in an Aged Ivory color. From working with this stuff for a little bit, I can see that with use,,, the handle material will take on a darker patina, over time. Although it's smooth, it has a nice grip feel to it. I'm going to have to use it some to see if it lives up to my expectations. Something this color, is difficult to get an accurate representation of it's color,,, the picture with it standing on end is the closest to the real color. I've been working with a supplier, trying to get rough cast blanks. If I can get the supplier to cast some blanks, for a reasonable price, I may be able to add this option to my mauls. This handle was turned from a 2" dia. cylinder, which made LOTS of white shavings, & wasted a lot of material. Thanks for looking,,, Ed the"BearMan"

-
My Goodness!! I deffinately need a bigger house with all the new adoptees!! Not to mention, trying to keep everybody out of my shop!! hehehe Thanks Everybody!!
-
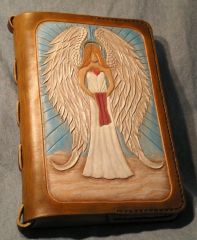
Thanks soooo much! It's nice to make something that so many people like! I truly believe that with some time & patience,,, most anybody can do this. I have a little over 100 hours in it. That's including the 4 times I did the bear claw, before I was happy with it. Of course those 100 hours are spread out over about a month & half,,, with a lot of "dream designing" in the middle of the night, when I should be sleeping. Thanks again for all the wonderful compliments,,, I'm really happy that it's done!! hehehe
-
My "Stuff" & some Mauls too!
-
-

From the album: Ed the"BearMan"
© © leatherworker.net
-
From the album: Ed the"BearMan"
© © leatherworker.net
-
From the album: Ed the"BearMan"
© © leatherworker.net
-
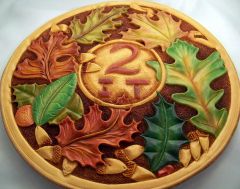
 My Son's Tooling Box
 -
From the album: Ed the"BearMan"
© © leatherworker.net
-
Thanks everybody! It's going to be a Christmas present,,, I'm glad I started it early! Now only about a dozen more presents to make,,, Ed
-
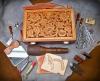
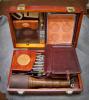
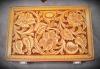
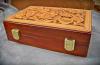
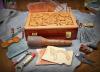
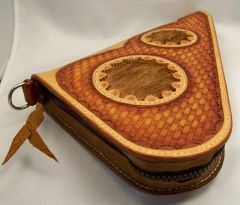
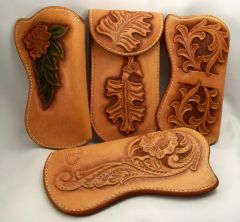
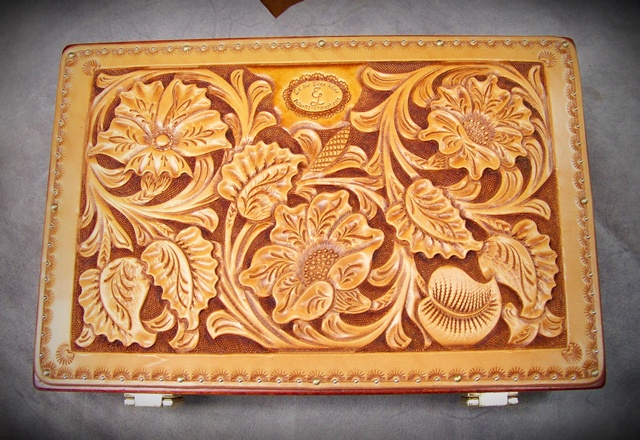
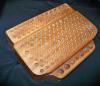
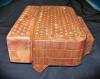
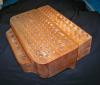
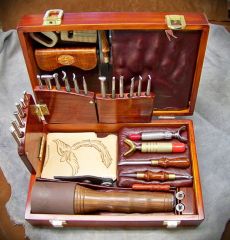
Hi Everybody, Here is what I've been working on lately. I have a little over 100 hours in it. I made everything in it, except for some of the stamping tools, the 2 swivel knives & blades, & the 6" rule. At last count, there are 35 tools in all. The tools include: a 4" slicker, a border tool, 6" rule, small screwdriver, "cheat sheets", 18 stamping tools, a strop, an expandable tube of rouge, a pair of "Lady Leg" dividers (carbon fiber), 2 different swivel knives, 2 extra blades, a petal lifter, a modeling tool, an allen wrench, & a 20oz Rosewood Maul. Several things are held in place by rare earth magnets. The compartment lid uses a magnetic latch. The top leather piece is held on with 93 tiny nails,,, I don't think it will fall off,,, hehehe The finger carved bird, is my interpretation of Clay Millers design. I only have one "secret" compartment in this box,,, & of course no I can't tell you where!! I was told I should call it "30-05" (thirty ought five), because it's 30 lbs of stuff,,, in a 5 lb box. Thanks Ben! Sooo,,,, what do you think??? What did I forget to put in,,, in this 9 1/2" x 6" x 2 1/2" box? Thanks for looking,,, Ed the"BearMan"