


Tob
-
Posts
44 -
Joined
-
Last visited
Content Type
Profiles
Forums
Events
Blogs
Gallery
Store
Everything posted by Tob
-
Try watering it down and use a spray bottle. Set it to spray not stream. I have thought about using a spray bottle because I have access to one. For the time being, I can only afford free, so I have to improvise even the cheap things. Just another thought, if you get spots, let them sit for a moment or two then wipe. As always, try on scrap first.
-
Homemade tools and ways you have saved money on tools
Tob replied to JenGranger's topic in Leatherwork Conversation
Do keep your eyes on craigslist. I found a set and some leather for free. I misplaced some of the tools like an idiot. There was a good amount of everything. Food coloring works for non brown or black dyes. I have made a barely passable beveler out of a nail. 550 cord could be a source of thread, use wax. It is braided, not woven and a bit thick. Almost forgot to say that you could use a sharpie to color it black brown or whatever color. -
I made something similar for my wife for Christmas. I found it on instructables.com and more or less followed the steps. Modifying the pin would I thing be the hardest part. Here is a pic of what I did.
-
Two-tone dye with a fade
Tob replied to Tob's topic in Dyes, Antiques, Stains, Glues, Waxes, Finishes and Conditioners.
I may have to give that a go as well. -
Two-tone dye with a fade
Tob replied to Tob's topic in Dyes, Antiques, Stains, Glues, Waxes, Finishes and Conditioners.
if the tutorial was from instructables...that would be the one. -
Two-tone dye with a fade
Tob replied to Tob's topic in Dyes, Antiques, Stains, Glues, Waxes, Finishes and Conditioners.
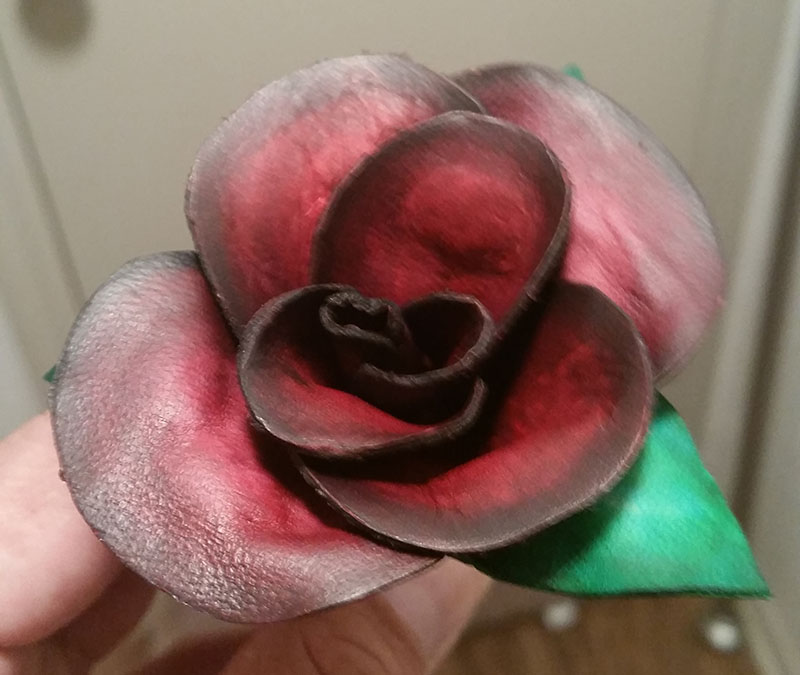
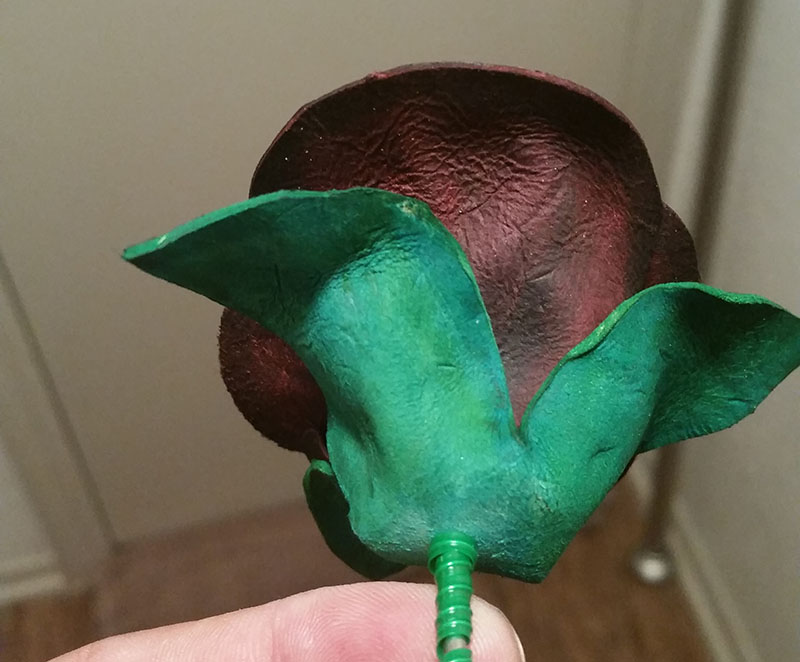
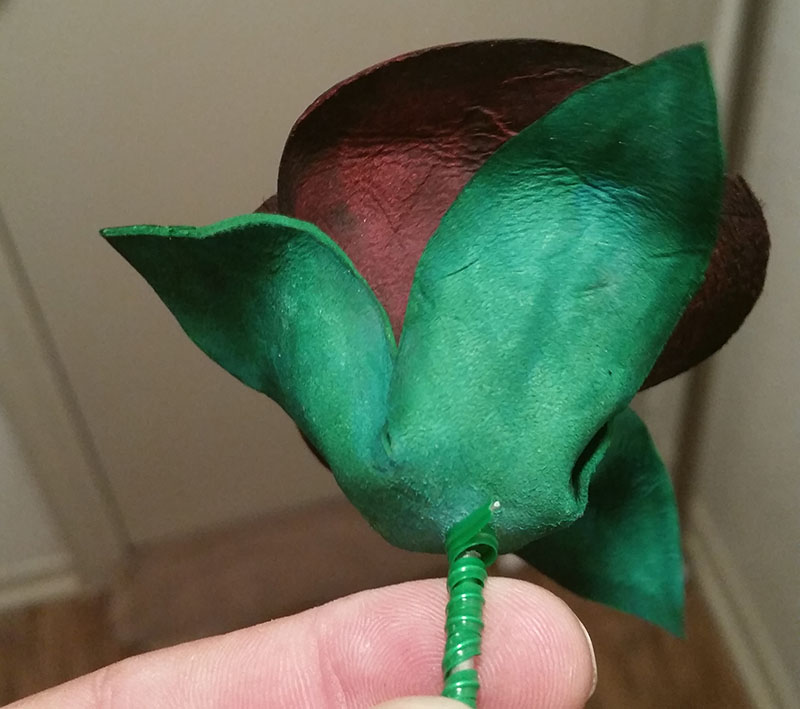
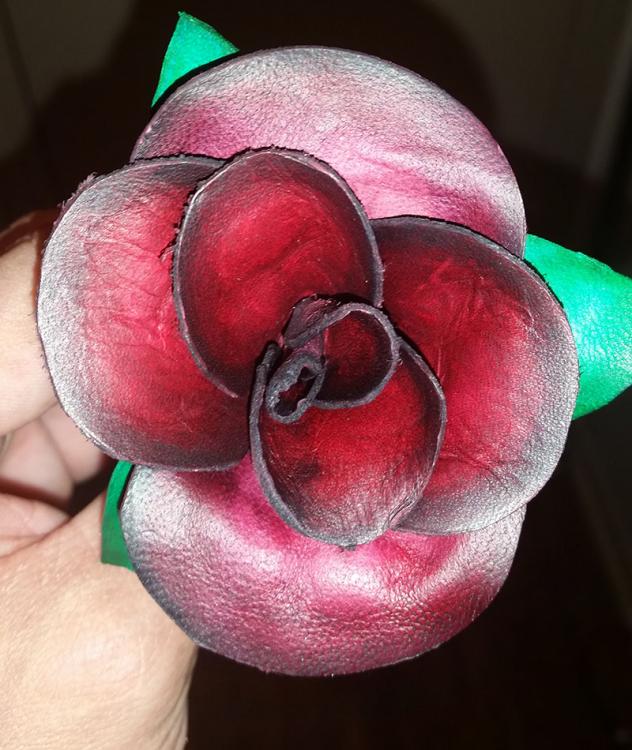
update... Finally got to finishing it. Used a combination of techniques. Eco-flo navy blue and red and coal black. The black was pretty straight at the edges and the purple-ish was watered down and many coats added to change color.
-
I found that one a couple of hours ago browsing further into this section. It is for an iPhone 6. Somewhere around page 5 or 6. In an hour or so, my palm print will fade from my forehead...
-
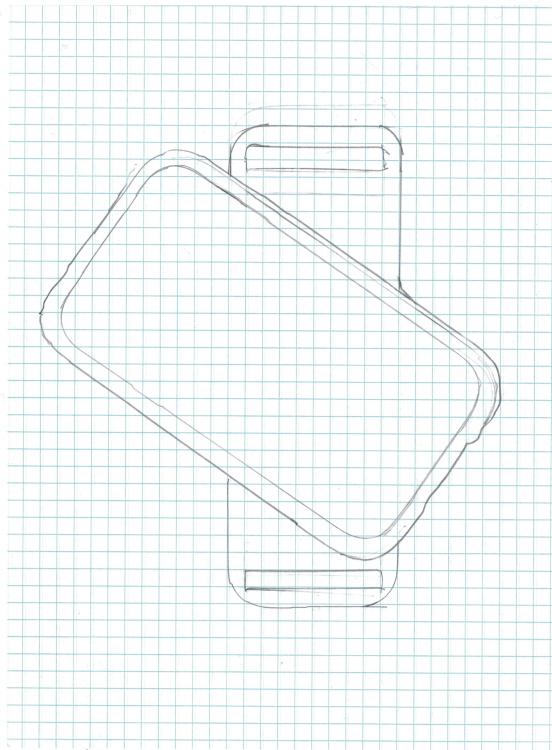
Most of the larger smart phone holsters I have seen are vertical, and after having put it on paper, I can see why sort of. Here is a quick jotting down of the idea. In the phone shape, the innermost line is the outline of the phone inside the protective cover. The outer line is a 1/4"ish allowance for wet molding and stitching. The squares of the paper are 1/4" for size reference. Criticisms are welcome, otherwise how do we learn.
-
Thank you for posting those patterns. I do have a plan for using something like the pancake for a cell phone. Saw it on some site somewhere and liked the idea. Might even work on purse straps, backpacks, or a messenger bag shoulder straps. Might also need modification. The cool thing is, the Galaxy S5 is the same size as the S7. I also plan to use cardboard wrapped in plastic or packing tape and make a block for easier wet molding and future attempts.
-
Two-tone dye with a fade
Tob replied to Tob's topic in Dyes, Antiques, Stains, Glues, Waxes, Finishes and Conditioners.
Thank you. The block dyeing technique is really really close to what I was looking for. There isn't going to be any tooling so i won't be getting that cool effect. I am not familiar with watercolor painting, but you have given me more of an idea of what I want to try. Light, bright center and darken to the edges. Think Tim Burton type colors. Again thank you for the tips. Now I just need to get my ideas out of my head and into the world. -
New to the site and leatherworking in general. I am going to do a leather rose for the better half and going to use purple and black. She digs that kind of stuff. She also does not like real flowers because they die. The question is how to dye the petals purple on the main "meat" of the petals and fade them to black on the edges. Bear in mind I do not have or have access to an airbrush. I have tried watering down the black, maybe it wasn't enough, but it left a line without a fade. Any ideas or proper search terms to use? All my searches keep turning up boot repair. I know it is going to be something that makes me palm smack my forehead, too. So, now I ask. TIA Tob
-
From what I have tried, blue will leave a greenish tint, could be the food coloring brand. The green worked good on the less than stellar leather that I put it on. Might have been stained with oil or something. The Eco-Flow that I also put on it didn't want to work right either. After it dried, there was no rub off and with good techniques, will work great. On some of the bad areas, I tried thinning it with alcohol and got better penetration, still wasn't as good as well prepped, but enough to color it a little. Something else I remember from the black Army boot days, was using sharpies on areas of the boot that was scuffed to plain leather. We could get "free" markers and tended to work better than the Kiwi brand leather dye. Thank you for this idea. Better than spending $8-9 for a small project.

