Search the Community
Showing results for tags 'diy'.
-
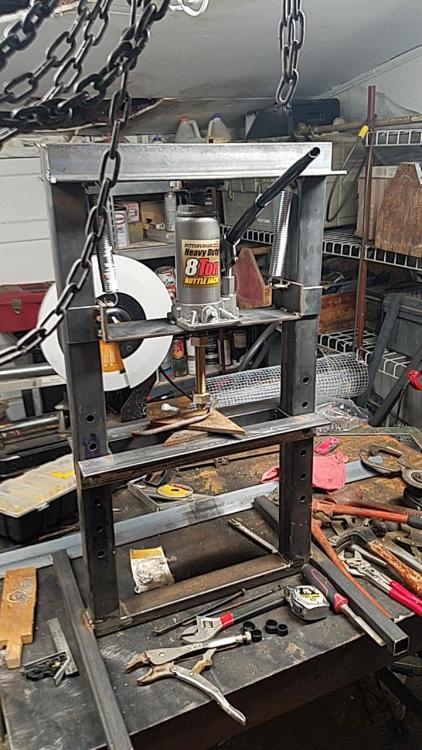
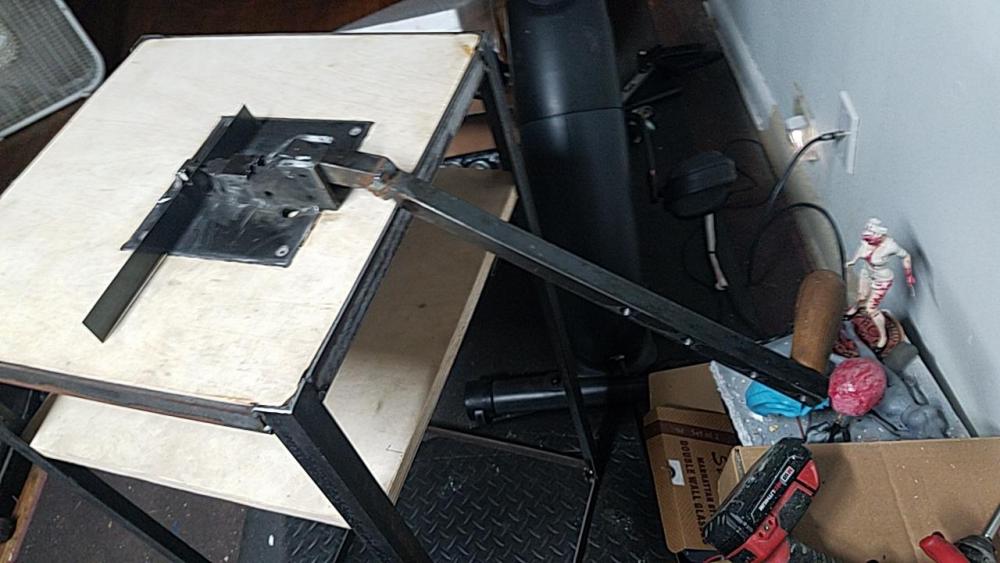
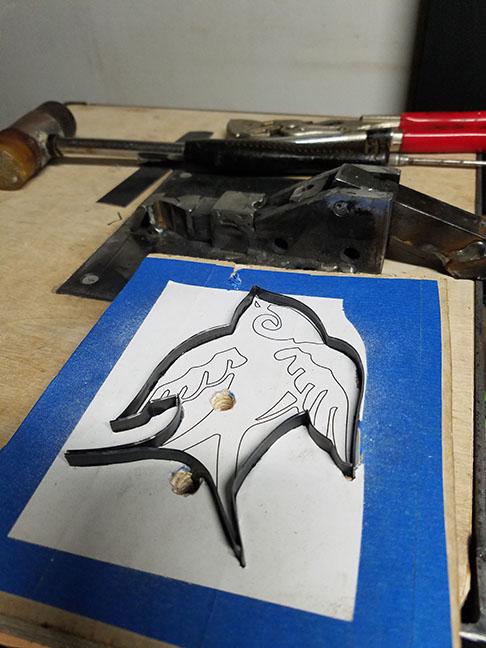
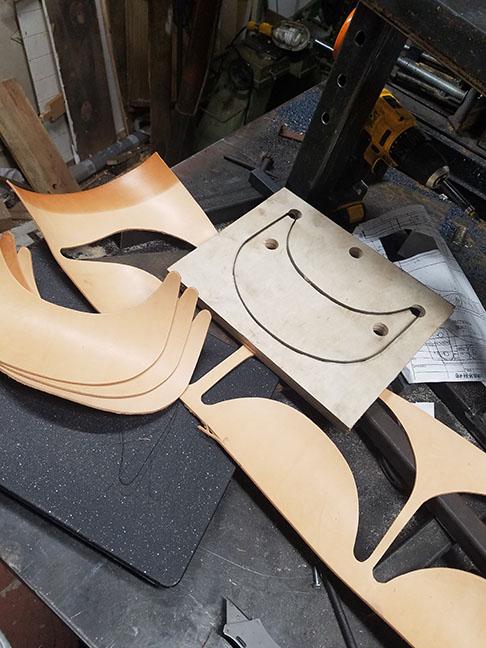
When one of my hobbies demand a tool my other hobby skills come to the rescue. Starting out in leatherwork I may not have the money to have fancy equipment but I do have the means to build what I need. Maybe someday I may get into selling more leather creations but for now, I am just preparing in case I do get serious in the future by having fun building cool things now. The die bender is very simple and works well. Using Autodesk Inventor software I worked out a functioning model to build into a tables surface and a handle to push downward to counterforce any table movement that it may cause. I already have an idea to make a different version that will be able to change out the bending points (whatever they are called) and stay out of the way of the bending steel rule on itself by making most of the mechanism under the surface of the table like a few commercial designs out there. The manual clicker press (pictured below) I made after a mini hydraulic press I saw online. Made some improvements by welding the joints solid instead of nuts and bolts (nobody ever takes them apart) for better rigidity and with tighter tolerances on the sliding parts so the press works smooth and solid. Still, need a few tweaking on both machines but overall they were a success for my needs. I would not recommend anyone asking me to make one for them because you can purchase the same class of tools in the open market for the same cost of what I would charge to make plus, the shipping cost. That said, in material cost, the press was estimated 40$-50$ and the die bender was built from scrap I had laying around. I am always open to suggestions and ideas for DIY projects like this that starving artisans like myself can benefit.
-
Recently been very interested in understanding what the big brands in the leather industry are using to create quality leather paints. From looking at different safety data sheets I can see they all share one basic ingredient Poly(methyl methacrylateco-ethyl acrylate), or P(EA/MMA), in combination with water and various pigments. I am curious if anyone has had any experience with making their own leather paint formulas, similar to the ones above. Is it as simple as buying and mixing together, or are many ingredients omitted from the actual safety sheets? I have experimented airbrushing with some artist acrylics in the past however the adhesion, flexibility and durability is just not there. Feel free to share any knowledge you might know on the topic, I would be happy to learn what ever I can as I am not a chemist but would love to make some quality paints on my own!
-
Hi everyone, I'm planning to make some leather stuff soon and the material I'll be using is un-dyed vegtan leather. Since supply is tricky for me and since I have to be very careful about dye safety as I make horse equipment and it is in contact with skin, I thought to ask this community for any recipes and methods for making natural dyes or stains for leather. Does not matter if they are super strong like commercial ones are, I just want something that can give leather a different color (even if it only darkens it) and something that I can make with relatively accessible materials. Any suggestions welcome, I am very new to the chemical department
-
From the album: Making Shoes with Sneakerkit
© Camp Leather Goods
- 1 comment
-
- diy
- leather shoes
-
(and 3 more)
Tagged with:
-
From the album: Making Shoes with Sneakerkit
© Camp Leather Goods
-
- leather shoes
- diy
-
(and 3 more)
Tagged with:
-
From the album: Making Shoes with Sneakerkit
© Camp Leather Goods
-
- leather shoes
- diy
-
(and 3 more)
Tagged with:
-
does anyone have a chap lacing diagram for closure
-
My tiny company has outgrown my tiny leather workspace please help me in reaching my goal of converting my detached garage into a dedicated leatherwork space. I have started a Kickstarter fund to help in reaching my goal, any pledge would mean the world to me. Thank you fellow crafters! a preview link to the page, Hoping to launch on Friday the 16th. Caleb https://www.kickstarter.com/projects/campleathergoods/camp-leather-goods-needs-a-bigger-home?ref=3p9452&token=ab877b1b
- 28 replies
-
- leathercraft
- diy
-
(and 3 more)
Tagged with:
-
For anyone willing and wanting to support, my fundraiser is live. I am hoping to convert my detached Garage into a dedicated leather shop. Thanks for considering. Caleb https://gofund.me/d9753f5a
-
- fundraiser
- diy
-
(and 2 more)
Tagged with:
-
My tiny company has outgrown my tiny leather workspace please help me in reaching my goal of converting my detached garage into a dedicated leatherwork space. I have started a Kickstarter fund to help in reaching my goal, any pledge would mean the world to me. Thank you fellow crafters! a preview link to the page, Hoping to launch on Friday the 16th. https://www.kickstarter.com/projects/campleathergoods/camp-leather-goods-needs-a-bigger-home?ref=3p9452&token=ab877b1b
-
- kickstarter
- diy
-
(and 3 more)
Tagged with:
-
https://blog.sailrite.com/meet-our-customers/hobby/leather-crafting-fabricator/ My Website https://www.campleathergoods.com
- 4 replies
-
- verteran made
- diy
-
(and 5 more)
Tagged with:
-
Hey everyone! I have my finally obtained my clicker and its time to try making my own dies. Is there anyone in the San Francisco Bay Area that has a rule bender that I may try out or knows of a place I can learn a bit about the process? Thanks so much for any leads! -Paul
- 1 reply
-
- bay area
- california
-
(and 6 more)
Tagged with:
-
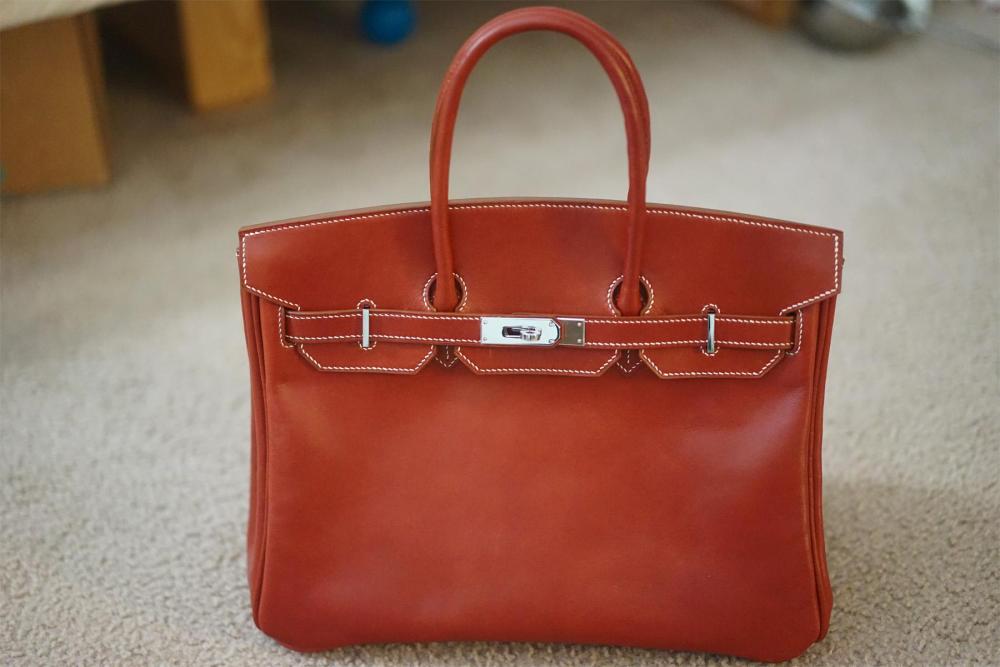
Hellow everyone, I'm a new memeber from Knoxville, TN. I start my leather projects from 2012. I don't have sewing machine, but love to stitch by hand. All my projects are for my wife, my family, my friends, and of course several for myself. I also DIY some tools for leather craft which were not afordable for me. I find this forum a great place to share experience, learn from others and ask questions. I'd like to join the forum. I attached pictures of several of my projects. (The bag is for self use only.......)
-
-
Has anyone ever made their own tooling solution? If so how could I make my own? Here is an example of what I am talking about, https://www.tandyleather.com/en/product/eco-flo-easy-carve-concentrate-8-oz
-
I want to hear about your homemade tools and other ways you have saved money one tools and supplies. I'm am on a low fixed income and had no idea how expensive leathercraft would be when I got into it and it was too late to turn back. So I've been trying to find ways to do this and save money. I get my practice leather from the local Army Surplus Store out of a dusty old box for 3 small pieces for a dollar. Most of it is 6oz or thicker and very stiff and dry and wouldn't even be suitable for boot soles. But at least it's leather to practice on... My dad let me cut off a couple of 18" pieces of two by fours and gave me one of his C-clamps to make a stitching pony for when I'm ready to learn how to stitch. He also gave me a ceramic knife sharpener for my 28 year old hand-me-down swivel knife, so that's one less thing I have to buy. I found a large nail I could sharpen up to make a scratch awl until I can get a real one. I have some nylon thread that I had bought for another project and I have 6oz of beeswax and figured I could coat the nylon thread with beeswax and use some large embroidery needles to practice with until I can save up to get the proper supplies. I was thinking I could make my stitch holes with a very small nail and hammer until I can get an awl. how creative have you gotten?
-
The Pros and Cons of Crafting with Leather 7/13/2018 0 Comments As a textile material it’s said that the origins of leather are as old as civilization itself? A lot of writers credit its origins to different points in history, but perhaps the most impressive is actually found in the Bible. The Bible credits the origins of leather all the way back to Adam and Eve. After they sinned and were removed from the Garden of Eden it’s said that God made them garments from skin and clothed them. What type of skin? It doesn’t say, but I’m guessing it might have been a lamb or something similar. So regardless of what point in history you go back to, leather has been around a long time and will probably be around until the end of civilization itself. But what has made this material so appealing throughout the ages? Perhaps this blog is not intended to completely answer that question, but feel free to add to it with your comments below… So for now, let's talk about the pros and cons of crafting with leather. I think the best way to tackle this topic, is to simply look at the qualities of the material and it applications. In this blog I’m only going to be focusing on vegetable tanned leather, since this is what was used historically. Chrome tanned leather didn’t come along until the 1800’s. The Pros – It’s an eco-friendly and natural resource – No harmful chemicals are used in the tanning process. It has a very pleasant fragrance - Natural rich earthly scent that doesn't overwhelm. It is ideal for use in art or craft – Images can be carved and tooled into the surface of the leather to transform this material into literal works of art It can be wetted and molded into any shape or form you want. Magnificent statues and pieces of art have been molded with leather throughout the centuries, such as in the image to the right. It can be stained or dyed to any color you want It’s extremely durable and can last a lifetime (Special emphasis on Vegetable tanned leather) It’s not that expensive… - You might be surprised to here me say that, but considering what leather is and how much you can buy for the price, it really isn’t that expensive. Since leather is a natural resource, it’s prices will fluctuate from time to time. But regardless, I still think it’s a very affordable craft material that is unmatched by any other. It’s compatible – Leather is also very compatible with other textile materials, wood, and more. Leather takes on beautiful properties as it ages and antiques - As leather is exposed to natural elements, such as sunlight, moisture, and oils from our hands, over time the leather will take on a beautiful natural patina tan that only adds to it beauty and look. Cons – Leather requires a little upkeep – Compared to other textiles leather actually requires much less upkeep to maintain, but in order to keep it clean it’s best to protect your leather goods with leather care products from time to time. Best not to get it wet! – Leather can handle some moisture but being a natural material it’s best not to leave it in the rain if you really want it to last. Shopping for leather – One of the biggest complaints people have when buying vegetable tanned leather is that it has some scaring on the leathers top surface. But this is unavoidable since the leather is a natural material. So, if the animal is raised on the free-range, then it’s going to have some scaring from bug bites, barbed wire fences, branding marks, or other animal bites. In some ways I think these marks lend character and beauty to the properties of the leather, but if you are shopping for perfection, then there are more expensive hides that can be purchased. Top quality hides are usually made from animals that are raised in protective environments where their exposure to harmful conditions are removed. These hides are of course very beautiful, but also very costly. Sometimes it’s more affordable to buy 2 hides of a cheaper leather with scars than it is to buy 1 piece of hi-quality leather. I guess it just depends on what you are making and what the job demands. It’s a less known craft niche – Some may see this as a pro or a con, but I think the leathercraft industry doesn’t get the attention it deserves. Considering everything that can be done with leather and rich history of the craft I hope to see it become one of the most popular crafts the world has to offer. So as far as I can tell the pros, far outweigh the cons... What do you think?
-
The Power Of Creative Therapy! I've always had a lot of hobbies but discovered leathercraft during a difficult time in my life. It was extremely therapeutic as well as rewarding and helped me focus on what I was doing creatively rather than on the problems around me. Over the years I've discovered a lot of people with a similar experience as mine. We all need a healthy outlet that does not involve looking at a screen or being preoccupied with likes on social media. One good friend and successful leather artisan once shared with me that prior to getting involved with leathercraft she was losing an ongoing battle with depression. She had been on medication and therapy for a while, but in spite was getting worse. Then one day someone introduced her to leathercrafting and suggested she give it a try. She immediately took to it and her condition began to rapidly improve. Within a short amount of time, she was off her meds and living a healthy and productive lifestyle. Since then she's made a career out of her craft and has received multiple awards and honors for her work and contributions. Healthy creative expression is not only a very important part of who we are, I believe it's also food for our souls. Its a beautiful way to share with others some of our finer qualities rather than some of the chaos we're fed through the media everyday. You can't always take a vacation from stress in your life, but you can find opportunities to rest and recharge through creativity. There are also many reasons why I love to work with leather besides the fact that I find it relaxing and therapeutic. So, I don't want you to think that it's just something I do to chill out, it's also extremely rewarding... It's provided me with incredible opportunities to develop my talents into a profession and work with some of the most talented craftsmen in the world. I love the strong sense of community that exists within the trade and the support that the community shares with one another. Leather is also perhaps one of the most versatile materials in the world and its craft is as ancient as civilization itself. Leathercraft is a skill that just about anyone can learn and put to use in their lives, given the opportunity. Thanks, Chris Free Tutorials, printable leathercraft patterns, and articles can be found on my website at, www.fischerworkshops.com My 1st workshop in Taiwan before starting the Fischer Workshops Youtube Channel
-
- therapy
- leathercraft
-
(and 8 more)
Tagged with:
-
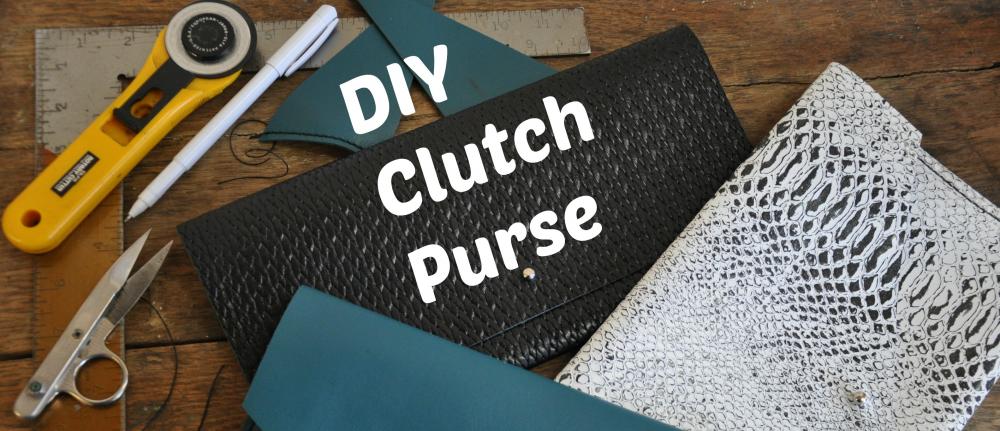
Hi guys! My name is Kristi and I'm from Tundra Leather in Hamilton. Here's a link to our blog post on creating a simple and easy leather clutch purse. This is a beginner project and great for getting people interested in leatherwork. Work's well for a birthday party, or girl's night! DIY Clutch Purse Instructions Click Here Feel free to send us a message or email (info@tundraleather.ca) us if you have any questions! Have a great day! Kristi
-
I have a whole lot of dies for setting rivets, stamps and other tools that I have collected over the years. All of them are hand held. Now I'm thinking of getting a small arbor press for some of that work. I would like to mount the dies I have in the arbor press. Several of the dies are hand made for custom projects and it would be good to use them in the future. Have anyone any idea how to do that? I'm guessing some kind of chuck and somehow attaching that to the press?
- 20 replies
-
- arbor press
- dies
-
(and 2 more)
Tagged with:
-
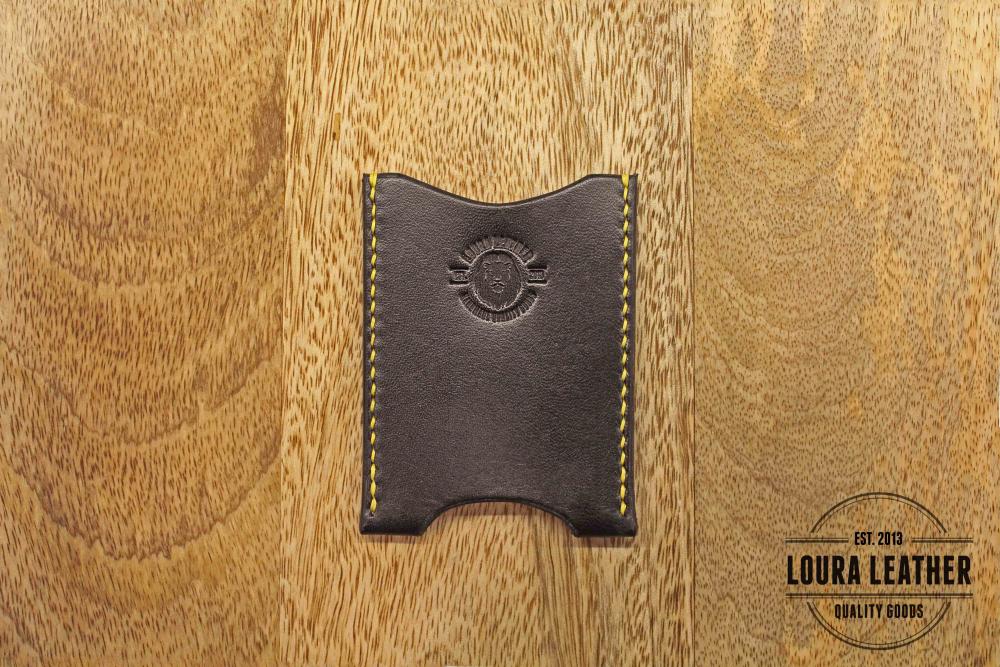
Hey guys, this is just another video of me making one of my wallets, this time a Leather Card Sleeve. The video is a much shorter one, not a tutorial per se, more of an entertainment video for those who like to watch, hope you guys like it! https://www.youtube.com/watch?v=VB_br0q1cG8&t=7s
- 1 reply
-
- wallet
- card sleeve
-
(and 6 more)
Tagged with:
-

Guide to Making an Exotic Leather Coin Purse
cicftaiwan posted a blog entry in Fischer Workshops Blog
This popular folding coin purse design makes for a great leather project. Small enough to conveniently store in your pocket or purse but able to store a large amount of coins in. It also opens up nice and wide so you can get what you need quickly and easily. To add value and beauty to the purse I have used several types of exotic leather for aesthetics through the circular cutout of the purse frame. I have used both alligator skin and gazelle hide as examples for this tutorial. A PDF pattern with a detailed list of leather types, tools, and products used in this project can be downloaded from Fischer Workshops. Just click on the following link to be directed to the download page...Exotic Leather PDF Pattern DownloadI have also published a video tutorial to demonstrate the step by step process I go through in making the purse. The video is only 10 minutes long, but it took me about 2 hours to complete this project. I chose to stain the leather by hand which is the longest process in making the purse. I suppose if you bought pre-stained leather you could finish this project in about an hour. To see the video just click on the link below... Thanks and Enjoy!-
- coin purse
- exotic
-
(and 8 more)
Tagged with:
-
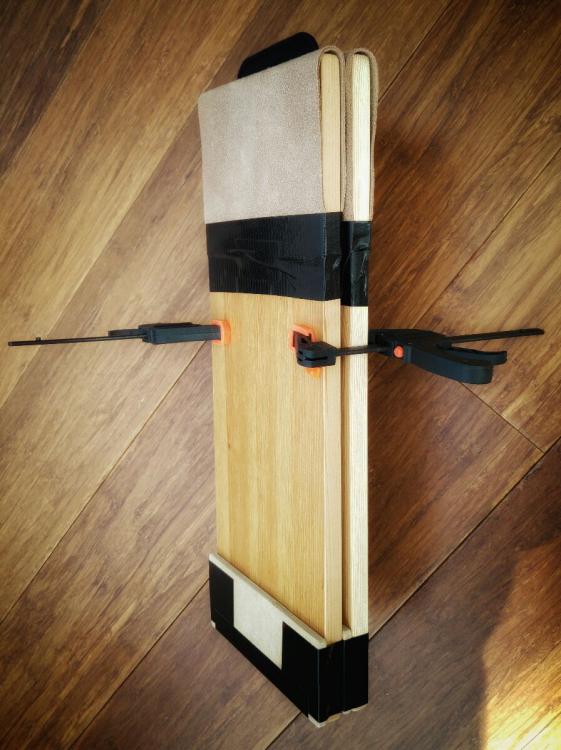
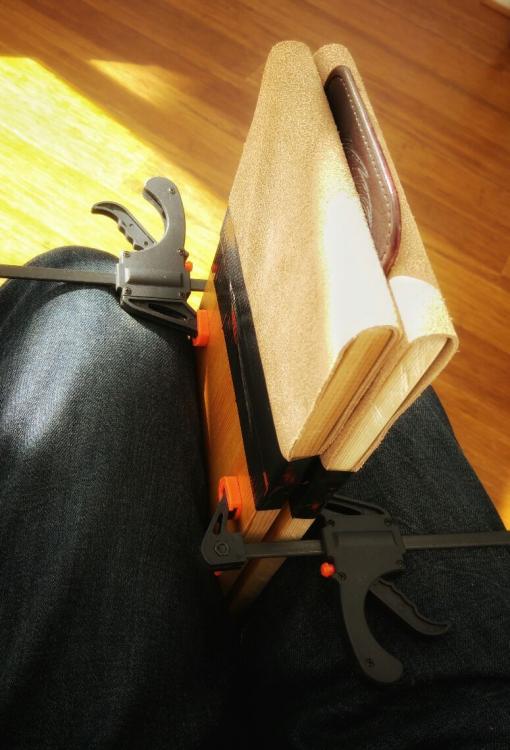
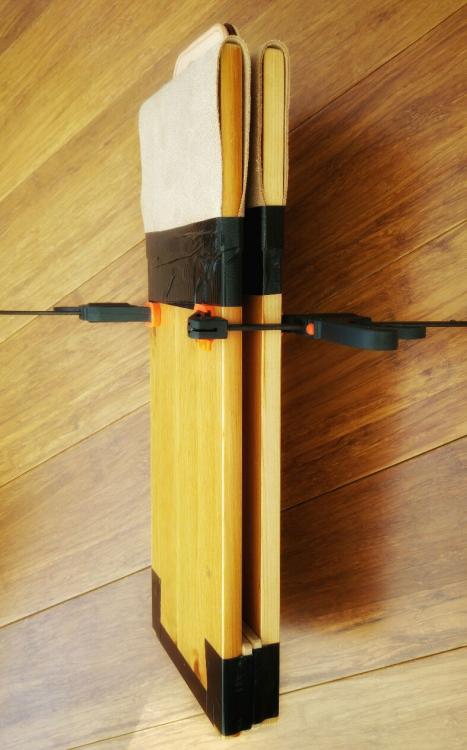
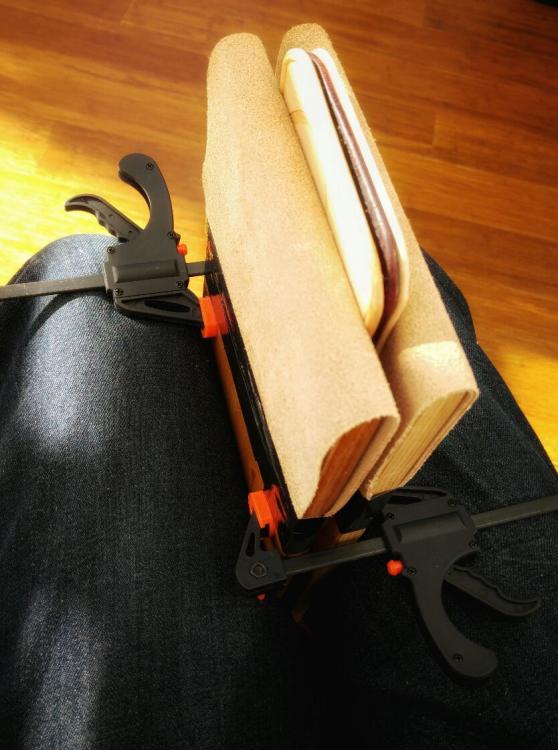
Well i wanted a lacing pony but didnt want to spend any money. So i made this one, the idea is that its easy packable and portable, parallel jaws for maxium friction so minimum pressure needed. Its just two boards, rounded and split leather added, at the bottom spacers added, just turn them around for no space, one layer spacer or two layer spacer. To keep jaws parallel to your work. Then tiny sash cramps, to add pressure but to also use as support on top of your knees, this way you can adjust the height perfectly.
-
I have been fabricating a hot stamping machine in my spare time. My goal is to build an air operated unit at least as competent as the $3,400 Kwik Print 86A/A. Time will tell. Phase One consists of building the heating unit. I will not be held responsible if you attempt to build one of these yourself, which you absolutely shouldn’t do. Heat embossers are made of electricity and extreme pressure and heat and danger and you can burn your house down, maim yourself, and/or electrocute yourself if you don’t know what you’re doing. Don’t do that. Phase One — the heater The Kwik Print 86 A/A uses an air circuit to deliver up to 1 ton of pressure through a Bimba air cylinder to an OEM ram to which the chase and heater are attached. The machine uses a 400W strip heater and Ulanet Robo Temp. I suspect Kwik Print uses Ulanet heaters and the Ulanet Robo Temp pulsating on/off controller because they’re American made. They’re expensive and I don’t care where my components were made. Maybe you do. My machine uses a 300W cartridge heater and Inkbird PID with solid state relay and thermocouple. The advantages of a PID and thermocouple are that (a) they’re cheap as dirt ($37 delivered from Amazon Prime), and ( once tuned, they’re very stable. My cartridge heater was less than $8 delivered from Amazon Prime. 300W is probably over-spec’d. The arbor press Until I build the frame for the air cylinder, I’m using my Famco 2 ton to test the heating unit. I made absolutely certain to over tighten the press’s guides so that the ram will stay raised. ANY skin contact with the heating plate will result in a second degree burn. The ram has a ½” hole with set screw drilled into its end. The heater The heating plate consists of a stainless steel block large enough to accommodate any embossing die I can see myself using. It’s tapped for a ½” stainless rod that fits into the end of ram. I used a vertical knee mill to dimension it and drill/ream holes for a cartridge heater and thermocouple. The heater hole (red leads) needs to be accurate within a few thousandths for maximum efficiency. The thermocouple hole (silver lead) is tapped to accept the unit’s threaded flange. Mounting and registering dies The embossing die is attached to the heating plate with a piece of 3M heat activated tape. Registration is simple. When the heater is cool, place your work piece on the press with the tape-covered die positioned where you want it. Slight pressure will leave a non-permanent mark on the leather showing you where the die is. Use a pencil to mark the edges of the piece. Slide the piece out of the way without disturbing the die or you have to start over. Place the edges of straight pieces of card stock on your registration lines and hold them down with some hard drive magnets. Don’t worry about the magnets being tall enough to hit the heating plate. Foil stamping dies are taller. Turn on your PID and get the die up to temp. You’ll have to experiment with temperature settings based on the leather and foil you’re using. Gently lower the ram so that it comes in contact with the taped die — always make sure that the leather you used to register the die is under it so you don’t damage it. Magnesium dies are durable for thousands of impressions when properly cared for. Give the ram a little mash. Get ready to stamp by placing your piece against the registration guides. Stamping You can blind deboss (stamping without foil) or use foil. To use foil, cut off a manageable section and place it flat against your work piece. Stamp by lowering the ram in a deliberate manner — you will have to experiment with temperature, pressure, and the amount of time the die remains in contact with your work piece. It’s not hard to get consistently good impressions. Results on leather and paper are nice. Top to bottom left to right: W&C bridle grain, W&C bridle flesh, Brown Horween equine Chromexcel, W&C natural tooling, black Horween bovine Chromexcel, Mohawk 130# paper. Materials 8mm x 80mm 300W cartridge heater — $7.47 delivered — http://www.amazon.com/Mold-Heating-Element-Cartridge-Heater/dp/B00DN6BQCY/ref=sr_1_8?ie=UTF8&qid=1452723192&sr=8-8&keywords=300w+cartridge+heater Ink bird ITC-100VH+25A SSR+ K sensor PID temperature controller with K-type thermocouple and 25A solid state relay — $36.99 delivered — http://www.amazon.com/gp/product/B00RMDZVNO?psc=1&redirect=true&ref_=oh_aui_detailpage_o01_s00 Misc. Various lengths of wire, terminal blocks, spade and fork connectors, grommets, scavenged inline fuse, scavenged rocker switch, etc. Suitable enclosure — I had a nice extrusion and face plates 1 ½”+ ton arbor press Stainless steel square rod and round rod in whatever dimensions you want Access to a horizontal bandsaw, vertical knee mill, end mills, drill bits, reamer, taps dies, etc. Dies and tape 3/8” raised/wrong reading magnesium foil stamping dies from Owosso — https://www.owosso.com/Products/MagnesiumDies/FoilStamping.aspx 3M heat bonding film — $22 for 1” x 180’ from Owosso — https://www.owosso.com/3MBondingFilm.aspx Foil This is specific to your application so you’re on your own.


