Webicons
Members-
Posts
250 -
Joined
-
Last visited
Content Type
Profiles
Forums
Events
Blogs
Gallery
Store
Everything posted by Webicons
-
I purchased my copper rivets and setters from Brettuns. Good quality and price. Second the solid base to set the rivets. I used the anvil portion of my vice. It made a big difference for me. https://www.brettunsvillage.com/leather/parts/rivets/
-
Help with stitch line around a tight curved corner
Webicons replied to Webicons's topic in How Do I Do That?
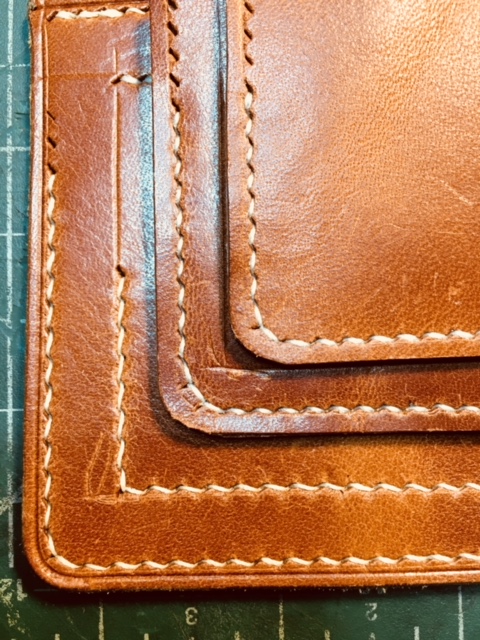
So I ran through a bunch of scenarios today and I think I like the look of just one round hole in the corner (top). I think it’s the cleanest look. I will just treat tight curves the same as I do 90 degree corners. Now I just need to figure out the break point where I would use the two prong Stitching Chisel. Thanks for your help Stetson. -
Help with stitch line around a tight curved corner
Webicons replied to Webicons's topic in How Do I Do That?
Thanks for the ideas Stetson - I’ve seen and use a round hole in the corner for 90 degree turns and it works well. I’ll see if it will work with rounded corners too. It may actually just be my stitching technique so I’ll have to reevaluate that too. -
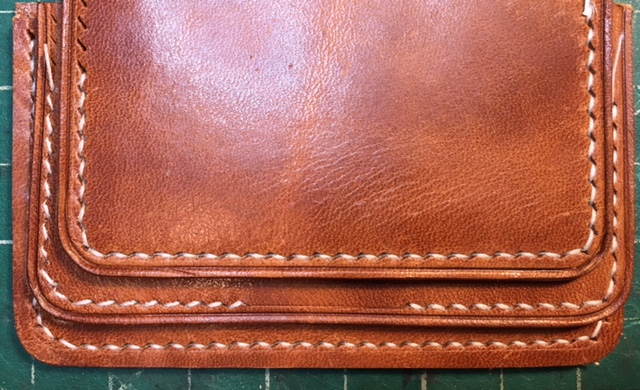
Hello All - I’ve been trying to clean up my stitching and I am having difficulty getting a nice stitch line around a tight curved corner (~1/2” radius) At 7 spi (lower stitch lines) I think it looks fine but at 8 spi (upper stitch lines) it just looks like a continuous line around the corner. I’ve used the 2 prong chisel and I’ve also used a single flat awl to try to come up with a nice looking stitch around a curve but not really satisfied. The placement of two stitch holes is driving me crazy! Any pointers?
-
I heard that the yield of W&C sides are on the lower side but I just received my order of Buck Brown Traditional direct from the factory yesterday and it was beautiful. First time ordering from W&C and it was pretty painless. From the phone call to receiving it took 12 days. Note that when all is said and done, it is actually more expensive to order direct from W&C then through a vendor such as TheBuckleGuy when you add on splitting, paste, refinishing and shipping.
-
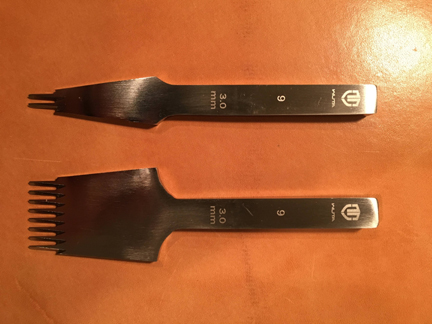
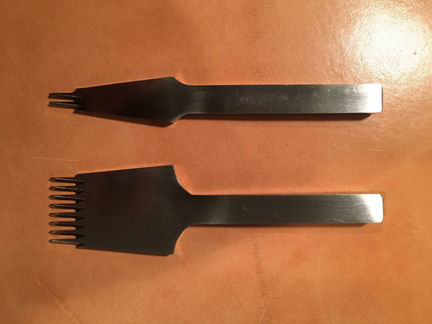
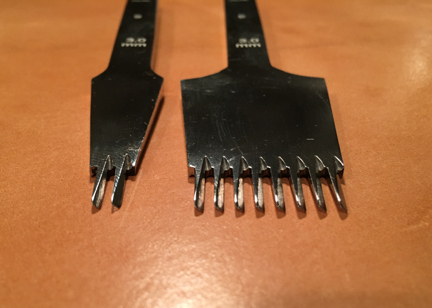
Selling my Wuta 3.00 set (8 prong/2 prong). They were maintained well and are in perfect condition. A recent birthday present made them redundant. Paid over $100 for them. $80 bucks OBO includes CONUS shipping. Let me know if you have any questions. Thanks for looking!
-
And yet another splitter adjustment question.
Webicons replied to Webicons's topic in Leather Machinery
Thanks Bruce. Almost dialed in perfectly. I think I’m in the home stretch now.- 9 replies
-
- crank splitter
- ls440
-
(and 1 more)
Tagged with:
-
And yet another splitter adjustment question.
Webicons replied to Webicons's topic in Leather Machinery
Notching worked! I made a notch on the old blade that was 1/8 wide by 1/16 deep and that did the trick. Now I have clean cuts all the way through. Thanks Bruce. Any thoughts about that gap between the frame and crank assembly?- 9 replies
-
- crank splitter
- ls440
-
(and 1 more)
Tagged with:
-
And yet another splitter adjustment question.
Webicons replied to Webicons's topic in Leather Machinery
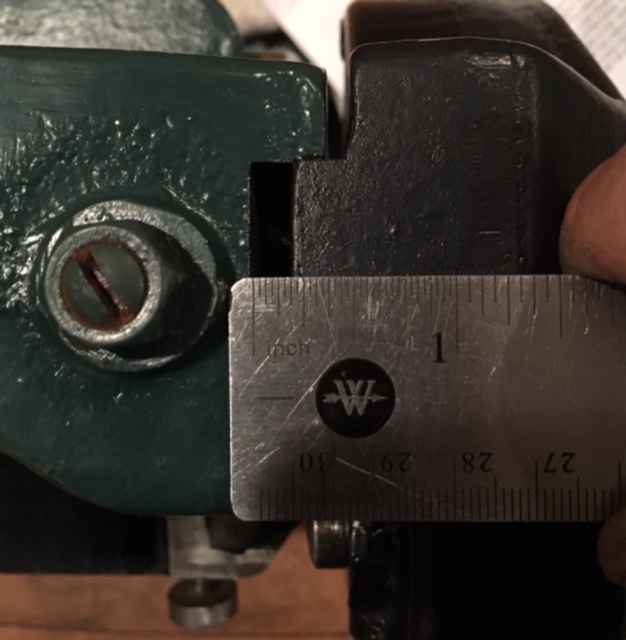
Bruce - thanks for taking the time to walk me through this. On another note (or maybe related) there is quite a gap between the frame and the gear assembly (see photo). Could you suggest how I would adjust to minimize the gap? I wonder if the cutting issue would get better if I properly adjusted to get rid of this gap. Thanks again.- 9 replies
-
- crank splitter
- ls440
-
(and 1 more)
Tagged with:
-
And yet another splitter adjustment question.
Webicons replied to Webicons's topic in Leather Machinery
I was able to give the old blade a pretty good edge and after I installed it I have the same issue. The leather splits well until the very end where it hangs up. i guess the next step is the notch it? Bruce, can you recommend a depth? Thanks!- 9 replies
-
- crank splitter
- ls440
-
(and 1 more)
Tagged with:
-
And yet another splitter adjustment question.
Webicons replied to Webicons's topic in Leather Machinery
Thanks Bruce, I was hoping you would chime in. The cutting edge of the blade that came with the splitter went strait across with no notches at the ends. It did allow the center bolt to attach and had a flat chisel grind. It was pretty dull so it didn’t split well and just shy of 2 7/8 so the adjustment knobs didn’t reach the blade. Ill try to sharpen and reattach the old blade to find out if it has the same issue and let you know. Thanks!- 9 replies
-
- crank splitter
- ls440
-
(and 1 more)
Tagged with:
-
So after a few hours of fine tuning my (new to me) American LS440, I think I’m almost optimized. The last bit that’s giving me trouble is that all the pieces gets stuck at the very end of the run. The last mm just doesn’t want to cut. A few threads down I see that someone had a similar issue but my blade is new and I believe positioned correctly: blade set 0.015 away from stop by feeler gauges. Bruce Johnson talked about a situation where notching the blade ends solved the issue but I just want to confirm and get other ideas before taking a drastic step. The center hole of this new blade doesn’t line up with the adjustment screw hole so I’m wondering if this screw issue goes hand in hand with my splitting issue. Any ideas are greatly appreciated!
- 9 replies
-
- crank splitter
- ls440
-
(and 1 more)
Tagged with:
-
On a scale of 1-10 I would put it at 9 with 10 being scary sharp so that’s pretty good. Thing for American splitter owners to know is that the center hole is off and can’t be used with the new blades from Pilgrim unless modified. Not a big deal but a little disappointing. I was told that they were exactly the same. Just in case this question comes up in the future, the size of the replacement blade is 3 inches deep.
- 4 replies
-
- american splitter
- ls440
-
(and 1 more)
Tagged with:
-
I just purchased a replacement blade from Pilgrim. They are a bunch of knowledgeable folks there. Helpful and shipped the hollow ground blade the same day. They confirmed that the original depth of the blade to be >3 inches so it was about time I replaced it anyway. Ill use this as a template to make a hardened steel blade this way I’ll always have one ready to go.
- 4 replies
-
- american splitter
- ls440
-
(and 1 more)
Tagged with:
-
Hello All - Does anyone know the original depth of blades used on an American LS440 splitter (Landis 30). I just picked one up this weekend and it seems that the blade that came with the unit is just shy of 2 7/8" and barely touches the adjustment screws. I would like to get one fabricated locally out of treated O1 steel. Much appreciated!
- 4 replies
-
- american splitter
- ls440
-
(and 1 more)
Tagged with:
-
On my journey/quest to find a decent crank splitter I came across an American LS440 splitter at about full price. I am not concerned about the looks of the unit, and I will be sending the blade out to get hollow ground, but the top roller has some pitting that may transfer to the leather. Should I even consider these types of units? I can probably send the drum to get refaced but would it compromise the performance of the splitter? How thick are the walls on the rollers? Thanks!
-
Lined Valet Tray / wrinkling and dye to thread transfer
Webicons posted a topic in How Do I Do That?
Hello All - I have been making some prototype valet trays which I am fairly satisfied with however I am coming across two issues: 1. The glued lining wrinkles too much when bending and snapping together the corners. Is there any way to prevent this from occurring? I am using Weldwood as the adhesive and stitching the inside box and outside perimeter. The leather is 2/3 veg tan on both sides. Lining leather too thick? 2. The thread is picking up alot of the dye. I am dying the leather with oil based dye and sealing with a 50:50 Resolene waiting overnight before gluing and stitching. As always, your advice is greatly appreciated! -
Card holder and watch strap
Webicons replied to Petewon's topic in Purses, Wallets, Belts and Miscellaneous Pocket Items
That is just too clean. Really nice work. Is the recessed stitching on the card holder a result of edge skiving or did you use an insert. It's a very neat effect! -
Thanks YinTx - I guess I'm back to my original stitching technique or I may have interpreted it wrong (which wouldn't be the first time!) When I started looking at videos on YouTube this week on Saddle Stitching was overwhelmed at all the different ways people stitch. Some seemed outright wrong while others looked very interesting. I think I saw a video on FineLeatherworking.com where they put both needles in at the same time. My head hurts again.
-
Thank you Tugadude. Does this apply to both the front and backside of the stitching?
-
Today was an interesting day. Here's what I learned: When stitching, I was taught to return the thread on the bottom and to the front (closer to body). Let's call that Method 1. I watched the movie posted by GMACE99 and I noticed the he was returning the thread on the top and to the back (away from body). We'll call that method 2. The resulting stitches are totally different. In one sense I like the Front view of Method 1 but I really like the Back view of Method 2. To get the classic look to the stitch, in Method 1 I don't really have to exaggerate the up/down angle of my hands when I pull but it is definitely needed in Method 2. I also think that it's critical to have a clearly defined hole in Method 2 but that helps for either way. I can see where there may be a situation where it's better use one technique over the other. So much to learn... Its interesting to note the direction of the stitching. In Method 2 the Front view goes Up/Down but the Back view goes Down/Up. In Method 1 the Front view and Back view both go Up/Down. Can someone explain why? My head hurts.
-
Solid and balanced work man. Stitching looks good and did you carve the box?
-
Thanks KCL! I also tried 2-3 oz and 4-5 oz with no change. If I don't knot the stitch then I can get the back to look like the front but not anyway else. If I don't knot the stitch then I risk throwing off my stitches. Not sure what I should be working on! Alpha - I'm just playing around with the look of the stitches. When I make wallets I want the outside to be as nice as the inside but I run into the issue above. If you look at the stitching from Niwa Leather you can see what I mean but I think that his stitching is machine stitched (which is incredible in itself). I'm just a novice as well just trying to improve my game.
-
Hello All! I was hoping to get a little insight and pearls of wisdom. While waiting for some leather to come in I am taking this time to practice and try to clean up my stitching. As you can see, I ran two quick lines here. I would like to have more breathing room between the stitches, especially the back side where it looks like one continuous line. I've played with SPI, thread weight, tension, etc. but I can't seem to be able to open it up and separate each stitch visually. What should I be working on? I love the look of Niwa Leather's stitching but I understand that it is more machine stitching but can I somehow emulate it with hand stitching? I have been thinking of looking at round stitching chisels that can actually make holes rather than slits (ie. KS Blades). Do you think that would help? Your insight is greatly appreciated!
-
Thank you for sharing and helping to preserve these gems. I always had a love for vintage and obscure tools. I have recently started making my own leather working knives and these are an inspiration.


