Chayse
-
Posts
127 -
Joined
-
Last visited
Content Type
Profiles
Forums
Events
Blogs
Gallery
Store
Everything posted by Chayse
-
Here is an idea, if you have an arbor press...very reasonably priced as well. Food for thought.... I checked tonight and the whole sha-bang was under $50(on Amazon)...minus the arbor press and heating elements.
-
I am mistaken @dikman..looking at the pictures I posted above..I do have it...or parts of it! I am now on a mission to find what I may have done with it.......? Thanks for the picture, as I would have totally forgotten about that piece if you had not of mentioned it!!!
-
Thanks @dikman..unfortunately I do not have the second half of the winder...was not on the table when I bought it. So...I will have to re-create the second half that is in your picture..looks easy enough to do. I will run up to my friends sewing machine repair shop and source all of the parts (tension assembly, thread guide) and come up with something that is close to what is in your picture. Sooner or later I will be able to use this thing!! Still waiting on thread, as NO ONE has it locally, so had to be ordered. After that, I will move it inside out of the garage to it's new home!
-
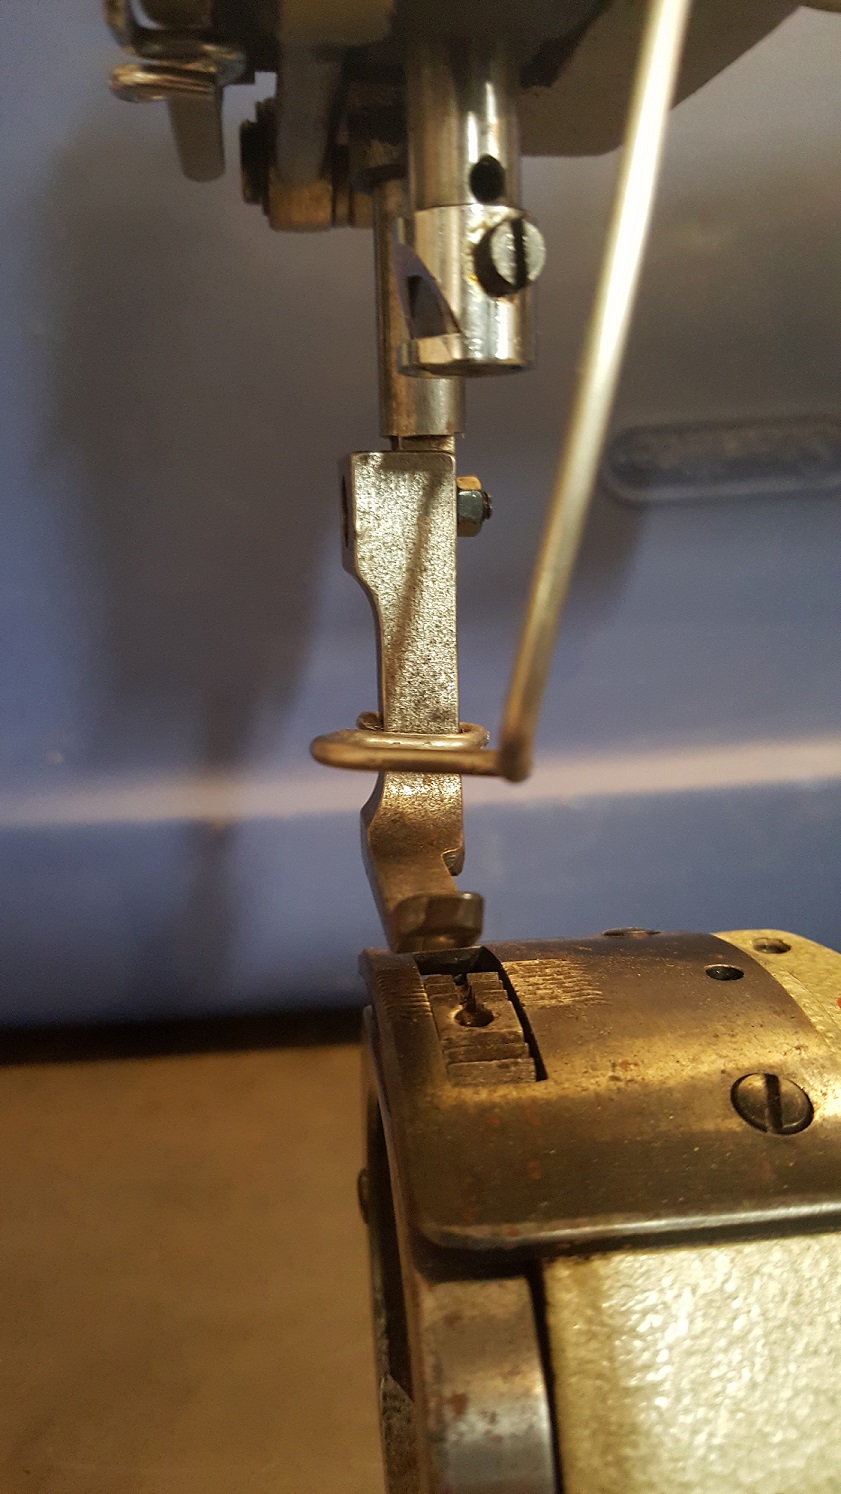
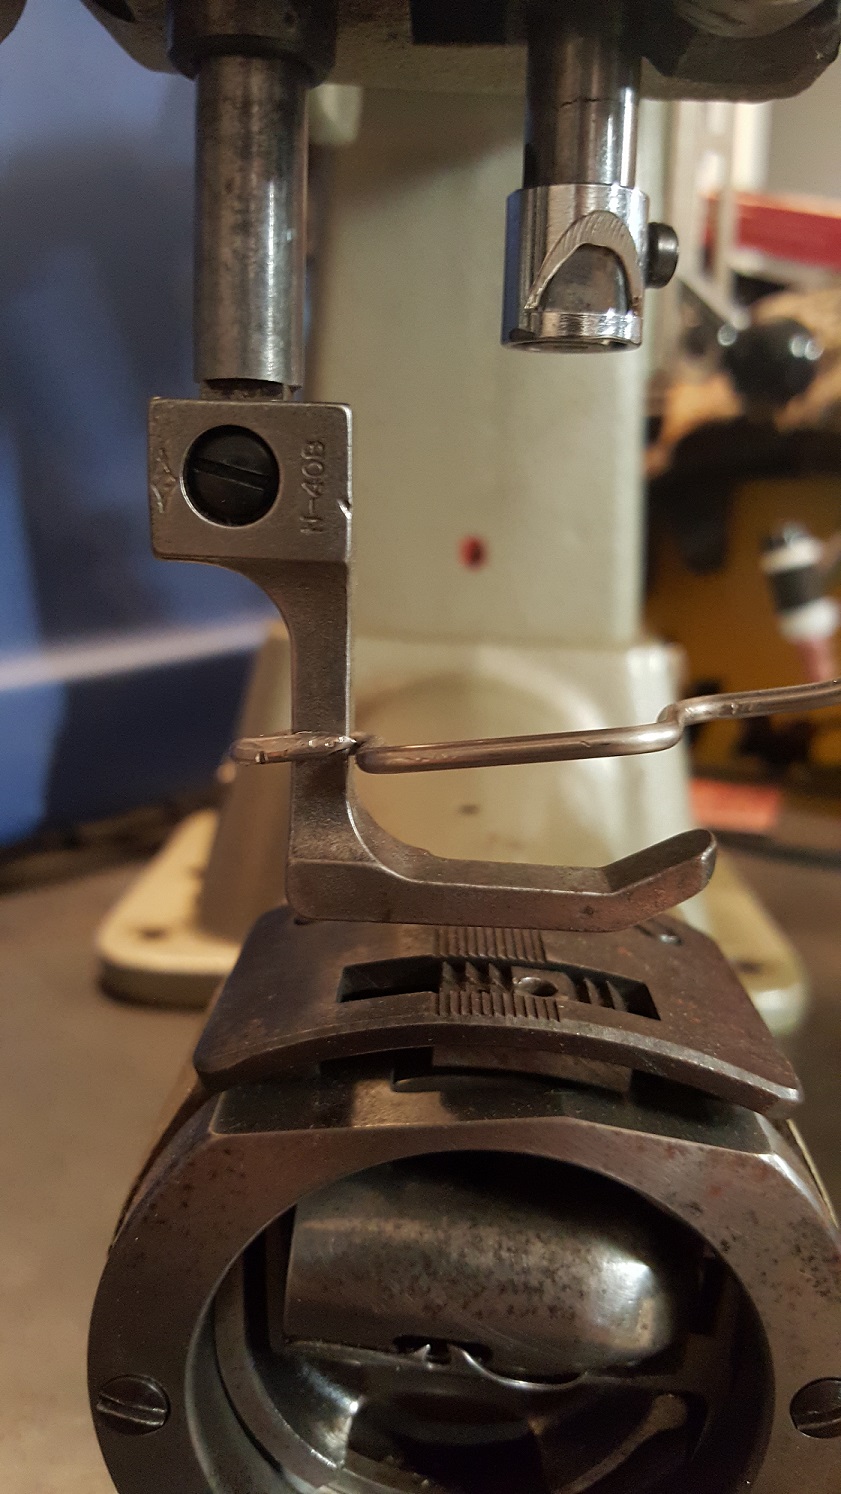
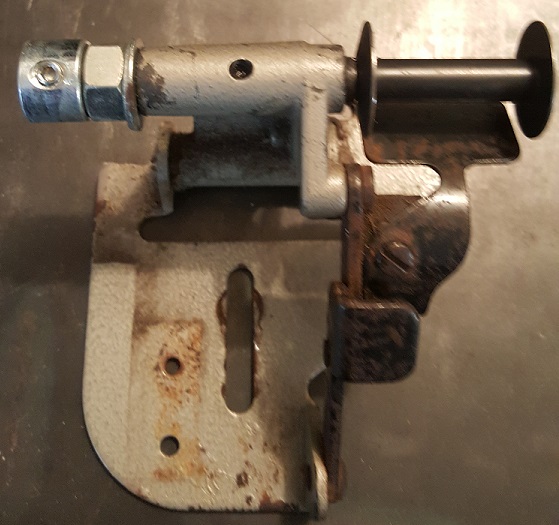
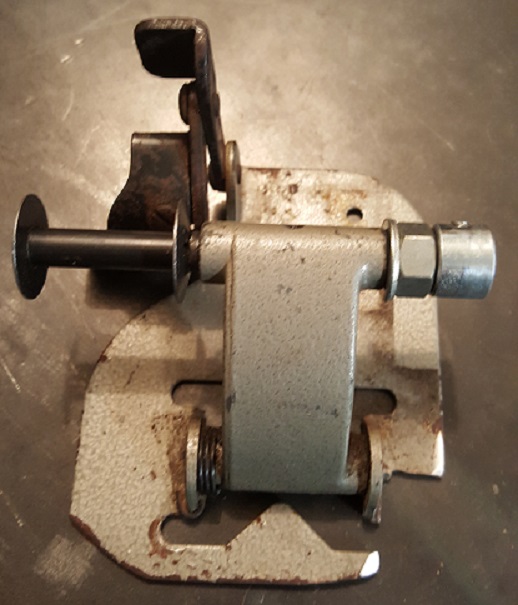
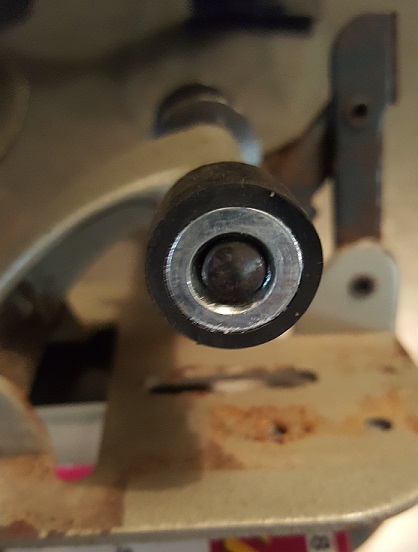
So after class today, I set out to correct a mistake I made when it comes to my table and machine....failing to plan for properly allowing enough room for my bobbin winder. I briefly thought about a standalone but figured I could come up with something if I just sat back and looked at it for a bit. For my bobbin winder to fit on the table, I would have to modify it...so after positioning it here and there, I found a good spot and then modified the bracket by cutting off a corner. Then I removed the OEM wheel that would normally make contact with the belt and replaced it with a shaft collar. I then found that the set screw made contact with the belt and didn't allow for a smooth rotation...hmmm? I sifted through my odds and ends and found a 1/2" vacuum line cap...wedged it on and cut off the excess. This allowed for a smoother rotation and it was now rubber-on-rubber. Due to modifying the corner of the bracket, I lost the ability for the new 'wheel' to come in contact with the 'brake' to stop it after it had disengaged. So, back to the odds and ends drawer! I found a bracket of some sort and made a couple of bends to bring it up to the proper level to engage the new wheel. Long story short, this is what I ended up doing to allow the bobbin winder to be mounted back on that table. I will add a tension assembly in front of the winder, so that it will feed and fill the bobbin as it should. The pics are in order of what I have tried to describe up above!


-
@LumpenDoodle2..I will retro fit the presser foot pedal, as the previous owner had it 'jerry-rigged'...I will definitely come up with a better system! @dikman--right now, I can get it to sew a single stitch at a time, so it is slow enough..just have to get accustomed to that small pedal. The pedal on my tig welder is 2x the size, so just need to get comfortable with it. I will update as things progress! Thanks for
-
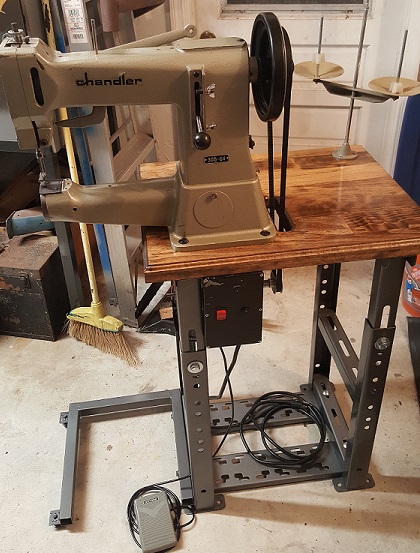
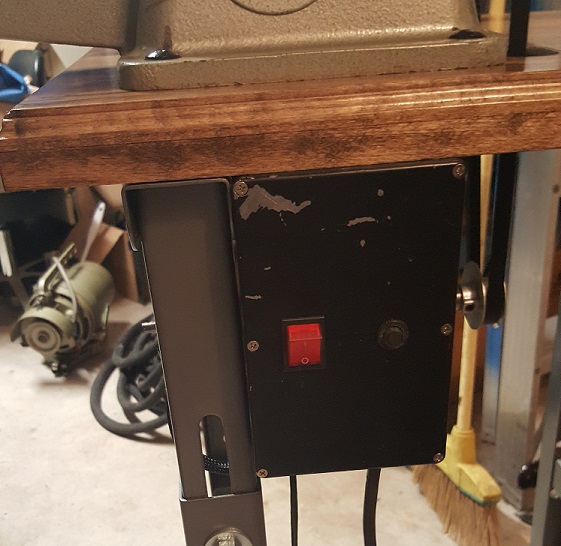
I took some time after class each night and slowly plugged away at getting the machine, table, and motor put back together. Everything works as I imagined and the true test will be when I sew with this beast. As of this moment, the only needles I have are NM 200/25, so I will need to order some thicker thread to test sew with when the time comes. I will definitely need to start educating myself when it comes to what needles use what thread...all in due time I guess. So, here is how it sits now. The pedal I am using is just your average electric $10 sewing machine pedal. I modified it (gutted it) to accommodate the slide potentiometer that I am using with the motor. The motor is just a 90vdc treadmill motor and controller. So far, I have good control, being able to really control the speed as it sews. Thanks to @Davidmadd for jarring my brain when it comes to using these motors...it never crossed my mind, even though I have one on my metal lathe!! I did reduce the size of the motor pulley down to 2", as to slow the machine down a bit more. Top speed is still a bit to fast for me but I did limit the amount of travel of the potentiometer, as to help me keep it nice and controlled. I will end up pulling the cover off the switch plate and repainting it, just a metal box I had in the garage. On thing I did not take into consideration is room for the bobbin winder, so a standalone is in the works now! As I finished up, I couldn't help but to see what this thing would do, so I put in a needle and started with a single piece of 8oz, it punched through it easily...so, I fold it in half, and it didn't blink an eye. I think this just might work for what I want to do!

-
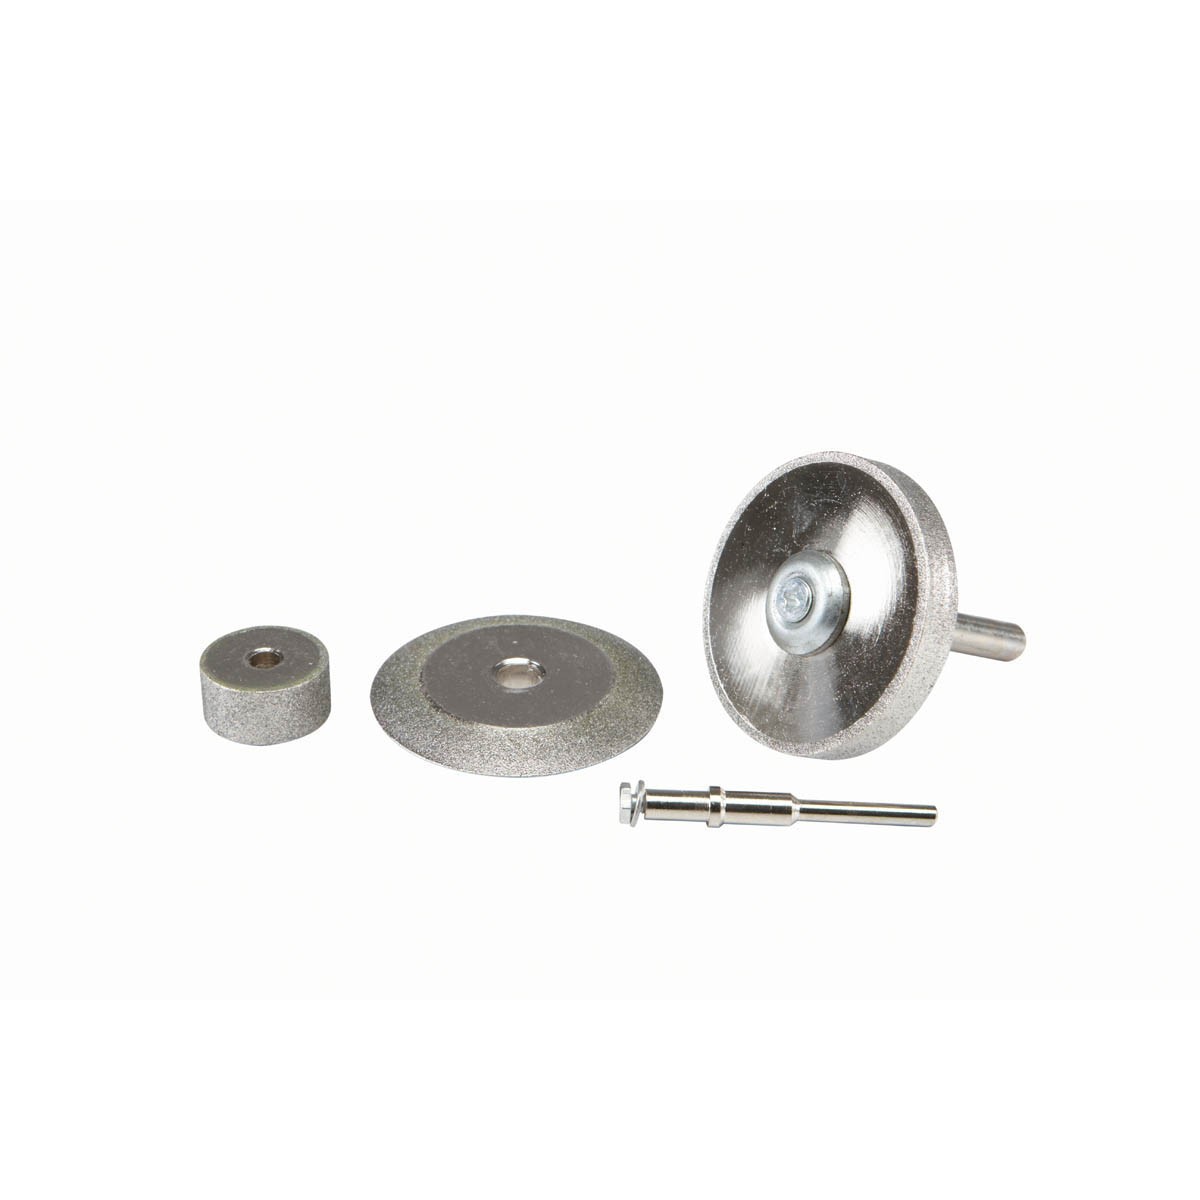
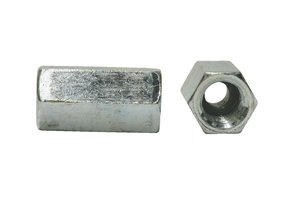
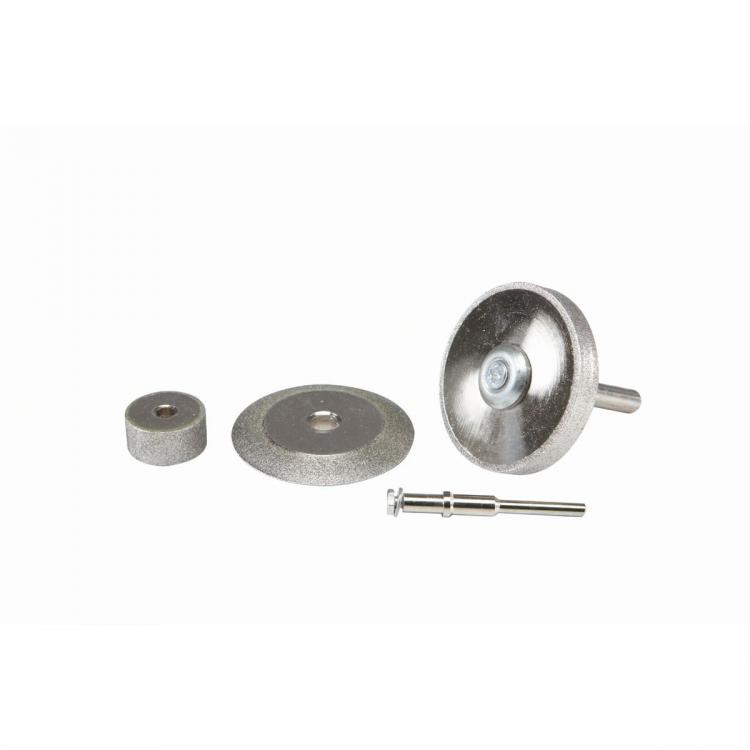
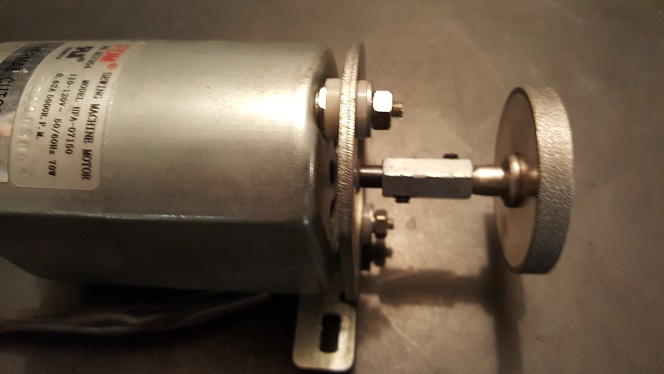
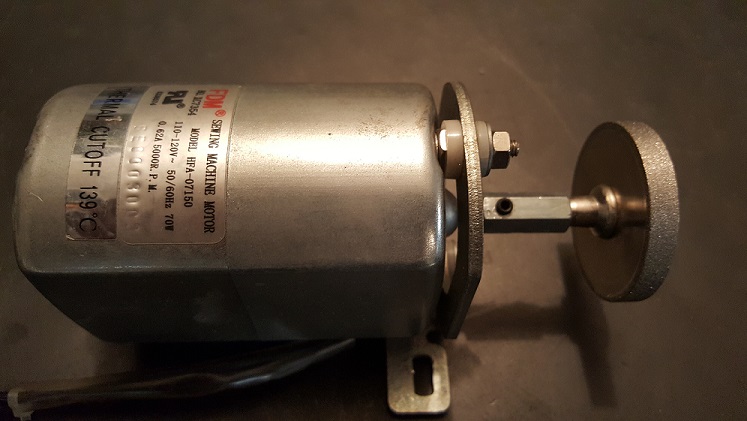
@LumpenDoodle2..here are the details you are after..pretty easy and not at all complicated. Parts list: Retired sewing machine motor (mine came out of a plastic Brother home machine) Coupling nut with a couple set screws El cheapo diamond wheel ( we have a cheap tool store in the states ..Harbor Freight) Find a coupling nut that fits the shaft of the motor (or at least close) and attach using a couple set screws. Attach your diamond wheel....just know that once you turn it on, it will spin up to max rpm. You can't limit the speed by adding in a potentiometer to regulate the speed. Also, another option for wiring is to keep the original wiring, complete with the pedal..it has a built in potentiometer! Here are some pics for reference.

-
Awesome news and am glad it is back in service! One has to wonder where @Uwe keeps all of these spare parts!!
-
Thanks @RockyAussie, it is always nice to have an extra hand to help!!
-
All finished...painted and bolted together. I choose to bolt it if one day it may need to be broken down and moved. I figured I would throw in a pic of a re-purposed sewing machine motor that I fabbed into a tungsten grinder...works fantastic! The parts of the 'hand' are all old sewing machine parts...the fingers are stainless bolts..I needed a place to hang my hood and rest my torch when I weld.

-
More pics...


-
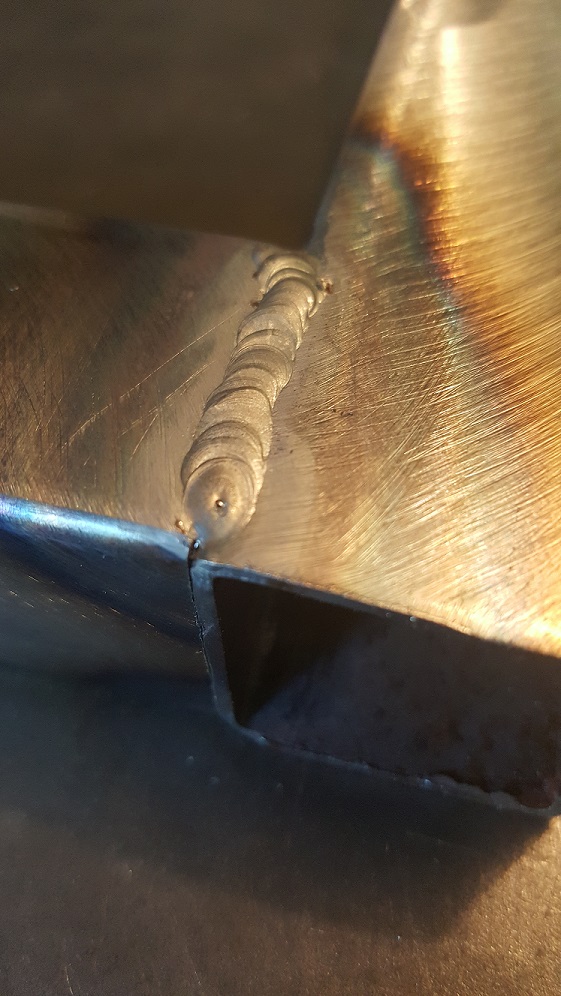
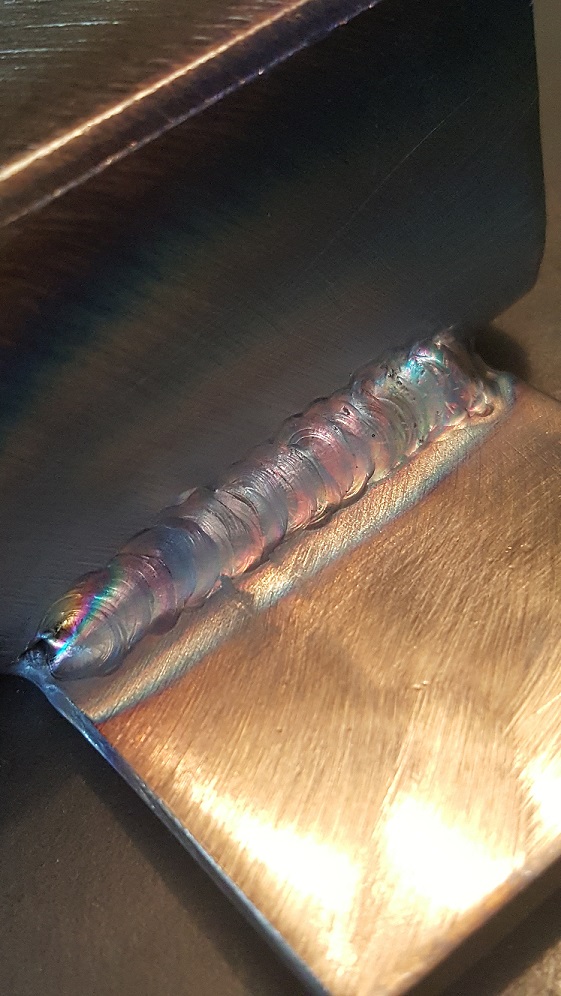
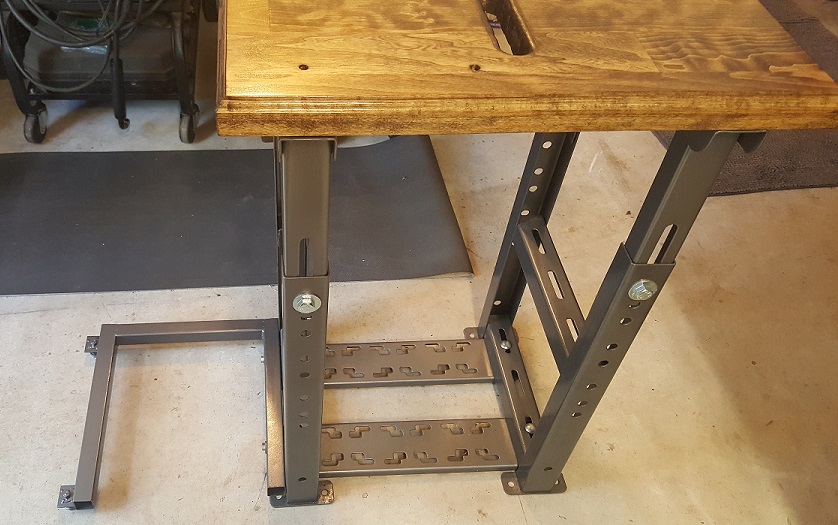
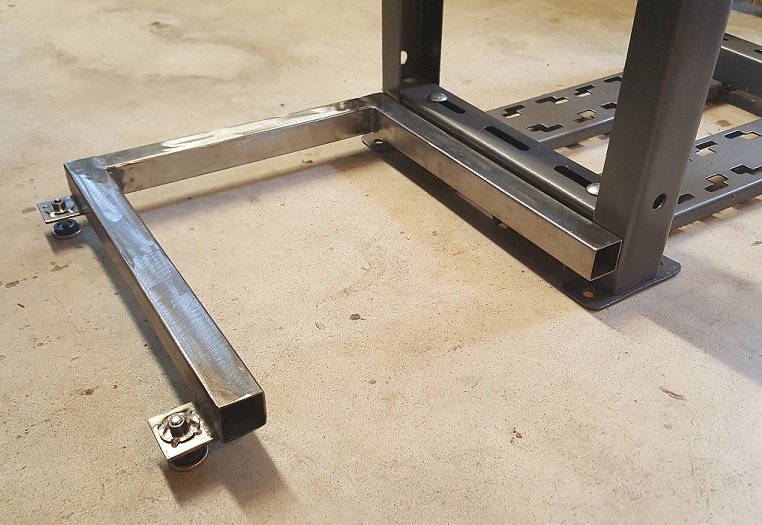
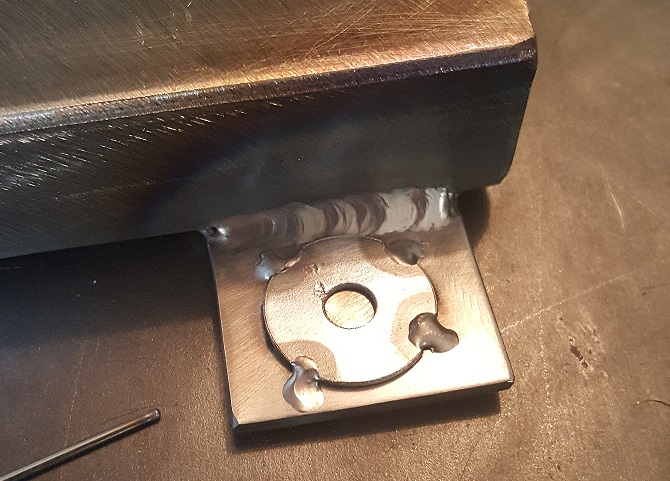
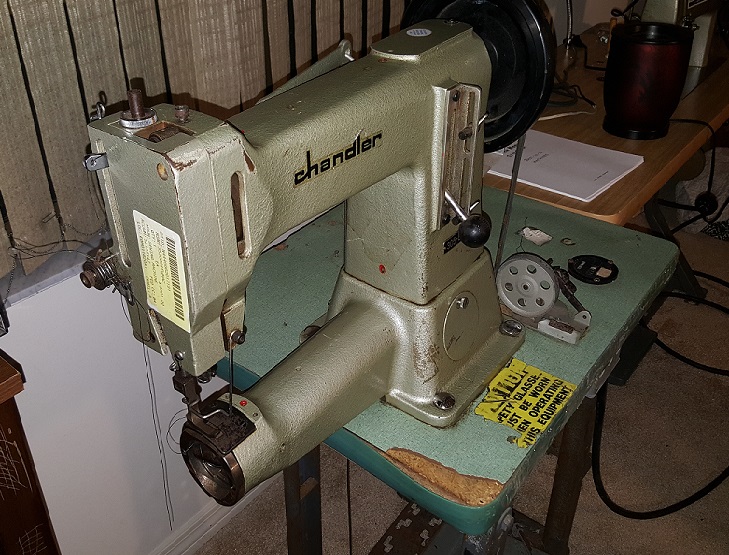
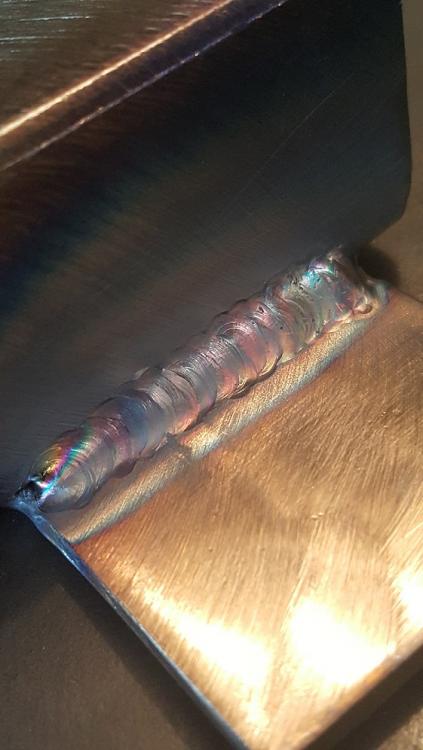
So I found some time to get to work on my table for my Chandler 305-64 cylinder arm machine....which is rare..just due to the fact that I have many projects going on at one time. Here is a pic of the table how I got it..typical formica and the previous owner had cut the table for some reason, which caused the table to tilt, given the weight of the machine when mounted. I knew I had to do something, so I first ditched the formica for some birch, which is 1.5" thick. I cut, sanded, routed,, and then finally stained and added a couple of coats of poly for protection. Here is how I got the machine.. I dug through my scrap and found some 1" tube and cut it to length. I choose to tig weld it for the sole reason that I haven't done it for a while...and it shows! I definitely need to get back to tig welding because it is relaxing and I truly enjoy it. I set out to fab up an outer support with adjustable legs or feet. This is what I have come up with and thought I would share. The tabs are 1/8" stainless that I had laying around...also from the scrap bin. When welding plain carbon steel to stainless, 309L filler is your go to material!


-
@Uwe..that is exactly what I was thinking about doing with my only presser foot! I actually think that would be the way to go, just due to the fact that low shank presser feet can be had for little to nothing. I admit, we did somewhat stray from the topic...I do apologize! I very well may just sacrifice my presser foot...that is once I get caught up on all of my other projects! I greatly appreciate that Uwe and agree with @mikesc, I think that there just might be a market for something like this...hmmm?
-
Thanks Darren! I know there probably several out there that would work or could be modified to work. The only place I have actually called was Toledo..and they had something that would fit. Sooner or later I would like to get a roller foot too...never know when it may be needed. Not to get to far off topic but had to look up a WC51..my daily driver is actually a diesel Toyota Surf...I am a diehard Toyota guy...'78 Landcruiser FJ40, '80 4wd pickup, '88 Surf, and the wife drives an '08 Sequoia. I like them and they are easy to work on!
-
I second the notion of checking the local CL, LetGo, or classifieds.....DAILY! I have found all my machines local via CL or LetGo...all (with the exception of 1) for $250. My last purchase was the Singer 29K71 that I picked up for $300. Don't get discouraged and keeping looking...sooner or later you will find your first machine. But, as many will say, that is just the beginning...it is a slippery slope. I started with just one...and now have 4 industrial machines...and to me, it is just a hobby. If you plan on making a living, well, I think you are going to need a bigger shop!! Good luck!!
-
Oh, I totally agree...100%. and like the vehicle analogy. Weird because I just had to explain this to my wife....she was looking at a Land Rover HSE...being a mechanic of sorts, I KNOW that everything associated with that truck means $$$$! When an oil change is going to cost you in excess of $100...you basically pay to play! It applies to everything...I am a certified welder and have a couple of machines and I make money with those machines, so dropping $150 for a water-cooled torch...is justifiable. And I know the same goes for sewing machines...it depends on what you get...Pfaff, Adler....you are going to pay to play! It would be easier to justify if I made money or used those machines to make a living. With that said, I am well aware that the deeper I get into this 'hobby'..the more expensive it is going to get. In the long run, I will end up buying whatever I need to get the job done...if I like it or not. I will admit that it may have been a poor choice of wording...but at this moment, I wouldn't spend the money for a genuine Adler foot. Not when prioritizing everything...(we just bought a house)..so 400ft of fence, kitchen repairs, etc...come first...in the end...when the dust settles...I will end up buying different feet for the machine...or at least be at my wits end if I can't come up with something on the mill and lathe!! I greatly appreciate everyone chiming in...it is talk like this that really makes this forum stand apart from the others out there and I am glad I can be a part of it!! Thanks everyone!!
-
@Uwe..I greatly appreciate you taking the time to dig those out, it definitely gives me hope when it comes to different options..at least now I know I have options!! I will PM you in reference to a potential purchase when time gets closer to actually using this machine. I still have to mount my 'experimental' DC motor w/pedal to see if what I have come up with, will work. @Gregg From Keystone Sewing..That is similar to the prices I have found...that, to me, is cost prohibitive...as it is over 1/2 the price of what I paid for the machine. I am strictly a hobbyist..only using my machines (for the time being) for odd repairs that might pop up on my dog's collars/harness...we foster and rescue. As of now, I have no idea of the feet I will need until I use the machine for a true 'project'..not just repairs. The repairs now are mainly completed on my 111W...it handles the leather and nylon webbing well. I thank you for the information..it helps me immensely when it comes to budgeting for my hobby! V/r, Chayse
-
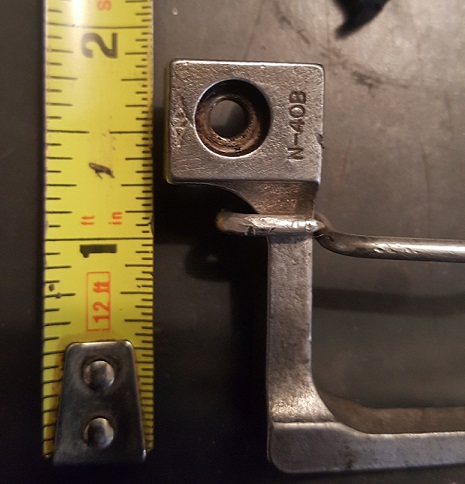
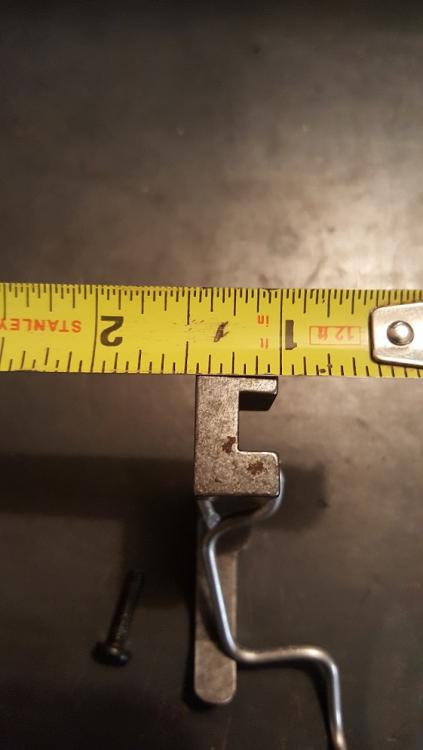
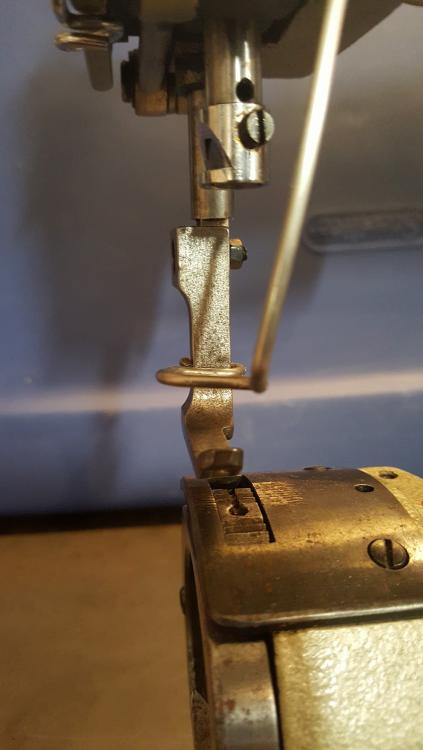
I can mic out the actual attachment point, instead of using a tape measure if that helps anyone. Thanks in advance! V/r, Chayse
-
I have begun to finish up cleaning and repairing my Chandler 305-64 (Adler 105-64 clone) and I am faced with the issue of having only 1 presser foot! Seeming that the original Adler presser feet are prohibitively expensive...I am at a loss. I either work with what I have or possibly sacrifice my only foot so that it will except more available foot options. I have looked and have found close substitutes but it would be a roll of the dice if they will actually work or not. I have attached several pictures of the foot that I currently have and I know that there has to be different presser feet for this machine that will work...hoping not to spend an absorbent amount of money for different foot options. They have literally cloned everything when it come to sewing machines...why not feet for this machine. I have thought of casting different feet or possibly trying to fabricate my own on my mill. Then again, i could modify the only foot I have to accept different feet from other machines that are not so expensive. I would basically cut the foot portion off the 'shank', mill it so it is as close to horizontal as I can (hopefully within a few ,001's) and attach more common presser feet. Basically, I am asking the knowledgeable folks here on how I should proceed....so let's hear it...at this point...I only have one option without modifying the only foot I have....


-
That looks like a beast! No wonder they wanted to get rid of it...just for the shear size of it. Congrats on the find...looks to be in good condition as well!!
-
Awesome news..looks as if you are well on your way!! This forum is outstanding!
-
@Wizcrafts...are you referring to Part #82149...Feed Motion Cam Wheel? By your description of the slight modification, I think I have the right part narrowed down. But through reading of your various threads pertaining to the 29K's, particularly the later models, I know it can be a number of things...will take it slow and see how it goes. I know for sure that I have a bit more than a 1/16th movement at the bell crank lever..at least it gives me a place to start. Thanks for your insight!
-
Thanks for everyone's input thus far as I still have to find the time to disassemble the machine and give it a good clean and inspection. I think it is then that I will have a better understanding of the next steps to take. I am still a novice, so the actual stitch length doesn't bother me as much and I am sure it will all come together on different projects and finding the stitch length that is aesthetically pleasing to fit the project at hand....all in due time I guess!
-
Out of curiosity sake, I looked up the parts schematic for the machine...machining would/might be a good option as I didn't look close enough at the pictures to see that the shaft separates from the end. Find a piece of tool steel and have it turned on a lathe, then machined for the profile on the end that is bent. At the quoted price, I would have it done as it seems cheap. Depending on where you are located in the states, machine shop prices can be astronomical for tooling up for just one part. That is the whole reason I put myself through school(s) to learn...because I didn't want to pay that high price. I would gladly make a few mistakes in my garage, then to pay some absorbent price! Keep us updated!
-
I have absolutely no idea what the large awl type tool is in the top left...is sharp tho! I think some of the fun is finding what, if any, hidden treasures might be stowed away in the drawer!