-
Posts
63 -
Joined
-
Last visited
Content Type
Profiles
Forums
Events
Blogs
Gallery
Store
Everything posted by andrewsejlv
-
Hello All, I have a question about a leather that I have, and I'm hoping someone might be able to help me identify the source. I fell in love with this leather when I got it, and want to source more if possible. I bought this leather in 2017 from OA Leather supply. It was sold under the name Kobicha Oiled Goat, 2.5/3oz. I have asked OA about the source, and he indicated he bought this leather on a liquidation order, and as such did not know the original source. Attempts to search for "Kobicha Oiled Goat" do not return any similar results, and still being relatively inexperienced in leatherwork I'm at a loss as to how to find a source for this particular leather. I've included two images of this leather as well. Any information that you guys could provide on this leather would be greatly appreciated! Image 1: Top/Finished side of the hide. Image 2: Flesh/Unfinished side of the hide. Image 3: This hide as used for stitching pony covers/pads.
-
I'll shoot you a PM, and we can work something out. I'm always interested in trying some new leathers. I was using a higher end Trotec laser for a while, but lost access to it when the local makerspace went bankrupt. I now use a cheap K40 with a few simple mods, and it's working great! In total I've got about $400 into it, and couldn't be happier. I can make a dedicated post about it if people are interested, but the basic list of changes is: - Added air assist -Added a steel mesh bed (removed existing bed) -Upgraded cooling pump, and using ice packs to cool the water going through the tube I use the laser for cutting the outline, cutting the stitching holes, and engraving.
-
Thanks! The stitching pony is from DreamFactoryKR https://www.etsy.com/listing/583248914/leather-clampleather-craft-toolstitching?ref=listing-shop-header-1 I love this thing, and couldn't be happier with my purchase. I'm putting aside funds for the larger floor model clamp now! Thanks! I use double needle Most of my leatherwork is done in the 2-4oz range. Thanks! Horween Rancho Brown Essex, 4oz. And they are technically diamonds, but basically round when you account for the laser cutter's kerf. Thanks! I'm using a modified K40 laser (The dirt cheap chinese type), so it's well withing reach! Thanks!
-
Beautiful work!
-

Sunglasses Case
andrewsejlv replied to andrewsejlv's topic in Purses, Wallets, Belts and Miscellaneous Pocket Items
Thanks! I think this is one of those things that everyone comes to a similar design for. All we can do is try to stylize it a little differently to stand out from the crowd. Thanks! -

Logo/Website/Business Card Design
andrewsejlv replied to andrewsejlv's topic in Marketing and Advertising
This actually looks like an awesome option. It looks like awards in the $300 dollar range are still getting a few hundred responses, and that's well within my budget for this work. I think I'm gonna give this a shot. It's all good. Thanks again for asking! -

Logo/Website/Business Card Design
andrewsejlv replied to andrewsejlv's topic in Marketing and Advertising
Much appreciated! -
Hey all, I'm looking for suggestions/leads on sources for the following work: -Logo touch up: I like the logo I have developed, but I'd like to have someone with an eye for marketing/industrial design find a way to incorporate my business name into the logo, develop a nicer color scheme, and incorporate a nicer border than the square that I have. -Business card design: Looking to get something original designed, so people aren't throwing away generic black/white cards that just have my logo and plain text. -Website design: This one will be in the near future, but I'd like to have someone design a simple sales site for me. Doesn't have to be complex, but when I try this myself it just always seems to be lacking that cohesive feel that a quality website should have. Any suggestions would be greatly appreciated! I don't have a fortune to spend on these tasks, but I could stomach a couple hundred for the first few tasks, and haven't set my budget yet for the website. Thanks, Jon
-
Looks awesome! I love the oil pan drip tray.
-
Knocked out this prototype sunglasses case tonight. Needs some slight size adjustments, and I think the final variant will require some type of liner (felt, suede maybe?), but overall I'm really happy with how it came out. A cold one seems to taste even better after a productive day at the workbench... If you guys have any suggestions on the design overall, or suggestions for a good liner, I'd love to hear it!
-
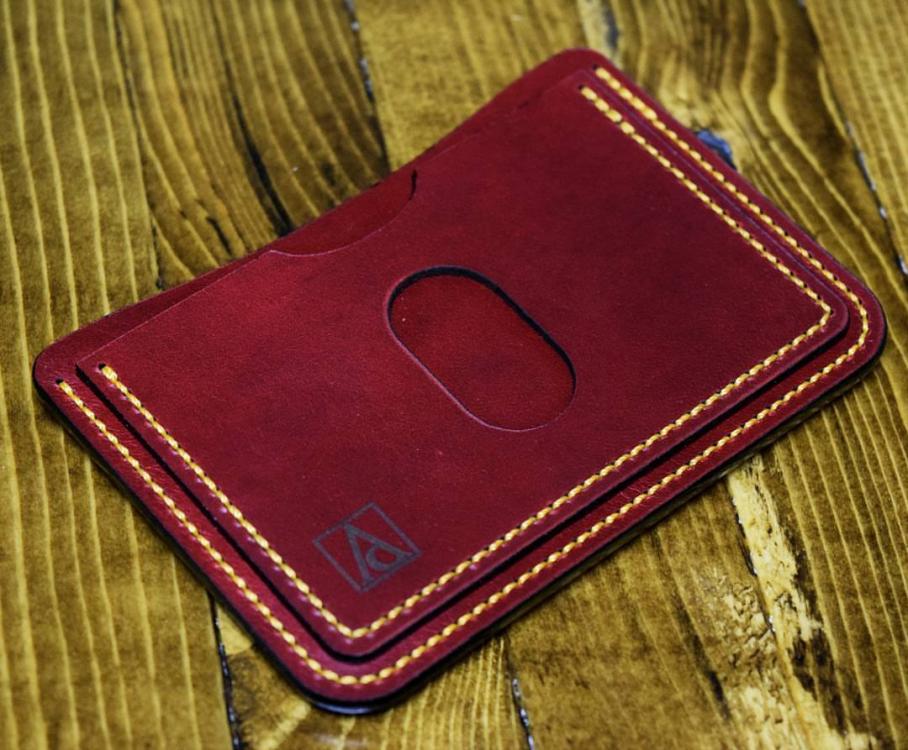
Made a card wallet with some new leather (Horween Candy Red Essex) and thread. I wasn't sure how I would like the combo of the yellow/gold thread on the red, but I think it came out great. I also tried using a sharpened pencil for the edge paint, and it worked like a charm! Right now I'm using edge kote black, but would love to try out some different colors. Anyone have any suggestions on a place I could source a number of edge paints in small volumes to try out?
-

Valet Tray/Organizer
andrewsejlv replied to andrewsejlv's topic in Purses, Wallets, Belts and Miscellaneous Pocket Items
So there weren't too many steps in the making of this item: First was the design of the item. I did the modeling of this item is Autodesk Fusion360. This was my first design in Fusion360 (I use SolidWorks at my day job, and it's my preferred CAD environment at this time), and I found a few things I really liked about it. For one, it let me design the MDF frame and the leather inlays in one model environment, and it has a good CAM post-processing system that allowed me to output the proper code directly to the ShopBot CNC router. Next was cutting the frame. This was a pretty easy process with the ShopBot, especially since I could so easily model my stock material in Fusion360. I simply lined up the origin of my MDF stock with the ShopBot's origin point, and let it go to work. That's when I learned the lesson about keeping your stock properly adhered to machine bed. The router kicked the work piece across the bed, and proceeded to cut through the side of the stock. Thankfully it cut away from the internal pockets, and I was able to cut the outer profile of the tray with a table saw. Then I cut the inlays of the tray on the laser cutter. Again, easy process with these tools, simply exporting the DXF of the inlays into CorelDraw and prepping for laser cutting. I will say that the liners were a little bigger than they should have been, so the Kerf didn't take off as much as I expected. Simple offset should solve this on future designs. After sanding the MDF frame to knock down edges and even out the surface from the bit, I used Zinsser Amber Shellac for the finish. After a few coats of Shellac, and quick coat of some leftover semi-gloss gives the frame a nice finished surface. Lastly I used some light duty 3M spray adhesive I had sitting around from another project to adhere the inlays to the tray. Because the inlays were a little bit, I chamfered the edges on the back side of the inlays, which allowed them to lay nicely against the edges (they roll up onto the walls a little bit, which is actually a nice effect I hadn't planned for). -
I posted this as a response to IngleGunLeather's valet tray topic (awesome post btw, check out the fantastic work on his tray inlay), but figured I would start a topic of its own as well. This was designed to hold my standard everyday items, and keeps them at the ready on my nightstand. This was my first project working on a CNC machine. It was a fun project, and I'll definitely be working on the CNC machine again in the near future. I actually learned a valuable lesson about making sure your stock is properly adhered to the table before cutting as well, lol. The MDF frame fresh off the CNC machine: The frame with the leather liners installed, and finish applied: And loaded up with all my standard items: Really happy with how it came out. I've got a few more items I wanna make in this style (headphone stand, cases for some nice tools, etc.)
-

Valet Tray
andrewsejlv replied to IngleGunLeather's topic in Purses, Wallets, Belts and Miscellaneous Pocket Items
Inspired by your valet tray, I decided to make one of my own design: Although my inlays are not nearly of the same quality as yours, I'm pretty happy with the end product. Thanks for the inspiration! -
Here are two small pieces I threw together over the last few days, while working on the CAD for a few new designs. The first is another field notes cover. I know I might have an obsession for these little notebooks, but they're handy to have around when inspiration strikes, and they give me a way to always have an example of my leather-work. It was also my first time using edge paint: I had some issues with the edge paint spilling over onto the front/back faces (I was applying it with q-tips for this first run). I do like how they came out though, so I'll be looking for some info on how to properly apply edge paint to keep the faces clean. The second is the round pouch. Not particularly practical, but I wanted to make something different, and it turns out to be a nice little pouch for my zippo.
-

Valet Tray
andrewsejlv replied to IngleGunLeather's topic in Purses, Wallets, Belts and Miscellaneous Pocket Items
I love it! I think I might have to make one of these and leave my leather valet tray for the EDC bag. One thing I would add, that I found out from my leather valet tray, is a cutout for the phone charging cord. If you're gonna leave your phone in it every night while it charges, it will not put stress on the cord/charging port if you have a cutout. Great work! -
Thanks all! Because of the positive response this design has gotten, I decided to tweak the design and make one from some proper leather (Horween Essex, 4-5oz). Here are some photos of the work in progress: I don't have a stitching pony, and this piece was too big for my binder clip method, so I had to rig up a clamping device to hold these pieces together. It actually works pretty well for the whole 5 mins of work that went into making it. A few photos of the pieces sewn together. Hoping to add the snaps and burnish the edges tonight! I'm more excited to finish this piece than any of my previous work.


