


katit
-
Content Count
241 -
Joined
-
Last visited
Posts posted by katit
-
-
Silicone plugs worked as a charm!! I waited about 30 minutes for paint to be dry to touch and pulled them with sharp pick. This is what I have now. Can start assembly and tinkering tomorrow! You see on a picture pulled plugs


-
Hmm. Received timing belt but not sure if it’s correct? Matched by PN. All sizes match except for width. Is that correct? New one is not as wide

-
38 minutes ago, Wizcrafts said:I believe it is a presser foot knee lift roller, but I could have misread the description.
Looks like it. Never seen anything like that, some installed pics would be nice
-
What is this for?
-
13 hours ago, chrisash said:Maybe a very thin layer of vaseline around the plug edge to stop the paint sticking to it, so when you remove the plug it does not pull away a small part of the new ;paint around the hole edge
I think I will be pulling plugs right after I finish spraying while paint is wet so even if it's lightly flows into the holes - it will be good.
This spray paint dries pretty fast, like 30 minutes to touch, stops flowing in couple minutes (becomes tacky). Need to organize and move quickly.
-
2 minutes ago, dikman said:What about foam earplugs? They can scrunch down pretty small, or be cut to fit.
That is great idea, but those ideas come too late
") I already have those silicone plugs ordered, just going to wait. Have to use what purchased, right? I still have plenty of work with table/top so machine can wait for now
I already have those silicone plugs ordered, just going to wait. Have to use what purchased, right? I still have plenty of work with table/top so machine can wait for now
-
I have some time. Waiting on timing belt. And paint dries pretty fast. I still have table to work on, keeps me busy and temps here is really bad for painting outside

I have hard time painting table legs. Did priming when it was 40, then moved parts to garage next to heater. Worked good, but PITA. So yeah, plugs on order, should be here on Monday. Spraying is 5 minutes, I can wait
-
I thought about just using paper, but didn't do it fo couple reasons. This "hammered" paint pools and builds texture weirdly, tested on some pieces. Ideally surface need to be without anything sticking out, Paper will soak paint and will be harder to get out. I ordered those silicone plugs for powedercoating from eBay. Will use those living maybe 1/16 over surface so they don't interfere with spraying. Then I'm going to remove them right after spraying while paint wet. At least this is my plan for now..
-
Yes, no problems on my end. I played with it a lot, but now it’s all good. With real stuff I always dial in stitch and tension wit a scrap piece. Depending on number of layers, etc it needs tweaking.
just as example - stitch get shorter as thickness increases. You can’t just set and forget. Those are all adjustments you do on a fly.
my pfaff 1245 works perfectly. Now I’m refurbishing Seiko machine similar to yours, will see if I can get it all setup/adjusted
-
Why would you sew 1 layer? If you connecting 2 layers its a minimum. If you do single reinforced seam it’s 3 layers. But in my case I have scrim foam and it becomes even thicker. Plus some vinyls just different and don’t even need 92, 69 is good.
Answers I got all good. I was more concerned with cosmetics and if you go with smaller needle/hole it will be different
-
I am new as well, but already past that stage of worrying about tension
Doesn't take much to develop this "adjust on a fly" skill. Stop worrying about knot on single layer of vinyl, it's not "real world" scenario. If material is VERY thin - chances are it's too big of a thread for it. I myself use 92 for everything. 2 layers of vinyl - no problem. One layer - no way it will hide knot. If you need to do 1 layer for decorative purpose just loosen top and let those be on a bottom.
Different color threads require different setup. Black is different from white. I have 92 from same manufacturer and they all different require slight tweak for different colors and materials. Bottom tension stays the same since it's always 92, I don't mess with it at all after figuring it out. You will be able to tell "by feel" even when you pull bottom thread out from machine.
Needle makes difference too. #20 with 92 will make bigger hole, knot can go up/down easier. #18 (what I use now) makes smaller hole in works better to my liking.
And for the next question of bottom stitch prettiness: Nope, it will be ugly on some materials
Experiment with needles, but out of all money I spent I settled on #18 LR needle.
-
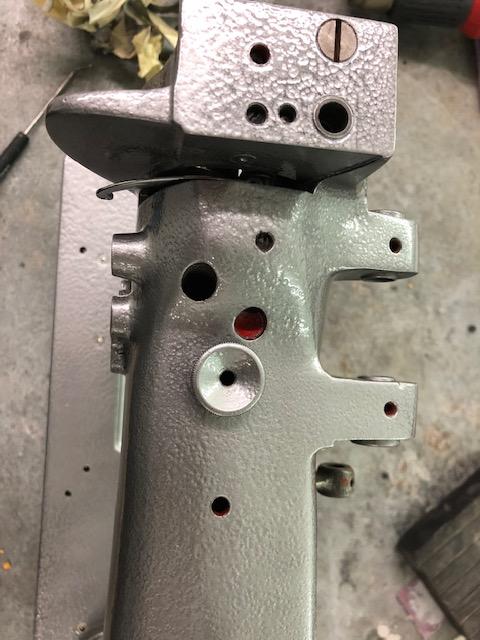
Ready to paint but I'm concerned I'm making mistake
Stopped to see if anybody have similar experience. I plugged small holes with playdough. But it gave out oil, you can see on picture. And I worry that it will mess with paint adhesion. Or it won't? It's not too late to remove it and use something else to plug holed (what?)
I picked Rustoleum hammered finish spray can, already painted 2 covers and reverse lever - looks very good, I really like it.


-
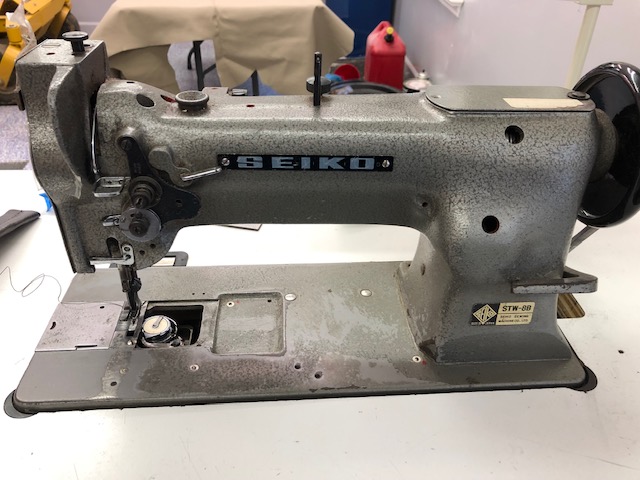
Took everything around apart, took belt off(ordered new one) and gave machine thorough cleaning with brush and kerosene spray. Cleaned up nicely. Decided mine as well won't make it any worse if I give it fresh layer of paint. Decided not to overkill and just go with rustoleum spray can of similar hammered finish. Called it a day after sanding right half of it. Another half going to be harder with all of the holes and voids.
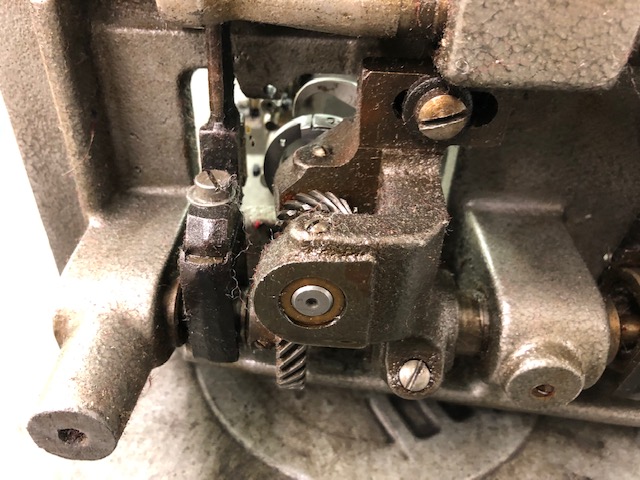
Shaft play: Even after clutch adjustment I feel some play in shaft. Also, there is some play in gears. Is that normal to have some? Logically machine moves forward, so there should be no problem, but what about reverse?


-
Topic below is where I bought machine, but it's got sideways with motor questions, etc
http://leatherworker.net/forum/topic/83707-seiko-stw-8b-question-on-servo-with-needle-positioner/
I'm working on getting it working. I installed new good needle, good thread top/bottom and tried to sew. No luck, if go slow - it works, when go faster starts skipping stitches. Reverse does not work, stitch adjustment wheel is not correctly set. There was other questionable items so I decided to fix/replace/readjust from beginning.
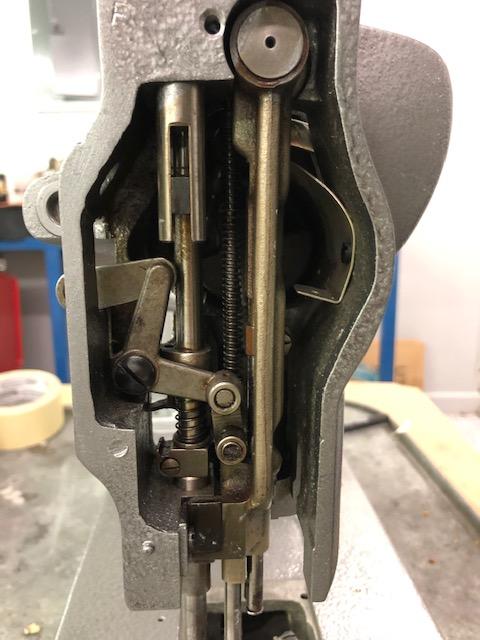
Clutch: I took it off, it was glued. Removed glue, cleaned, lubed. Looks like pretty simple mechanism so I'm puzzled on why it was glued? Anything I need to know? Tooth which latches and keeps it connected has some wear but very little. I didn't assemble it completely, need to figure out eccentric adjustment and spring position.
Also, look at the bearing case (???) left from clutch. Seems like someone tried to pry it off. Why? Anything I should check?
Belt: frayed a little, should I replace it?
Hook/shuttle: There is some slop in gears, they look like they are not aligned properly, is my assumption that they need to be moved to mesh closer correct?
Cleaning: It's sitting on metal pan right now, I was thinking about getting kerosene, brush and spray bottle. Then go top to bottom and get it all cleaned as much as possible. I took off covers, bobbin case, pulley, reverse lever. Is kerosene proper thing to use? I plan to let it drain afterwards and lube everywhere. Any place I should use grease instead of oil?
I decided not to take it apart any further. Will do all adjustments A-Z after cleaning, does that sound like a good plan?


-
2 minutes ago, Matt S said:Don't get me wrong, when it worked it was amazing -- a £80 pocket sized machine that takes razor blades costing pennies doing a job that I thought I needed a £1000 machine to do. However it was just running too much leather and I was having to work so slowly that I bought a bell skiver when a good deal came up. Never looked back.
Did you mean "ruining" leather? Nor "running"? And what exactly happened? Cut through surface?
$1000 is little too much. I can afford if I was doing a lot of it, but it's just one time project for now and even if I go slow it's OK. I also don't have much space and don't want to move heavy machines if possible.
Ok, I got main idea: If you practice and go slow - it will work. I think thats all I need.
Taking pieces to somebody is a good idea, but there is couple problems. I don't know anybody. Time/beer will cost as much as this machine. I am pretty sure I won't get it from first time. Will forget a piece or maybe screw up later sewing needing redo, etc.
-
I think your machine needs different table, here is why. I have Seiko machine (same as consew 226R) and it came with hook style and table had round metal plates. My other machine have this new style mounts (Pfaff 1245) Both machines would go to each other table. Both machines have same size holes on back and positioned exactly at the same distances. So, it's just table/hook/mount style. But on your case 2-needle machine seem to require different table top
-
14 hours ago, Matt S said:There are little skiving machines like the Scharf-fix that take razor blades. I imported one of the Chinese copies, used it for a few months, figurated it wasn't suitable for my needs, then sold it for about what I paid for it. I wanted to step-skive medium-stiff 2+mm chrome tan for turned edges but being designed for bookbinding I think the frame wasn't stiff enough for what I wanted to do. Upholstery leather would probably be better but it'd still be awkward doing large panels.
Hmm. Checked those, they are pretty affordable. I'm just not sure how it will work. In my mind hard leather should be easier. Upholstery leather is ~1.2-1.6 and it's softer. I wonder if it's going to jam/bulk under blade while pulling. It feels like upholstery leather more "gummy" and thus it's like cutting rubber vs cardboard. Bell skiver constantly moves blade across which should do better job.
Anybody tried those "razor blade" skivers on upholstery leather?
-
STL is St Louis, MO USA
I’d love to use someone’s local help in exchange for beer. I think what I need can be done in 15 minutes with bell skiver
-
Does anybody have link to manual of those controllers? Mainly want to see what buttons do and how to program those?
-
Need advice/input. I need to skive 1/2 edge of automotive leather before sewing parts. I know about bell skivers like Fortuna, but can't afford one at moment.
Is there other budget solutions which work?
-
I'm sure if you can make a video of hook and whole process - someone will help you here.
It seems that top thread get's "hung up" on something underneath on a way up. Maybe it's related to how you turn and how loop just slightly angles underneath. Video of this would help for sure.
-
This excersize was pretty easy for me on my machine. Stop with needle jast starting to raise, just slightly lift feet and turn material. Voila!
What puzzles me is that author doing exactly the same but not getting desired result. And look at other corners (not 90) - they all look good. OP, anything you do differently with those corners other then how much you turn your work?
I wonder if there is some kind of misadjustment on machine which opens top thread tensioner too early? But why other corners look good is a question.
-
Trying to find something that will fit my budget and this motor seem to be a good candidate. At ~$160 shipped it's got positioner, it's 750w (1hp?) and control panel look exactly how I want it - needle control via button push.
Comparing to cheaper 550w motors looks like a great deal, no? I wonder if I miss something.

-
Almost placed order with Keystone for this servo motor sp-1100-NPFL but stopped due to $40 shipping
Makes it $300 motor, little bit too much.

Seiko STW-8B aka Consew 226R refurbish/adjust
in Leather Sewing Machines
Posted · Report reply
Need to mark oil ports. Nail polish is what you guys use?
Anybody knows about timing belt? Is it OK to use narrow one? I would imagine it should work just as good, but looking for info from people who dealt with it before