


katit
-
Content Count
241 -
Joined
-
Last visited
Posts posted by katit
-
-
Need some advice on what to look for. I was practicing with vinyl (automotive) and machine didn't give me any single issue. 10 layers? No problem. fast, slow - no problem.
I finally decided to start practicing with real stuff, leather. Got 2 hides of eBay ($50 shipped!!!) - strictly for practicing, cheap enough but real stuff.
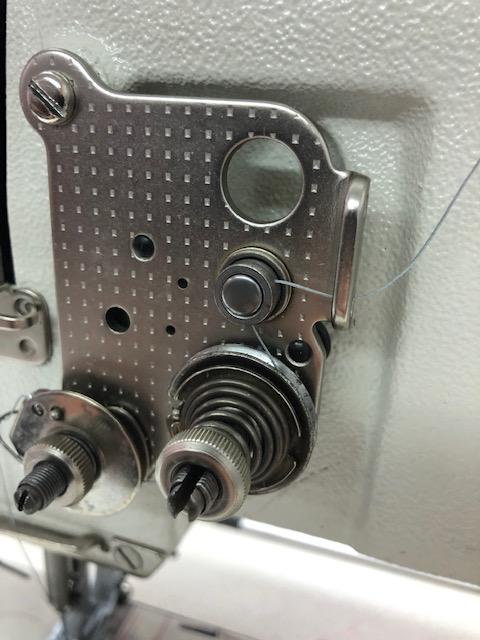
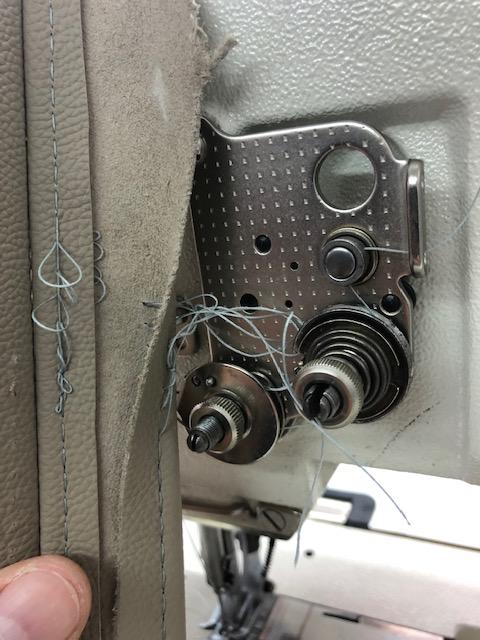
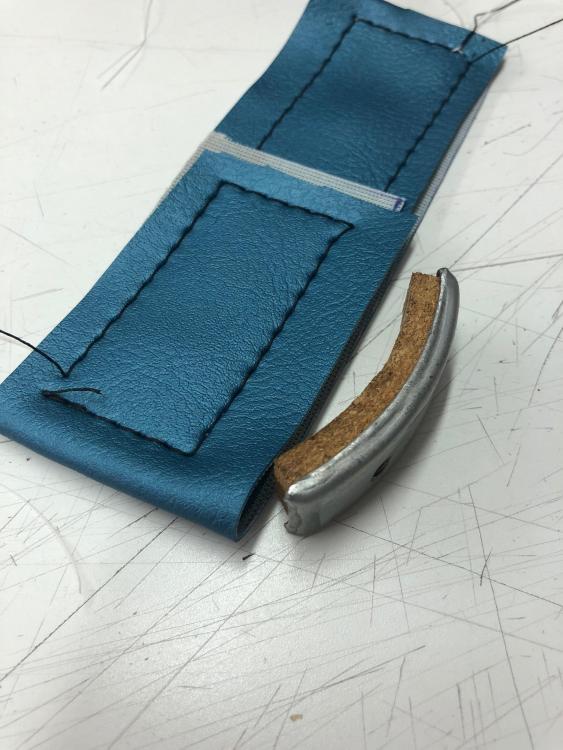
Anyway. Started doing some seams and I hear "pop" sound and bottom thread goes in loops (see pic below). Then I realized that thread coming off the tensioner (see picture). It should stay between 2 plates but it just pops out for some reason. I should say that I did increase tension about 1 turn on top when switched to leather.
However, just to check - I took some vinyl and did bunch of sewing - not problem.
Switched to 2 layers of this leather - within 5 inches I hear "pop" and thread comes off.
Any pointers on what I should look for?
-
I thought it's just me. If I go slow - all is good. If I want to go faster - my eyes focus on a needle and I stop seeing whole thing :0
-
Steve, I have same motor on my Pfaff 1245. With original 75mm pulley it was little too fast for me. With 45mm pulley it is much better. Keep in mind I'm learning too, so it may not be a problem to someone with experience. To me - this one change is good enough, but I'm working on upholstery stuff. For small items like you mentioned I would probably think about reducer, but again, I think this is 95% experience and 5% motor reducer
-
17 hours ago, Northmount said:Item 1
You should reverse after the needle has risen about 1/4" from bottom of its stroke. Stop before you reverse so you have control. If you reverse too early, the hook won't have caught the loop and you have a missed stitch.
When starting a line of stitching, you can start in reverse about 3 stitches before the beginning end of the stitch line, then switch to forward. Same rule as above applies.
Item 2
By hand-wheeling and adjusting the reverse leaver/stitch length to hit the target.
Item 3
When starting a stitch line, hold both tails to keep tension on them for the first few stitches. When doing your top stitching, don't pull the seam too tight. When reversing, don't lift the presser foot. You might need more top and bottom tension.
Item 4 - belt dust
Could be rough spot on a pulley, or misaligned. Possibly over tightened might do it too. Should be able to depress the belt about an inch by pressing with your thumb midway between pulleys without having to exert a lot of pressure. There is not a heavy load on these belts, so doesn't need to be really tight. Do you have a belt riding high above the rim of one of the pulleys?
Tom
Tom,
Thanks a lot for explanations!
#1 - I did practice but need to work on it. Not always getting through the same hole result.
#2 - Didn't practice yet, but I didn't realize that reverese lever can be used for that, all videos I've seen involved pressure release and material movement.
#3 - I will practice more. Yesterday I tried to increase tension on both top/bottom and started to get a lot of tangles on a bottom. Took me awhile to figure out. What happened was that top thread got out of tensioner and was on a tensioner spool but not between plates. And even with releaved pressure it wasn't getting in. Good expirience I guess!
#4 - See picture. I think it makes less dust now. It is straight, it does deflect about 1 inch. Completely inside pulley on bottom pulley, top pulley see pic, about even.

-
7 minutes ago, R8R said:Just food for thought, there are options.
I wish we had those choices here in St Louis
")
NONE since July.
-
17 minutes ago, Wizcrafts said:Vinyl is trivial to penetrate and pull lockstitch knots into, even with undersize needles. Leather is not. You will almost always need more top tension, or less bobbin tension, or a bigger needle to bury the knots inside leather. The denser or thicker the leather, the larger the needle, or higher the top facing tension needs to be upped.
Got it! Makes sense, then my theory not good and I need to setup tension whenever I deal with different materials...
-
Got it. Another question about needle I just thought about..
What is signs of "dull" needle? When you change needle, do you keep it or get rid of it? I read somewhere to get rid of old needles and not mix with new. Especially that sizes is almost impossible to read..
I'm most likely going to change from 19/20 to 22 when doing french seams and vice versa
Q2: Does tension work the same for all materials? For example, I did 2 layers of vinyl, looks good. I did 3 layers of leather and had to make adjustment to top tension. To me it looks like vinyl looked good because it's thin/soft and I didn't notice difference. With thicker leather thread tension misadjustment became more visible. It almost seems like I need to adjust thread tension on thicker/tougher material and then it will be good for thinner stuff. Am I correct or it's wrong?
-
Understood. Then I just do what I did? Eyeball position? I was thinking there is some trick on installing needle "precisely". Or maybe turning it right/left slightly will affect something.
-
Forgot to ask simple question. Maybe I'm missing something. In my machine needle shank is just round. I can install it pretty much any way I want. What I was doing is using needle threader to get it where hole is inline with main shaft. But obviously it's not 100%. I would expect needles to be ground on left side for the screw but they aren't. How do you install them?
-
Finally installed 45mm pulley on a bottom (smaller belt needed, OReilly didn't have right size, had to get online). So, for less that $20 I got machine slow the way I need. For material thickness I will use it's enough to penetrate, motor setting is about 950RPM, this gives me good control and can go decently fast when pushed.
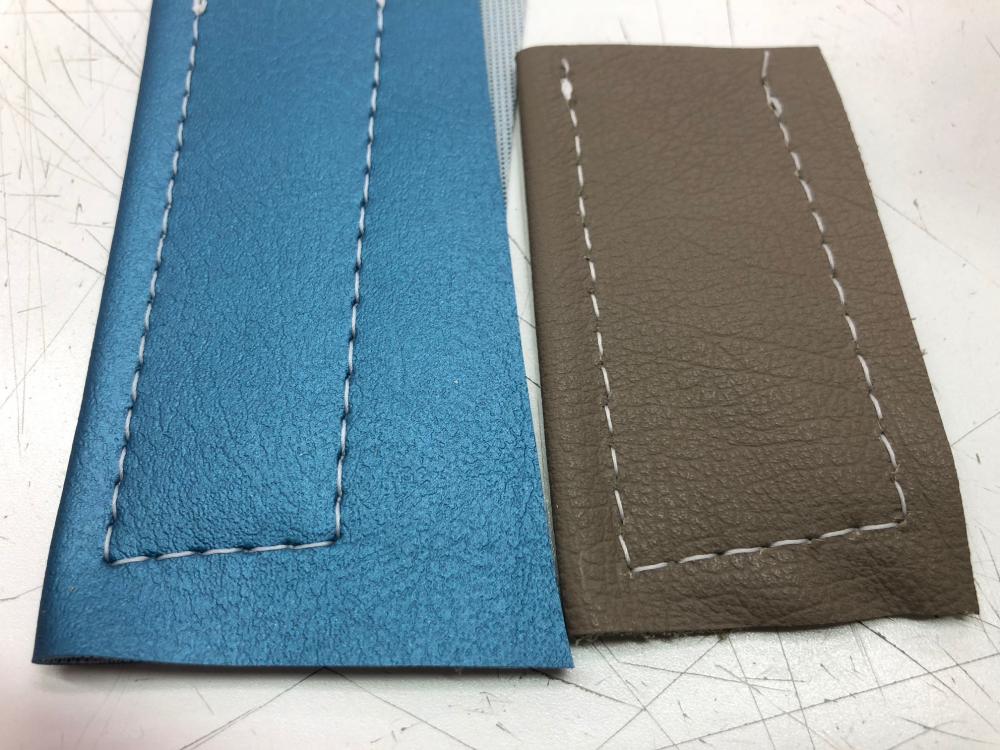
Also tried guide foot. nice even seam, not bad for newbie
Have couple more questions:
1. When locking seam with reverse, what is the correct procedure? Specifically items I'm curious about:
- Should I start sewing and then reverse? Which means I will get 3 stiches through the hole. Or should I start backwards and then go in?
- When I reverse a lot of time I don't get holes aligned, sometimes I have missed stitch. I think it' because of the timing. When should I back-stitch? Needle up? Down?
2. When I need to make shorter stitch, how should I do it? For example, I need 1/2 stitch, what is correct steps to do it?
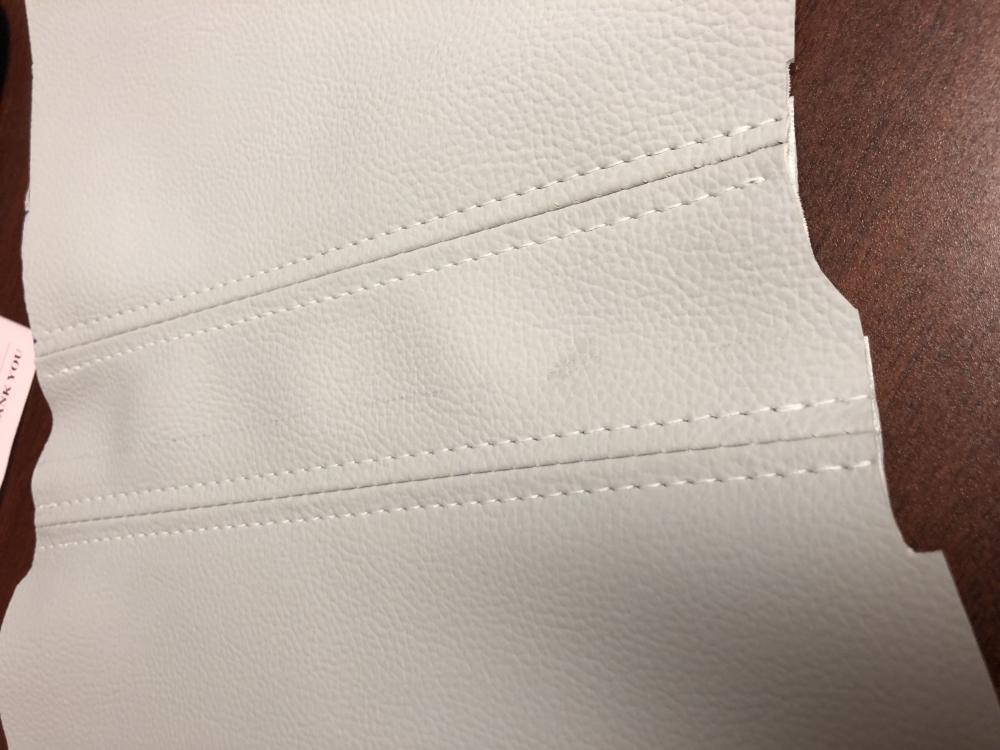
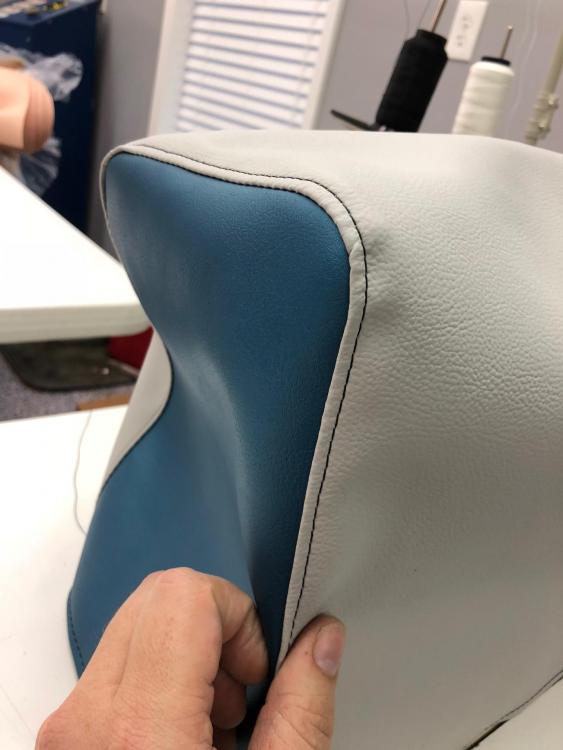
3. When sewing french seam (like on picture), what needs to be done so there is no visible thread inside? You see on start/end some vinyl, this is where backstitching was done
4. I see some belt black "dust" on sewing table. Is that normal for new belt or my tension might be little too tight?

-
I tried #20 LR and #19R. No visible difference on top stitch, with LR I get straight stitch on a bottom.
Top definitely tighter, smaller hole.
-
Yes, St Louis, MO. Places I found that sell original german BMW leather sent me samples - very soft I would say. Leather I pulled from seats very hard but from age, don't know what it was back then.
-
32 minutes ago, fredk said:To find out what is good for your vehicle I'd need to know what type of vehicle it is. The leather used on the seats and door cards of my 1930 Austin 7 is not suitable for the seats of my son's Series 7 BMW, nor is the type of leather we used on a 1935 bus' seats suitable for a 1980s Corvette
It's for 94 BMW 5 series. And it's St Louis. Get's pretty hot. Car tinted now, should have less UV impact.
-
Well, I do have exact task: Reupholster car seats. In reality I don't think I will drive more than 50k miles in this car. But I do want leather to last 10 years even if parked in sun.
I also want leather to feel and look nice. I did see nice upholstery hides at Tandys, but not sure if "upholstery" is the same as "automotive".
-
24 minutes ago, Wizcrafts said:Once you get the smaller needles the bottom appearance will improve. You will also be able to tighten the top thread for a tighter lay on the surfaces.
Did you order leather point needles?
So, for what I have it's normal? I am new to this, don't even know what "proper" look should be. When you say "tighter" - isn't it a function of tightening bottom (and, in turn, top) ? Right now bottom have some resistance and top is close to maxing out on loosening.
I ordered Schmetz #19 standard (R)
and Organ #20 LR
-
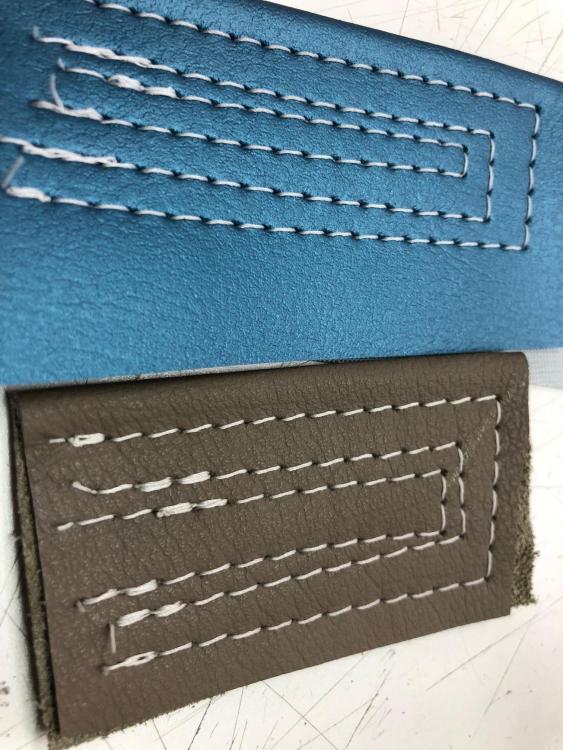
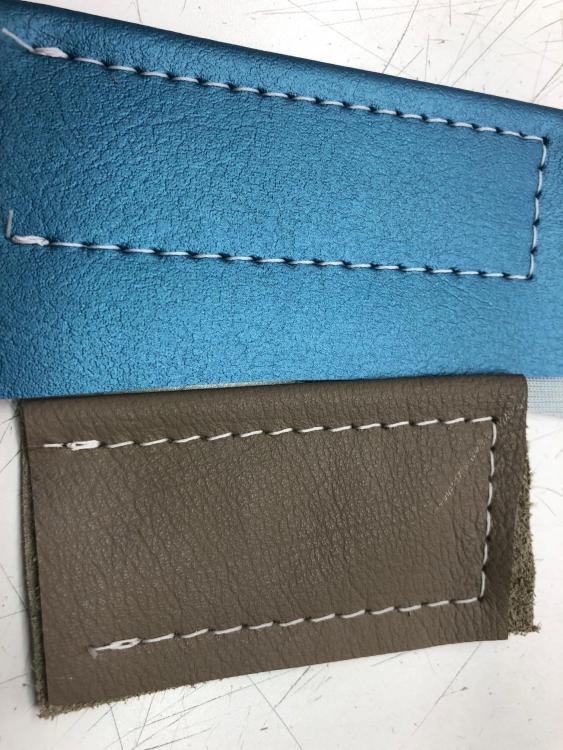
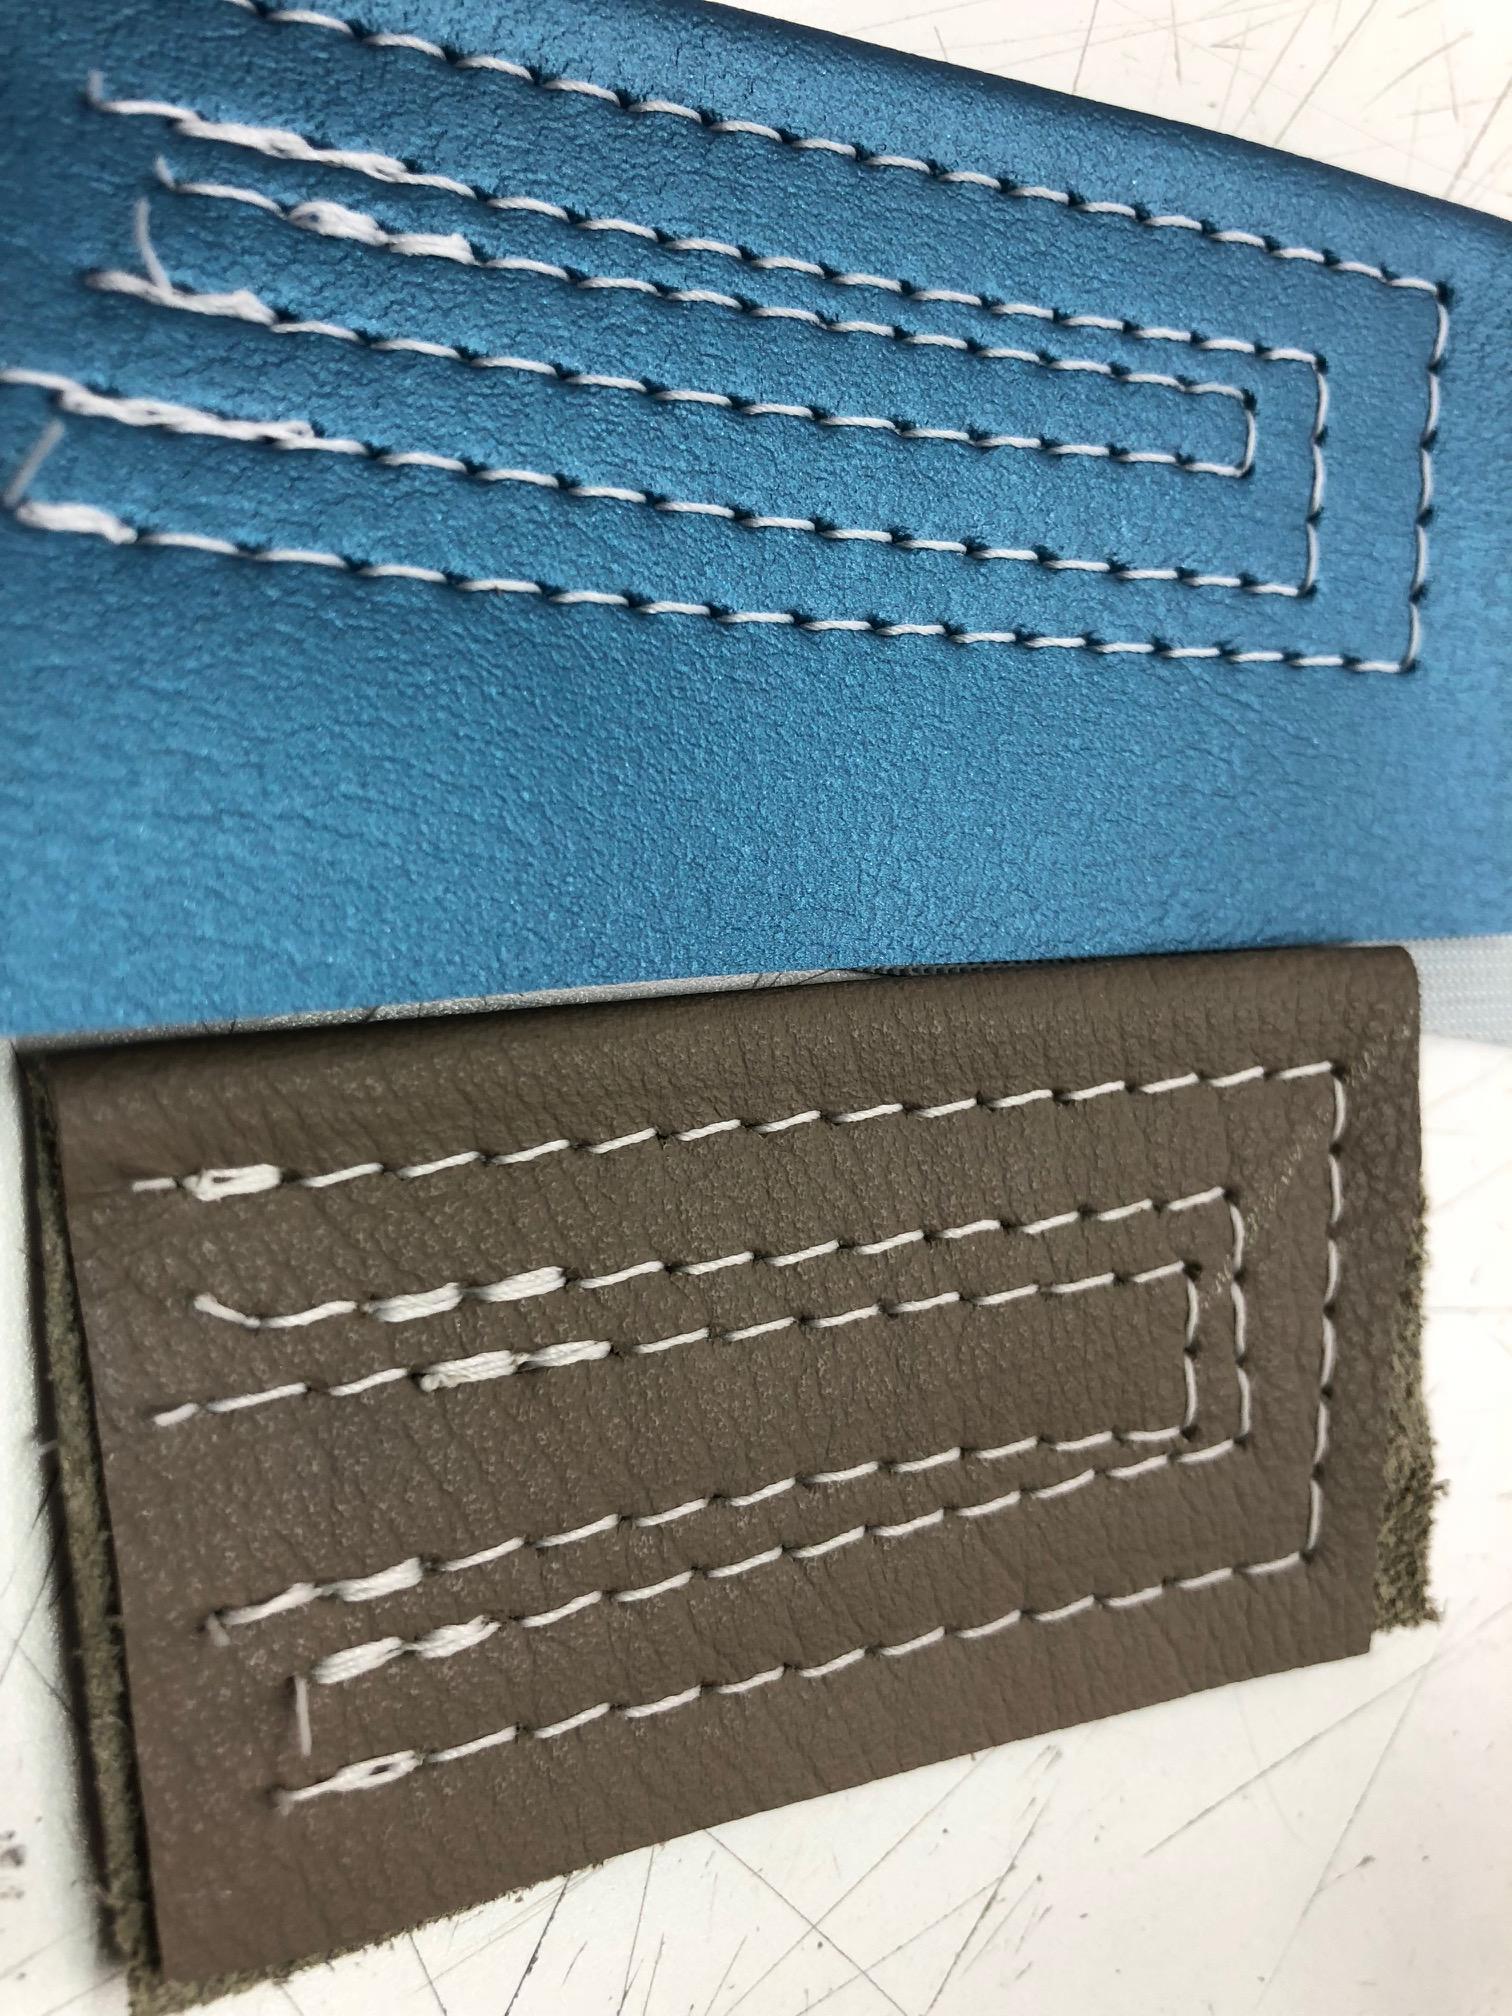
After posting pictures I noticed that it looks like not enough tension on top (judging by blue vinyl bottom)
So, I did another run inside after adjusting little (tighten top). Still little loose.
I did yet another adjustment and did inner most run. Now it looks like vinyl is perfect. But leather looks horrible on a bottom.
-
44 minutes ago, Wizcrafts said:Using a needle 3 sizes larger than optimum pokes oversized holes that don't hold the thread lockstitch knots firmly in place. Further, the appearance of the stitches will be shorter because of the larger holes at each end of each stitch.
That makes sense, thank you! I ordered some Schmetz #19 and Organ #20 needles, will see how it works.
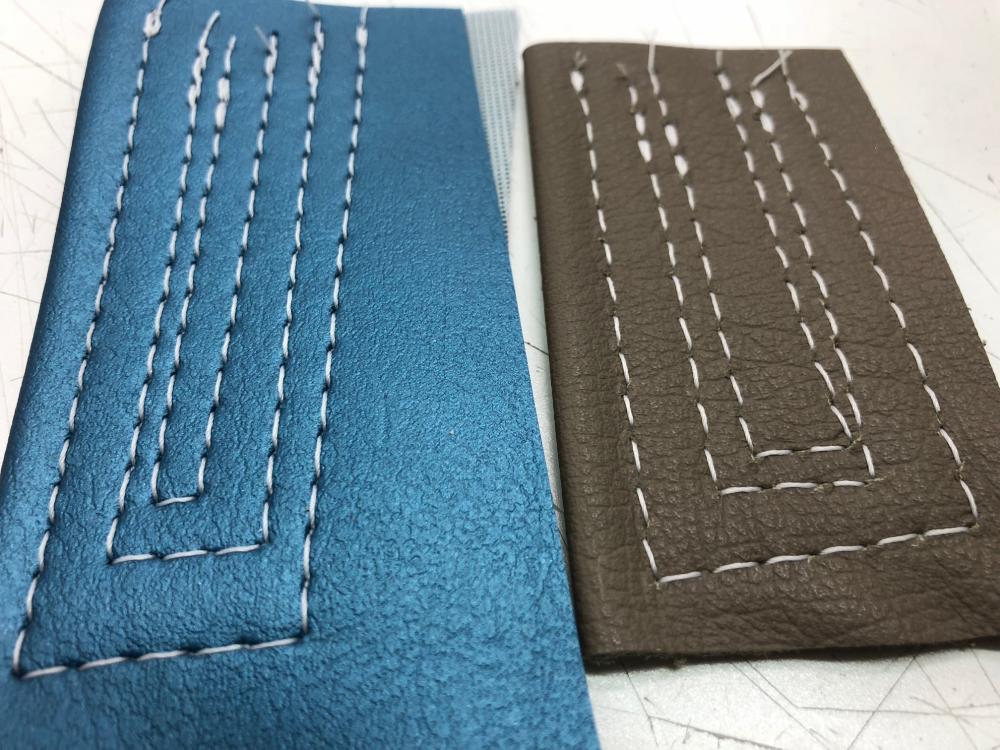
But for now the best I was able to do is here... See top image - both vinyl and leather look decent. However, bottoms on vinyl look OK and leather look ugly. Is that a problem with oversized needle or something else?
Also, in theory doesn't matter what material thickness if you setup tension correctly for thread/needle - it should work, right? I'm asking because now I'm setting it with 2 layers of vinyl/leather. But my actual sewing will involve layers of sew foam in-between.
-
39 minutes ago, Pintodeluxe said:Manual for the 1245 shows not to go around the pin on the tension disc. I never go around that pin. That one change would add some tension inherently to the upper thread path. It might be so much that you are "out of range" and the bobbin case tension cannot make up for it.
I know there are differences of opinion on this one, but lots of people thread the 1245 that way at first. It looks like the thread will fall out of the tension discs if you don't go around the pin. In my experience with the 1245, the thread has never fallen out of the tension discs... even when you don't go around the pin.
Bobbin tension should feel really pretty light in normal use.
Interesting. This is how I was shown in a store to thread (not around a pin). Then I found video and "fixed" it.
Another mistake I found is bobbin direction. I put it on with thread "clock-wise" which seemed natural to me how thread will exit. Changed that now too.
33 minutes ago, Wizcrafts said:A number 22 needle is way to big for #92 thread. I use a #19 and get easy to position placement of the knots. The holes are tighter with a #19 needle, allowing you to have more leeway with the top and bottom tension adjustments.
Hm. I read a lot of different auto-upholster forums and that's what people use. 92 with 22 needle. Or 138 with same needle if decorative seam needed..
That's what I was given with machine..
-
Need some advice/guidance on thread tension setup in my machine.
Here is what happening now. I use 92 thread with 22 needle, works great. I used following video to thread machine:
https://www.youtube.com/watch?v=35zxtSRFXwQ
Next I try to set bottom tension to be not so tight. I didn't know how it should be but I thought it should be just little tight. Just like this video shows
https://www.youtube.com/watch?v=41R2Og1AELE
Well, it doesn't work. If I do this - then bottom thread get's pulled up and I run out of adjustment on top thread (nut come off).
I had to barely put top adjustment on and then tighten bottom until I got good seam. Now bottom thread is not as easy to pull as on a video. When I finish a seam, raise needle and need to pull work - there is considerable resistance.
Is that normal or I should do something about? Or it's OK because I'm approaching thread size limit of machine? Seam itself seem to be good, no wrinkling, tight.
P.S. I think it's important to know that thread is "Tandy" brand polyester. I'm still waiting on my package from thread exchange
-
3 hours ago, Uwe said:Looks like you got yourself a nice machine there!
Thanks! I eventually got machine from Nick. He brought this Pfaff to local store and the deal was pretty good. All this time (since July) I monitored local CL and nothing showed up... STL is like a "black hole"
So.
1. Extra part removed, much easier to deal with machine now!
2. Hook cleaned up. Took it out as per instructions, used brake clean then immediate oil everything and then wipe. Now I know where to put oil when changing bobbing (little hole and wick between tiny bolts). It seems like it's sewing better now (placebo most likely
)
3. Guide foot ordered. Looking forward to nice French seams.
-
Yep. It is brake. Sligtly pressing on pedal removes tension.
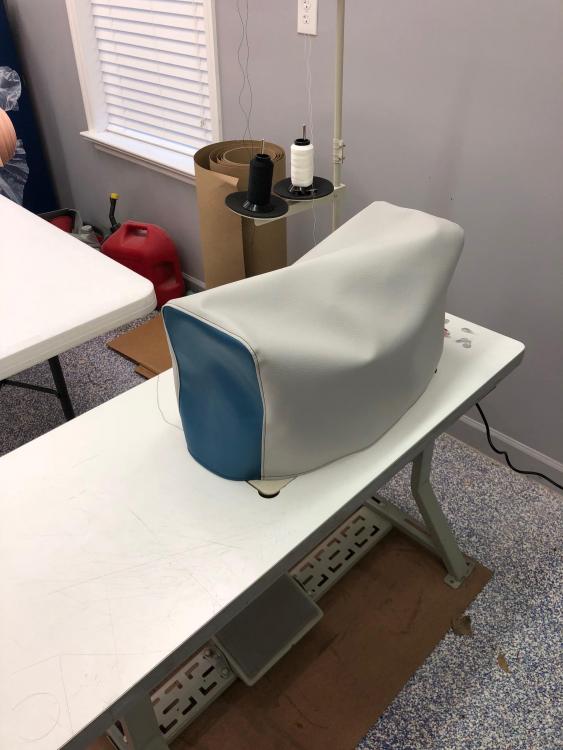
did my first project- machine cover. Almost got used to speed control. Thinking that 45mm pulley might solve issue
Will try soaking wiyh rubbing alcohol. Tried simple green - no luck
-
Yep. I can do that. Problem with missing belt cover will be solved automatically as I will have to take other one out as well
-
Ok, I see. And it’s pretty expensive. I will see what 75->45mm pulley will do. Maybe practice and exchange will fix it for me
-
25 minutes ago, R8R said:One of those 550w servos with no speed reducer is great for upholstery or garments, but it won't have much low speed torque, and it will need speed and momentum to penetrate anything substantial. A smaller pulley on the motor will help, but a reducer will make all the difference.
Can you point me to speed reducer? Can’t find what it is
thank you!


PFAFF 1245 tensioner issue
in Leather Sewing Machines
Posted · Report reply
Thanks! When you say "need some back pressure". How do I achieve that? I can see that the way it's threaded now - 3 holes missed. You see right there on a picture it's only in one hole. And above there is a rod on top with 4 holes, only 2 used. I used instructions I found to thread machine. Maybe for leather I need to put thread through all of those?