


RidgebackCustoms
-
Posts
92 -
Joined
-
Last visited
1 Follower

Recent Profile Visitors


RidgebackCustoms's Achievements
Member (2/4)
-
Sometimes buying tools from alternative sources can save you money. Like buying gasket punches from auto suppliers can save big money over buying hole punches. I find that bookbinding has a lot of overlap in the tools between leatherworkers and bookbinders. You can find skiving knives and bone folders at reduced prices compared to your typical sources for leather tools. www.talasonline.com https://www.talasonline.com/Bone-Folders?quantity=1&number=352&length=42
-

What are some tools that changed your leatherwork?
RidgebackCustoms replied to Kenzi's topic in Leather Tools
A hard lesson. I remember when I was learning to skive (book binding). I decided the knife I had was the problem. So I saved up and bought a nice skiving knife from Chartermade. Beautiful tool. Showed up pristine and ready to work. Took it to the bench and basically had the same problems. Realized I probably just needed to practice. Nothing wrong with having great tools. I've learned a really great tool can let you focus on the skills because your problems will just be you. -
What are some tools that changed your leatherwork?
RidgebackCustoms replied to Kenzi's topic in Leather Tools
DMT Diamond stones (not the hatched pattern ones, the full width kind, metal bed). I tried water stones, sandpaper, etc. Both work, but the diamond stones let me focus on just the sharpening as I was learning. The 3/4" and 1" skiving knives from Lisa Sorrell. Those things came to my door screaming sharp, no break in or touch up required, so I could focus on learning the inlay work, not the sharpening. -
Learning to do Portraits of People
RidgebackCustoms replied to RidgebackCustoms's topic in Figure Carving
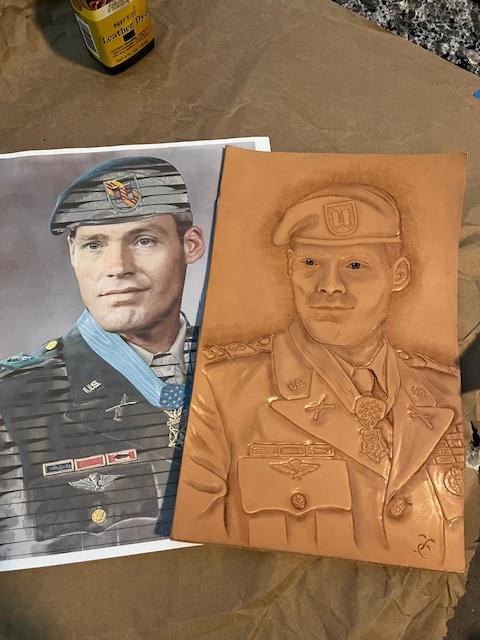
New portrait. I'm fascinated by the biographies that The Fat Electrician keeps putting together. Latest portrait is COL Bob Howard. Bob is the most decorated Green Beret of all time. That sentence is staggering when you take into account the breadth of men and valorous actions accounted for in the subset "every green beret ever". Hard to say where the discrepancies are between the portrait and the picture in this case. Off the cuff I think the skin texture is too smooth. On the next one I'm going to try the sandpaper trick (320 grit) to give some texture to the skin. Open to critique as always.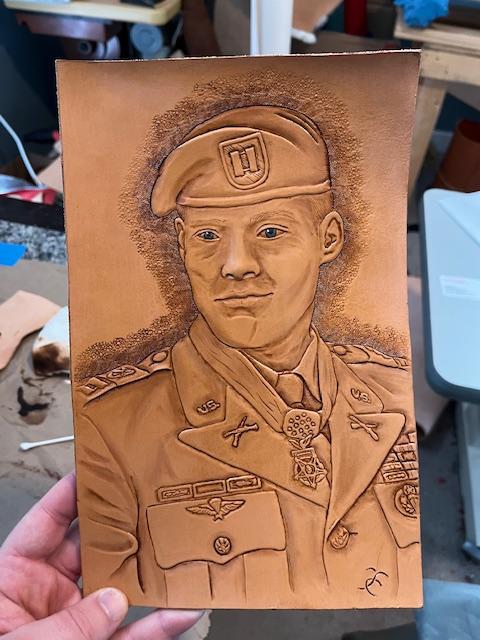
-
Learning to do Portraits of People
RidgebackCustoms replied to RidgebackCustoms's topic in Figure Carving
Good tip. I prefer hard copy of references, but anymore they're harder and harder to find. Sucks being an analog man living in a digital world. -
Learning to do Portraits of People
RidgebackCustoms replied to RidgebackCustoms's topic in Figure Carving
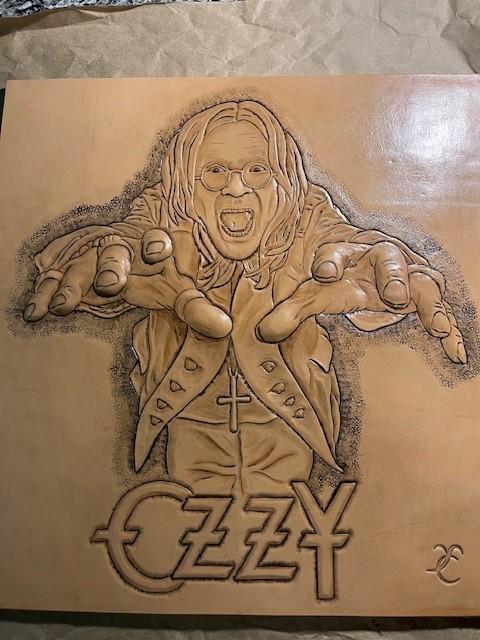
Was able to finish up 2 portraits this week. Next one is none other than Ozzy Osbourne. Granted, labeling the portrait is a little bit of cheating lol. This is my first time doing deep embossing (around the hands) to achieve more depth to the piece. I like the effect, but find I can't get the crisp detail out of the carving if I try to add tooling to the embossed section. The filler material (Renia 3D embossing filler) has a lot of give to it. I wonder if a hard setting epoxy or similar may be a better solution? Also maybe I should tool, emboss, then retool to establish the crispness that I lose by pushing out the embossed section? Not sure. I also used the black eco flo antique which I find I prefer the dark brown of the other portraits. The black is too much of a contrast for my taste. The brown seems to marry the leather undertones better, but just my opinion.
-
Learning to do Portraits of People
RidgebackCustoms replied to RidgebackCustoms's topic in Figure Carving
Finished another one. Used a sub-standard piece of leather because it's what I had. There are a couple of fat wrinkles running horizontal through the center of the portrait. I don't think I nailed the likeness, but this is why we practice.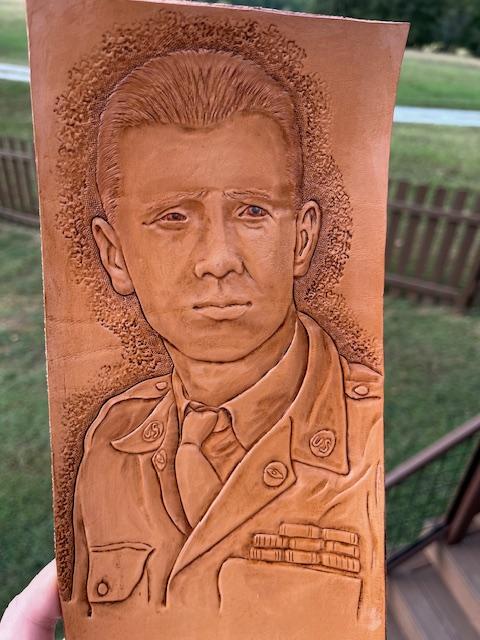

-
Tips/advice for 1st craft market tent?
RidgebackCustoms replied to ThisIsMyFirstRodeo's topic in Marketing and Advertising
Have bags / pack out bags for after a sale. Plain brown bags sized for whatever you're selling. My very first sale I just handed it to them and they had to carry it around the rest of the show. Was something I didn't even think of and one of my "duh" moments cemented in my brain. -
Show Me Your Stamp Organizer
RidgebackCustoms replied to RidgebackCustoms's topic in Leatherwork Conversation
It's never enough lol. -
Show Me Your Stamp Organizer
RidgebackCustoms replied to RidgebackCustoms's topic in Leatherwork Conversation
@BlackDragon Your maul storage catches my eye. -
Show Me Your Stamp Organizer
RidgebackCustoms replied to RidgebackCustoms's topic in Leatherwork Conversation
@PastorBob Good looking 1911 you got there. Holster project I'm assuming. What do you think of the brass stamps? I see them there in the picture. I just started dipping my toe in the water and picked up a set of brass backgrounders. Also, what's your work surface and does it span the whole length of the bench? Is it a white UHMW? -
Show Me Your Stamp Organizer
RidgebackCustoms replied to RidgebackCustoms's topic in Leatherwork Conversation
@bruce johnson That's a lot of tool density in a little area. Love it! I'm trying to plan ahead as my tool collection increases. My last solution (in the background) I outgrew really quickly and it never was quite right (poor tool density, super heavy, etc.). The rolls in a box I like! It would be nice to not have to pack up a tool roll when I go mobile. I've had my eye on some new Wayne Jueschke tools, but haven't pulled the trigger. Still in the process of getting more of the basics from Barry King. I have a Bob Beard basket weave stamp I'm on the wait list for. Haven't heard of a lot of the other makers. I'll have to educate myself. -
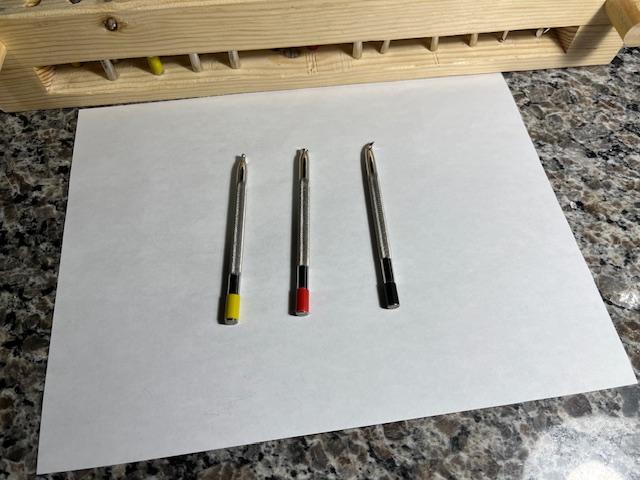
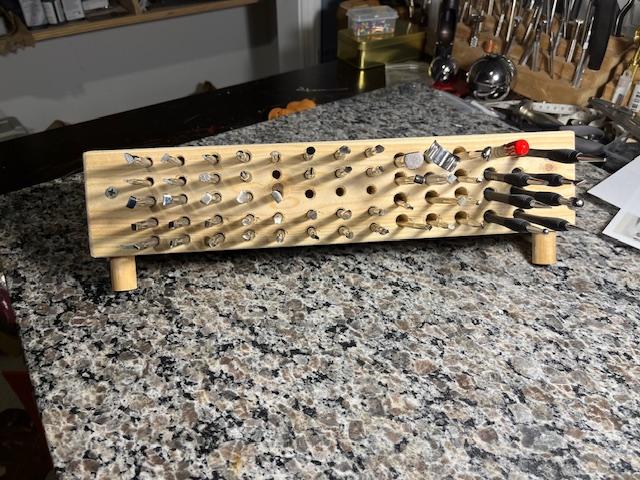
Across the posts I've seen a ton of different organizer solutions. Most of them are home grown. I'm always looking for the next better mouse trap, so show me your tool organizer. Here's my current solution, but show me yours. Uses a 3 foot section of 2 x 4 cut in 2. One of the boards is slimmed down to create an opening that does 2 things. Keeps the dirt, leather plugs, etc. out of the bottom of the hole and lets me see the color marks on the back end of my stamps. For stamps that look similar I mark the back ends with some colored electrical tape. I've never seen anyone else do this, but it just makes sense to me. Easy to spot the low angle beveler vs the standard angle beveler when I inevitably take both out and leave them on the stone as I tool. Biggest shortfall I have is that the capacity is limited. I punch columns 1" on center to allow finger space to either side, but the tool density could definitely be increased.

-
Learning to do Portraits of People
RidgebackCustoms replied to RidgebackCustoms's topic in Figure Carving
I like it! -
Learning to do Portraits of People
RidgebackCustoms replied to RidgebackCustoms's topic in Figure Carving
It's definitely on my list to integrate into my work, but no pyrography experience on leather. Are you a trial and error guy or do you know any tutorials I should check out?