ftnpenlvr
-
Posts
56 -
Joined
-
Last visited
Content Type
Profiles
Forums
Events
Blogs
Gallery
Store
Everything posted by ftnpenlvr
-
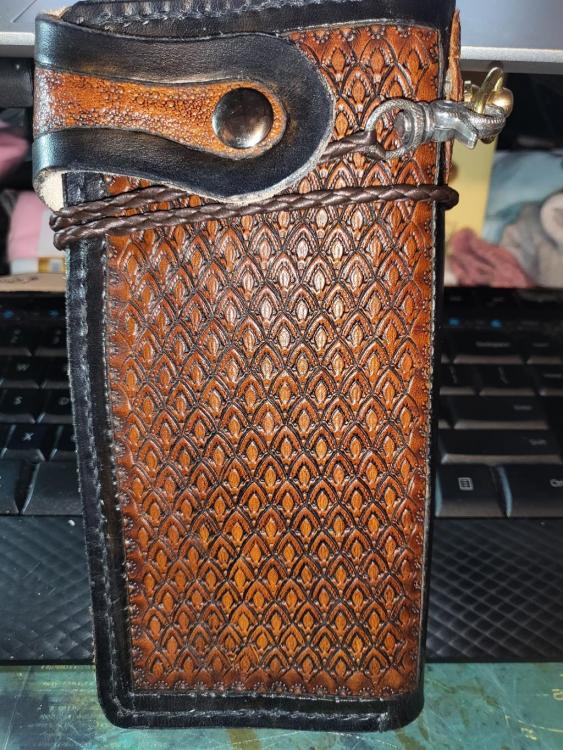
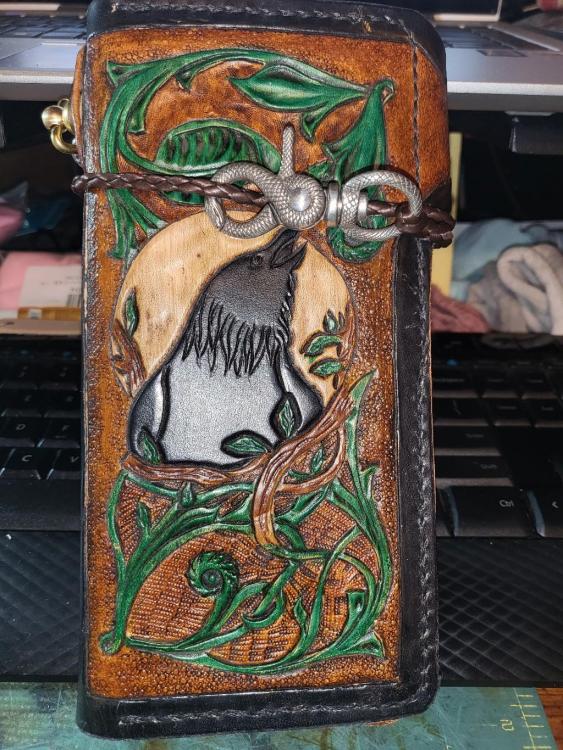
Finally finished a couple months ago, and been too busy to post. Finally got 'round to it, and here's the final result. I like it, but, I need to work on figure carving to get more details and rounded shape to the bird
-
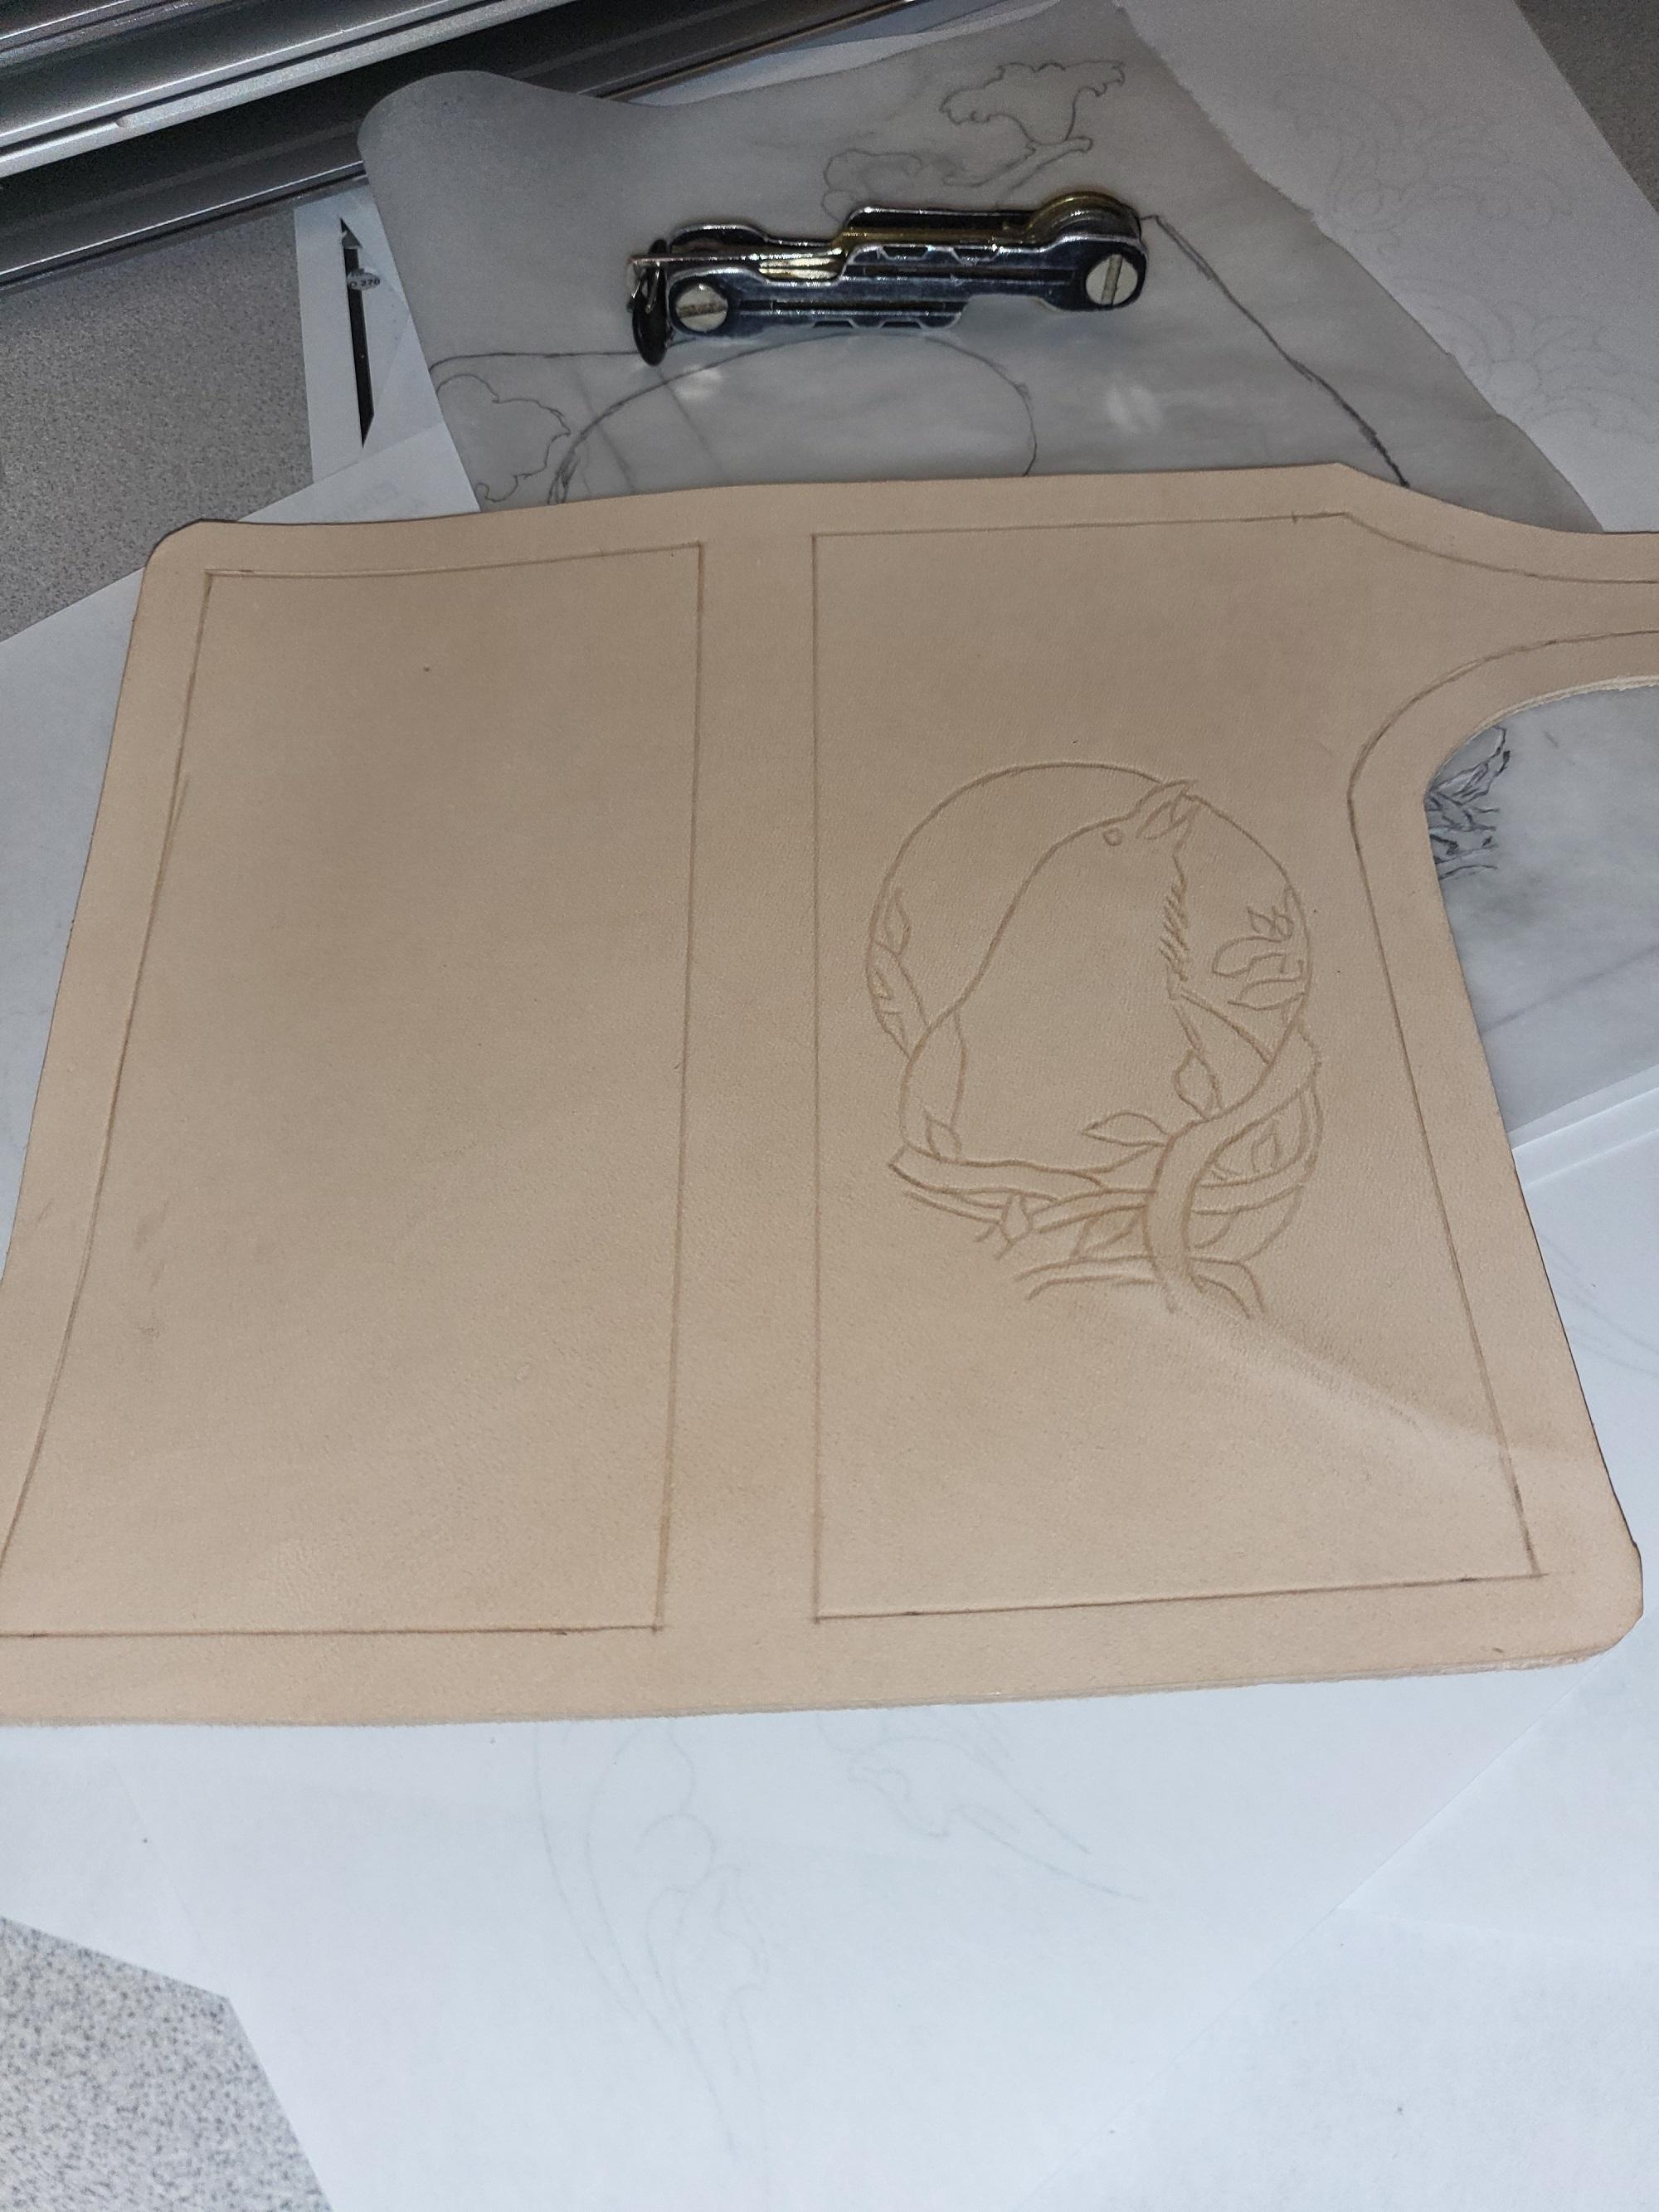
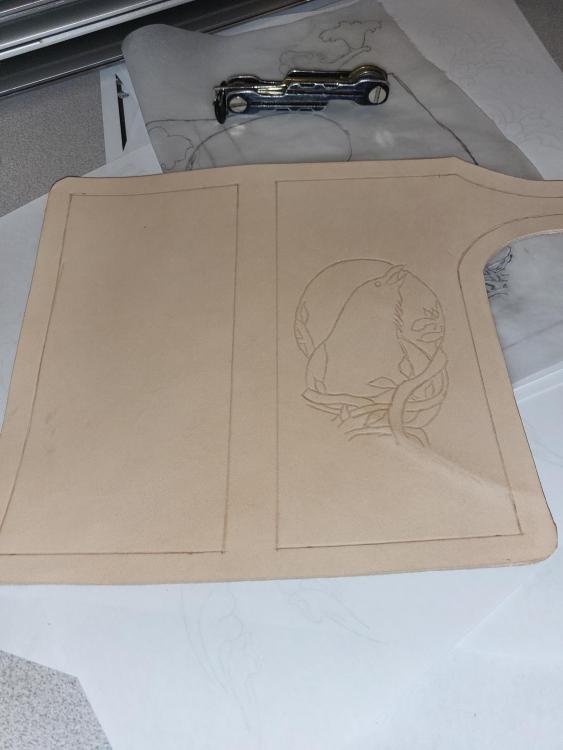
Well, I've started it... I know I want to feature a raven, moon, and some branches, so, that's in the middle of the front. Now I just have to figure out what I want to add in to fill the rest of the empty space on the front. The back will probably be basketweaving... Open to suggestions... I thought vinework tying into the branches, but, not sure the two go together real well...
-
Vertical bifold wallet
ftnpenlvr replied to Chux's topic in Purses, Wallets, Belts and Miscellaneous Pocket Items
Well done! I'd carry that with pride! -
Thank you. The Stamesky knives I have gotten are inexpensive, and came pretty sharp out of the box - pictures later. The larger one was definitely sharper than the smaller. Maybe the change in steel is one of the reasons we are encouraged to strop early and often?
-
Many thanks! I have a ways to go, and a lot of practice to do. I'd like to get that smaller, get the lines closer together, and more consistent - practice, practice, practice.... :-) Agree on the "one side only" thing. I don't understand it, but, I didn't cut myself either, so... Well, I will keep using it, and appreciate that it fits my hand nicely, turns smoothly, and seems to cut well, regardless of the blade shape.
-
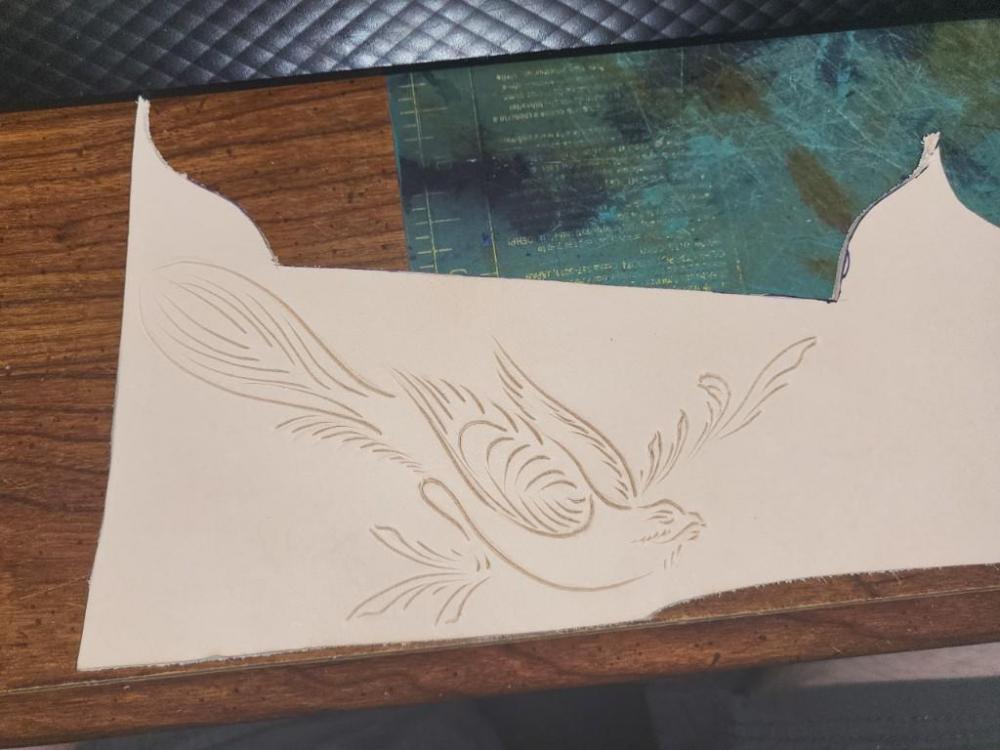
After mucking about with the new knives, here is a first attempt at Jim Linnell's "Swivel Knife Finesse" bird, done with the Slice. I have a ways to go with my finesse, before I can make it as neat and clean as his work, but, I am not too horrified with the results. I have a hard time believing I will be signing my name or logo with a swivel knife soon, but, I'll keep at it. Good use for scrap pieces! I spoke with the folks who make the knife, and the secondary bevel we talked about is intentional - it is intended to make it harder to cut yourself, while still allowing a decent cut on leather. While I ran it across my finger, I didn't press hard, for obvious reasons, but, didn't cut myself, so, I suppose it works. I will say it is rare that I am cutting towards my finger, or cutting fast enough that I lose control of the knife, but, I suppose it is good to know that, if I were not paying attention, I'd not hurt myself too badly enjoying my art...
-
Bit late to the party, but, figured I would throw this in
-
I think my wife would hurt me if I brought in another any time soon... Unless I make her another purse, or another panel to her dashboard.... :-D
-
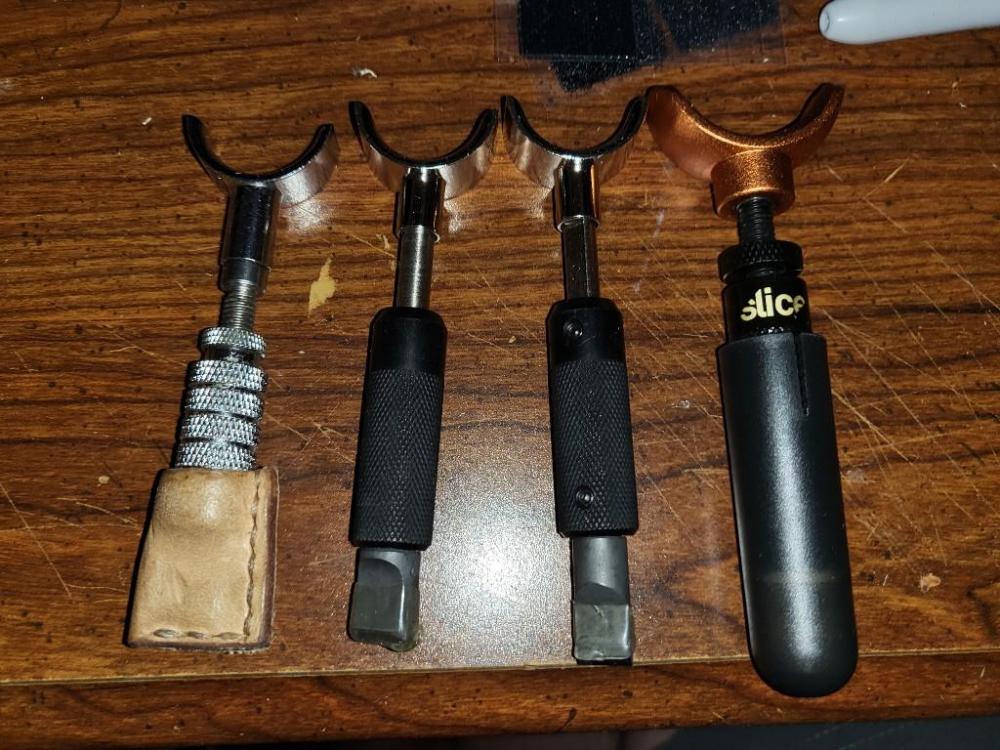
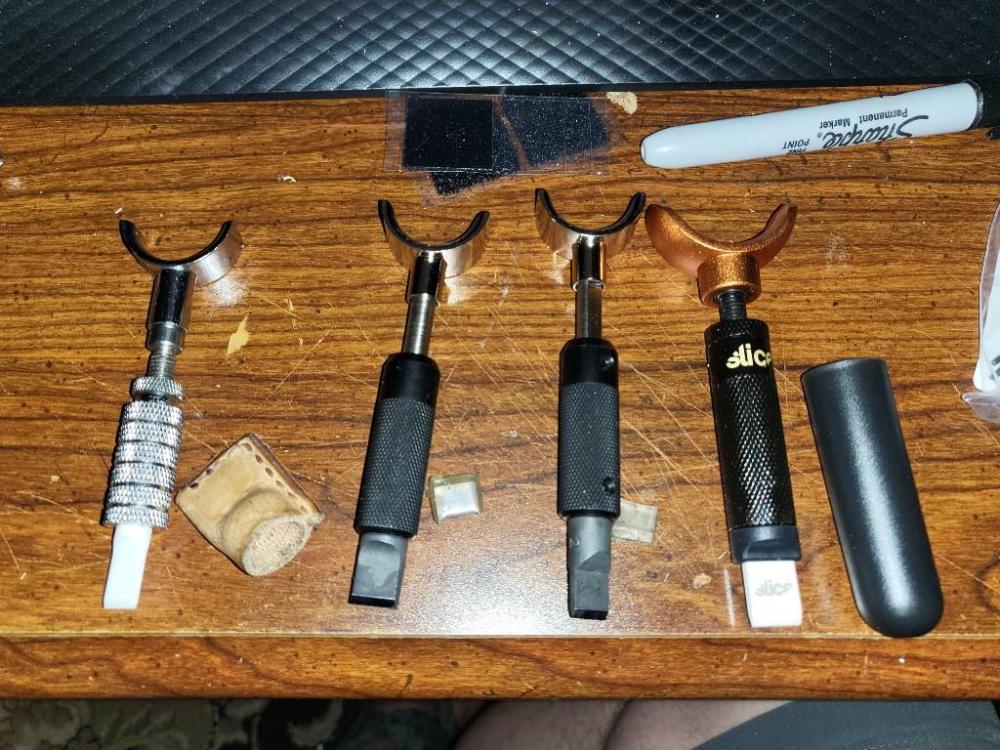
The four swivel knives, left to right: My original, with ceramic blade (quickly knocked up a leather cap to replace the rubber one I blew through/lost) I loosened the lock nut at the top of the barrel for visibility. Japanese, with double blade Japanese with standard blade Slice with ceramic blade Yep - I wasn't sure if that was intentional, or a design flaw... Or, like you said, poor quality control... But, I suspect with a little time, I can knock that down, or they might even replace it...
-
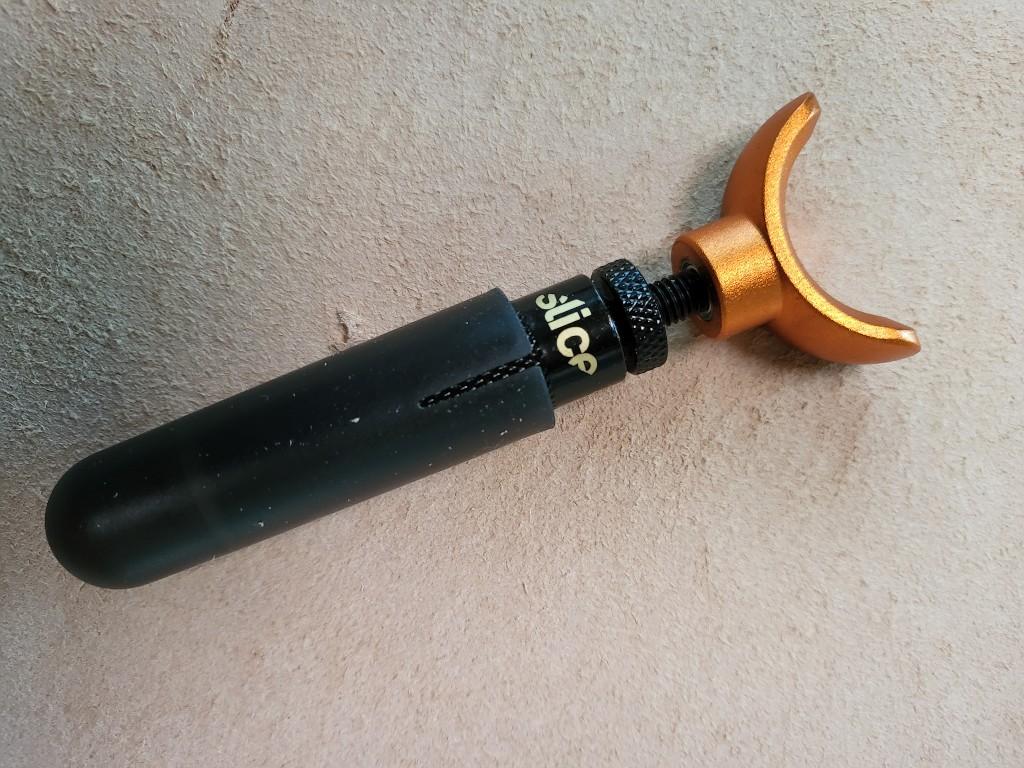
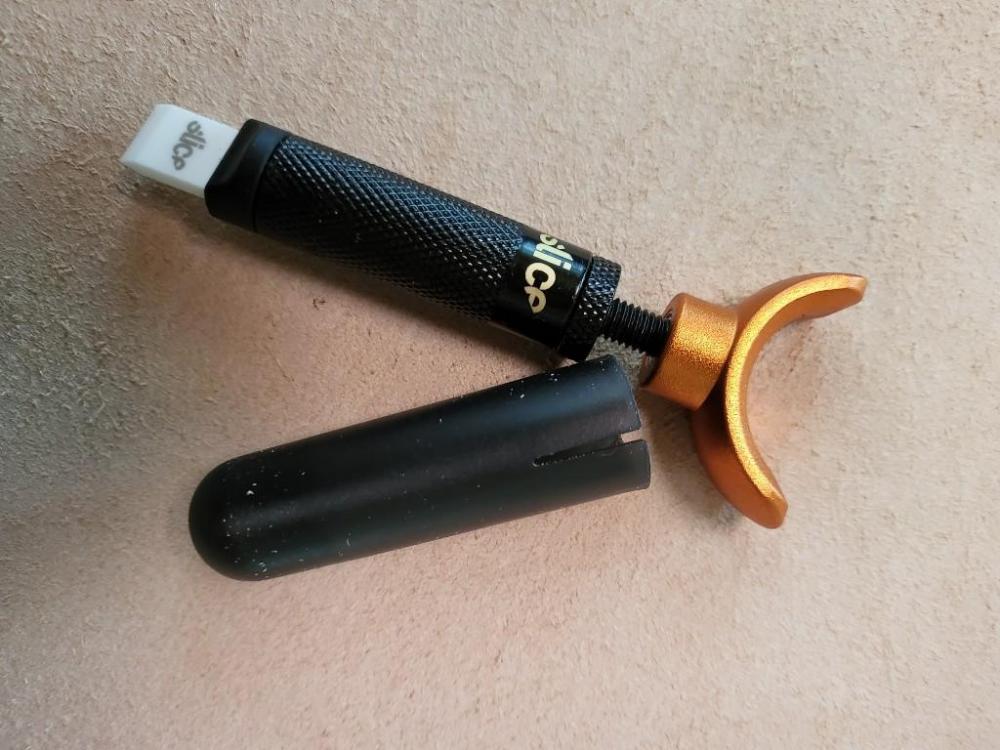
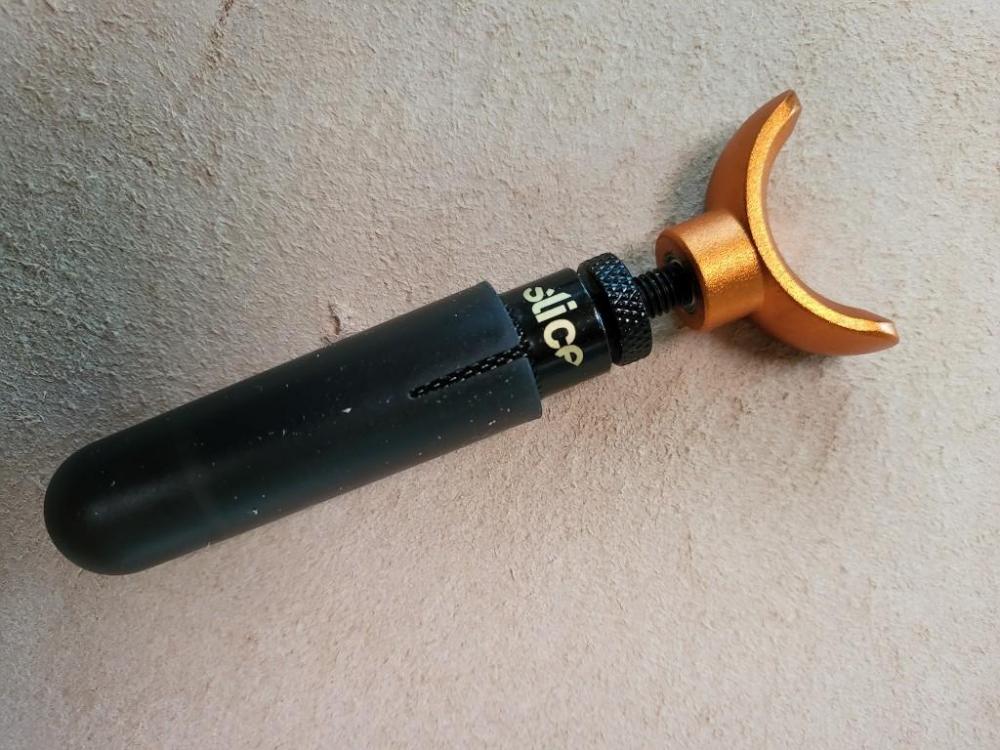
Absolutely! I'll post some of those this evening. The Slice swivel knife just arrived. As before, I dampened a scrap piece of leather, and, out of the box, gave it a whirl. Like the Japanese knives, it was a little grabby. I stropped 12 strokes on each side, and it just glides through the leather. To be fair, their sales rep reached out about an hour after I bought the knife, and advised I would need to strop, but would otherwise have no need to sharpen. That has been my experience with my other ceramic blade, as well. Seems more like a need to clean than to sharpen. Before stropping, I noticed the blade has an interesting "feature." One side of the blade is single bevel, as normal, while the other side seems to be double-beveled. Not sure if that is intentional. Sure enough (and I don't know if this is different from other swivel knives, as I have not tried with them, but,...) when I ran it across my skin, it didn't cut, but, leather it did just fine on. One thing I LOVE with this knife, it comes with a real cover. Not one of the goofy little rubber bits, but, a real cap! It also comes with another little hex key that I can lose before I need it. Adjustments to the yoke height are by the usual lock nut. I'll add some more pictures this evening.

-
I suppose, as part of this review, I should focus a bit on the swivel knife itself. First, this is the Japanese Swivel Knife Handle, purchased through BuckleGuy.Com. Having fairly large hands (particularly long fingers, I always get XL gloves, if that helps), I went with the large handles. The barrel is knurled, and is perhaps a 1/2" longer than the one I got from Amazon. It gave me a comfortable grip, and swiveled smoothly on the yoke. I gave the yoke a good tug, and it did not pop off. The yoke is adjustable for height. Unlike others that have a nut moving up and down the threaded part of the stem, these have a smooth stem which locks in place with a little set screw on the side. The screw is fully recessed, so, it doesn't interfere with the usage of the knife. I raised the yoke about an inch to fit my hands. Similarly, there is another set screw to mount the blade. Because I thought I was only ordering a handle, and failed to read the "Includes" part of the description, I was surprised to see that they came with blades already installed. Oops on my part, as I ordered a standard, and a double, blade with the handles. So, I have an extra standard steel blade that I suspect I will not ever need. I think I saw that Jim Linnell is still using the original blade that came with his first swivel knife, 50 years in, so, I doubt I will burn through mine any faster! I removed one of the blades and replaced it with the double line, also purchased through BuckleGuy.Com (I got the 2.5mm, medium size), quickly and easily with the provided allen key. The blade seated easily, and stays put, as expected. As mentioned before, both the standard blade, and the double, were a bit grabby in the leather, straight out of the box. This was not unexpected, and a dozen passes on the strop on each side of the blade took care of that. I took a scrap piece of 4-5 ounce leather, and made a few quick cuts. I found these blades seem to open the leather a bit more than my ceramic knife, were easily controlled through turns and curves, and tapered well as I pulled the blade out of the leather at the end of a stroke. The double line is going to take some more practice. It really accentuates when you are not holding your knife perfectly vertical - you'll see one line deeper/wider than the other. If nothing else, it is a valuable learning tool to really show you what you're doing (or not doing). I apparently tend to hold my blade a couple degrees off to the left. With a single blade, it was not really noticeable, and I don't noticeably undercut, but, still, an area to work on. All told, I am glad I got them, and would recommend them to folks looking for a good, functional, swivel knife. It isn't flashy; it isn't decorated. There is a beauty in its simplicity that appeals to me. So, I now have 3 workable swivel knives, and am awaiting the fourth from Slice. Should be arriving today. I like the setup right now that I have a thinner cutting ceramic blade, a wider cutting steel blade, and a double-line blade. The one from Slice purports to be "skin friendly". I'm not sure I understand how it can cut leather but not cut skin, but, I'll check it out and report back. Now to go make a case to put all these goodies in!
-
The two Japanese swivel knives from BuckleGuy.Com arrived today. Before even stropping, I dampened some leather and gave them a quick run - a bit grabby (to be expected, having not stropped), but, left great cuts. One is a single blade; the other a double, and they did a great job on the leather. With a little stropping, I suspect I will be even happier with them.
-
I completely agree, but, I do like to try new things, too. I would say I have done well with the cheaper tools I started with. The smaller of the Stamesky round knives arrived today. I will say, it is somewhat unfinished, in that the handle is rough and there is some staining where the blade seats in the handle. With that said, the blade was sharp right out of the box. A quick skiving, and a few cuts confirmed that is cuts as it should, and shaves as it should. The handle is longer than that of the Al Stohlman, which gives me the ability to manage a longer skive. Can't wait for the large Stamesky to arrive and confirm I didn't just get a fluke!
-
To date, I have gotten a couple of cheap swivel knives, one with ceramic blade, and an Al Stohlman round knife, all off of Amazon. The first swivel knife was of brand Owden, and had an issue with the yoke popping off easily, but it cut well. I ordered a different brand, along with a ceramic blade, and has worked well, but, I am curious as to whether I am missing out on something. I cannot justify to myself, the expense of paying over $100 for an SK3, as beautiful as they are. The round knife takes a little doing to keep a good edge on. Lots of stropping, with the occasional touch up on the WorkSharp. It is a good size for my toolbox, and cuts through thinner, or softer leather very nicely; 7-8 ounce and thicker, though, I have to make multiple passes, or do a lot of rocking of the blade to make a smooth cut. When I have a good edge on it, it works well enough, but, similarly, I wonder if I am missing out by only using the one. I have recently ordered a swivel knife from Slice (also with ceramic blade), and a couple of Japanese swivel knives from BuckleGuy.Com, and a couple more round knives to check out from Amazon. The round knives should be arriving today; looking forward to giving a review of them after I have had a chance to play with them a bit.
-
Bit the bullet and just did it. Grabbed a couple straps of my 7-8 oz leather, wet, and stretched by hand. Let them dry, and riveted into place. Now, everything that I use for my tooling is in one small contained box. Sewing, airbrushing, painting, dying - well, that's a different story! But, I can tool most anywhere by grabbing that one box, sticking it in the car, and going there. If I want to go set up at a craft fair, or some other such (local renaissance faires seem an option), I can grab that, my portable table (Worx Sidekick), pop-up canopy, finishing supplies, leather sides, and still fit it all in my car, and be set up and ready to tool in a few minutes. I would still like to find a collapsible stool that is tall enough to sit at that table, but, for now, I can stand...
-
Looks good so far! I'm working on a purse for my mother, and would love to put a video together of some of my other projects down the road!
-
No doubt. One of my buddies recently got a 3D scanner, so, I may ask him to scan and print something a little smoother and more uniform...
-
So, rhe next phase in that toolbox is going to be putting some leather straps on the side/bottom, to make a harness for my stone. The stone fits nicely, but, is heavy. I have no doubt it is going to stretch the leather some, so, thinking if u can "pre-stretch" to get some if that play out, that may help minimize distortion later. Thoughts?
-
Thanks! Certainly has been convenient to be able to just slip the toolboxes, portable table, lights, car tent, and hides in the back of the car. Up here in NH, we have a twice annual "swap meet" for motorcycles and classic cars. I was going to go to the one back in June, but, the wife was feeling poorly, so, I skipped it. Hoping I can get to the one later this year, show off my seat and some other goodies, and drum up some business to keep busy during the "Why oh why did I move here" months that everybody else calls "Winter".
-
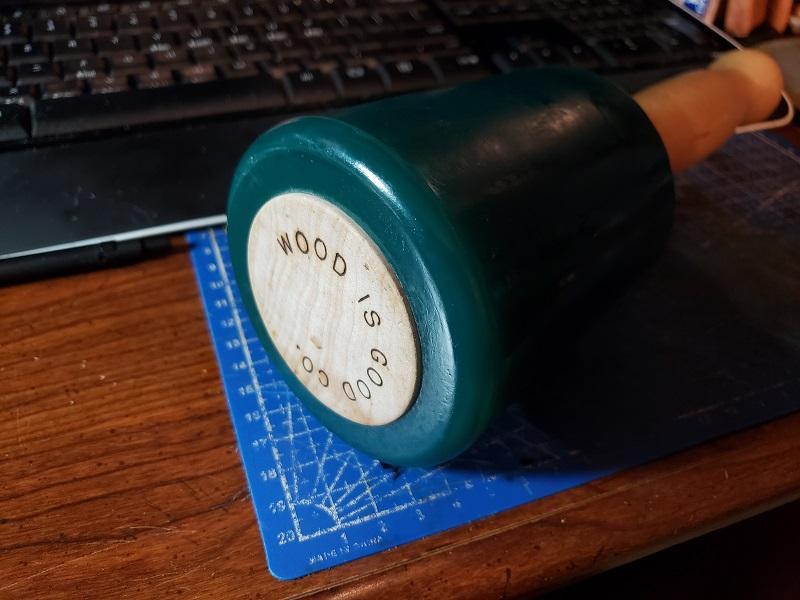
PS - the only working and stamping tools I can't fit in here (yet) are my big 3d figure stamps, handle, and my 30-oz maul, which stays on the shelf unless I am using one of those big stamps... I want to find a way to attach some straps so I can put my stone on the side, and be able to just pick the whole thing up and go. I am sure it is doable - just have to tinker a bit to figure it out...
-
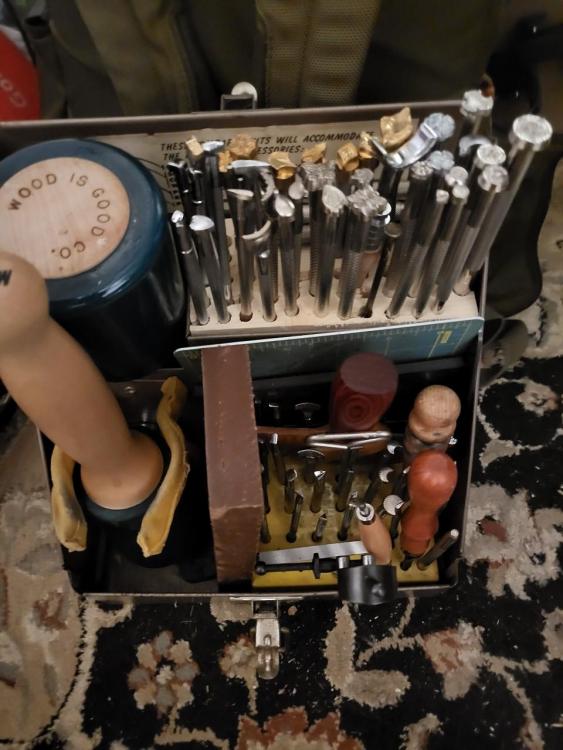
I am still at a scale where I do not really have a dedicated space for leatherwork. My slab of stone goes on my lap, my tools need to be something I can pack up and put on a shelf so I can use the horizontal surfaces for other work and hobbies. I'll get there, but, not yet. I was in our local Re-Store (love that place) and stumbled across this old steel drill case, and though, my mauls would fit where the drill goes, and I bet I can put some of my stamps in the holes for drill bits. So, I brought it home for $15, and start randomly sticking things in there. I put some pluck foam in the top shelf, and used that to shove more stamps in. It worked, but, the foam started tearing, and getting sloppy looking, so, I drilled a bunch of holes in a piece of 2x4 that I cut the edges off of to make it fit. Now, all my "working tools" go in there, with the exception of the stone. My sewing tools, notions and the like go into a cantilevered toolbox, my dyes and pastes go into a third, my airbrushes go into a fourth, and I have bought a Worx Sidekick table to be something I can work on when I need to. I hope to do some road shows at local farmer's markets and other craft fairs, so, having everything be collapsible to stick in the back of my car is a must. When we are watching TV at night, I can bring my case and stone up and whack on leather, then put it all away when I get ready to go to bed. Hopefully, this helps somebody else out, as, like so many others, I struggled with keeping tools organized and portable, until I can set myself up with a dedicated workspace.
-
Thanks for the replies, all! I consistently closed my calipers "just to snug", so that the leather would easily slide out afterwards. The ones that were super close to the expected thickness, I wouldn't stress over (and, honestly, almost everything I have done, to date, has been on 5/6-oz leather, excepting a couple of belts that were on ~10-oz). The one that really surprised me, though, was how thin the 10/11-oz sample was - thinner than the 8/9 oz. Mostly, that made me wonder if somebody grabbed the wrong piece of leather, but, it got me wondering if others had had similar experiences. I very much agree with what others have said above - if it feels like the right thickness to do what you want to do, go for it. :-)
-
The finish is definitely a new one, but, makes a lot of sense to me. Thanks!
-
Hey all I got some samples of Hermann Oak samples from Weaver, last month, in a range of thicknesses. Finally broke out my calipers out of curiosity, and started measuring the thicknesses. According to Tandy, thicknesses SHOULD be: 2/3 oz = 0.8-1.2mm; the sample was 1.4 - so, a little thicker. 3/4 oz = 1.2-1.6mm; the sample was 1.5mm - top end of range. 4/5 oz = 1.6-2.0mm; the sample was 1.9mm - top end of range. 5/6 oz = 2.0-2.4mm; the sample was 2.5 - just over range, and I may have gotten a particularly thick spot. 6/7 oz = 2.4-2.8mm; the sample was 2.8mm - top end of range. 7/8 oz = 2.8-3.2mm; the sample was 3.1mm - top end of range. 8/9 oz = 3.2-3.6mm; the sample was 3.6mm - top end of range. 9/10 oz = 3.6-4.0mm; the sample was 4.0mm - top end of range. 10/11 oz = 4.0-4.4mm; the sample was 3.5mm - well below the range, thinner than the 8/9 oz range. So, I definitely understand that there are ranges of weights/thicknesses, and that guide should be regarded as "-ish" rather than hard and fast rules. I was curious, if others have seen that same kind of variability in weight:thickness ratios. Understanding that the butt end is more dense/durable, maybe the 10/11 oz came from that end and so, while thinner, was the right "weight." That also got me wondering whether folks rely more on the weight than the thickness when designing a new project; the thickness might matter more when measuring a project with 90-degree joints, as it impacts your cuts, but, might not have so much to do with the project from a "sheath vs holster" perspective. I'm still pretty new to all this, so, I certainly appreciate any insight!
-
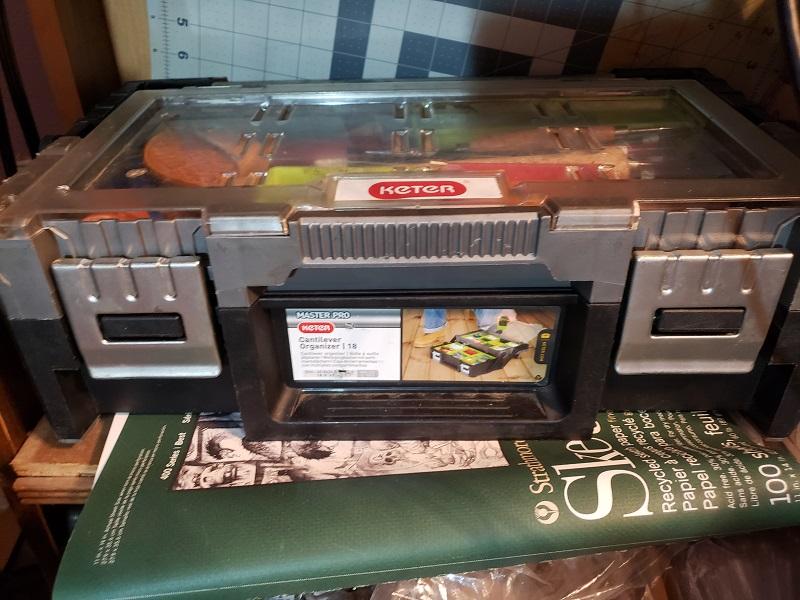
This is the Keter I mentioned. Holds most of my tooling and sewing supplies. Does not hold my stone, stains, airbrushes, stitching pony, or lace, but, holds stamps, needles, one mallet, knives, most thread, and other basic tools. My mauls don't fit in much of anything, so, they just stay separate. Same for stone and punch block.