


michaelcbarr
-
Content Count
25 -
Joined
-
Last visited
Posts posted by michaelcbarr
-
-
Thanks @CowboyBob - I have tried some minor tension adjustments which haven't been successful.
Next is the check spring, then the timing.
Mb
-
Thanks @Wizcrafts - I'll see what I can break over the weekend :D
Mb
-
Thanks all - i will have another look at tensions then I'll check if the timing has been thrown out. @Wizcrafts is the check spring throw something that can be adjusted on a cb4500 and of so, then how?
Mb
-
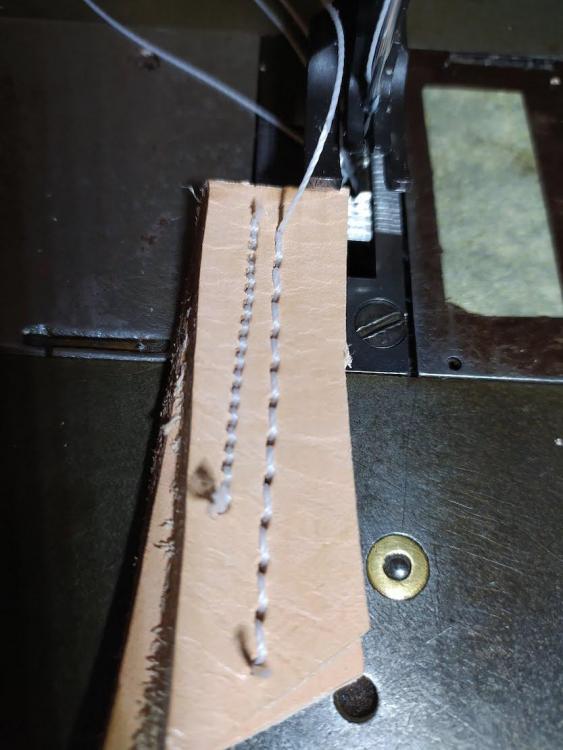
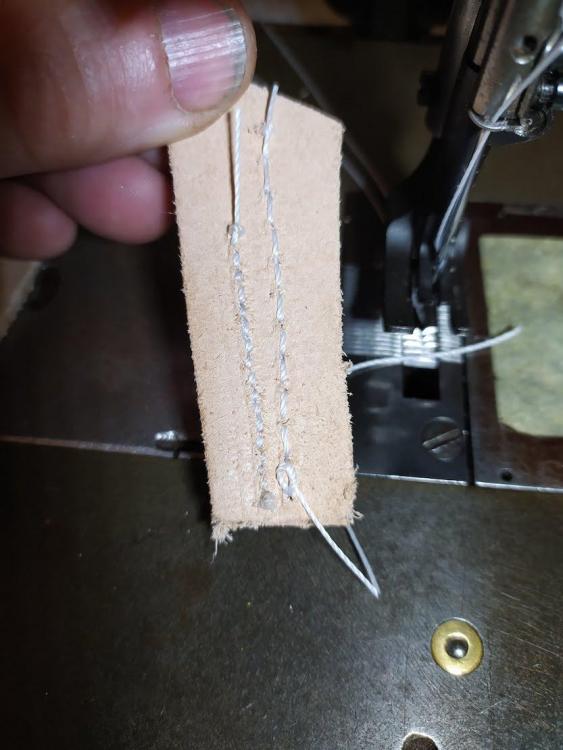
Hey @CowboyBob, thanks for your reply. Currently using 277 top and bottom with a 200 needle. Tried a 250 needle but seems to be the same issue.
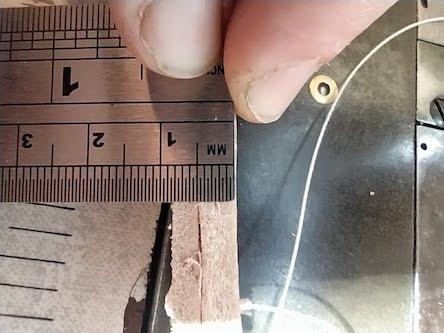
I'm making leather knife sheaths so this is stitching through 3 layers of 9/10 oz leather - so perhaps 12-15mm thick.
I have tried 2 layers and one layer but very similar issues.
I have tried adjusting too and bottom tensions, and rethreading top and bottom thread in case there were snags somewhere along the path.
Mb
-
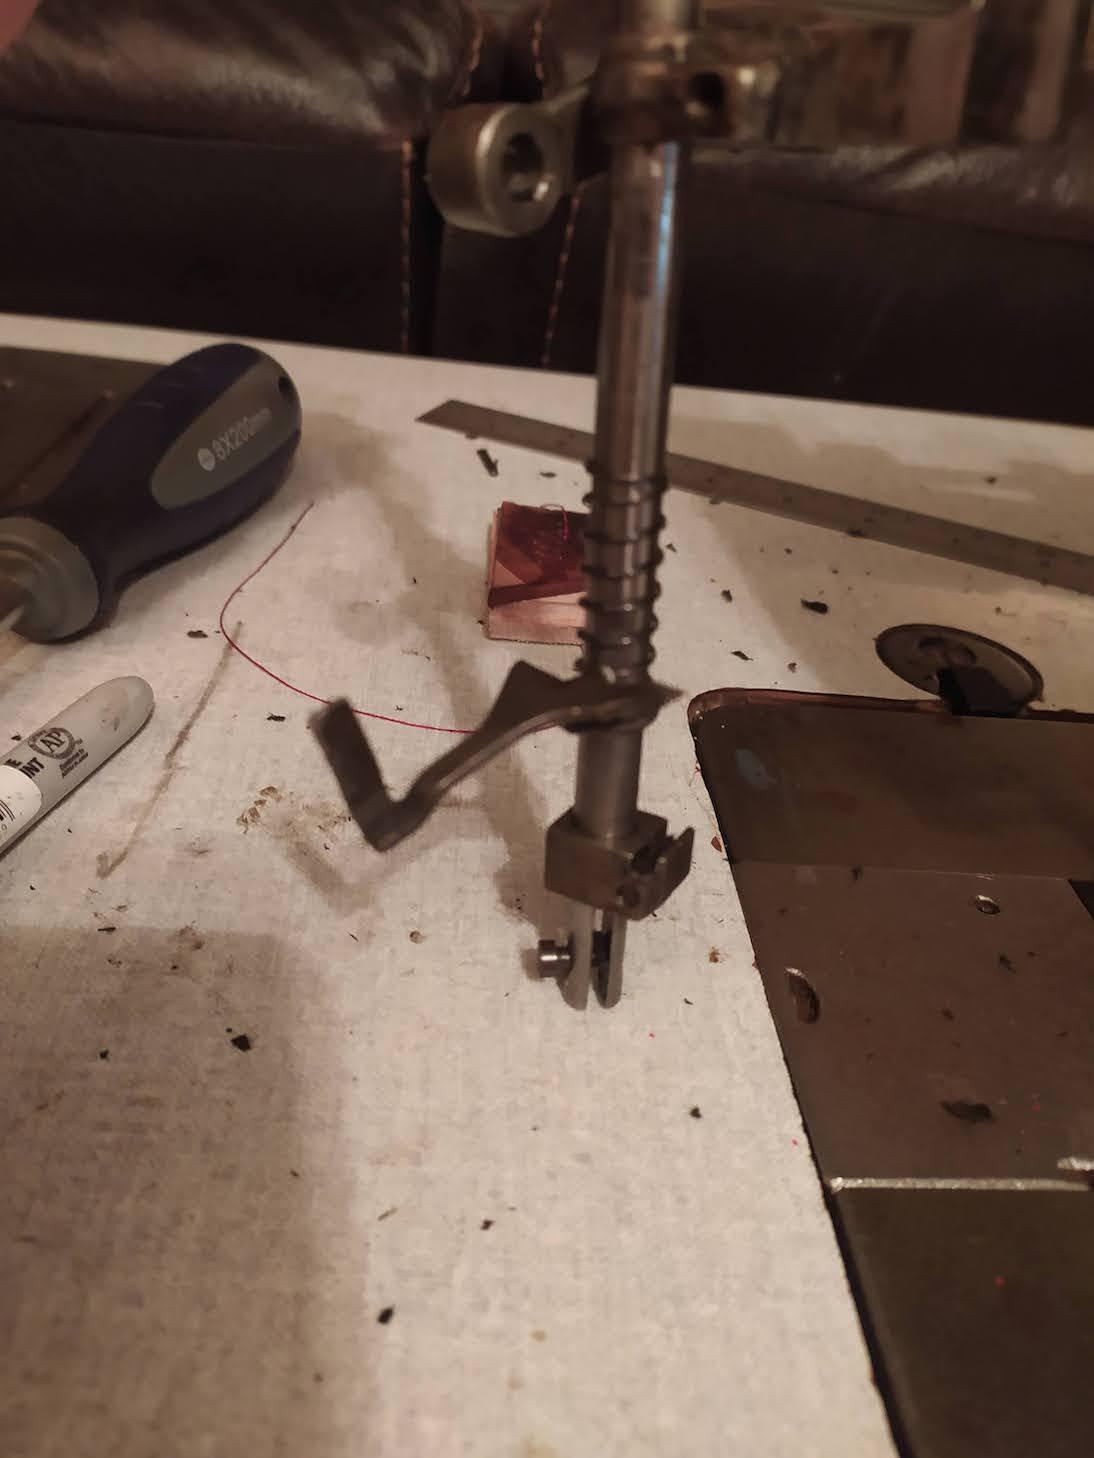
Hi all - I have a strange issue with the cb4500 which I don't think has been there before but I may just be going mad :D
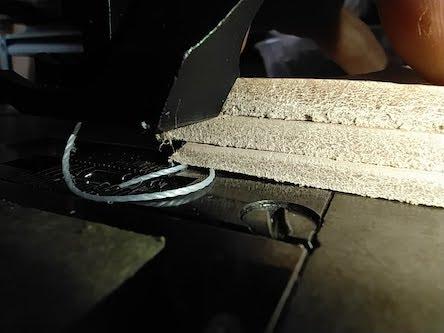
The top thread is being picked up fine by the hook, but when it slides over the bobbin case to form the knot, it seems to snag on the little hole right at the bottom of the bobbin carrier and then snaps back up when the tension is increased at the end of the stroke. I don't think this is correct as it makes a loud snapping noise and I cant remember that happening before. It is still making stitches but seems to be putting a large strain on the thread and the rest of the assembly so I'm concerned.
I took the whole bobbin shuttle and race assembly out to clean it, oil it and reinstall. I also gently sanded the case to remove micro burrs around the hole. This seems to have helped a little bit but it is still snapping very loudly!
I tried to compress the video to add directly to the post but can't get it small enough so apologies for the external link.
Mb
-
On 11/5/2021 at 6:35 AM, michaelcbarr said:Thanks @RockyAussie - quote received and accepted
")
Just as an update for the other forum members - I ordered the needle plate set before Christmas and, even with the crazy post around that time of year, it was shipped halfway round the world from Australia to Northern Ireland in less than 3 weeks.
The product is fantastic. It is a perfect fit, straight replacement for the stock items on my Cowboy (Hightex) 4500 with zero fettling. Thin leather is a breeze with this plate fitted and I'm now debating on whether to keep my Seiko STW-8B for lighter work, although it is handy having a second machine all set up with the correct needle and thread
Thanks again to @RockyAussie and particularly Jessica for her patience with the ridiculous shipping situation regarding Northern Ireland.

Mb
-
Thanks @RockyAussie - quote received and accepted
-
7 hours ago, RockyAussie said:Sorry for the delay in answering. I have tried to get a price for postage out of Australia Post online and that is not working out. I will have to get into the post office to find out and I live a good ways out of town. I will try and find out tomorrow for you.
Brilliant thanks - no rush just making sure you actually received my email

-
@RockyAussie I sent you an email requesting a price including postage to Northern Ireland (UK) but haven't heard back yet
Mb
-
Yes @CowboyBob that sounds like exactly what happened. It's just weird that I have been using this machine from brand new for about 4 months with no issue - until I changed the Bobbin!
mb
-
@Wizcrafts thanks for the reply. I should have said that I tried replacing the needle but no luck.
However I do seem to have fixed the problem, yet I don't know exactly what it was.
My local dealer suggested removing the shuttle assembly to send him some photos of the inside . He couldn't spot anything amiss and we had agreed to catch up tomorrow when he would decide whether or not to come out for an onsite visit.
However, when I reassembled everything - I noticed that the lateral play in the shuttle was almost gone - and sure enough, when I tried a stitch - it all worked perfectly.
Not sure if this helpful to anyone else but I suspect that either the screws had worked loose over time since installation (this is a new machine) or perhaps dirt had been caught up somewhere. In either case, the process of disassembly and reassembly seems to have fixed it.
Happy to share photos and video of anyone is interested but the problem is solved for me ☺️
Mb
-
Apologies for posting a link rather than the full vide clip but I can't compress it enough to meet the forum upload limit!
https://photos.app.goo.gl/zgpYAeUaGmWpCrNA8
You can see that the needle very clearly fouls on the hook and causes an audible click as it gets deflected out of position. This seems to have started after I replaced a bobbin and on the first few stitches I managed to birds nest it a bit. The jam was cleared immediately and I didn't force anything - just gently cut away all tangled threads. Might be just coincidence?
I haven't looked at setting the timing yet as I am hoping this is a more simple fix.
While investigating this, I noticed a large amount of play in the bobbin shuttle but I really cannot remember if this was always there and I just never noticed!
Anyone got any good ideas? We have only one dealer in the country and he hasn't replied to my messages yet.
Thanks,
Mb
-
Thanks @Uwe! I'm tempted to stop fiddling as it really is working beautifully on double layer veg tan now - but I'm still convinced there is something not quite right!
OK I checked the linkage as described above and its pretty much exactly on the green lines when all feet are level with the throat plate.
A bent vibrating presser bar does seem to make sense and would definitely explain the weird needle hole alignment as you suggested. Also, as I mentioned earlier, the lifting presser bar was not in a good state and I did some major polishing on it to try to even out some wear marks so it wouldn't surprise me if the other bar has been mistreated - or just worn out I suppose.
I can't seem to work out where the clamps are that hold the vibrating presser foot in place - so that I can try spinning it - I just see the large pressure spring and the the little oil access holes that are attached to the rest of the linkage.
Is it a really major job to take the entire bar out - and are there any manuals/video I can follow? Also are the parts available and affordable if It does need replaced?
Thanks again @Uwe - it has been great getting all this assistance :D
Mb
-
Thanks for your reply @Wizcrafts!
Yes I know I am pushing this machine beyond its limits and I think I should admit defeat and settle for using the Seiko for its intended purpose - which is actually very impressive :D
However, the reason I have been confused about the capability of my machine is due to @Uwe's video of sewing similar thickness of veg tan leather - approx 10mm on a Consew 225. I understand this was just a test and the machine should not be used for this purpose on a regular basis, but in that video @Uwe was clearly able to lift the presser foot up to insert the material with room to spare and that's where I'm not sure if there is something else I need to adjust on my own machine.
The correct size needle was in the machine when I bought it and I think the bar is correct but honestly I am at the limit of my knowledge here.
I can force the lifting foot to 1/2 inch but then the vibrating foot is actually underneath the lifting foot for part of the cycle and the lifting foot does not come back flat to the throat plate when the lifting bar is released - so I know something is wrong and I would never try to sew.
Mb
-
Well we have some progress but still some frustrations :D
I fitted the new part for the tension release guide - which I had to "fettle" as it wasn't a perfect fit. Also when I was reassembling I noticed burrs and uneven wear on the main presser foot bar and the piece which connects to the tension release (not sure of the name!) so I sanded with very fine grit and polished both for a better, smoother fit.
Once I retimed everything - the machine is sewing great again - attached photos of great looking stitches at different lengths through approx 8mm of double layer veg tan.
HOWEVER!!! I still cannot get the presser foot up any higher than about 9mm.
Photos attached show the presser foot at max lift using the lever - just fits 2 layers of veg tan. I can use the knee lift to enable an extra mm to slide the work piece in and out.
Last photo shows 3 layers of veg tan - approx 1/2 inch. This should be the max presser foot height but you can see it's miles off and even using the knee lift I could not squeeze the work piece in.
I went through the process several times to adjust the height but if I force the presser foot up to 1/2 inch then try to set everything else, the vibrating foot does not seem to move freely through it's cycle and/or the needle bar bottoms out on the presser feet and the machine won't complete a full cycle.
I'm stumped again.
Two more things :
1. I still have to manually skew the vibrating foot to fit the needle through.
2. I fitted a servo motor and when punching through 2 layers of veg tan with a 22 needle and 207 thread it seems to jerk a bit then catch up when making the initial holes - maybe I need a speed reducer also to beef up the torque and slow it down?
Thanks again for your help everyone
Mb

-
7 hours ago, Uwe said:I think it’s better to know what’s broken than to get frustrated with a machine that’s not working properly without knowing why. Hopefully that new thread tension release slider will fit and your foot lift and clearance issues will be resolved. Perhaps this was why the machine was for sale in the first place.
Kudos for getting all that disassembled, that was not a trivial task! On the plus side, it’ll give you the chance to give the disassembled parts a good cleaning and remove gunk from the works. It also is good to get to know your machine at that level and gain confidence in handling service and repair tasks yourself.
Let us know if you run into trouble putting things back together. It takes some patience to line things up properly inside the tight space. It’s okay to just let it sit for a while if you get frustrated with it. Then try again.
Hopefully by the time you’re done you’ll feel good about the machine working the way it’s supposed to and having done the repair yourself.
100% agree @Uwe and I really enjoyed seeing how everything actually works - once I got over the panic about not knowing what I'm doing :D
Your videos were, and will continue to be, invaluable.
Mb
-
@Uwe
Well... we have good news and bad news !
The timing seemed to go OK - it was a bit out as you suspected - although not by much.
Equalising the presser feet lift seemed to go OK too.
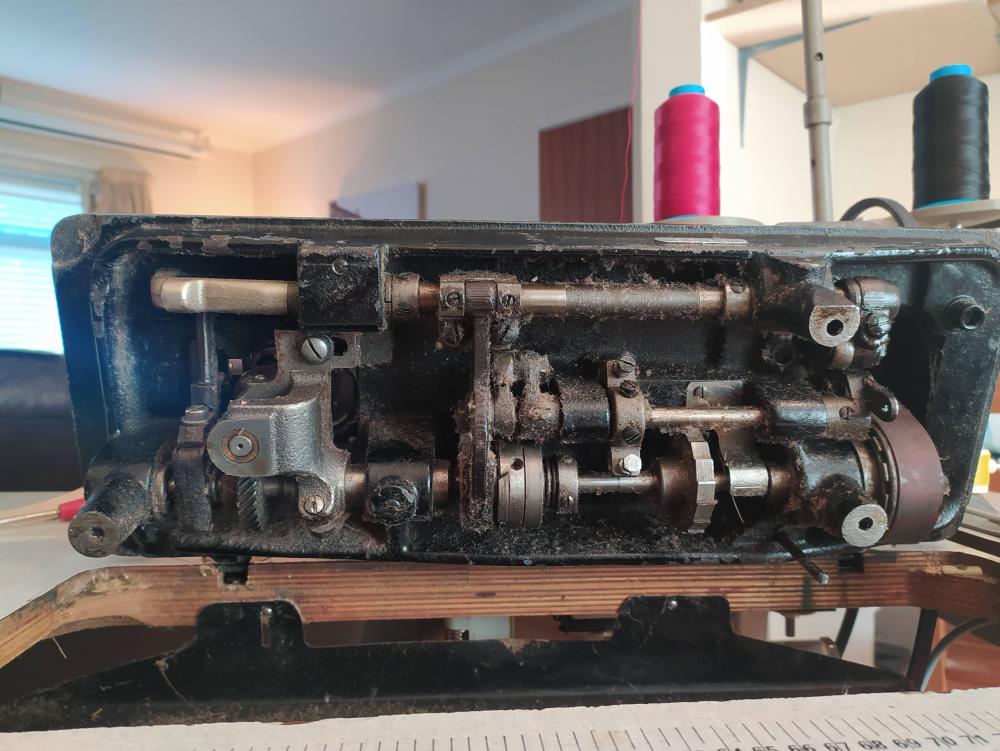
However, once I started trying to go through the steps to raise the overall height of the lifting presser foot - it all went wrong. I could not get the foot to adjust properly by following your steps and it just seemed to be jammed even when I loosened up every screw. Now the hand operated lift lever has never really worked well for me but I always used knee lift so it never bothered me too much. However, I suspected the issues may be linked after watching your video and sure enough when I disassembled the presser foot bar assembly - the Thread Tension Release Guide came out in 2 pieces.
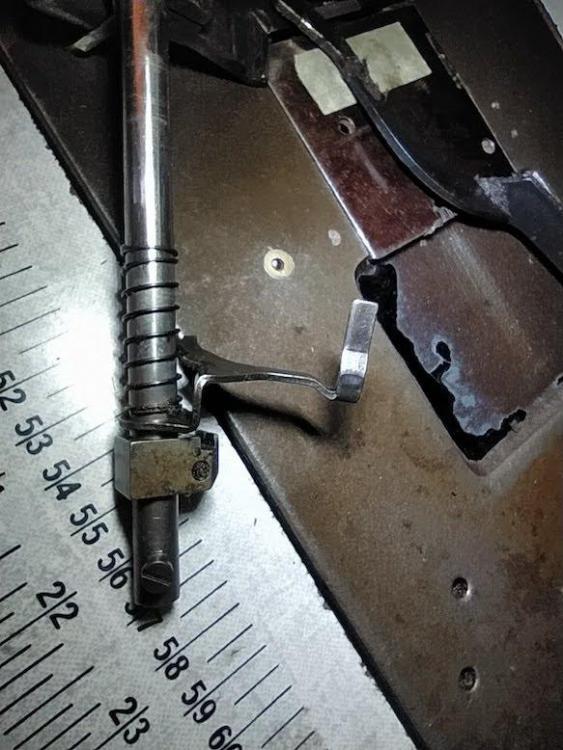
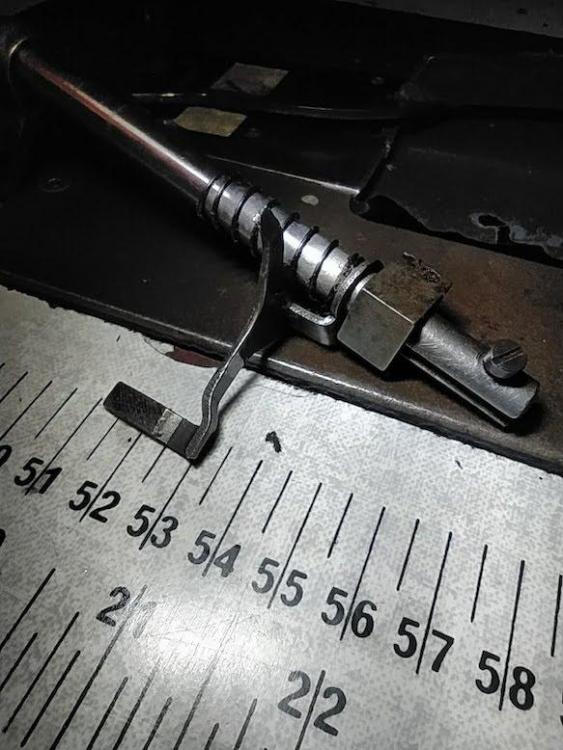
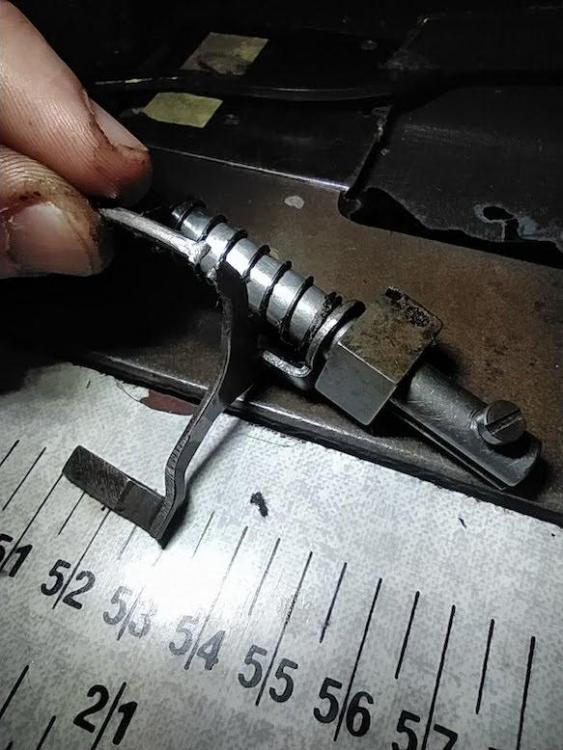
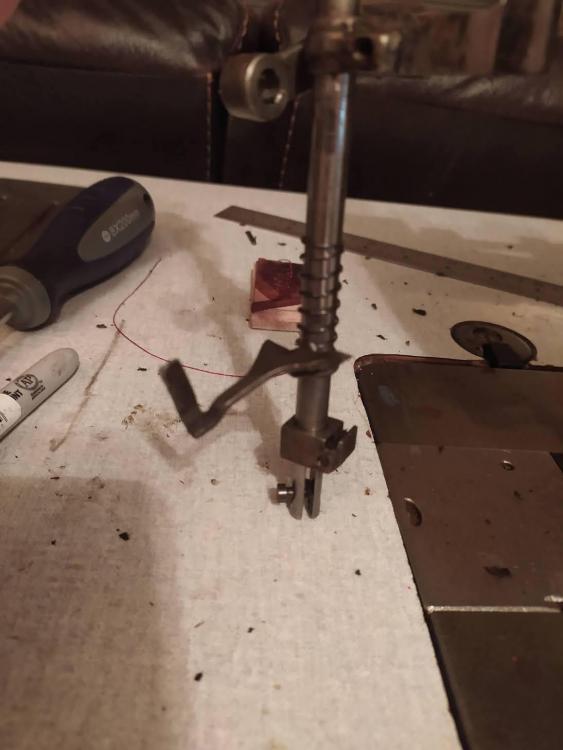
I ordered the new part you suggested - it looks quite a different shape to the one from my machine but I think it was the same with yours.
Hopefully this solves the issue - I assume the broken part was jammed somewhere in the presser foot bar assembly and was blocking it from raising properly?
Mb
-
7 hours ago, Wizcrafts said:I use FastStone Photo Resizer. It is easy to use. By lowering the "quality" 15 or 20 percent you get a smaller image file size with very little reduction in clarity. It also has a sharpen function that makes reduced, or even slightly out of focus images sharper. If you also crop out unnecessary portions you can save more bits and bytes. Finally, resizing an image down makes it smaller. I often cut the original file size in half, or close to it, using combinations of functions.
Thanks Wiz - I have downloaded and will have a look later or tomorrow - been too busy breaking my machine
Mb
-
well if you still have the machine - try adjusting these two screws:
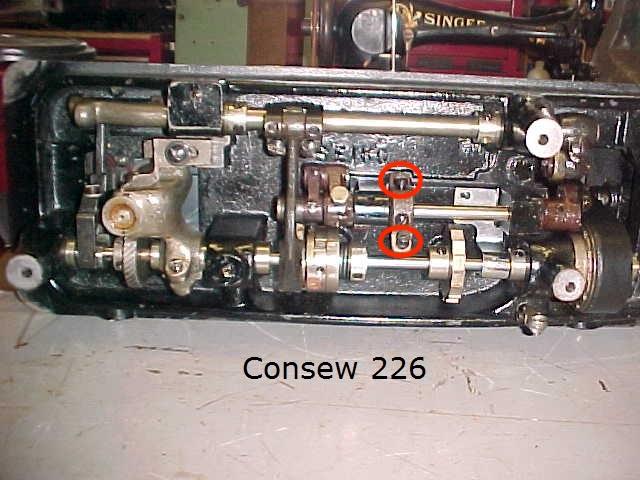
Please let me qualify this advice by saying I know almost zero about this machine (or any other machine) but I had the exact same issue and it is the only thing I found that worked :D
Mb
-
I'm sure this has been sorted after 4 years but I had similar issues on my 226R and was wondering if you got to the bottom of it?
Mb
-
That's brilliant thanks @Uwe! I will get on to that today and see what I can do .
I can also have a look at resizing some of the pics and reposting if you think any of them would be helpful to others?
Mb
-
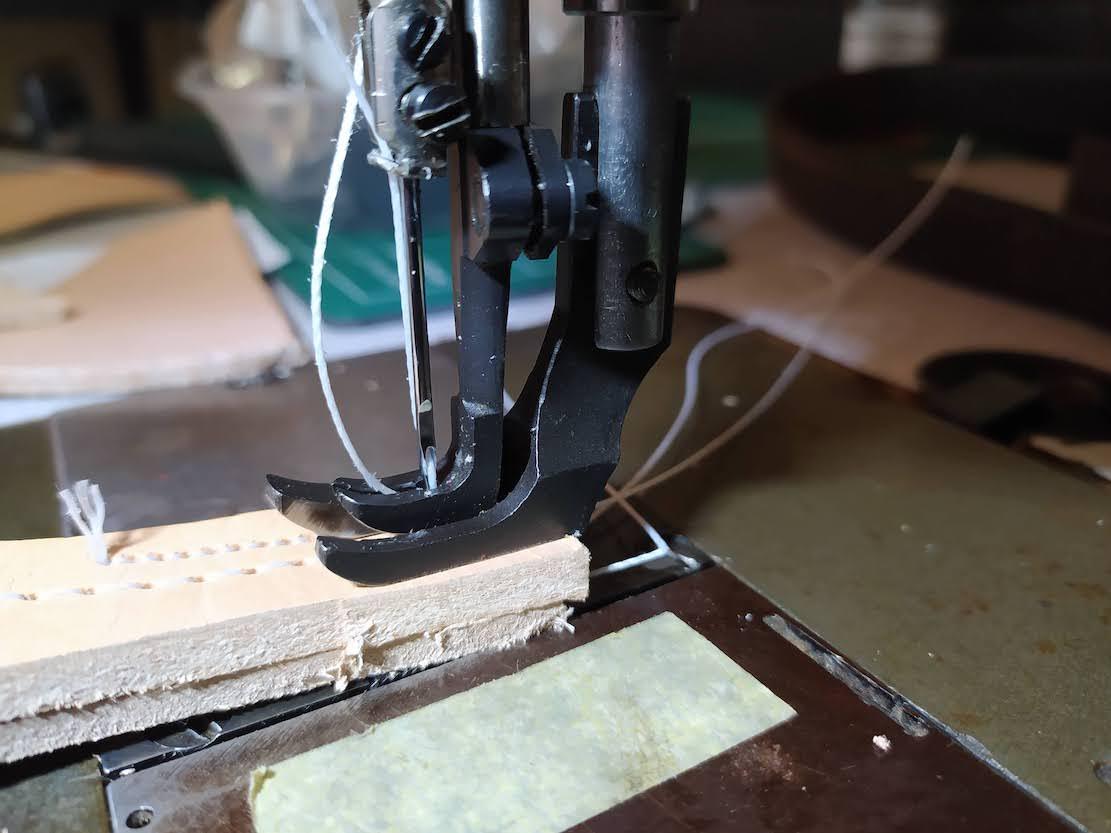
@Uwe first of thanks so much for taking the time to reply - it is very much appreciated.
I have taken a load of photos and a wee video of a slow hand stitch, along with a video of the needle bar colliding with the presser foot if I force 10mm of leather under it.
I used a small piece of paper with marked measurements to show the max lift height (using hand lift and then knee lift)
Hope this gives you some idea!
I have created a shared Google photo album as I can't attach the photos here - hope that's OK?
https://photos.app.goo.gl/NEX5wJiNEmeipj146
I have picked one out up to my 1.5MB limit :D
Here is the video clip of a slow stitch:
And this is is one of the needle bar collision on 10mm leather:
BTW - please excuse the dirt on the machine - once I make sure it works as required and I am definitely keeping it I will give it a thorough cleanup - promise :D
Thanks again for your help,
Mb
-
Thanks so much Don!
I had another crack at the timing based on your advice and noticed that the needle was actually being deflected by the shuttle - more so in reverse than forward. On closer inspection, this seemed to be caused by the hook being in line with, or slightly inboard of the edge of the shuttIe. This had the effect of very slightly pushing the needle away from the shuttle at the point of bobbin thread catch, if the needle height was correct as stated.
i very gently applied some pressure to the hook and moved it a tiny fraction out - we are talking 1/2 a mm at the very most. This allowed me to set the hook closer to the scarf of the needle avoiding the deflection, and it seems to have fixed the problem:
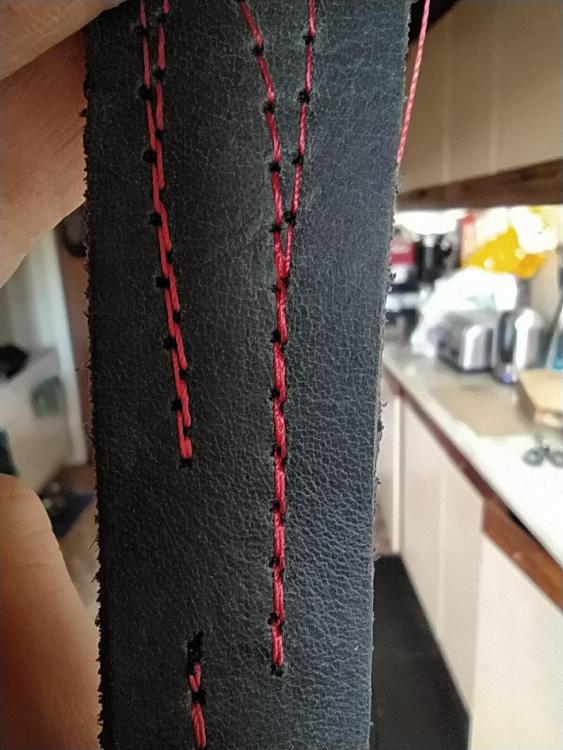
That line on the right shows forward and reverse hitting the same holes perfectly with no missed stitches!
Thanks again @DonInReno.
Now I just need to look at the max presser foot height and the weird rotated vibrating foot issues!
Mb
-
Hi all!
I'm brand new to machine leather sewing so please excuse any stupid questions
I bought a Seiko STW-8B - which I have since found out is often sold as a Consew 266R. It was sewing OK but had some issues with reverse stitch length which I think I solved by replacing an after market bolt which was fouling on the main shaft. I now have forward and reverse hitting the same holes - which took hours but was worth it I think.
I have also fitted a servo motor as clutch control is apparently wAY beyond my skill level :D
I still have a few issues which I would really appreciate some advice on. I'm going to list them all in one topic but happy to split if moderators prefer:
-
Presser foot height and needle bar interference
- From watching @Uwe's brilliant video series I can see that it is possible to sew through 3 layers of 8/9oz veg tan - I would love to try this but I cannot get the presser foot adjusted high enough to even fit the material under. I have tried all the adjustments I could find on this site and elsewhere but it seems to be maxed out at around 9-10 mm on the knee lift even though the manual suggests it should be 0.5 inches - i.e around 13mm.
-
Even when I do get 10mm of leather under the presser foot, when I try to cycle the needle, the needle bar fouls on the vibrating foot - I'm only using hand power to test this but it seems there would be interference and damage if I tried to run it under power. I have the standard 135/17 needle - do I need a longer needle and then adjust the needle bar higher and reset the timing?
-
The vibrating presser foot seems to be off centre in relation to the needle. The needle sits dead centre in the feed dog hole but if I line the vibrating foot up straight in the middle of the lifting foot, then the needle is very, very close to the left edge of the vibrating presser foot hole. I can remedy this by rotating the vibrating foot slightly to one side so it does not run true from front to back - but surely that isn't correct?
- The timing seems to be correct (seems!!) but in reverse it is skipping stitches every time - and I'm pretty sure the top thread is just being missed by the hook. Is there anything obvious i could have messed up or do I just need to check the timing again?
Thanks so much for your help - I only discovered this website a few days ago and I am hooked - so many helpful folk out there!
Mb
-
Presser foot height and needle bar interference


441 Clone - CLANG sound mystery.
in Leather Sewing Machines
Posted · Report reply
@ShortyLV this looks very similar to a problem I am still seeing myself with my Cowboy (Hightex) 4500.
I still haven't got to the bottom of it so I'll be very interested to see if you solve it")
Mb