deloid
-
Posts
78 -
Joined
-
Last visited
Content Type
Profiles
Forums
Events
Blogs
Gallery
Everything posted by deloid
-
Thanks to you both!
-
I make a lot of hand stitched Kangaroo wallets and most of these hides are about .7 to 1.2mm thick. Currently I sell them unmarked because the regular stamp we use leaves an imprint that is too light or too deep to the point of nearly cutting the leather. A press does the same. I thought about a hot press and perhaps using gold colored foil for dark brown leather but the samples I've seen are not cleanly marked. A laser would be fine (I think) on lighter Roo but probably wouldn't show up well on the darker leather. I also worry that .8mm Roo would be too thin for a laser. Has anyone run into this same situation? Found any solutions? Thanks-
-
No, I got the Cobra 4 then later the Cobra 18. I've been really happy with these. Sorry this is so late but I didn't know about this notification until today. Dean
-
Thanks everyone. I think I figured it out. I wasn't casting the back side properly. I watched both of the wonderful videos (Nigel/Ian's) and I agree, they are remarkable in their generosity. I discovered a new stumbling block now that I'm trying to improve on the quality of my stitching. Using the Roo, .6 thread, JJ #2 9no groove) I was doing well. I use double sided tape from Tandy for many of my projects.When freshly taped and marked with the pricking iron the leather works easily and the needles and awl stay clean. As I worked on the last section many hours later the awl and needle started getting gummed up and while the front stitch was fine, the back now didn't cast cleanly. I think the gummed up hole couldn't be cleanly opened with the awl so the backside didn't open enough for that nice slant. I have to compare the white leather glue and contact cement to see which dries better. Perhaps someone is already aware of this issue and has a recommendation.
-
"Proper"
-
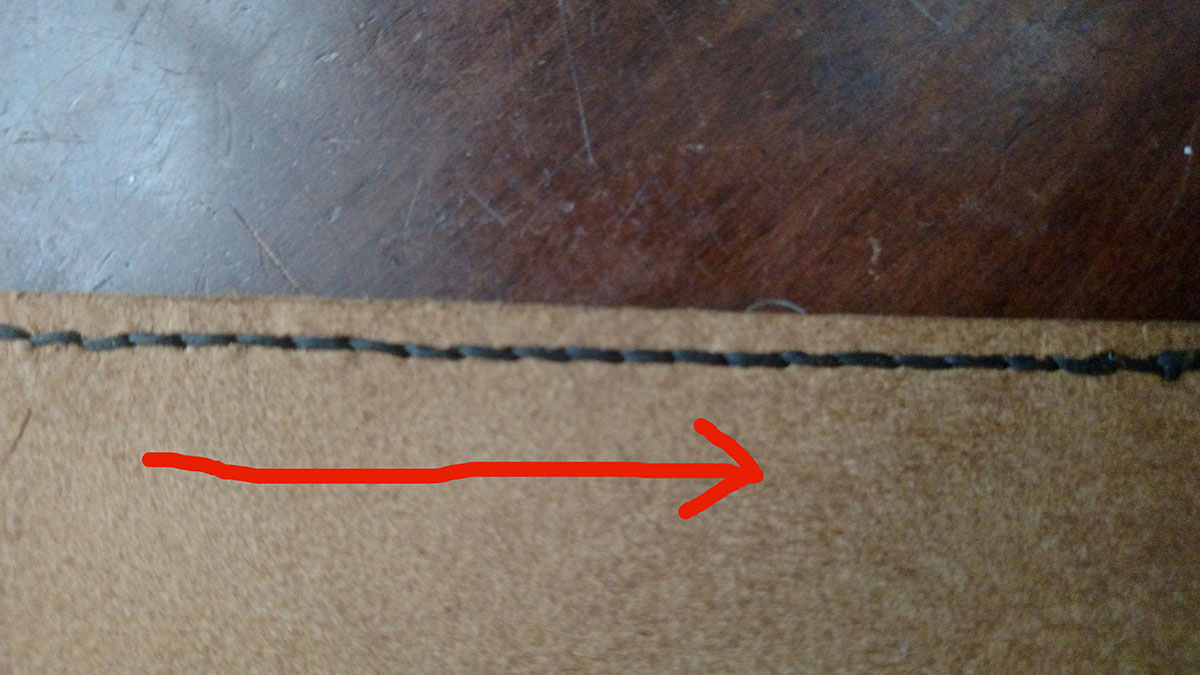
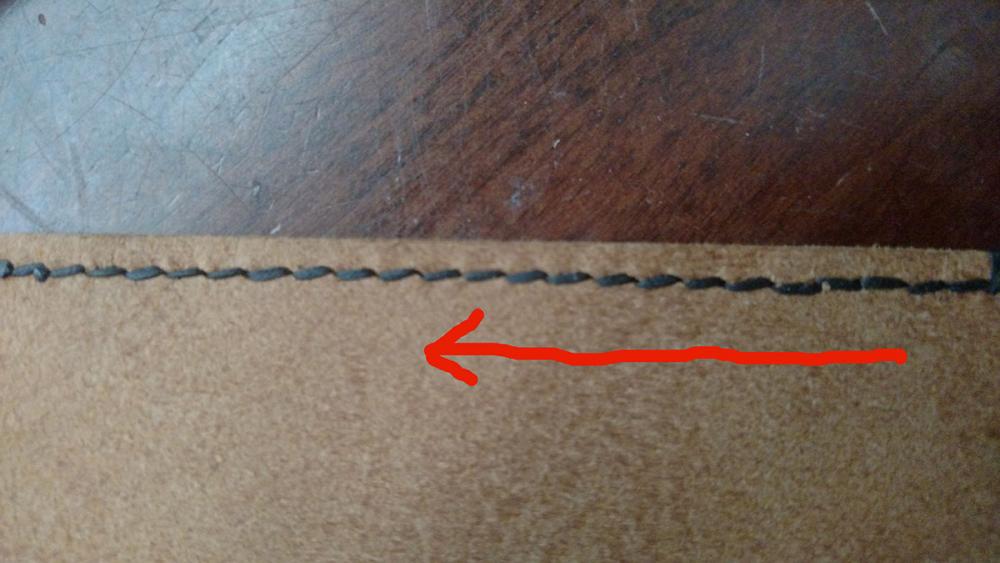
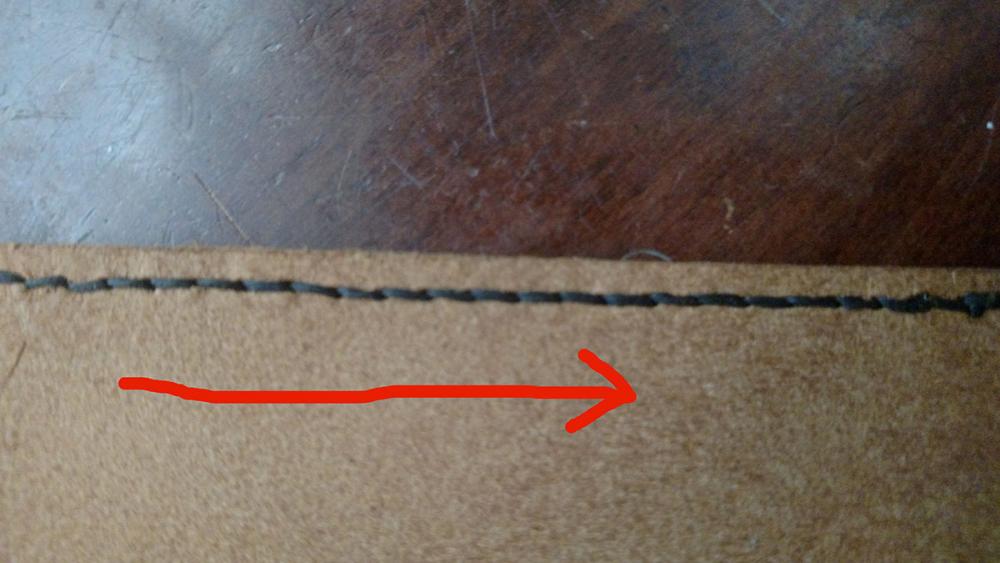
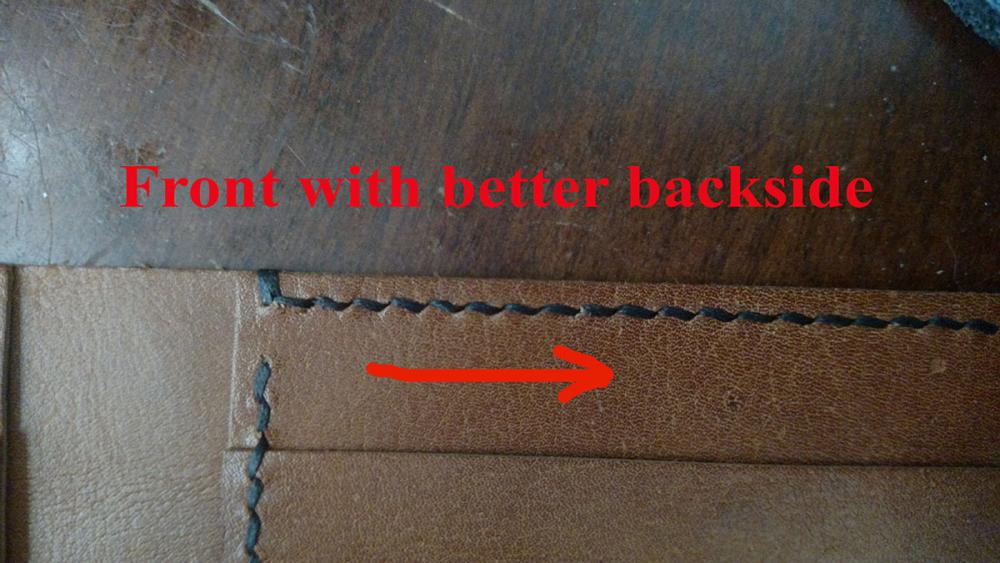
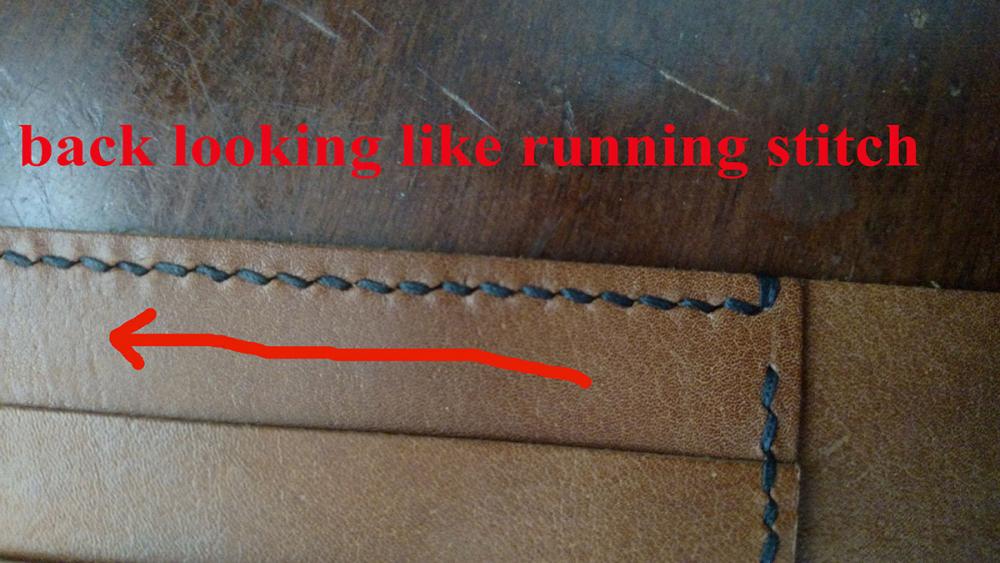
I've been trying to get a nice pattern with Ritza .6mm thread, K&S blade 3.85, awl and kangaroo. The front isn't a problem and the last wallet I completed looked good front and backside. The problem is that I need to sew in different directions and that throws the pattern on the backside. On the bad side I tried starting from the back, from the front, loop below the single thread and loop above. Three and four from the left (back) looked better but the next was straight. I'd really appreciate a methodology or thinking process when stitching in the direction as per the pictures. Last picture was supposed to state Front with the back looking like a running stitch.
-
Thanks Guys!
-
I have a 50 year old coin pouch that has a gold "Top grain Cowhide" stamp. Though it is old and well used the stamp with the gold color is still in excellent condition. I'd like to do this on some small projects but I can't find out how it's done. Any help?
-
I do the same but the thickness for anything around 1mm to preferable .7mm is inconsistent (really thin spots) with my Cobra splitter. I never try to shave off a small layer. The big splitters are not capable of doing this.
-
I have the Cobra skiver and I can get real thin and consistent cuts but do you use it for veg tan leather? If you have to do multiple pass throughs for something like a wallet cc pocket is it consistent?
-
I have the Cobra 14 but it doesn't do well splitting to or just below two ounces. I need a consistent .7mm thickness for my wallets. I believe splitters made for this purpose are going to be too large and expensive. I'm wondering if anyone has figured out a way to get leather down to an even .7mm or if the leather can be farmed out to someone with these big splitters.
-
In my opinion don't try and split moss back leather. It dulls the blade really fast. Make sure it's properly tunes so a 10" by 2" test strip has a consistent thickness from the beginning to the end (fix for that is posted here somewhere). Make sure blade is honed then sharpened when needed. I like the trade in program at leather machine co. All leather is different so test pieces first. Some will allow you to jump 2-3 ounces down, some only 1-2 ounces (also dependent on initial thickness). It's great down to about 3 ounces. I find it is too inconsistent to get pieces down to one ounce (something I need). Dean Lapinel, MD
-
a freshmade watch strap
deloid replied to raditya's topic in Purses, Wallets, Belts and Miscellaneous Pocket Items
Nicely done!! -
I just had the sudden appearance of bottom knots with notably increased bobbin thread tension (by feel). The machine has been perfect regarding tension for the past three years. It is used pretty heavily but well maintained. Cobra 4- 138 top/bottom Threading checked and redone just in case. No tension changes made in the last two days of work on the same material Thread OK...bobbin clean- no nests of thread. Bobbin tension spring clear of debris. Timing is perfect. I can easily understand decreasing bobbin tension with time but increased? I increased the top tension and the knots raised but now the leather is being compressed too much. Then I backed off the top tension to it’s starting point (for today) and I kept the bobbin tension looser than it has ever been and still getting bottom knots. Really need help/ideas. Only two sewing days before an out of state art festival.
-
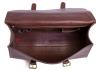
I know the Cobra 4 cyl can't sew this (bottom and deeper gusset sections). Anyone know how this type of sewing can be done (via machine)?
-
Contacted Wayne and you are correct! Thanks-
-
Looking for this or similar stamp (about 3/8"). It looks like it would do well with any arts/craft or Aztec type stamping. Anyone seen this before?

-
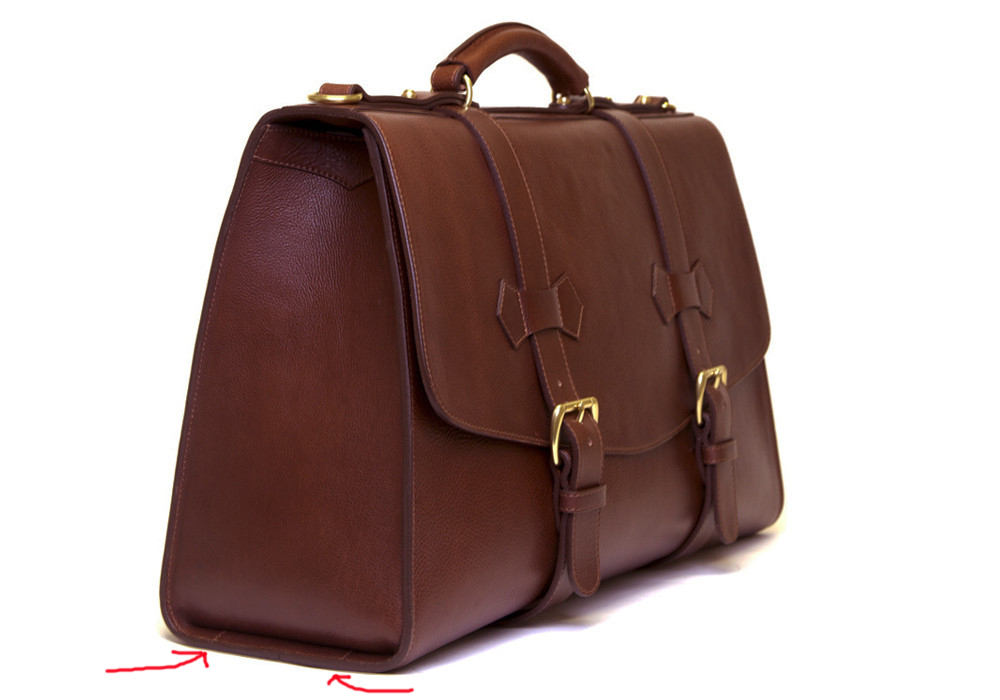
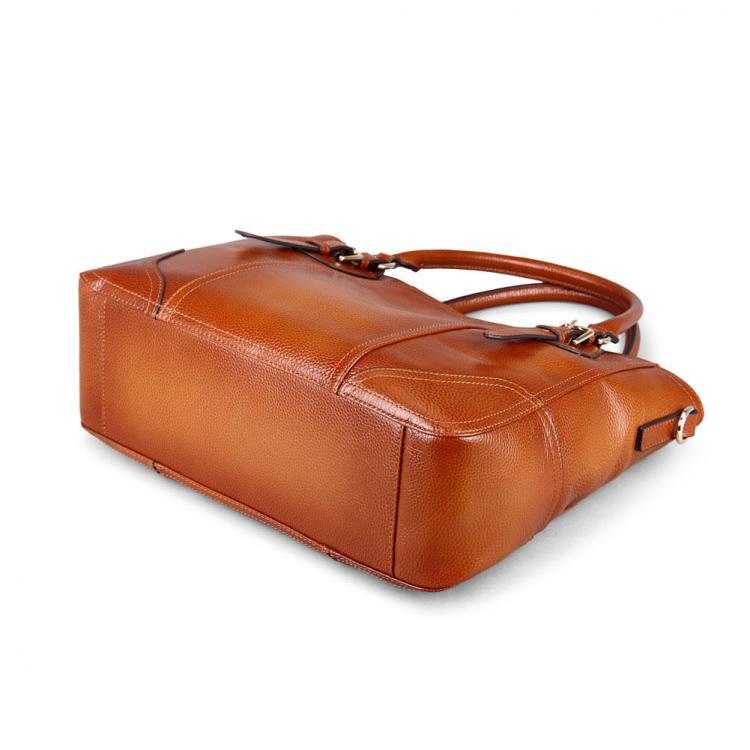
Thanks James- Well demonstrated in your pictures and comments. I believe that this roll-in adds additional rigidity to the bottom.
-
Saw this lower gusset tuck in a briefcase and liked the functionality (stiffens the bottom). I see that the gusset is cut and rolled in but don't quite see how it is tacked down on the inside. I'm sure that this is a common technique...just can't find any references in the internet. Thanks!
-
Having used all three I now only work with the metal draw gauge for smaller work and when starting a new hide for belts or other long parts (9-10 ounce), definately the plough gauge. The Plough Gauge is easier to control and seems to cut like butter if you keep the blde sharp and honed. The wood cutter works but requires a bit more finess to prevent mistakes and even with a new blade doesn't cut as easily as the plough.
-
I Would Love To Try Some Diamond Point Needles (Dyx3)
deloid replied to deloid's topic in Leather Sewing Machines
Thanks so much for helping me out. I guess the least thing to look for is the LL point in a smaller size. Dean -
I Would Love To Try Some Diamond Point Needles (Dyx3)
deloid replied to deloid's topic in Leather Sewing Machines
I currently use chisel and rounds for wallets and LR for thicker weights. While I understand that LR points offer greater strength I don't like the angled stitches. I just read up on th LL points and it seemes that these are nice cutting needles that still give a straight stitch like the diamond points. Know anyone that carries these in the 22, 23 size? -
I Would Love To Try Some Diamond Point Needles (Dyx3)
deloid replied to deloid's topic in Leather Sewing Machines
Thanks for catching that error- yes I meant DYX3. All of those are round or chisel points and they do have some triangular but in larger size. I really wanted to try the diamond point. -
I've searched everywhere and can't find and company that sells diamond point needles in sizes 21, 22 or 23 for the DXY3 system. Anyone know of a supplier?
-
I want the heavier thread look of 270 but in my first attempt at using it on my cobra 4 I couldn't get the tension right so I went back to 138/138 and an appropriate needle. I was going to try again and increase my pressor foot pressure but now I'm wondering if using 277 top needs to go with 207 in the bobbin. It seems that I see this combo used quite often. Any thoughts on this?