ClaimedVacancy
-
Posts
30 -
Joined
-
Last visited
Content Type
Profiles
Forums
Events
Blogs
Gallery
Store
Everything posted by ClaimedVacancy
-

Swiss Saddler Clam Drawings
ClaimedVacancy replied to ClaimedVacancy's topic in Leatherwork Conversation
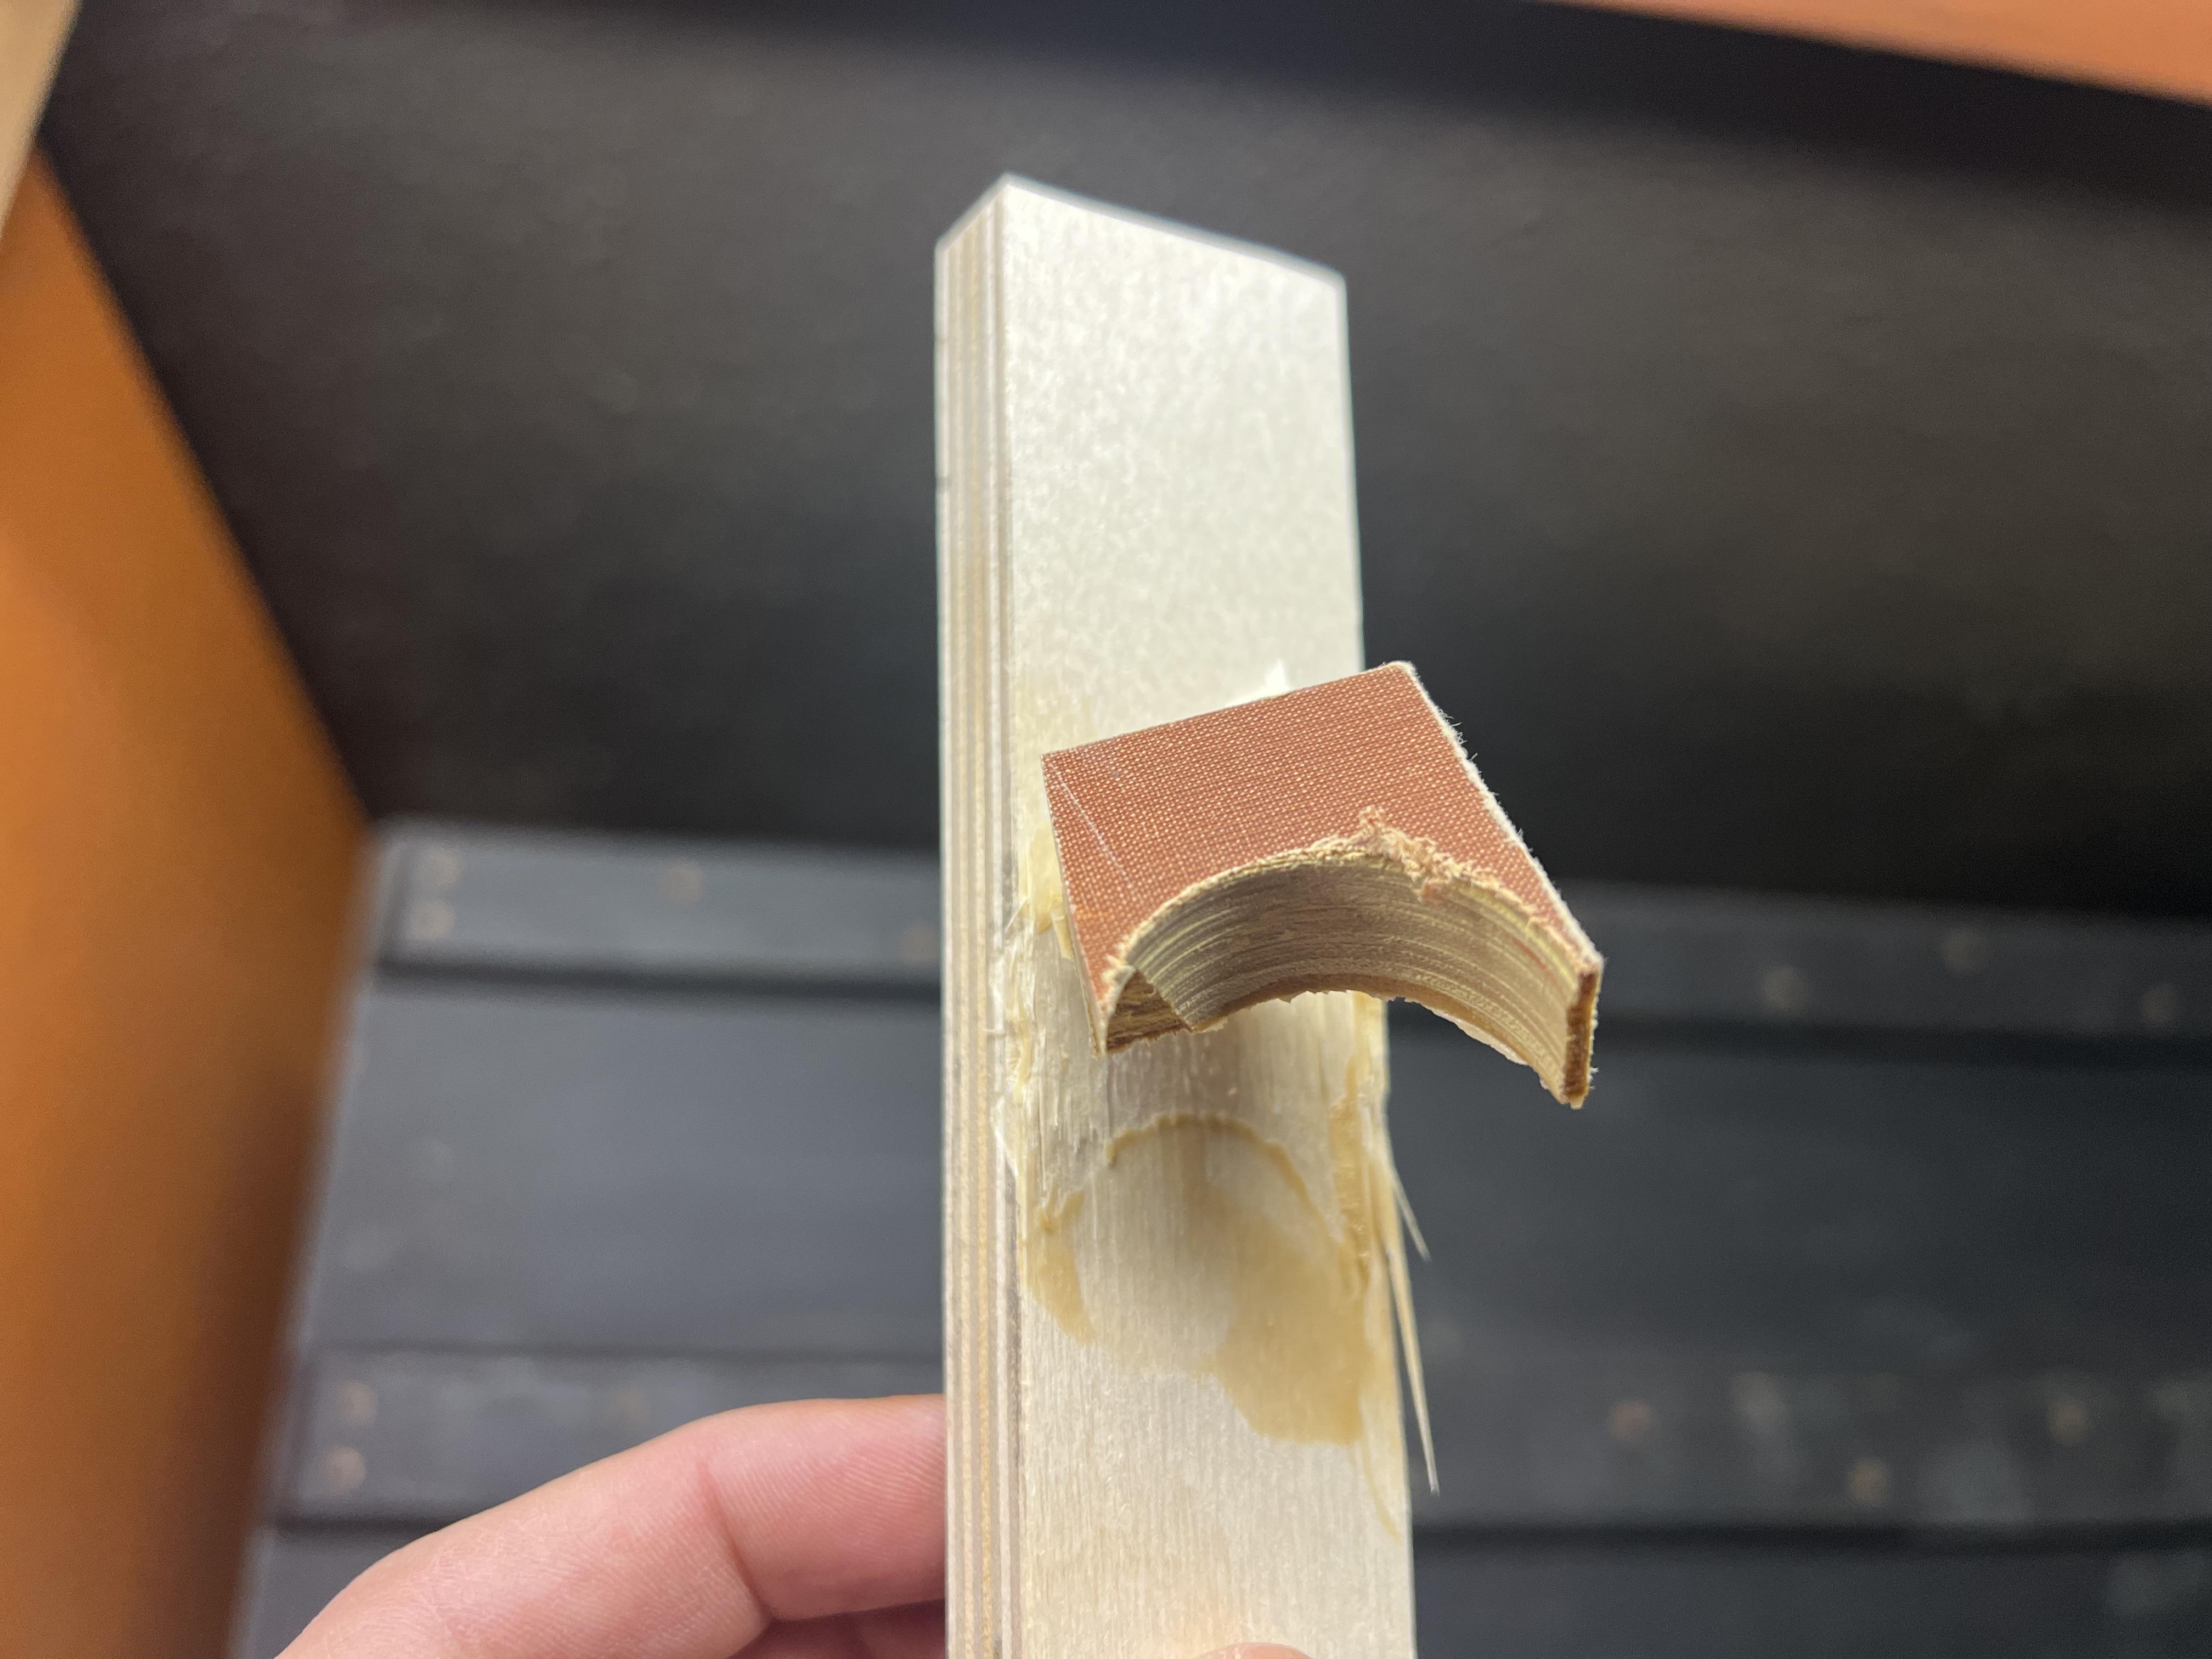
Side note: yes, titebond 3 will bond phenolic, micarta, etc to wood exceptionally well. This is great because it has a high resistance to wear and grips leather just as well. Its pretty non marring to the leather if it’s rounded over well. It’s a fun material to incorporate into this tool for leather working. -
Swiss Saddler Clam Drawings
ClaimedVacancy replied to ClaimedVacancy's topic in Leatherwork Conversation
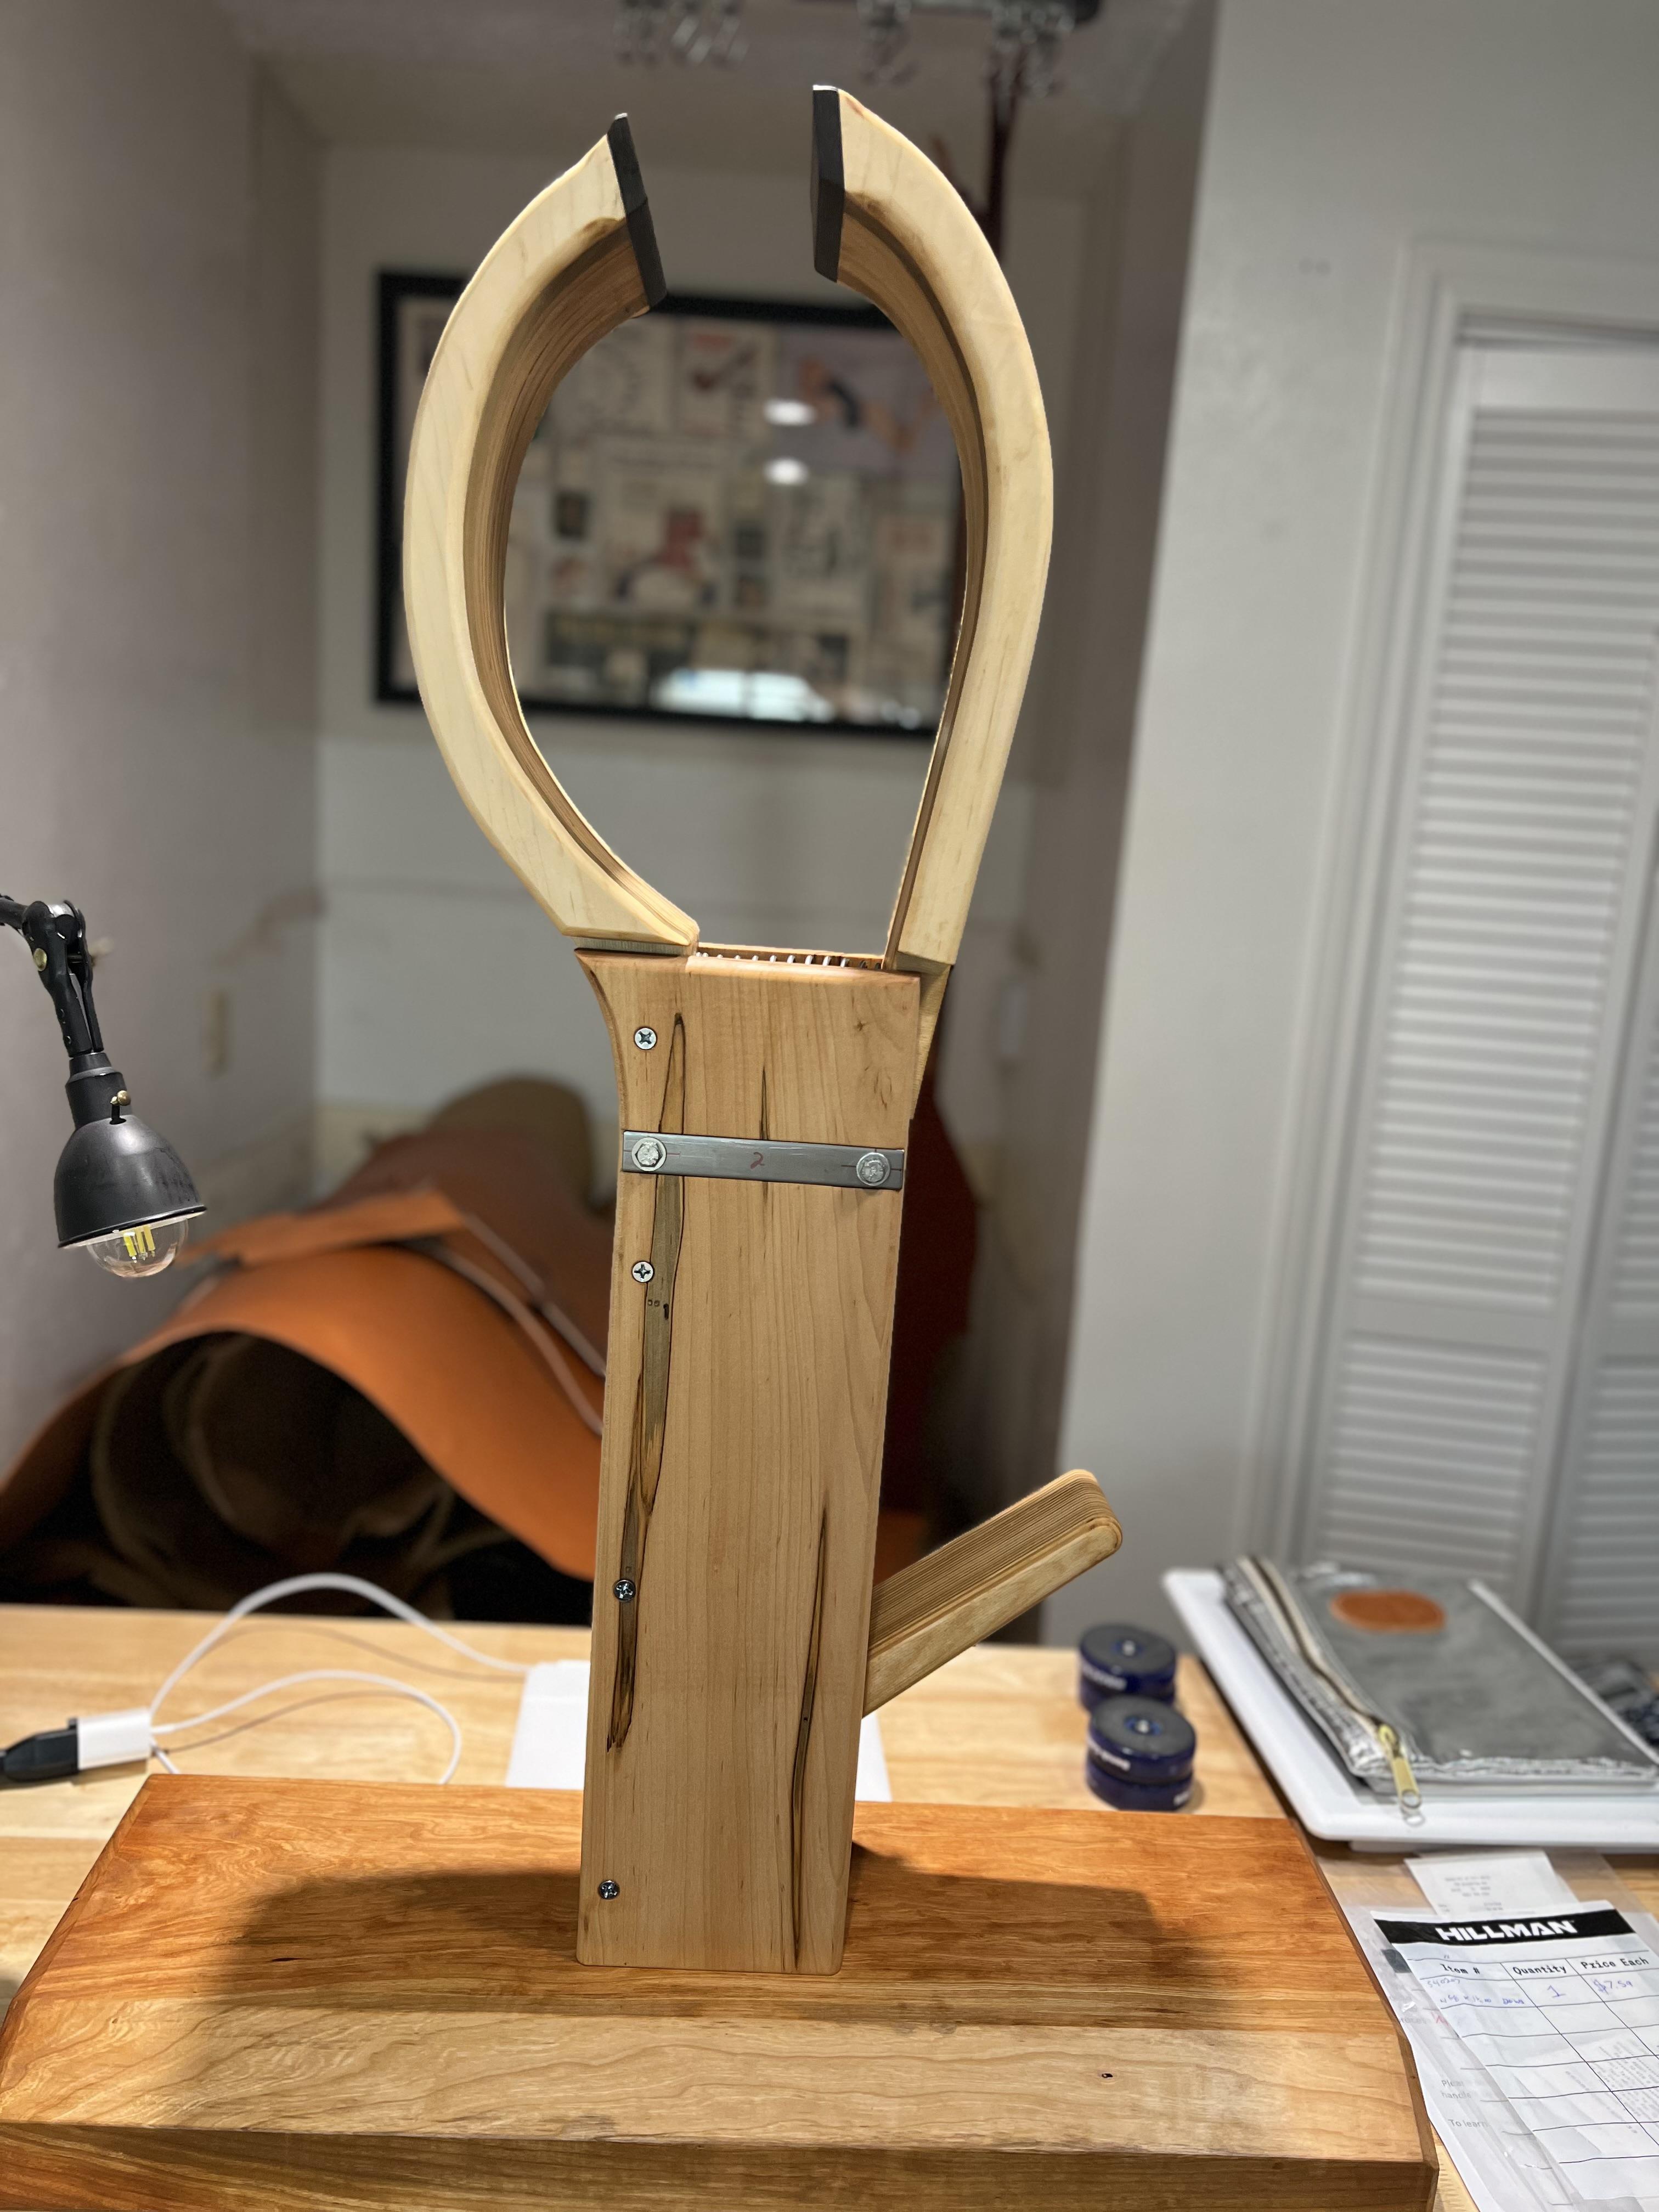
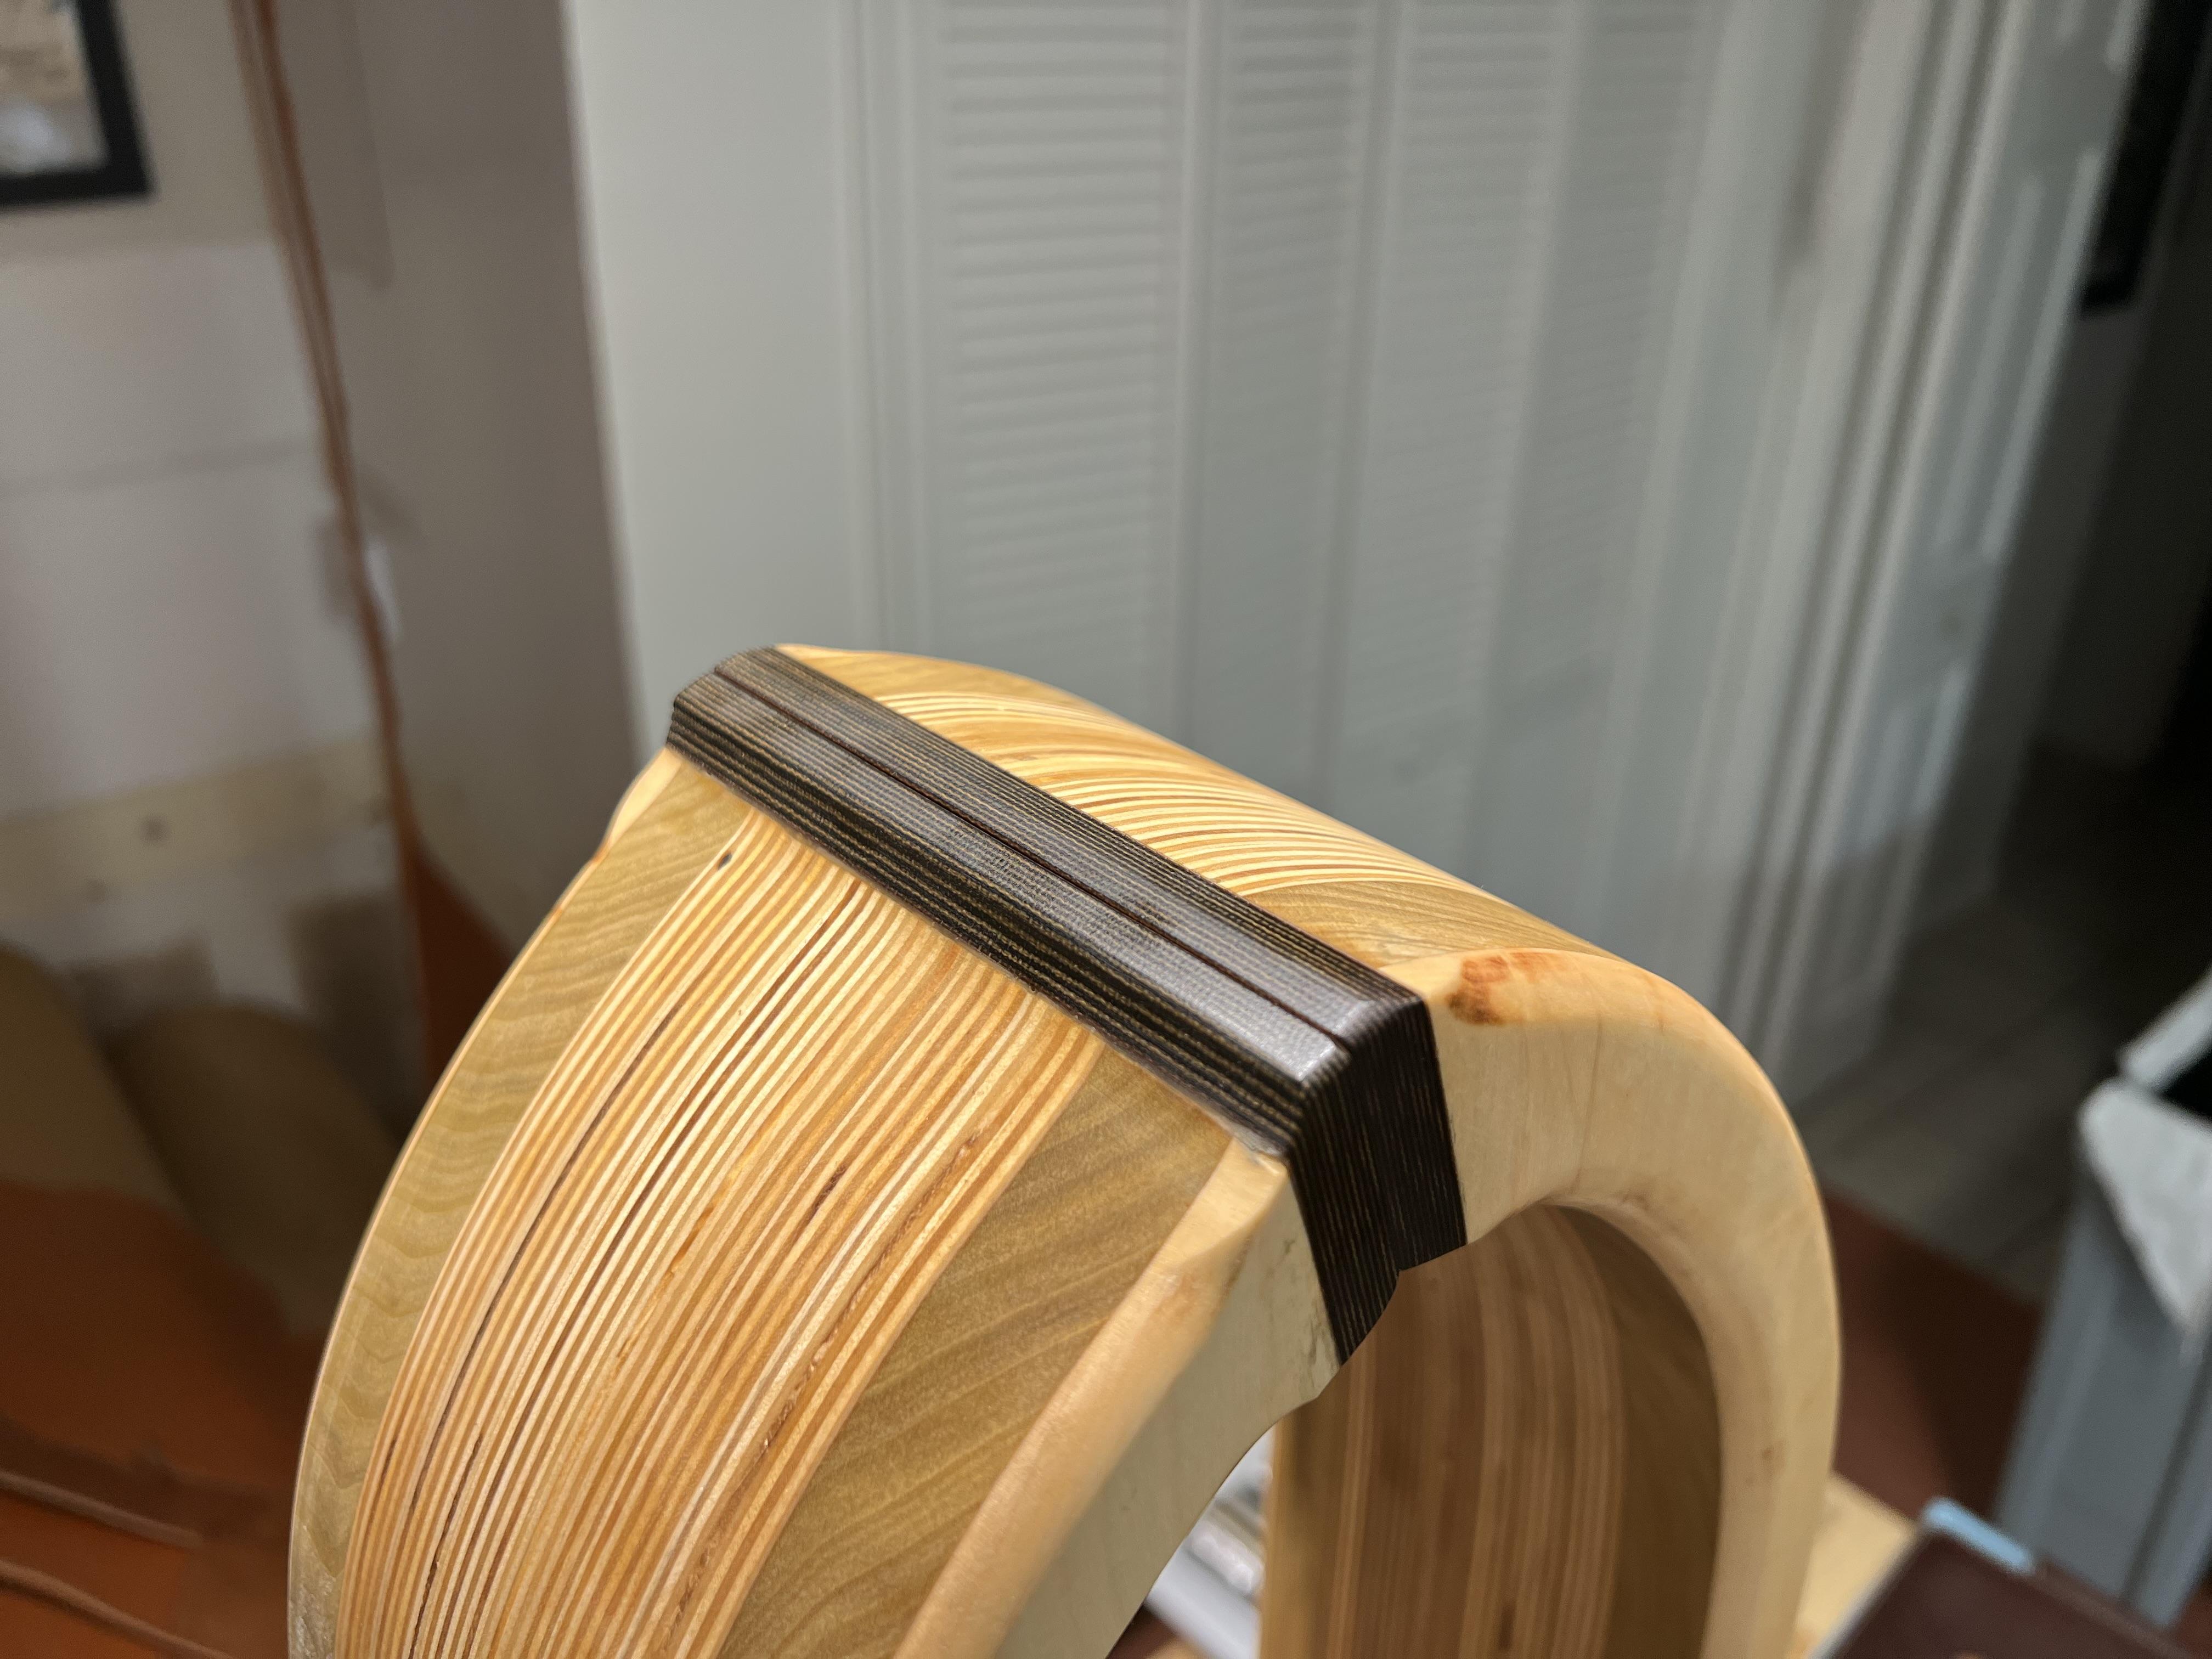
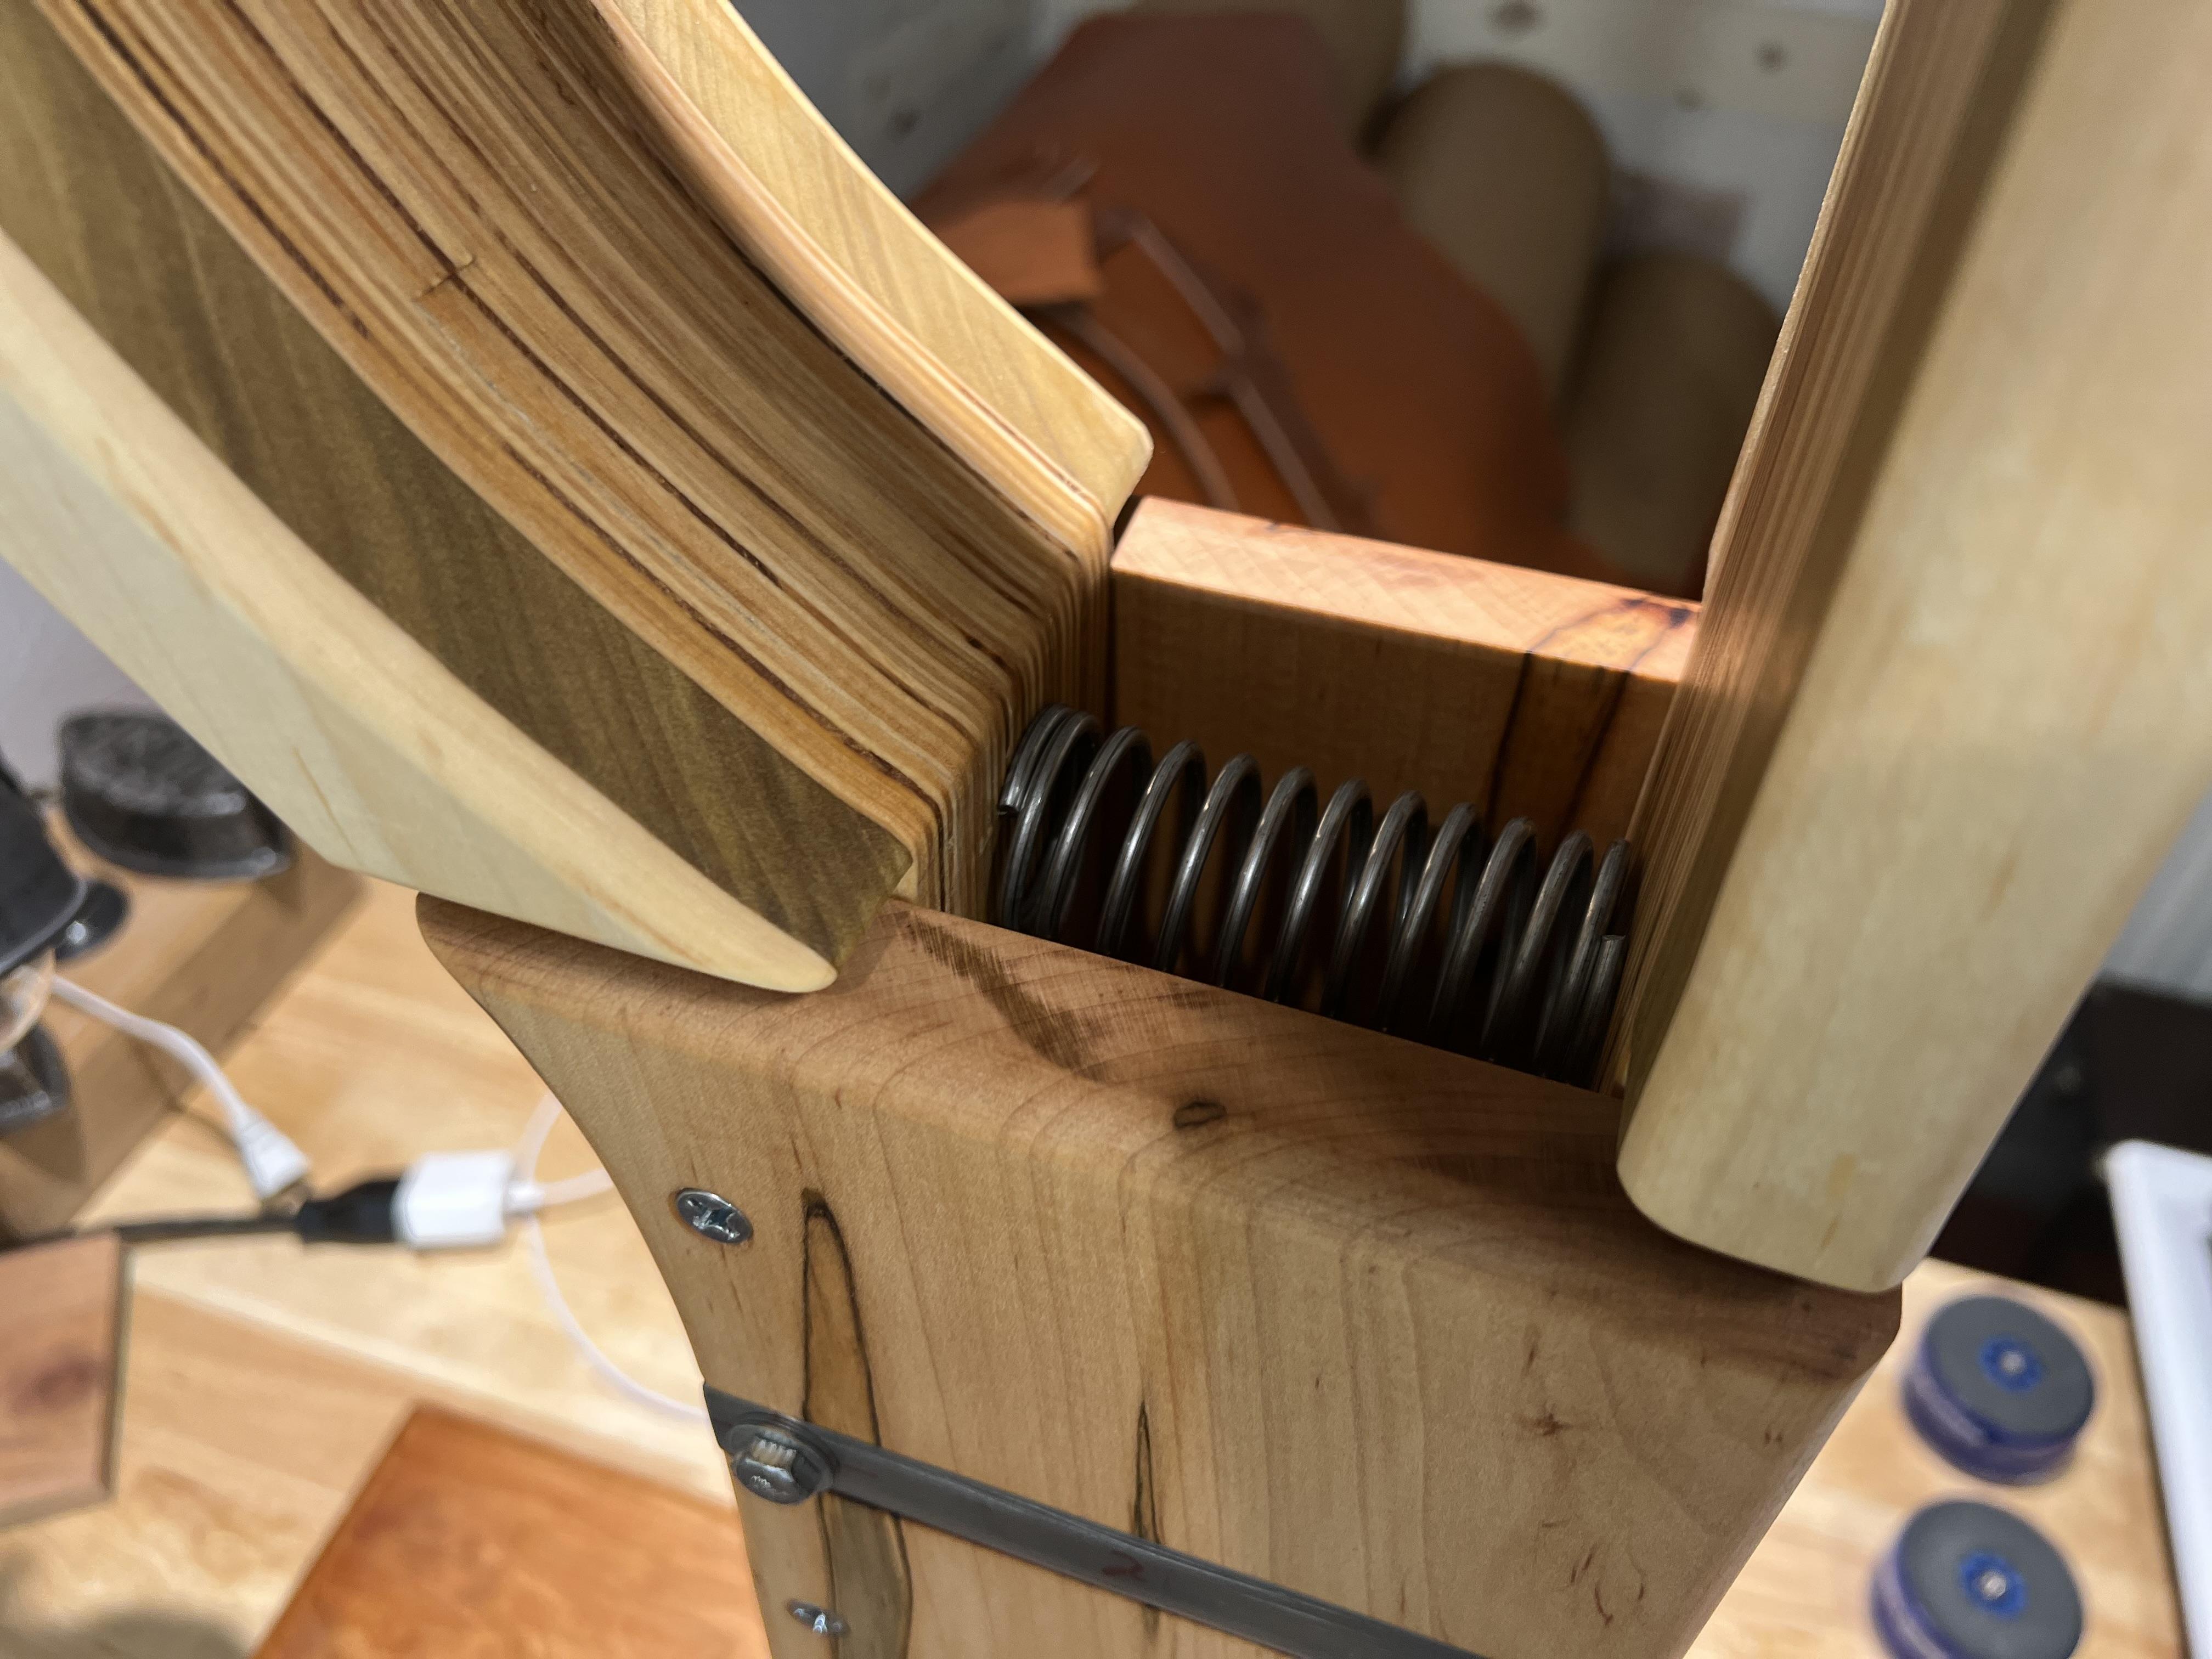
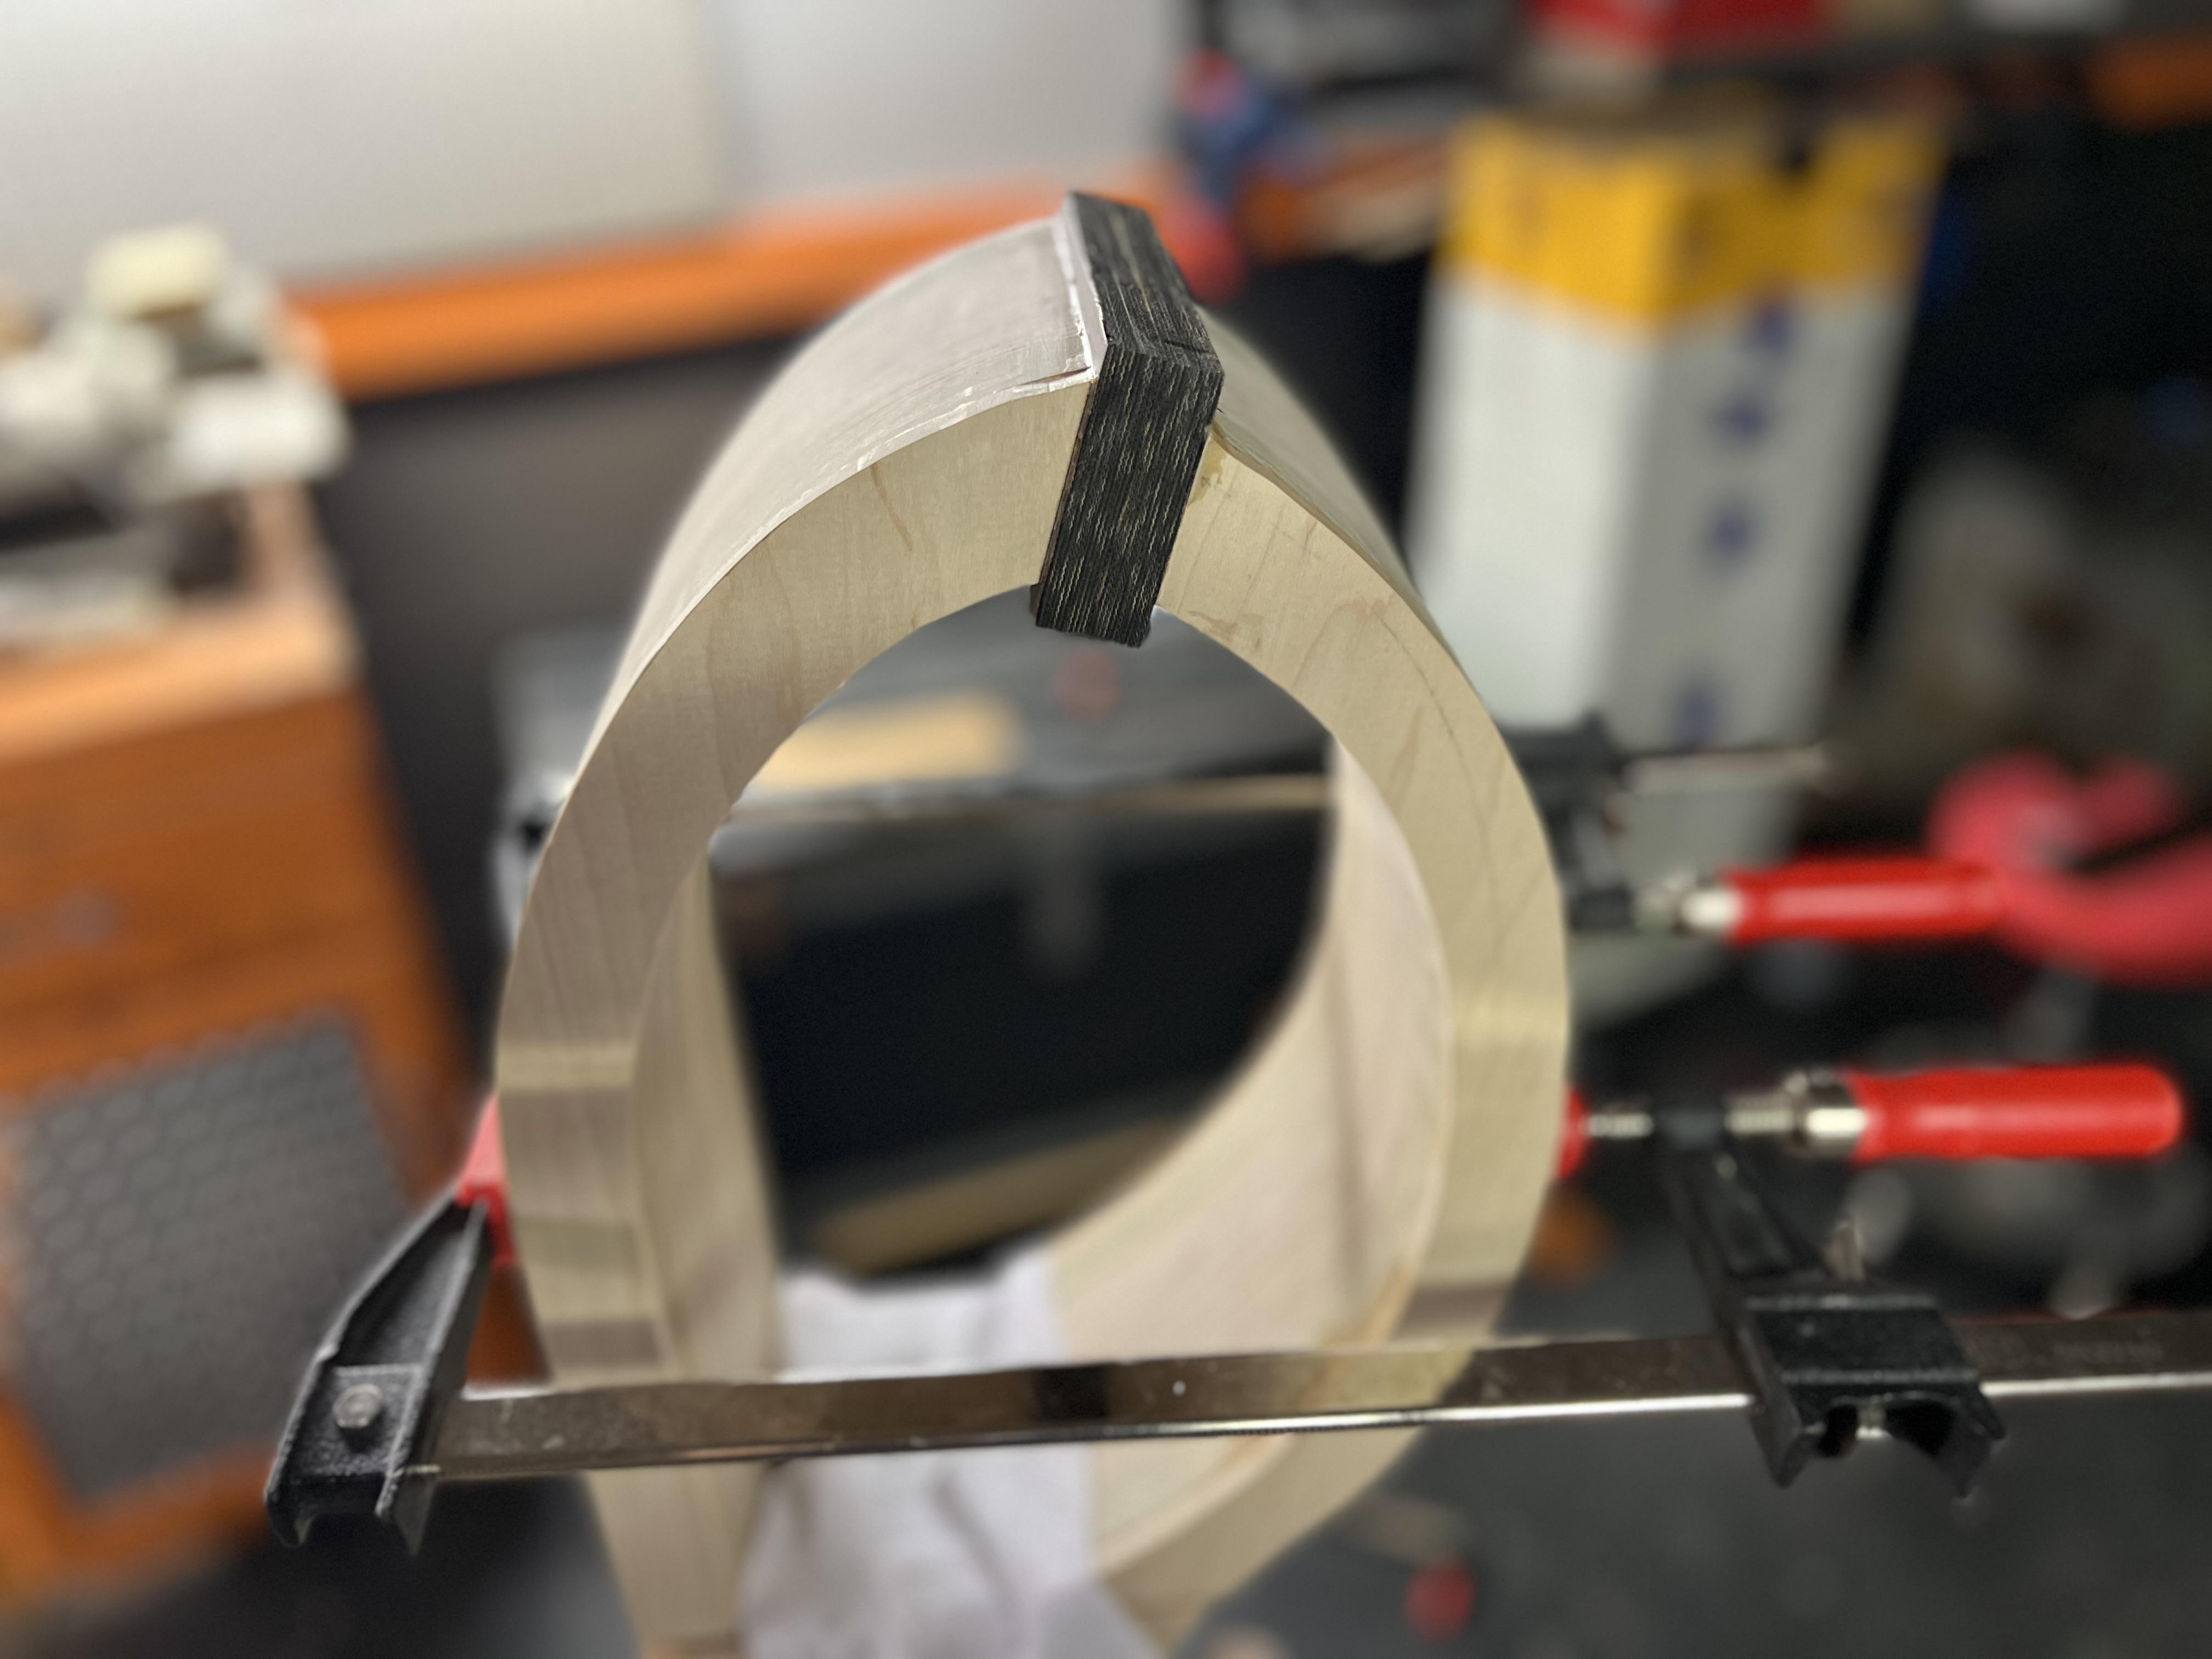
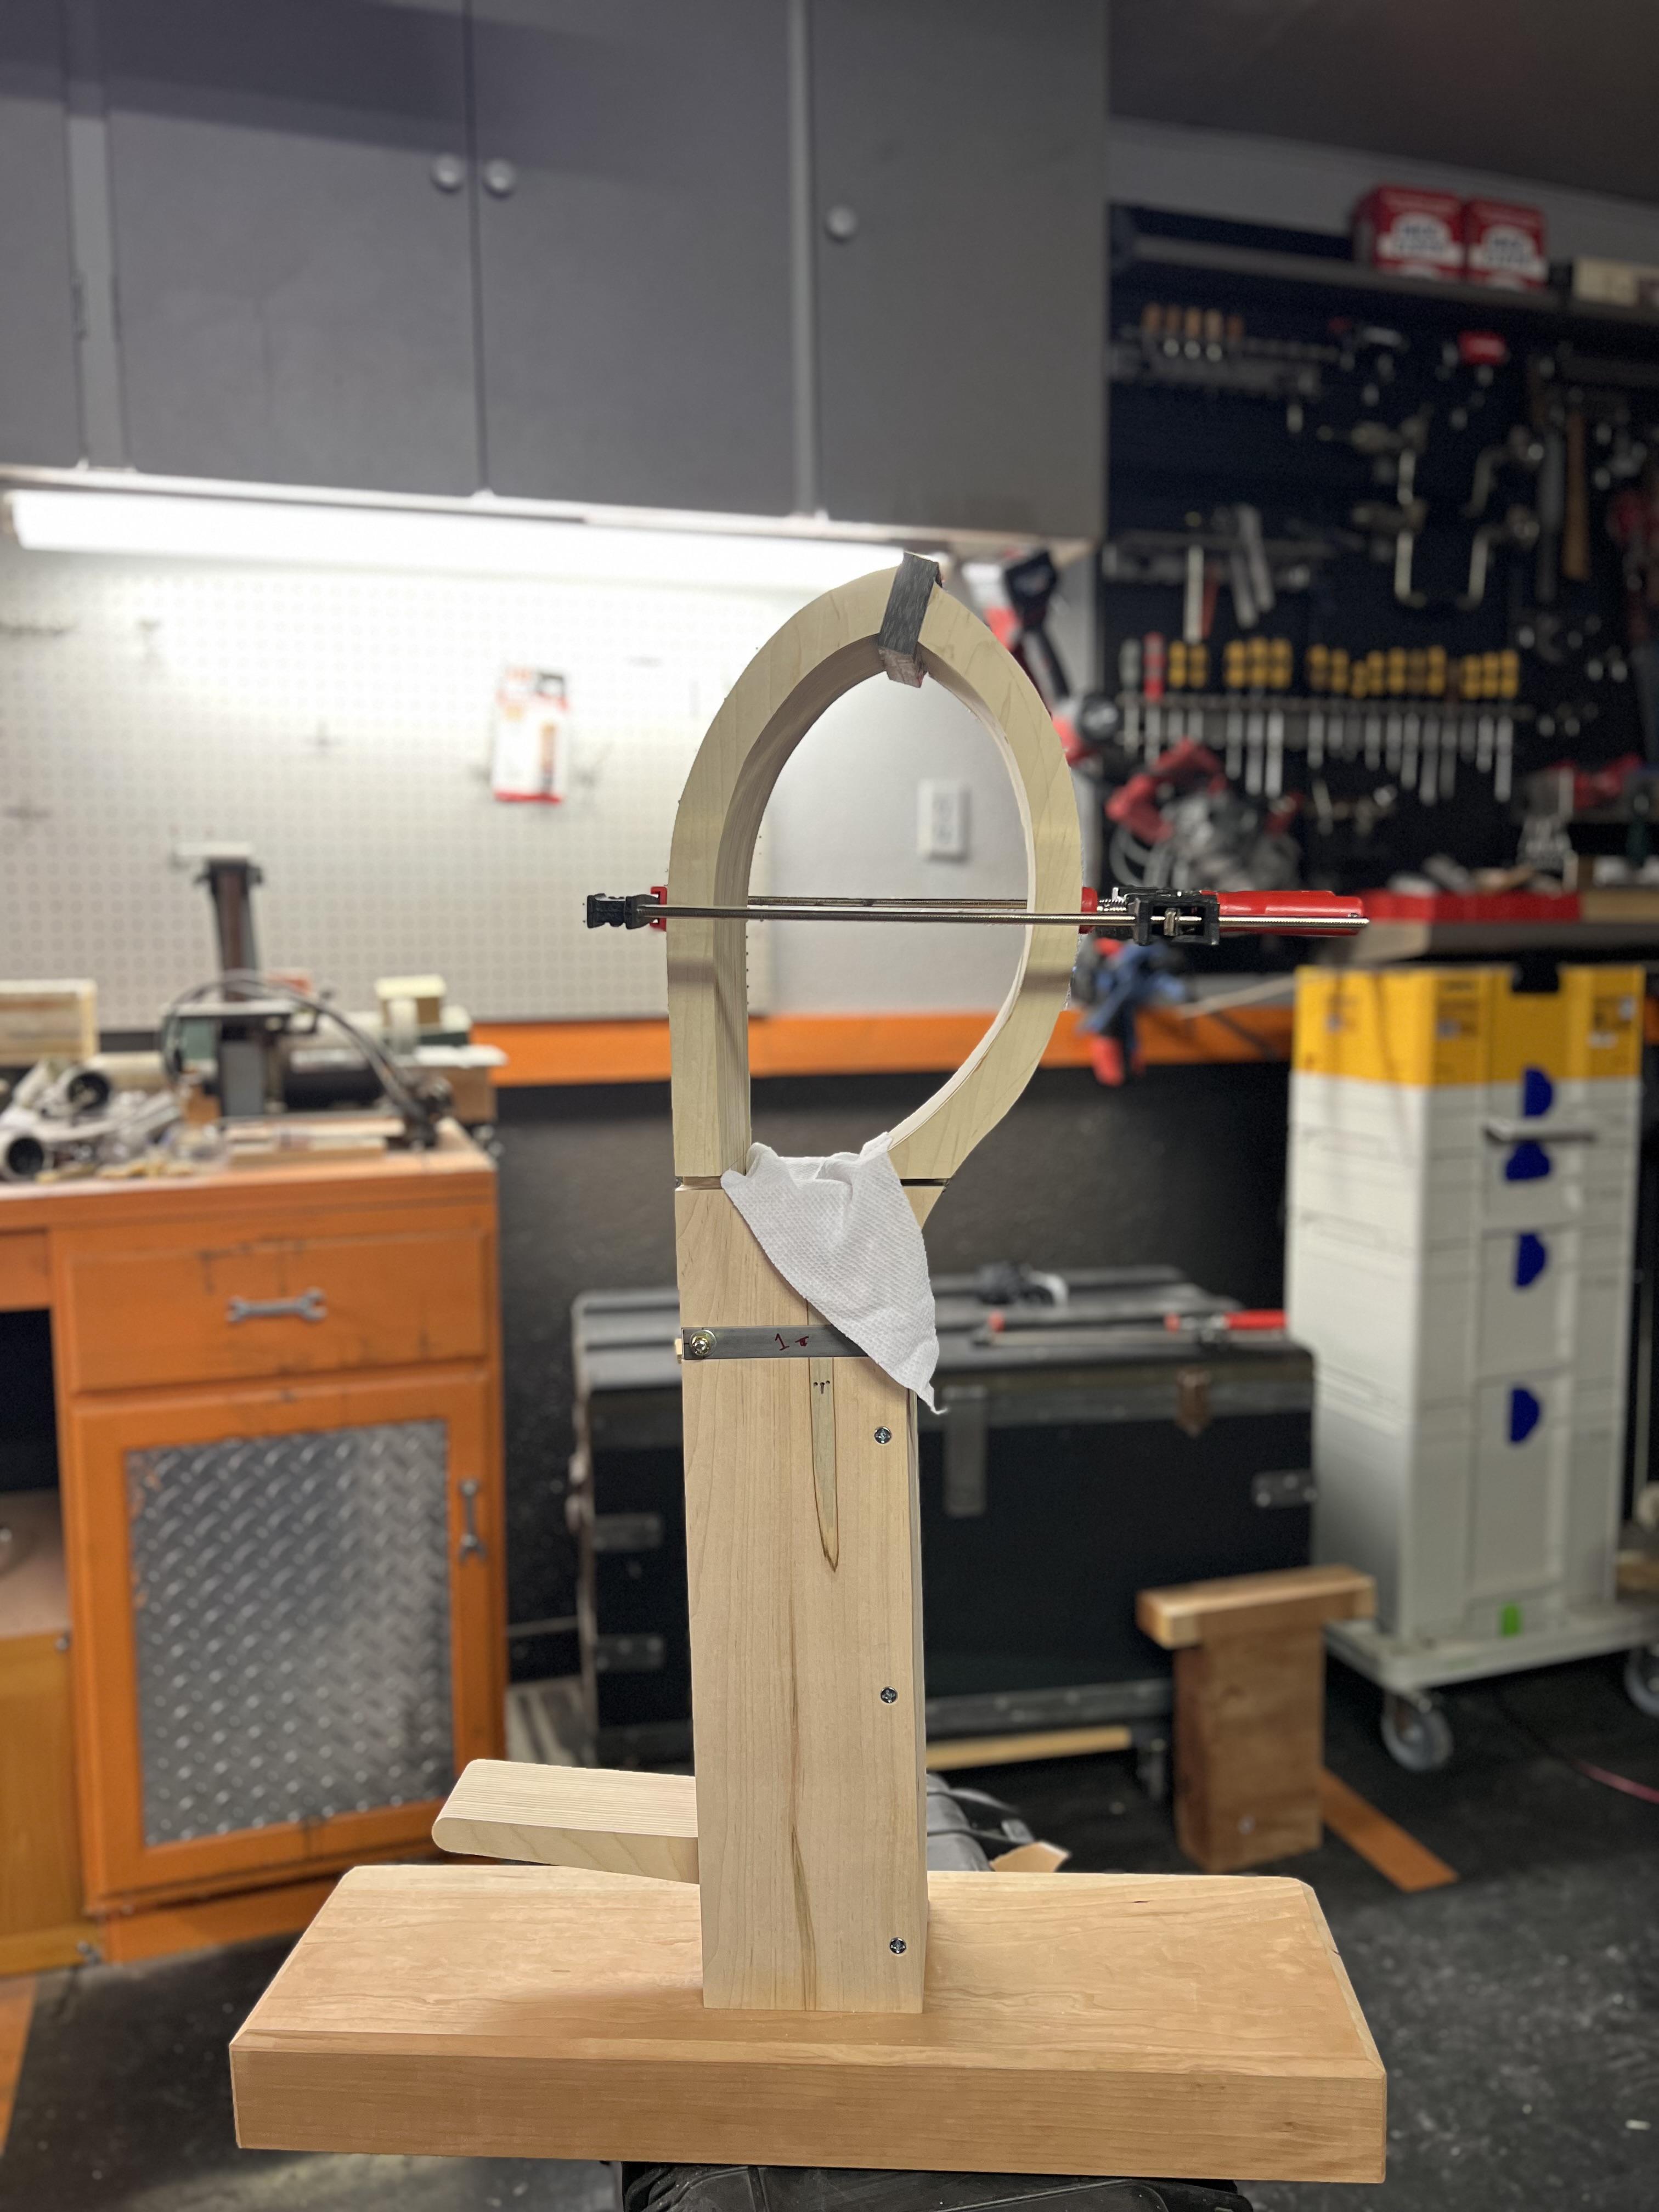
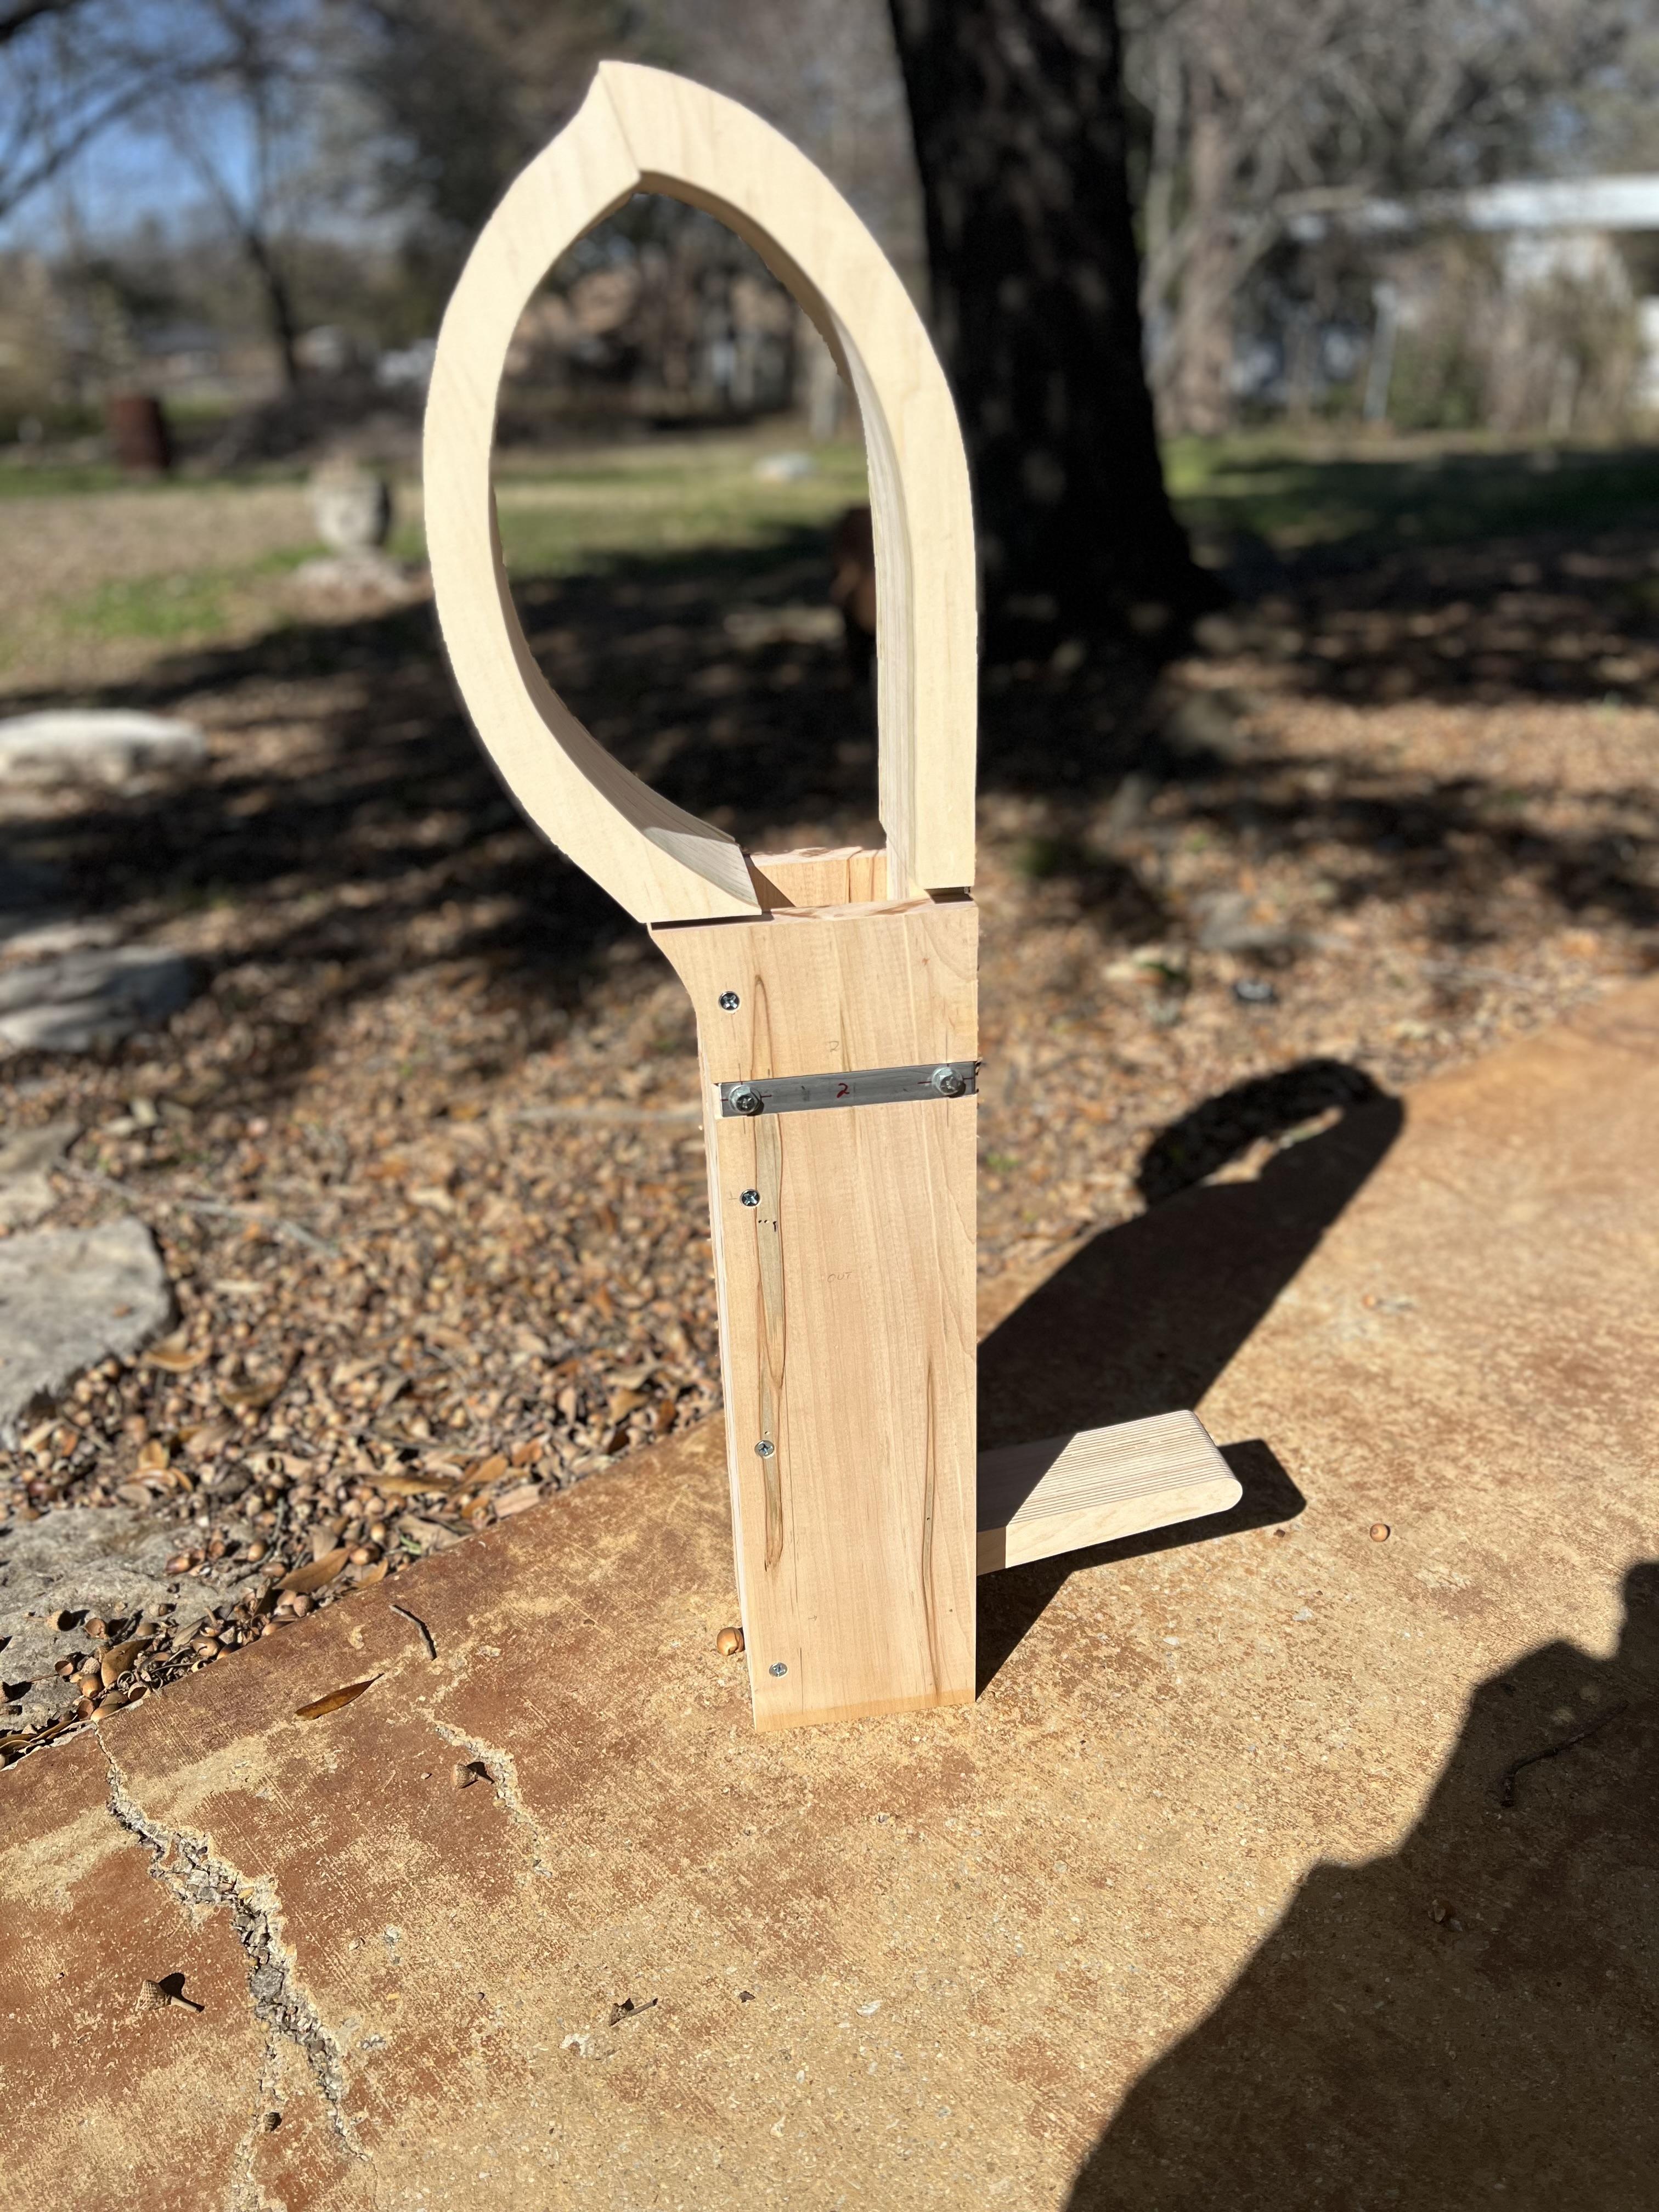
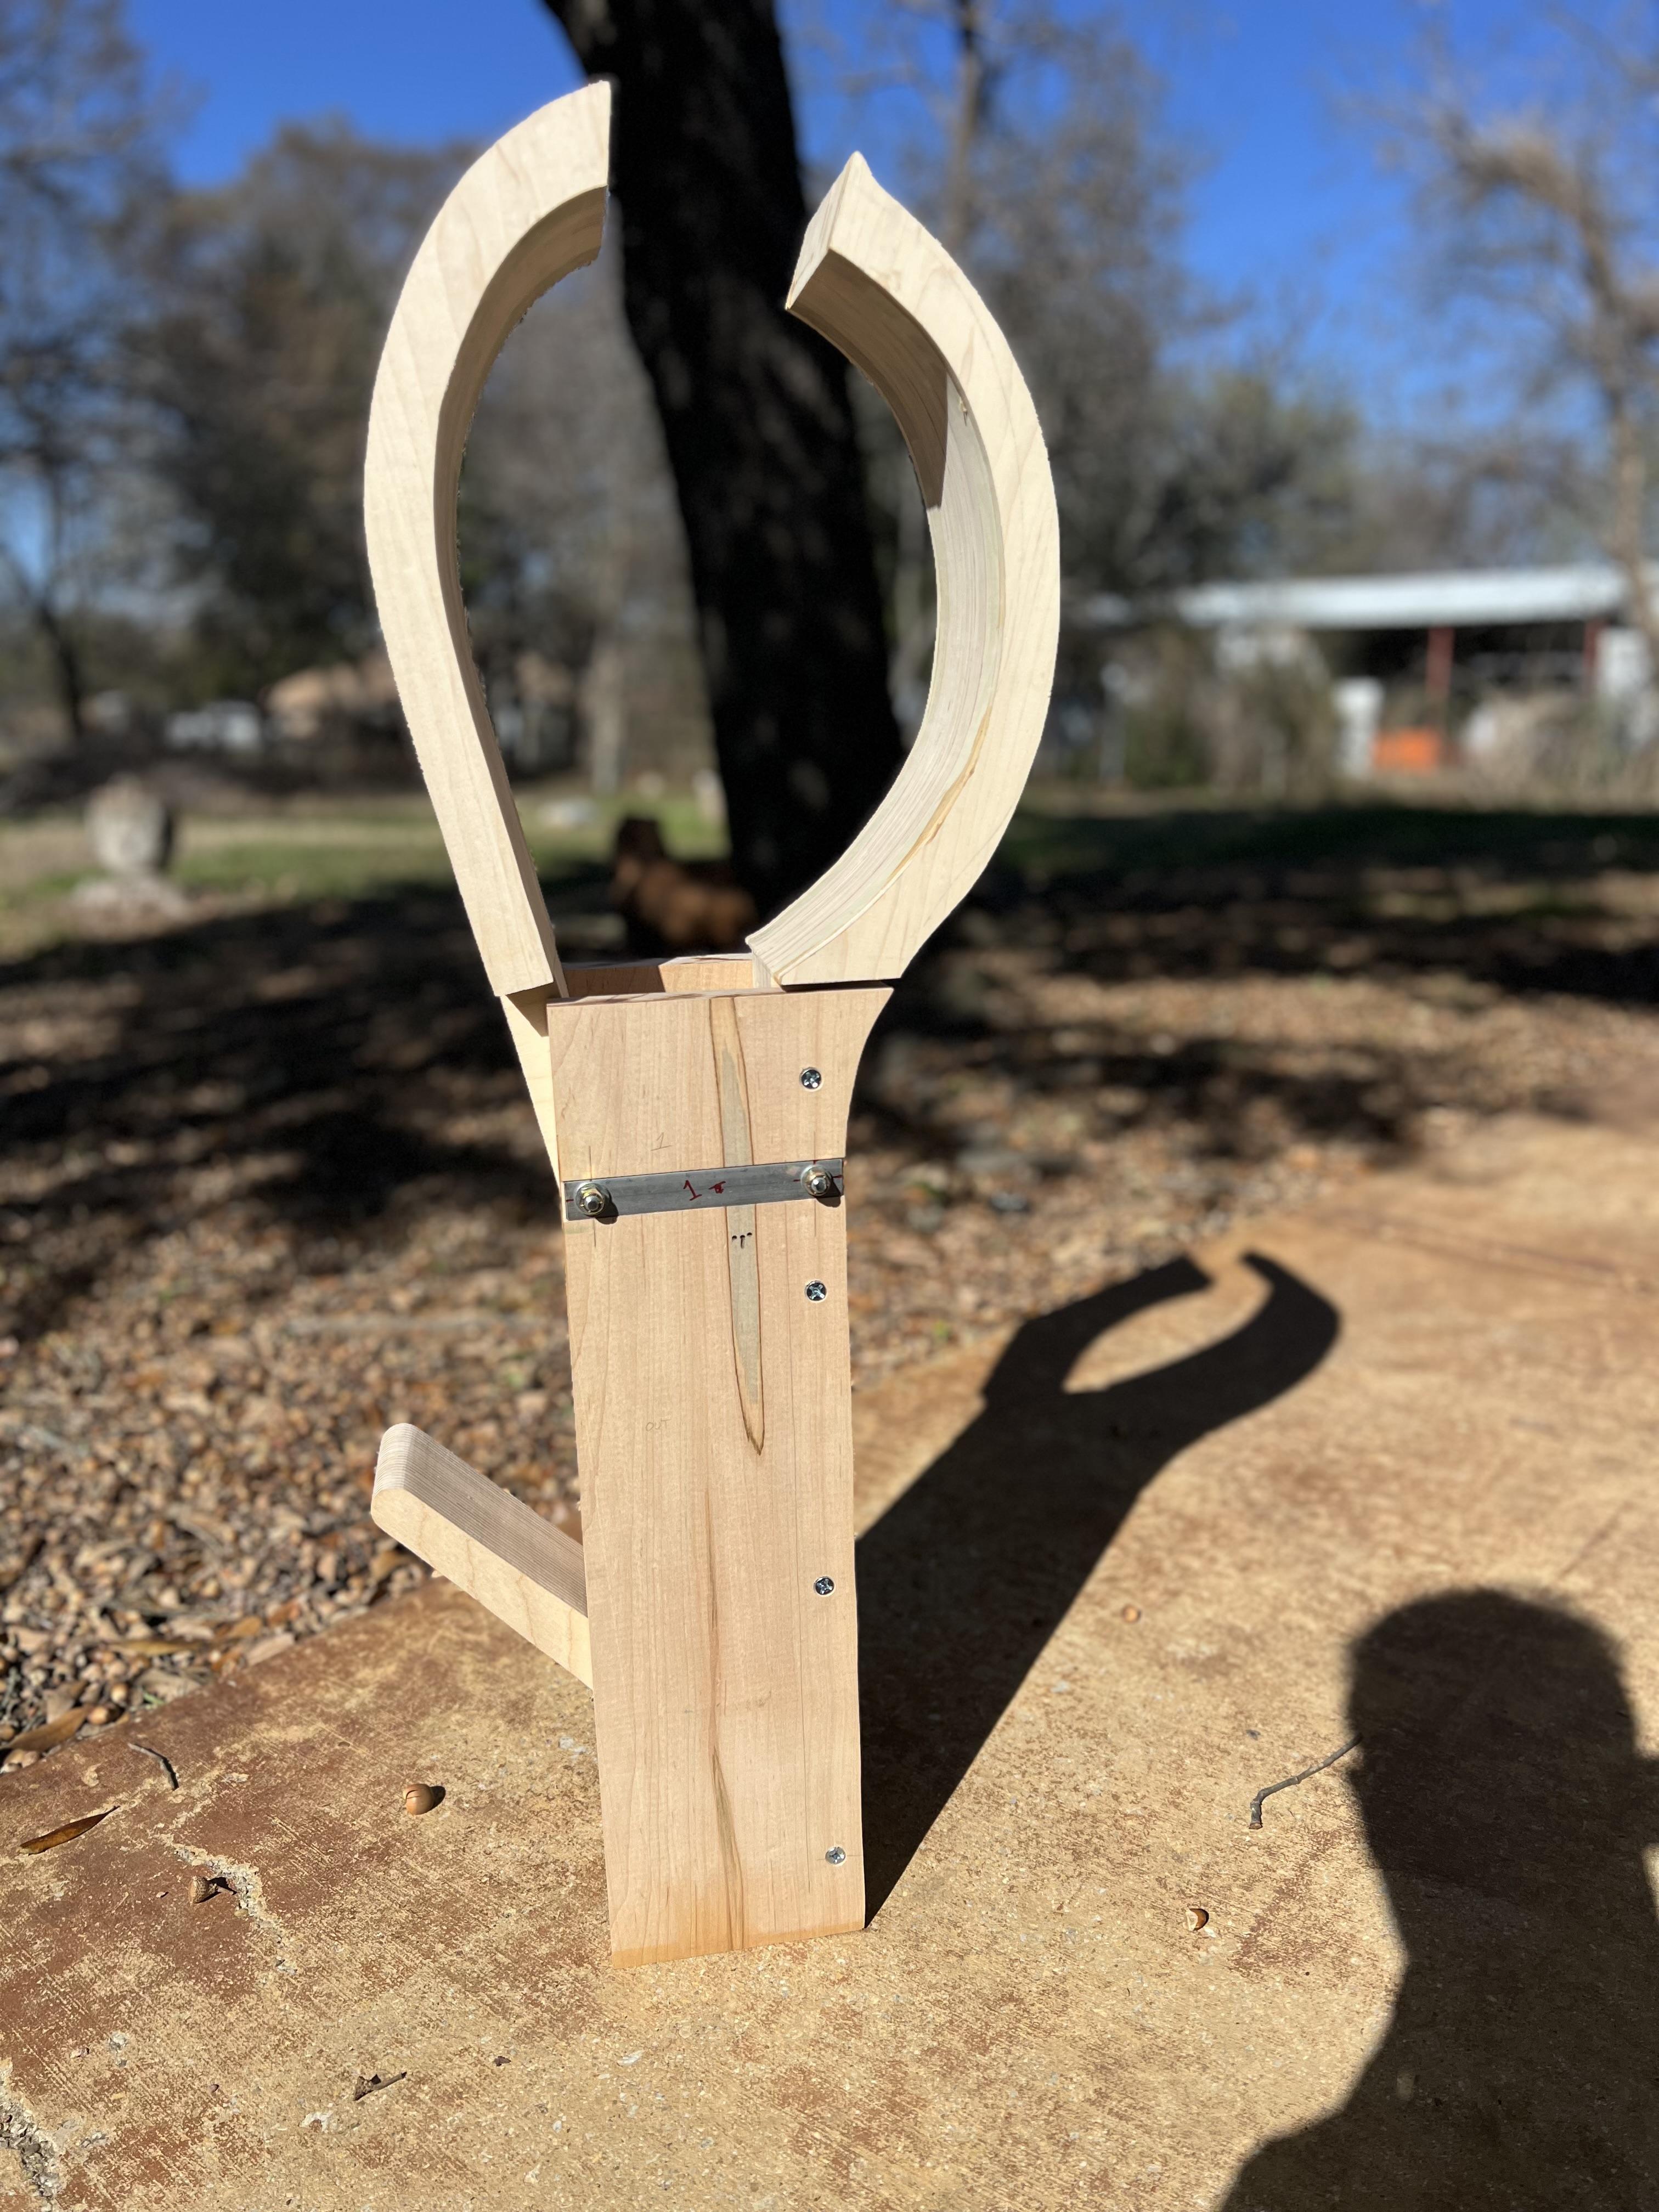
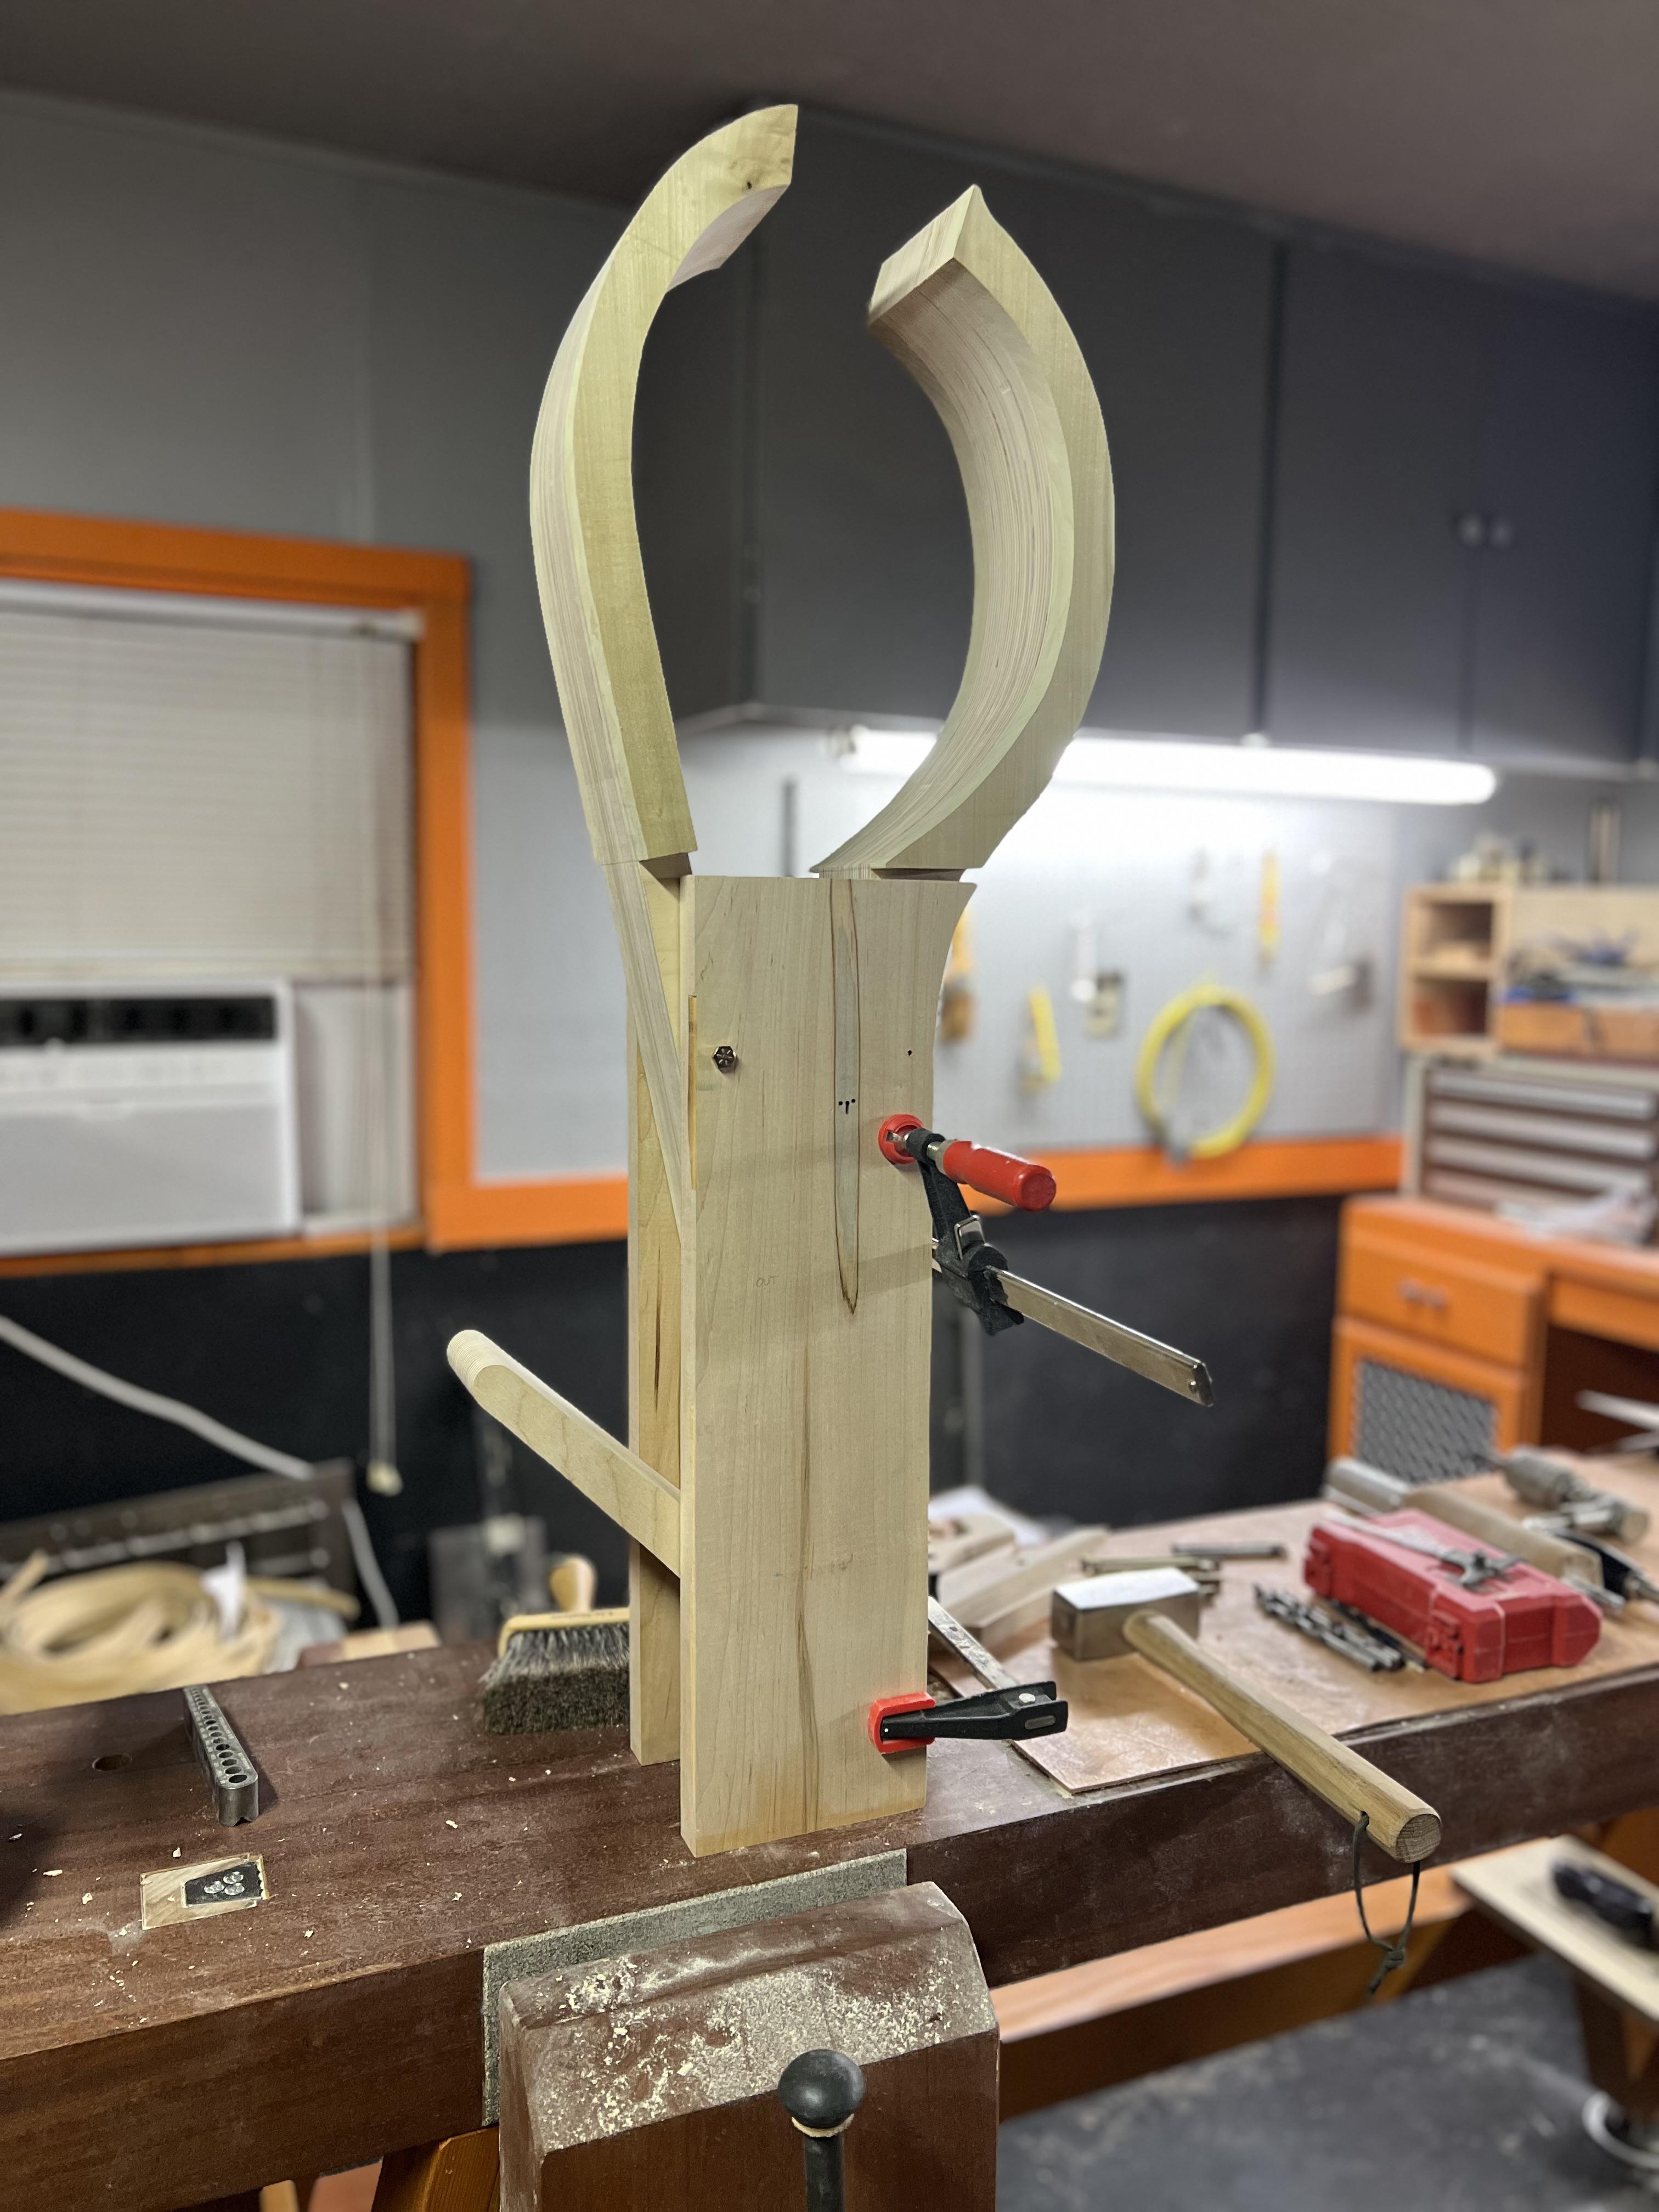
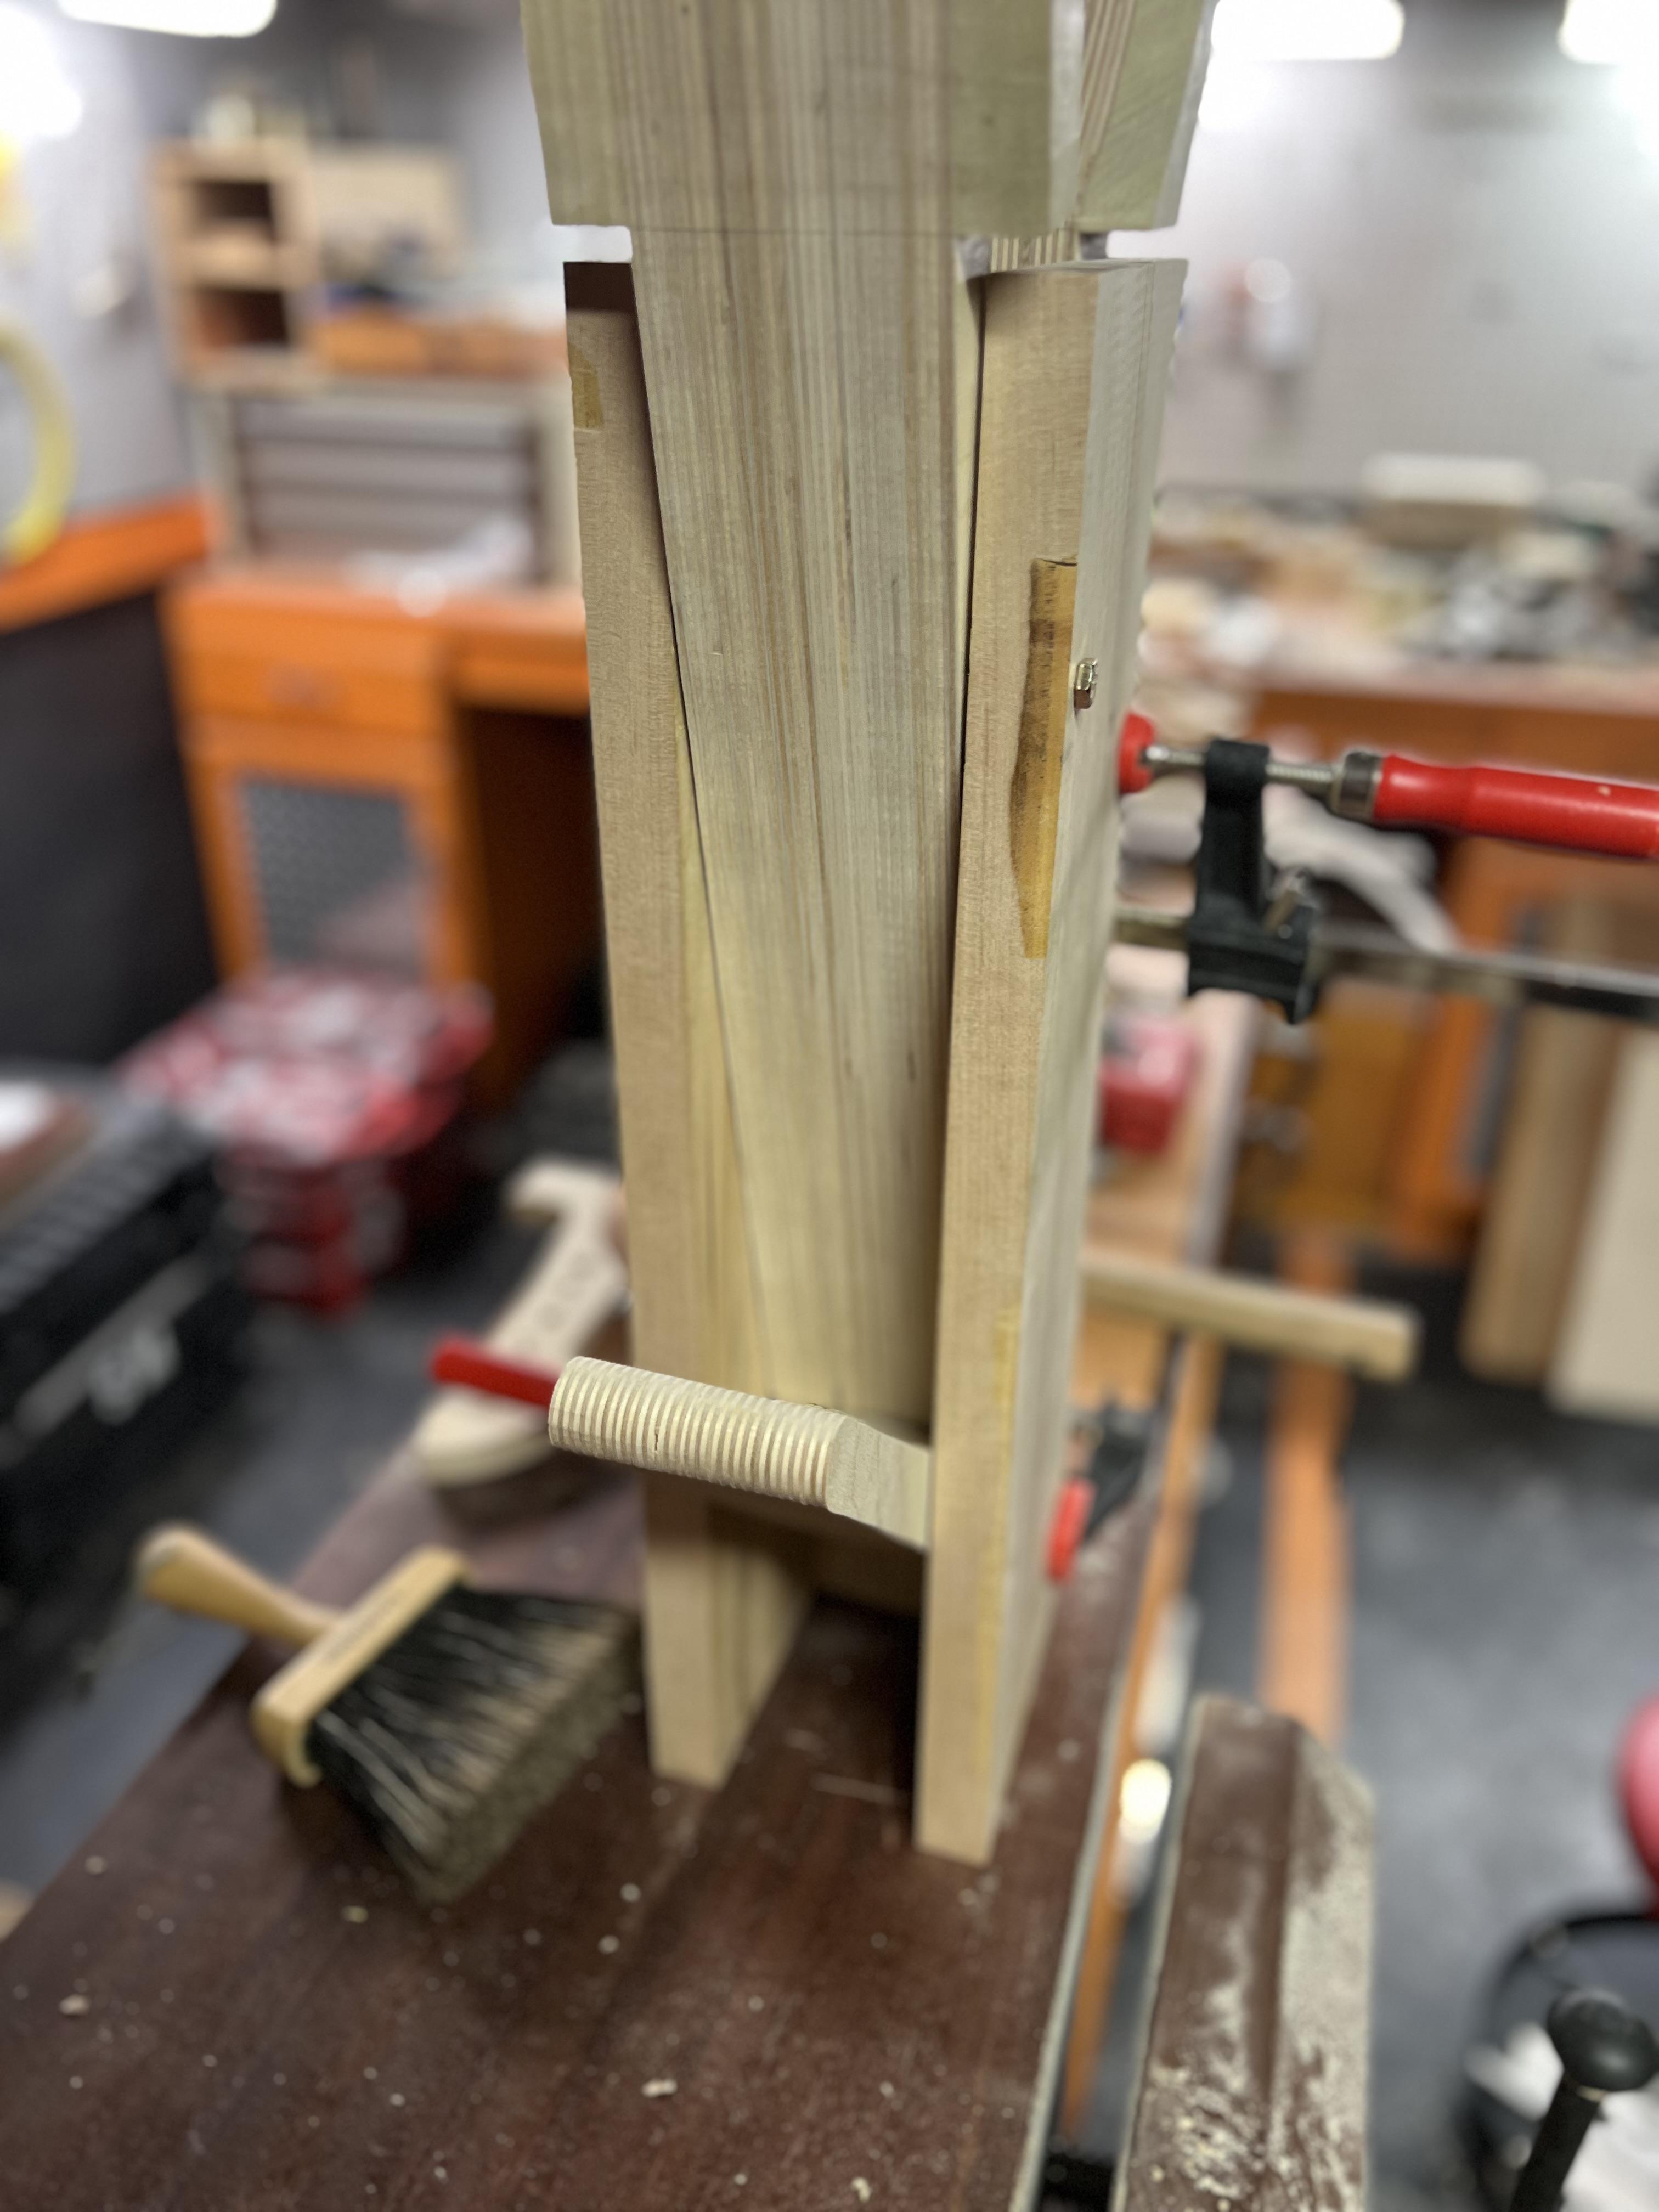
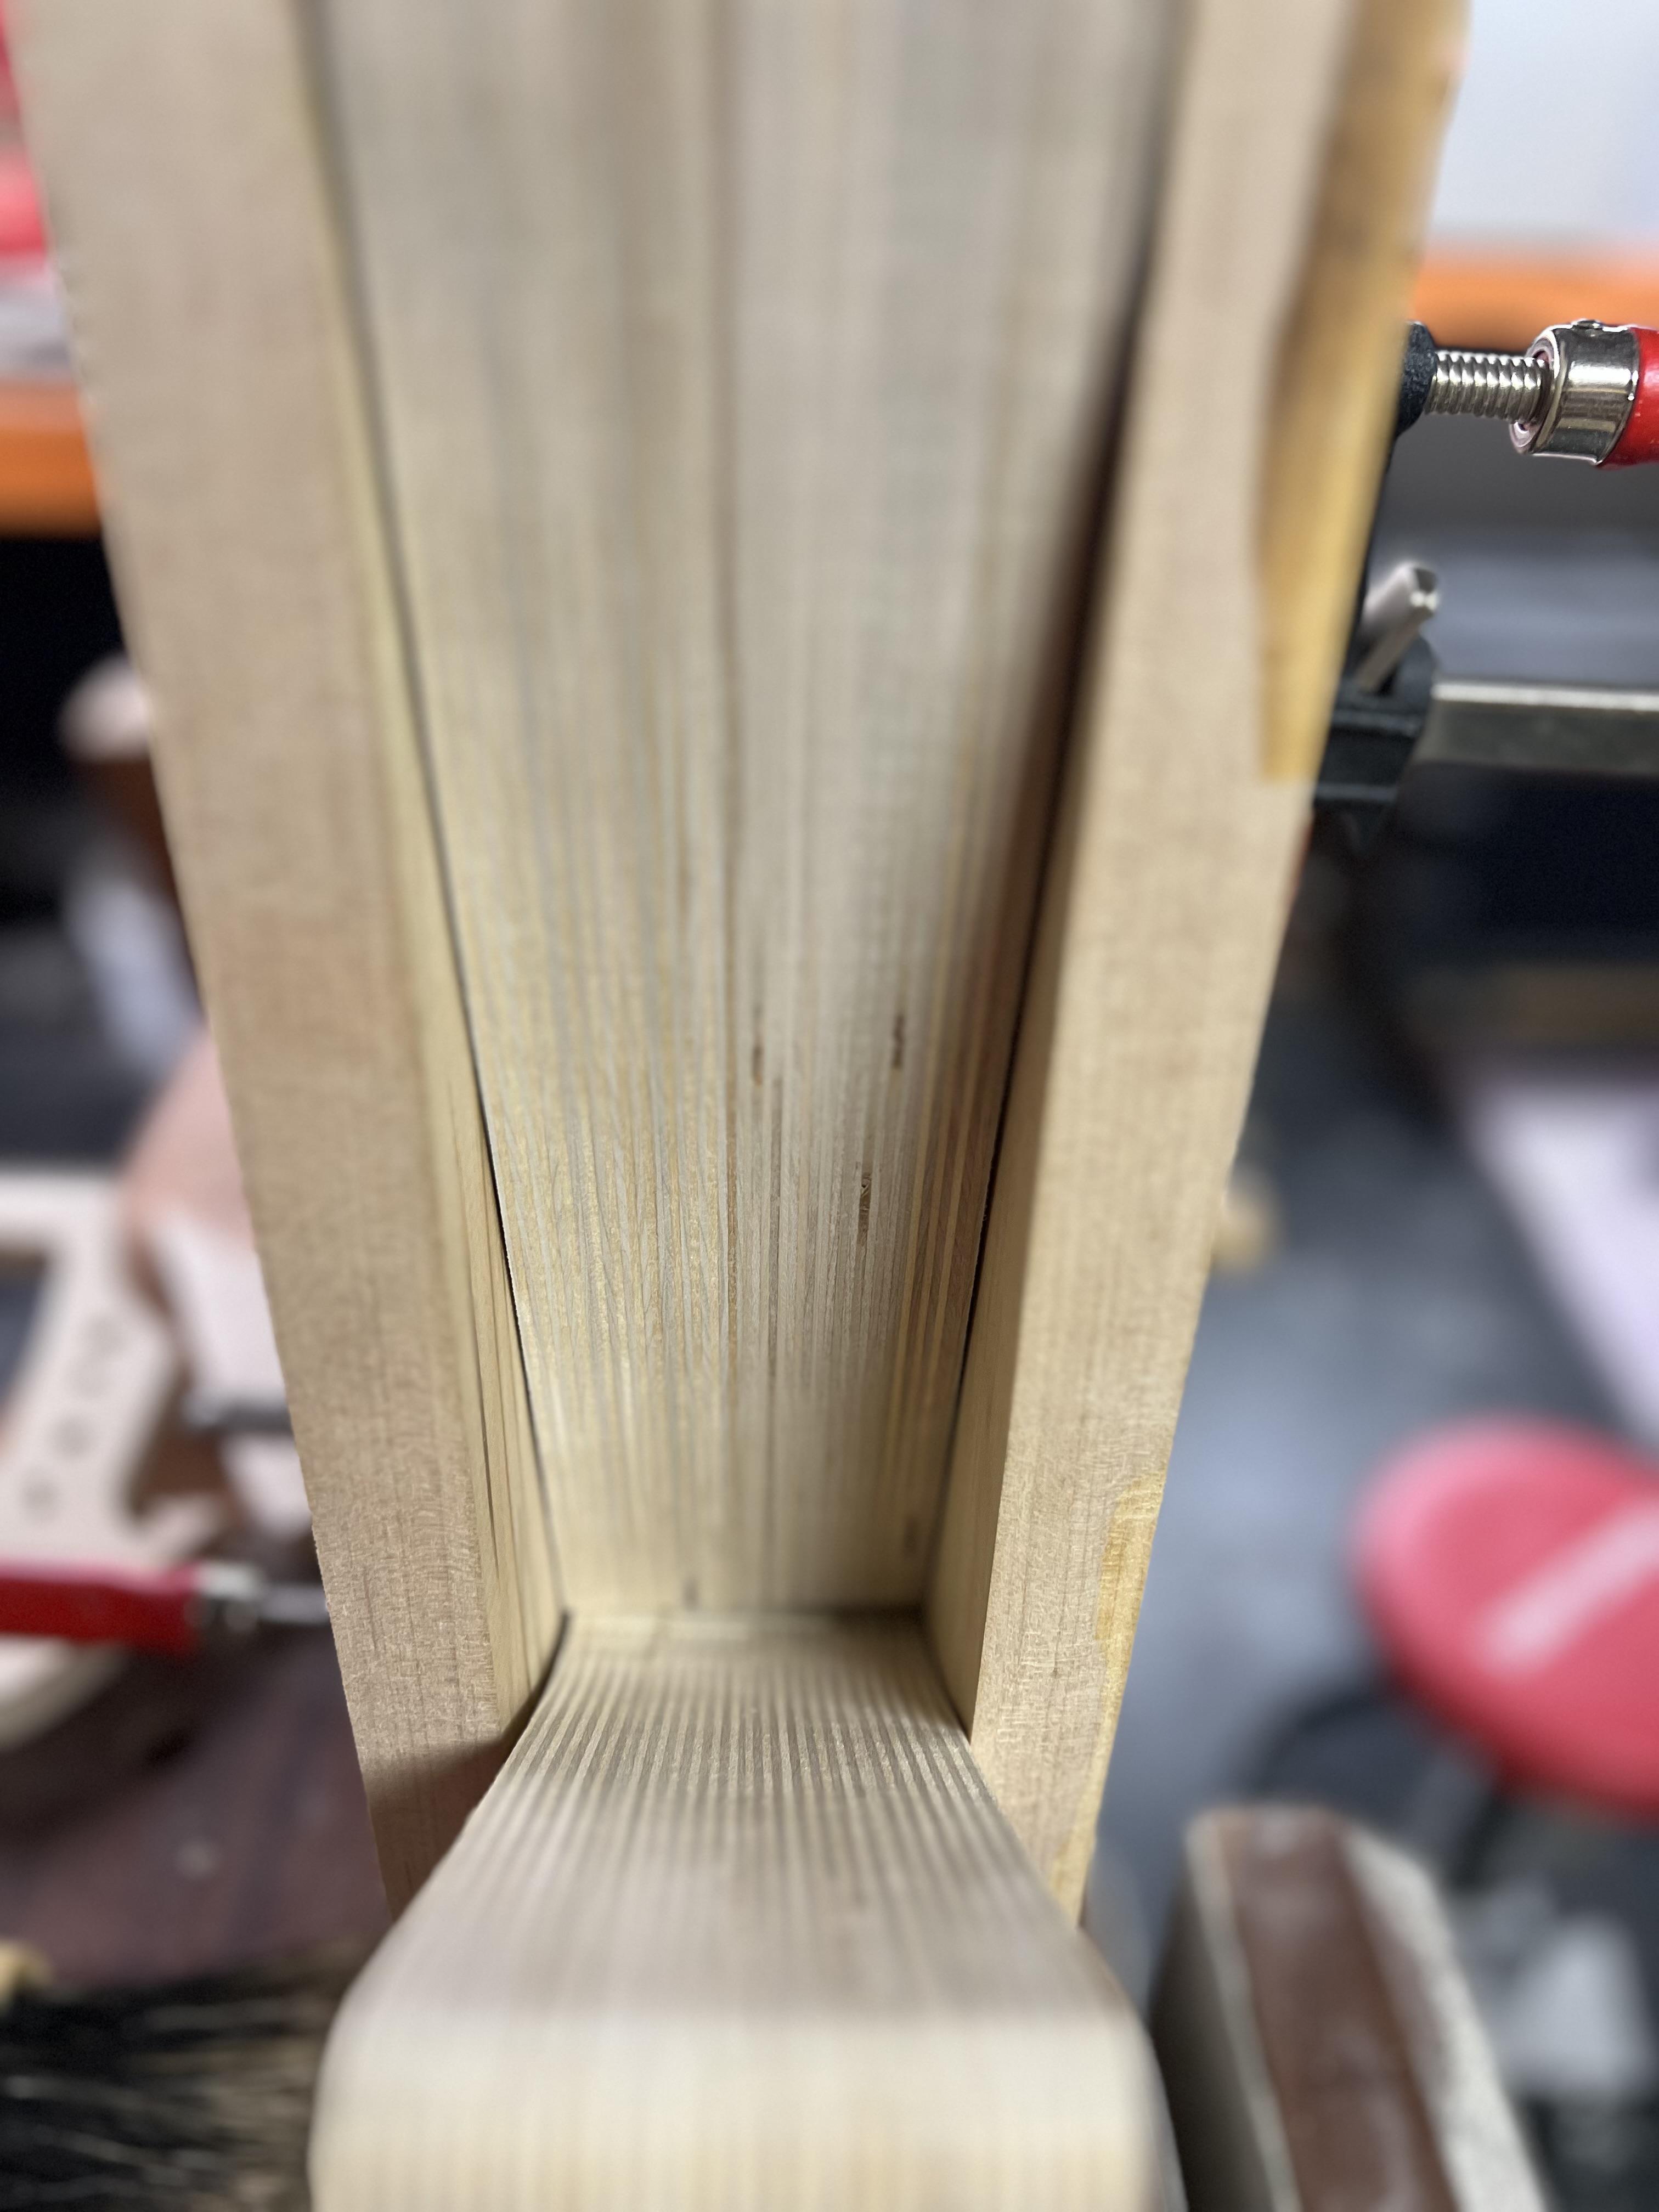
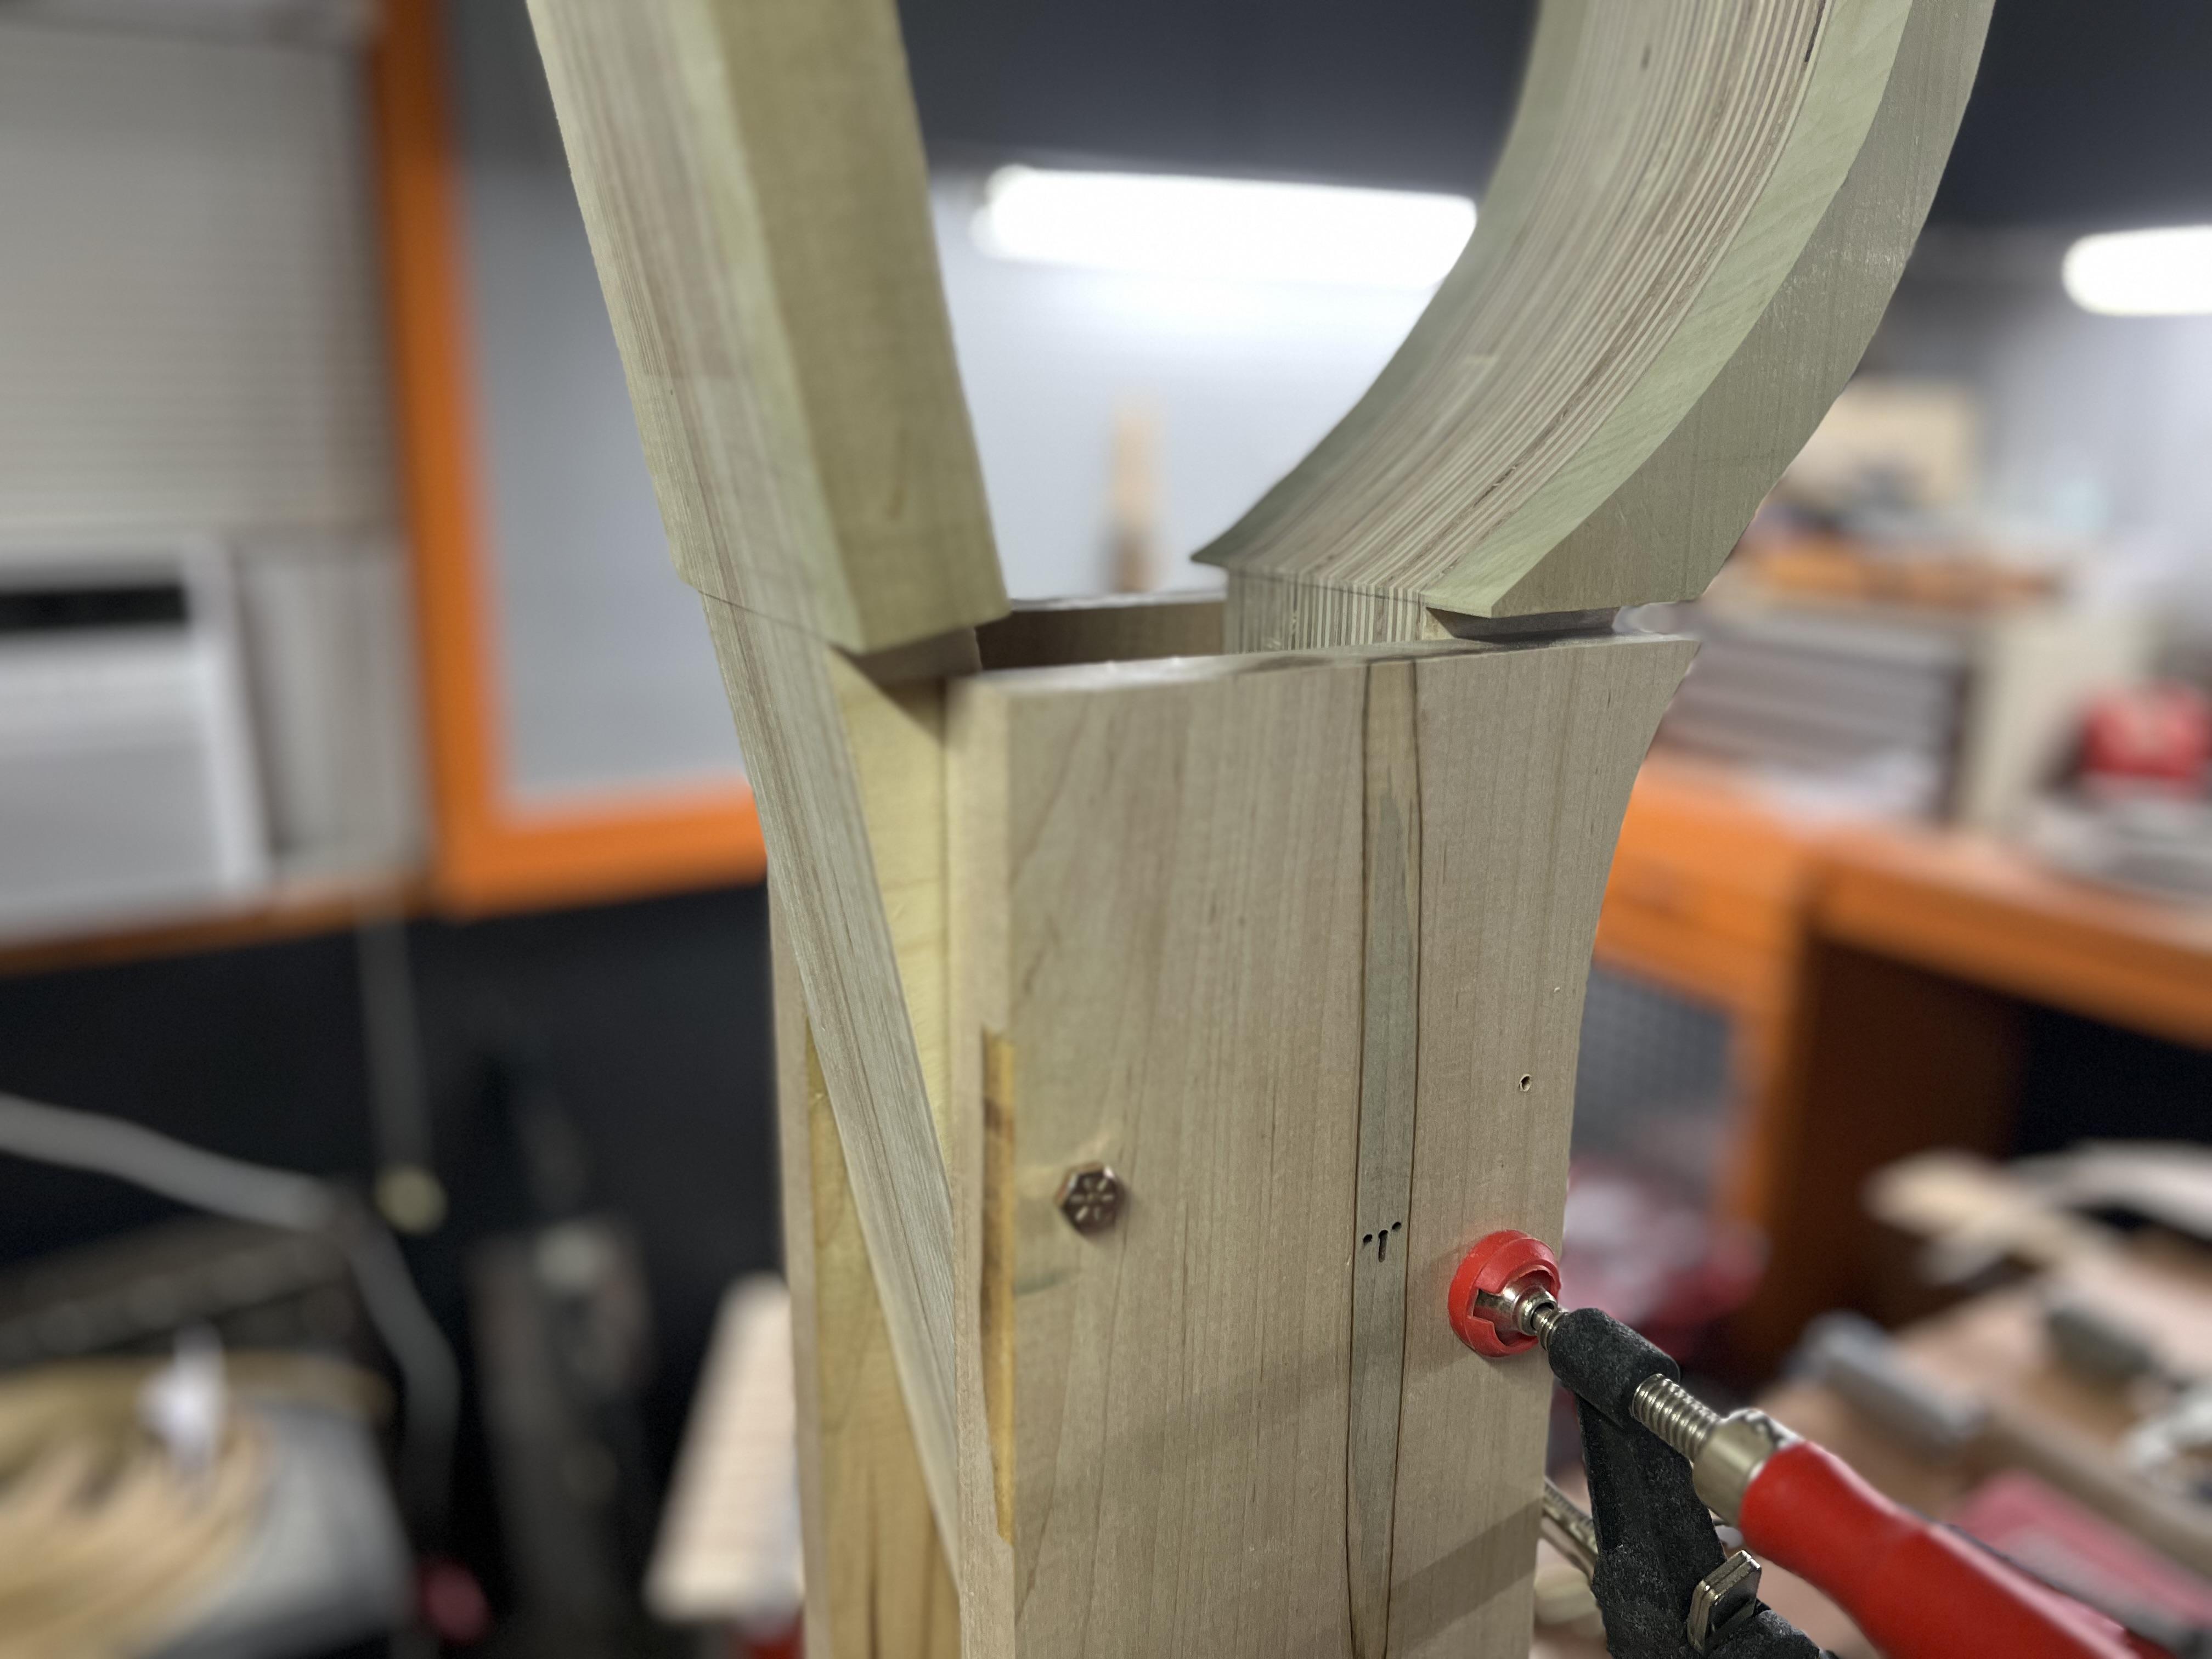
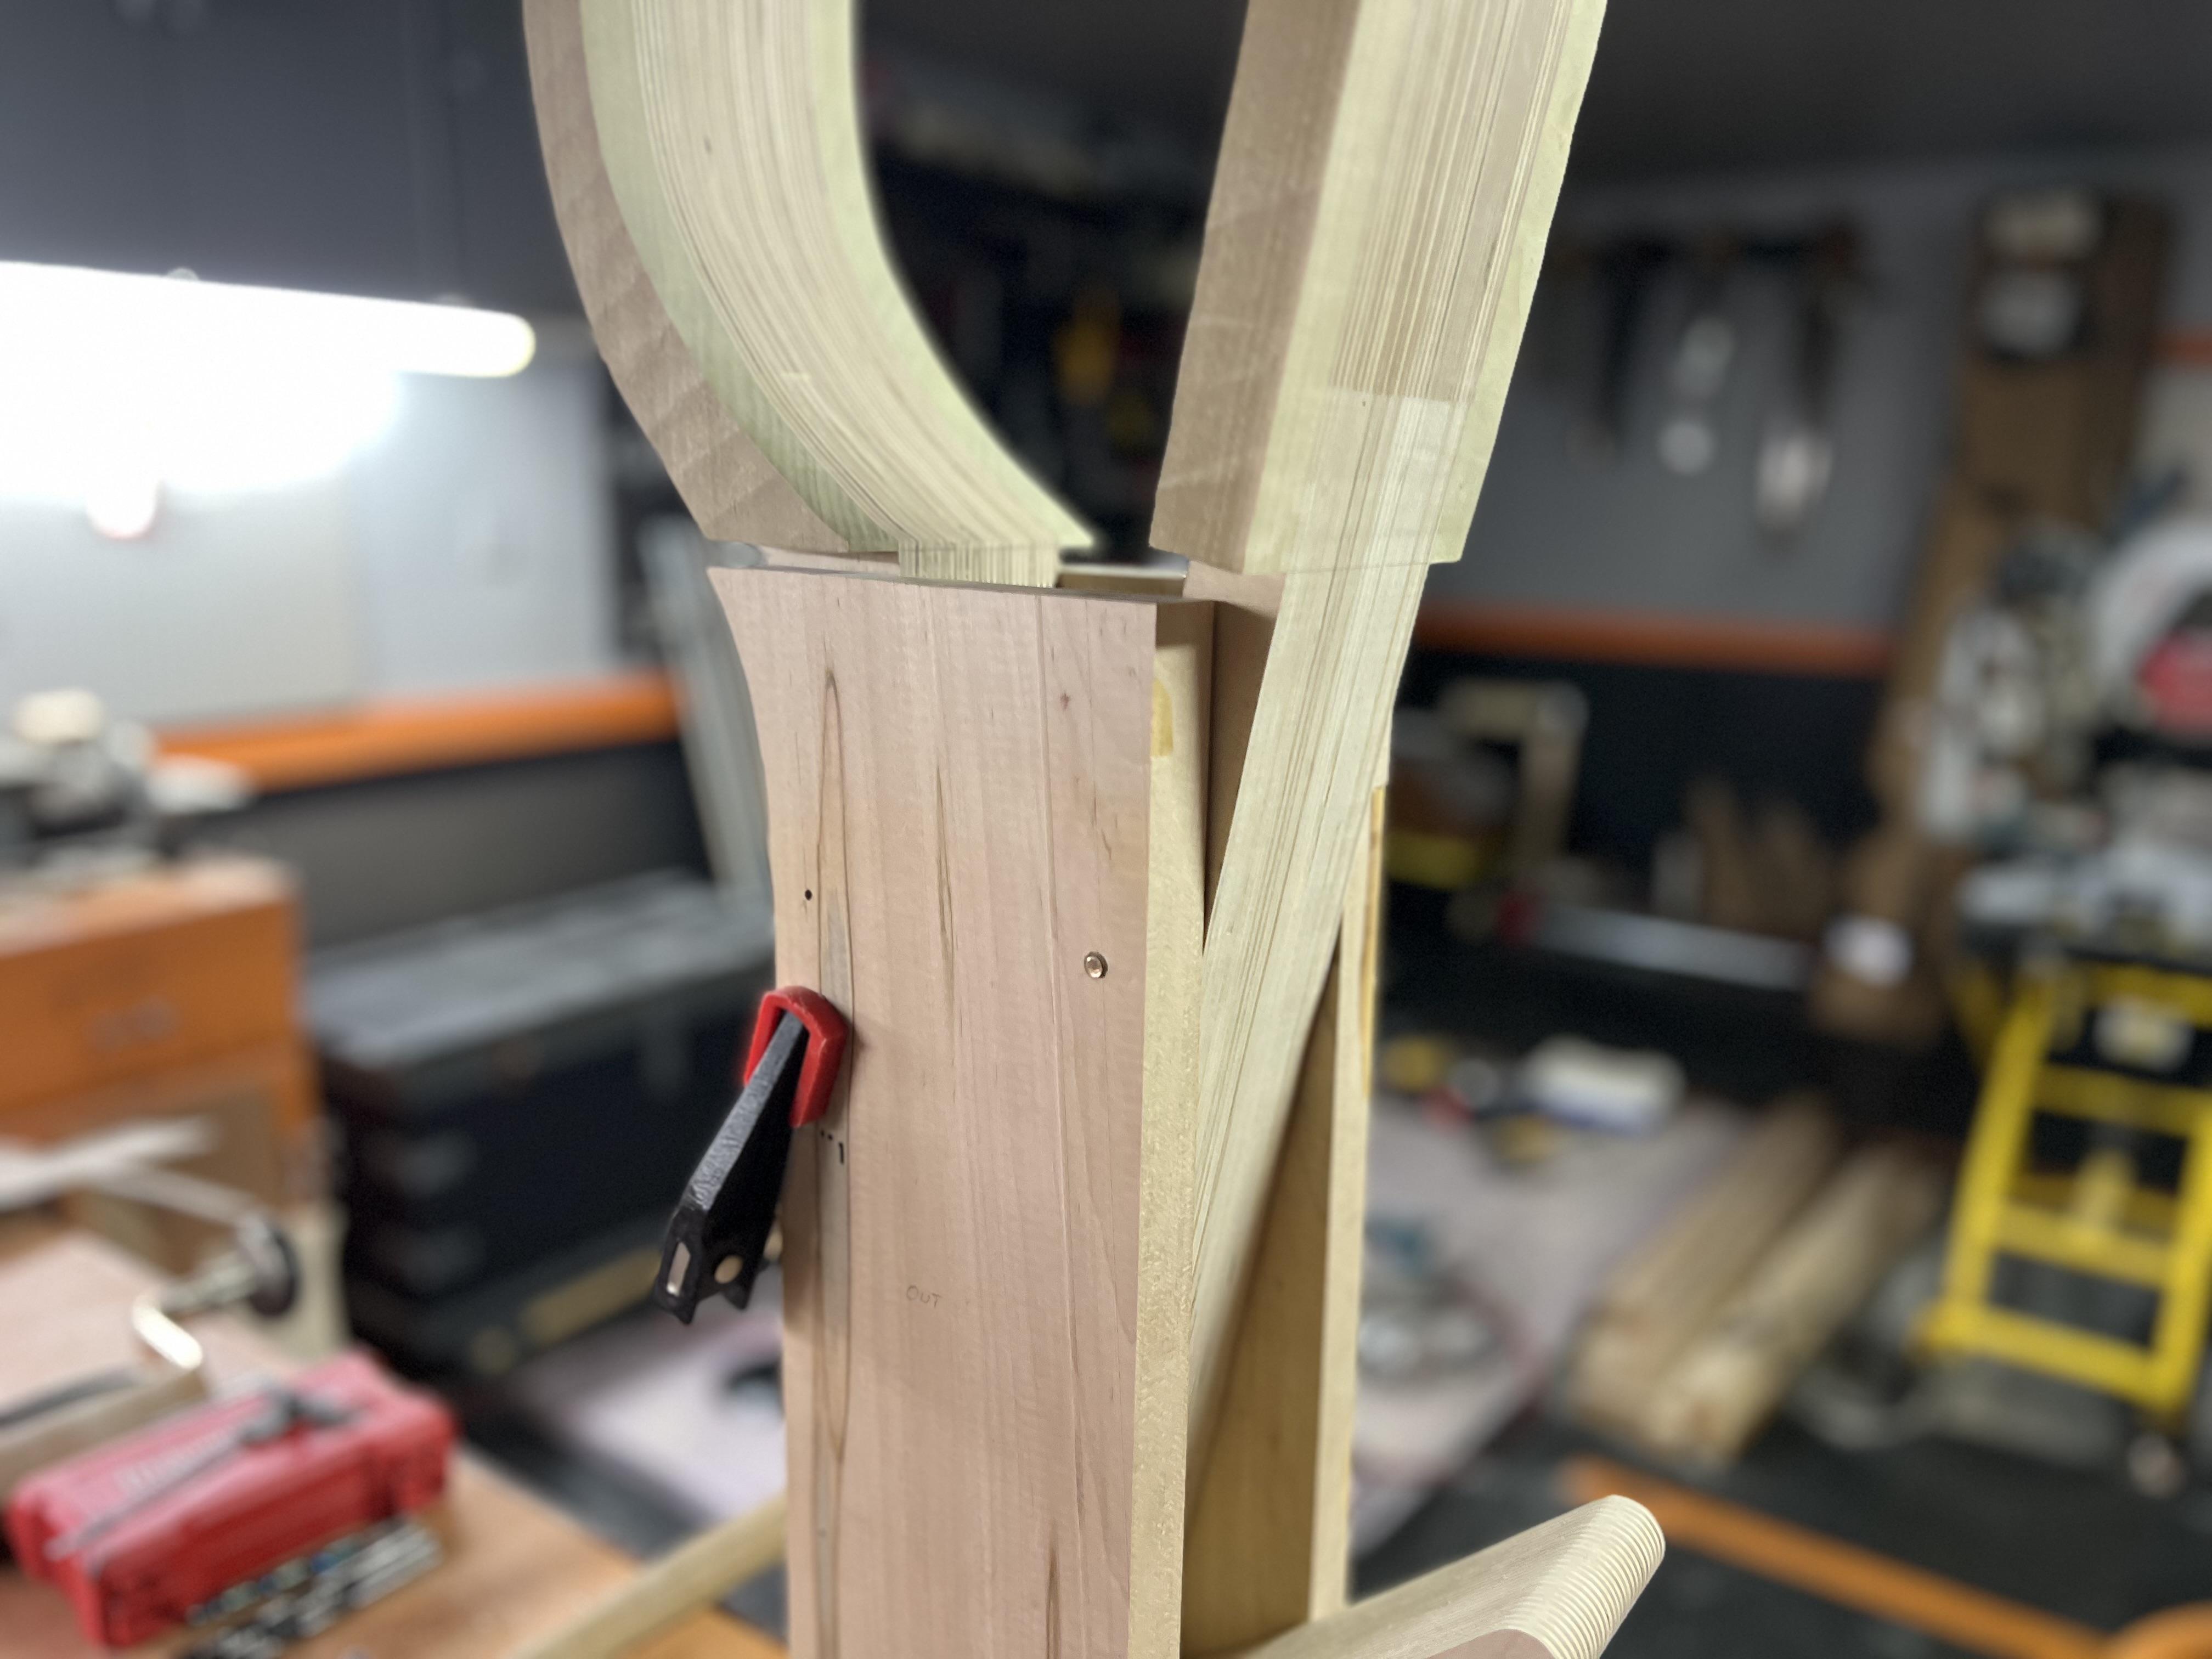
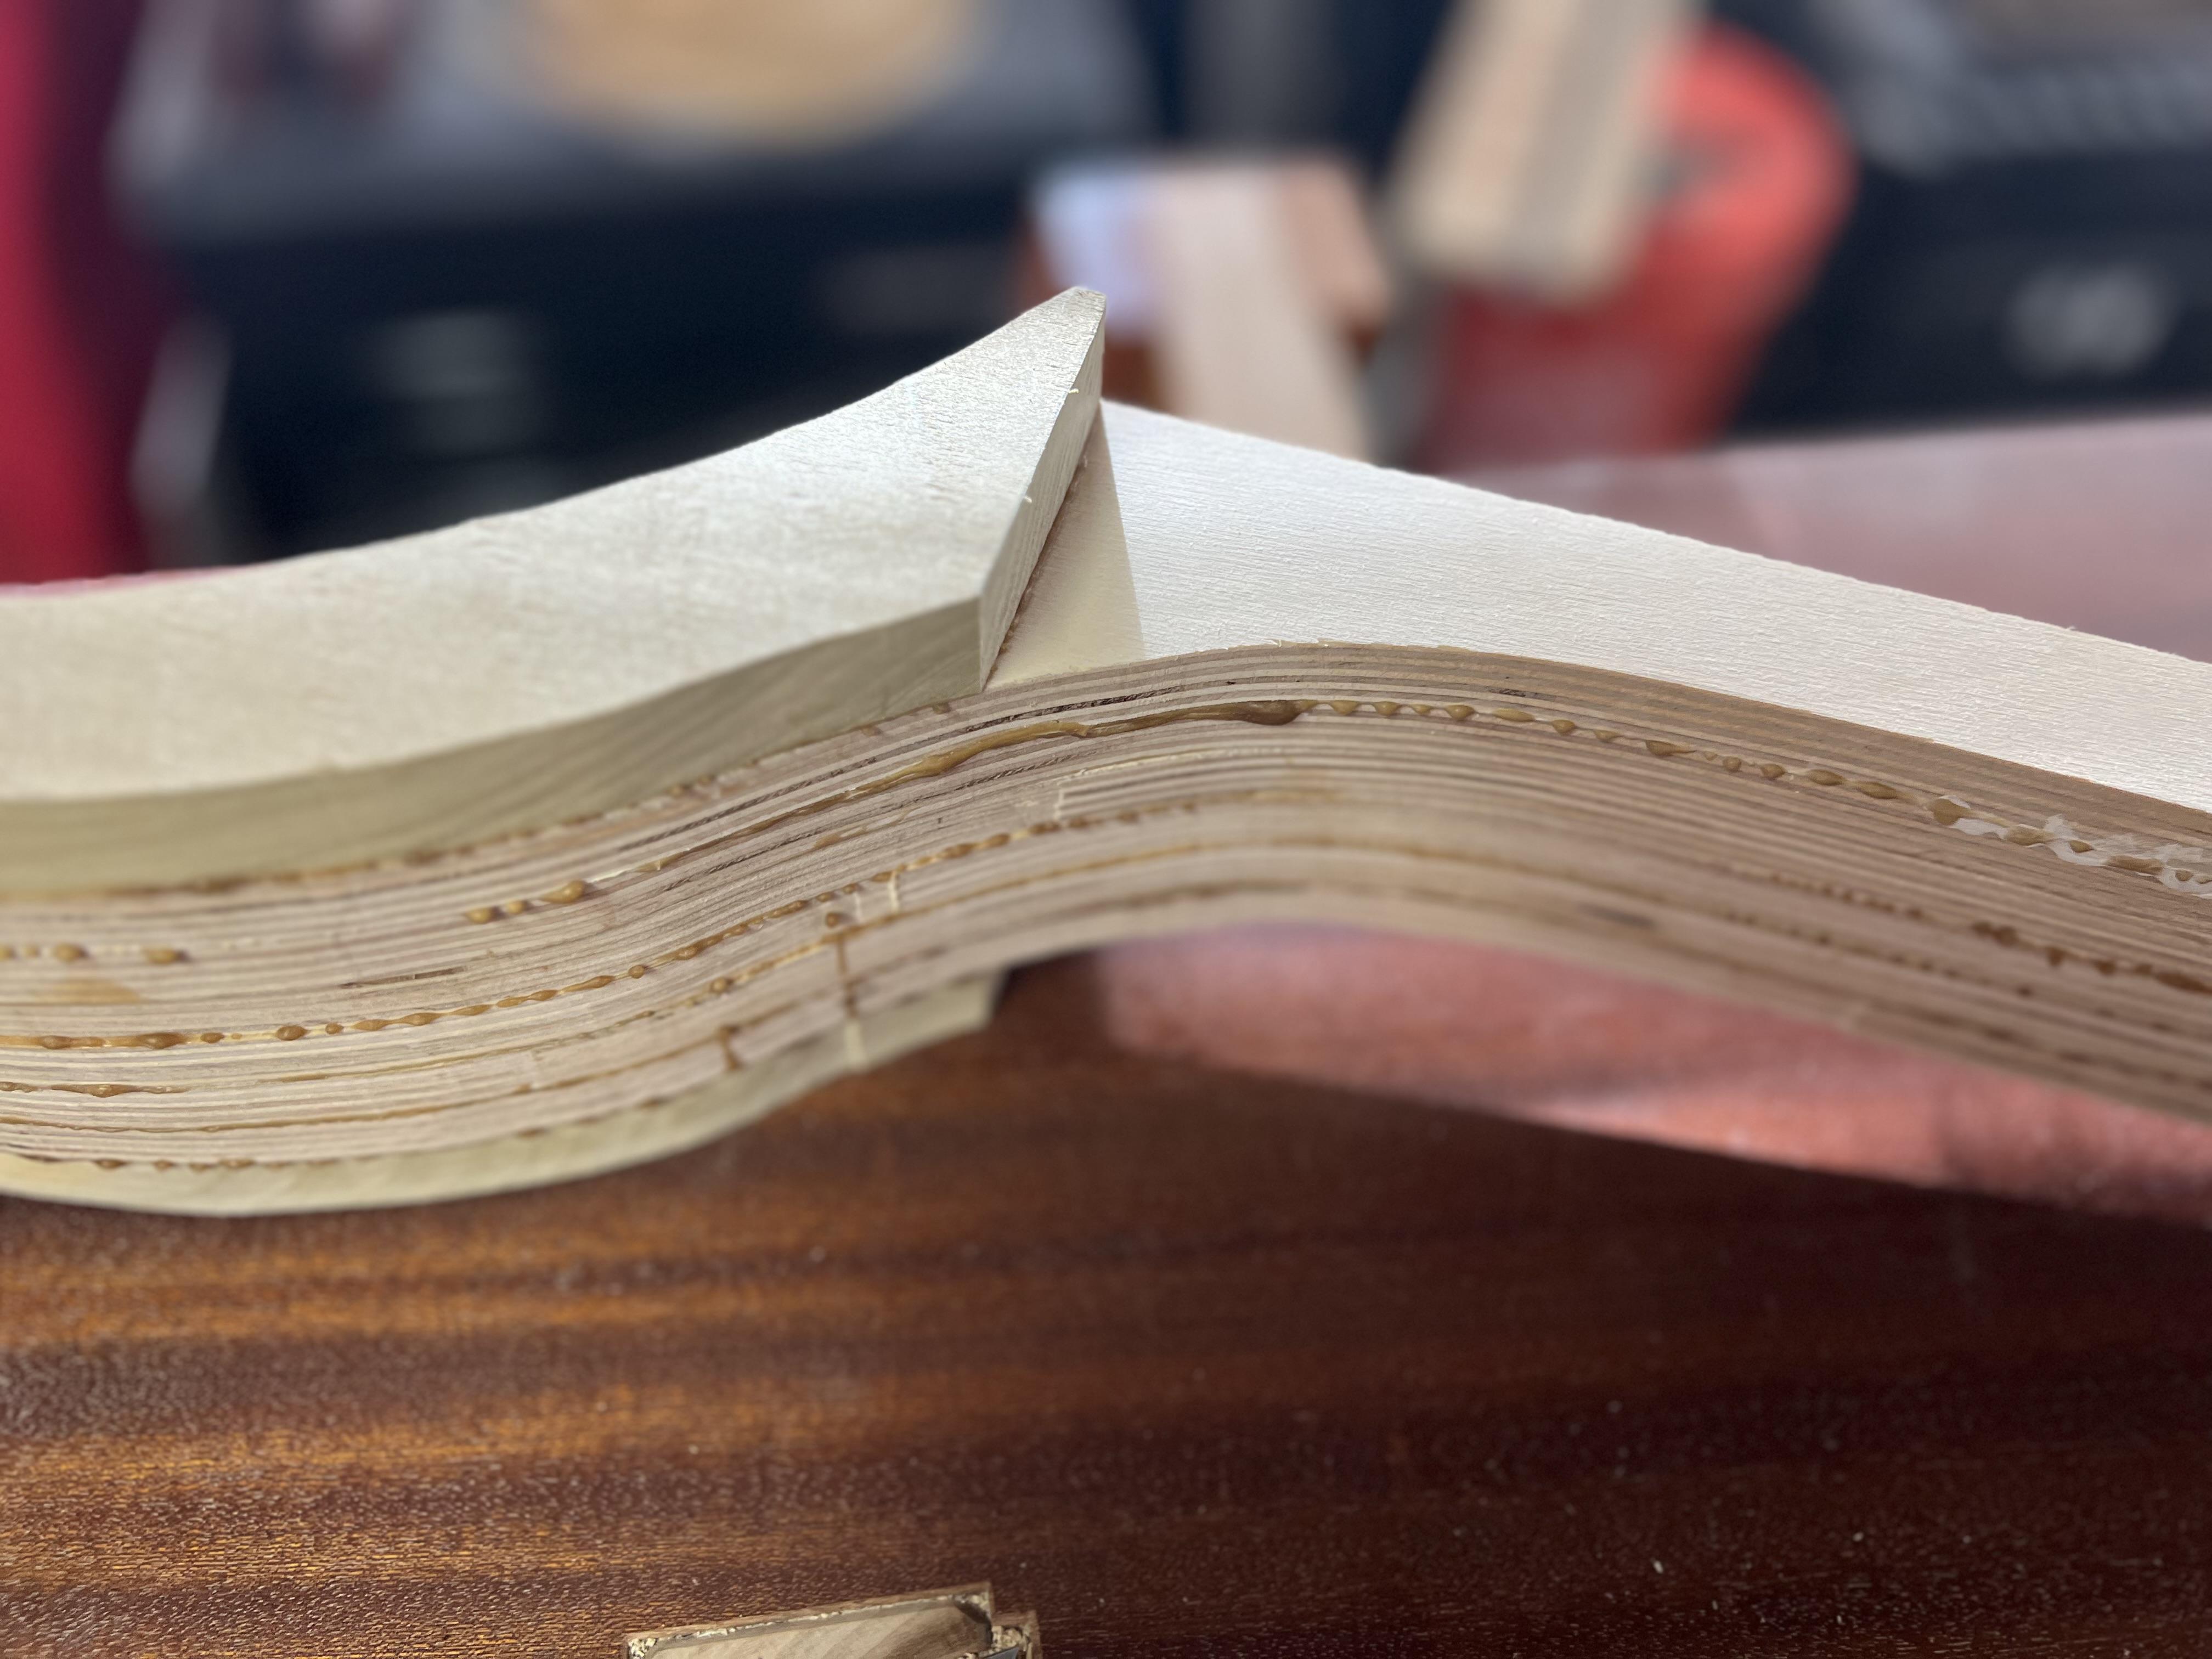
Update #9: Jaws have been trimmed and shaped. The movable arm needed some bolstering so I routed out two areas to fill with phenolic strips. This turned out beautifully and gave me substantial strength in the plywood. The tip end of the movable arm flexed a lot at the tip end and this needed resolve. After all of the gluing and shaping i finished the parts in Tried and True Varnish Oil, and threw the spring in between the jaws. The spring is a 1” ID, .120” WG, 4 5/8” long spring found at ace hardware. This one has a working load of roughly 80 LBS and that is the sweet spot for the action. Stronger springs could absolutely be used. Next up is the locking system. I already have a working drawing, but need to source some better steel locally. It really needs to be 1/8” or thicker steel. Anything in the 16 gage is too flexible and does not contain the required temper to not flex.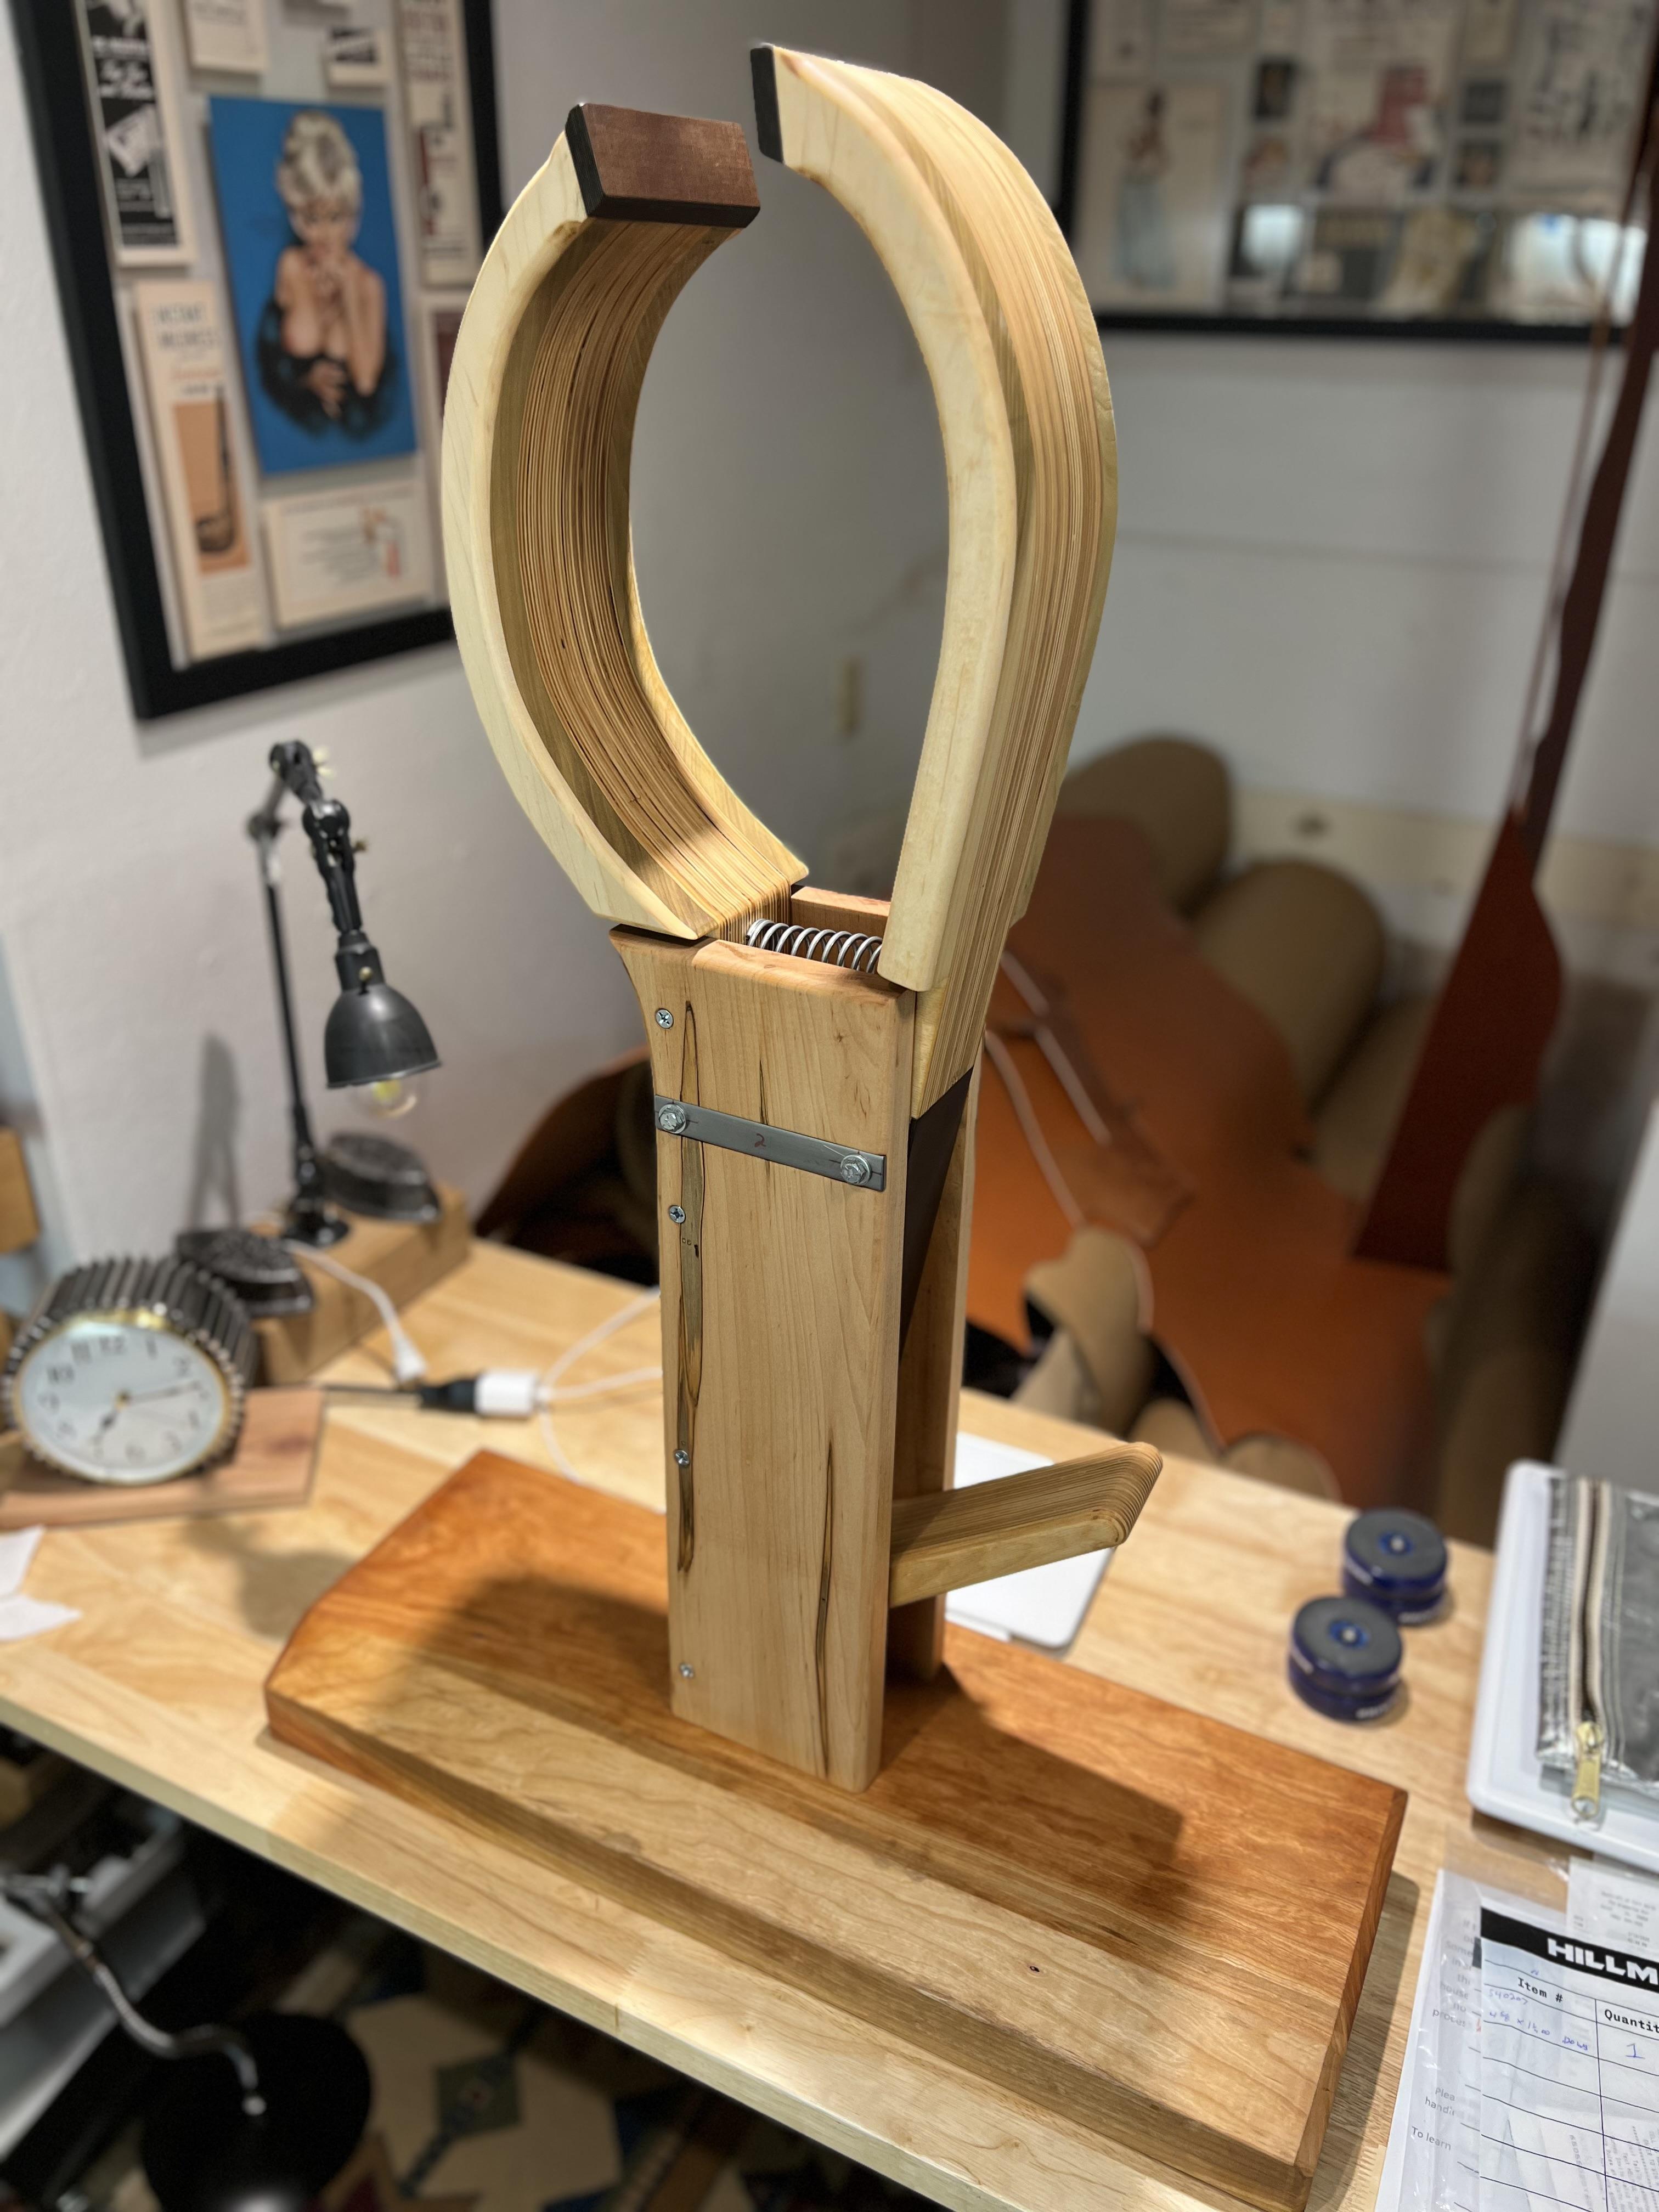

-
Swiss Saddler Clam Drawings
ClaimedVacancy replied to ClaimedVacancy's topic in Leatherwork Conversation
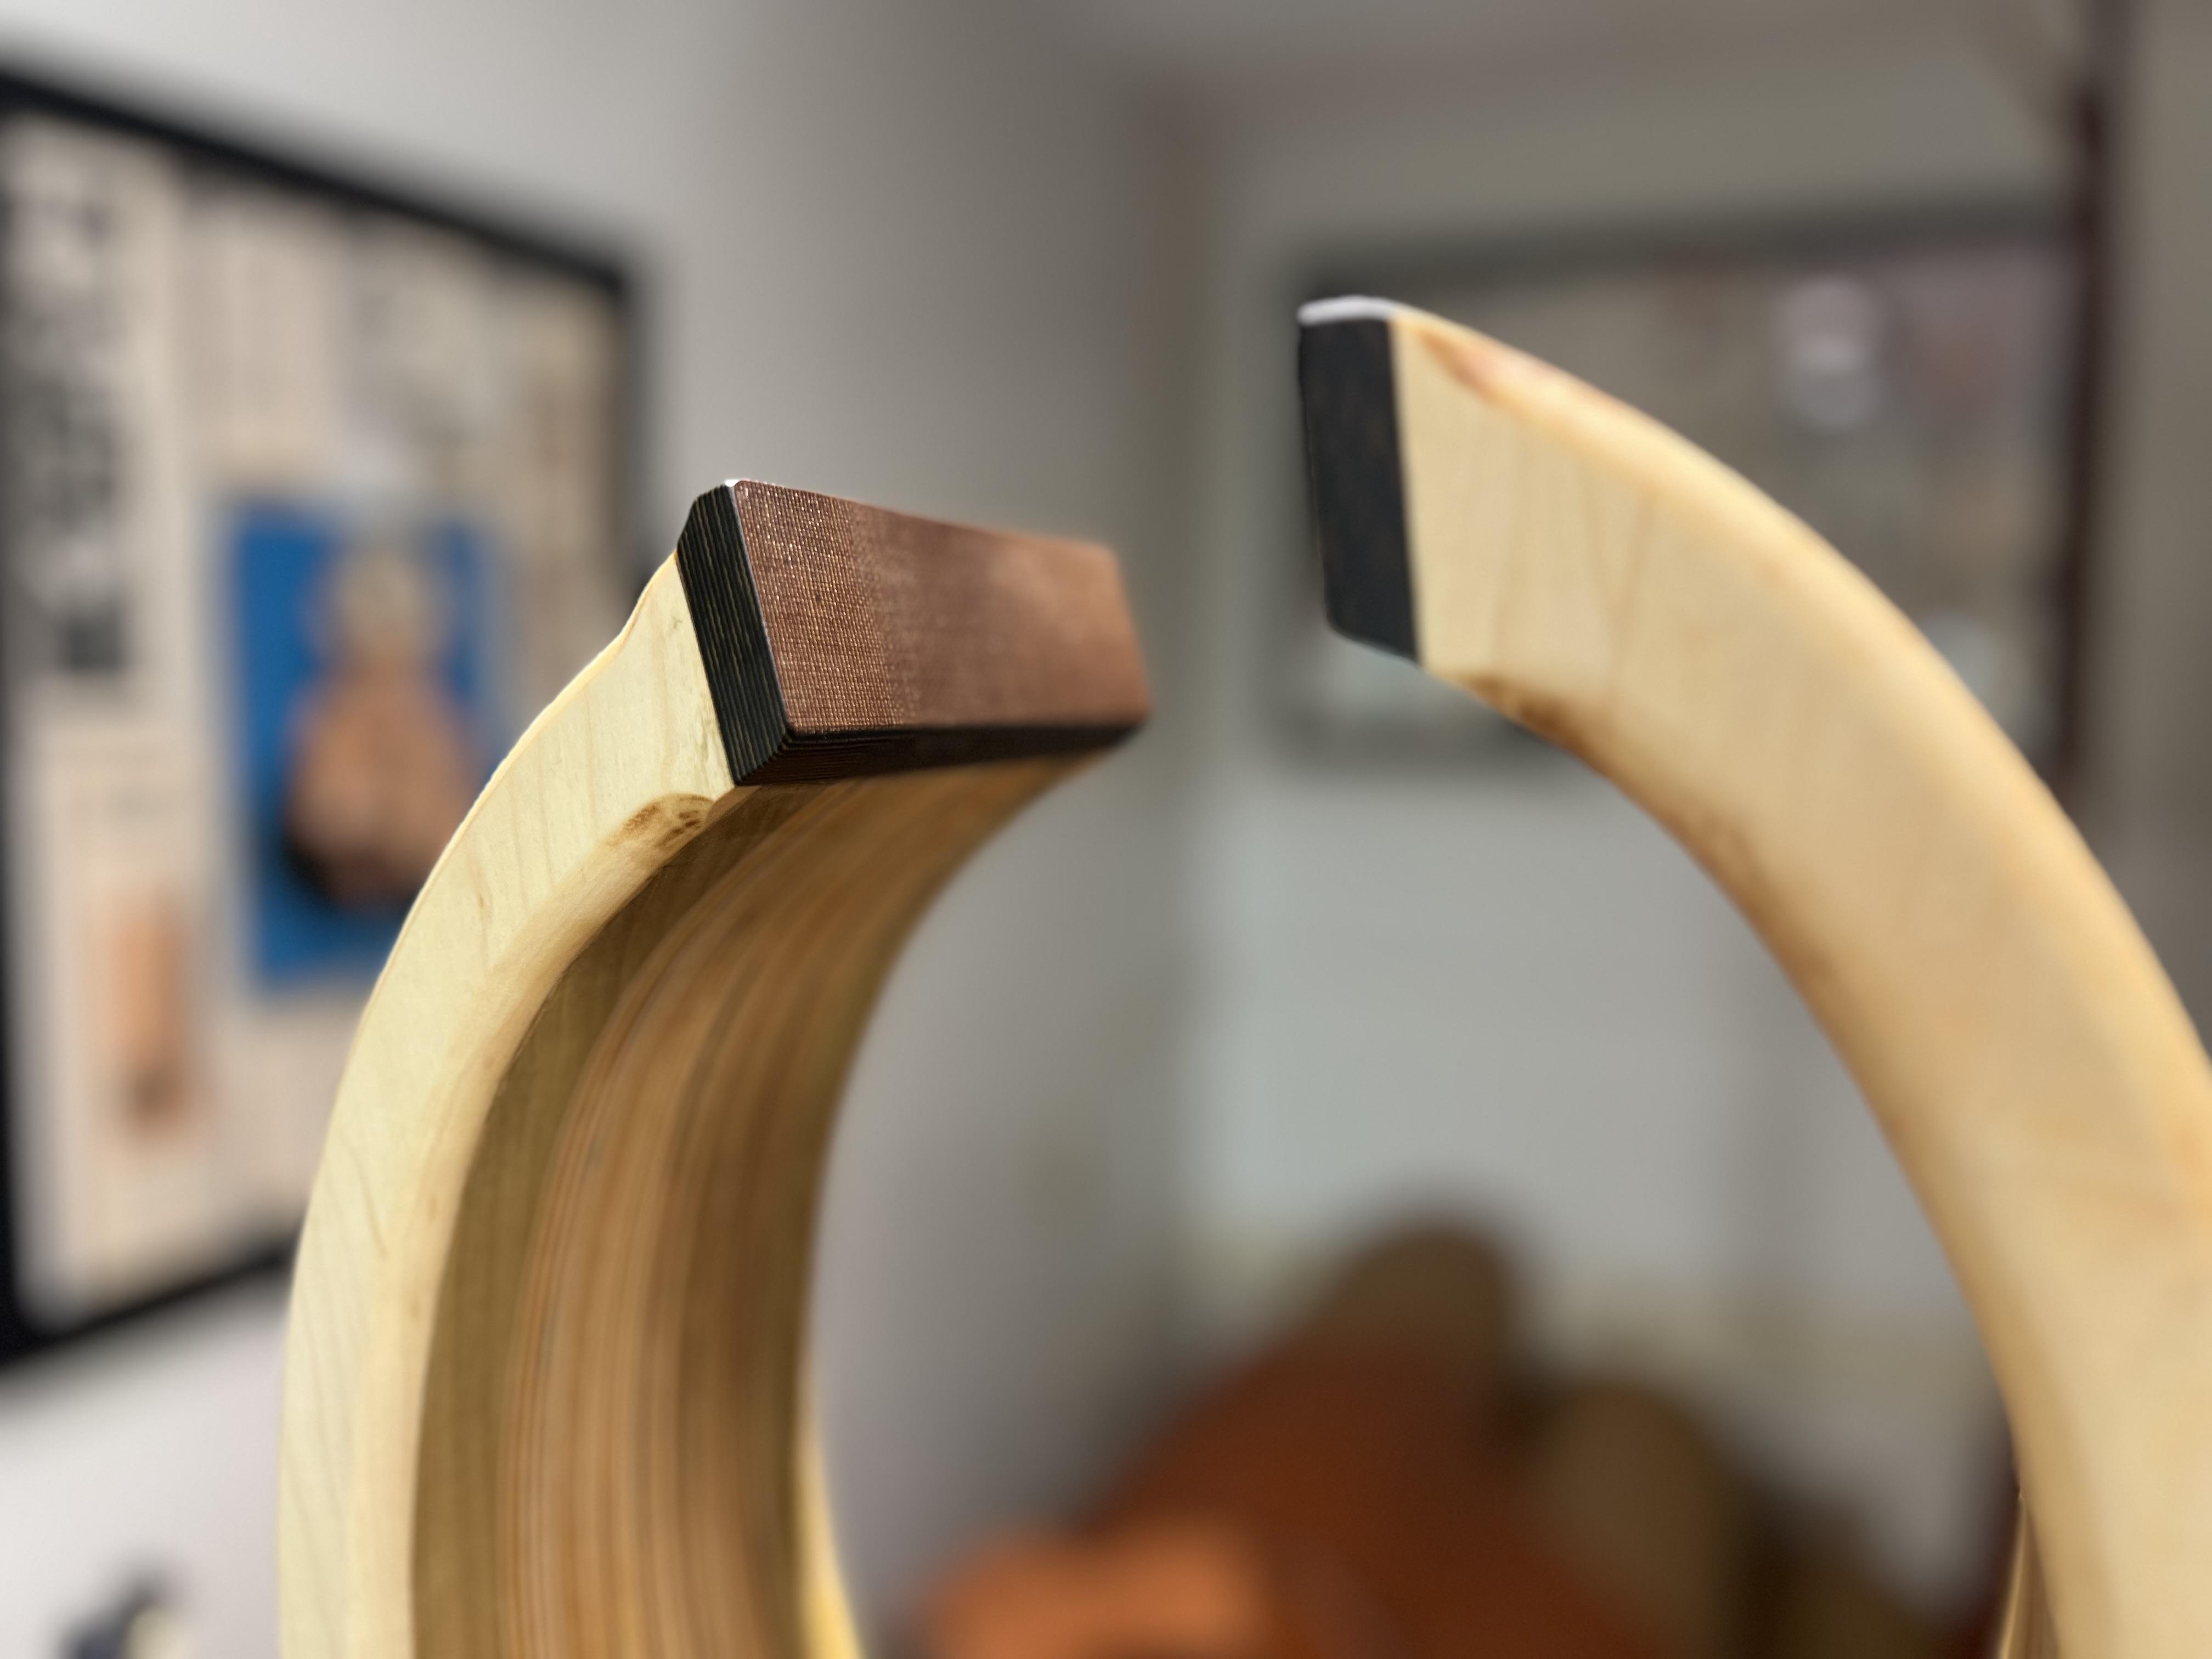
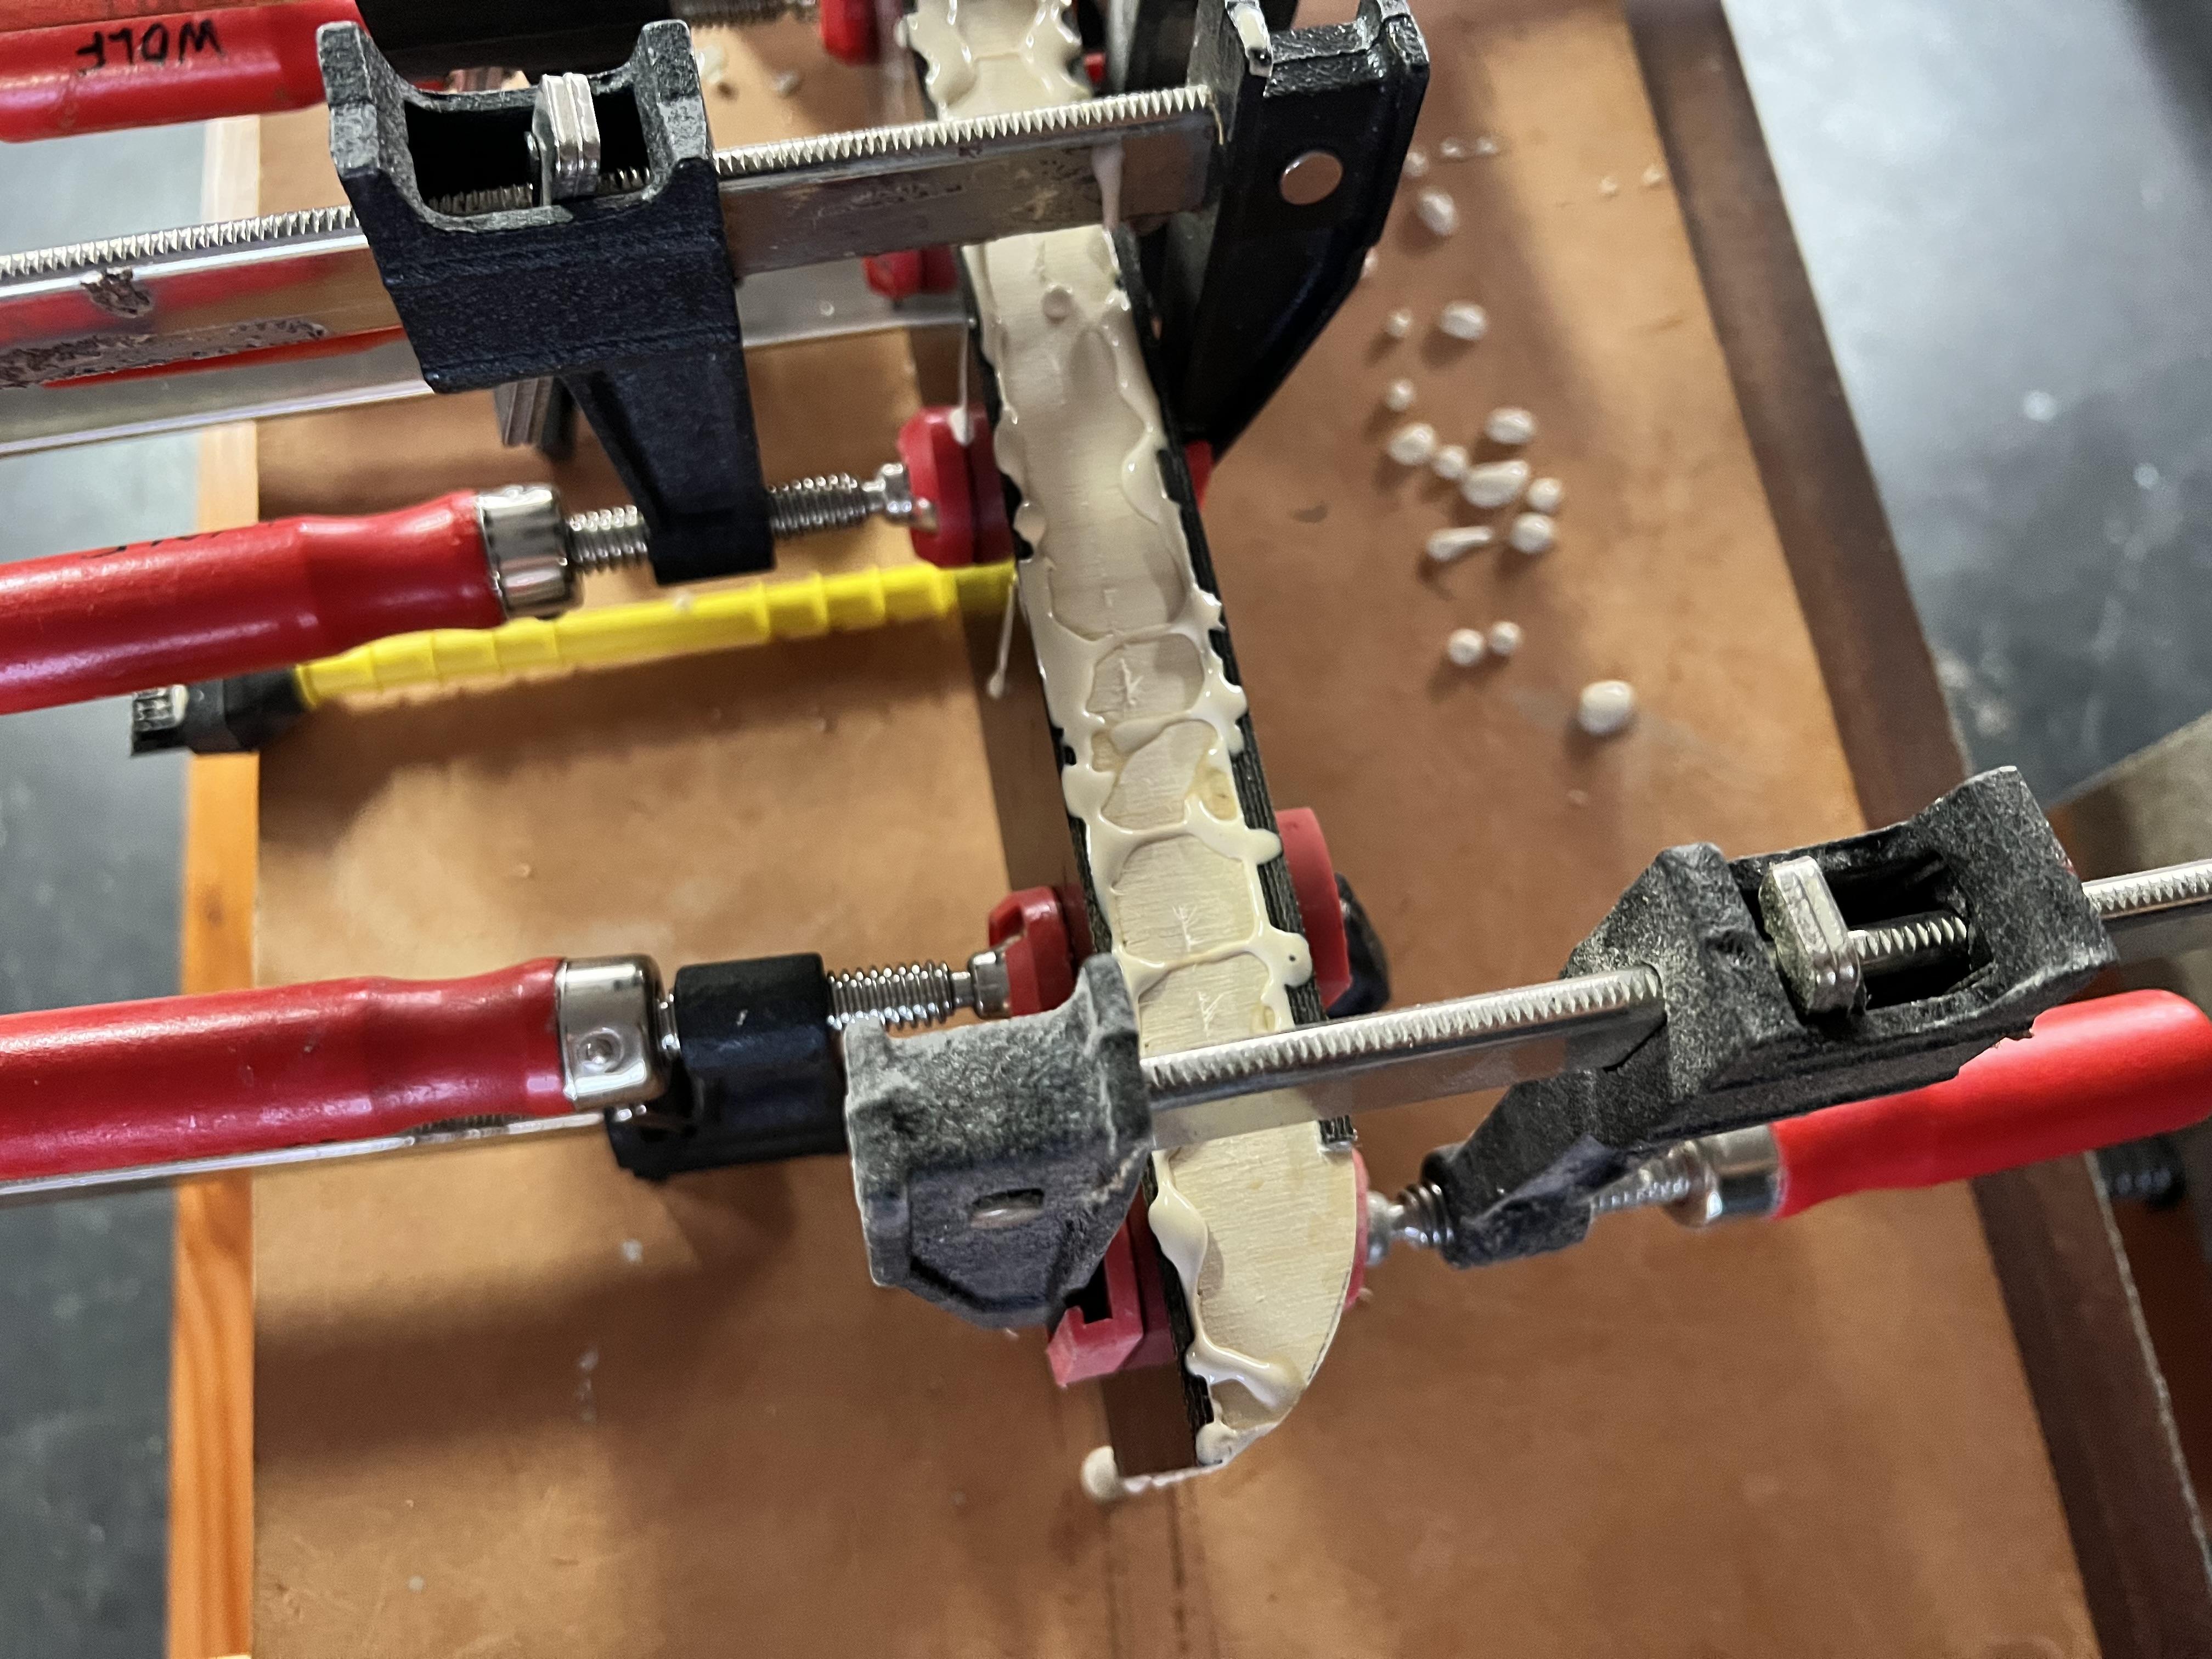
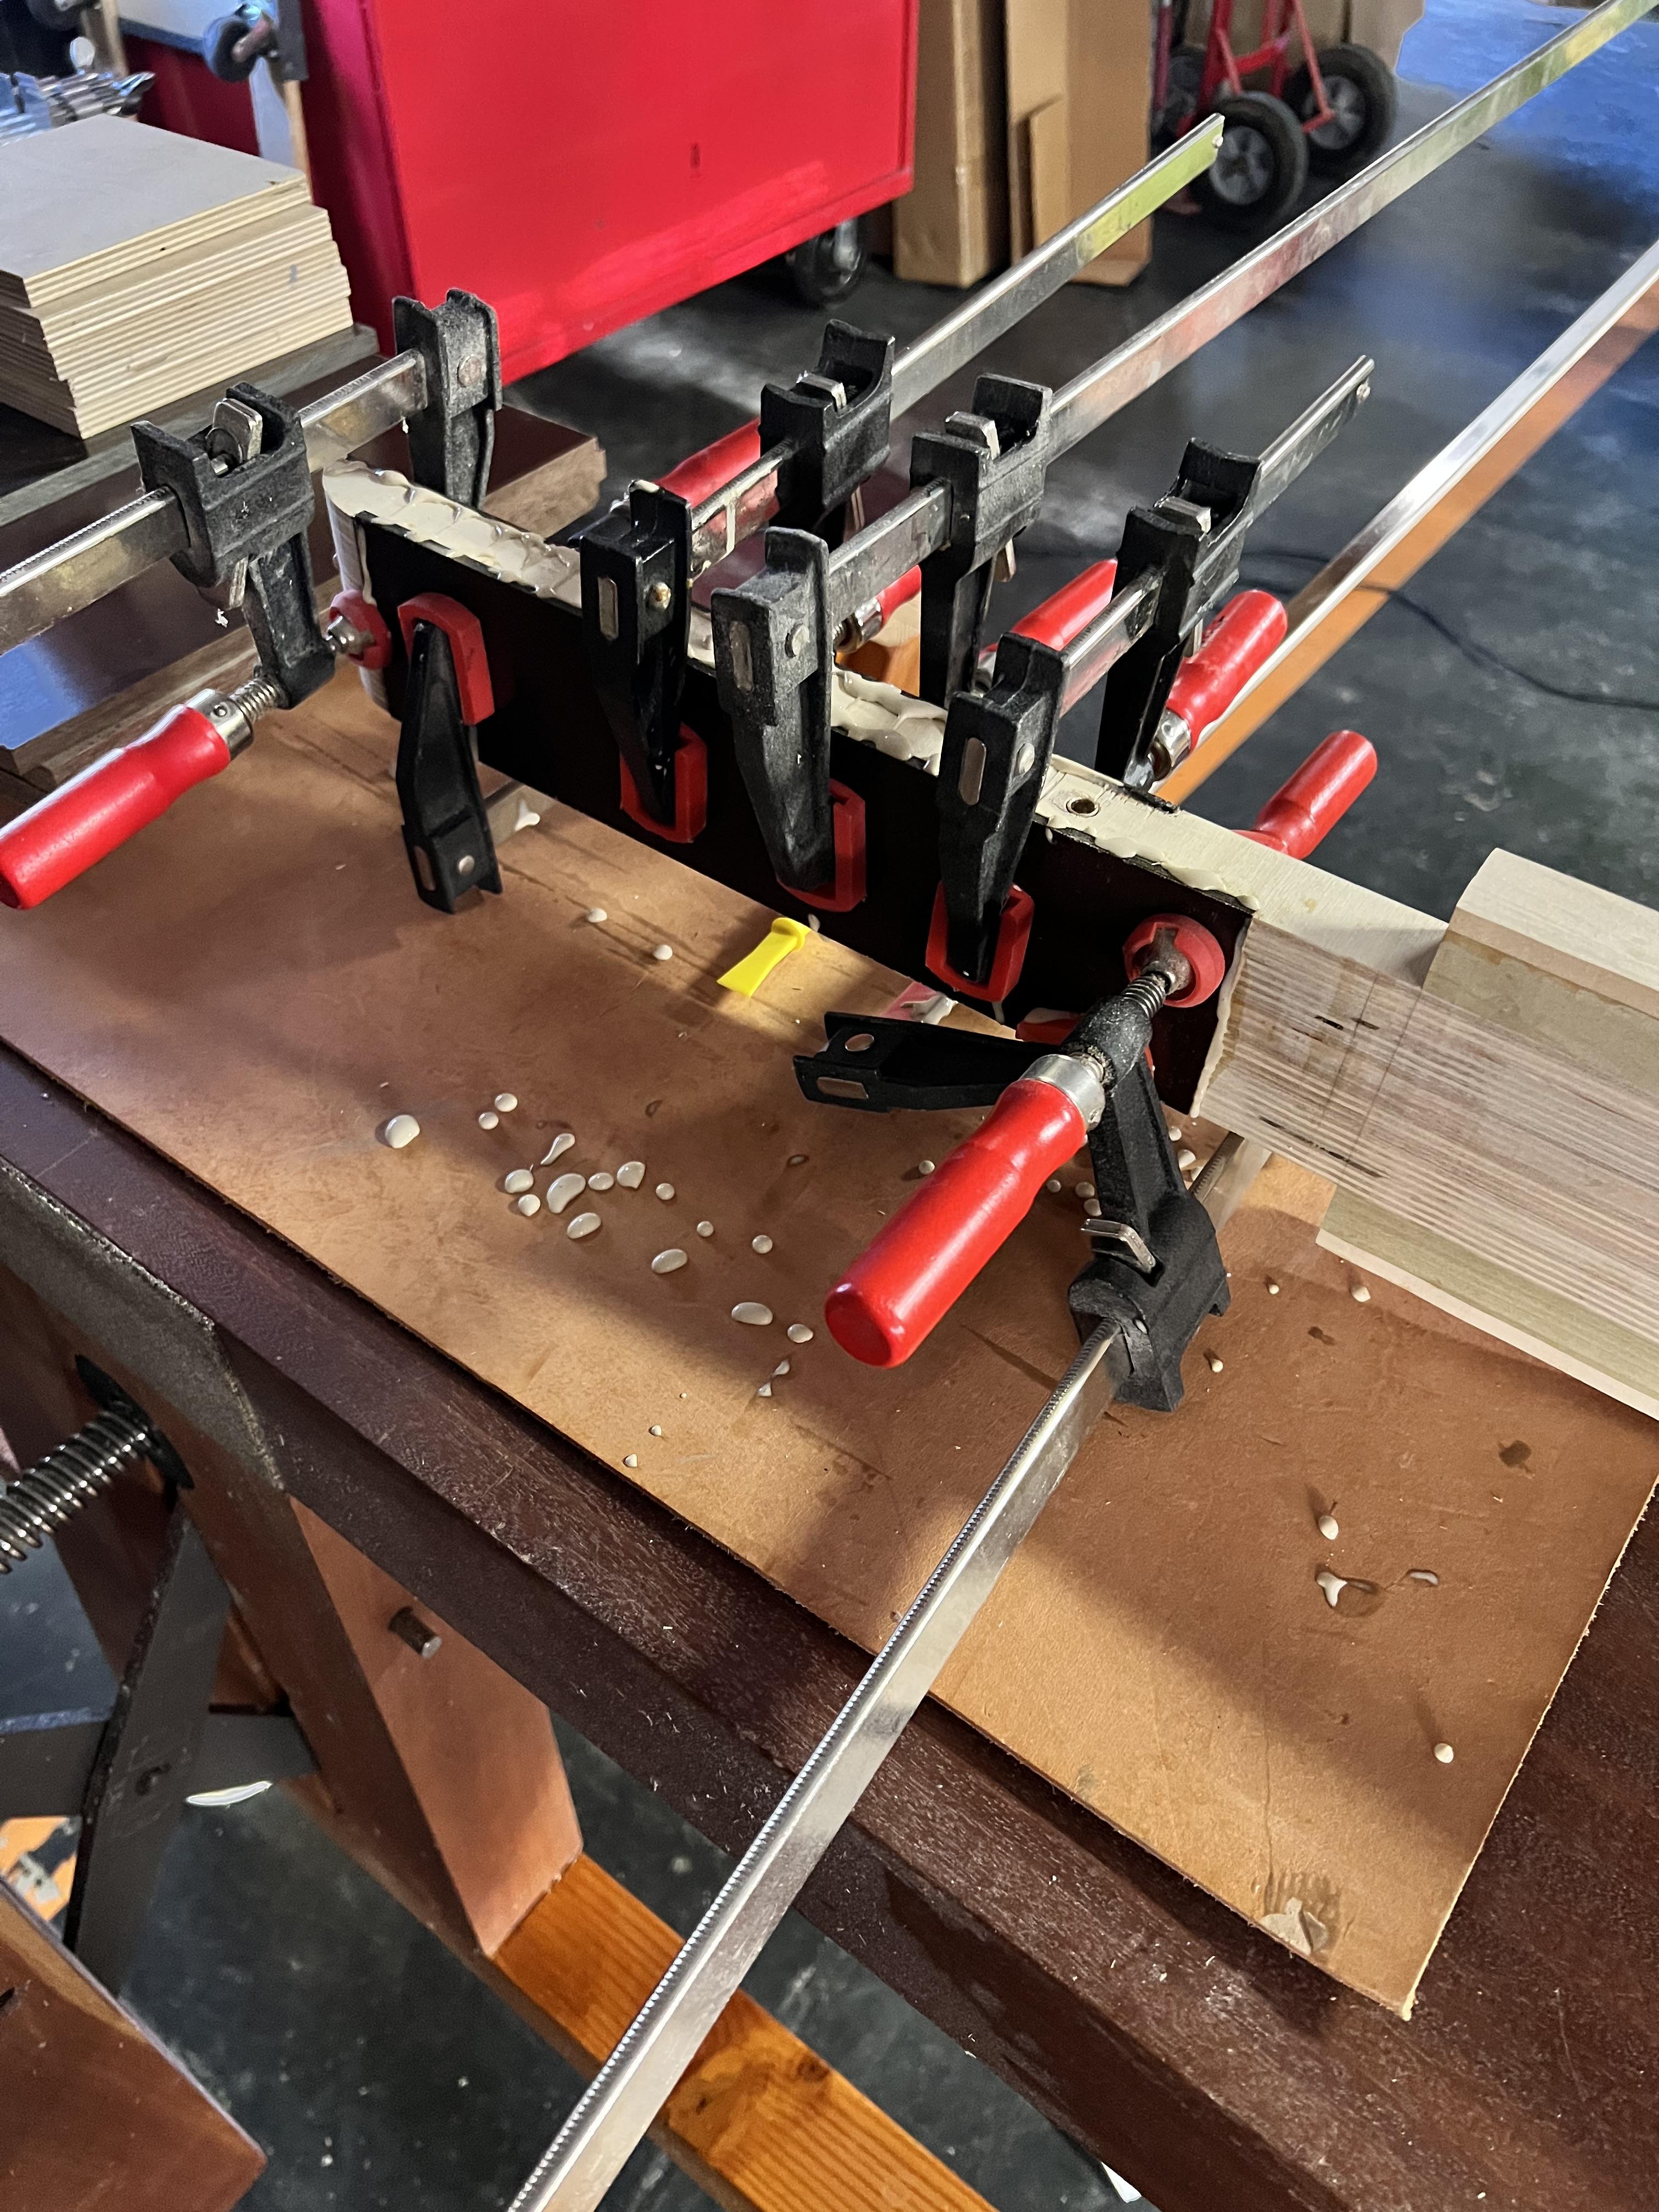
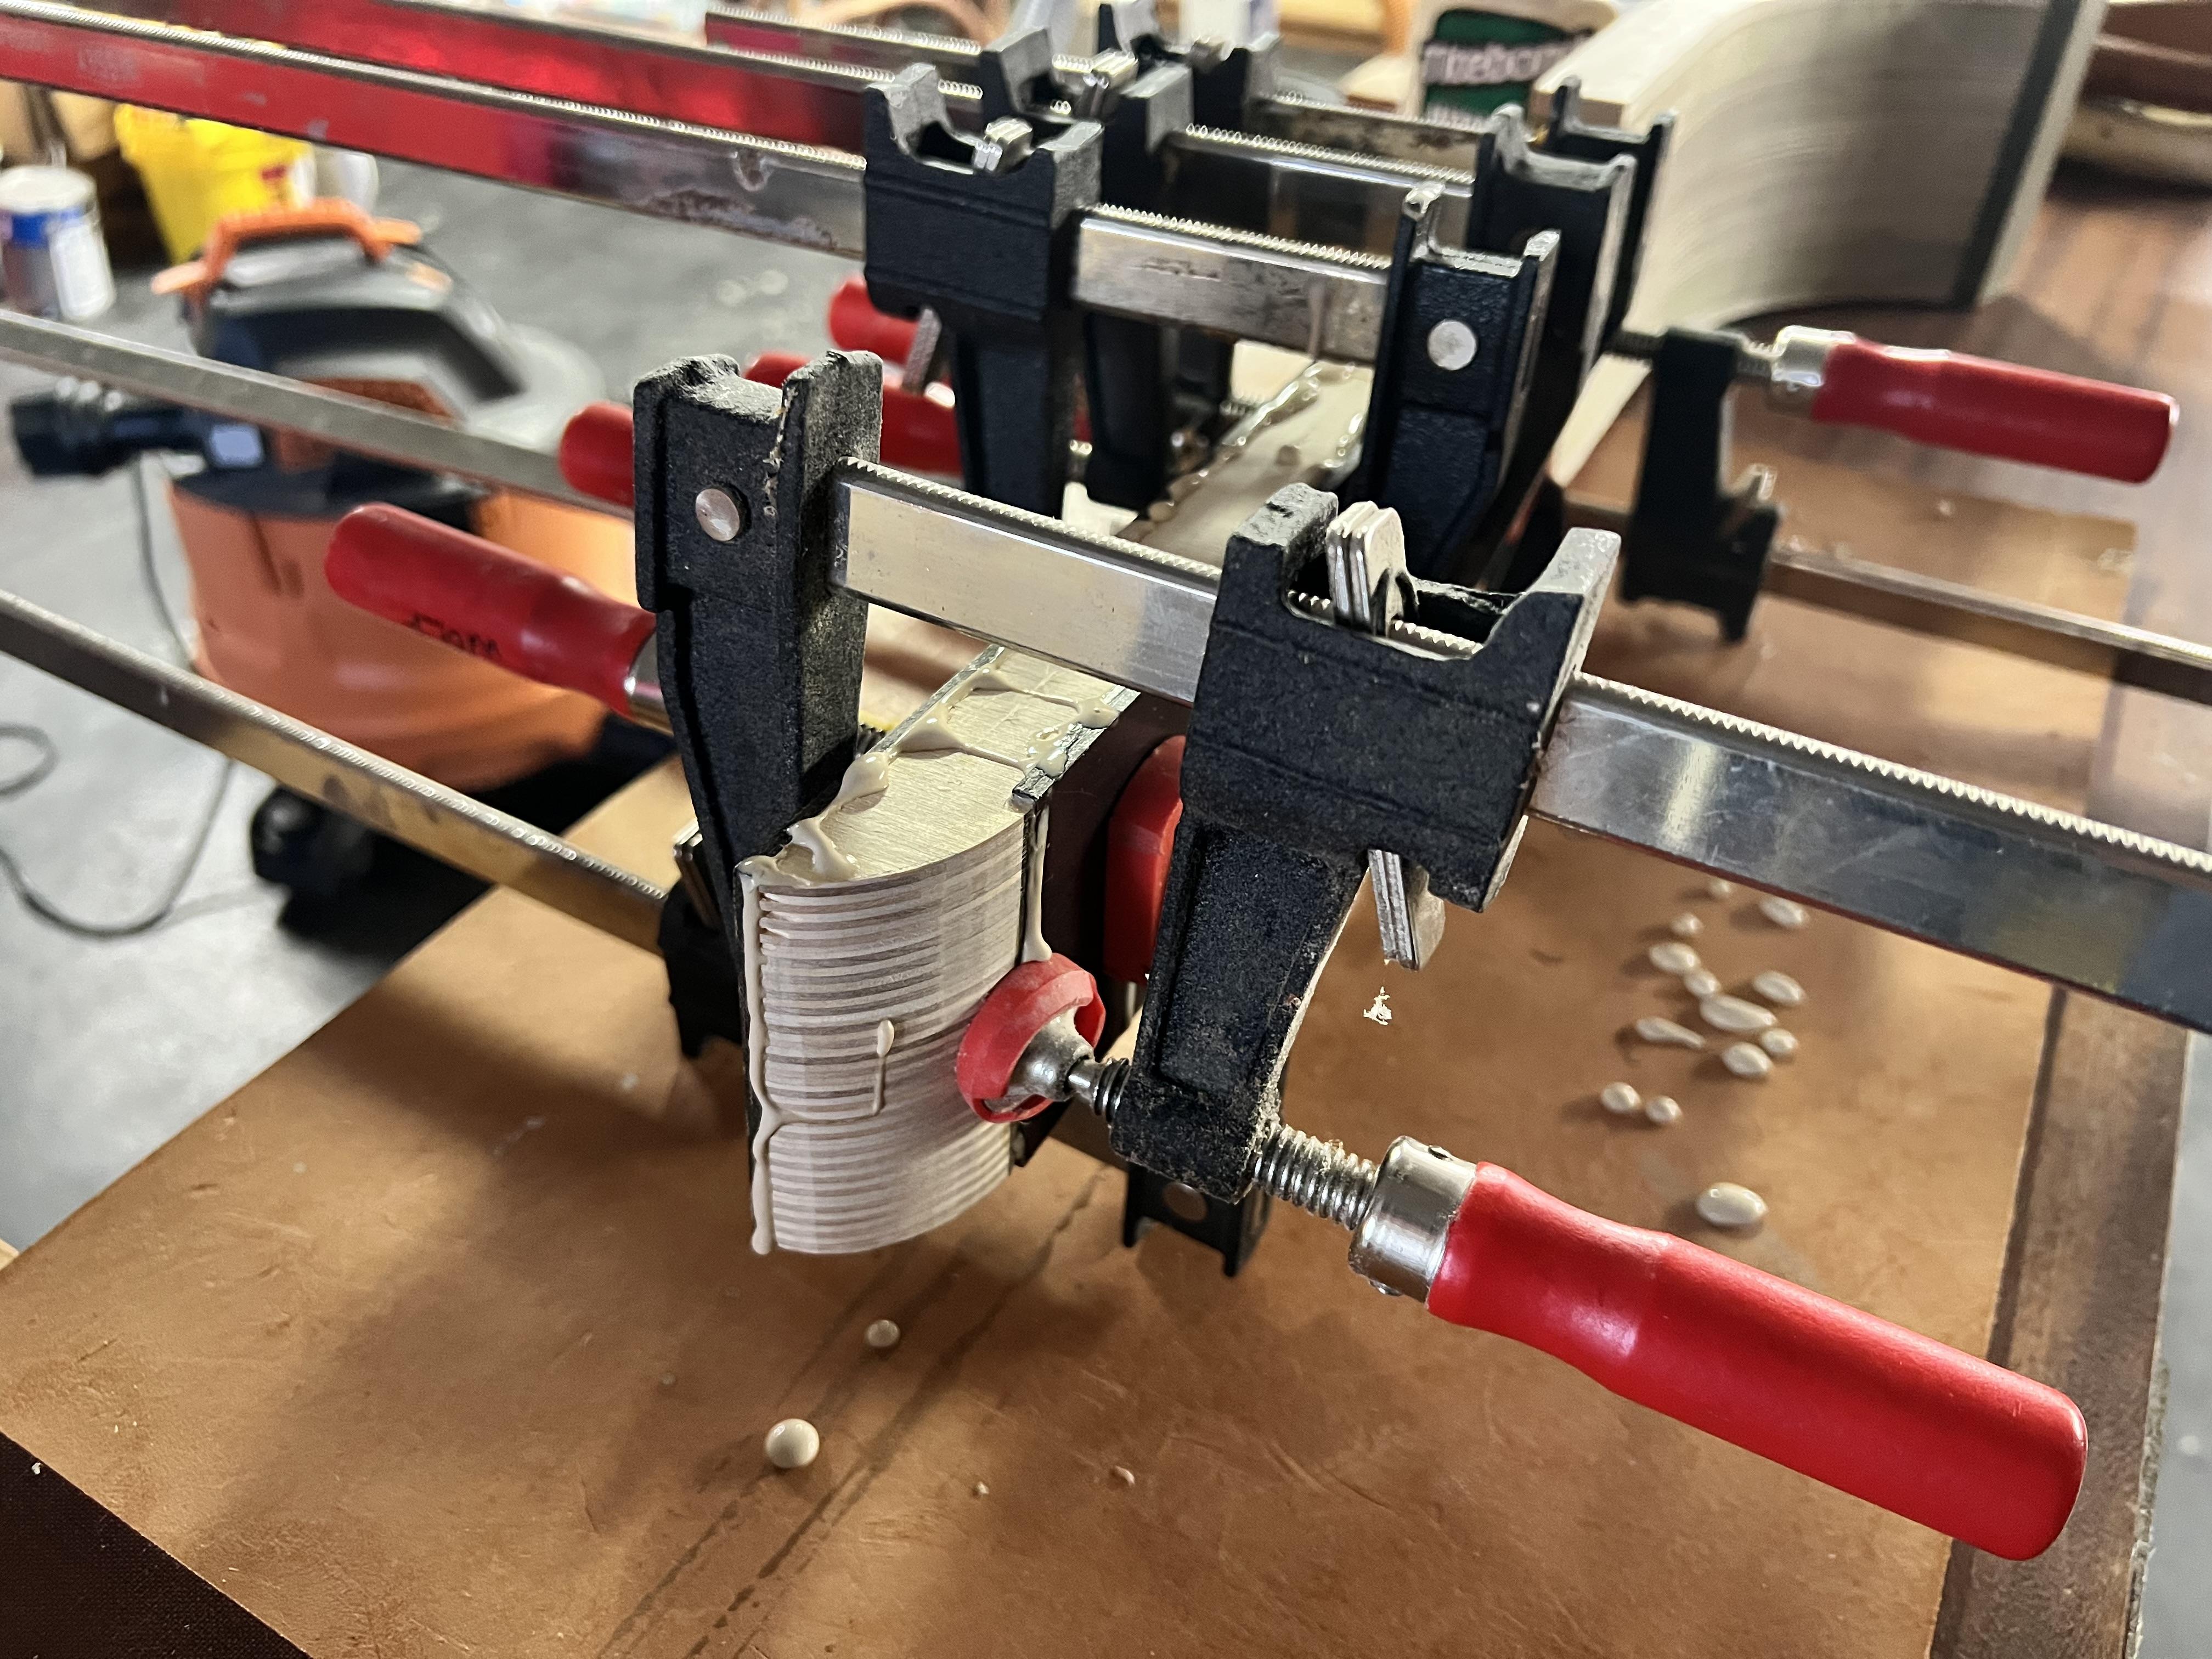
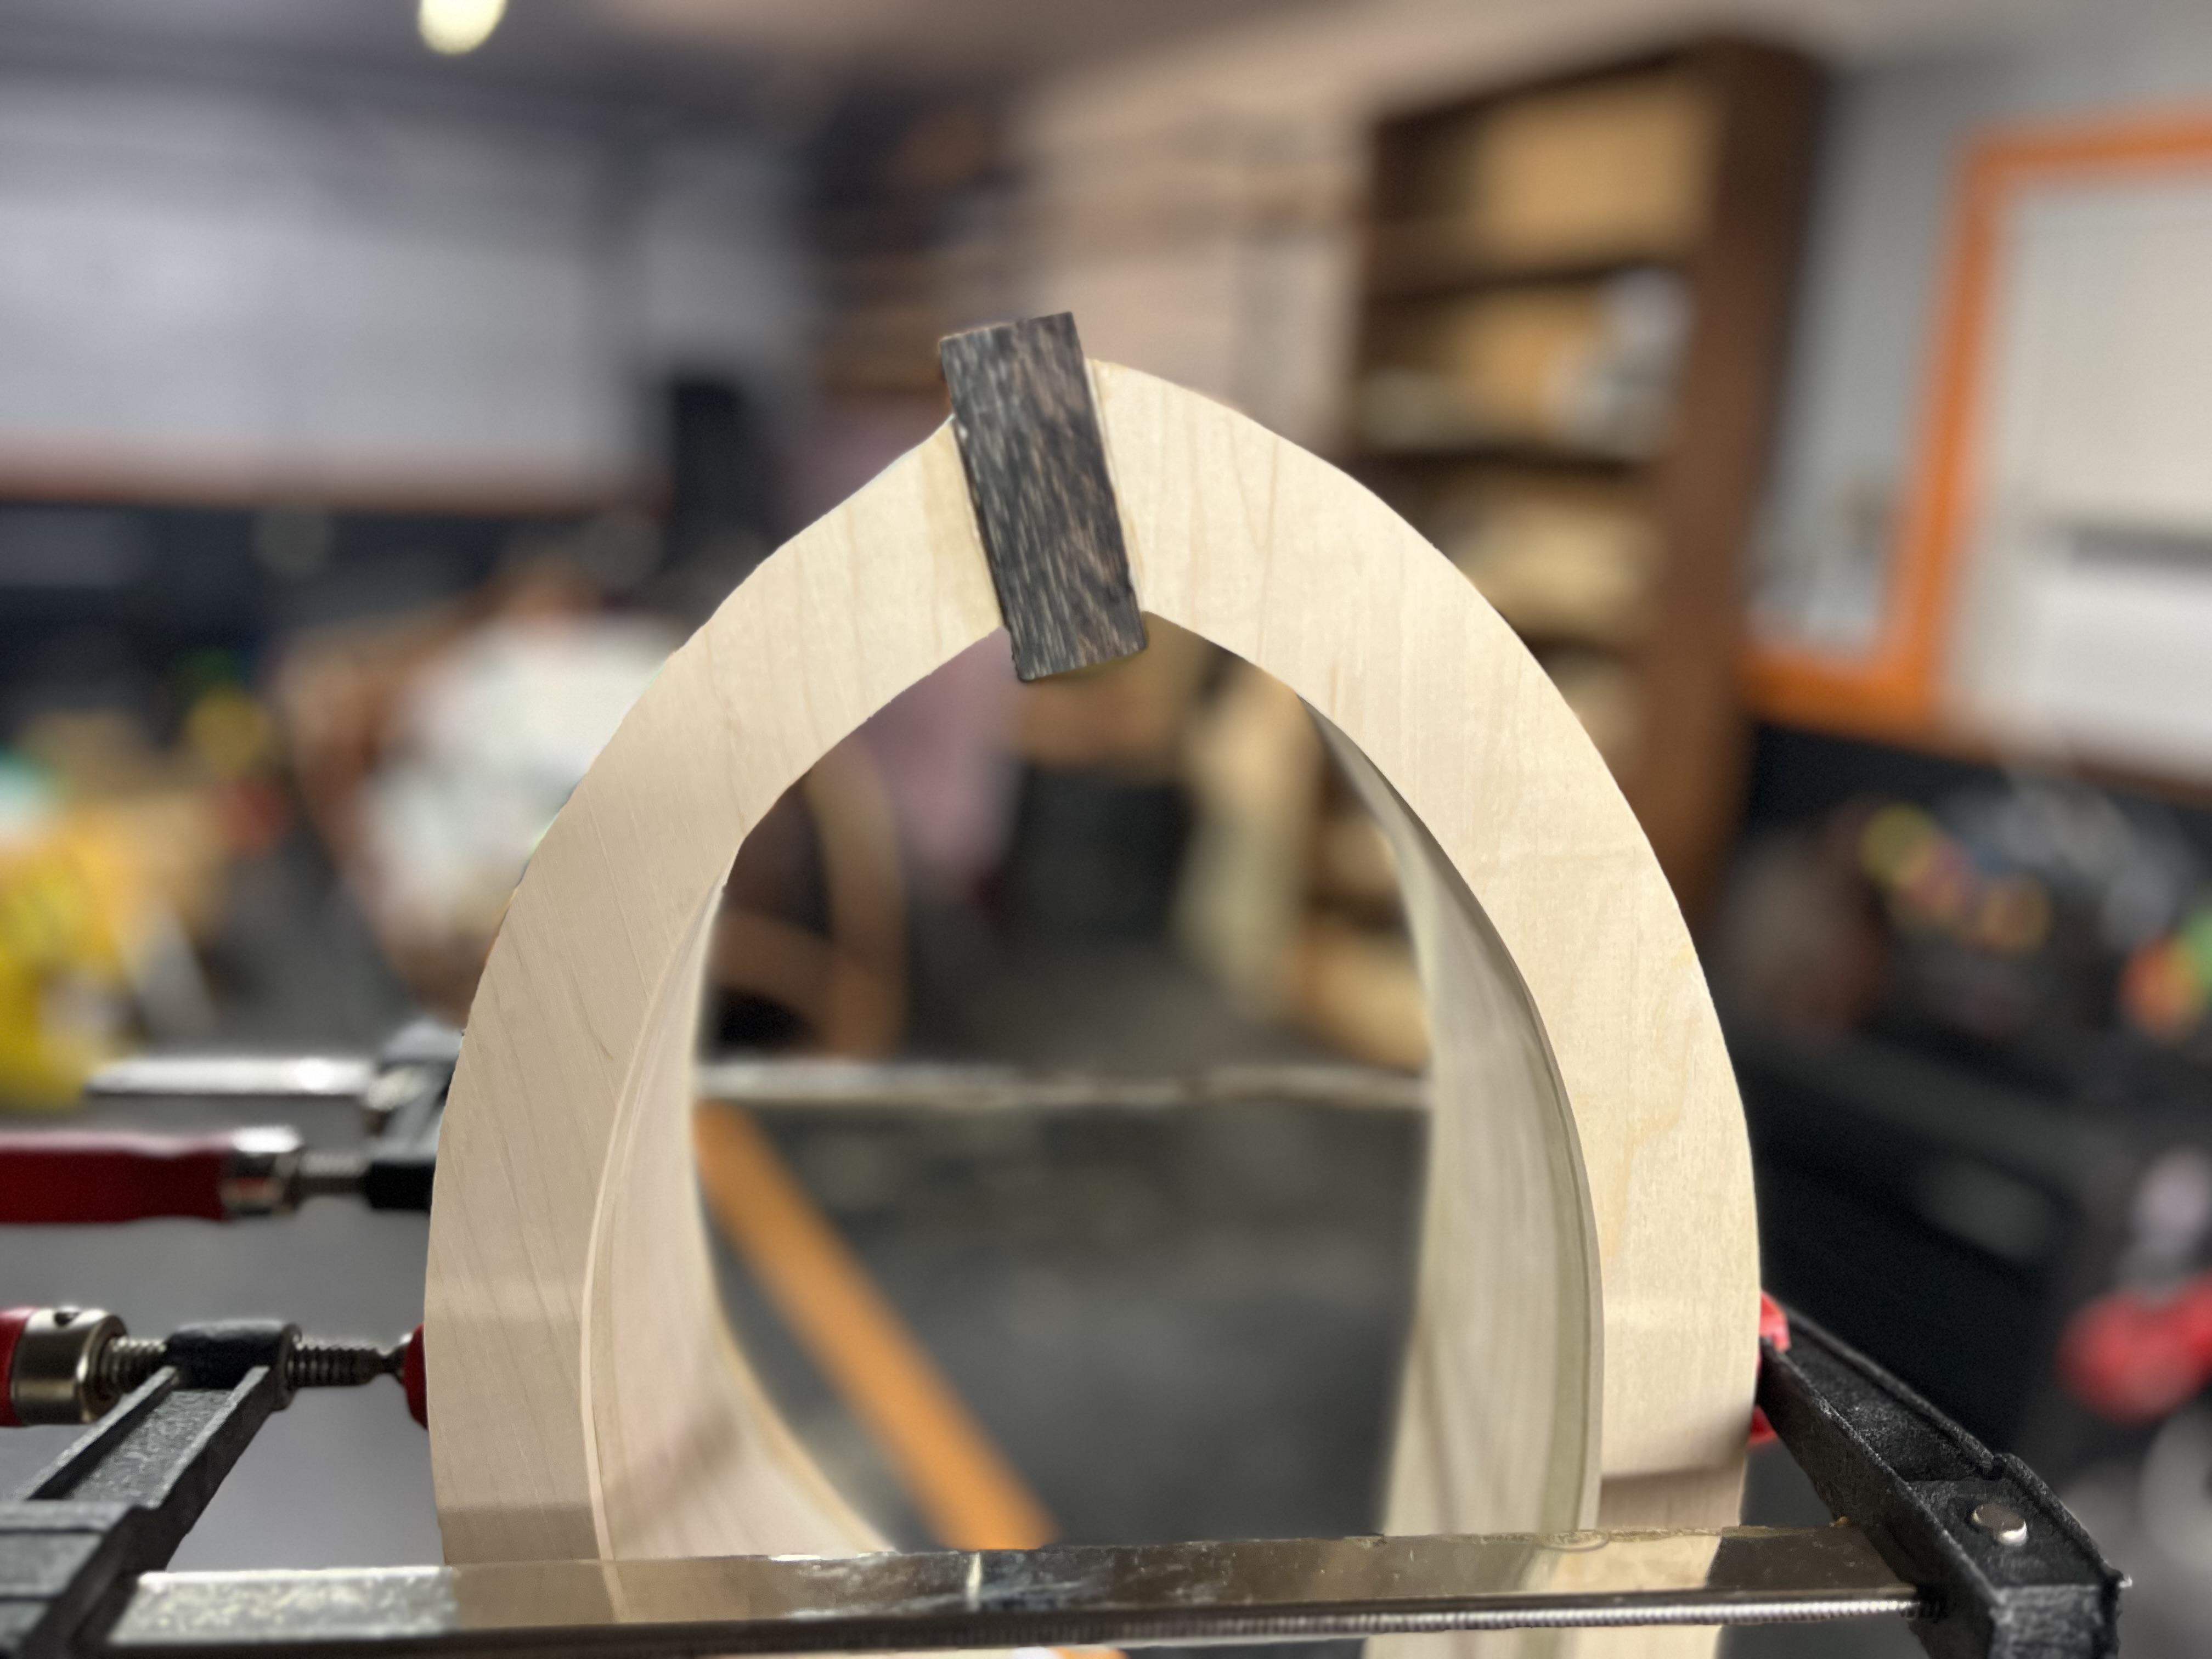
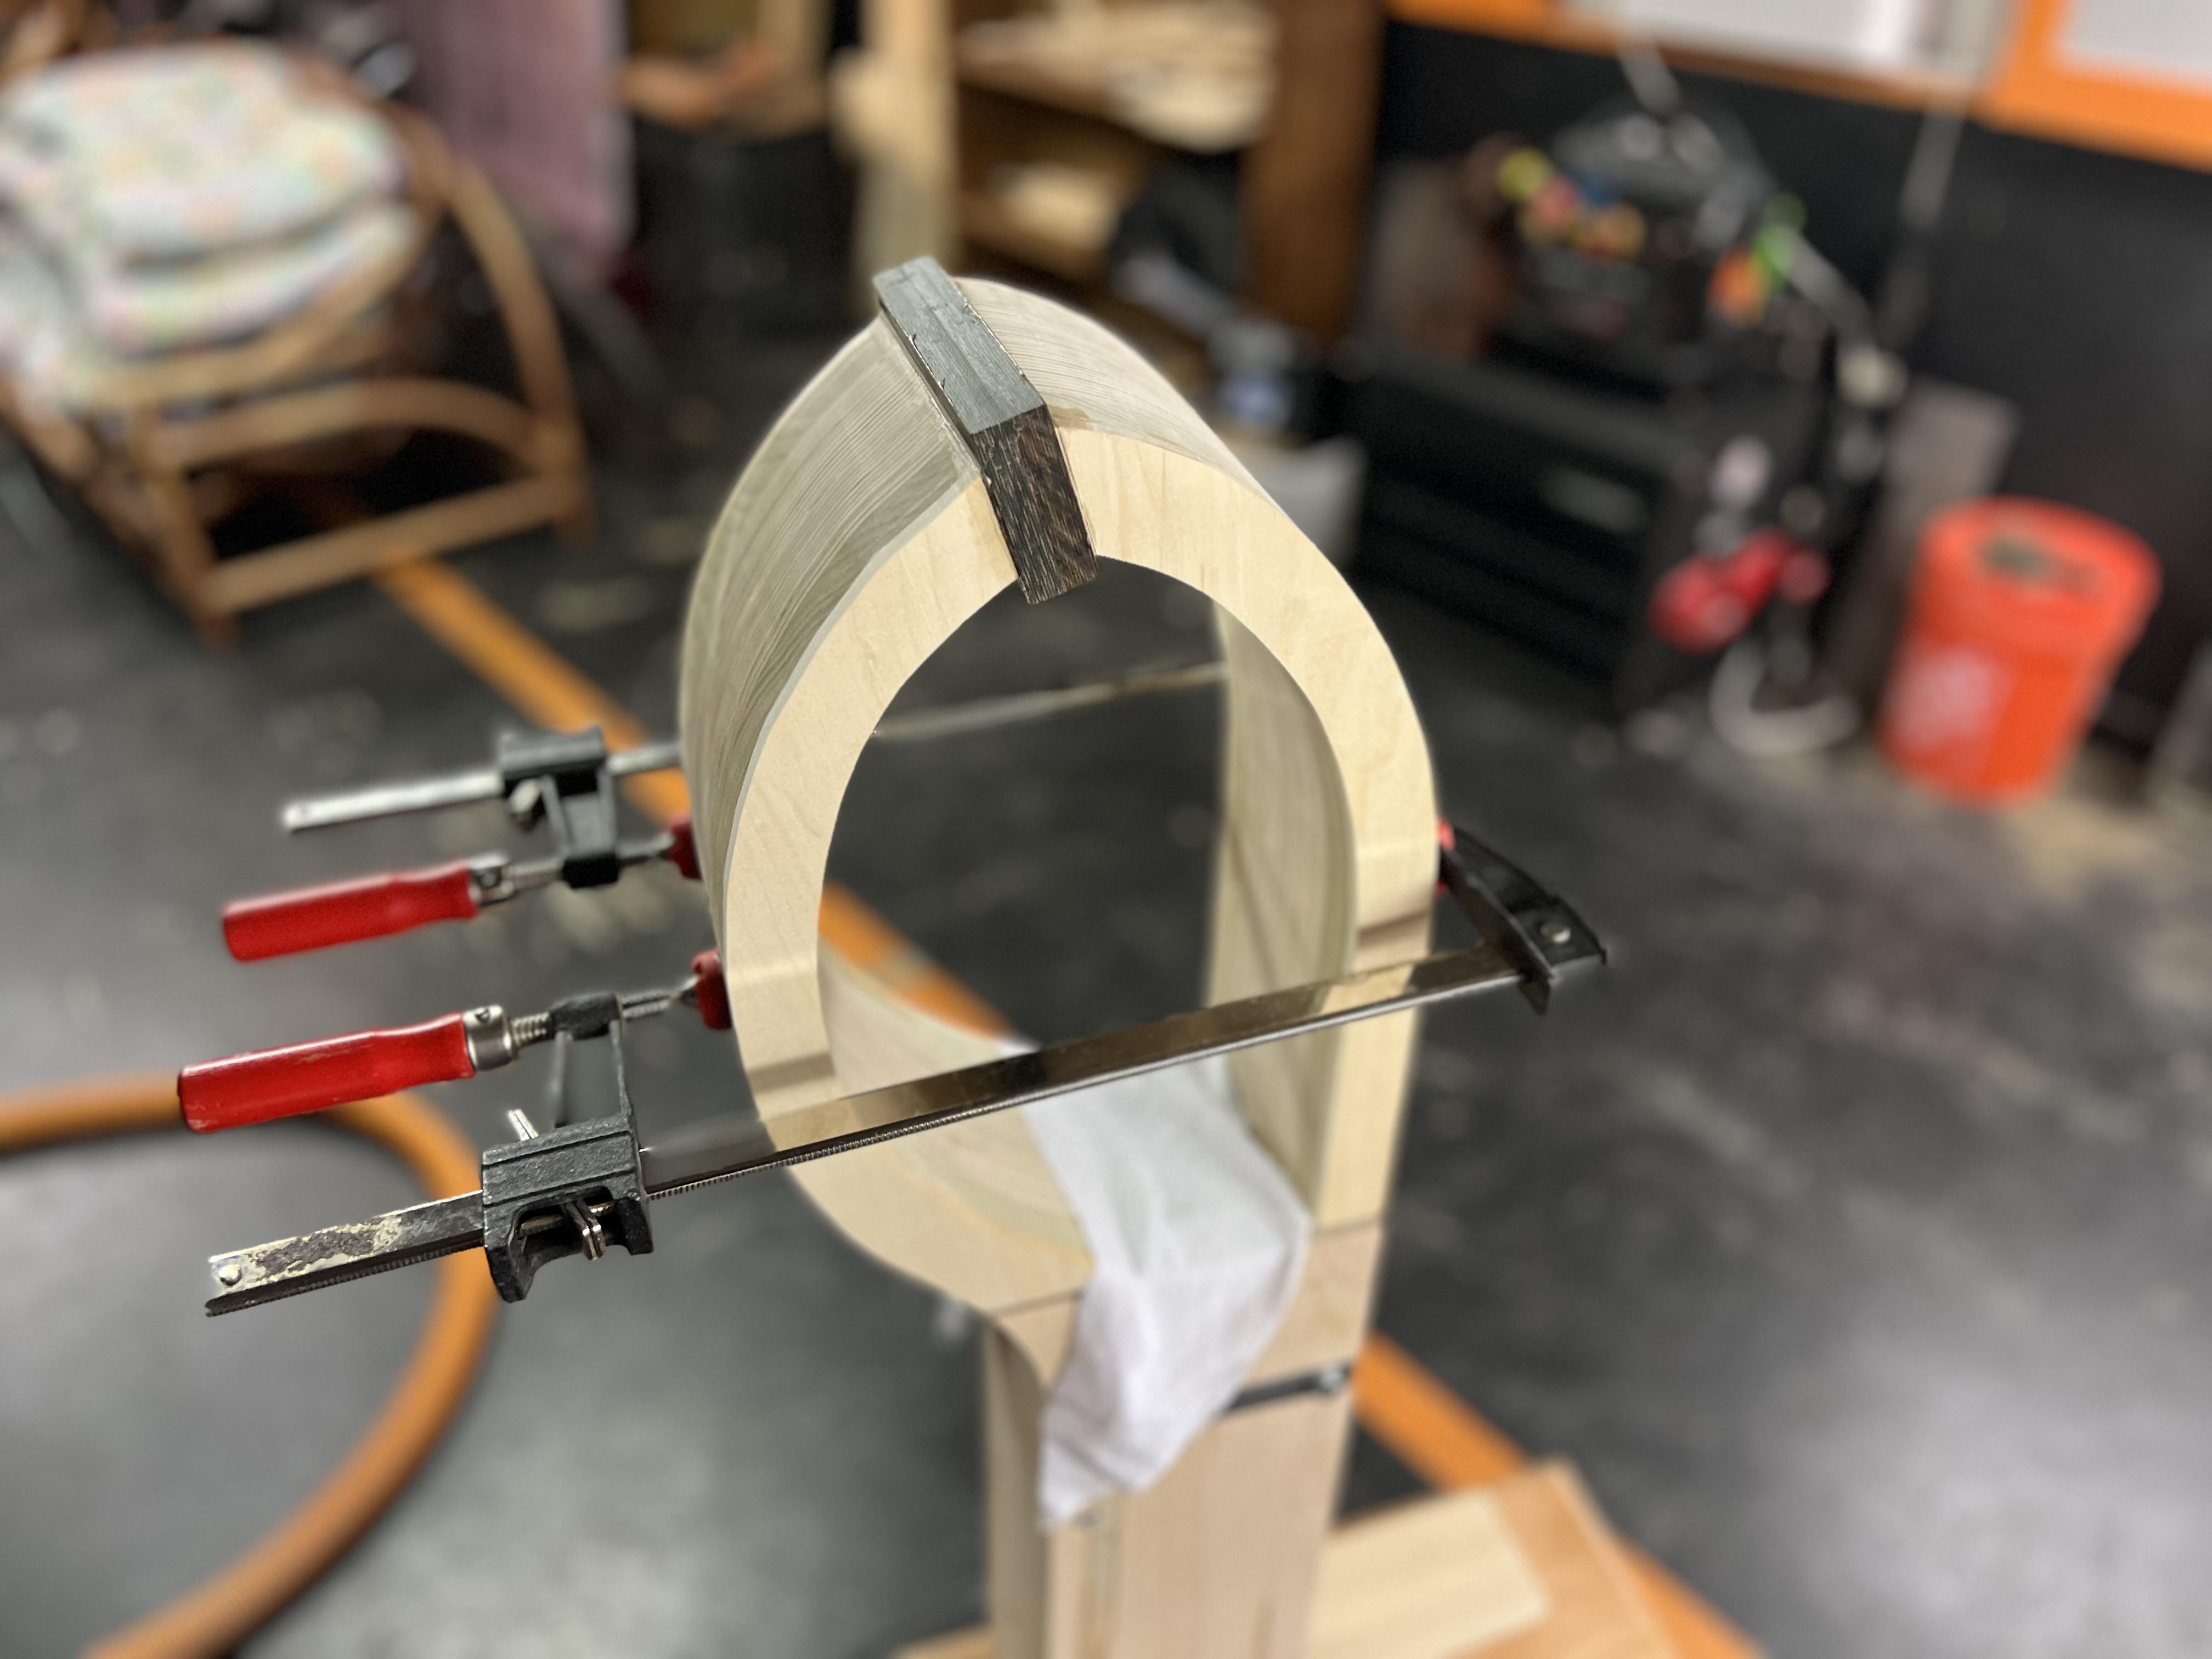
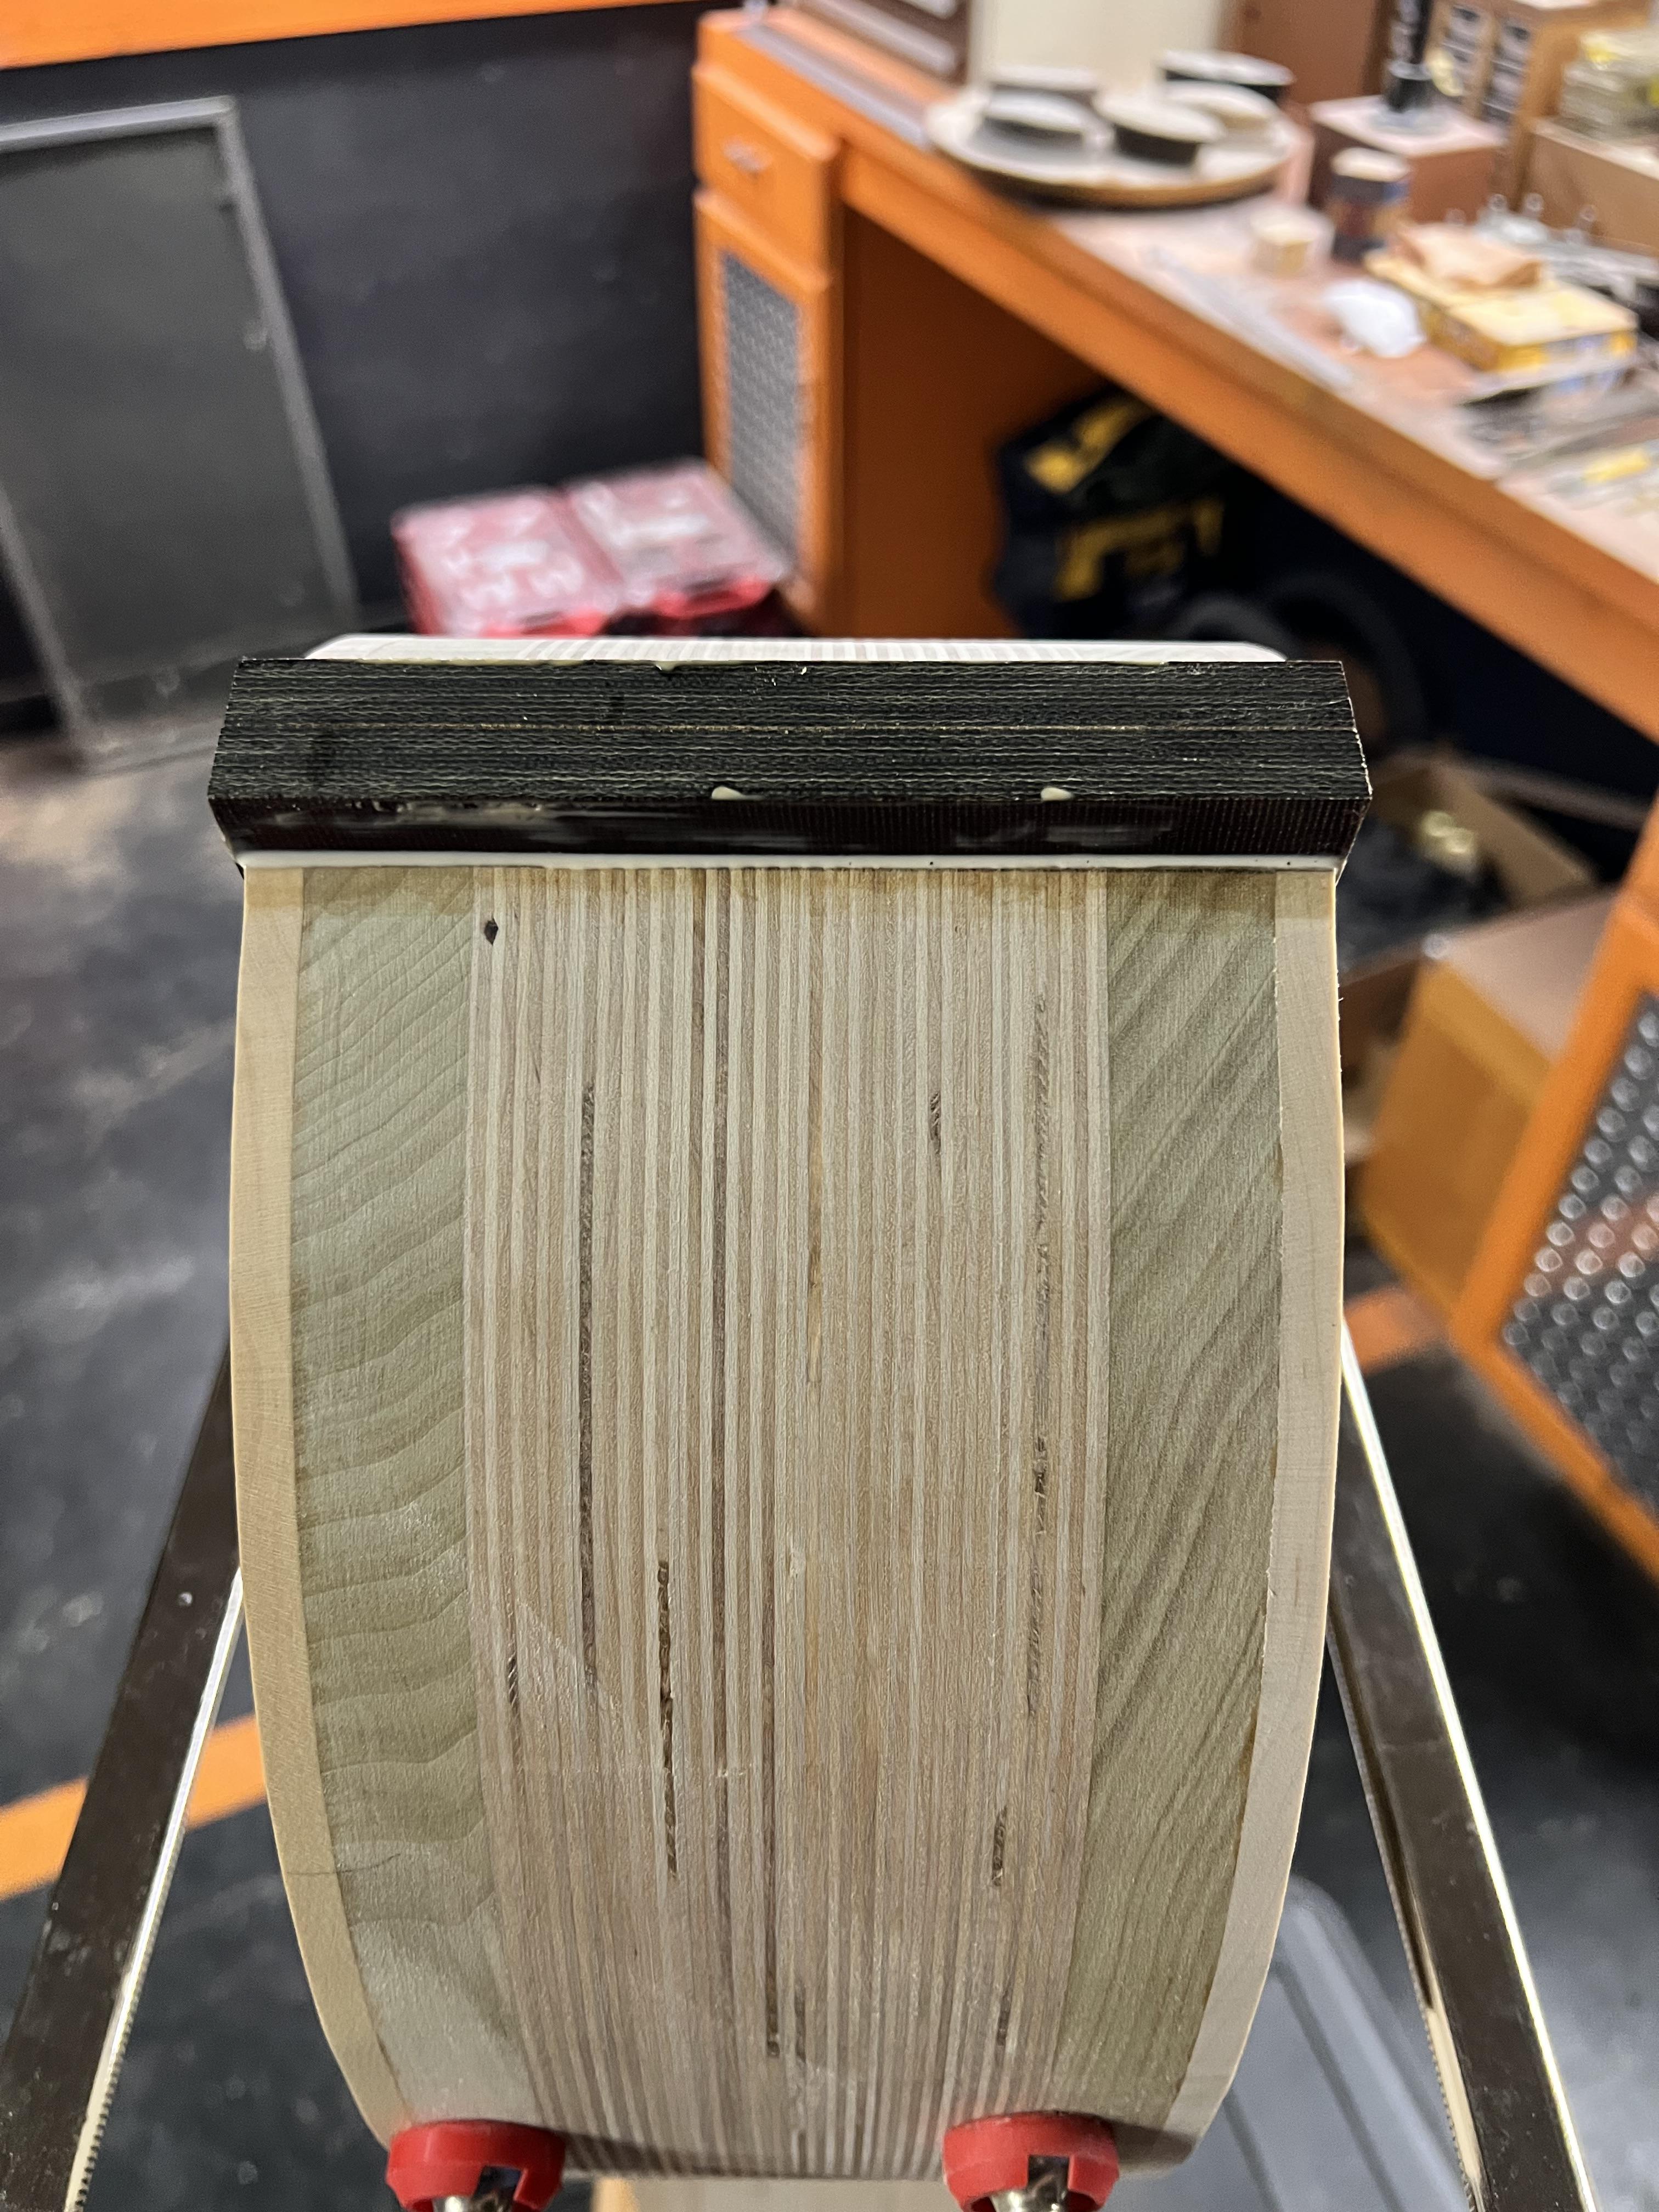
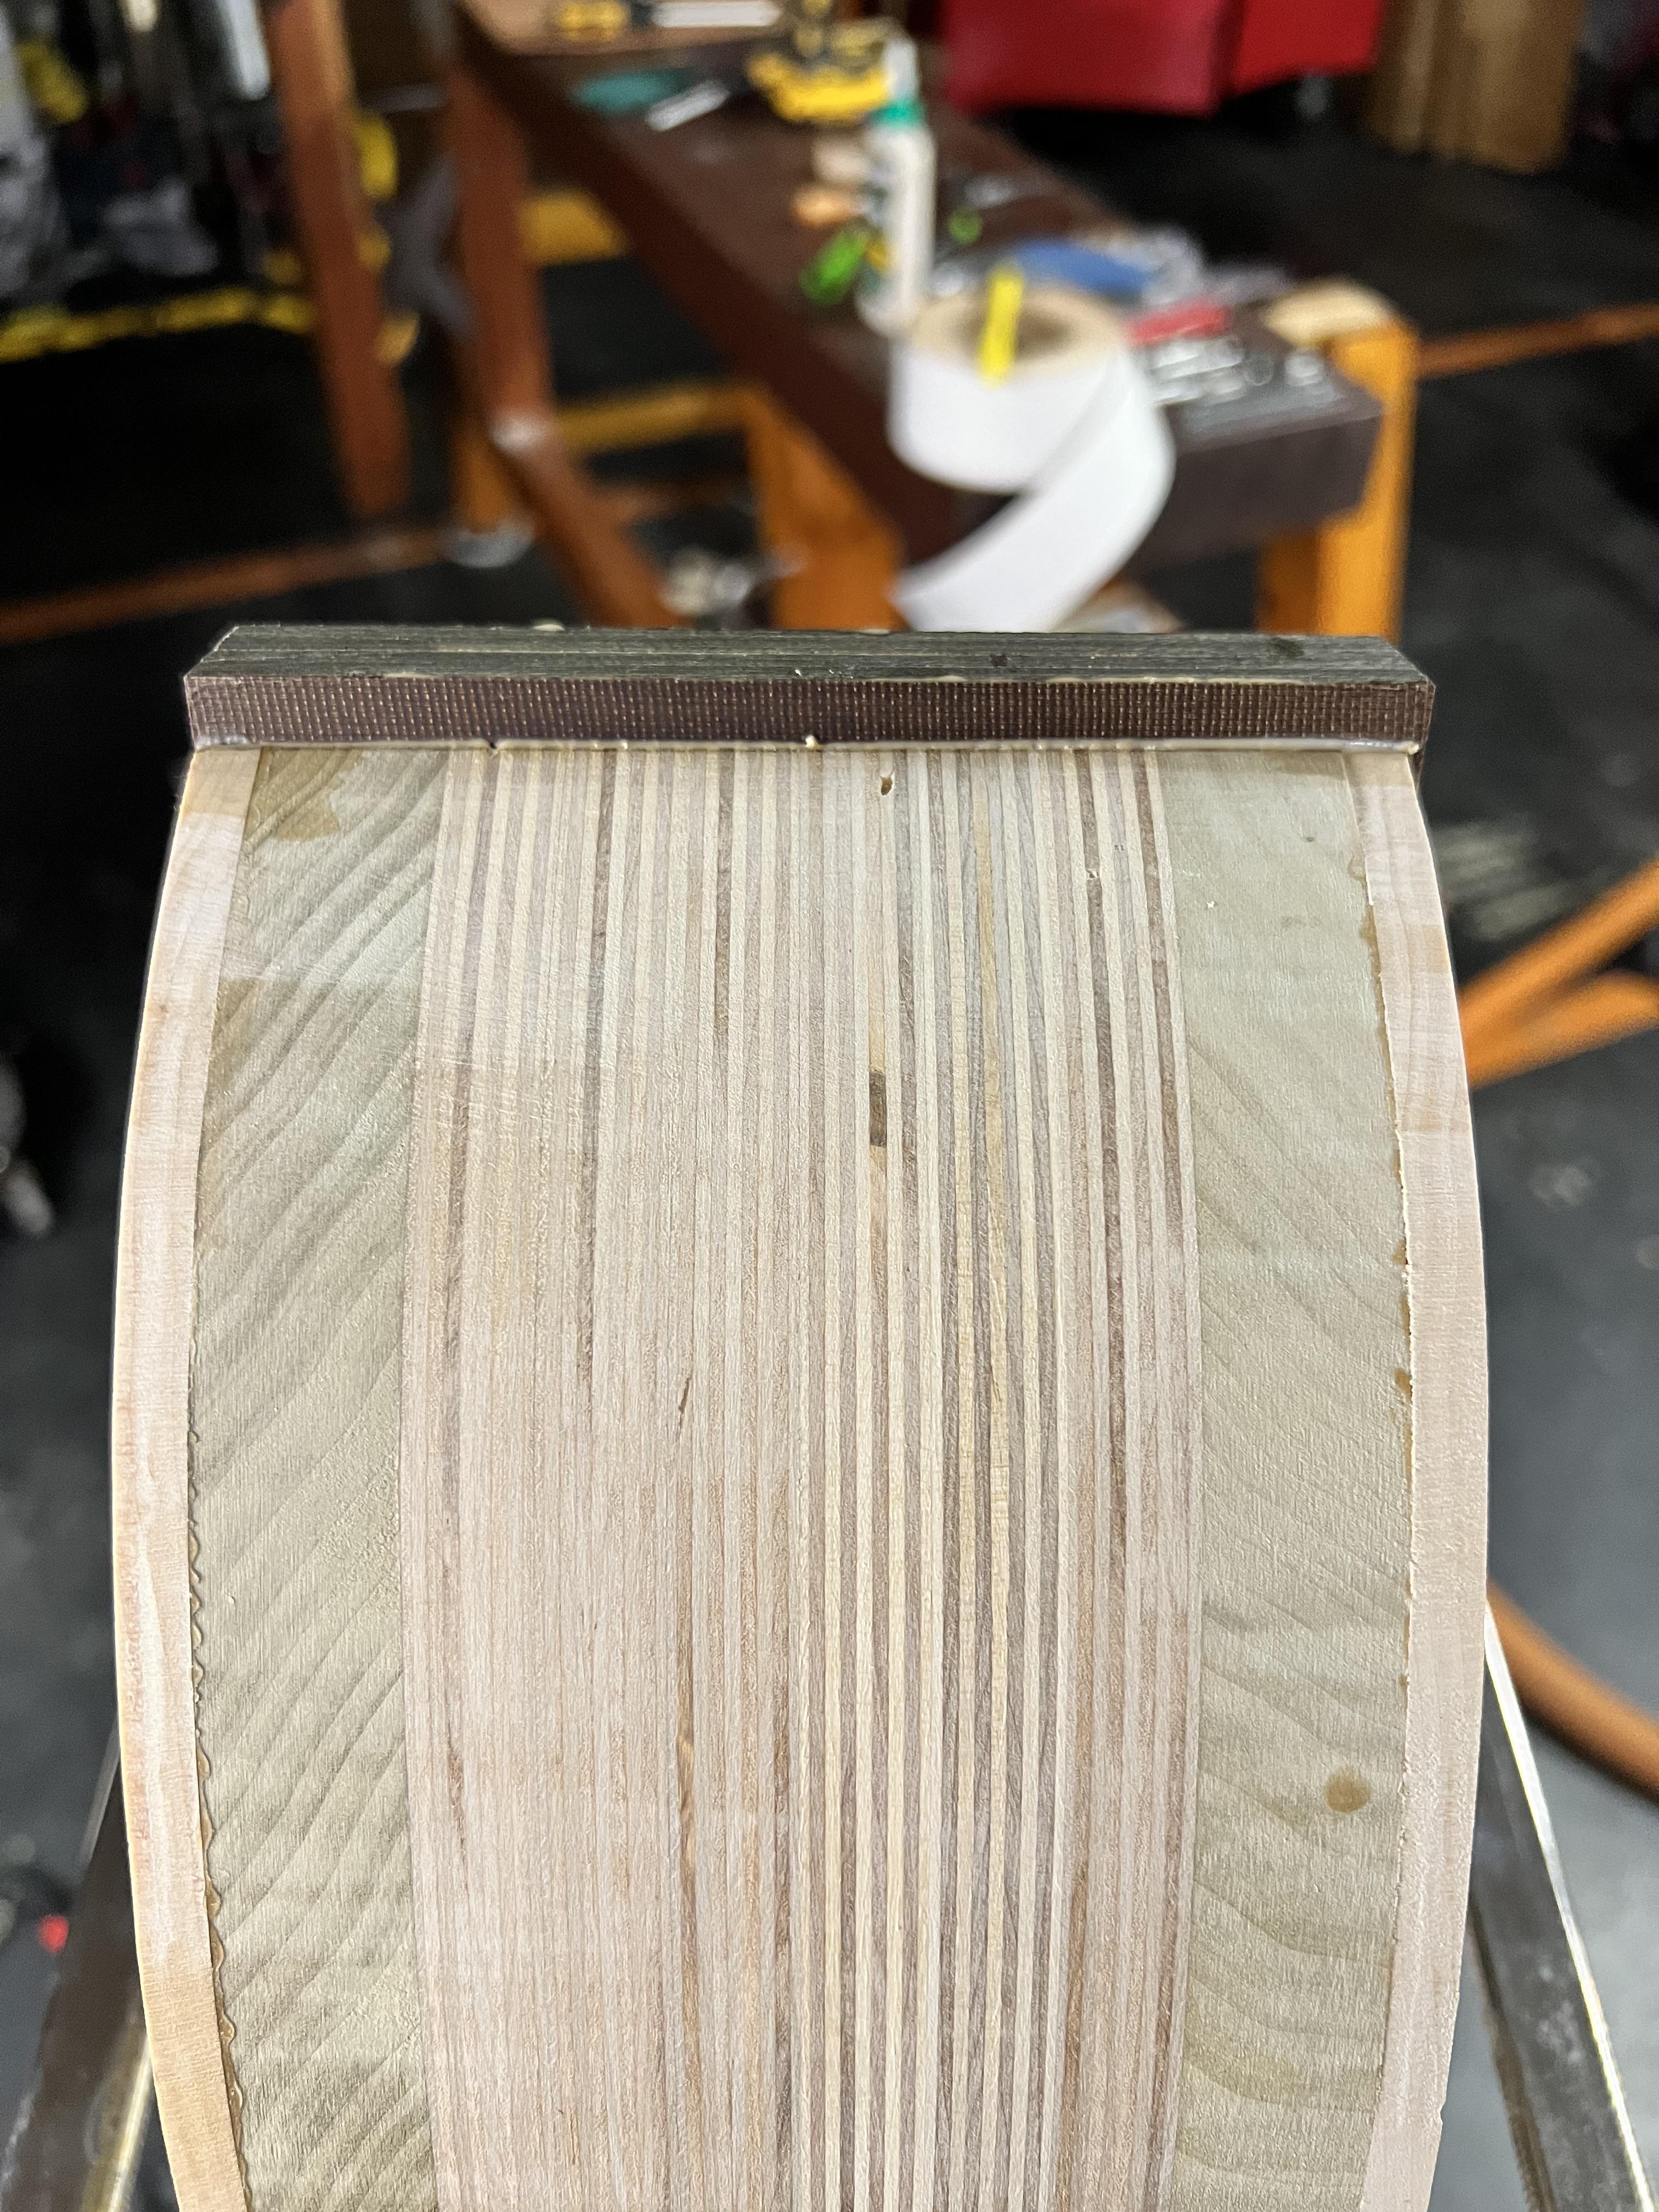
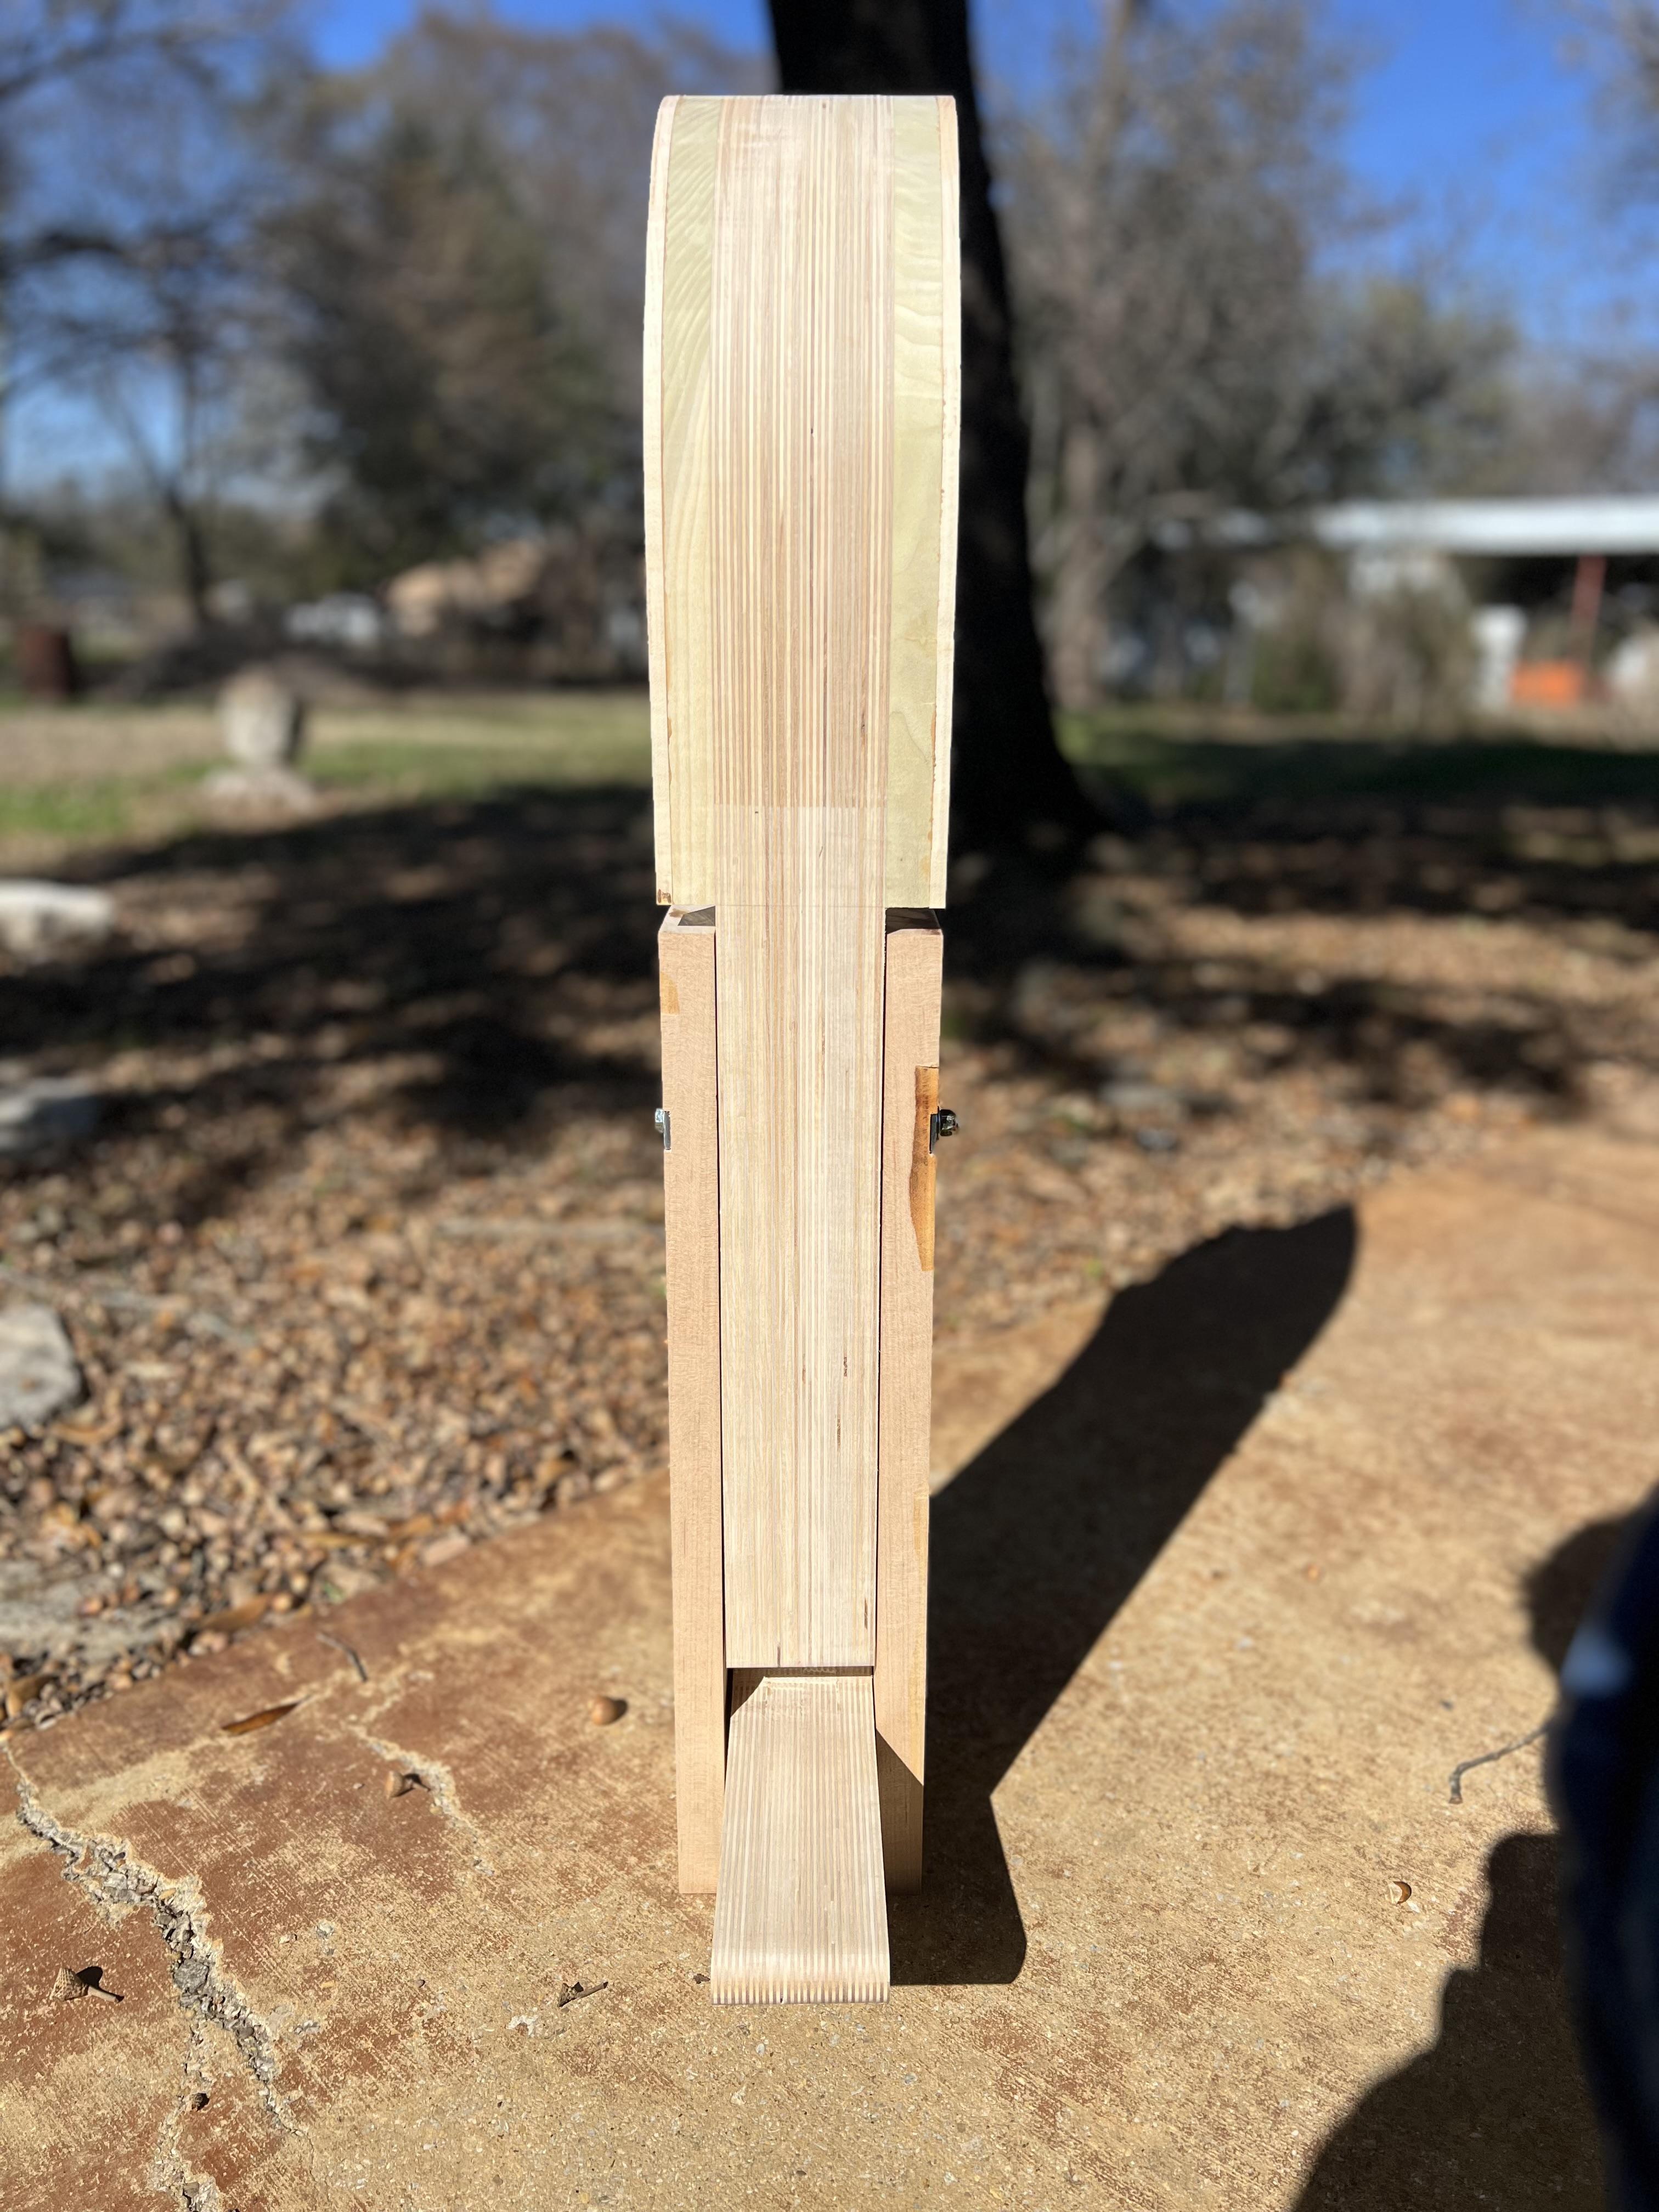
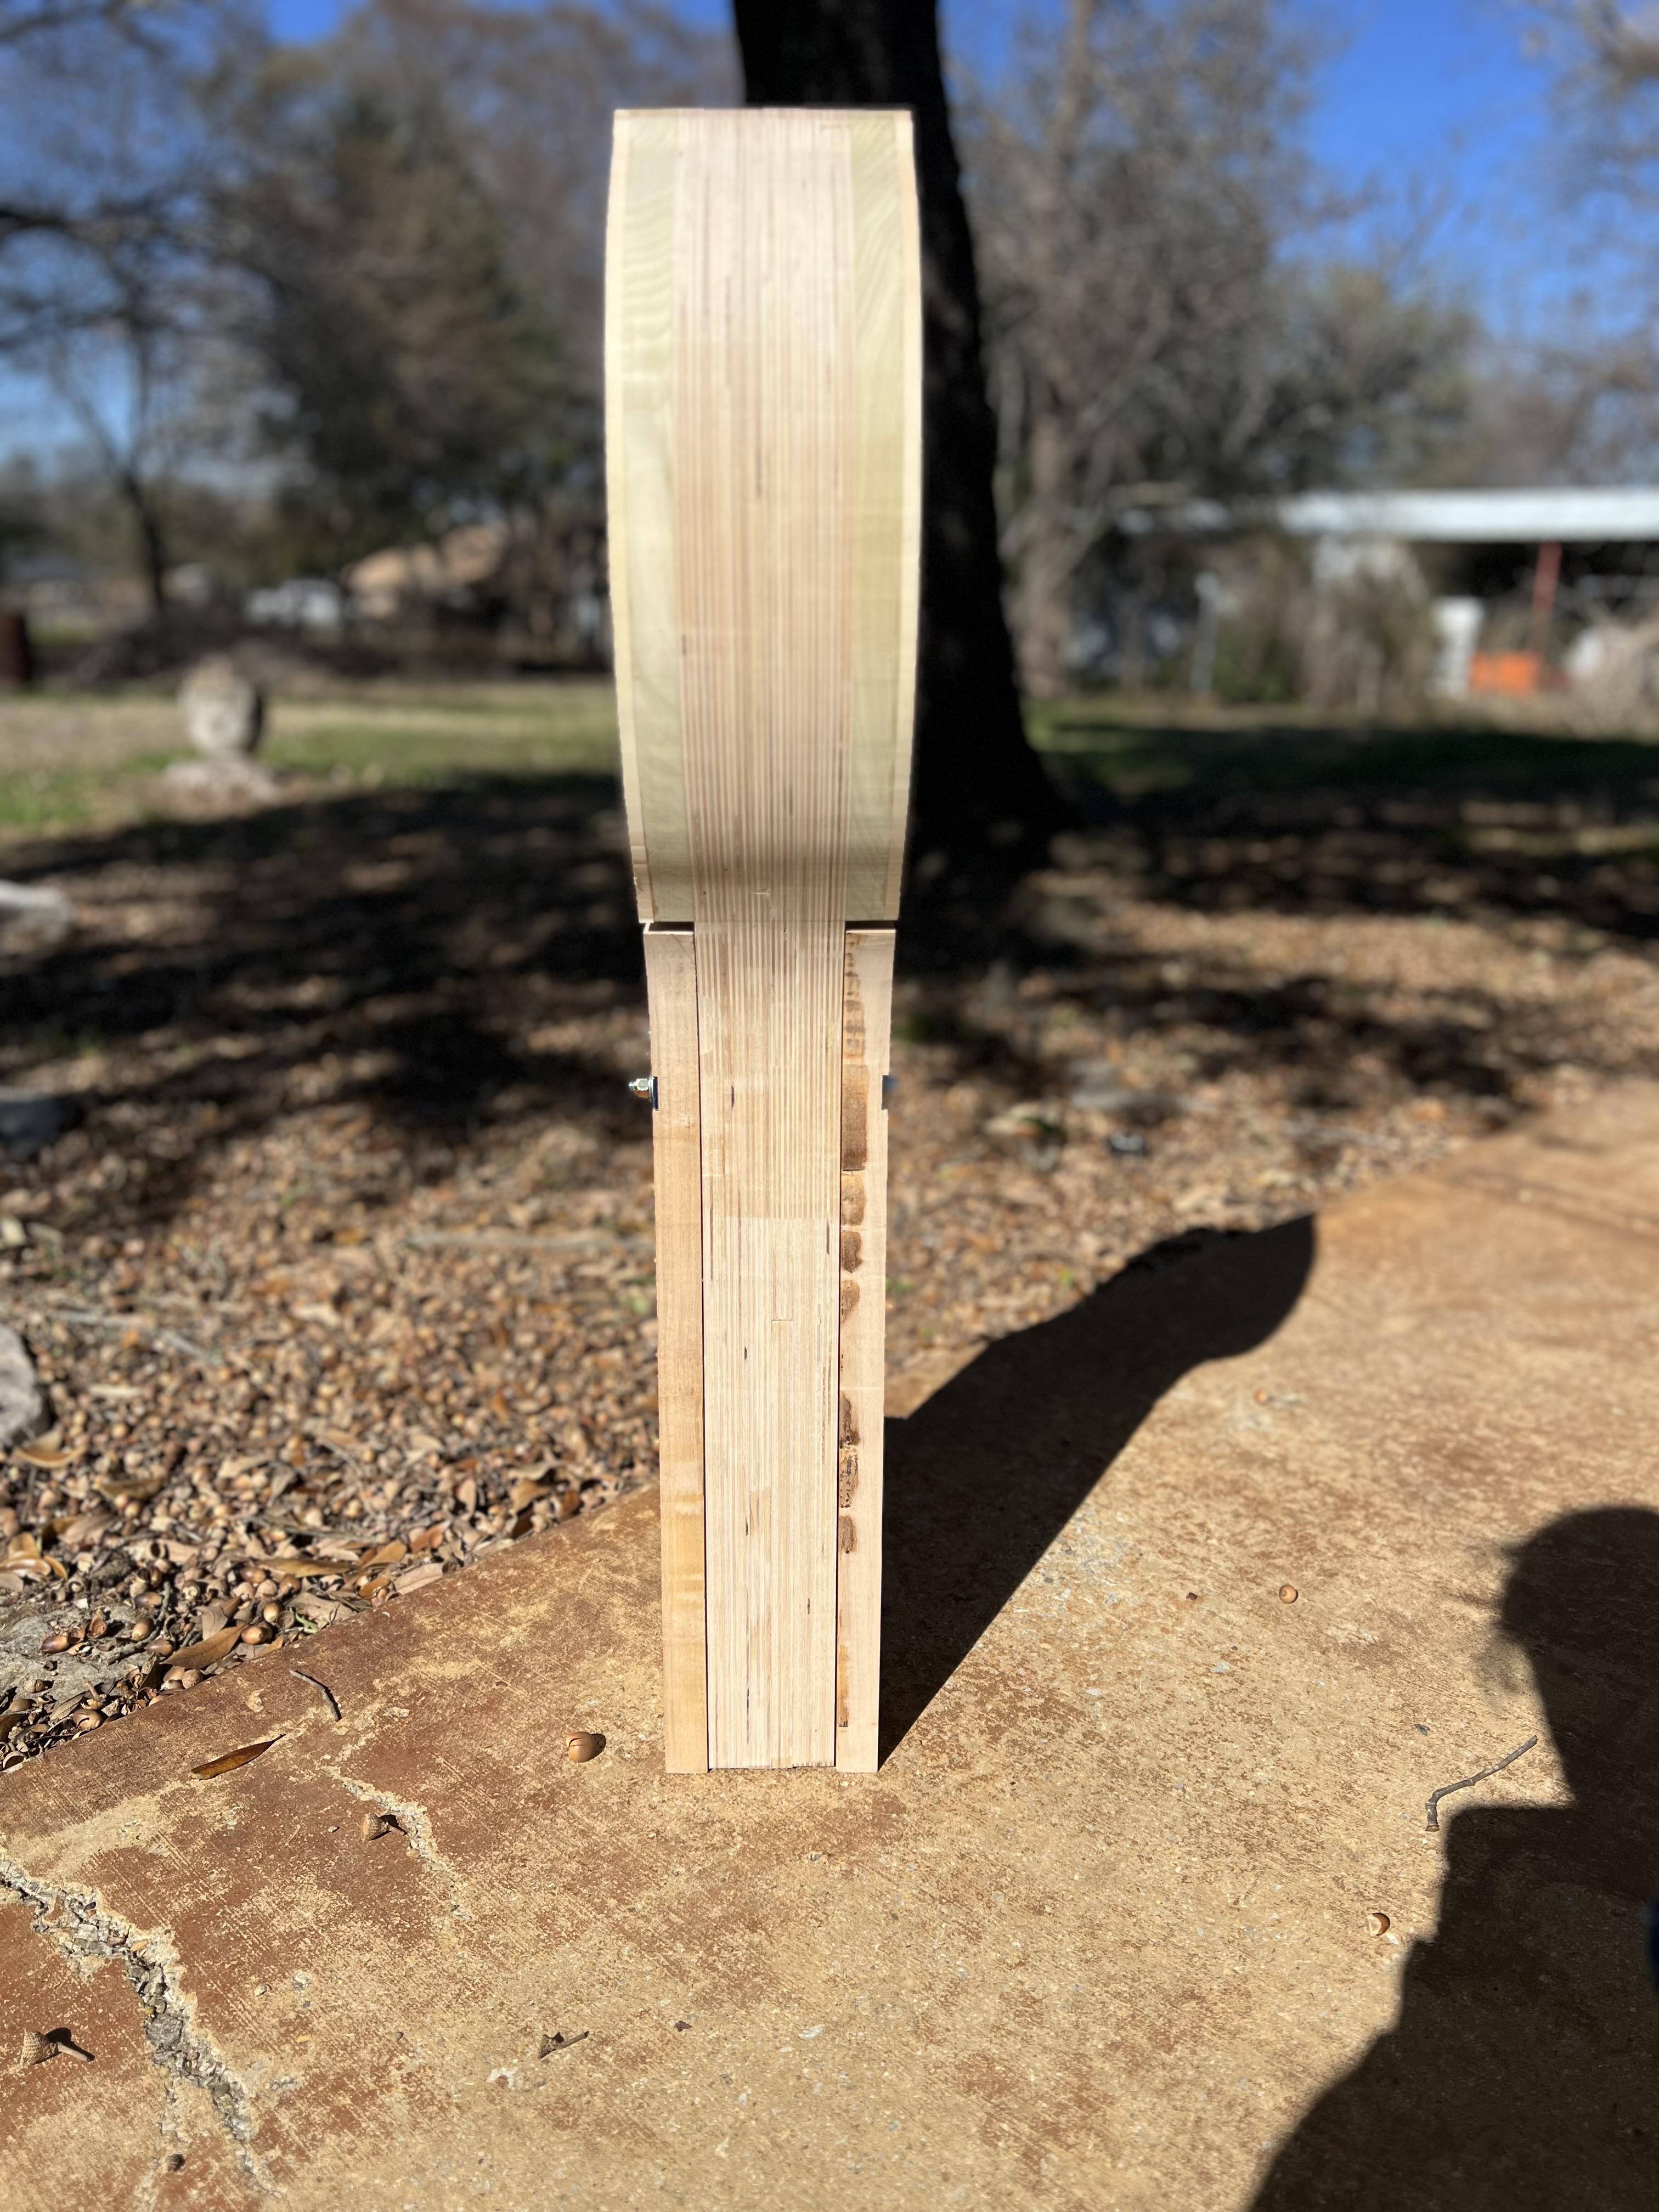
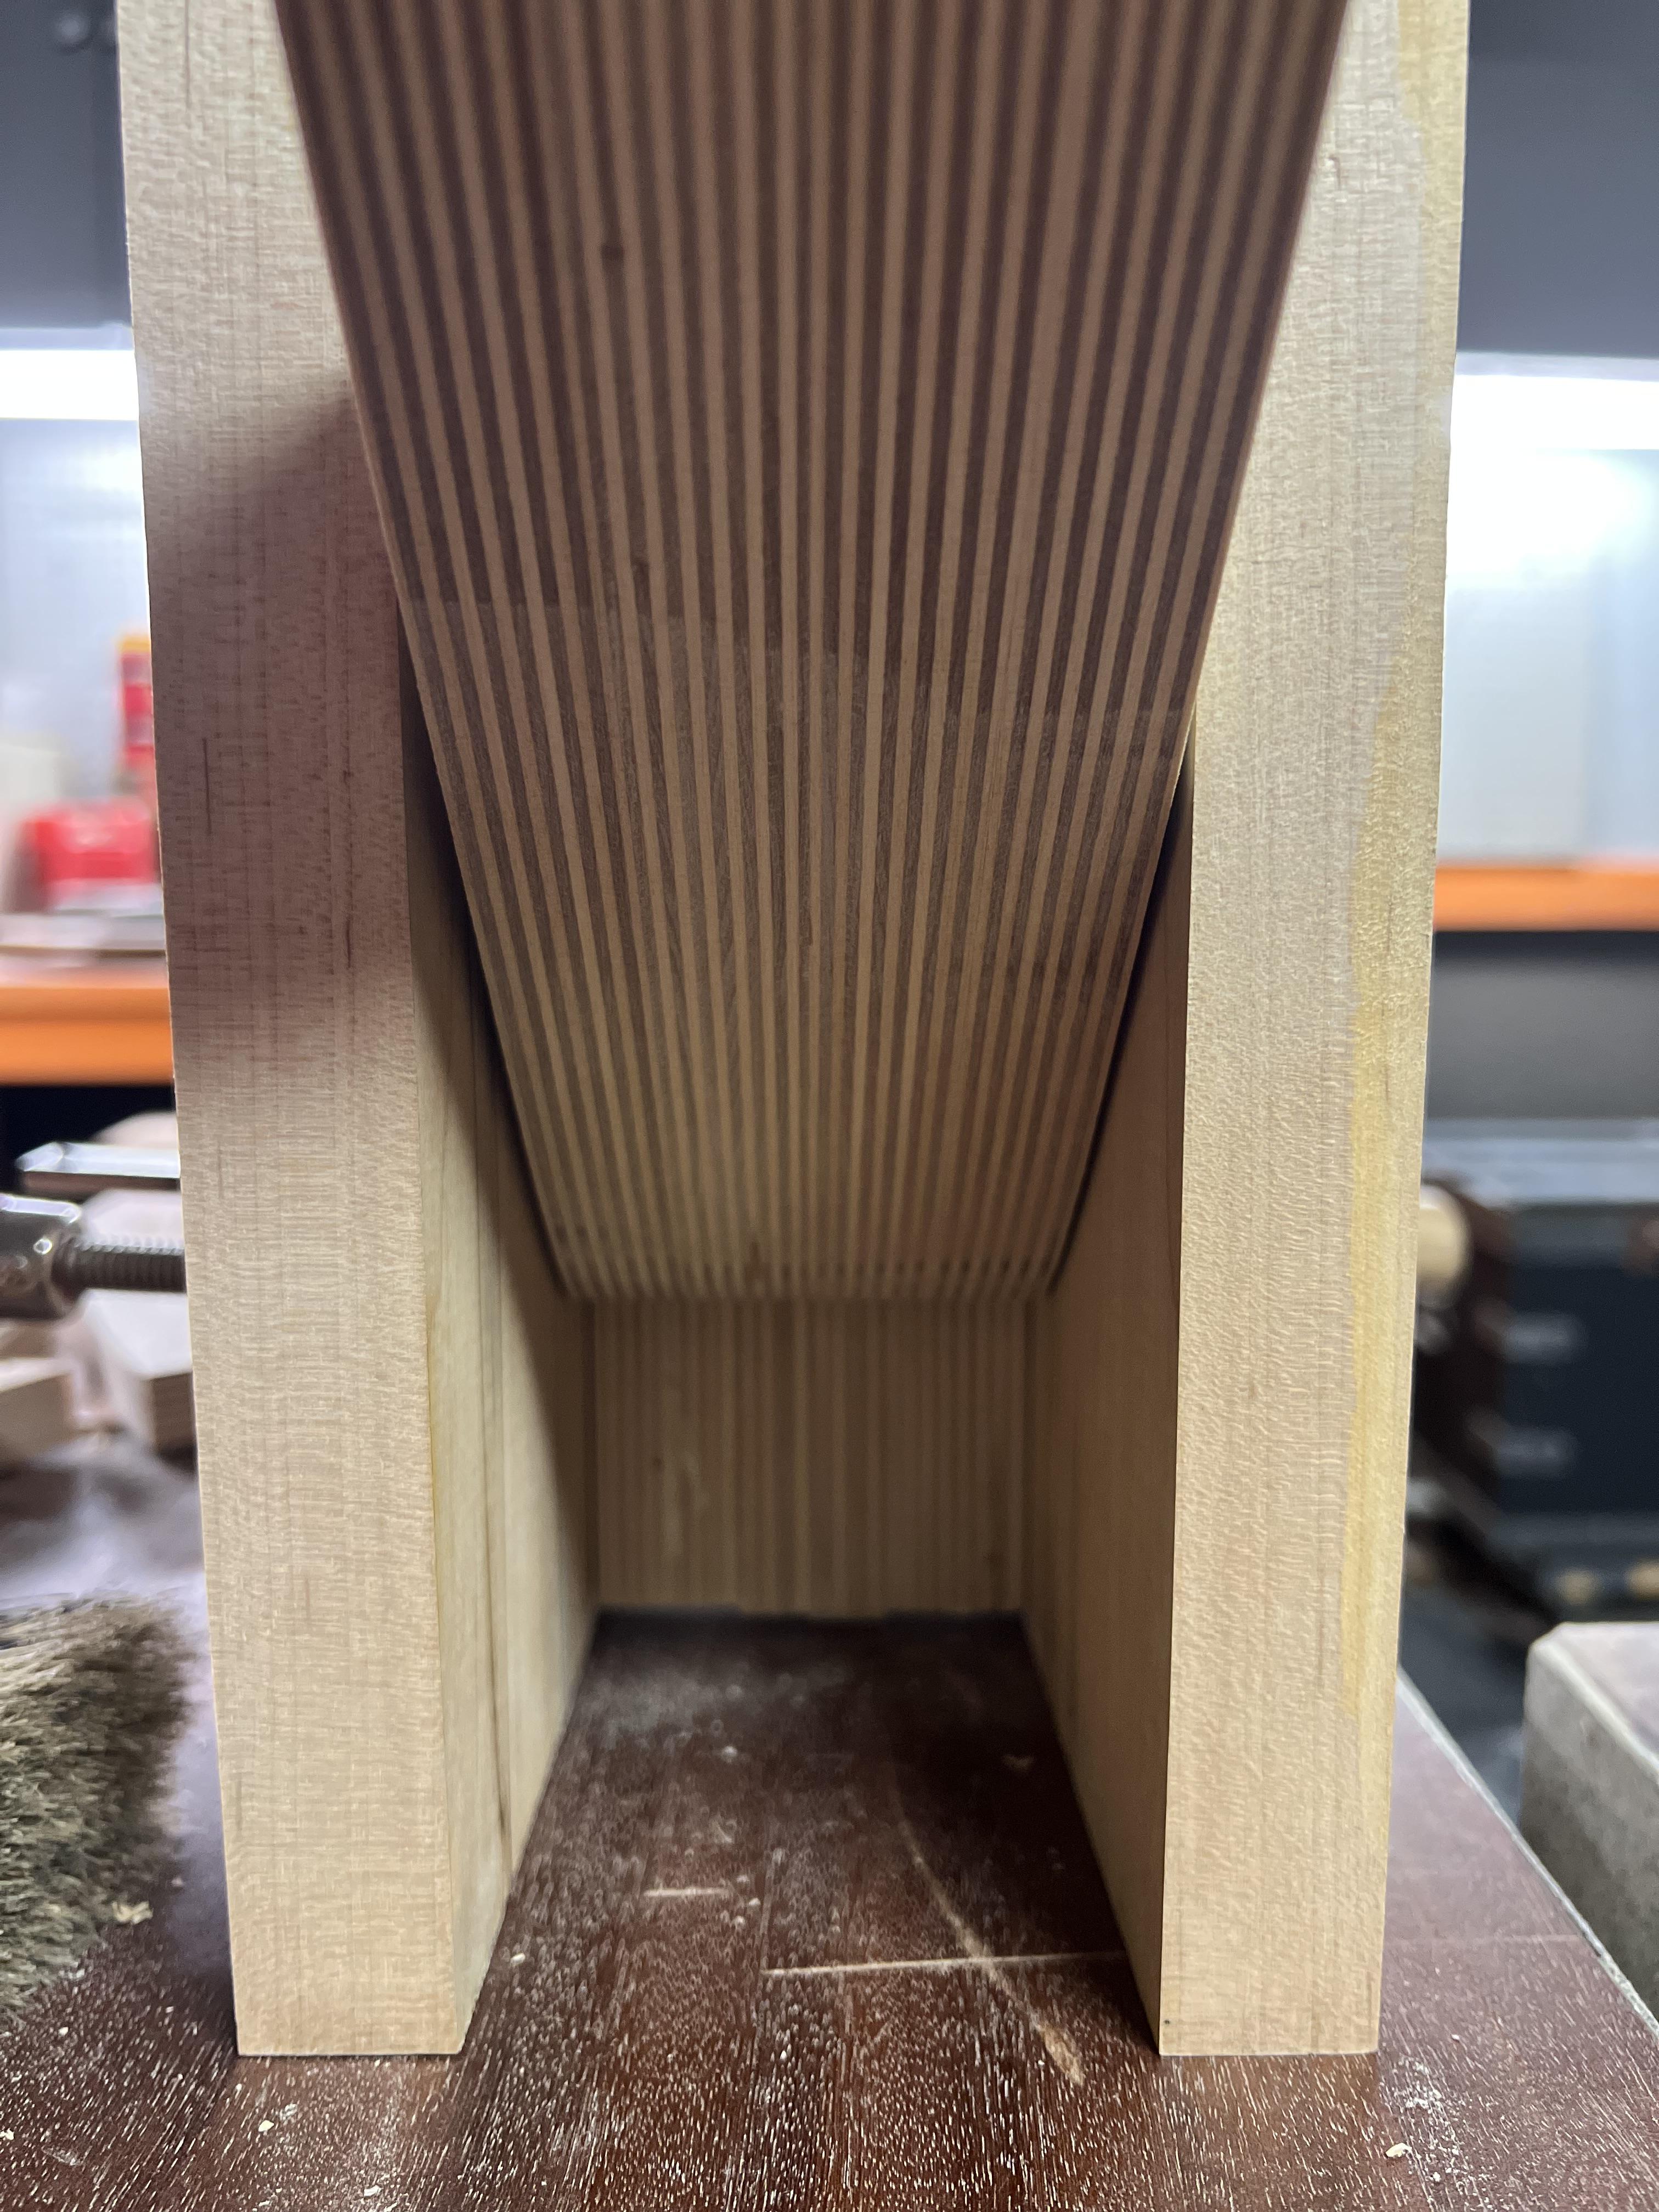
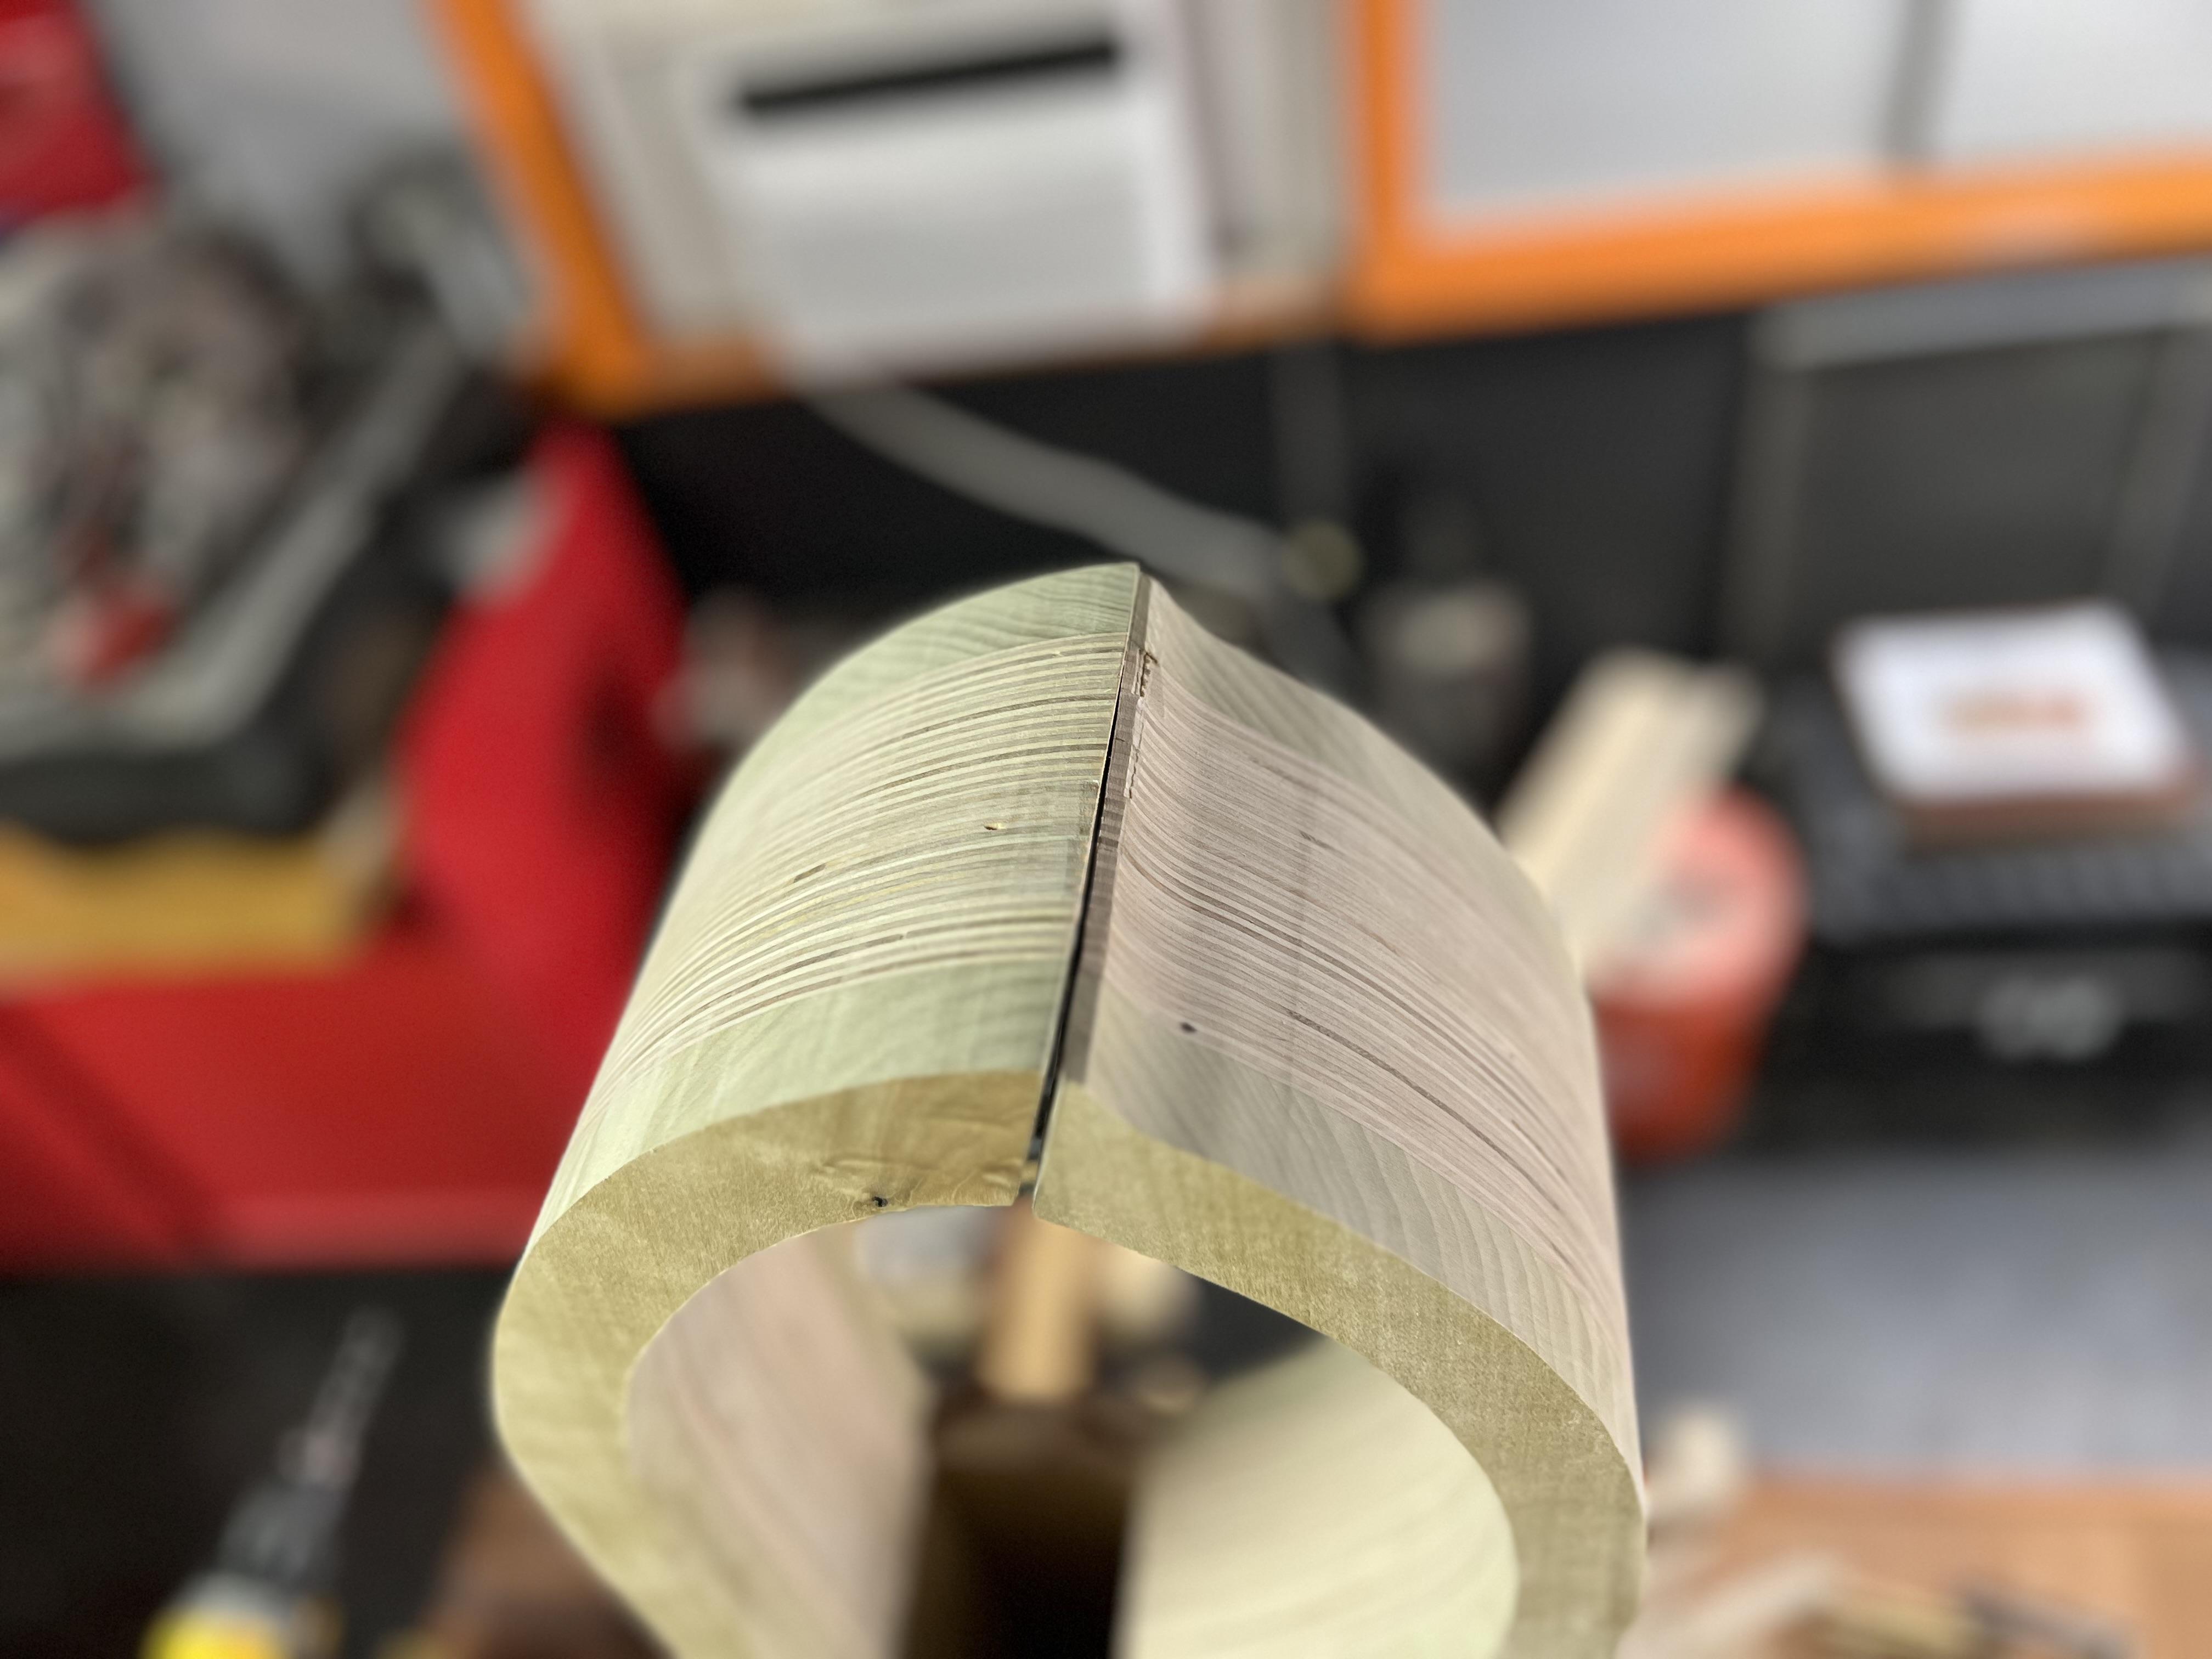
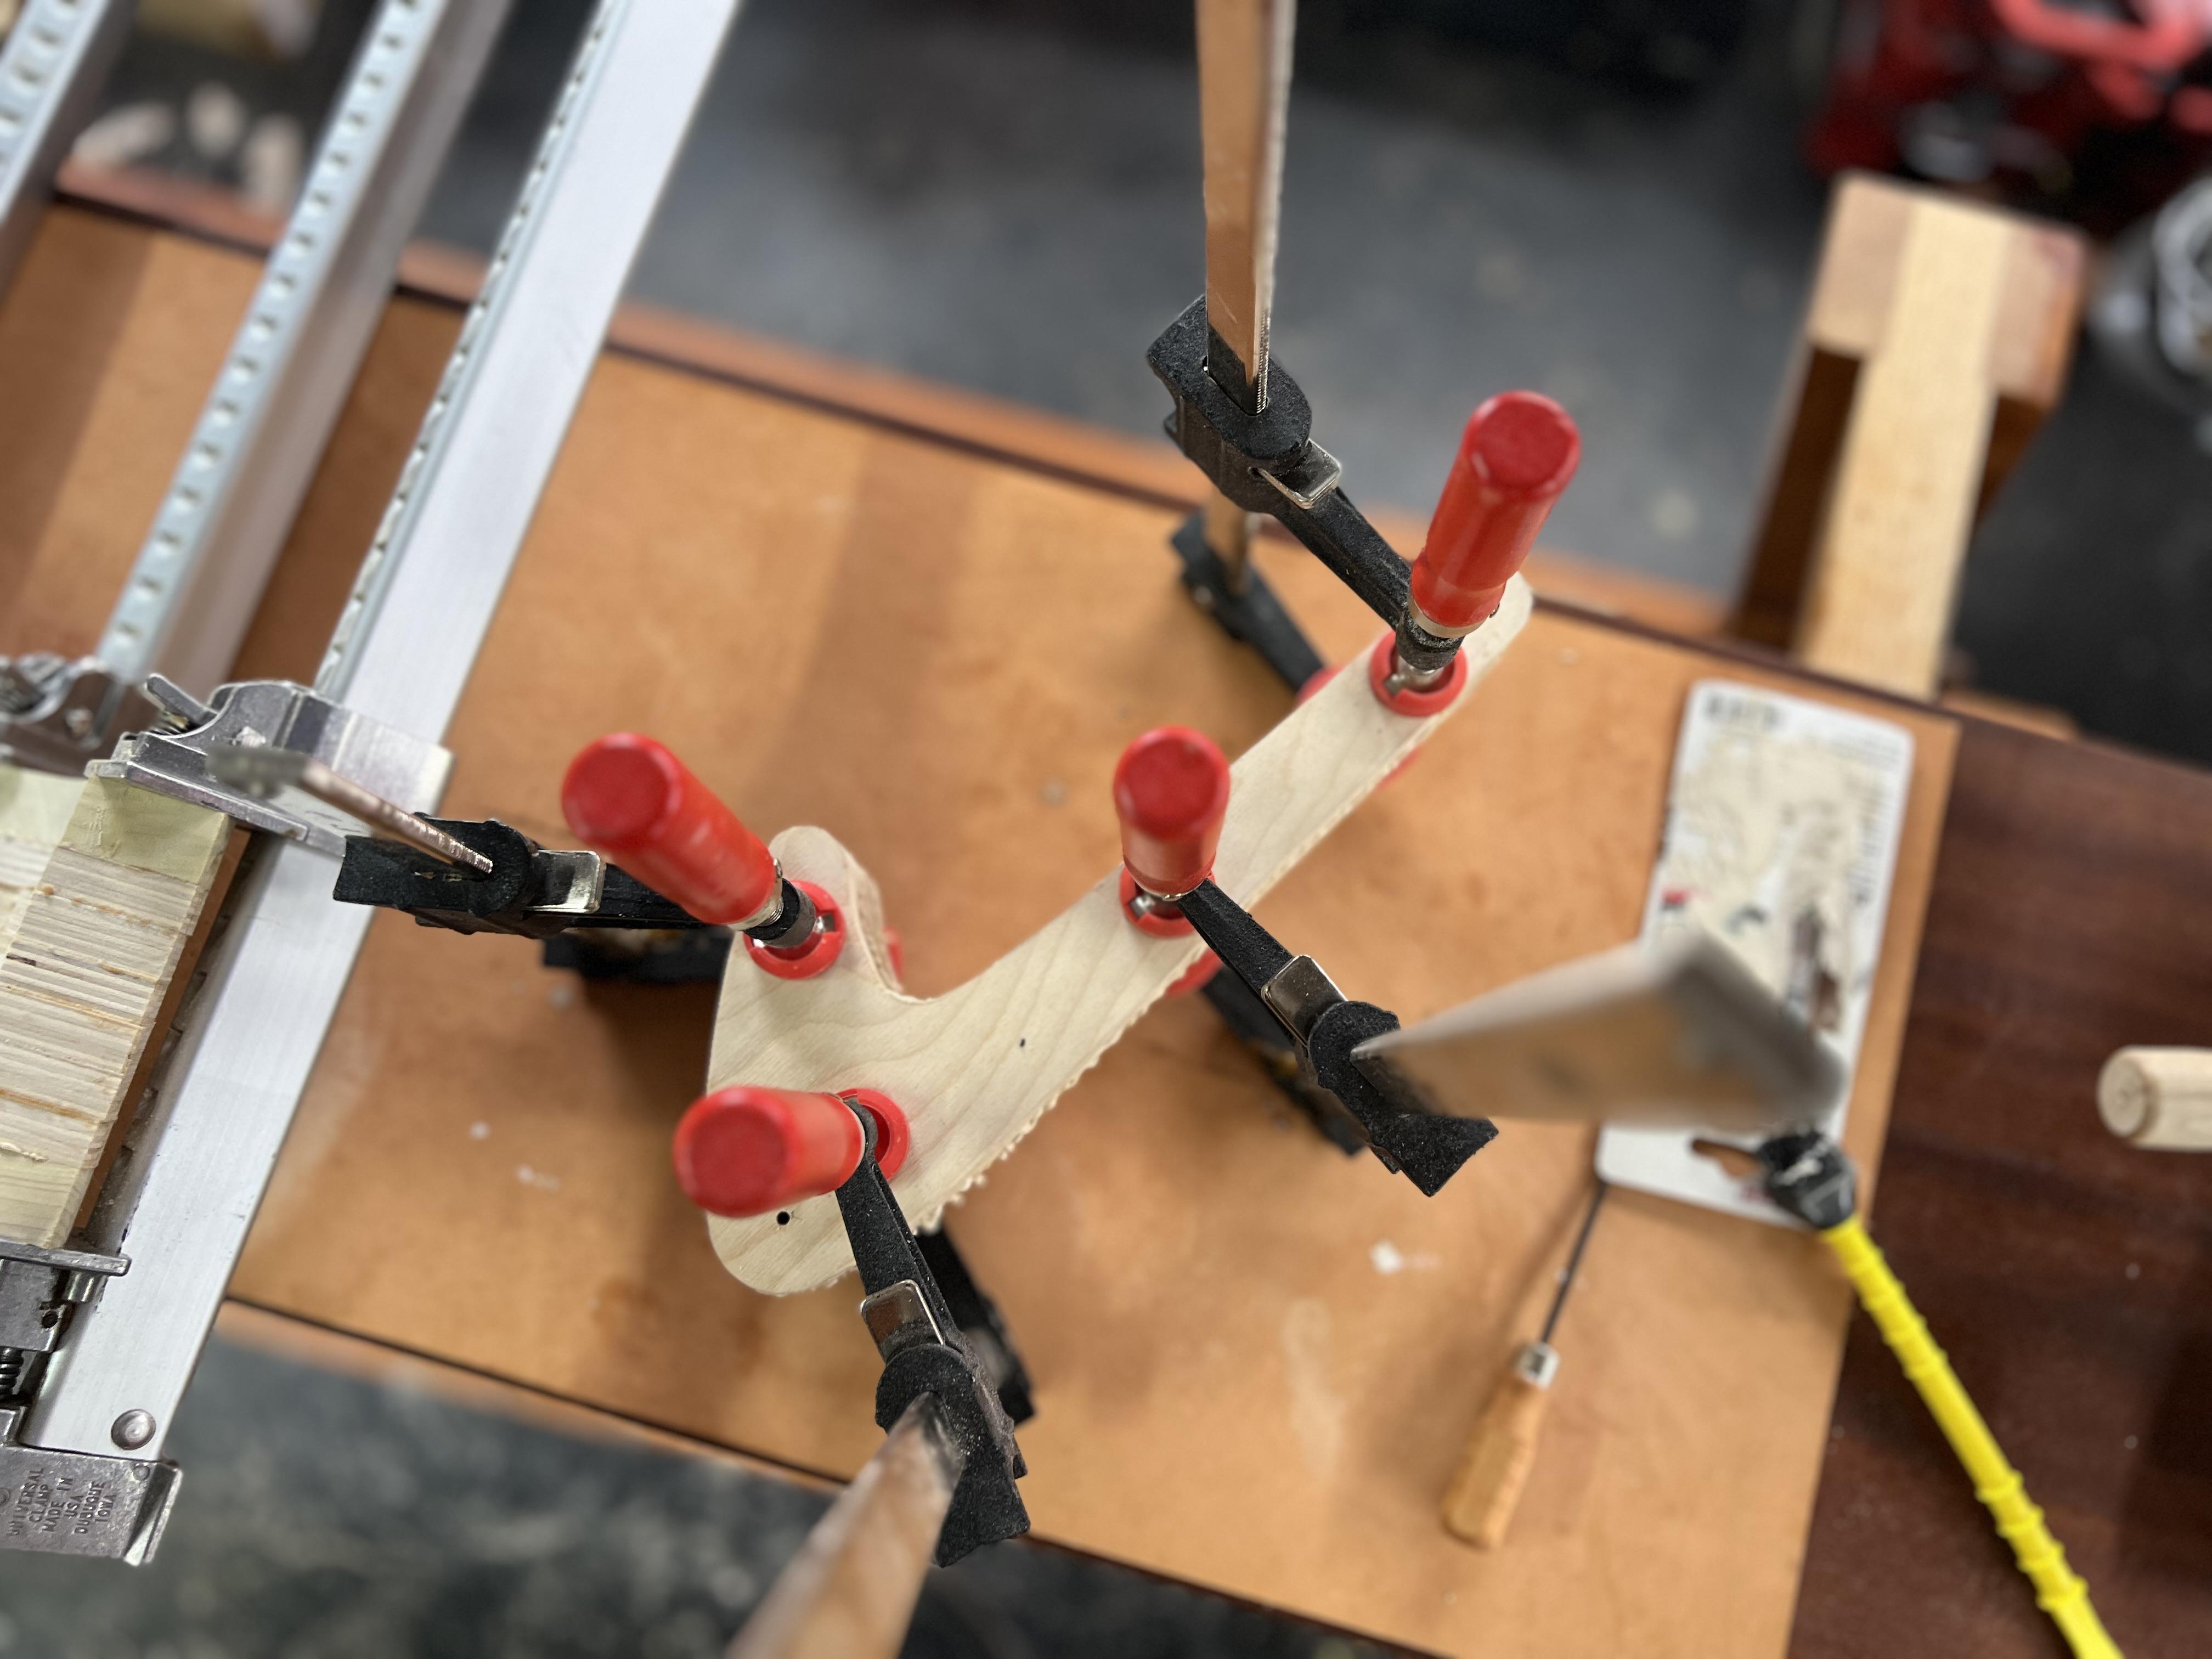
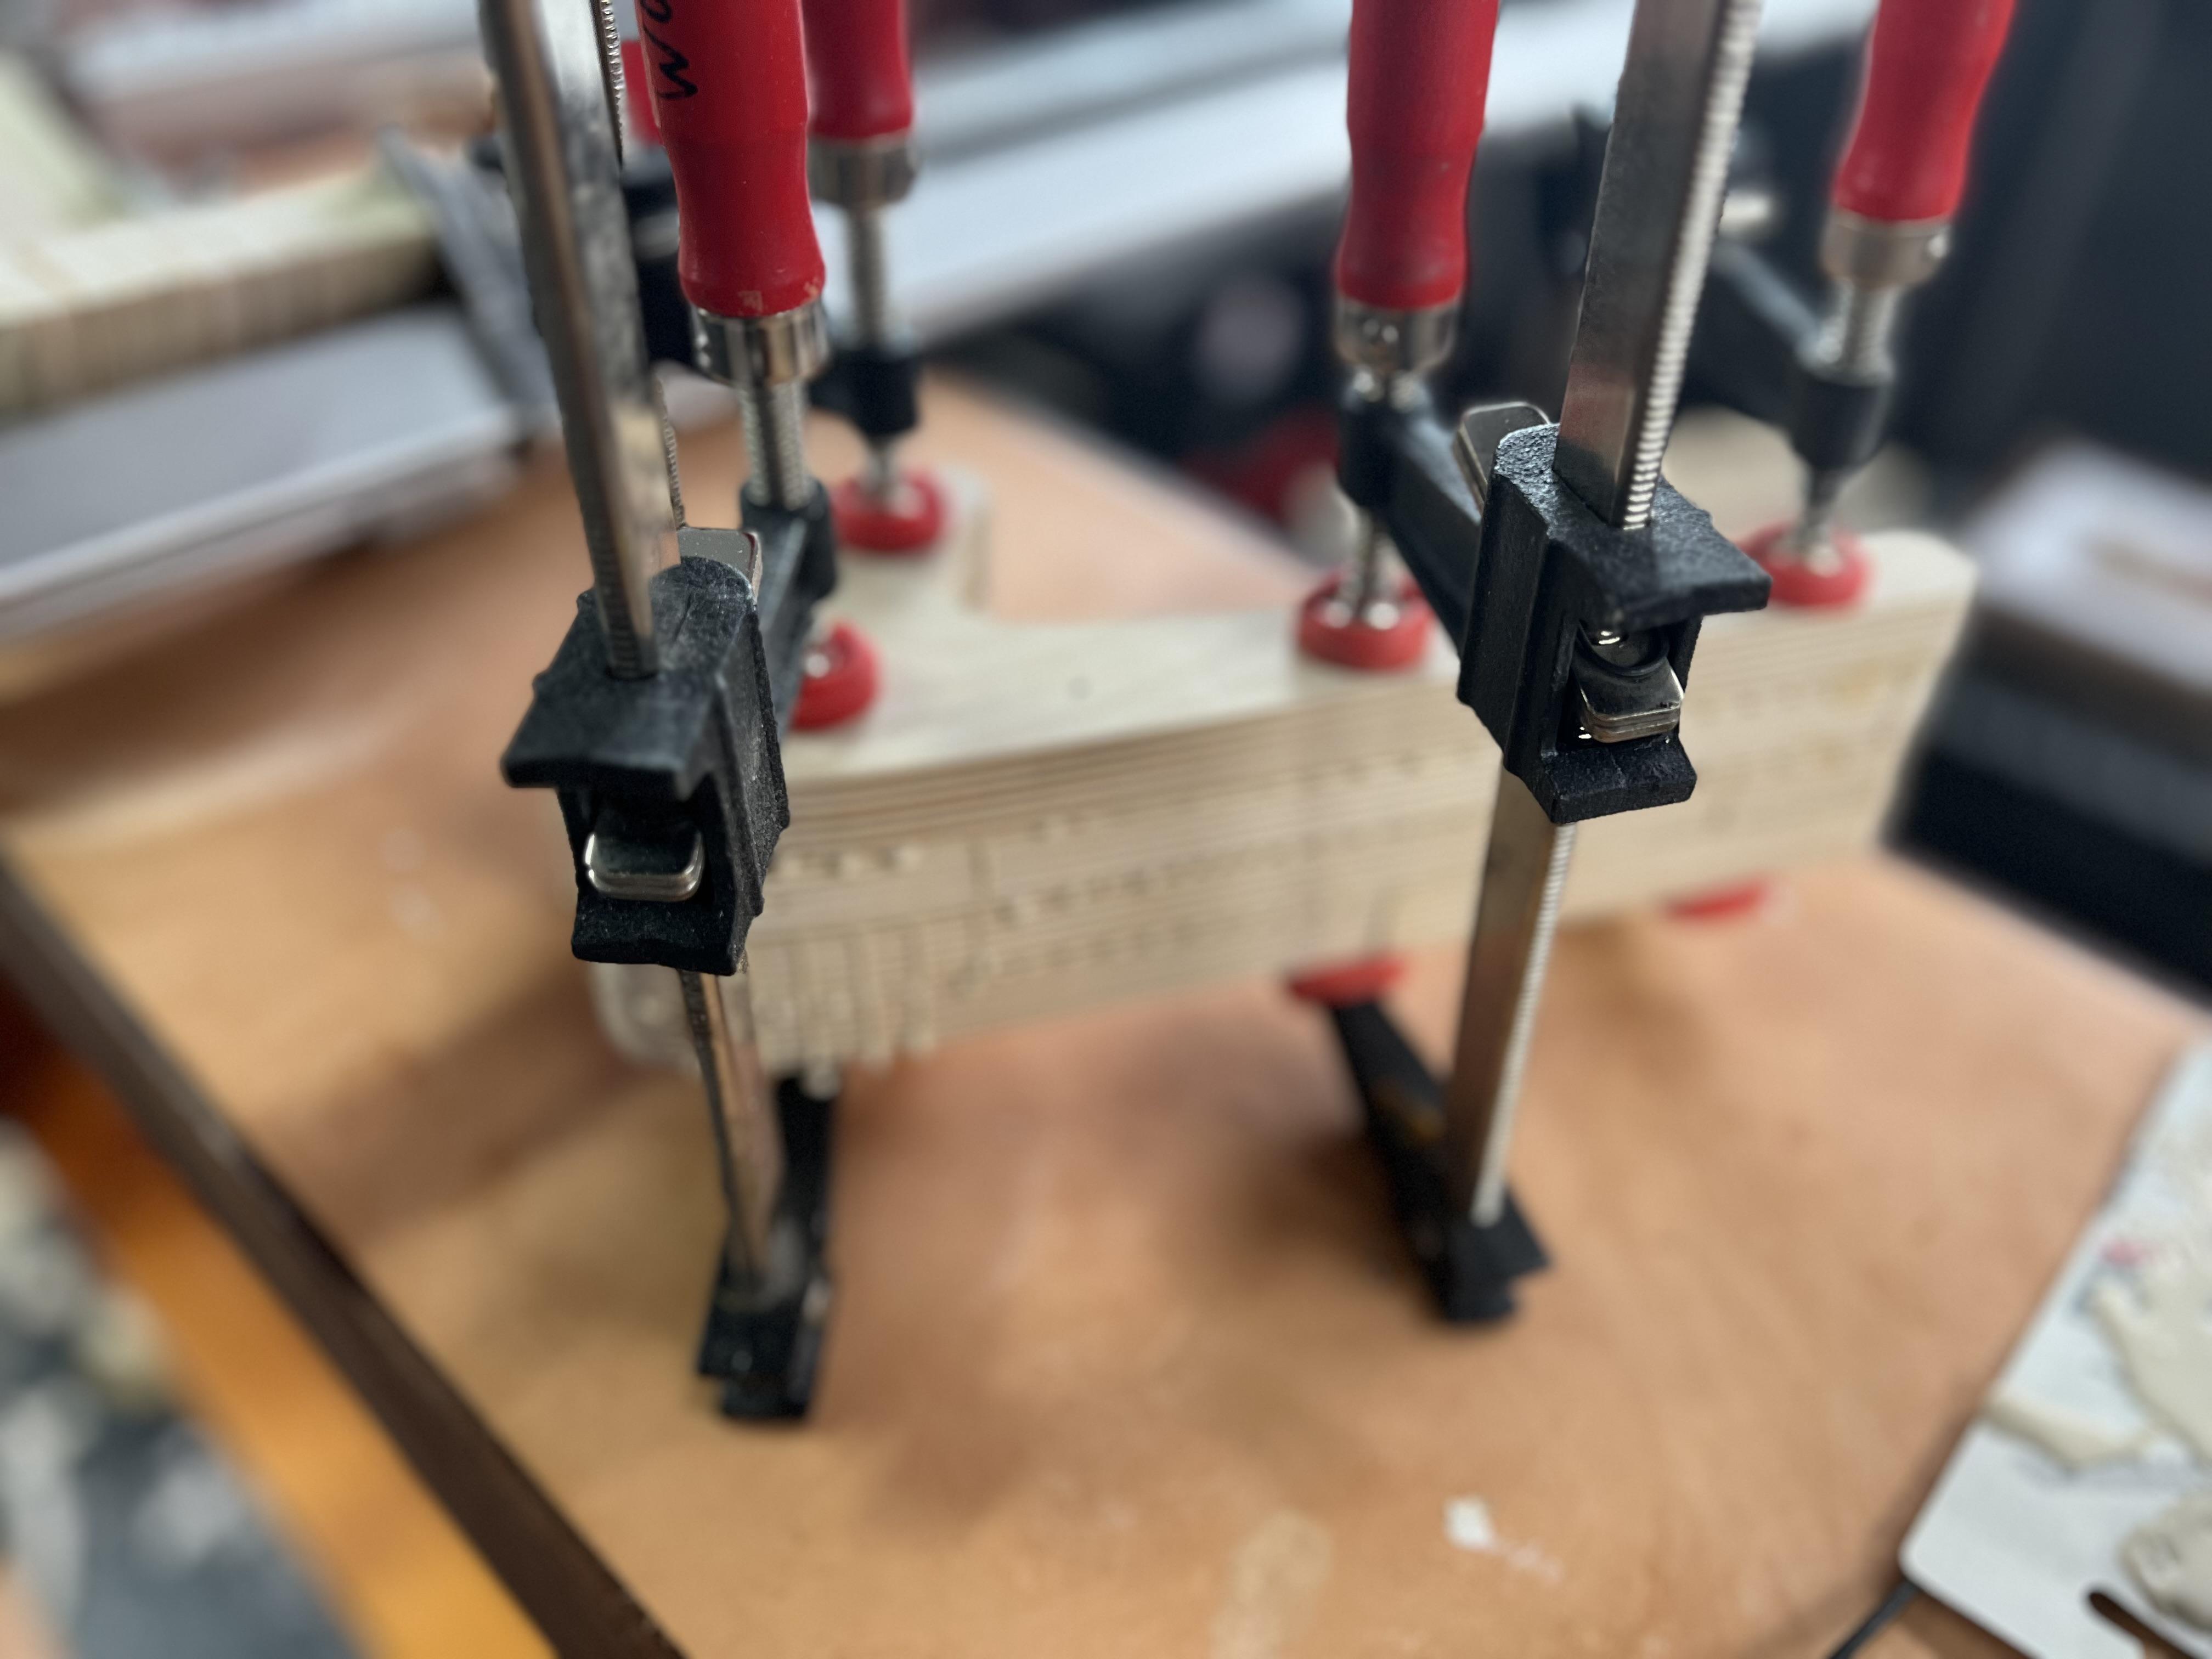
Update #8: Phenolic blocks glued in for today. I cut both sides of the jaws to match the thickness of the phenolic. Some minor sanding for a bit of time to make them square, and then glue.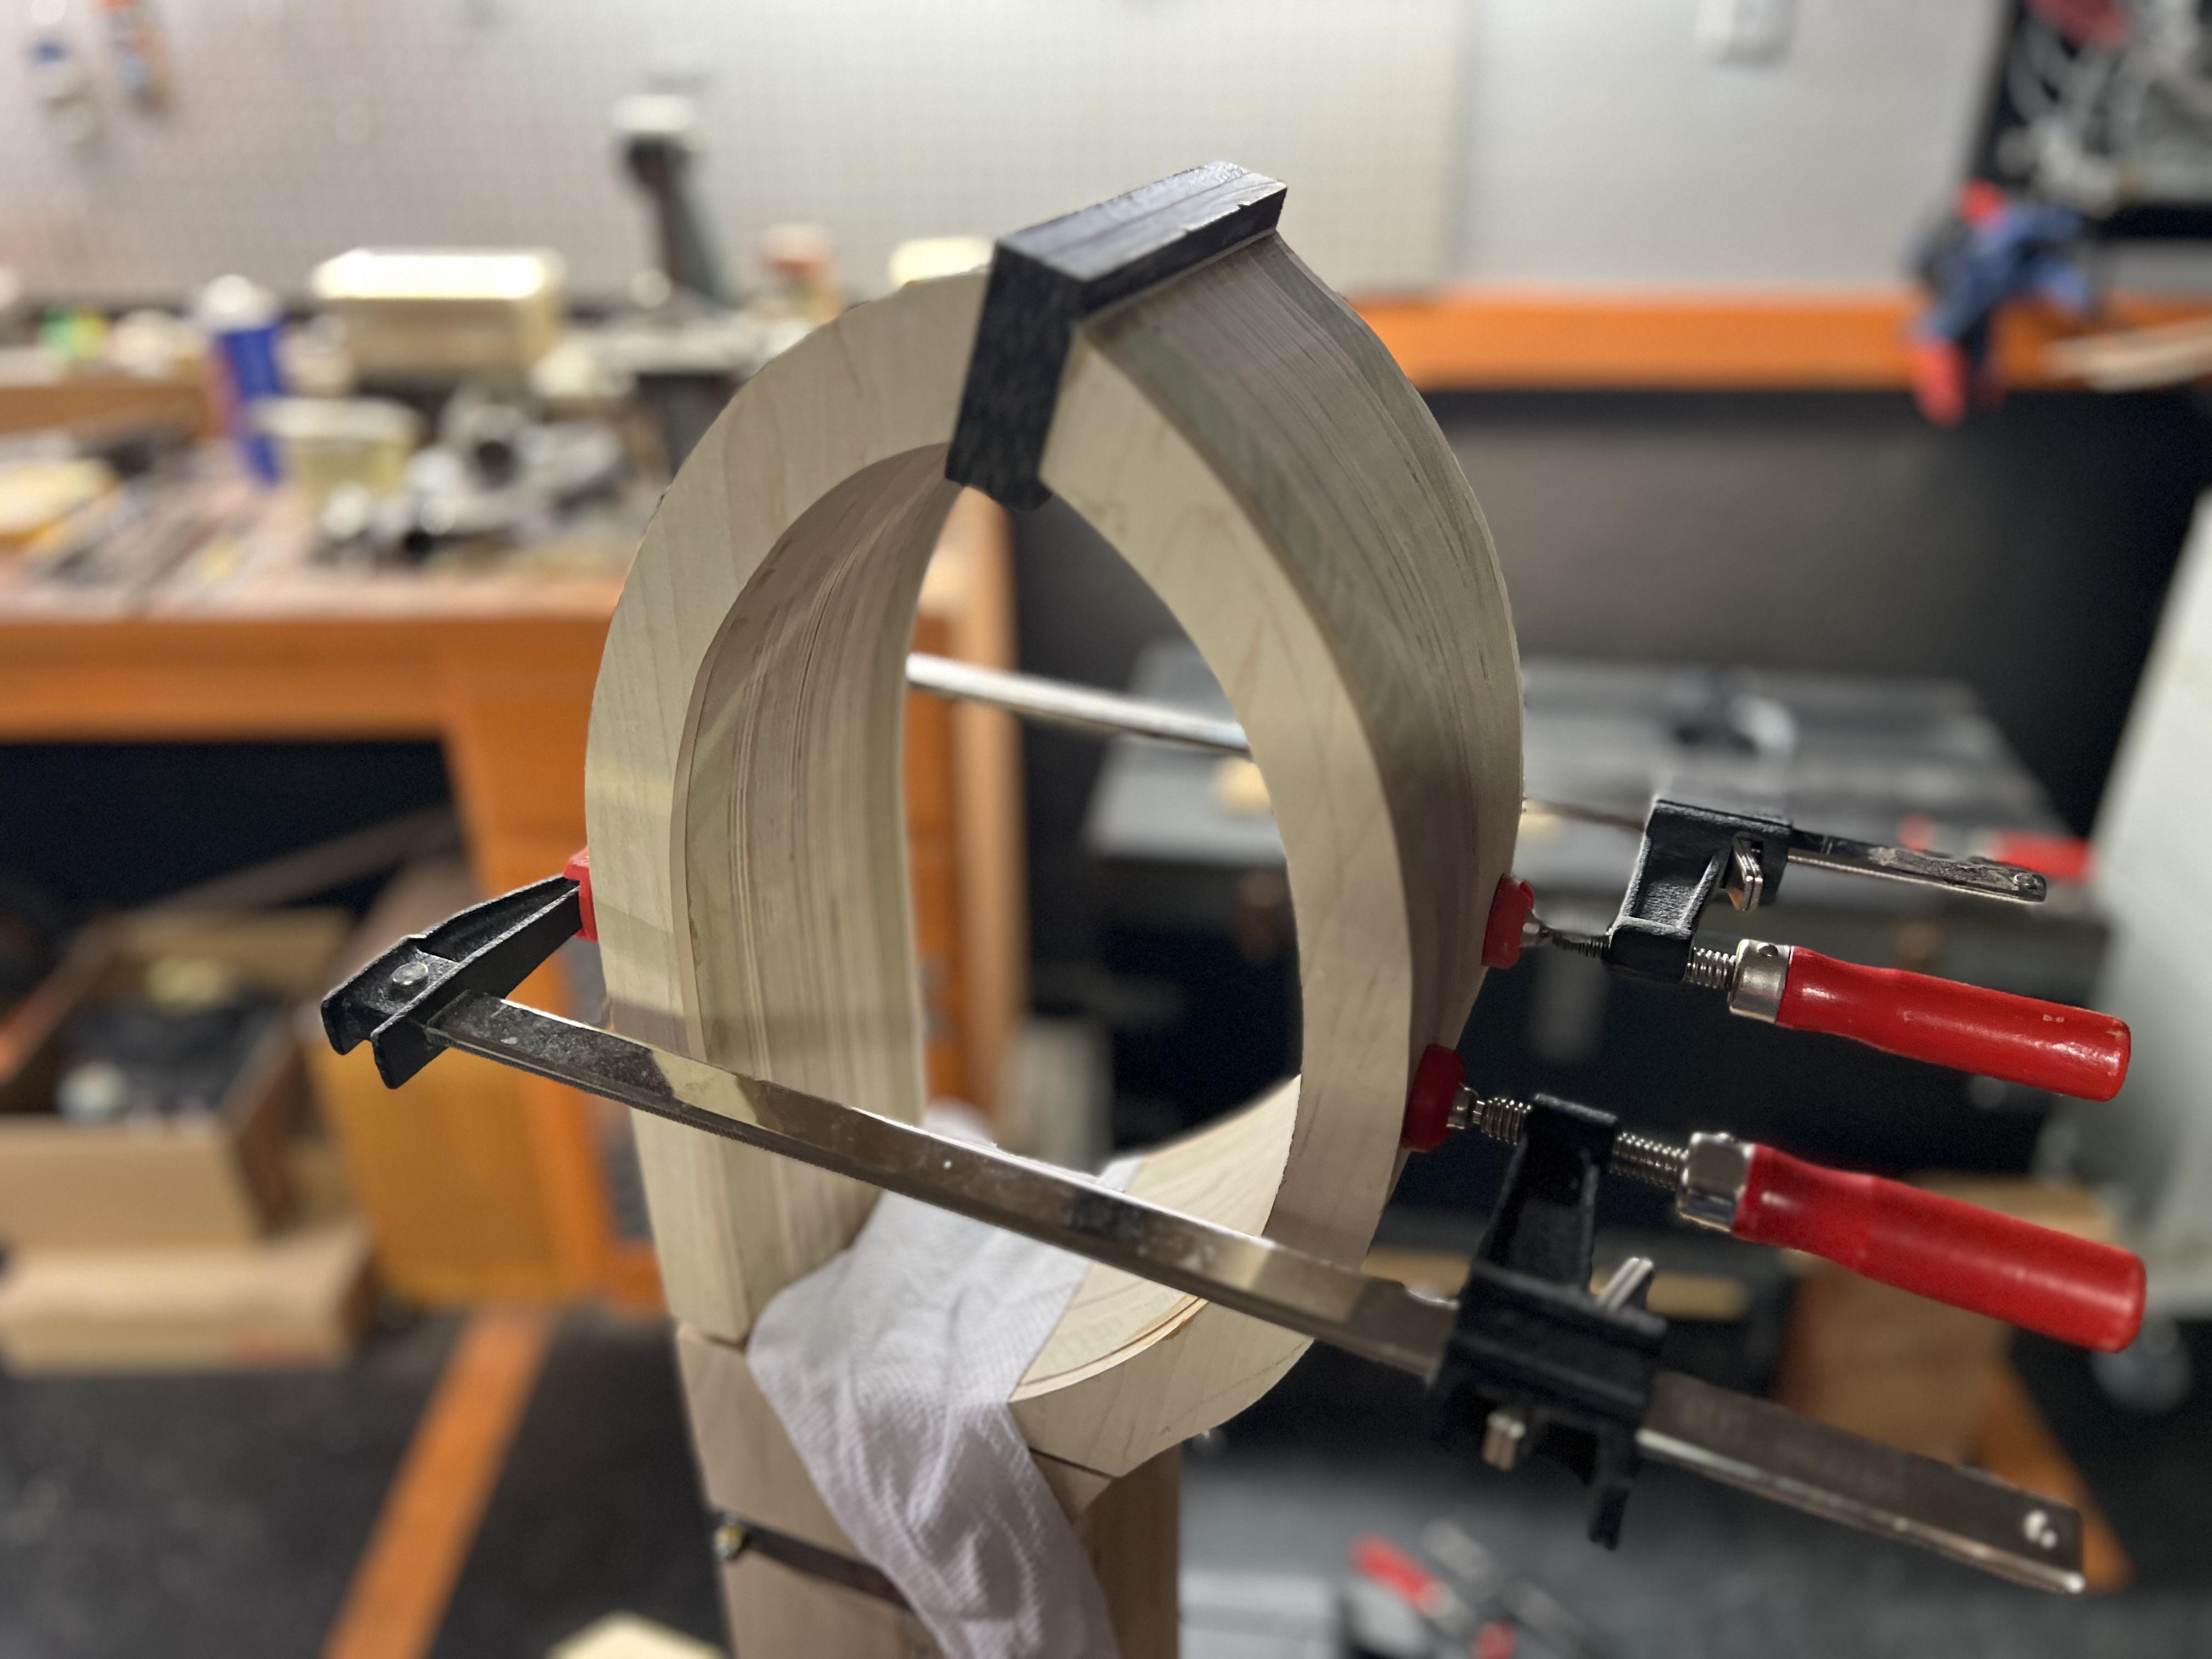
-
Swiss Saddler Clam Drawings
ClaimedVacancy replied to ClaimedVacancy's topic in Leatherwork Conversation
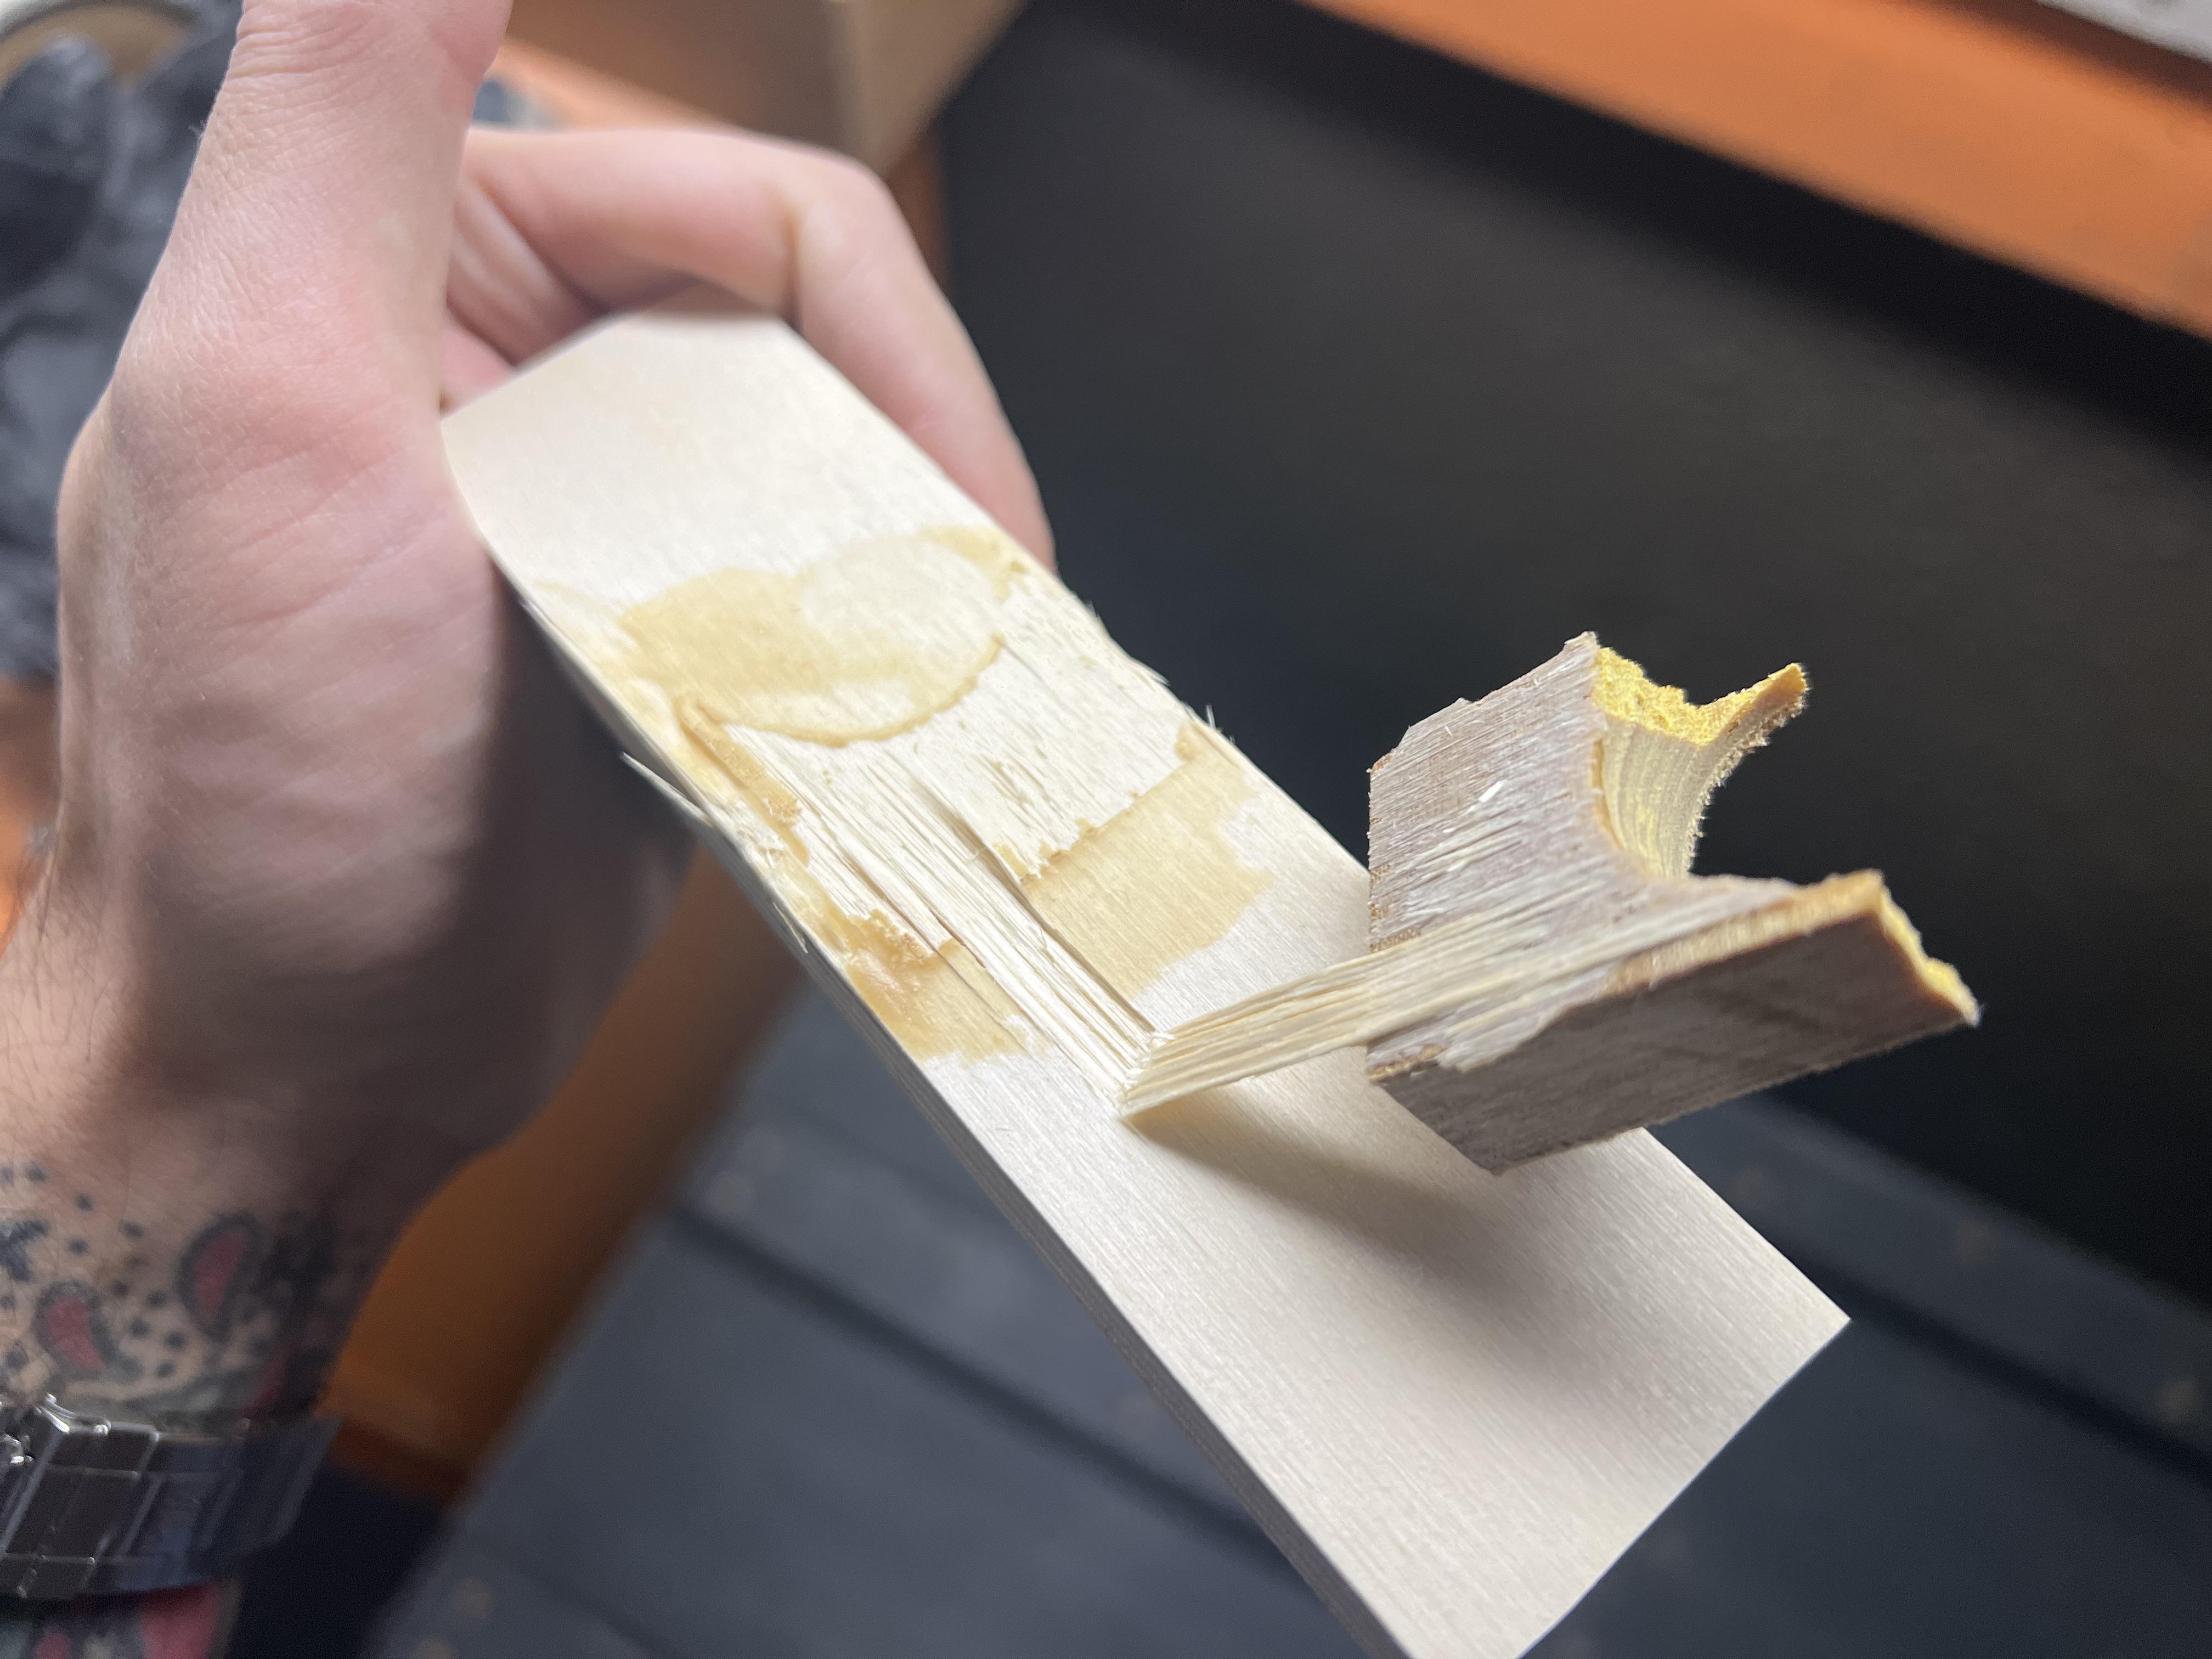
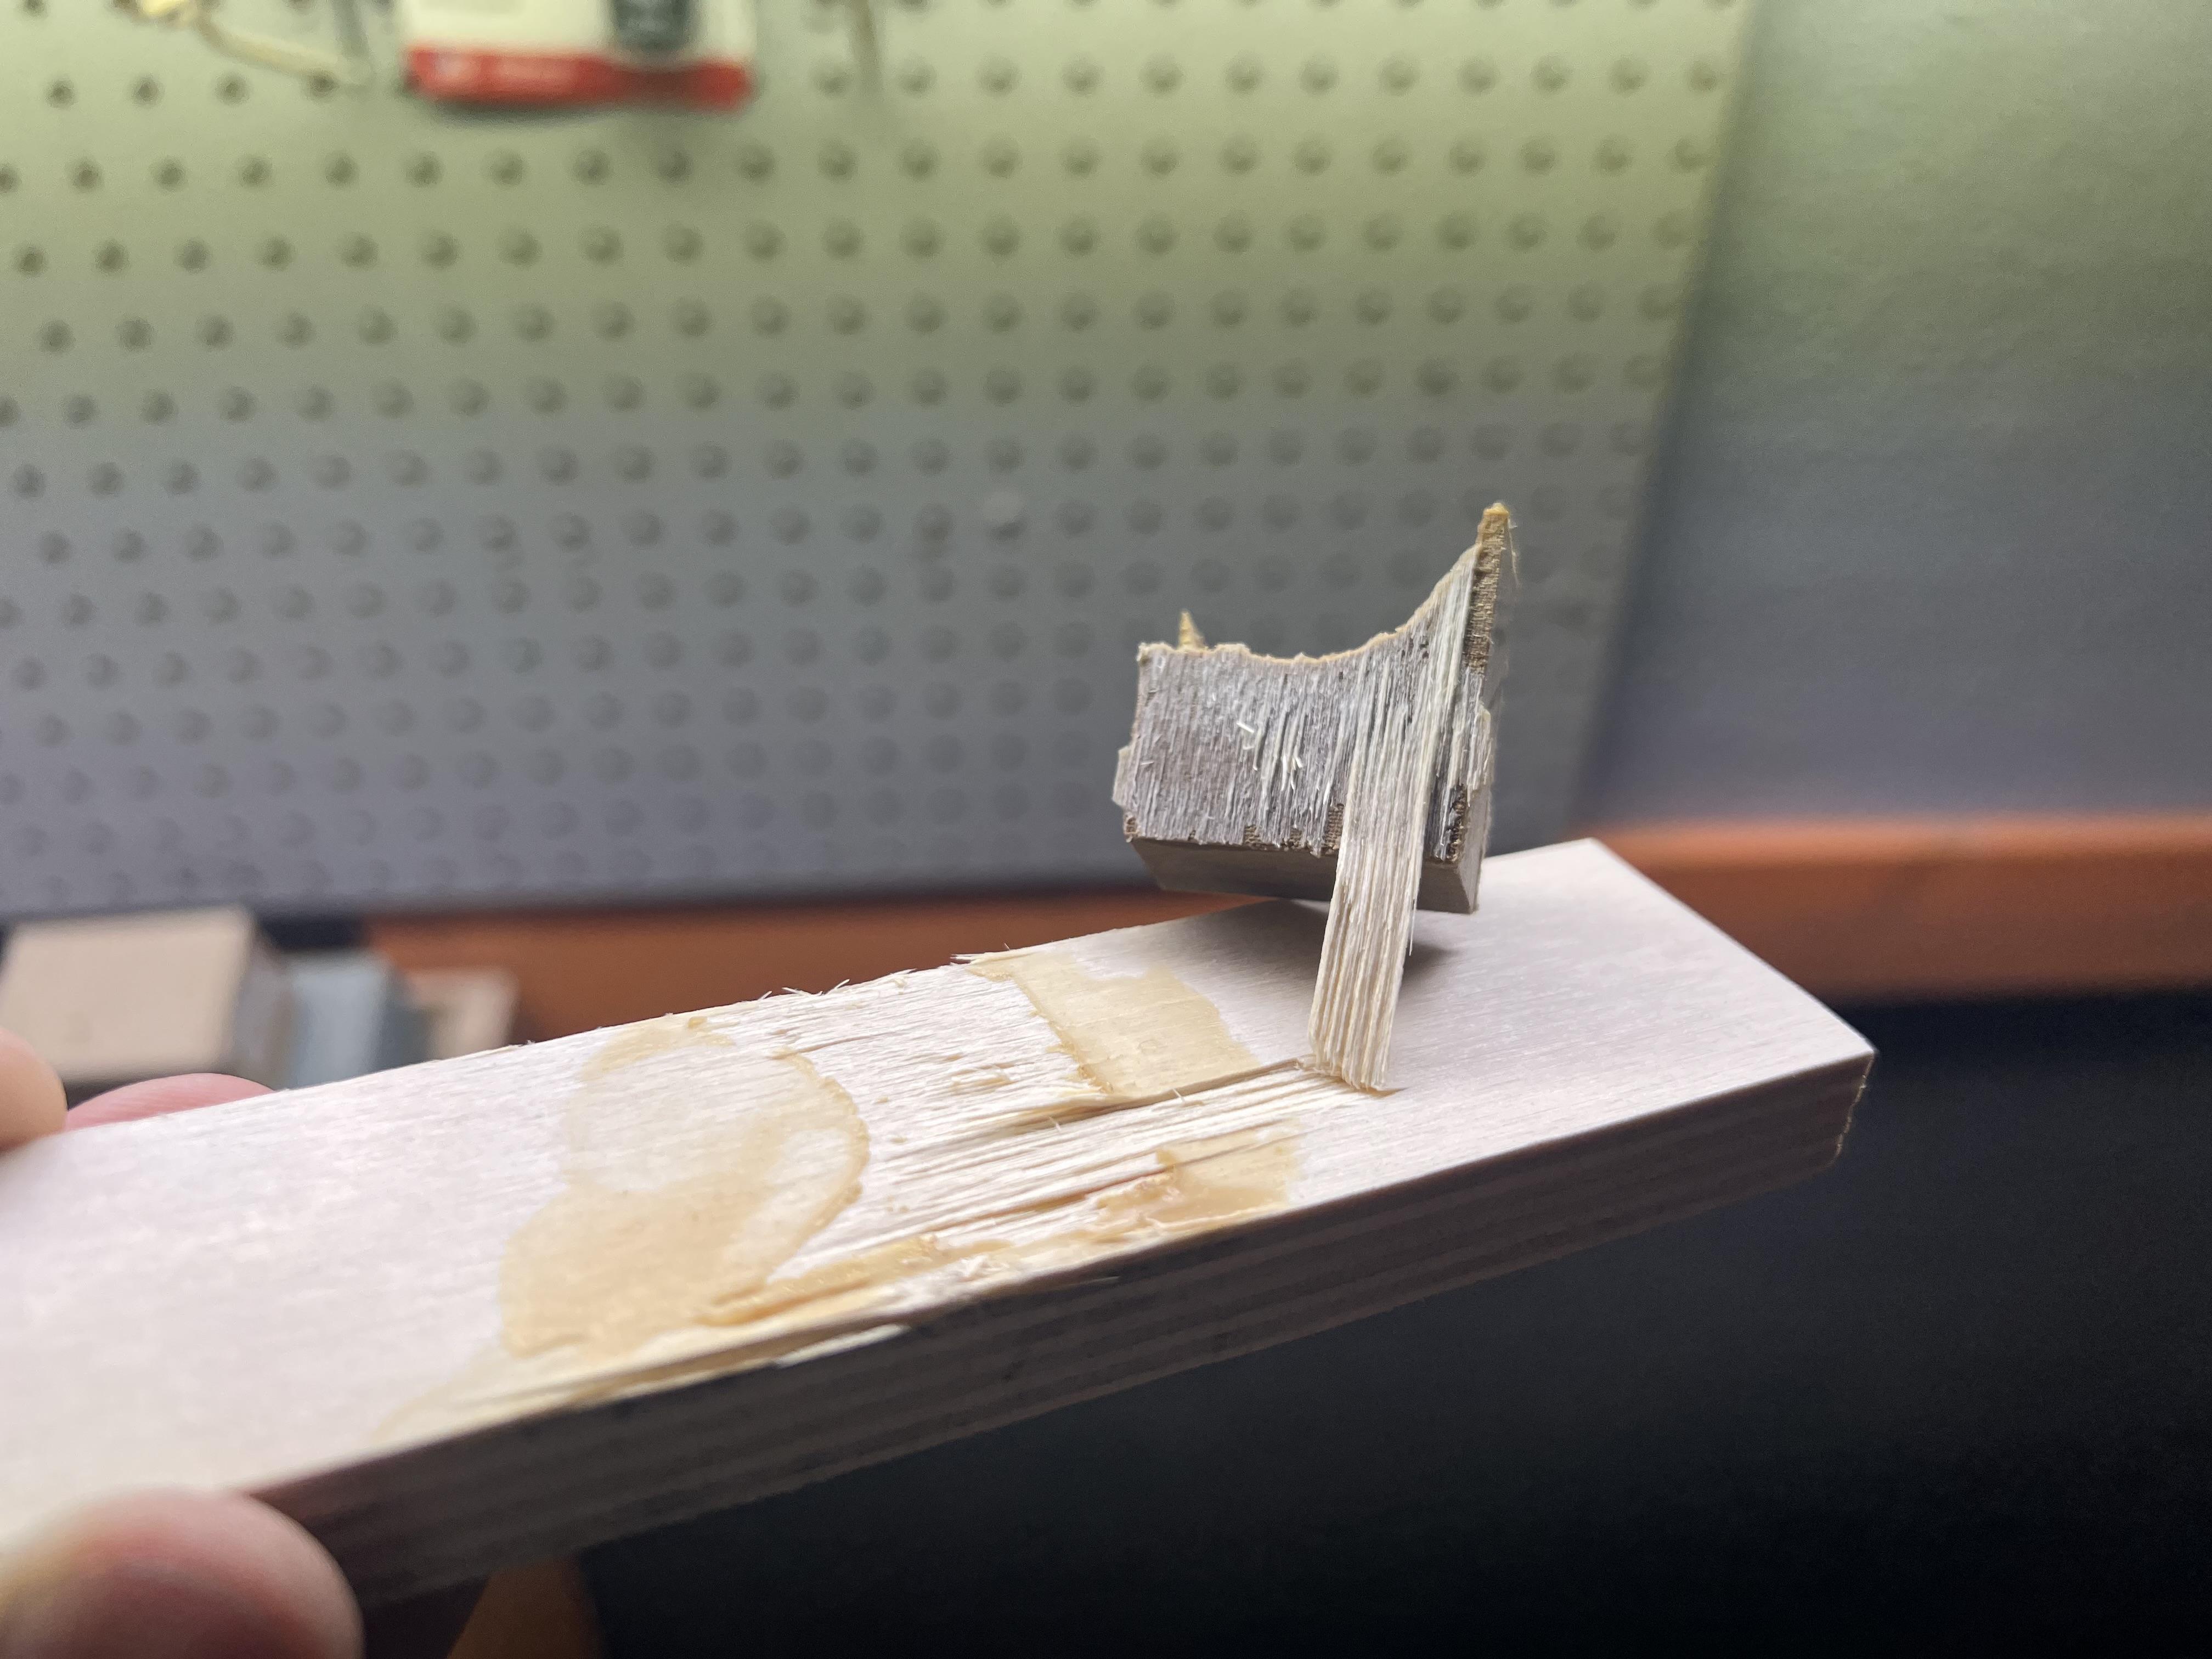
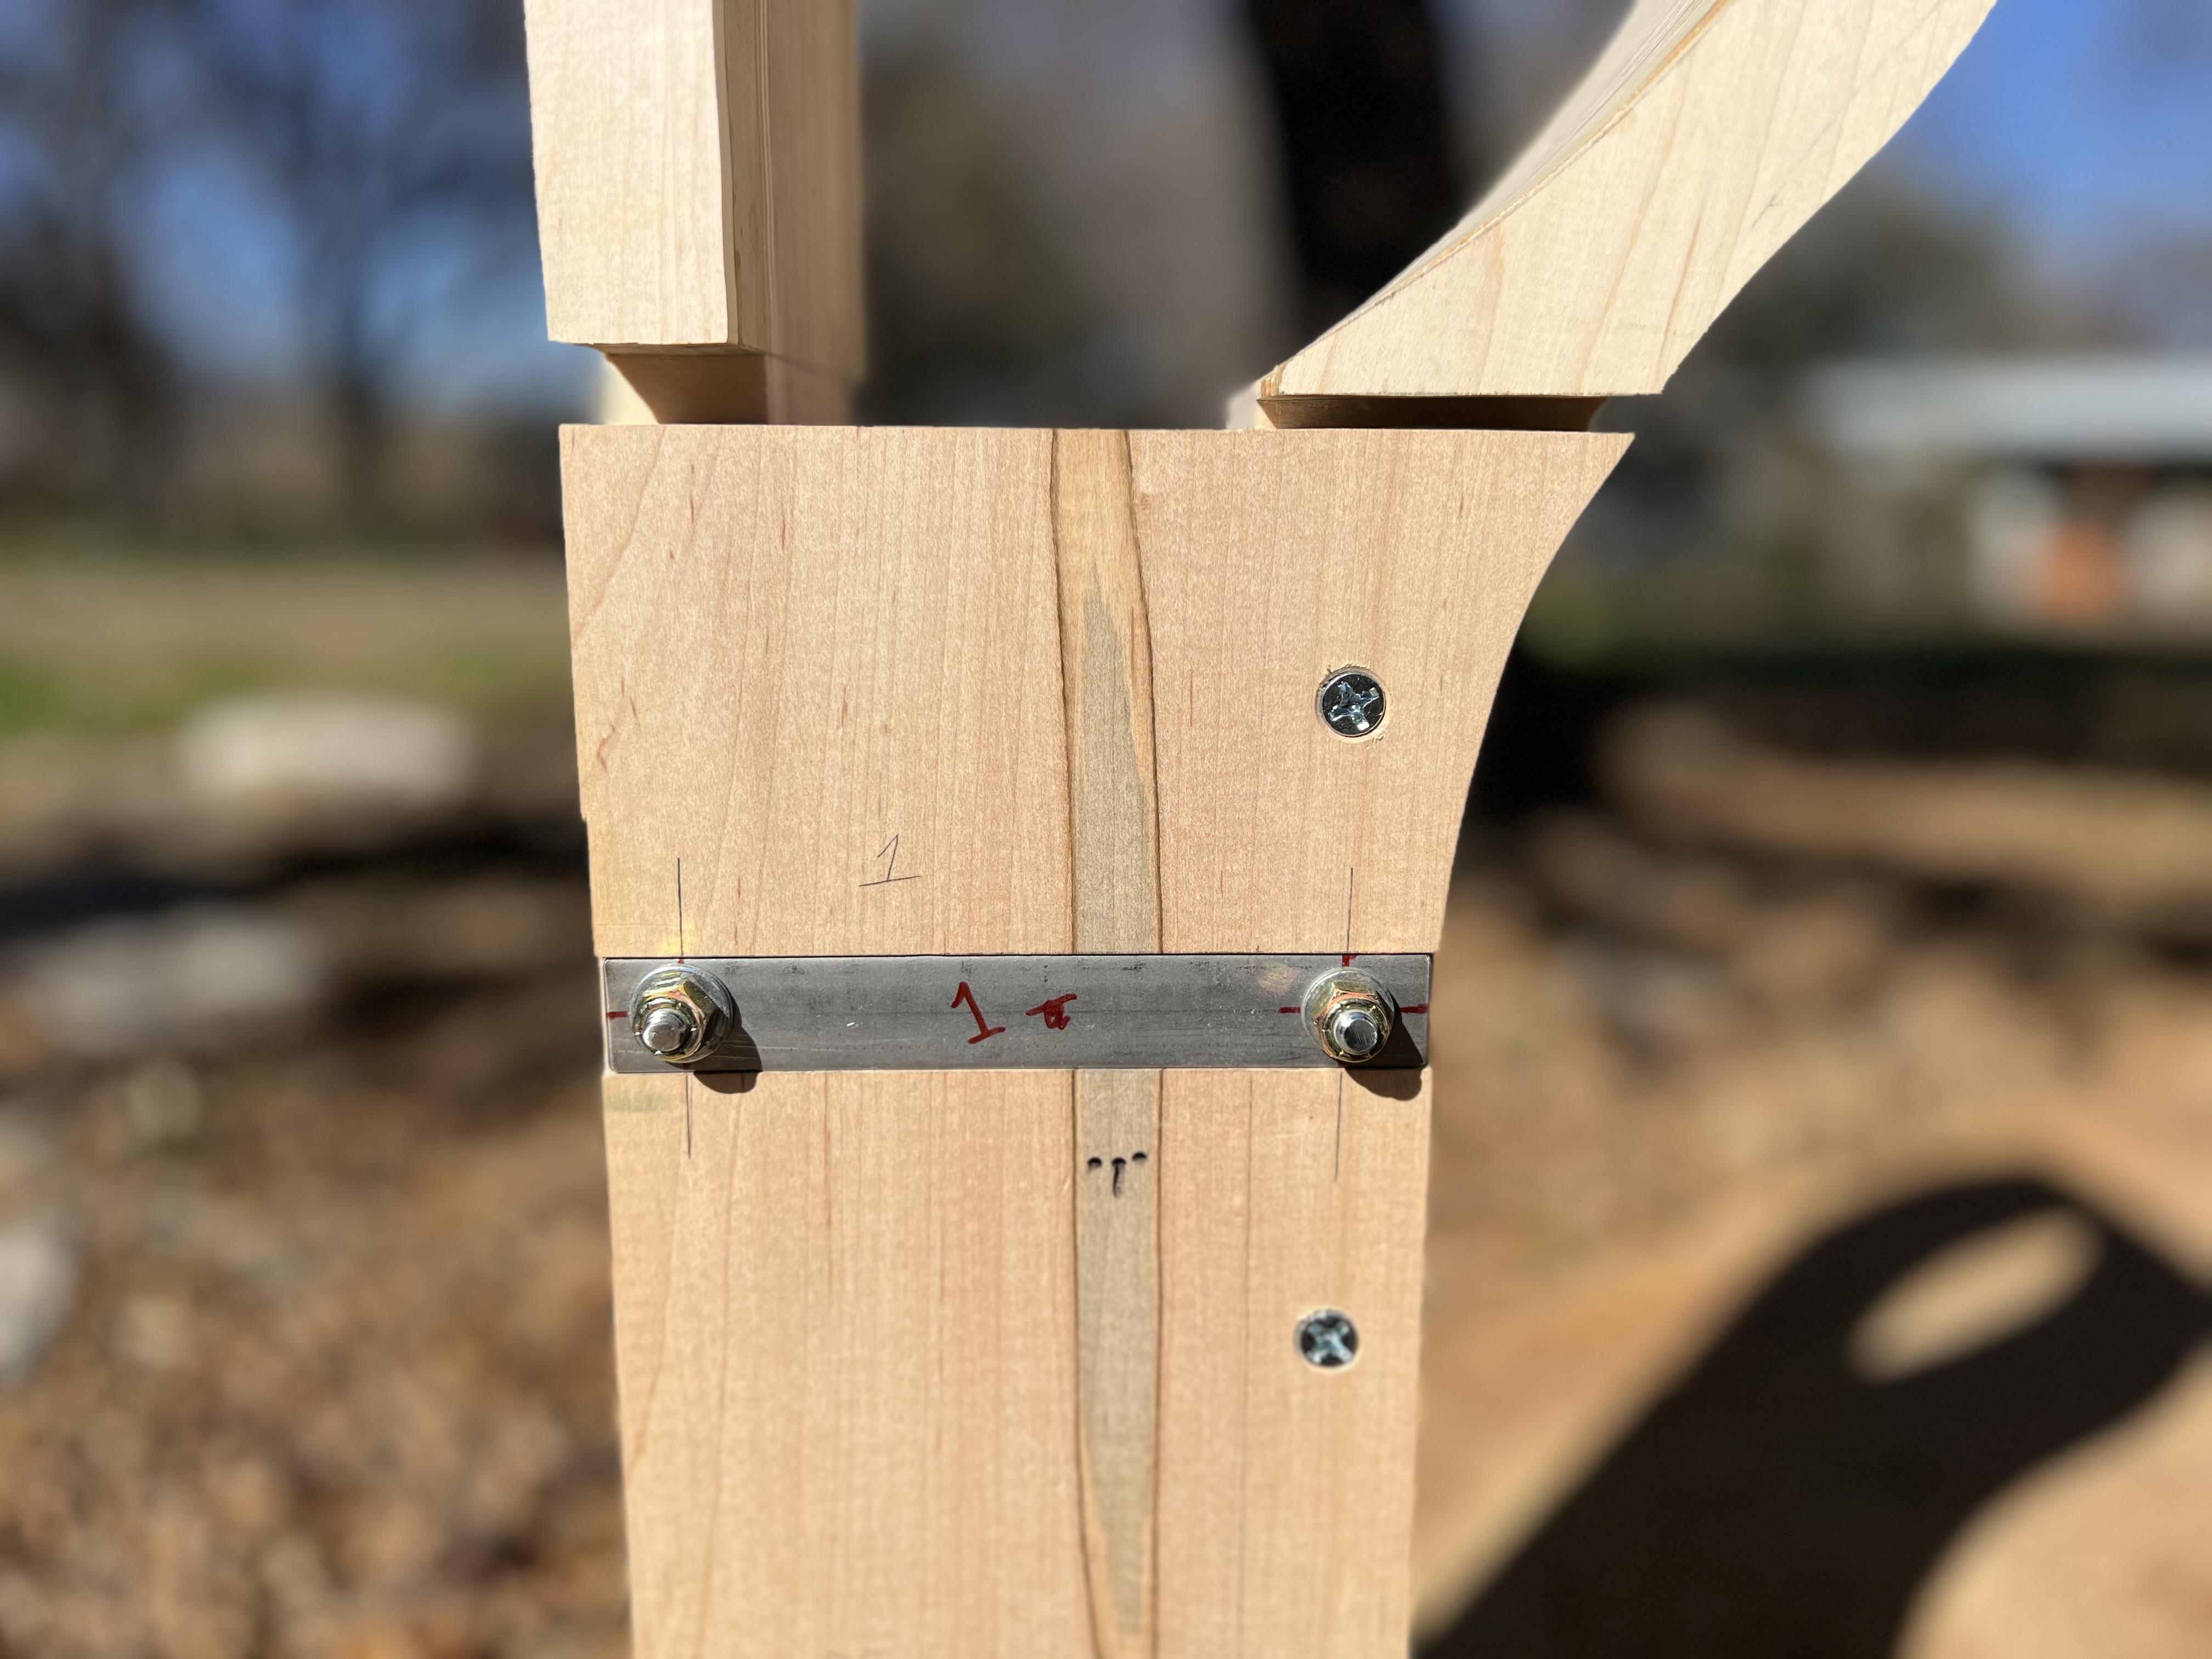
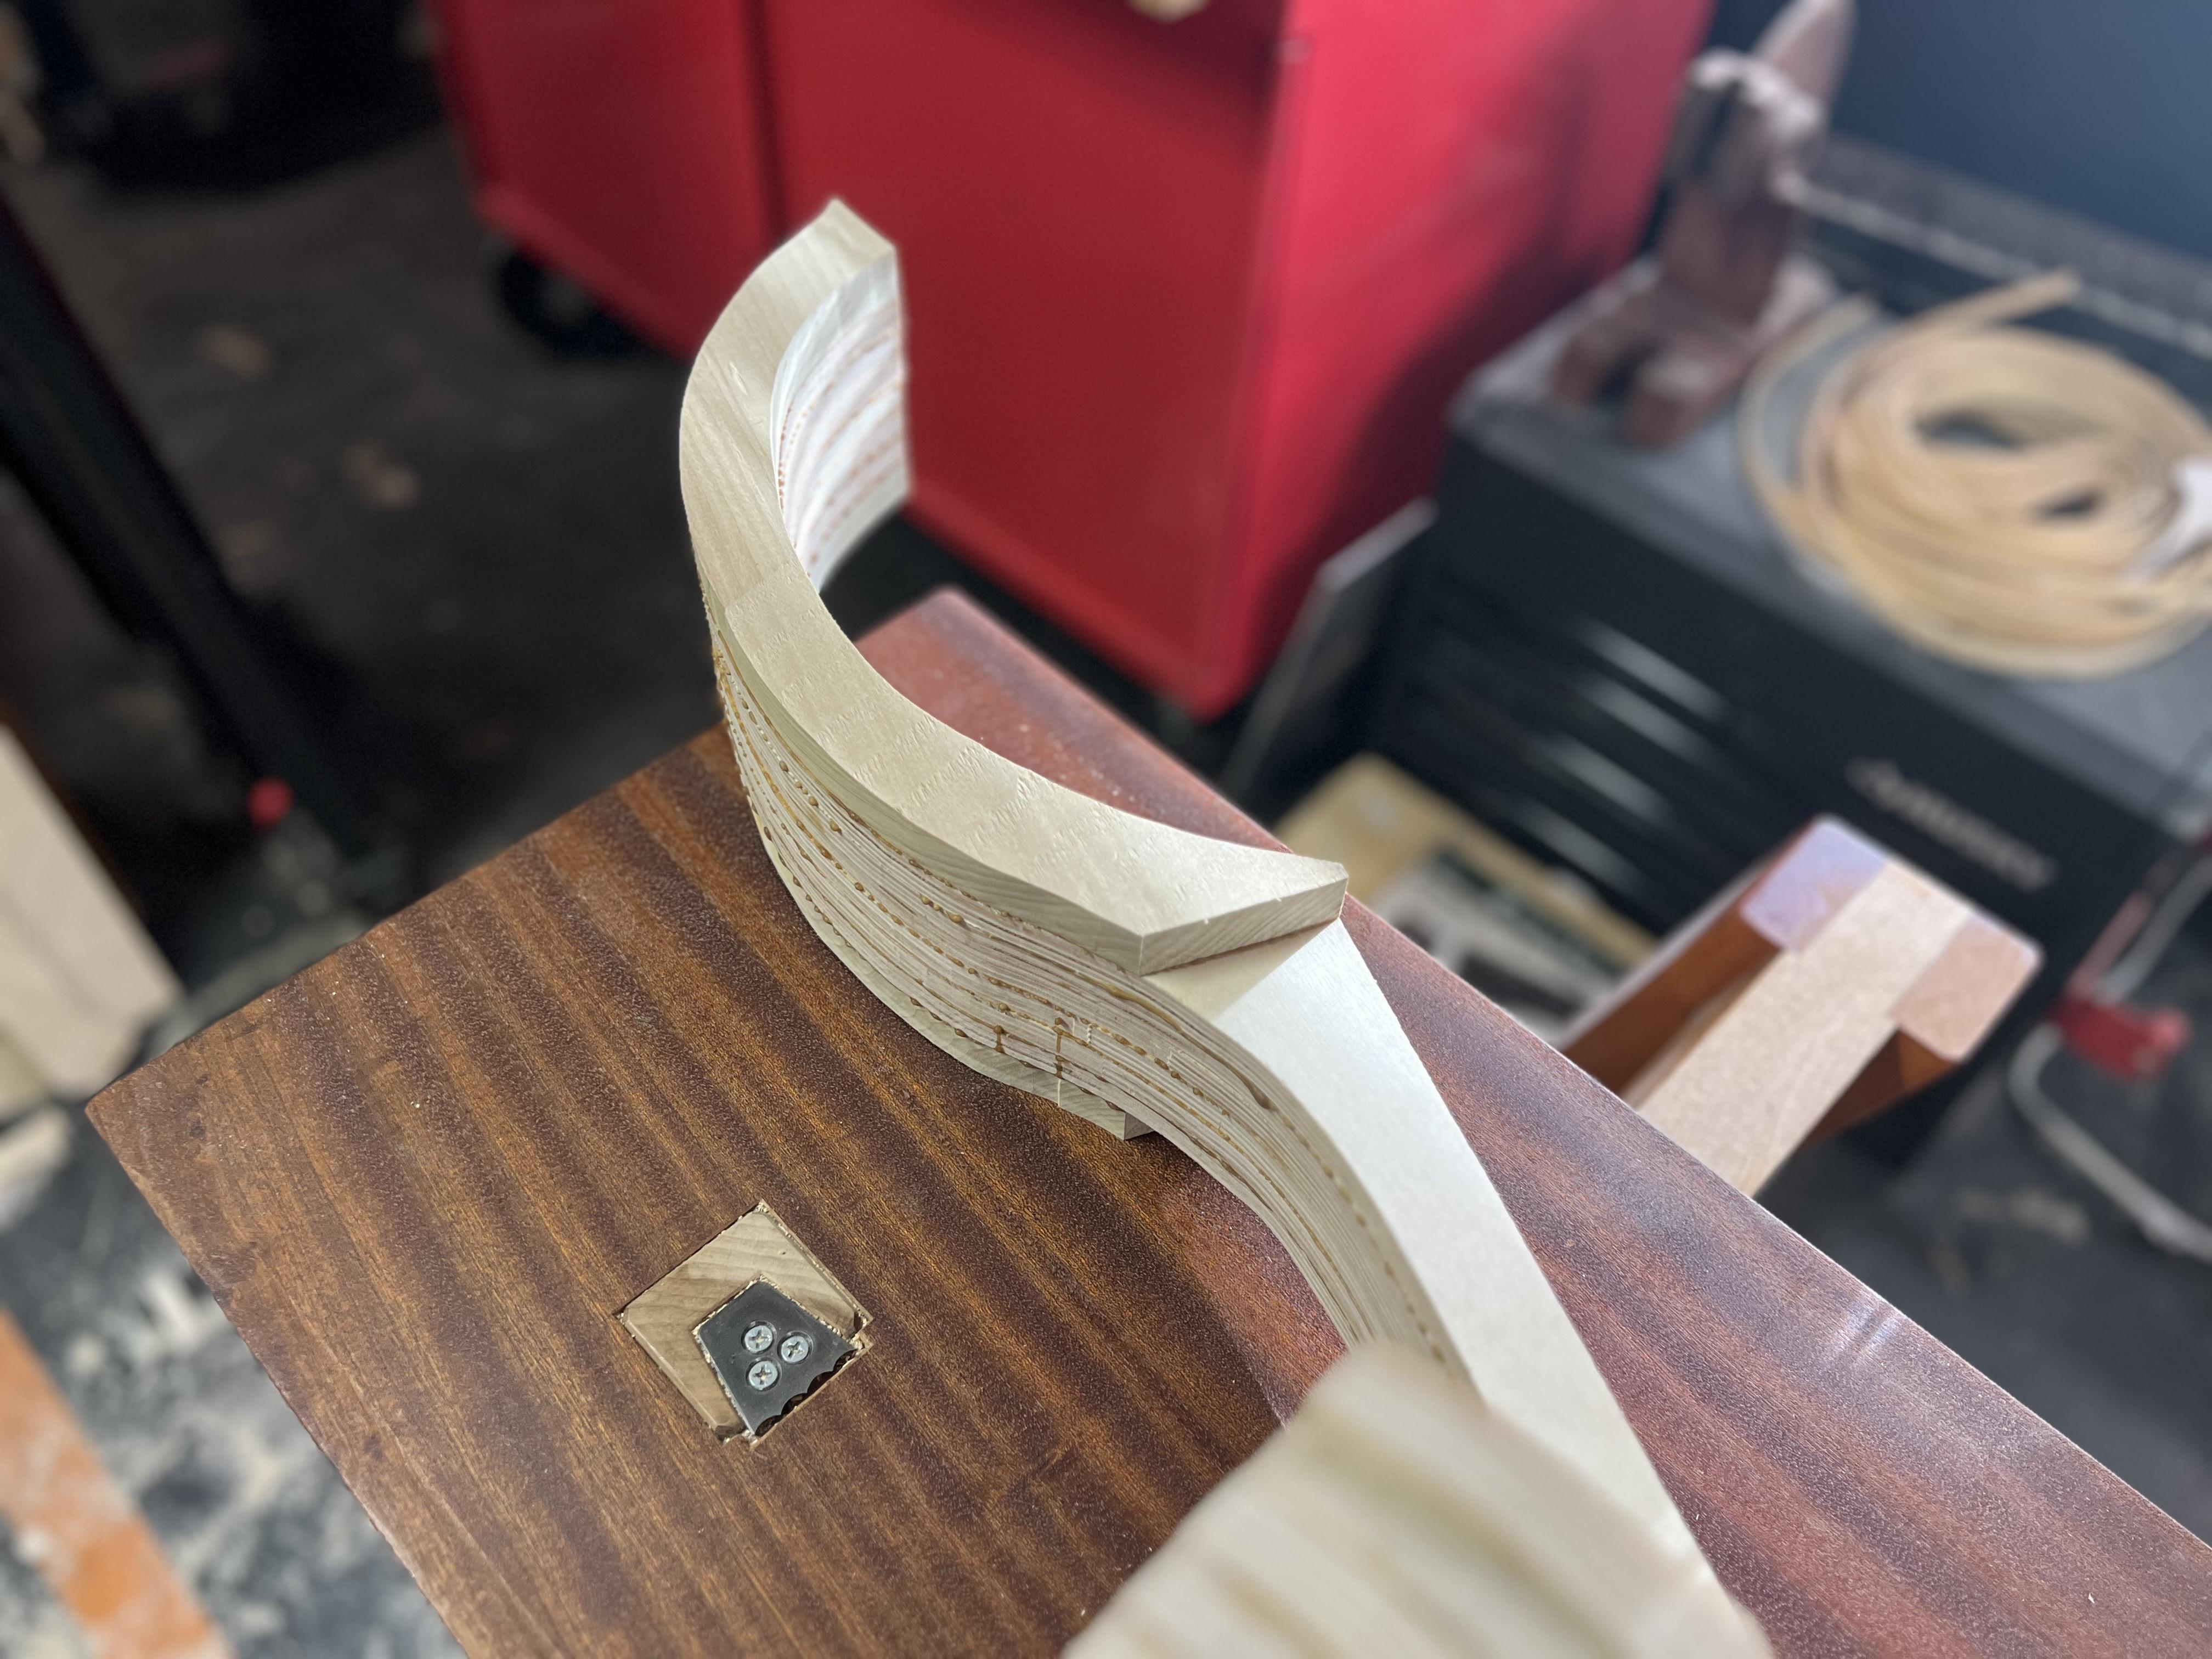
Update #7: I filled and redrilled the moveable arm in order to reset the placement of it with the stationary arm. Much better now. The cam also makes 80% contact on the bearing surface inside. I also mounted the structure to a slab of cherry i had. Its fantastic. Doesn't move, doesn’t ask for permission. I used 1/4 x 20 pitch stainless inserts (EZ Lok) and a few long wood screws going into the plywood areas. Next actions will be the jaws. Im going to use some vintage phenolic blocks glued in. I tested it with wood glue and it worked great. It just tore the wood fibers instead of disbonding. This will hold leather very well and resist lots of wear.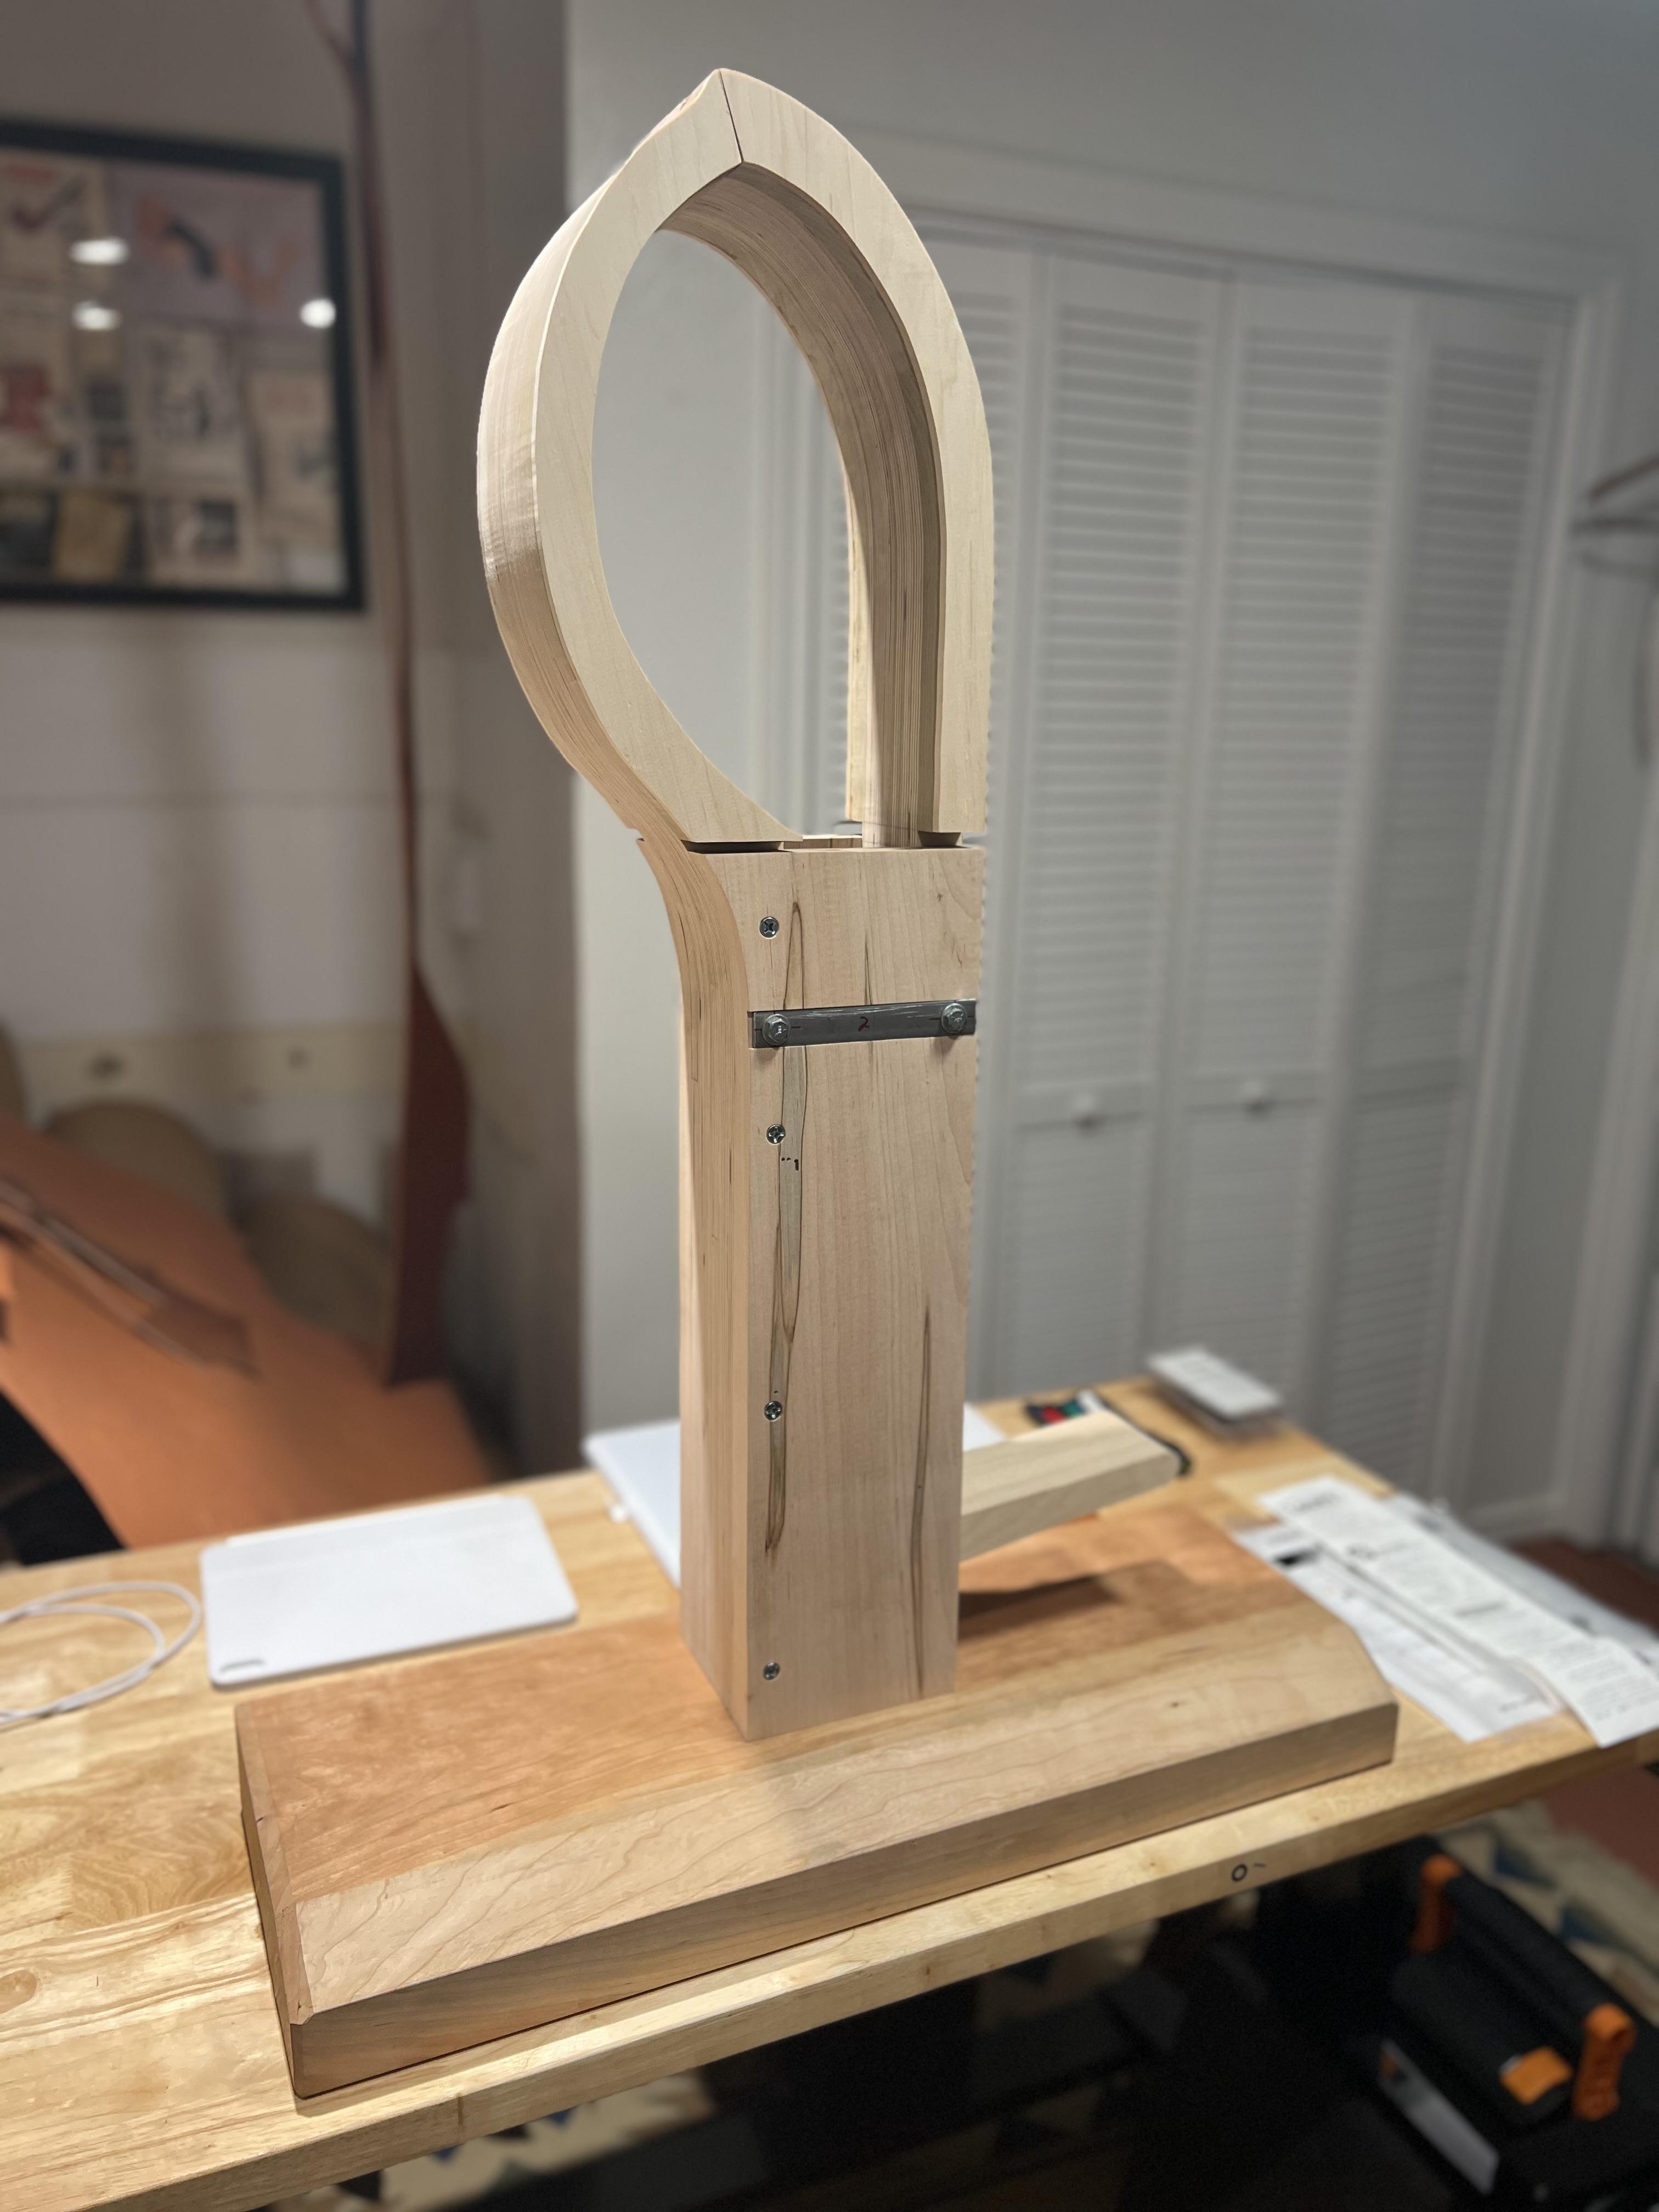
-
Swiss Saddler Clam Drawings
ClaimedVacancy replied to ClaimedVacancy's topic in Leatherwork Conversation
The only scaled drawings i have are the templates i posted earlier. Everything else has been in the moment, and it mainly boils down to what can i free hand and what can i not. So the do not free hands are the arms, two side panels, the cam, and all of the placement holes minus the screws that go into the fixed arm. There is a fairly high amount of drilling on structure depending on how square all the wood is! For me i didn't square the two side panels, and what i’ve noticed is I’m off about 1/16” or less. I think the reason is because i went off the template and not on structure when drilling and that tends to go bad sometimes. If i had squared the arms to the side panels, and used the template holes as a guideline i wouldn’t be off anywhere. The stationary arm bolt hole is also off by 1/16 to 1/8”. This is causing the jaw misalignment. Best advice at this stage is SQUARE your parts to each other, but separately first. Overall, it’s inconsequential and can be alleviated. Mainly talking about the jaws. What ill end up doing is cutting the jaws while closed until i have an imaginary square. Ill then glue in a harder block of wood. Cut right through the center of that, and finally shape the two blocks to match the contours. For progress report #6: I got many of the screw and bolt holes drilled and fixtured. The base is square now, and next will be jaws and getting the dowels installed to hold the upper spring. Spring will be installed after the jaws are fixed. Somewhere in between ill get the base plate squared away and fixed to the body. You can see that the cam is off as well inside. This is because the movable arm bolt hole is off, and some of that is under shaping on one side. Ill fix that later.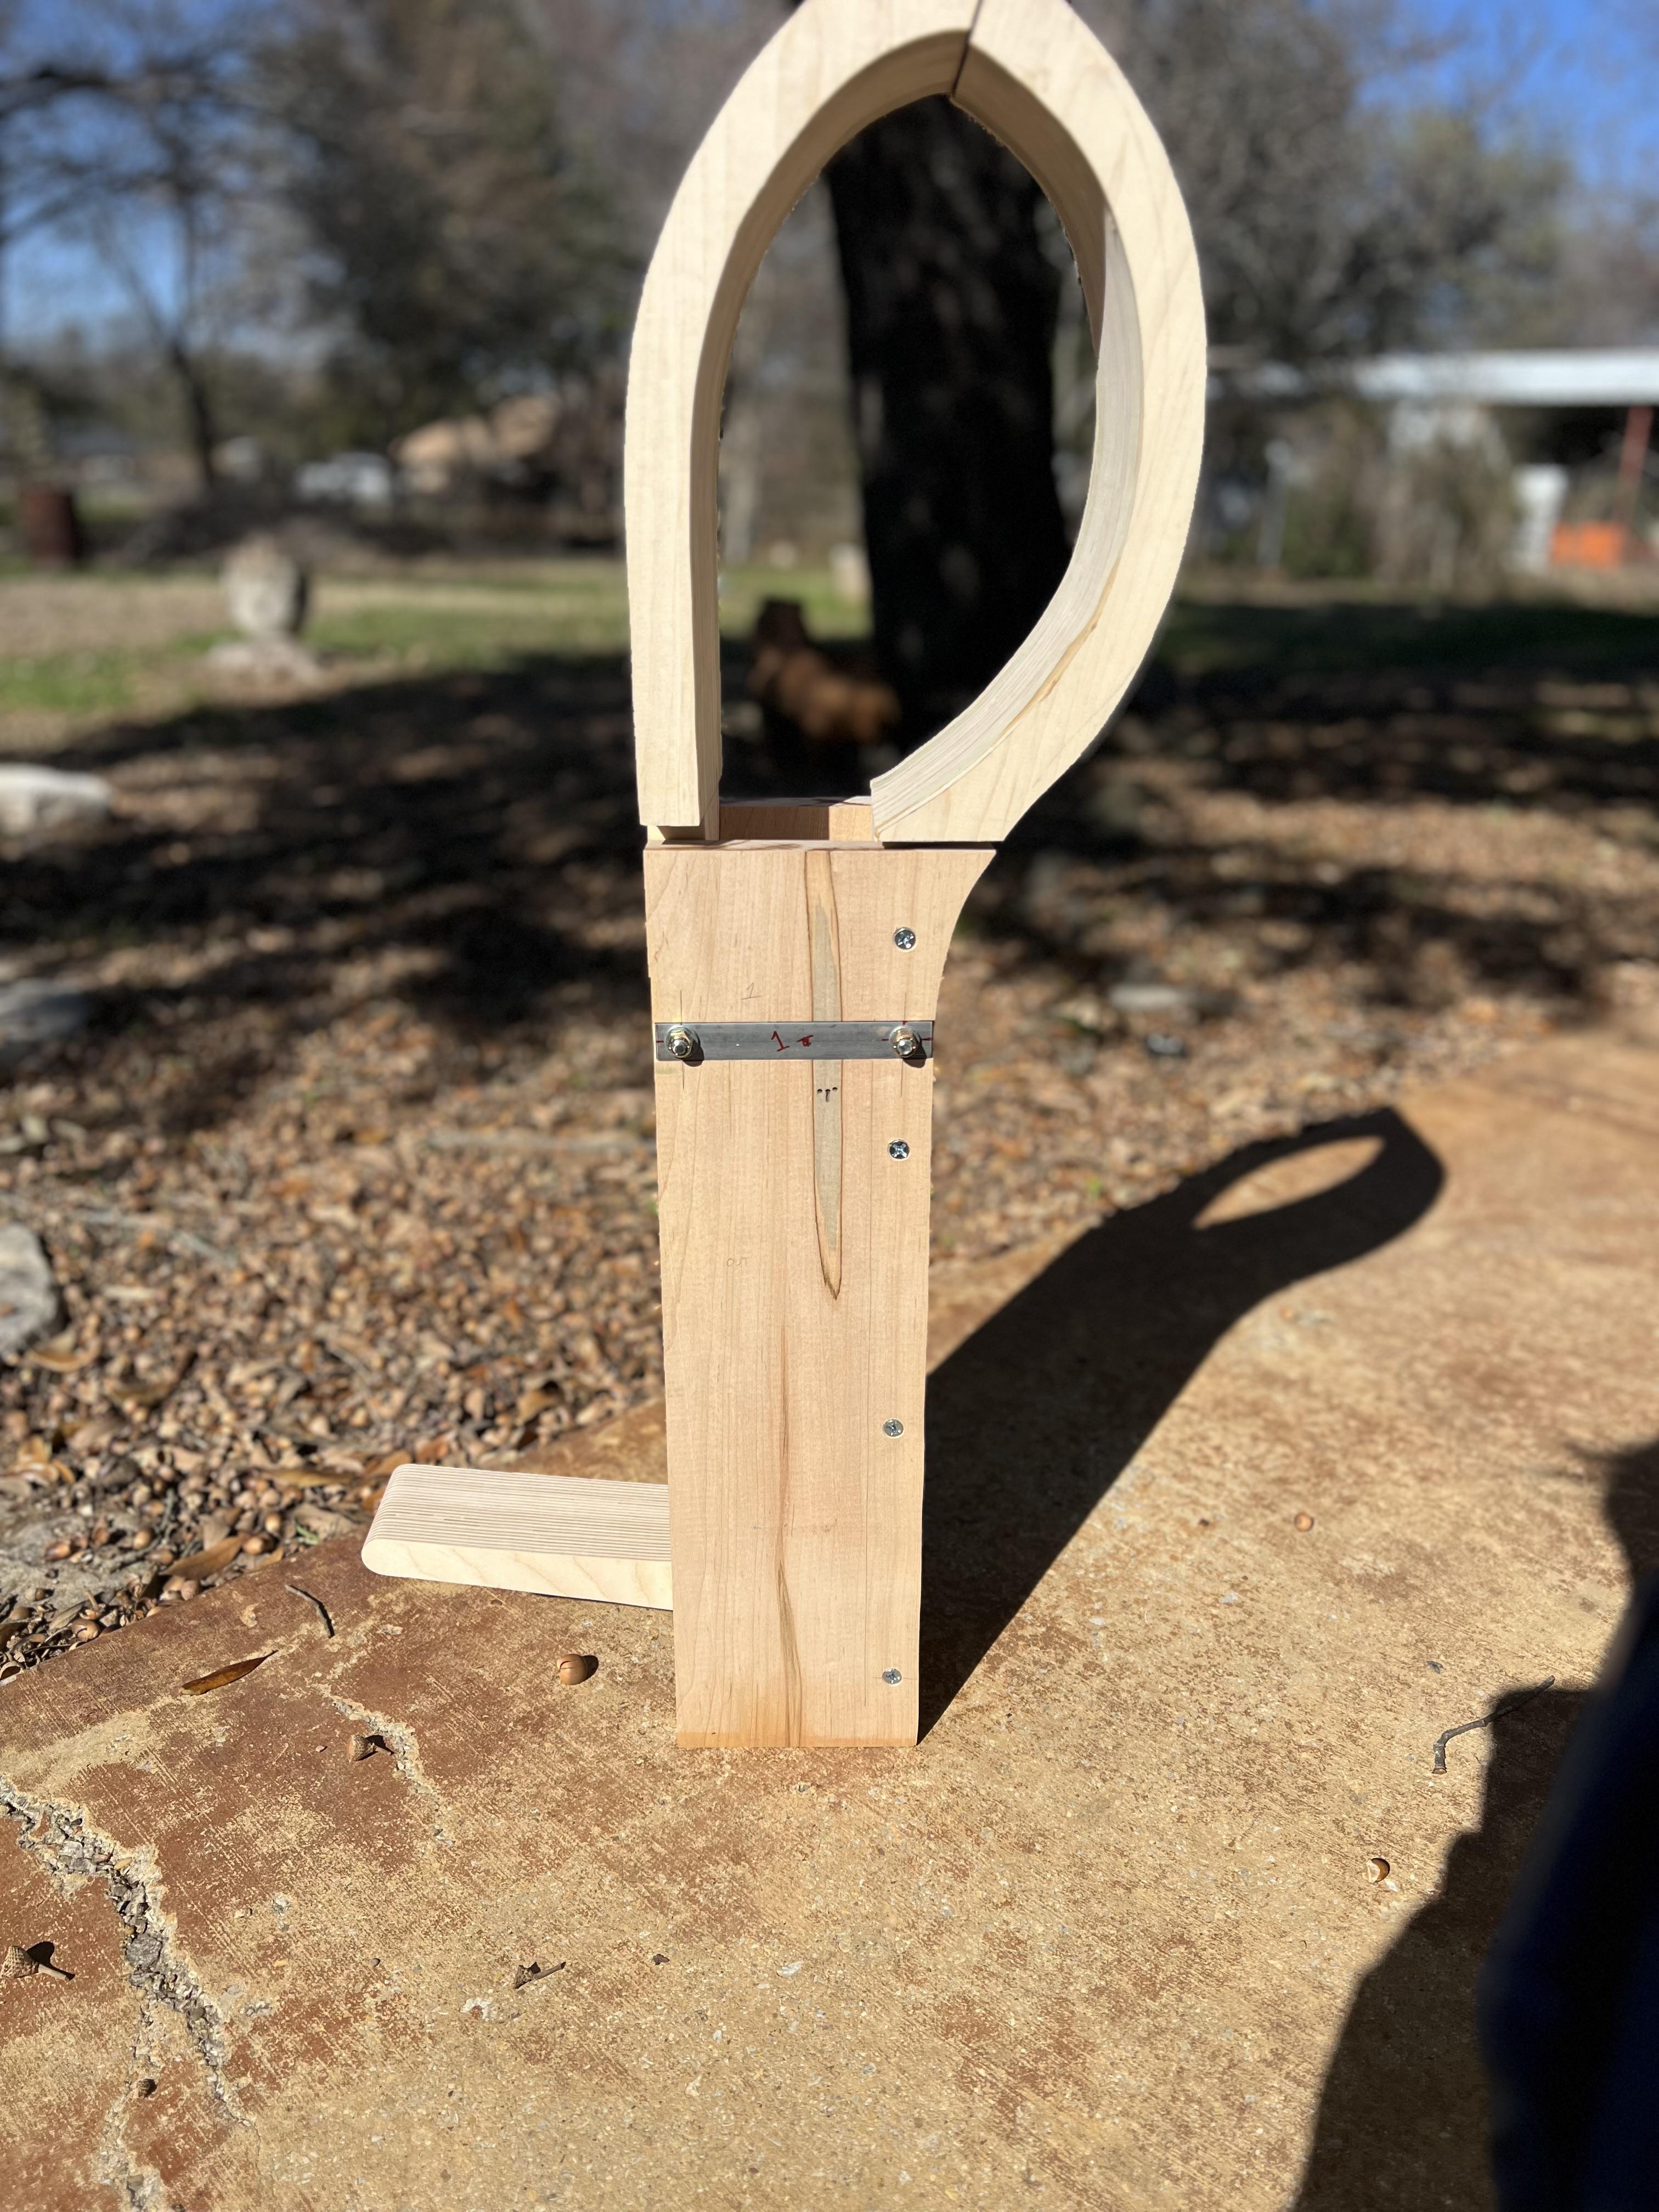

-
Swiss Saddler Clam Drawings
ClaimedVacancy replied to ClaimedVacancy's topic in Leatherwork Conversation
My thoughts too. It’s a lot of money for such a device, and ya know, for those that need it and don’t want to make it, fine. I mean I’ve made all of this with only a handful of pictures, and doing the best to match contours and ratios that I can find. And it’s taken a good while to get here! I think I’m only in this project about $150 dollars at this rate. The most expensive part is the wood, and Baltic birch is not cheap anymore. If i had used poplar for everything I probably could’ve saved a few. Hardware is the next most expensive thing. But if you want to be real conscious of money, go to estate sales over a month every week and collect hardware and wood. I have so much antique hardware from those sales, and the sells would’ve thrown it all out had I not grabbed it! -
Swiss Saddler Clam Drawings
ClaimedVacancy replied to ClaimedVacancy's topic in Leatherwork Conversation
@dikman try this one. It’s still on there! https://shop.leder-louis.ch/en/sewing-and-stitching-tools/stitching-ponies-and-clamps/sattler-naehzange-schweizer-modell./090-007-01 For today’s update, more sanding in the crotch areas of the yoke cam as well as small areas of the arm. I also installed the bushing and got some precision holes drilled. Then i put it temporarily together. I did decided to give it one more layer of wood on the arms. I chose 1/4” plain maple so that it would match the ambrosia maple cover plates and be flush with them. Before the additional maple it was about a quarter shy of the edge of the cover plates. One thing to note; the use of bronze or beryllium bushings is a must in my opinion for the cam and the moveable arm. No friction points and very very smooth operation. I used 1/4” ID 3/8”s OD and im happy with that. For the bolts i just used some grade 8 smooth shank bolts. The cam is a grade bolt with the threads and head cut off and the ends polished. The jaws will need work once it is screwed and bolted together. But thats for another time. I did trim them today but thats it. I very well may cut them quite a bit further and use some cocobolo to bolster that area back since i have some.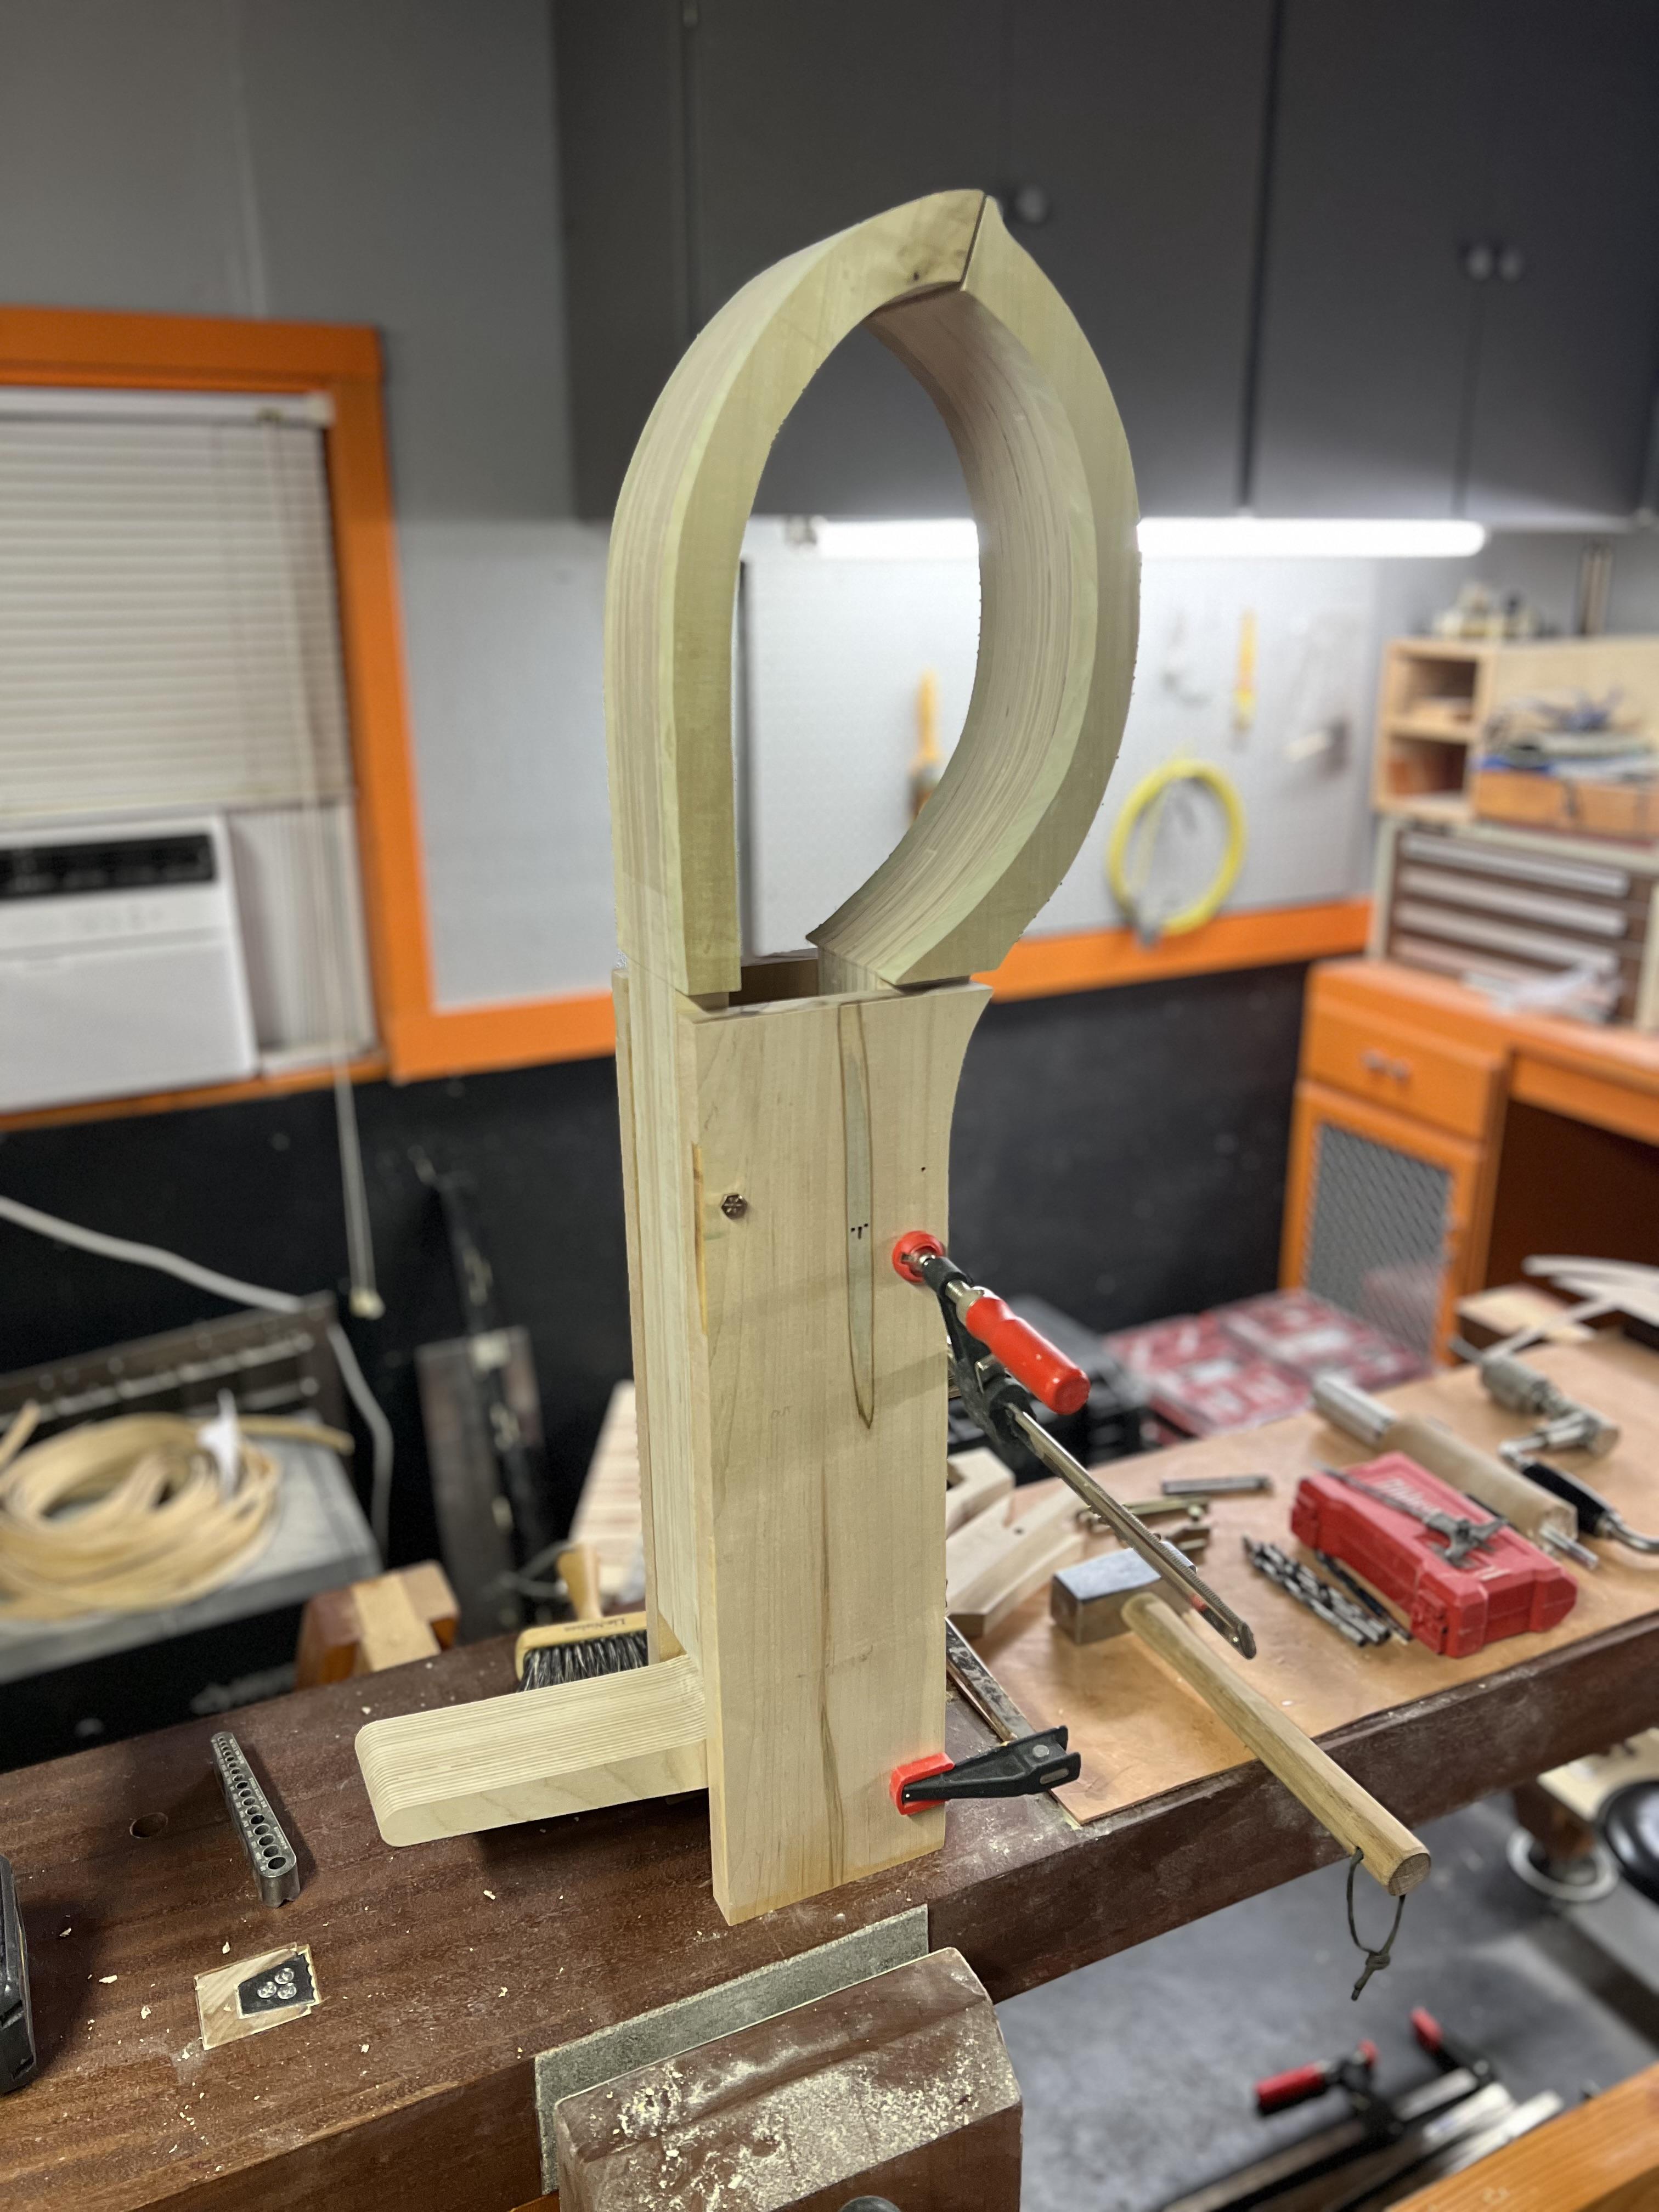
-
Swiss Saddler Clam Drawings
ClaimedVacancy replied to ClaimedVacancy's topic in Leatherwork Conversation
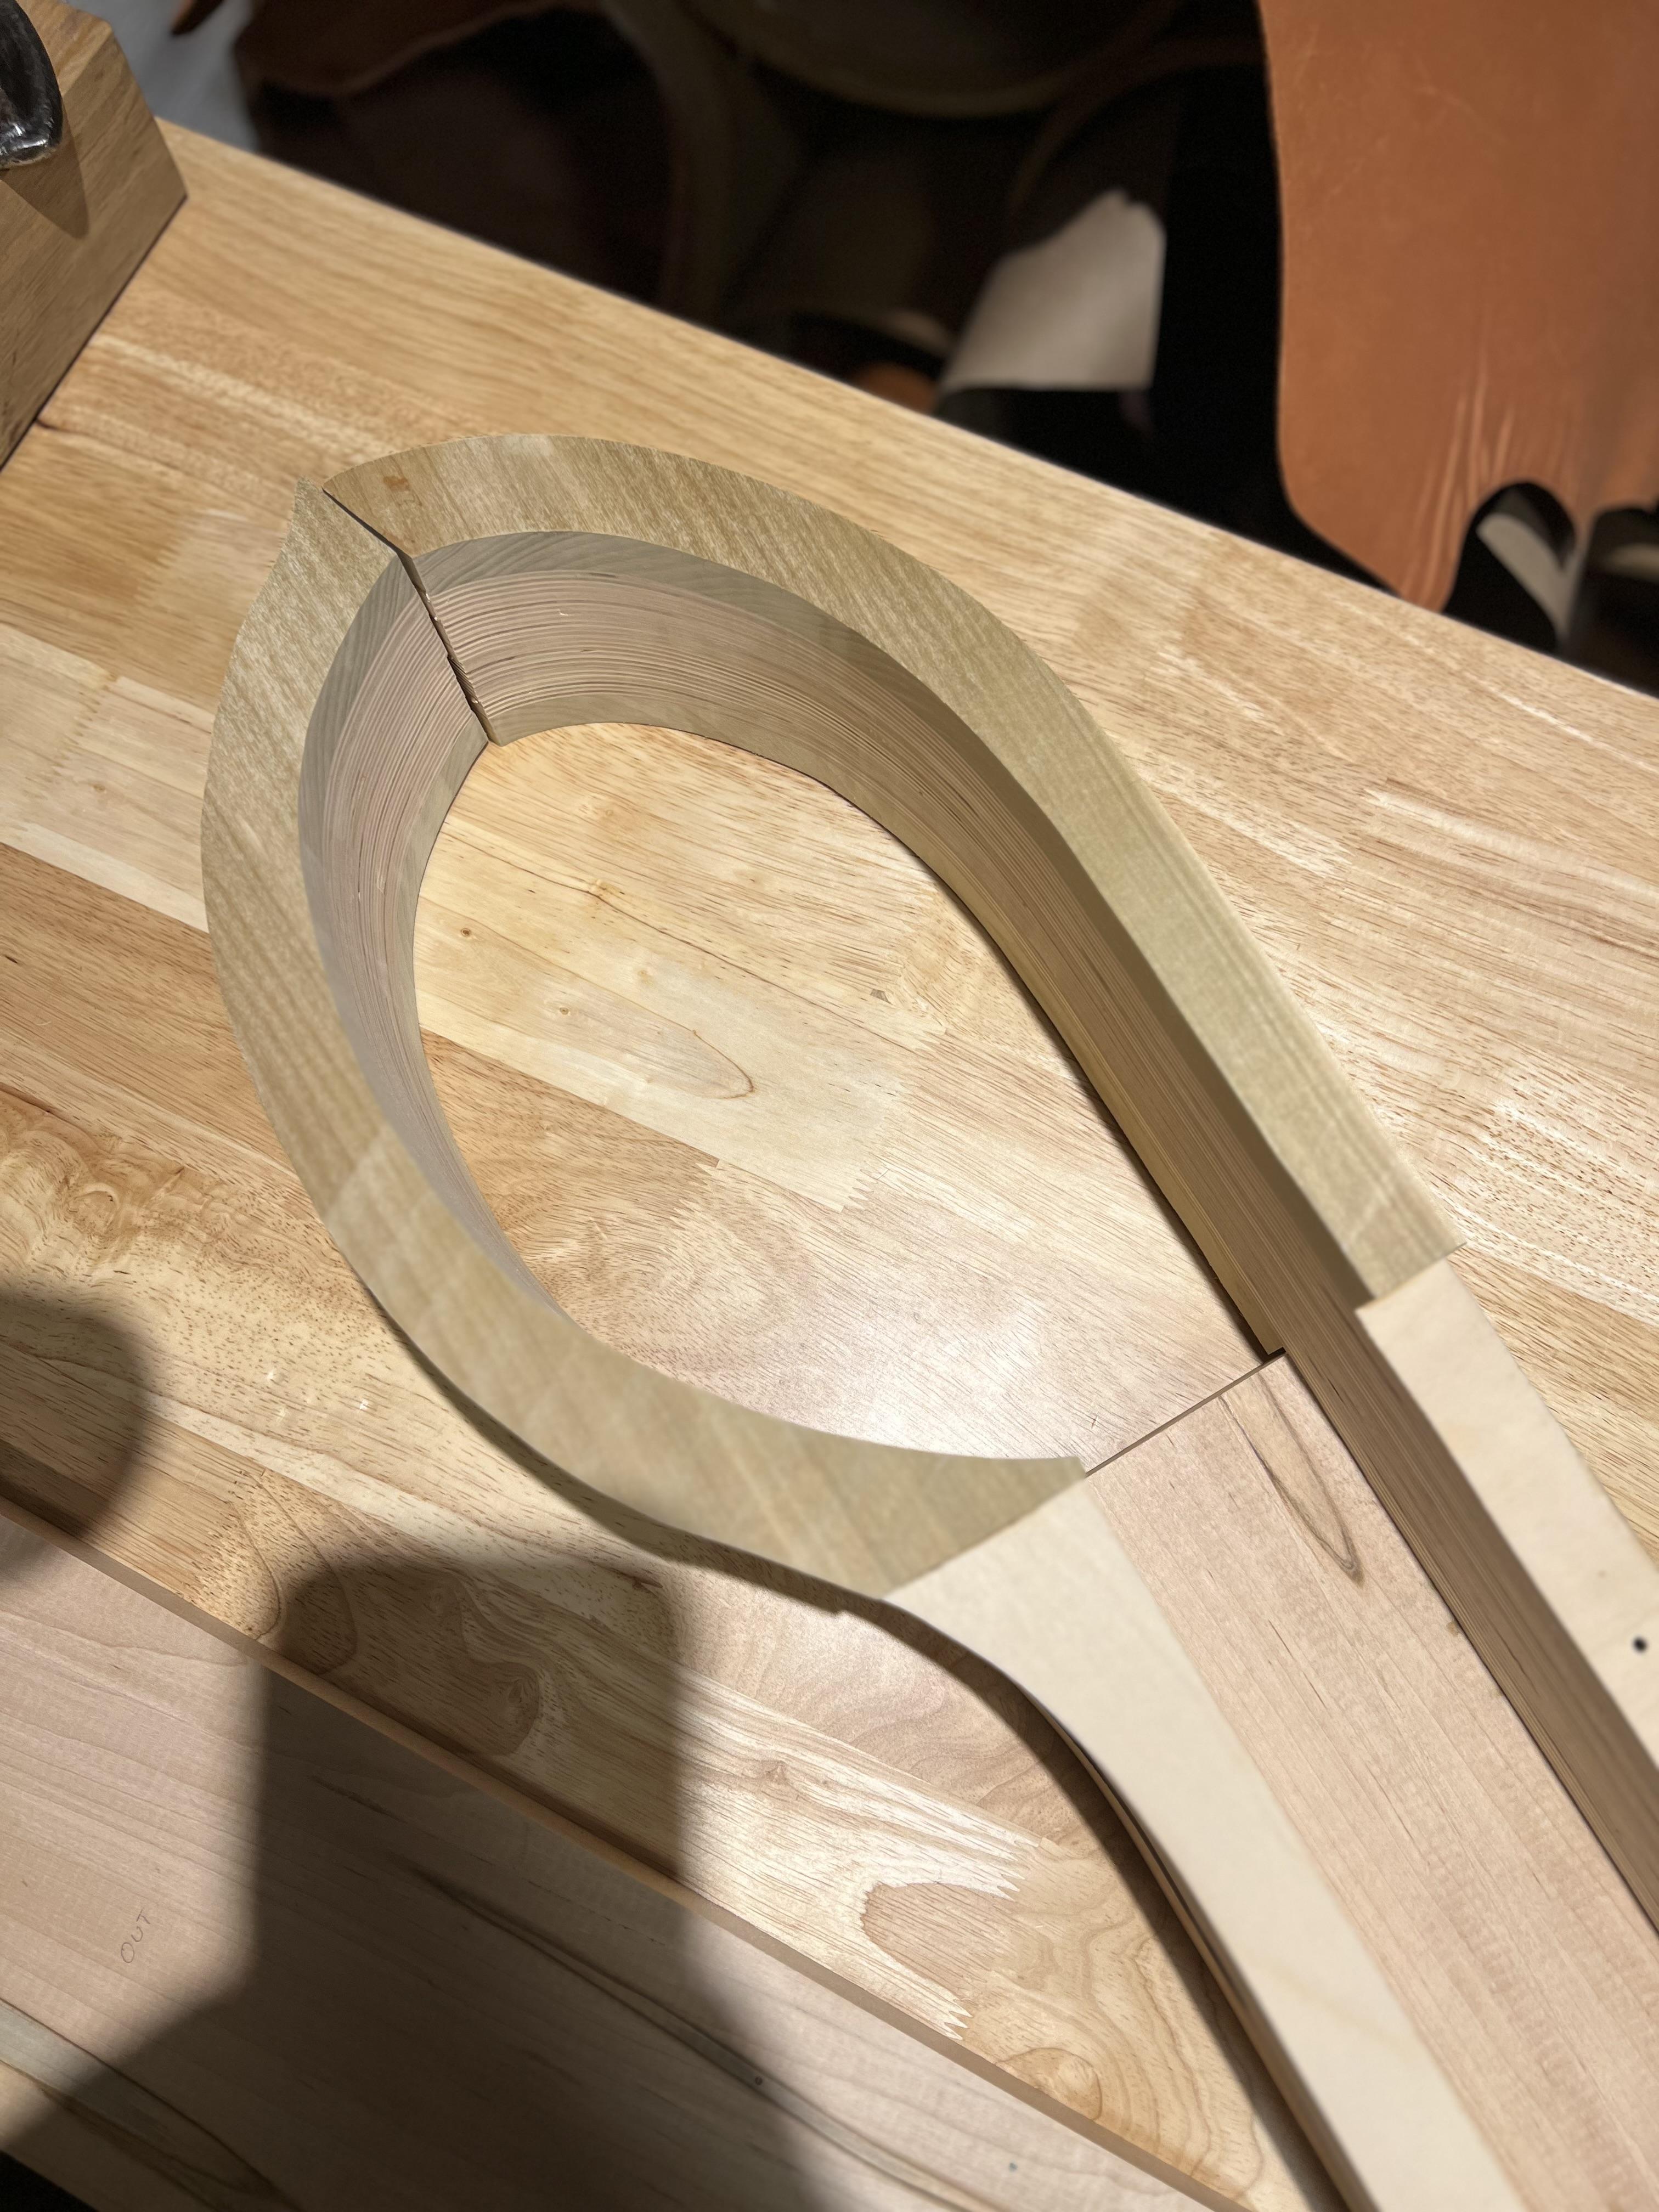
@dikman man! Are those still up for sale on marketplace? Yeah those are ones that are still for sale on the site i posted at the beginning of the thread! I certainly haven't found out any info on them either. I did study that particular one though. In fact, I’m going to model the locking device. Here is update #4 for today: All the parts are 90% shaped and sanded. So far so good.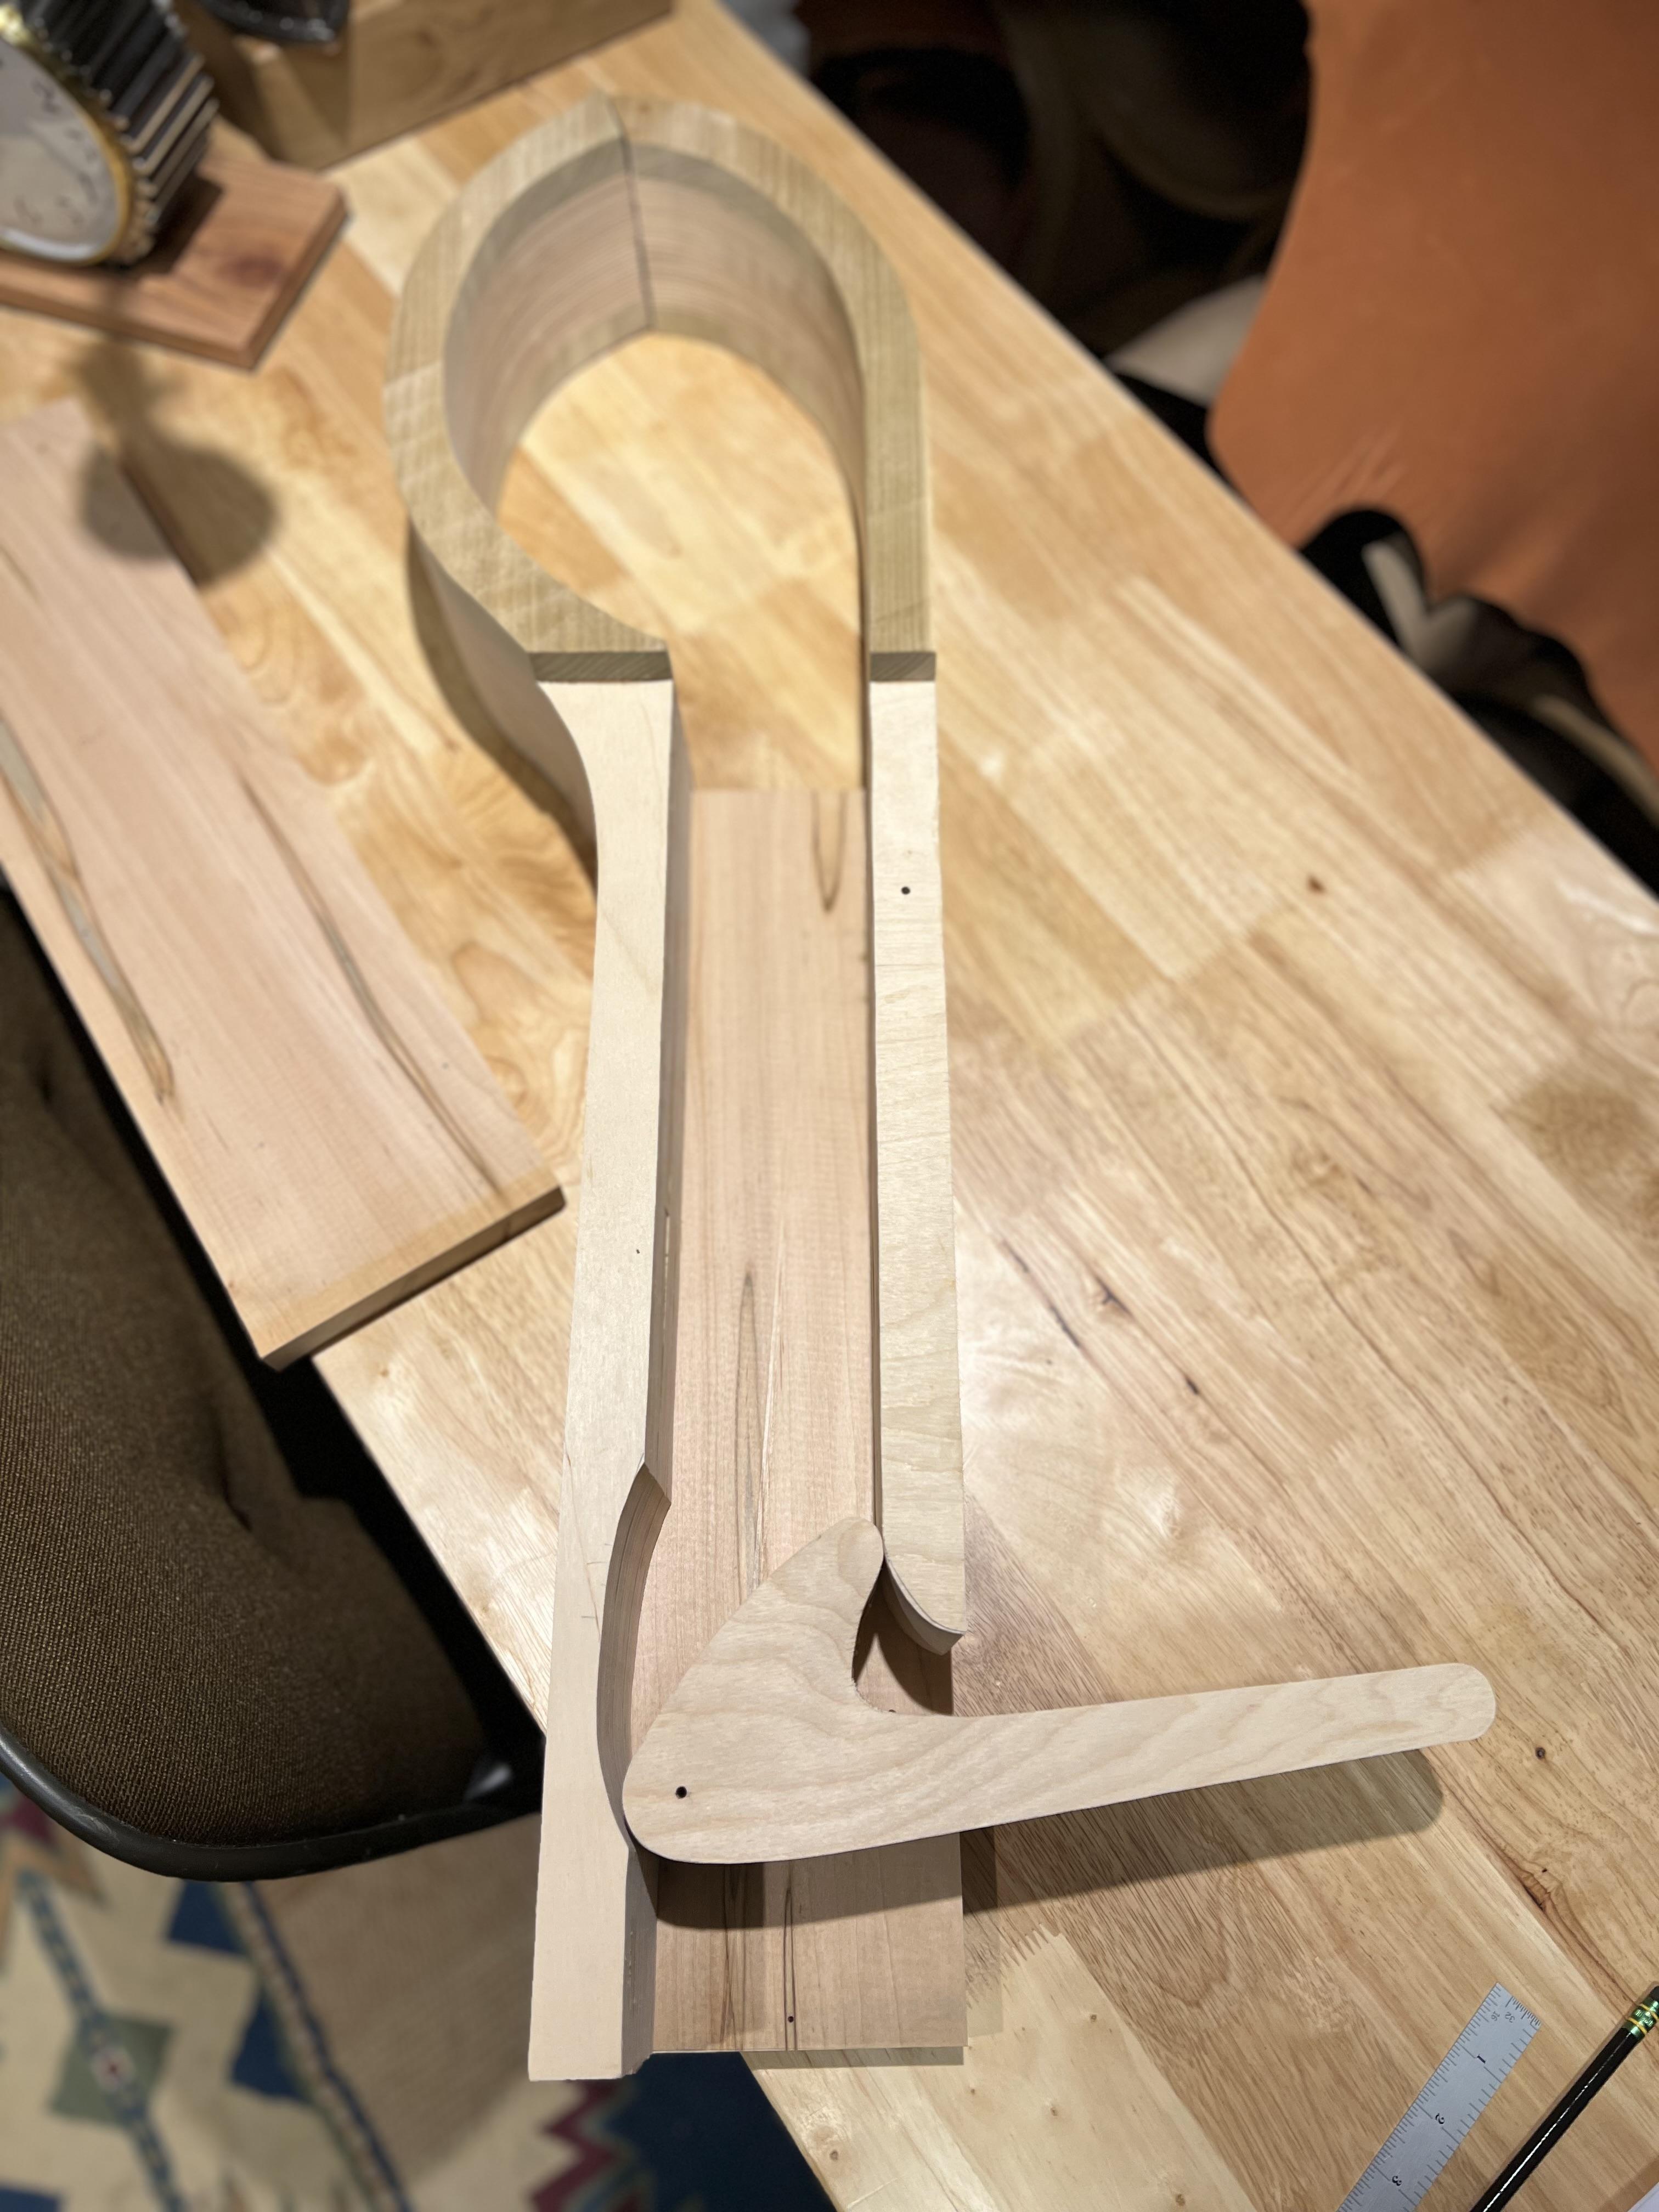
-
Swiss Saddler Clam Drawings
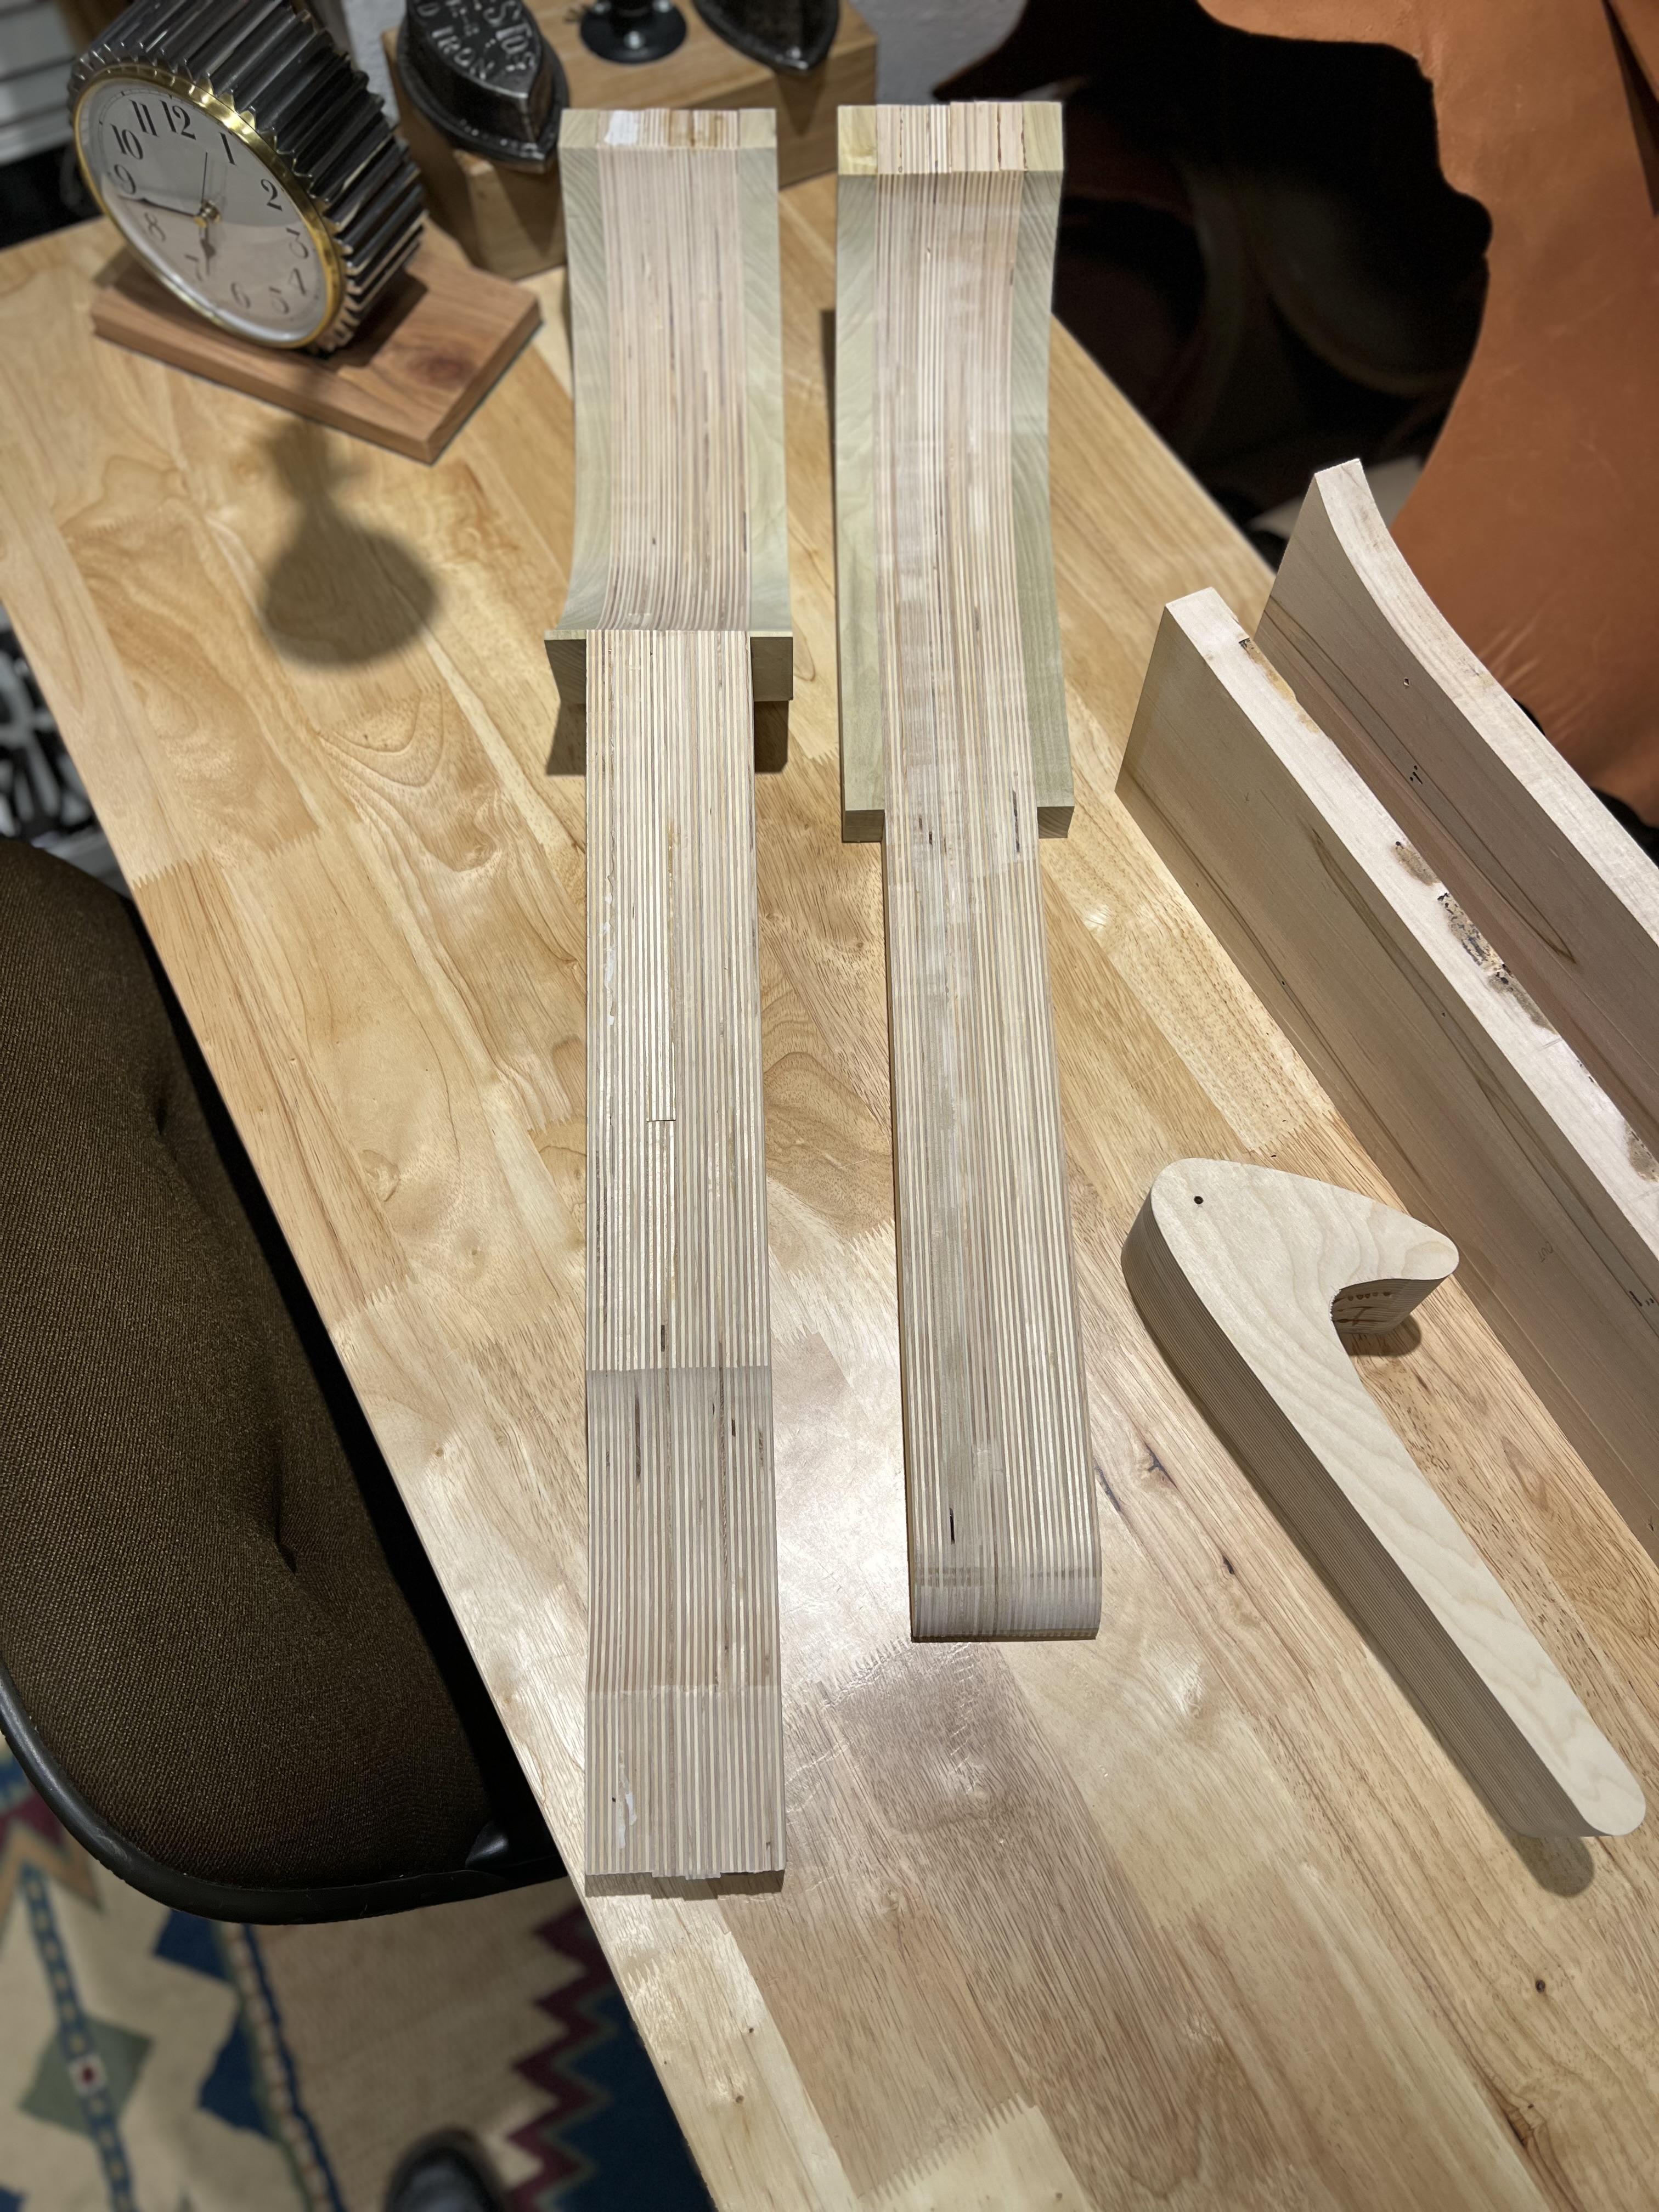
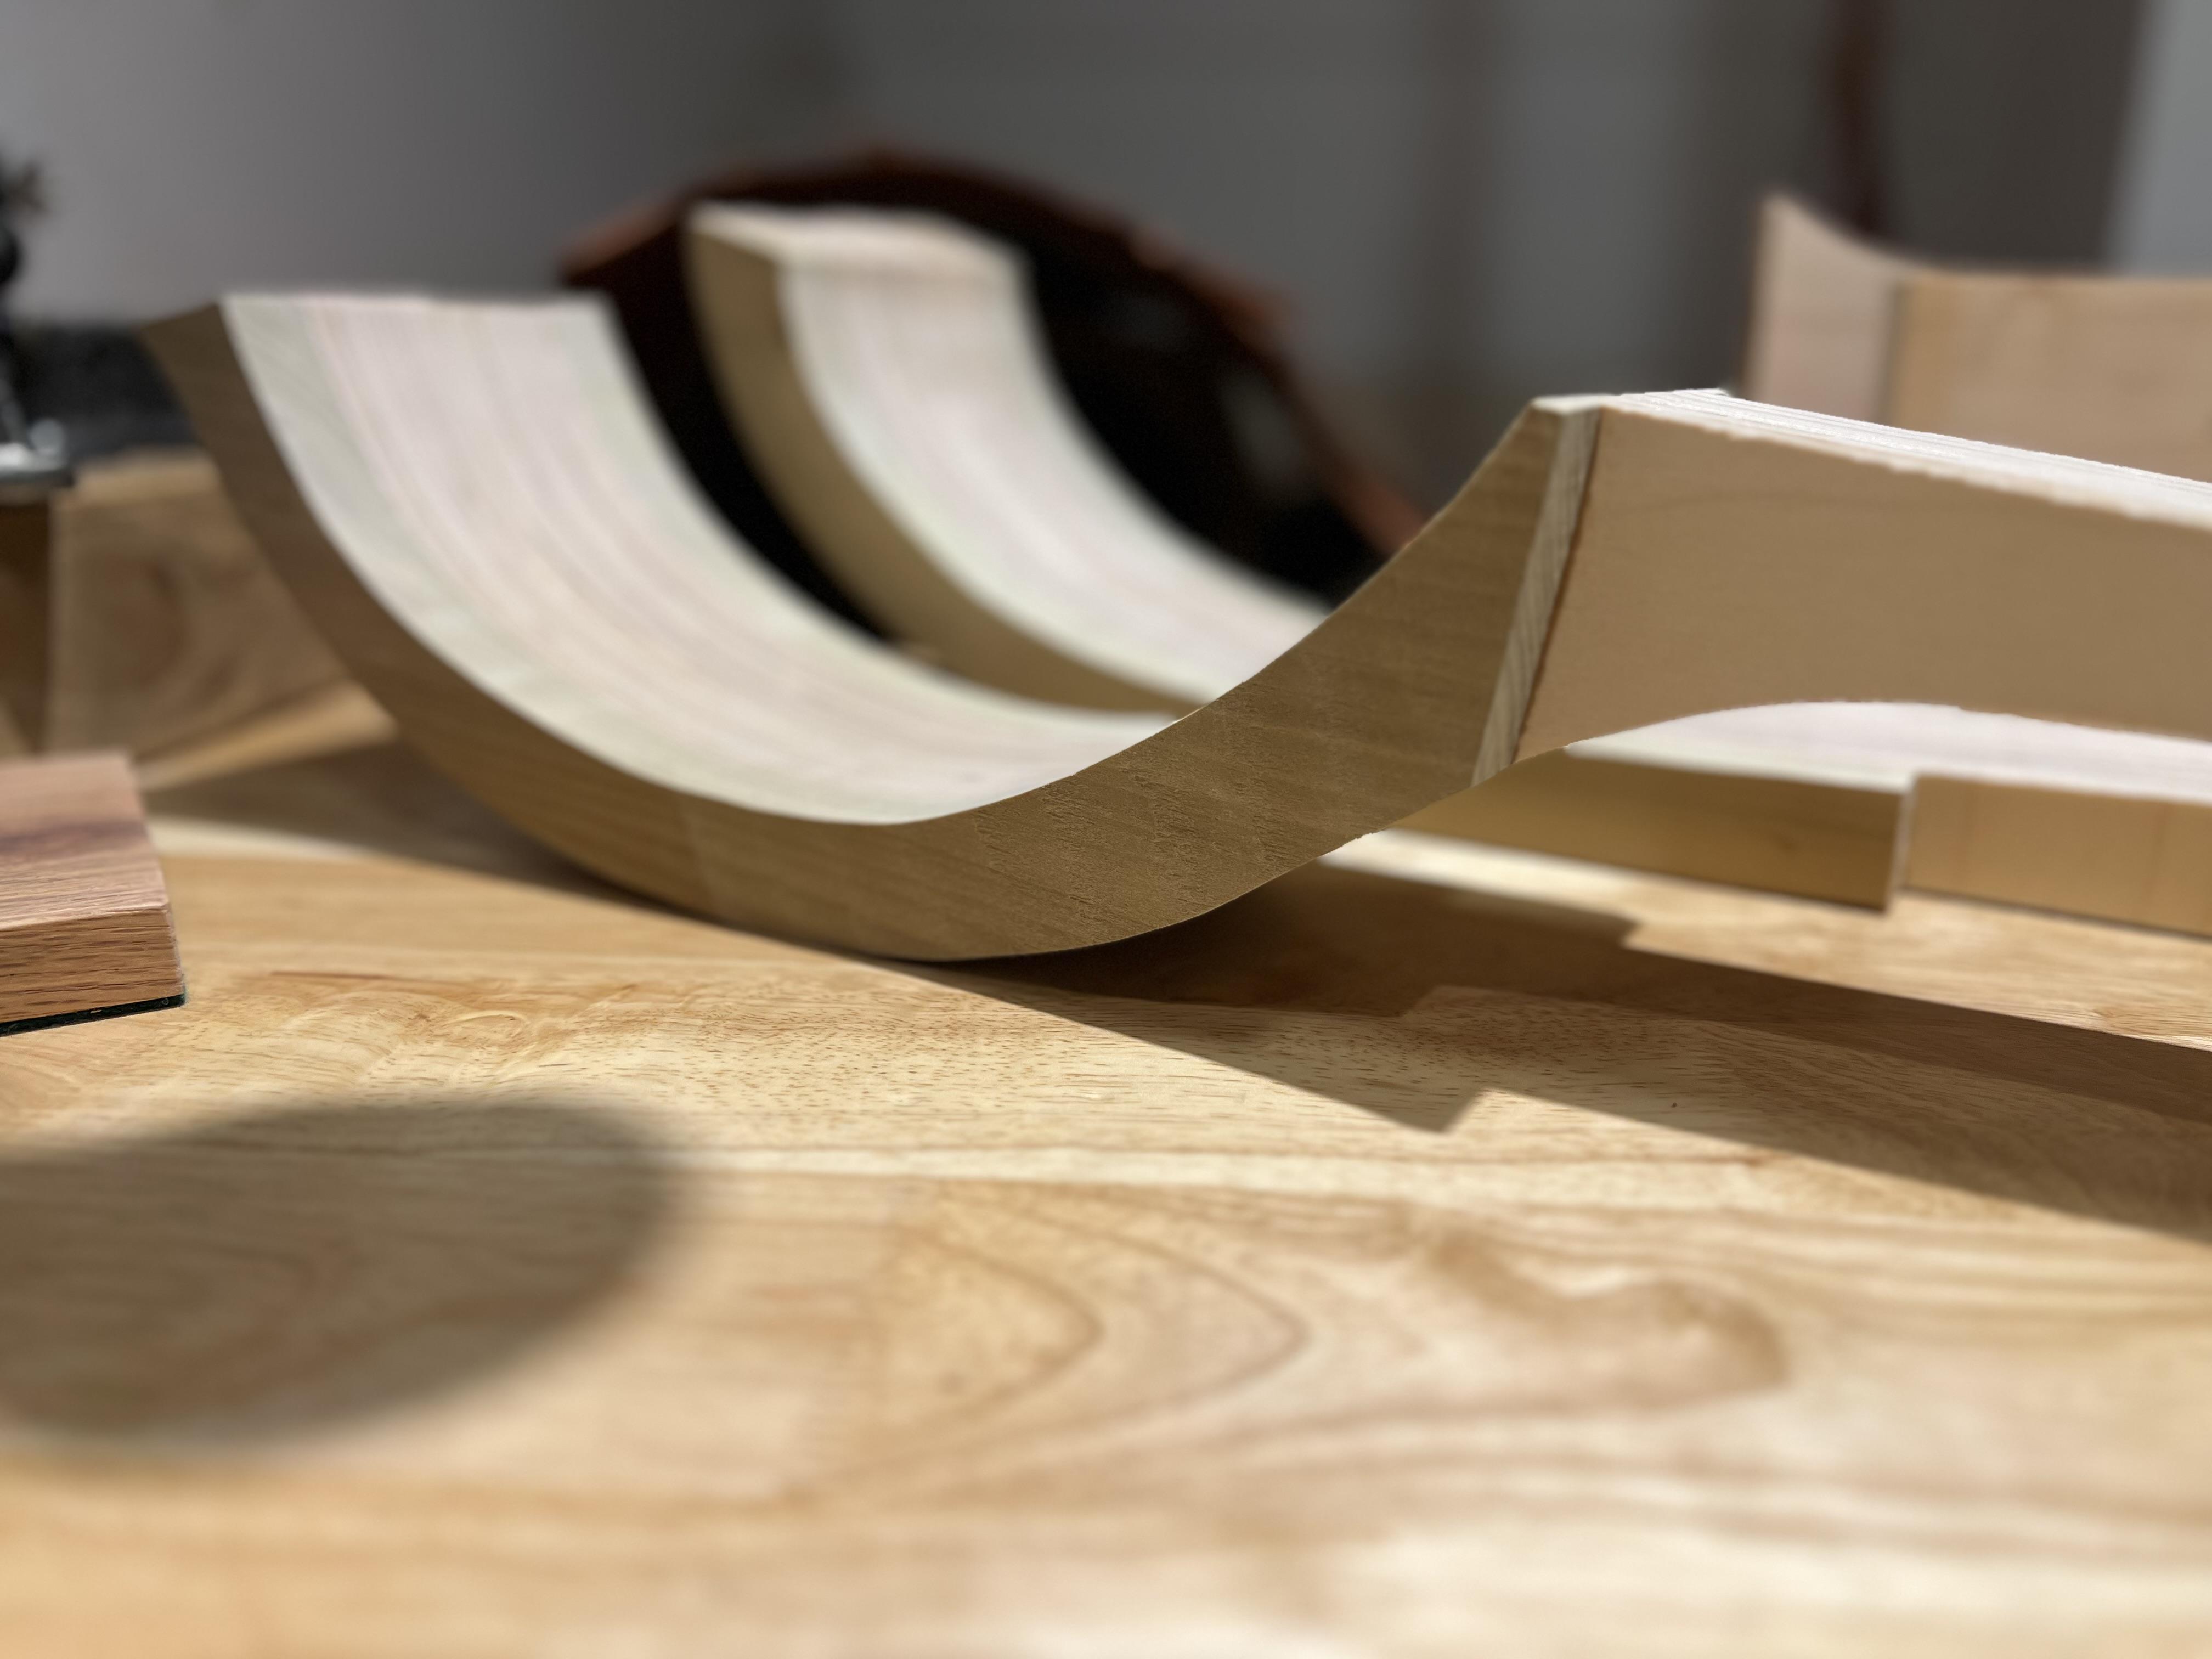
ClaimedVacancy replied to ClaimedVacancy's topic in Leatherwork Conversation
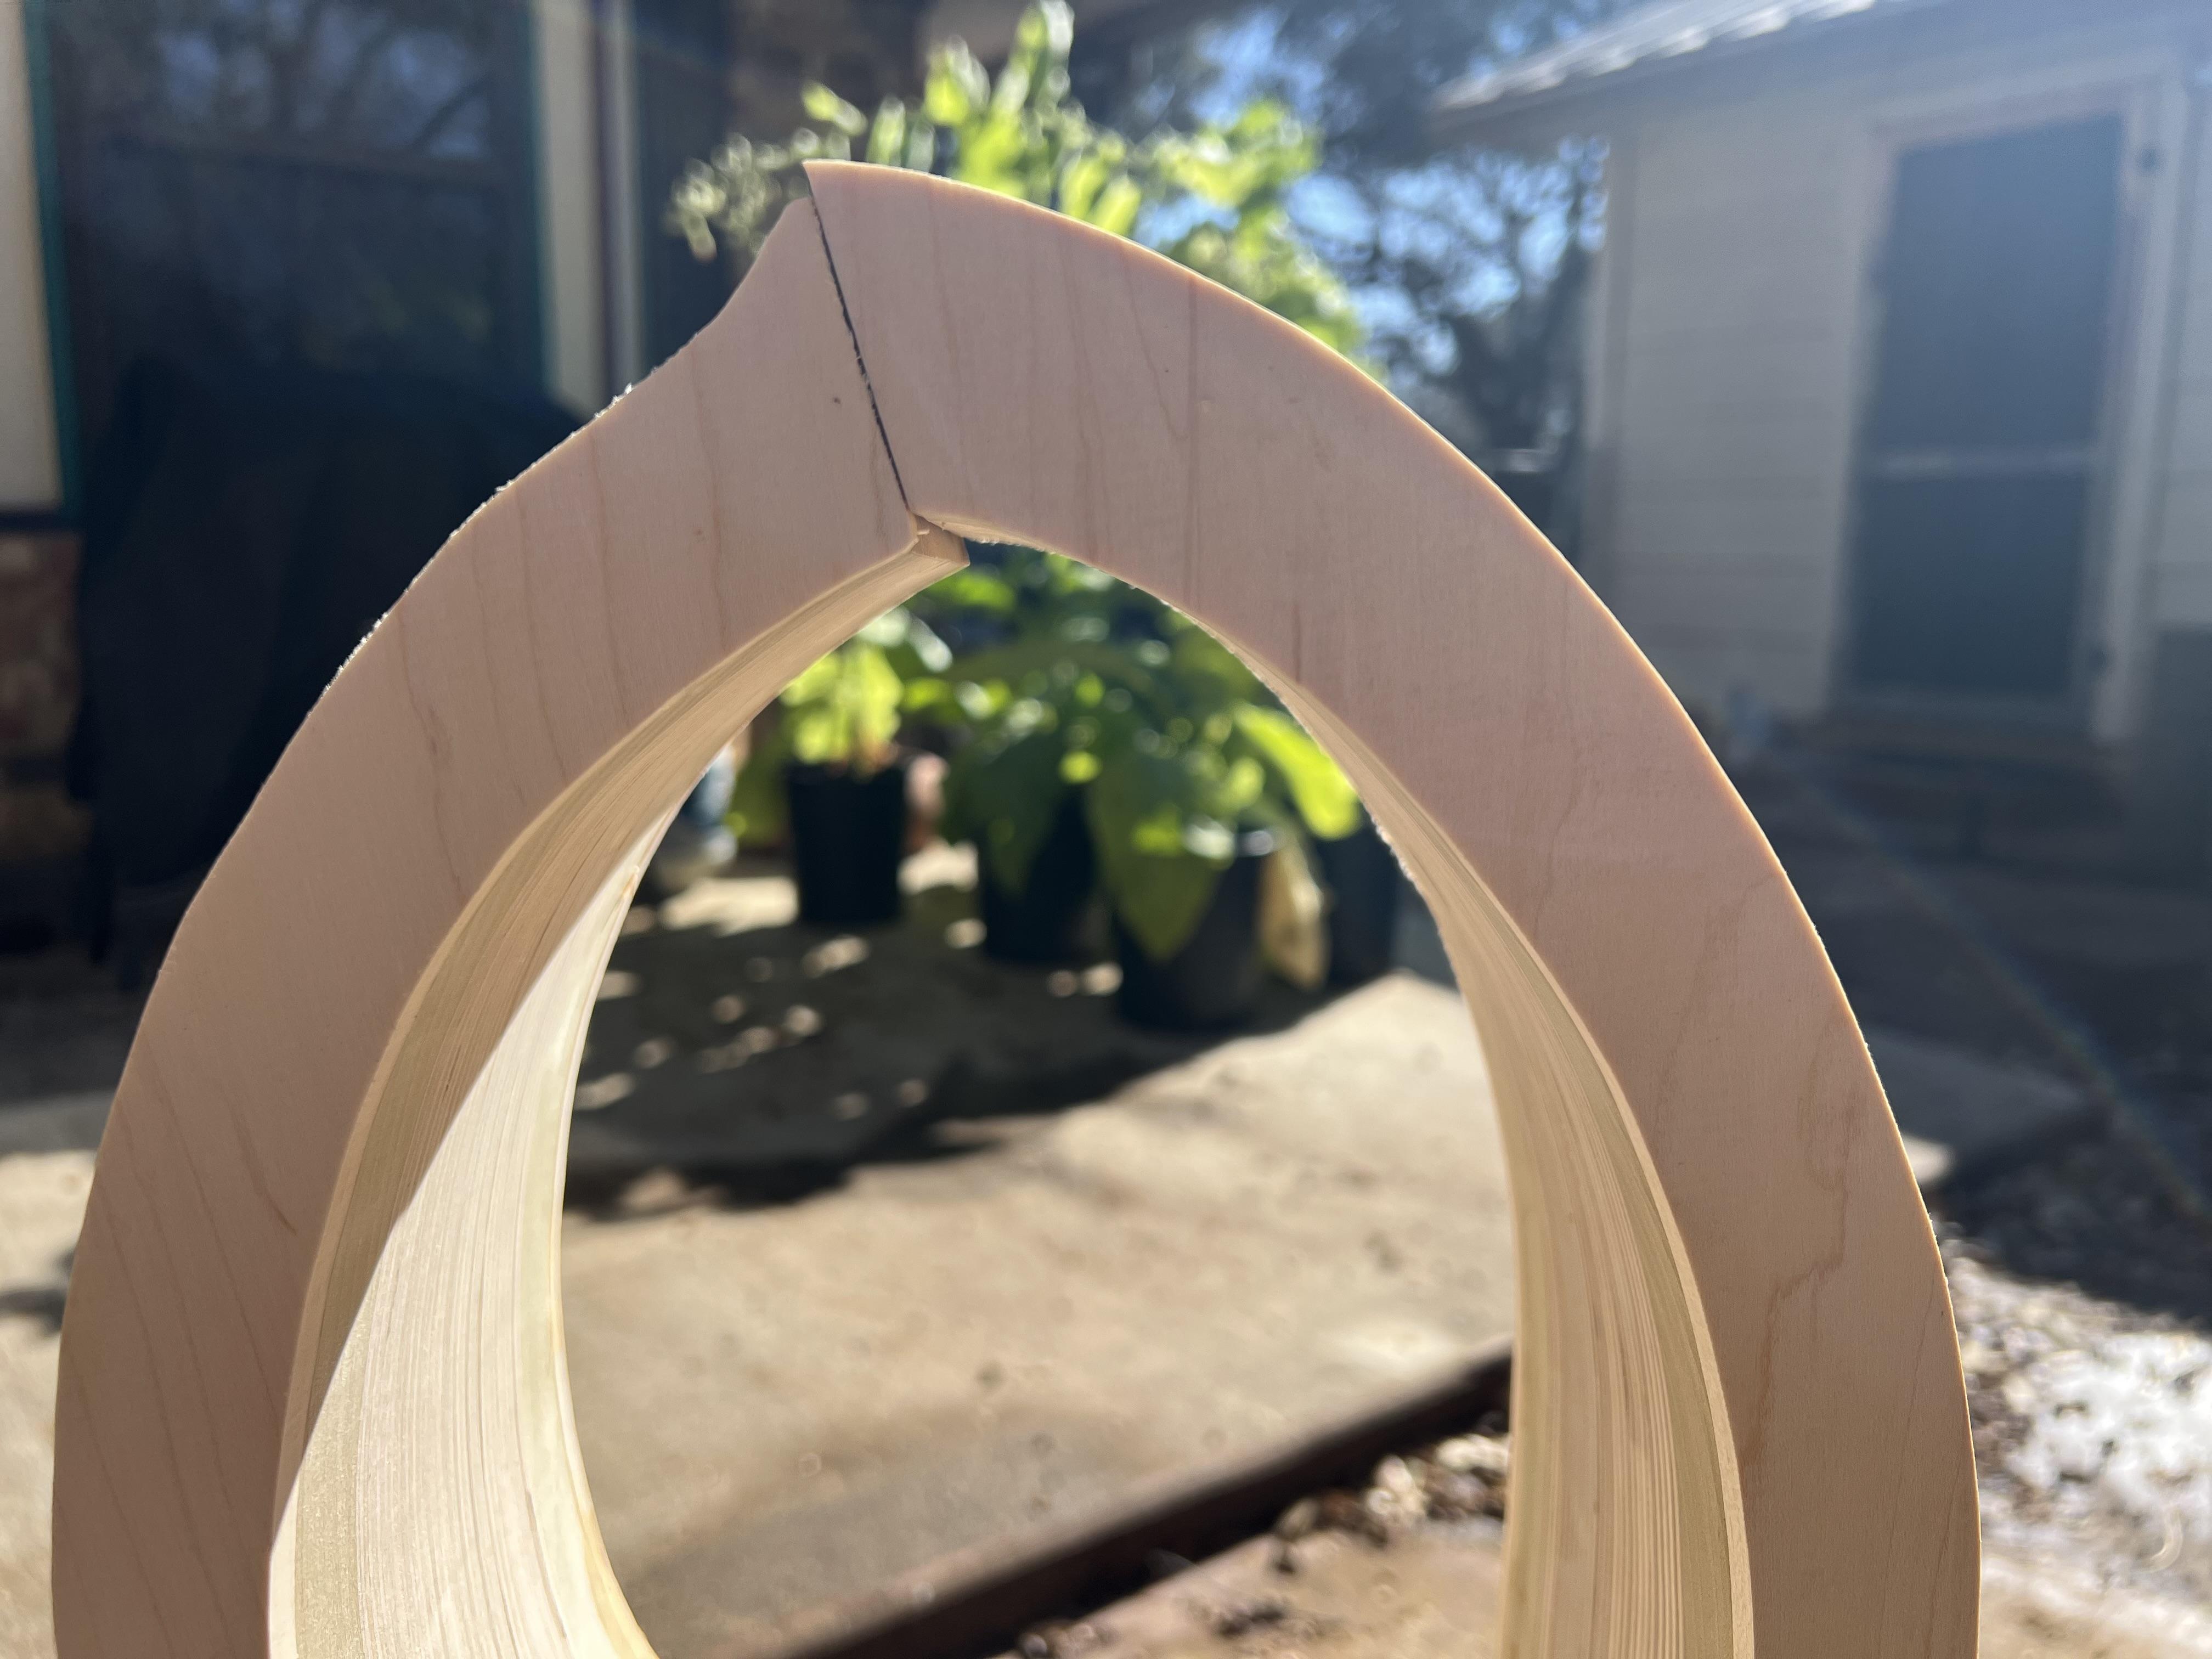
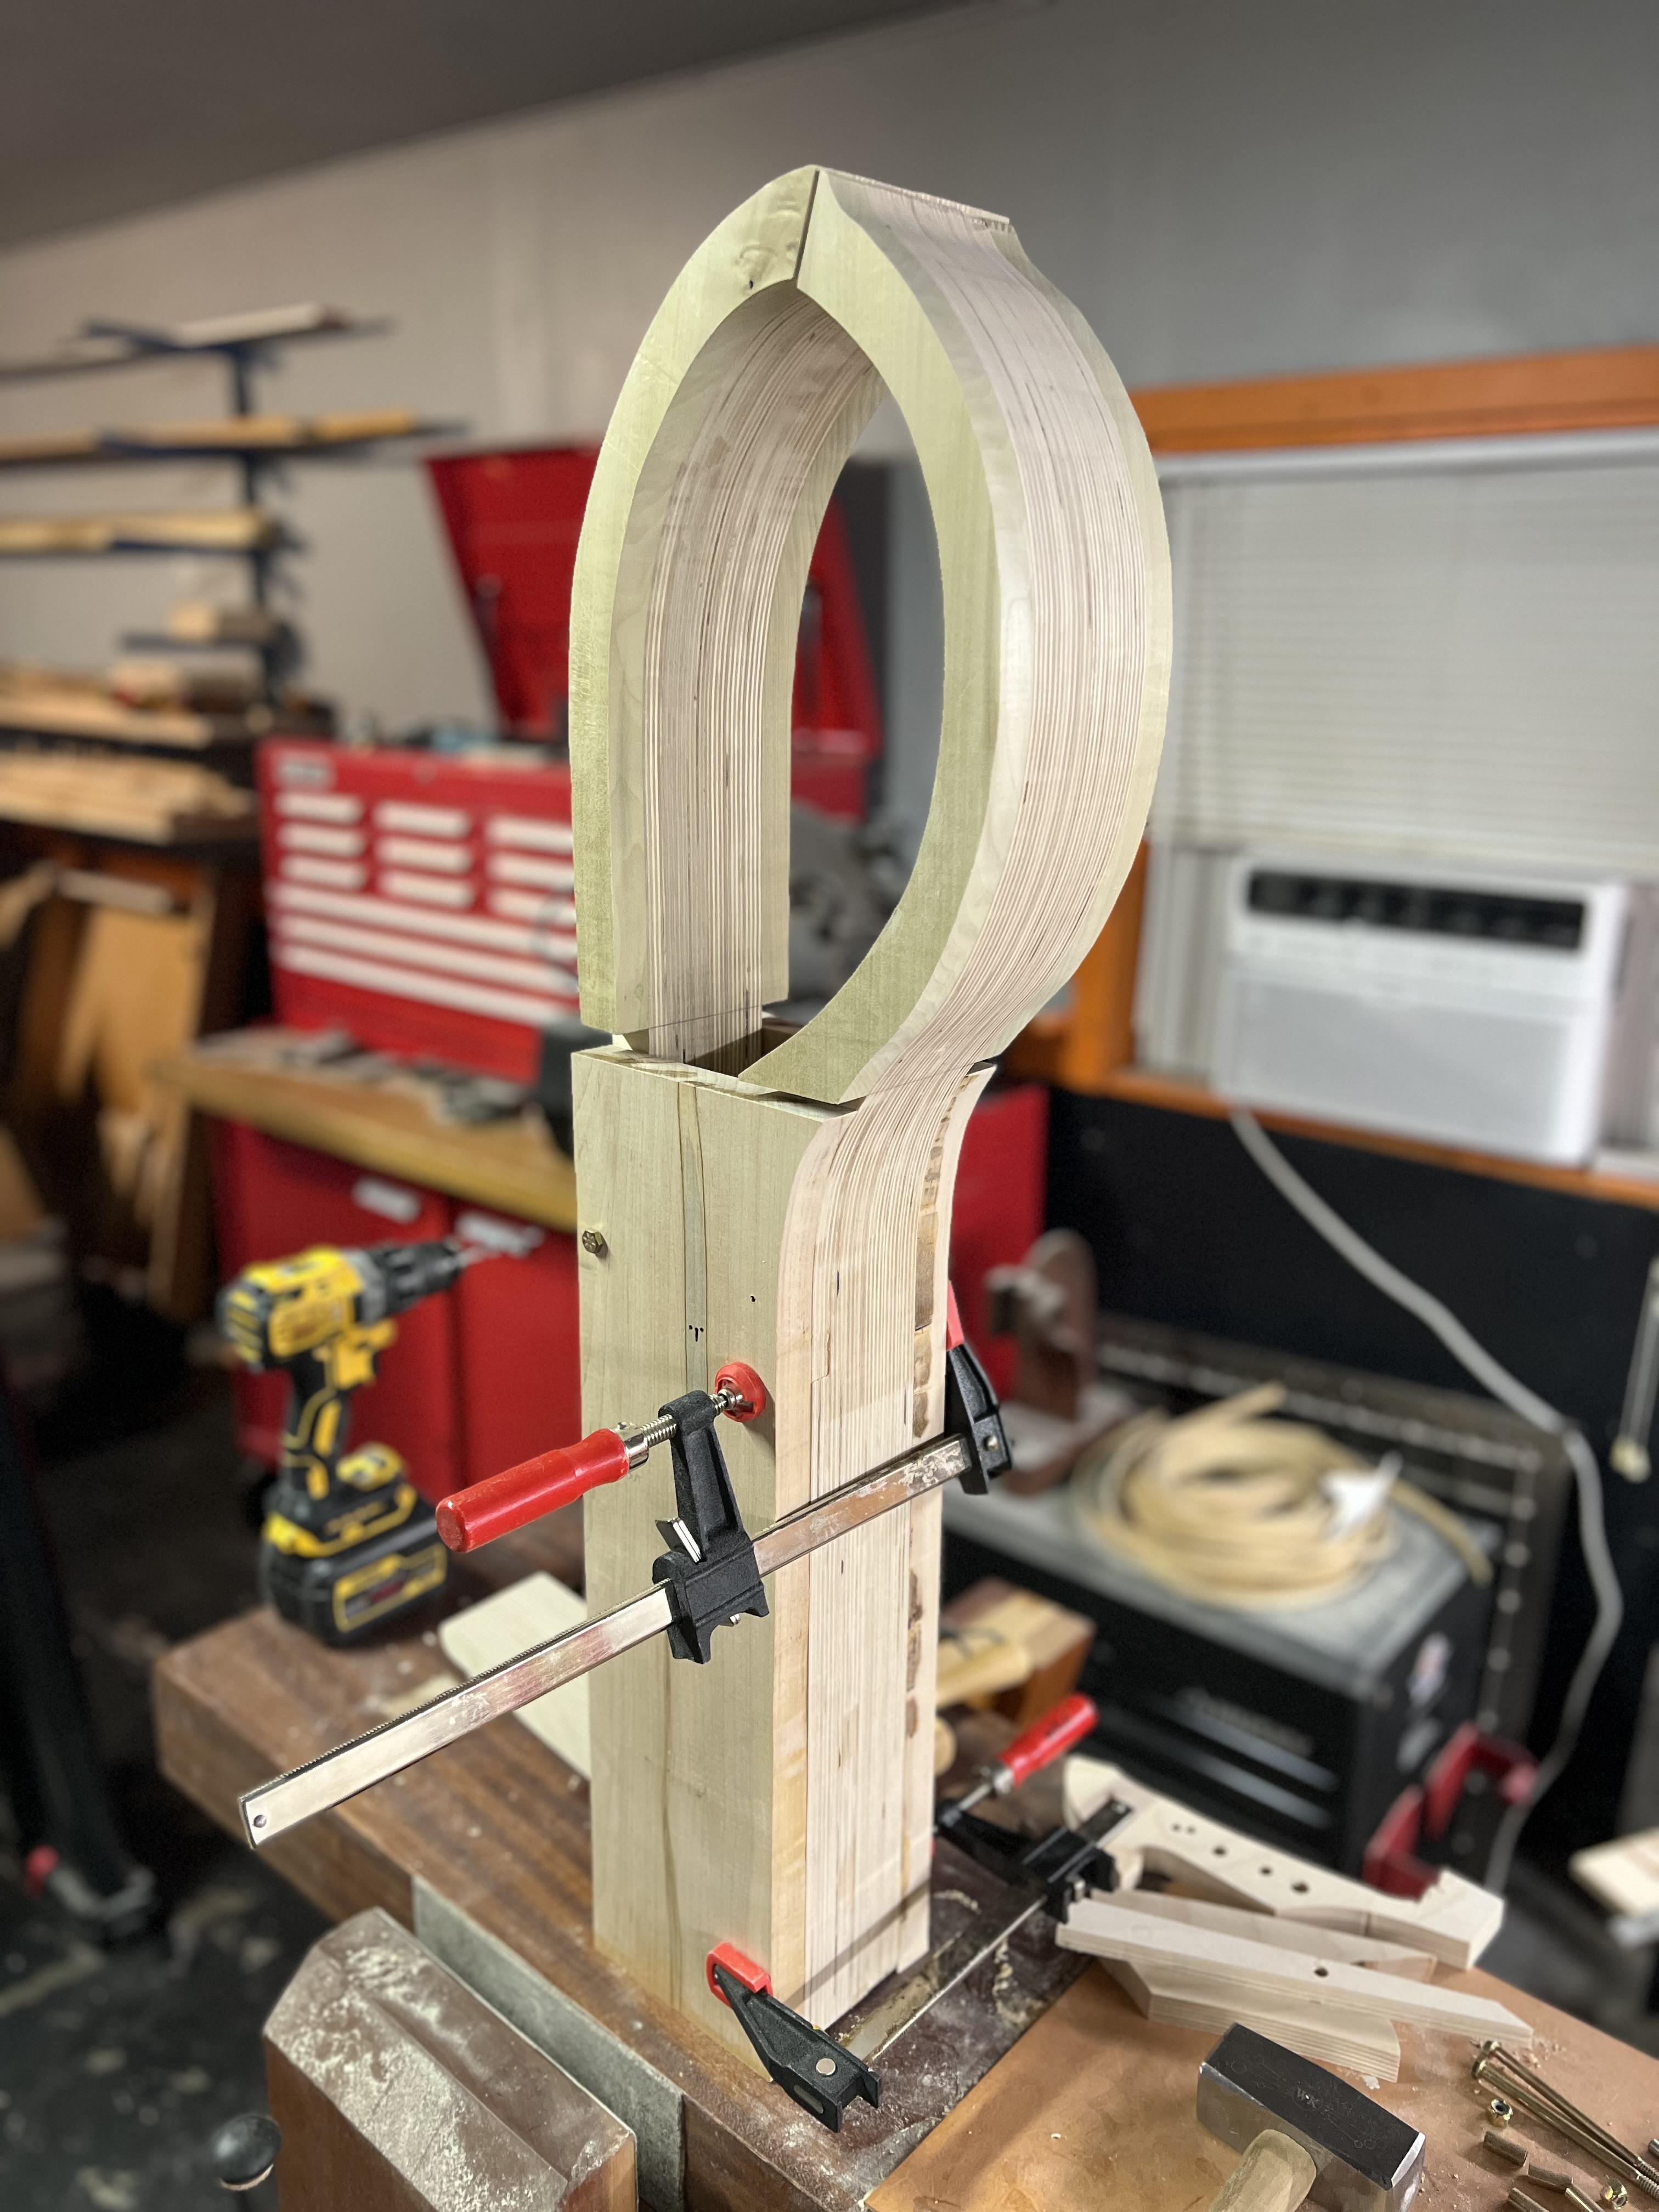
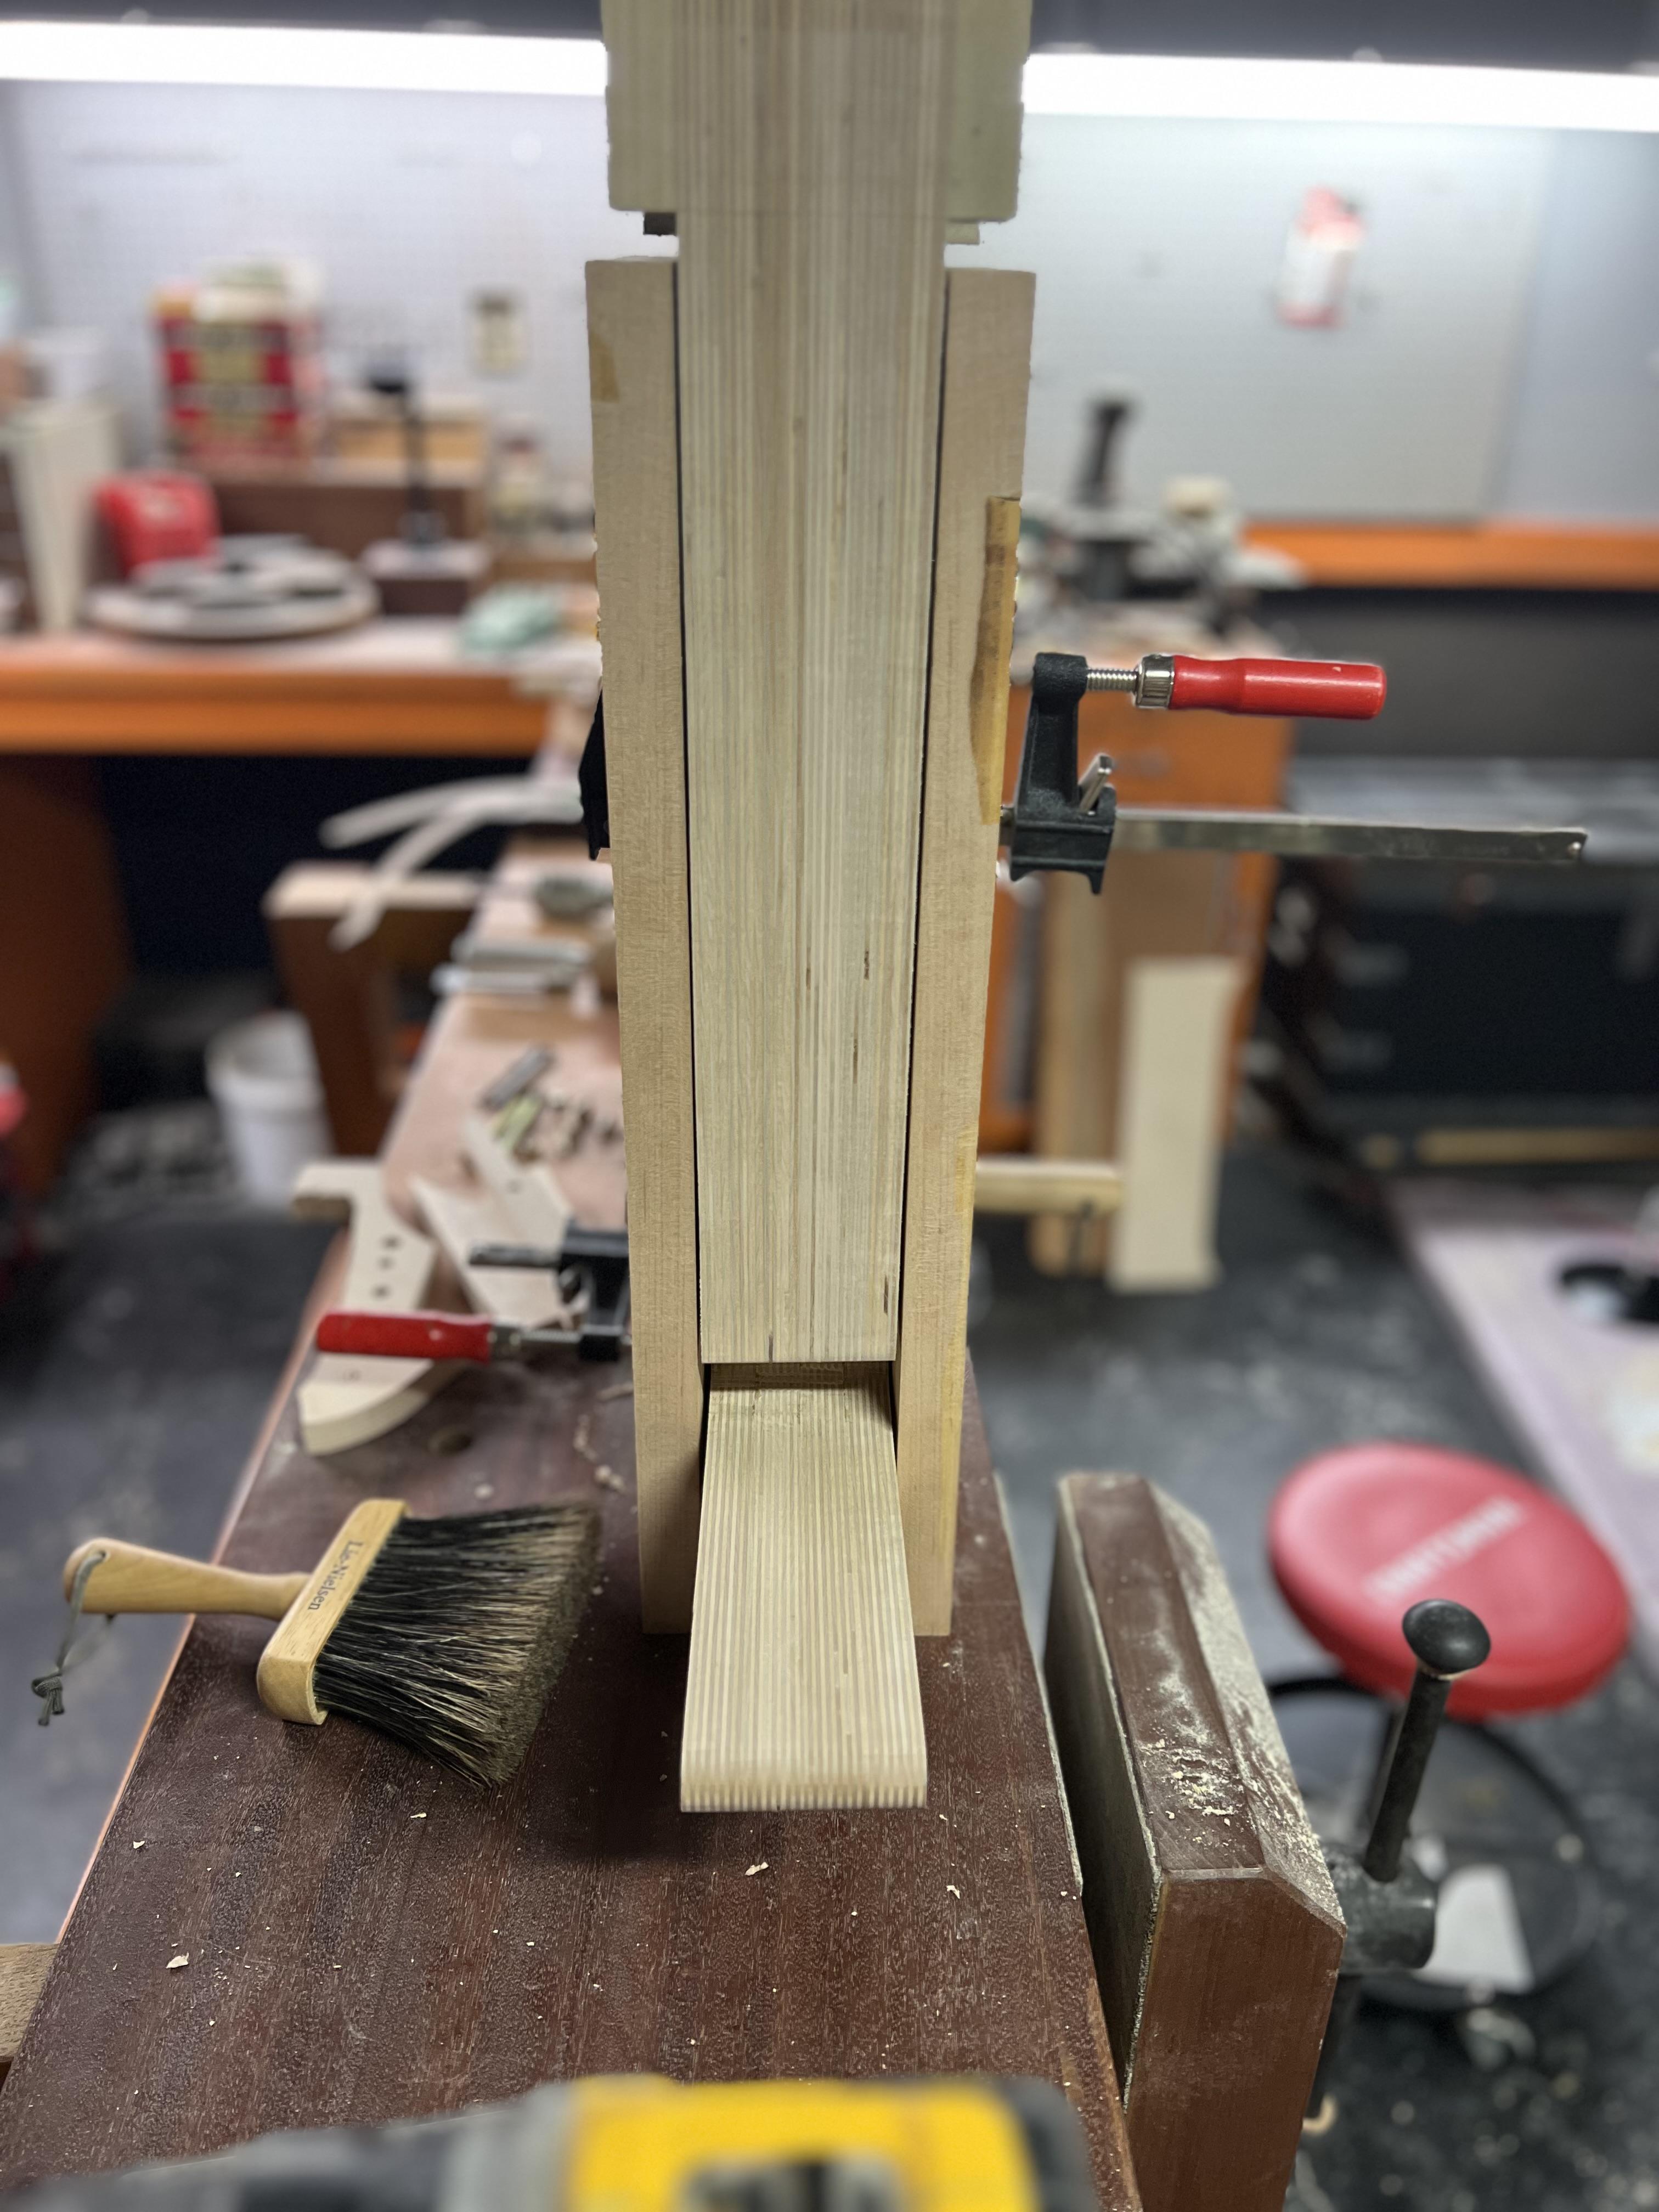
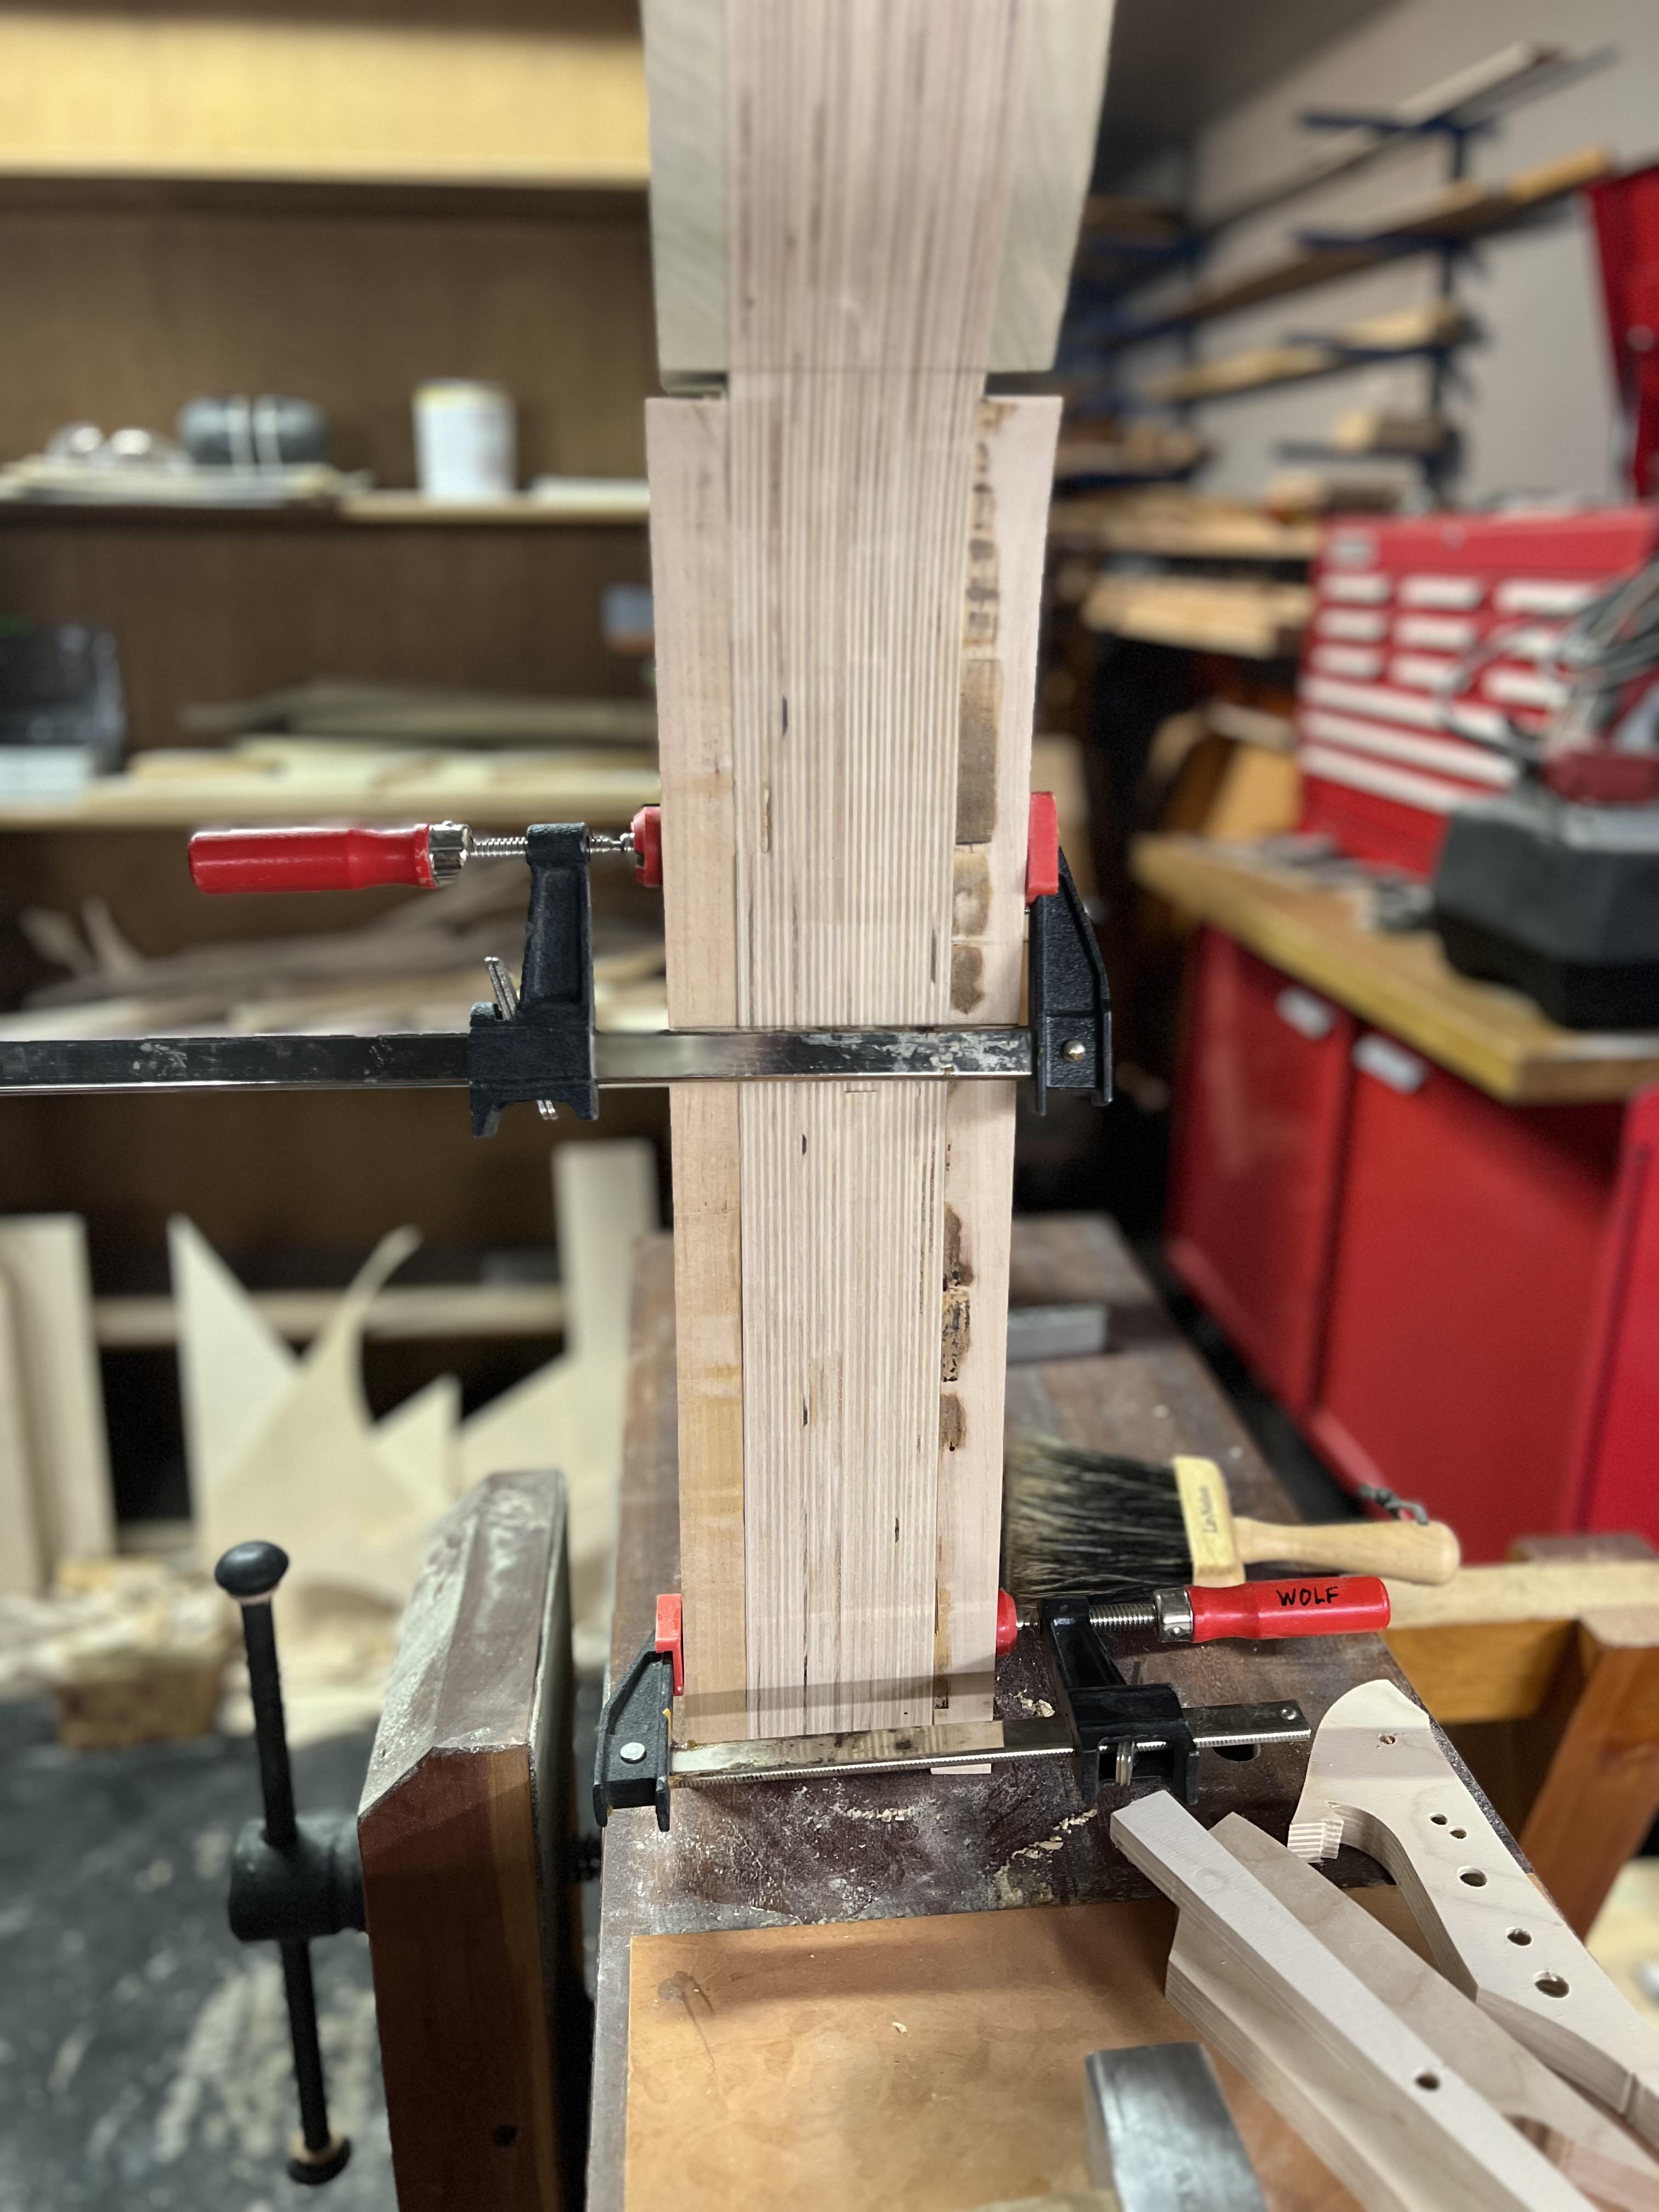
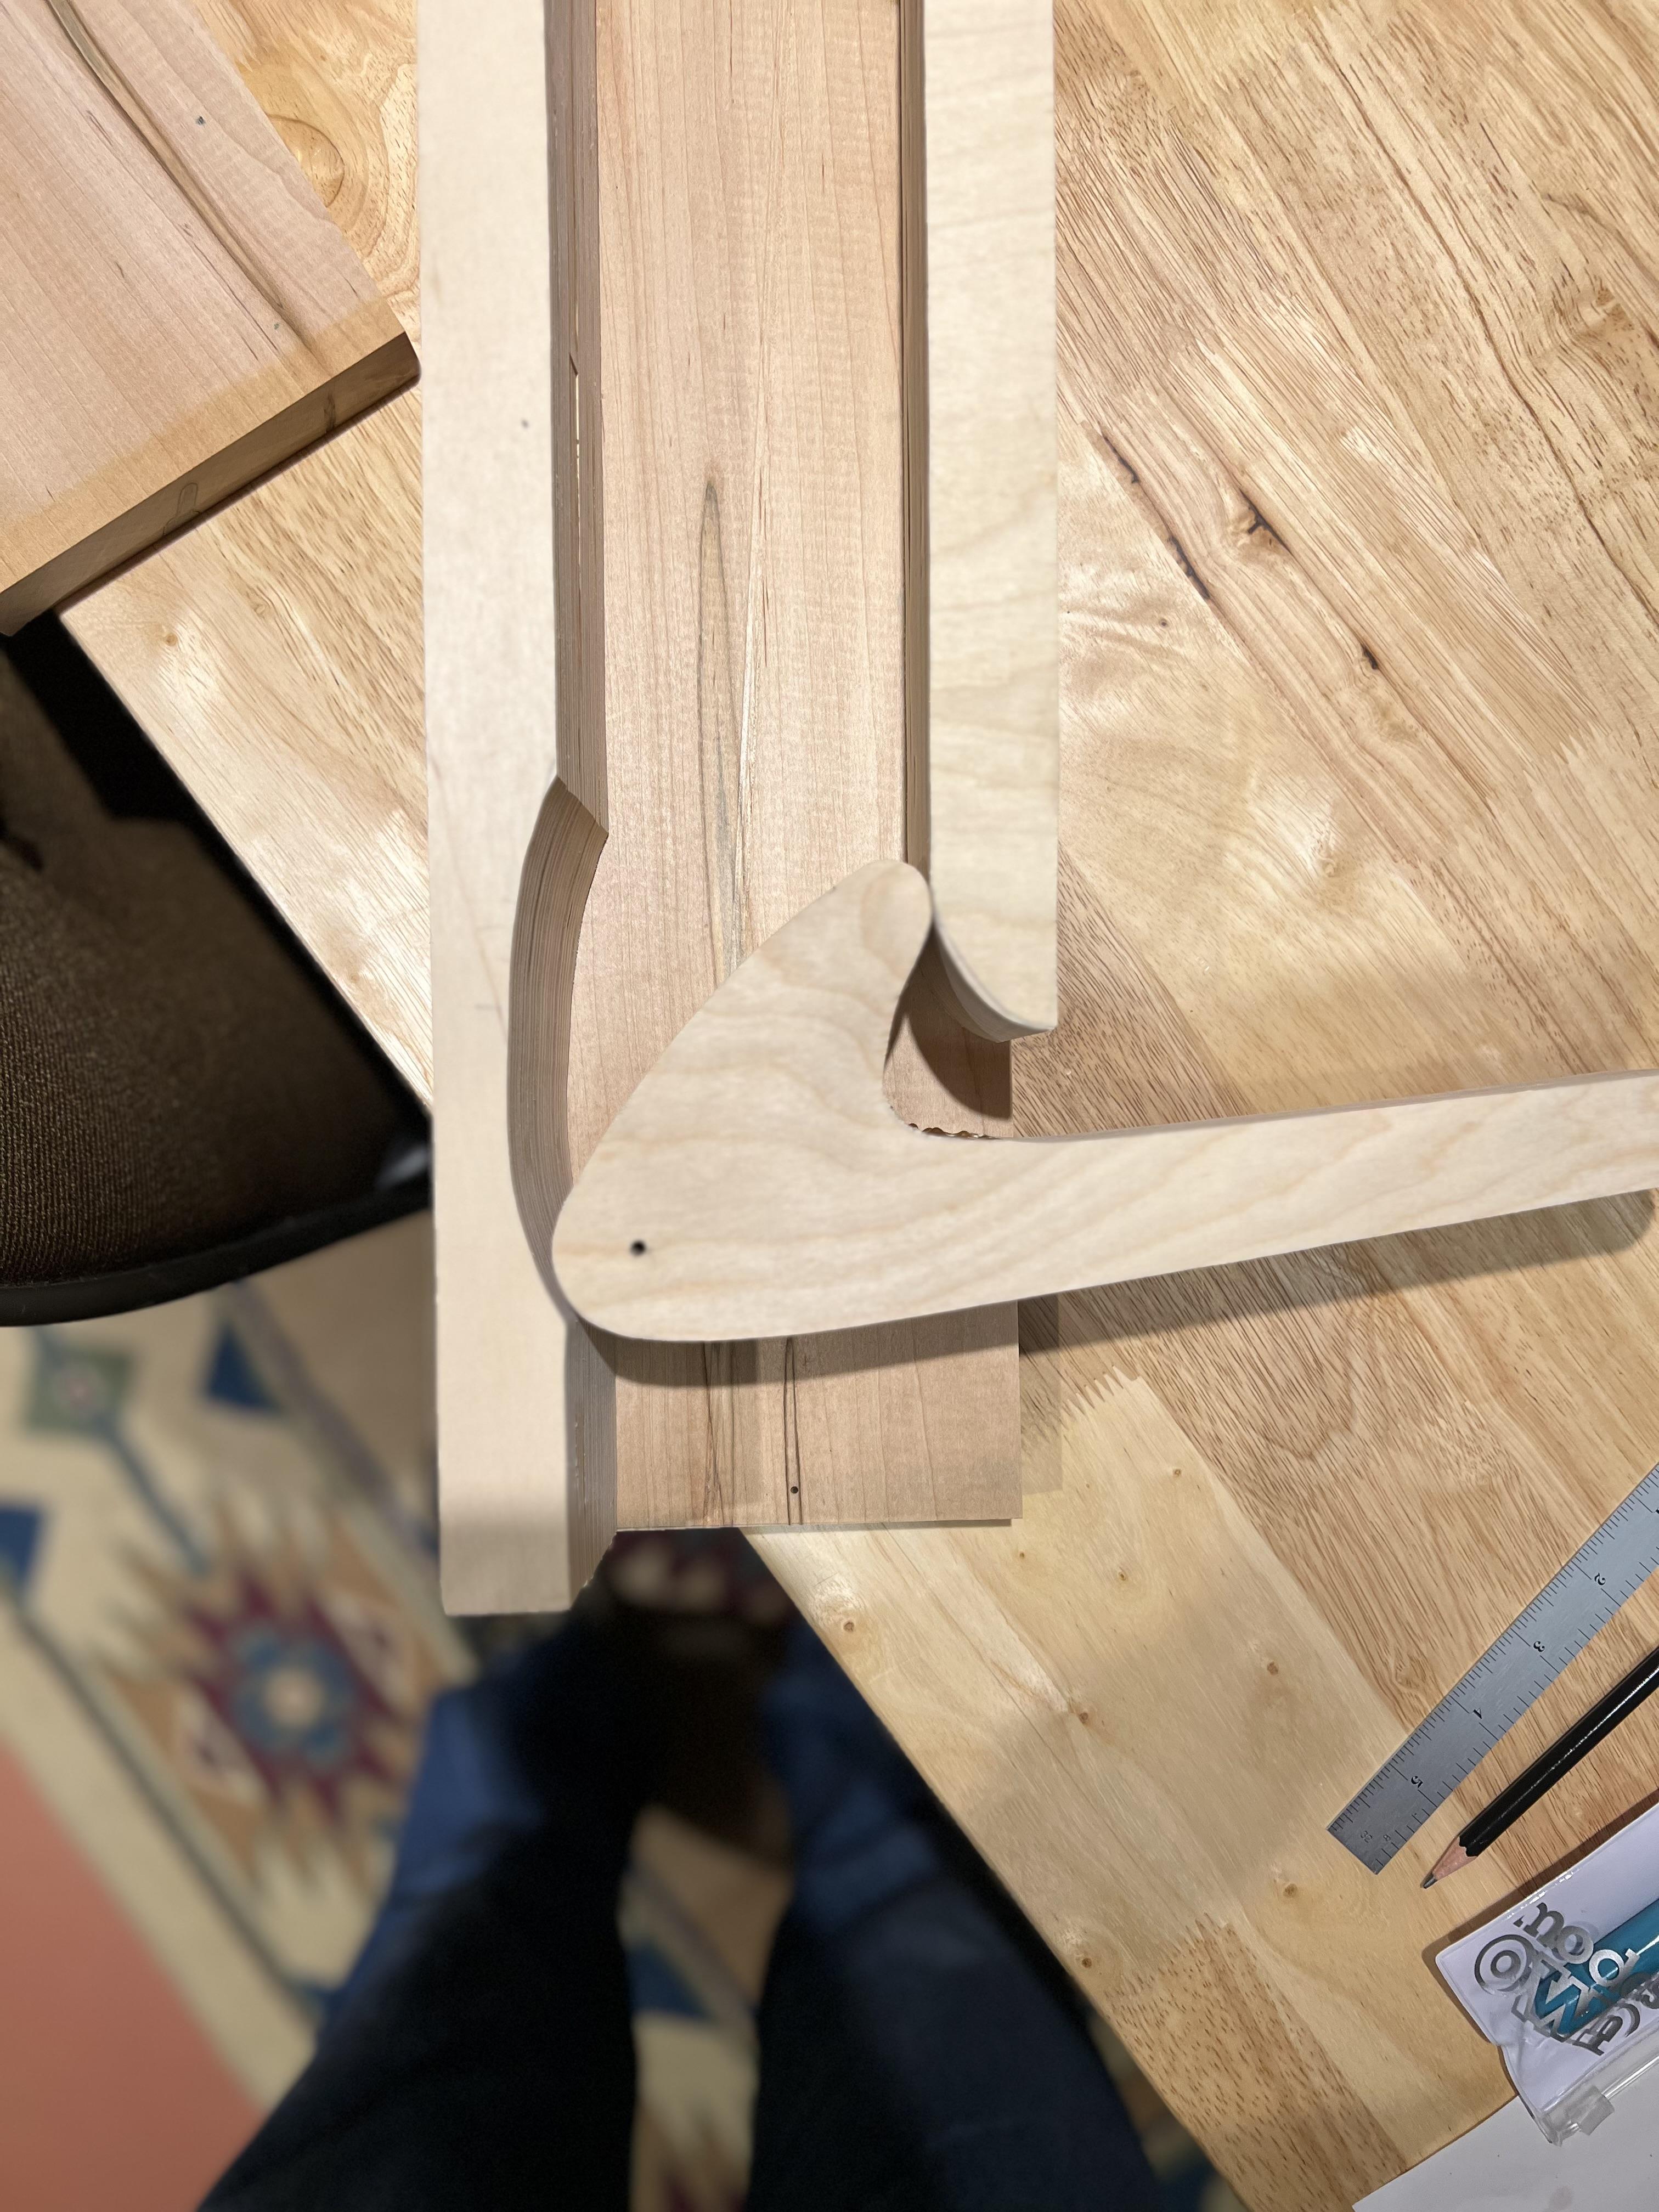
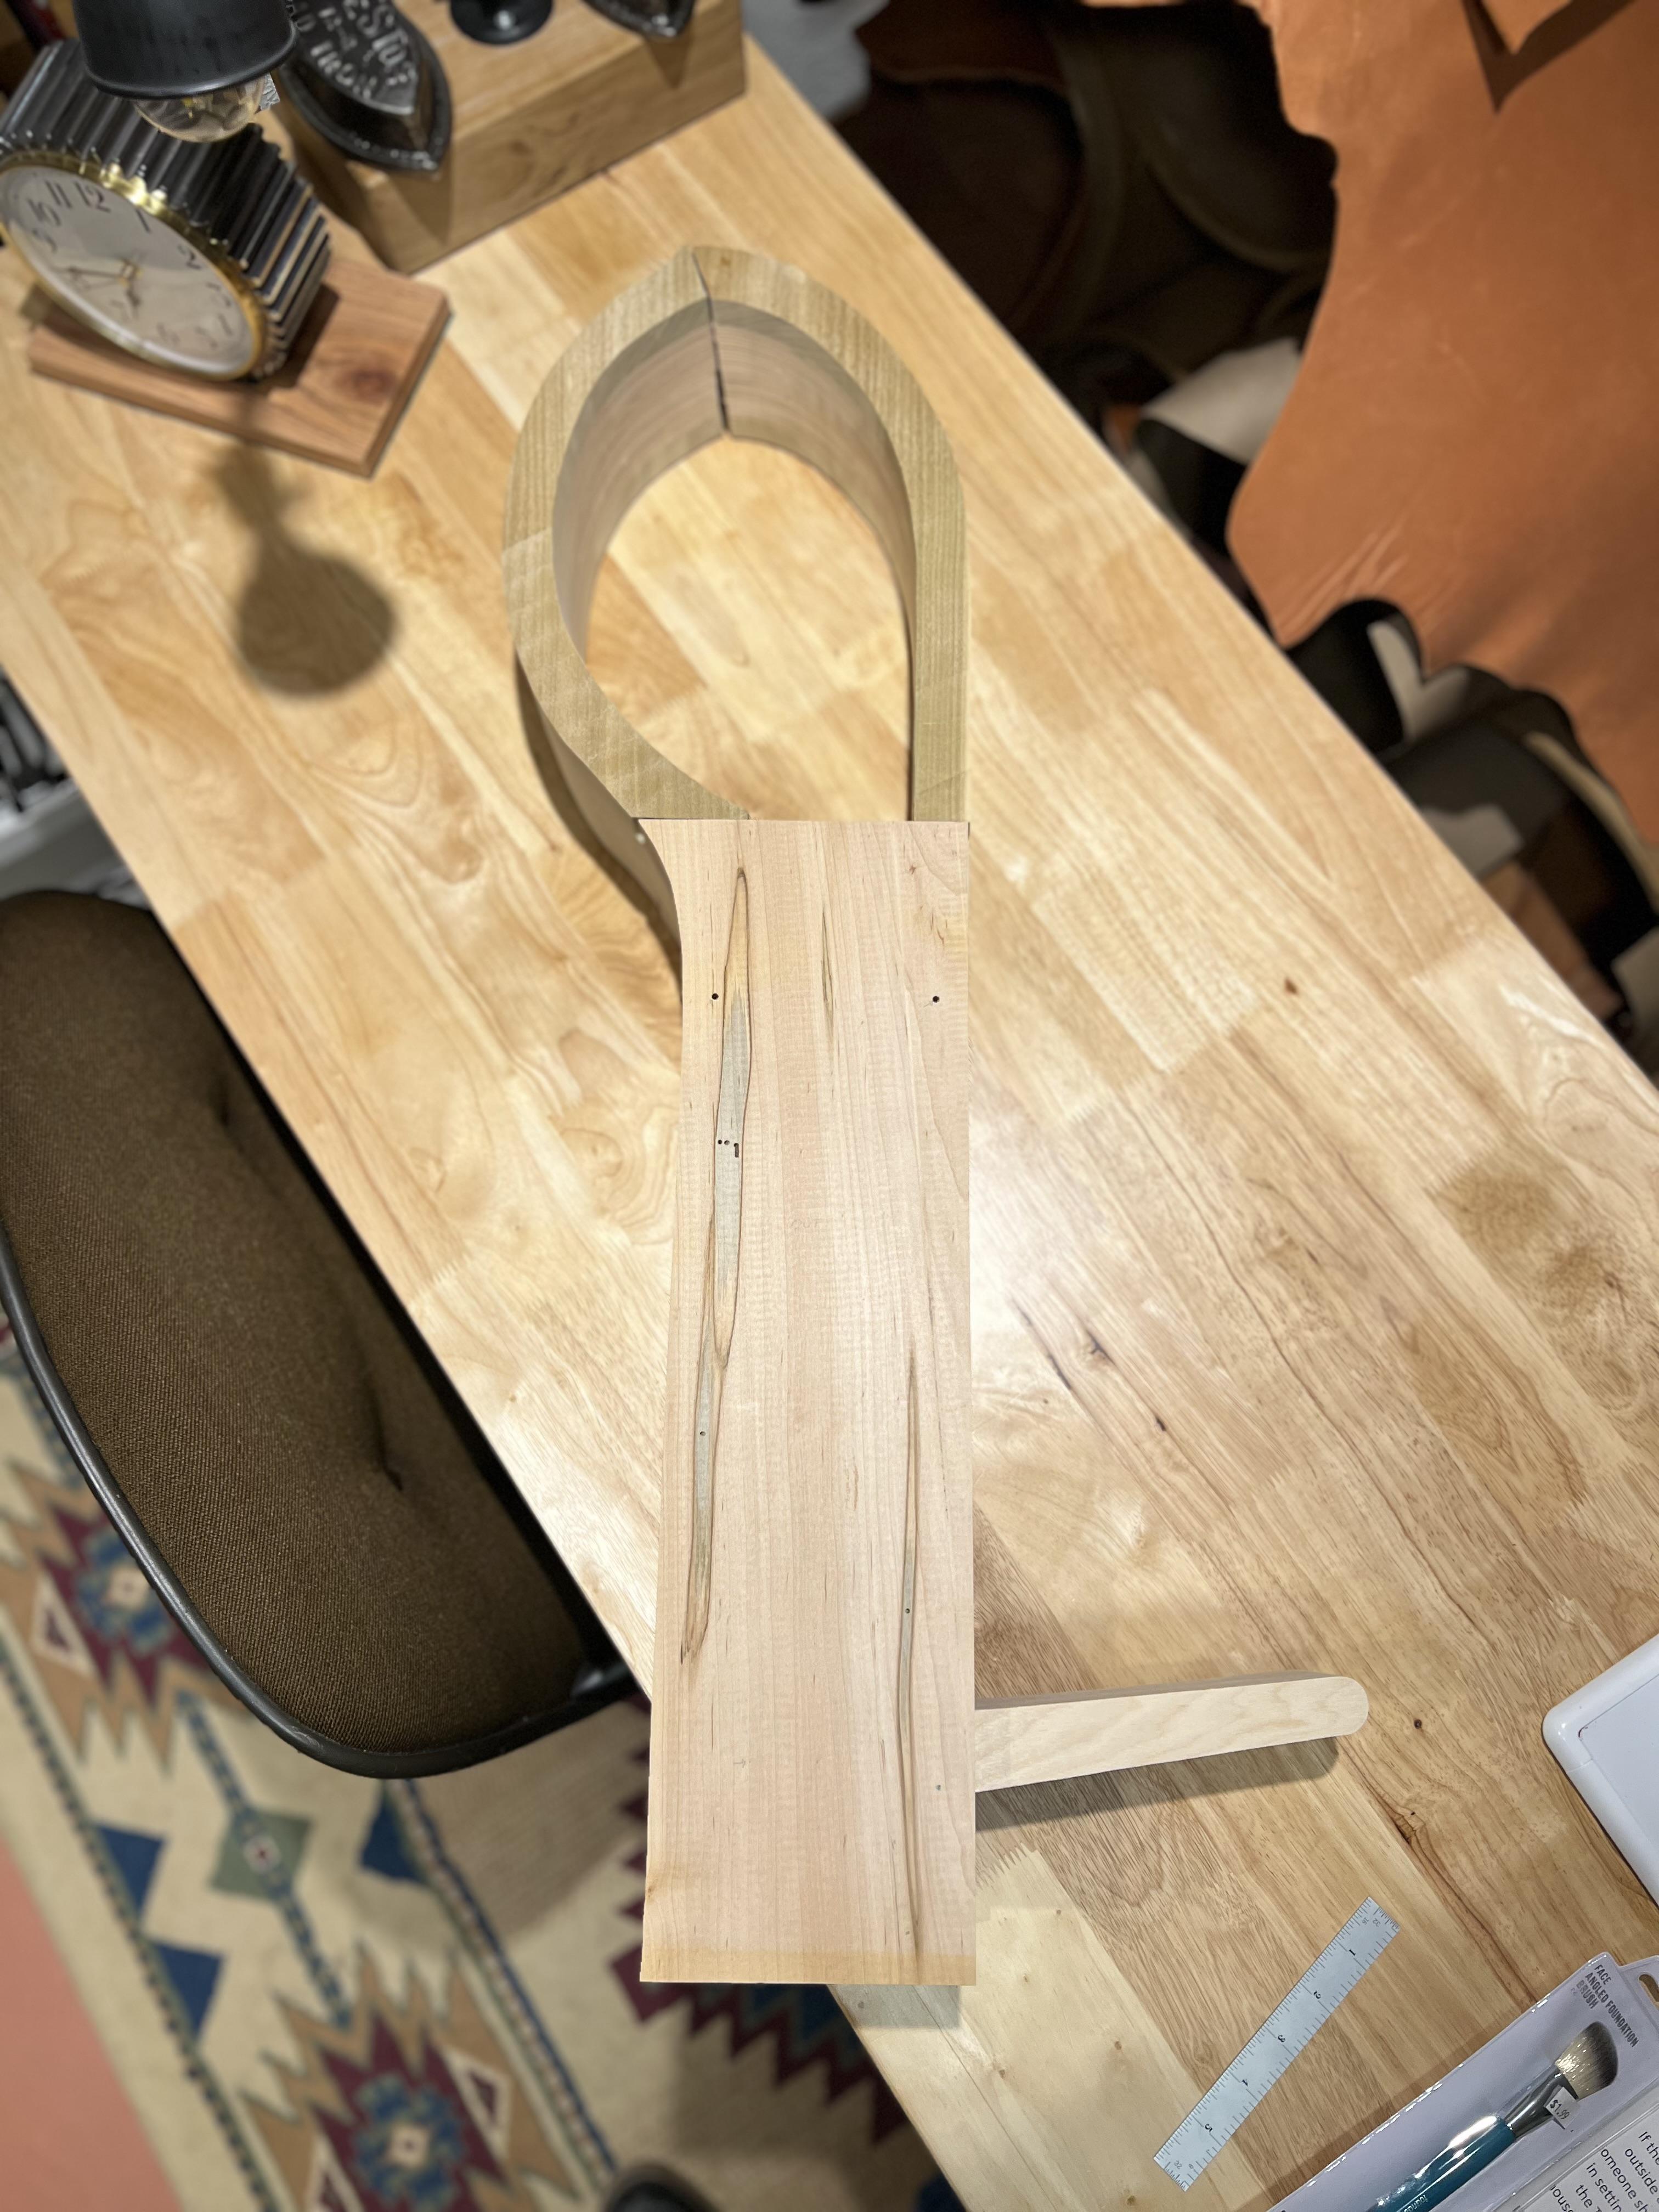
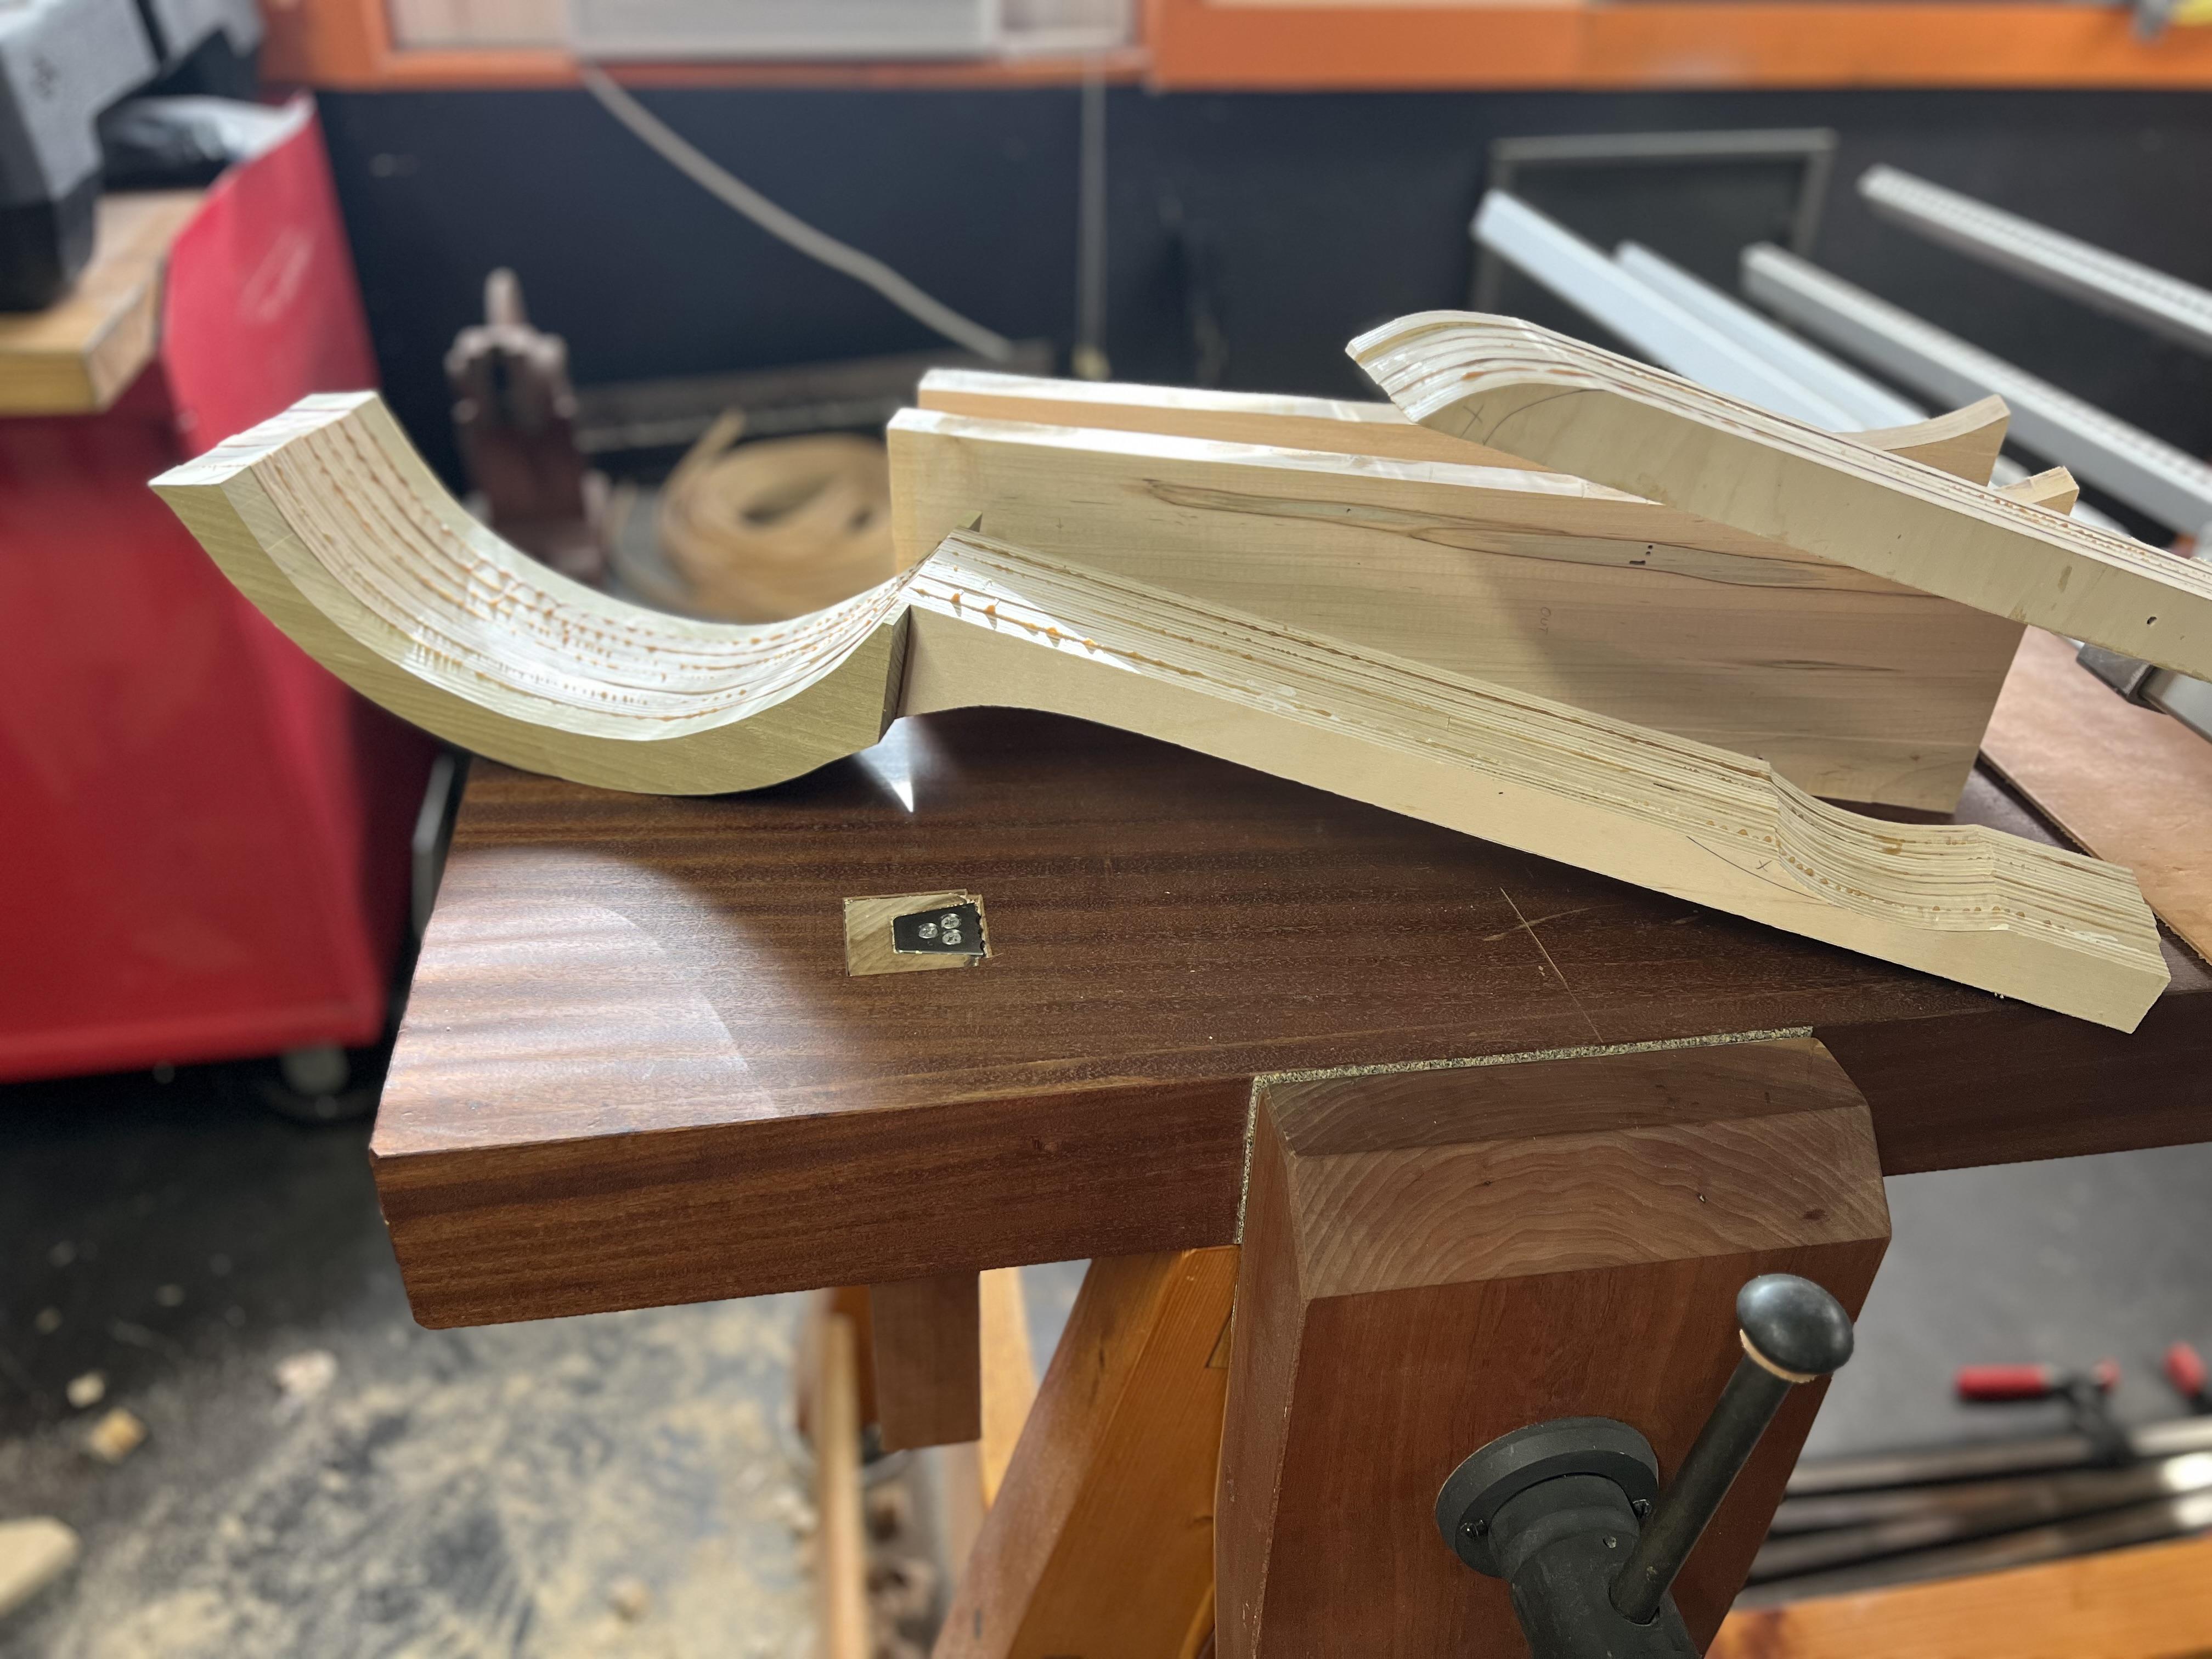
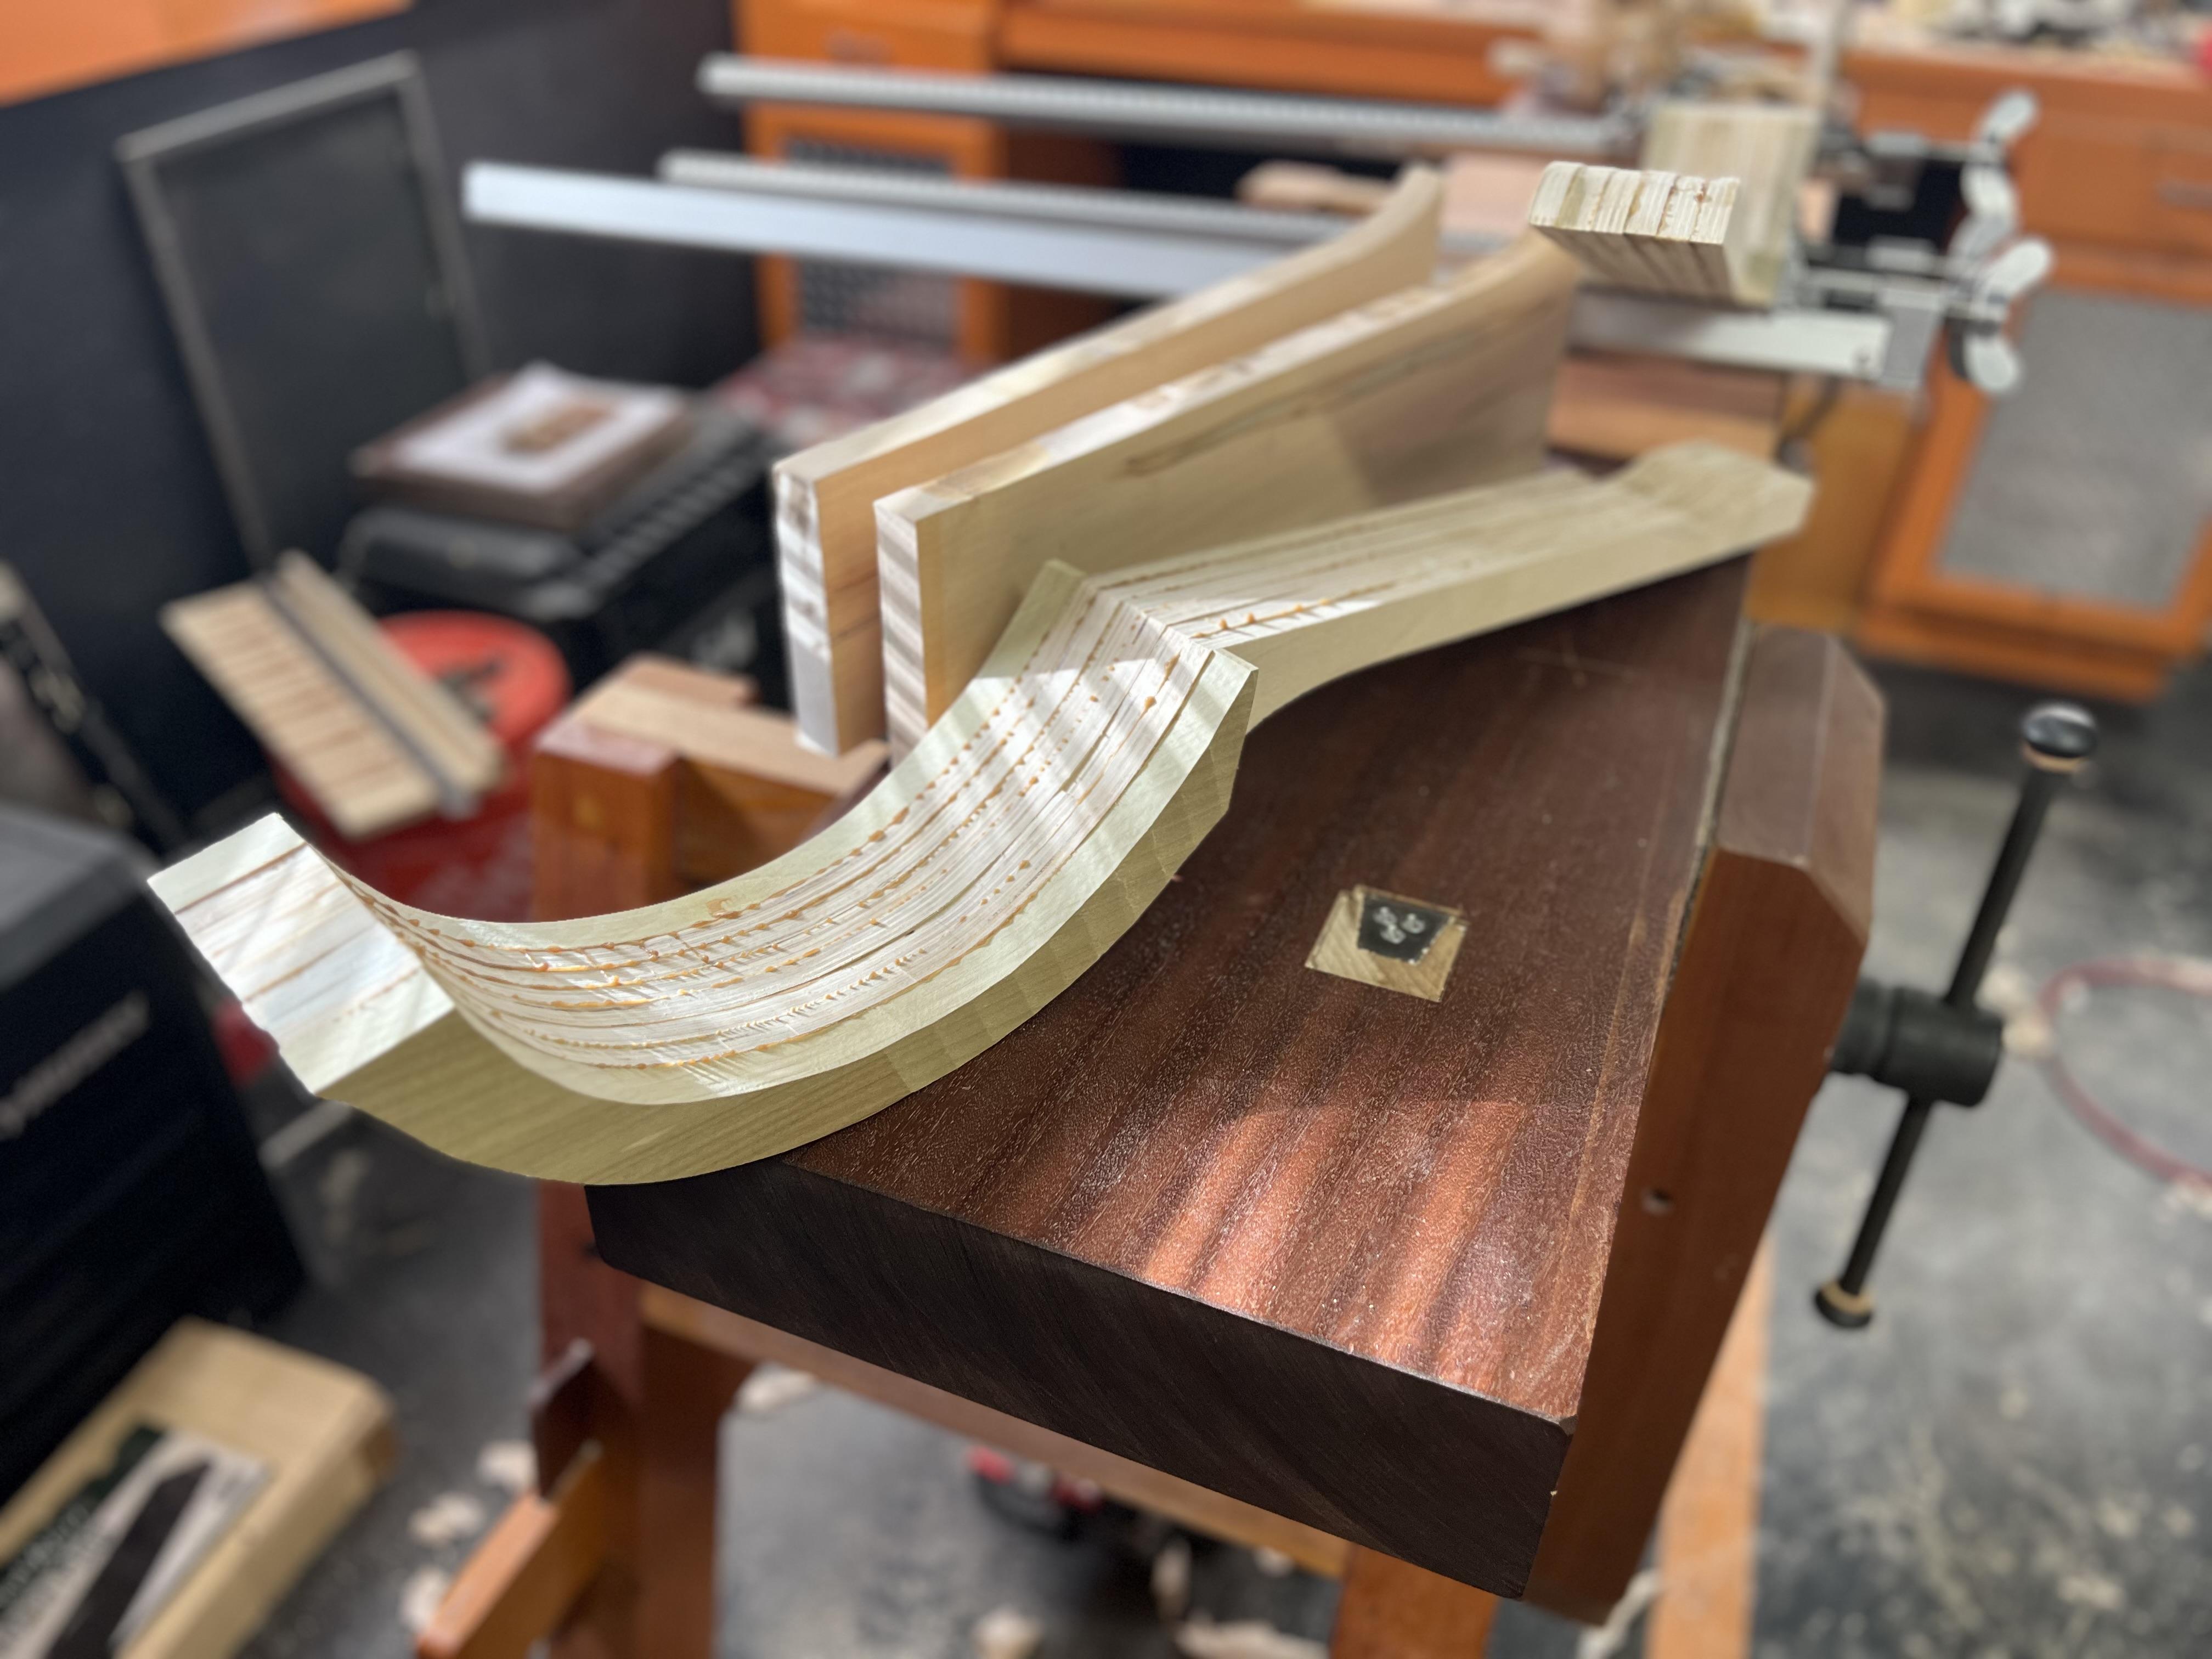
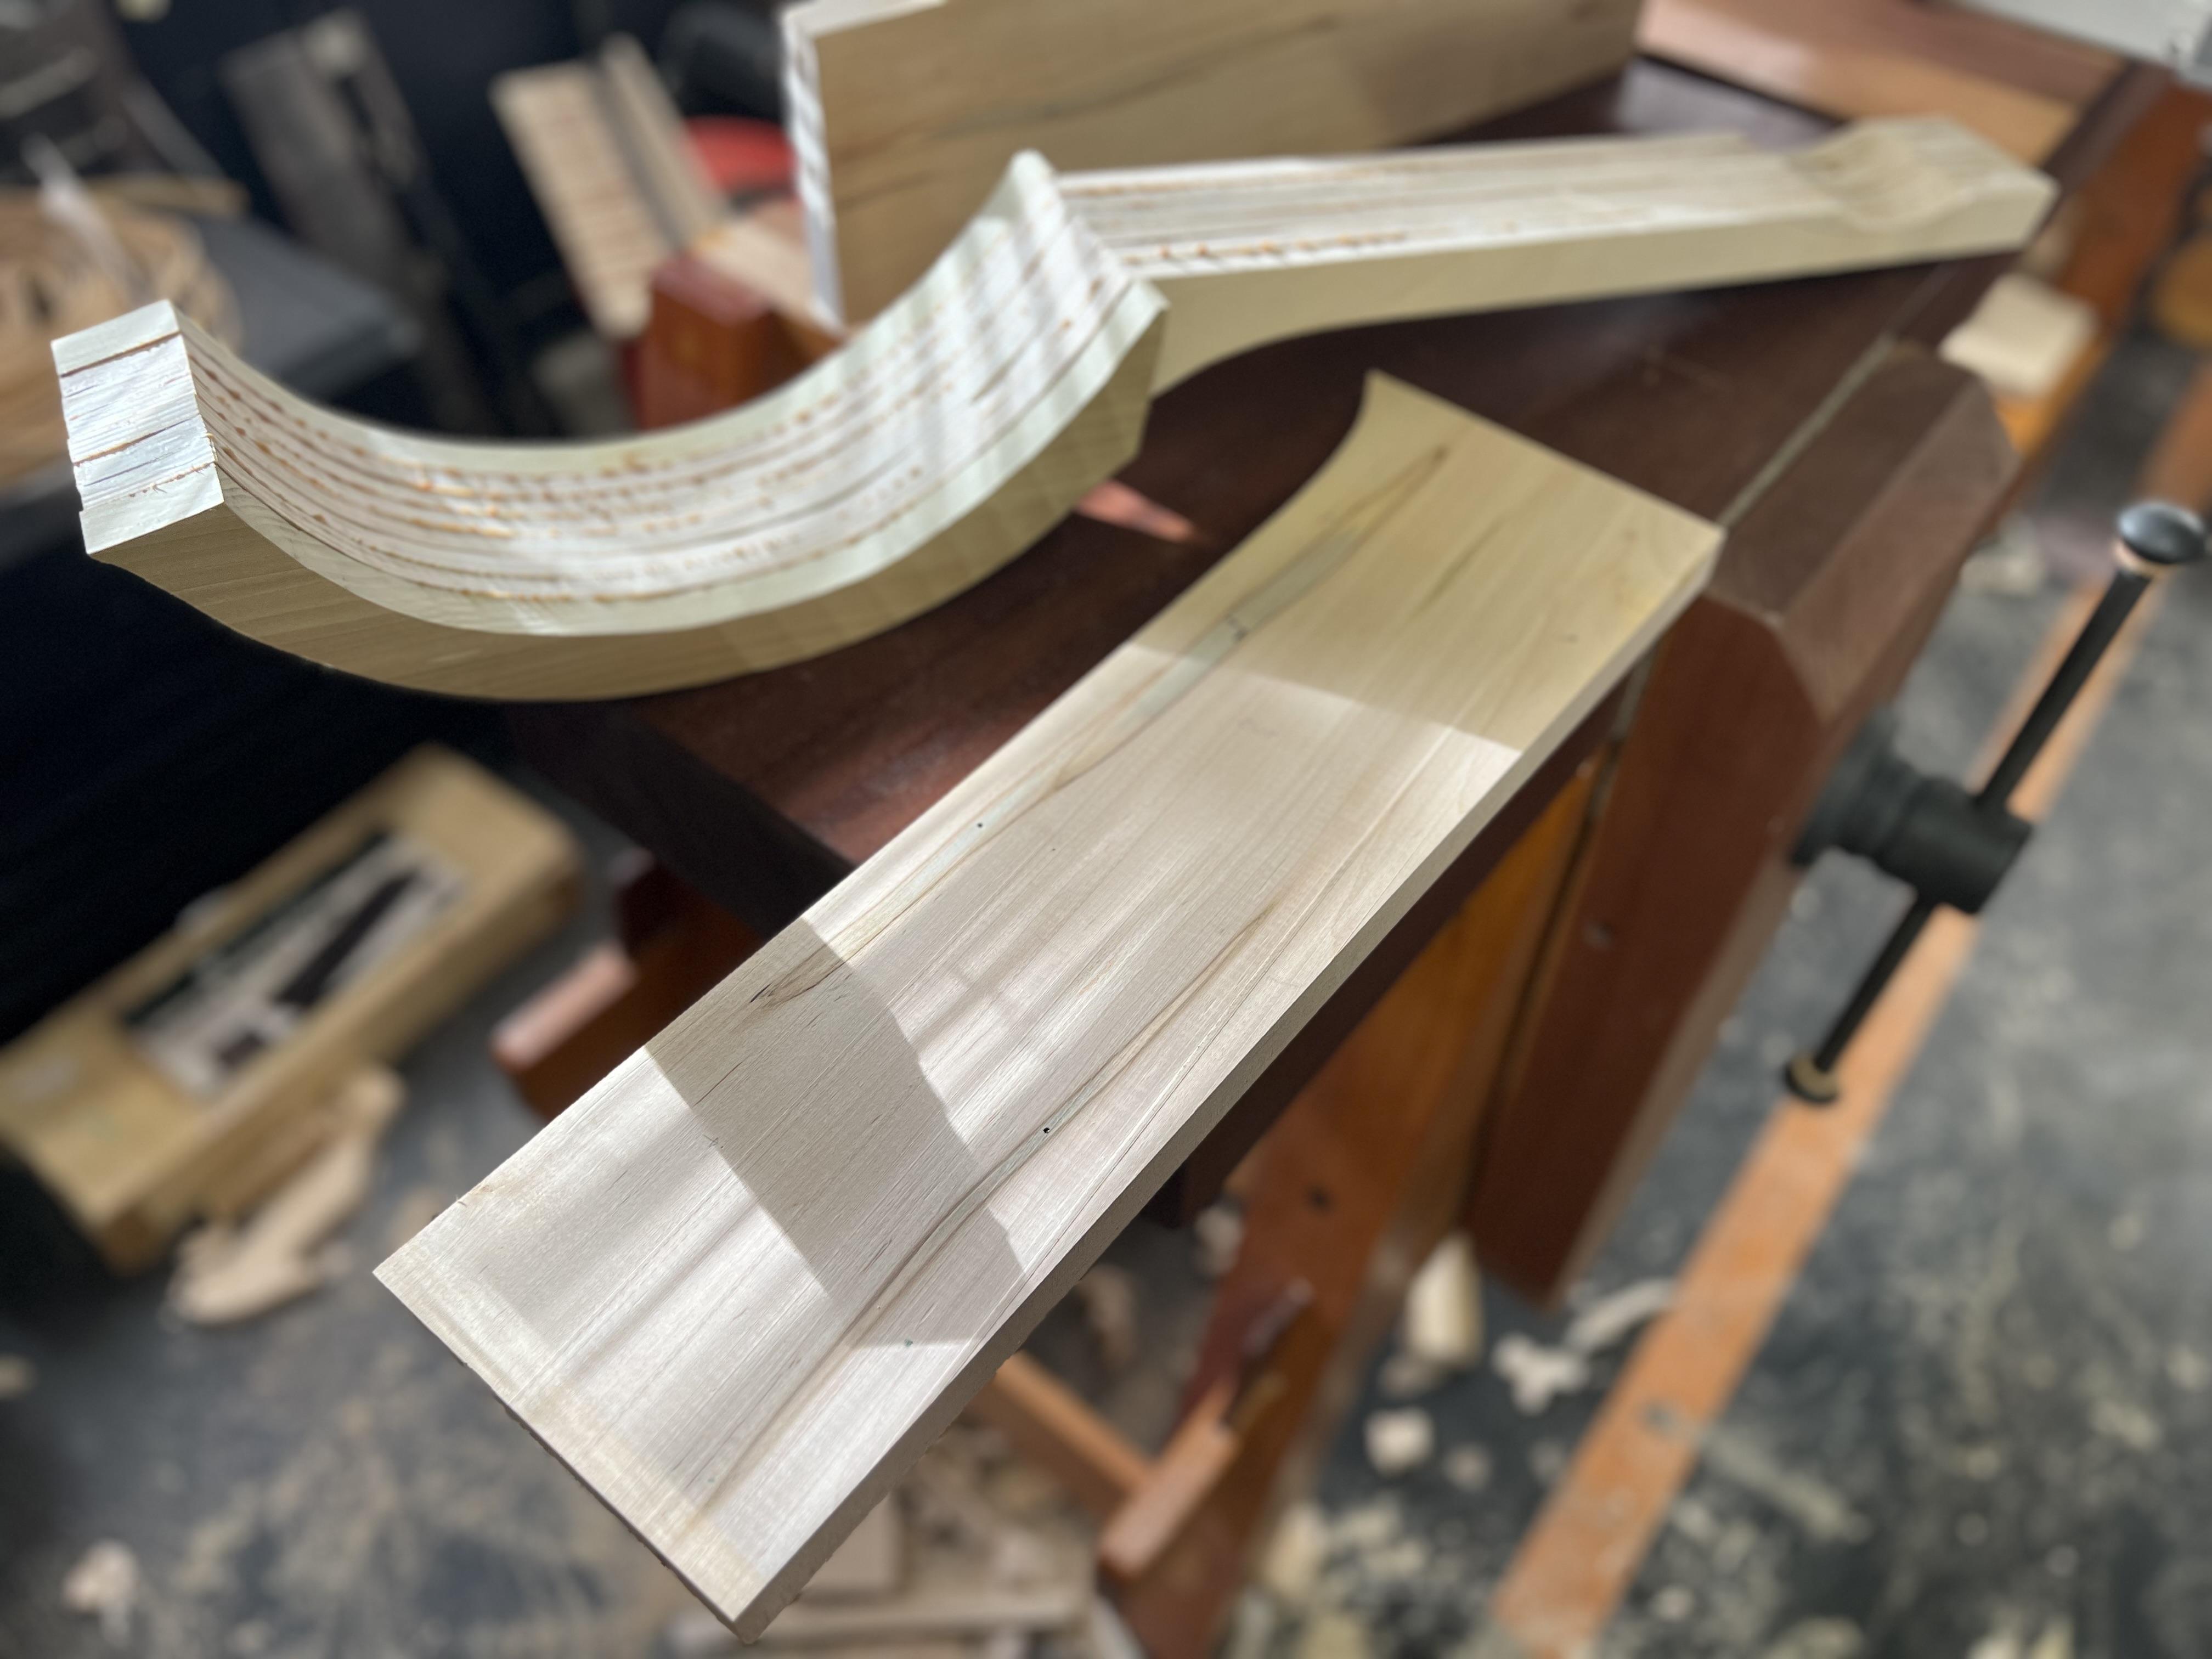
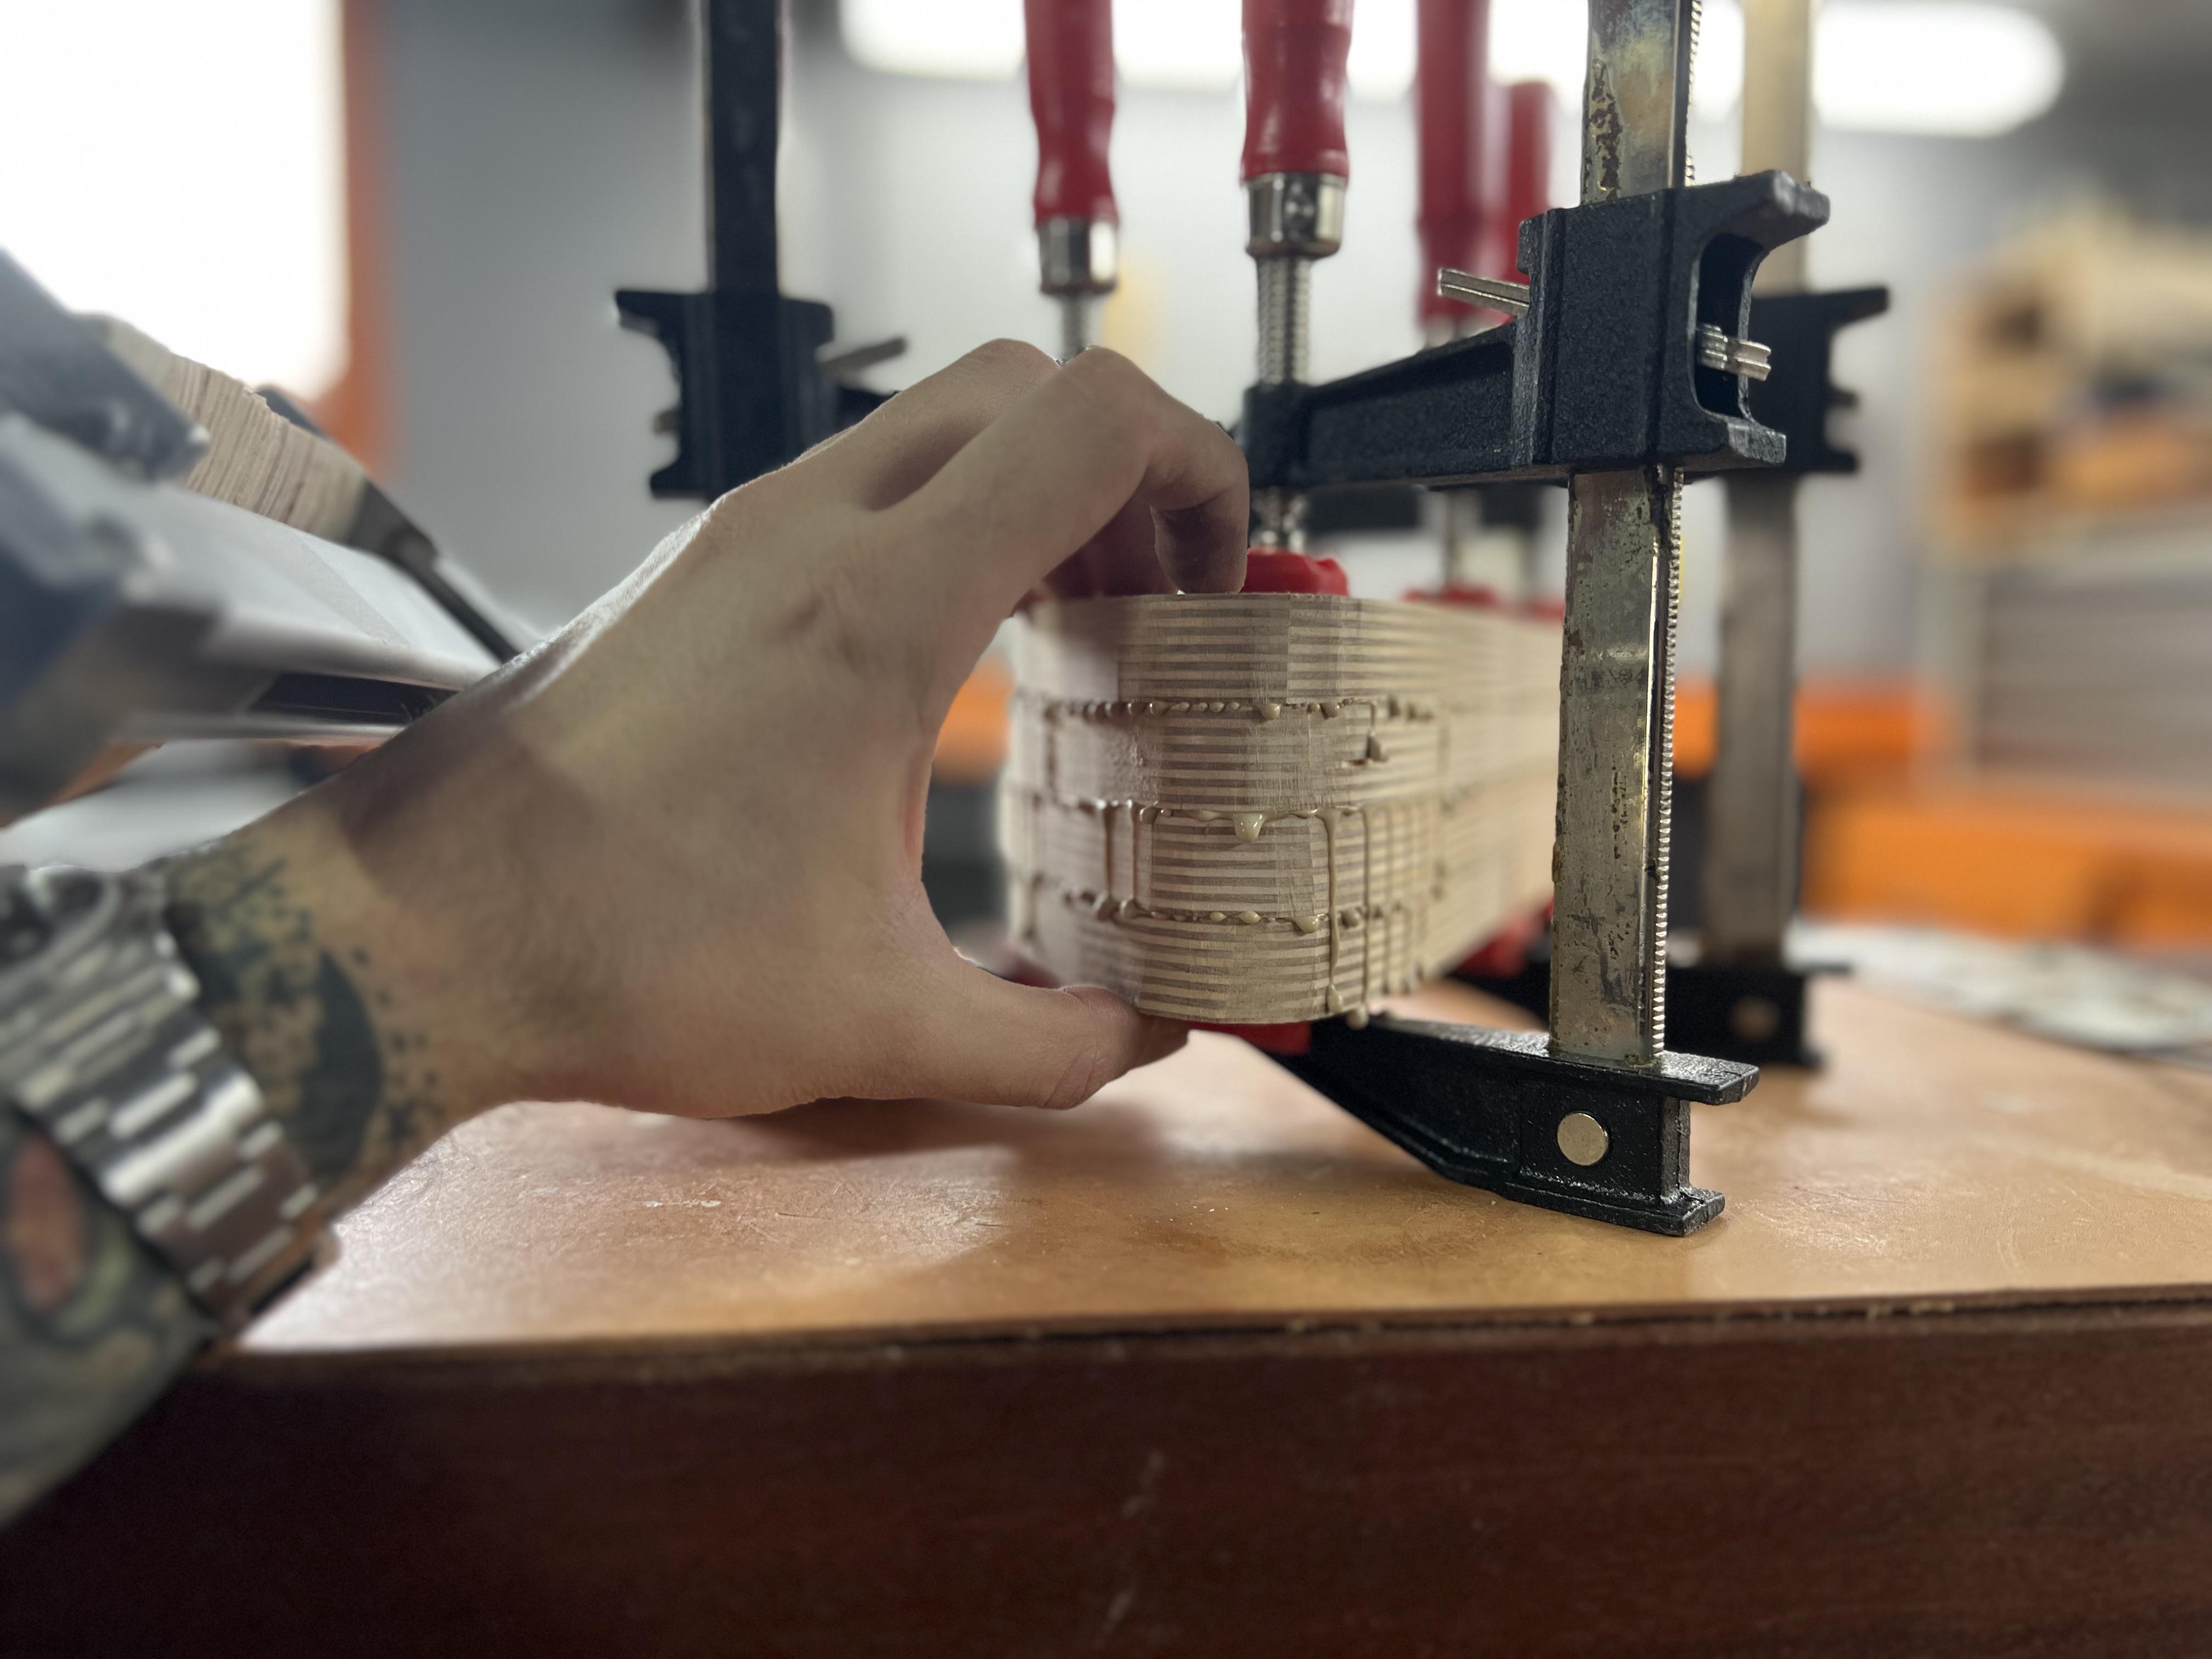
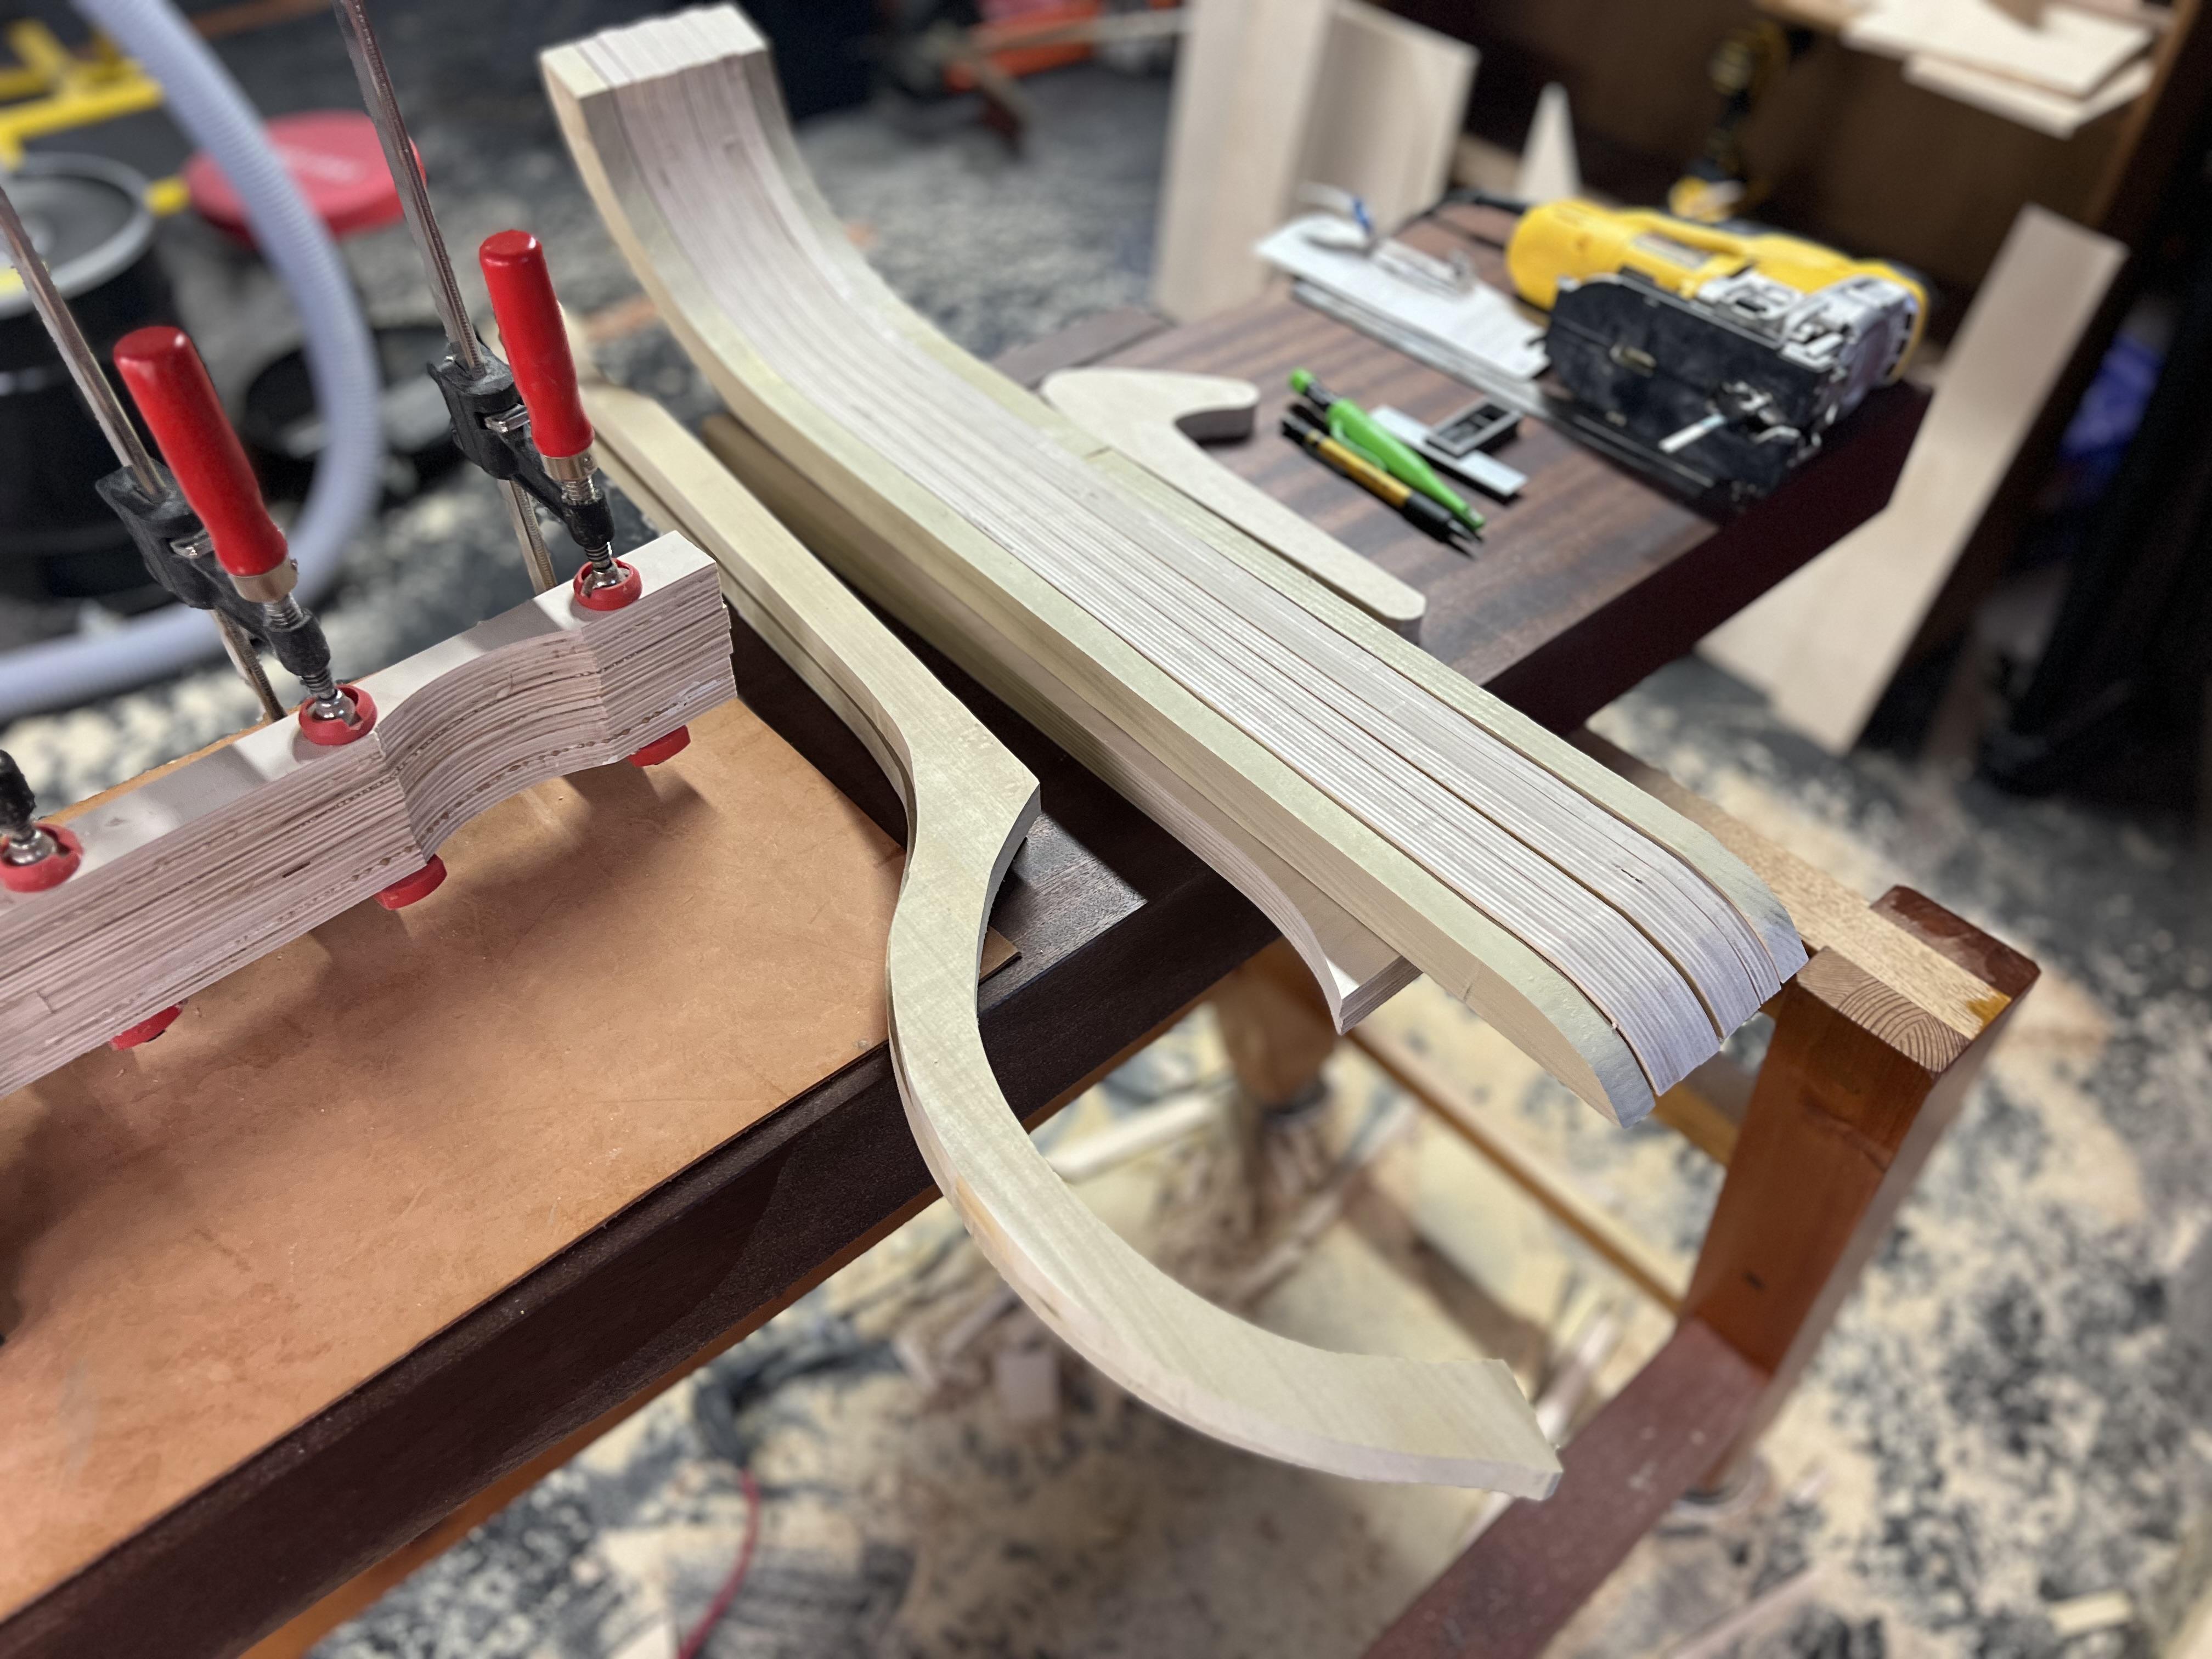
Update #3. Ive got all the parts that need gluing, glued up at this point. I did readjust the geometry for the trajectory of the swinging arm so that it would nest in the yoke (cam foot lever). This will work much better. I also took some shots with my hand for reference. I have fairly large hands if that helps. Next will be trimming, shaping and lots of sanding followed by precise cutting at the bottom of the arms for mounting to a slab of hardwood. And finally, after those parts, the locking device for the foot lever cam yoke.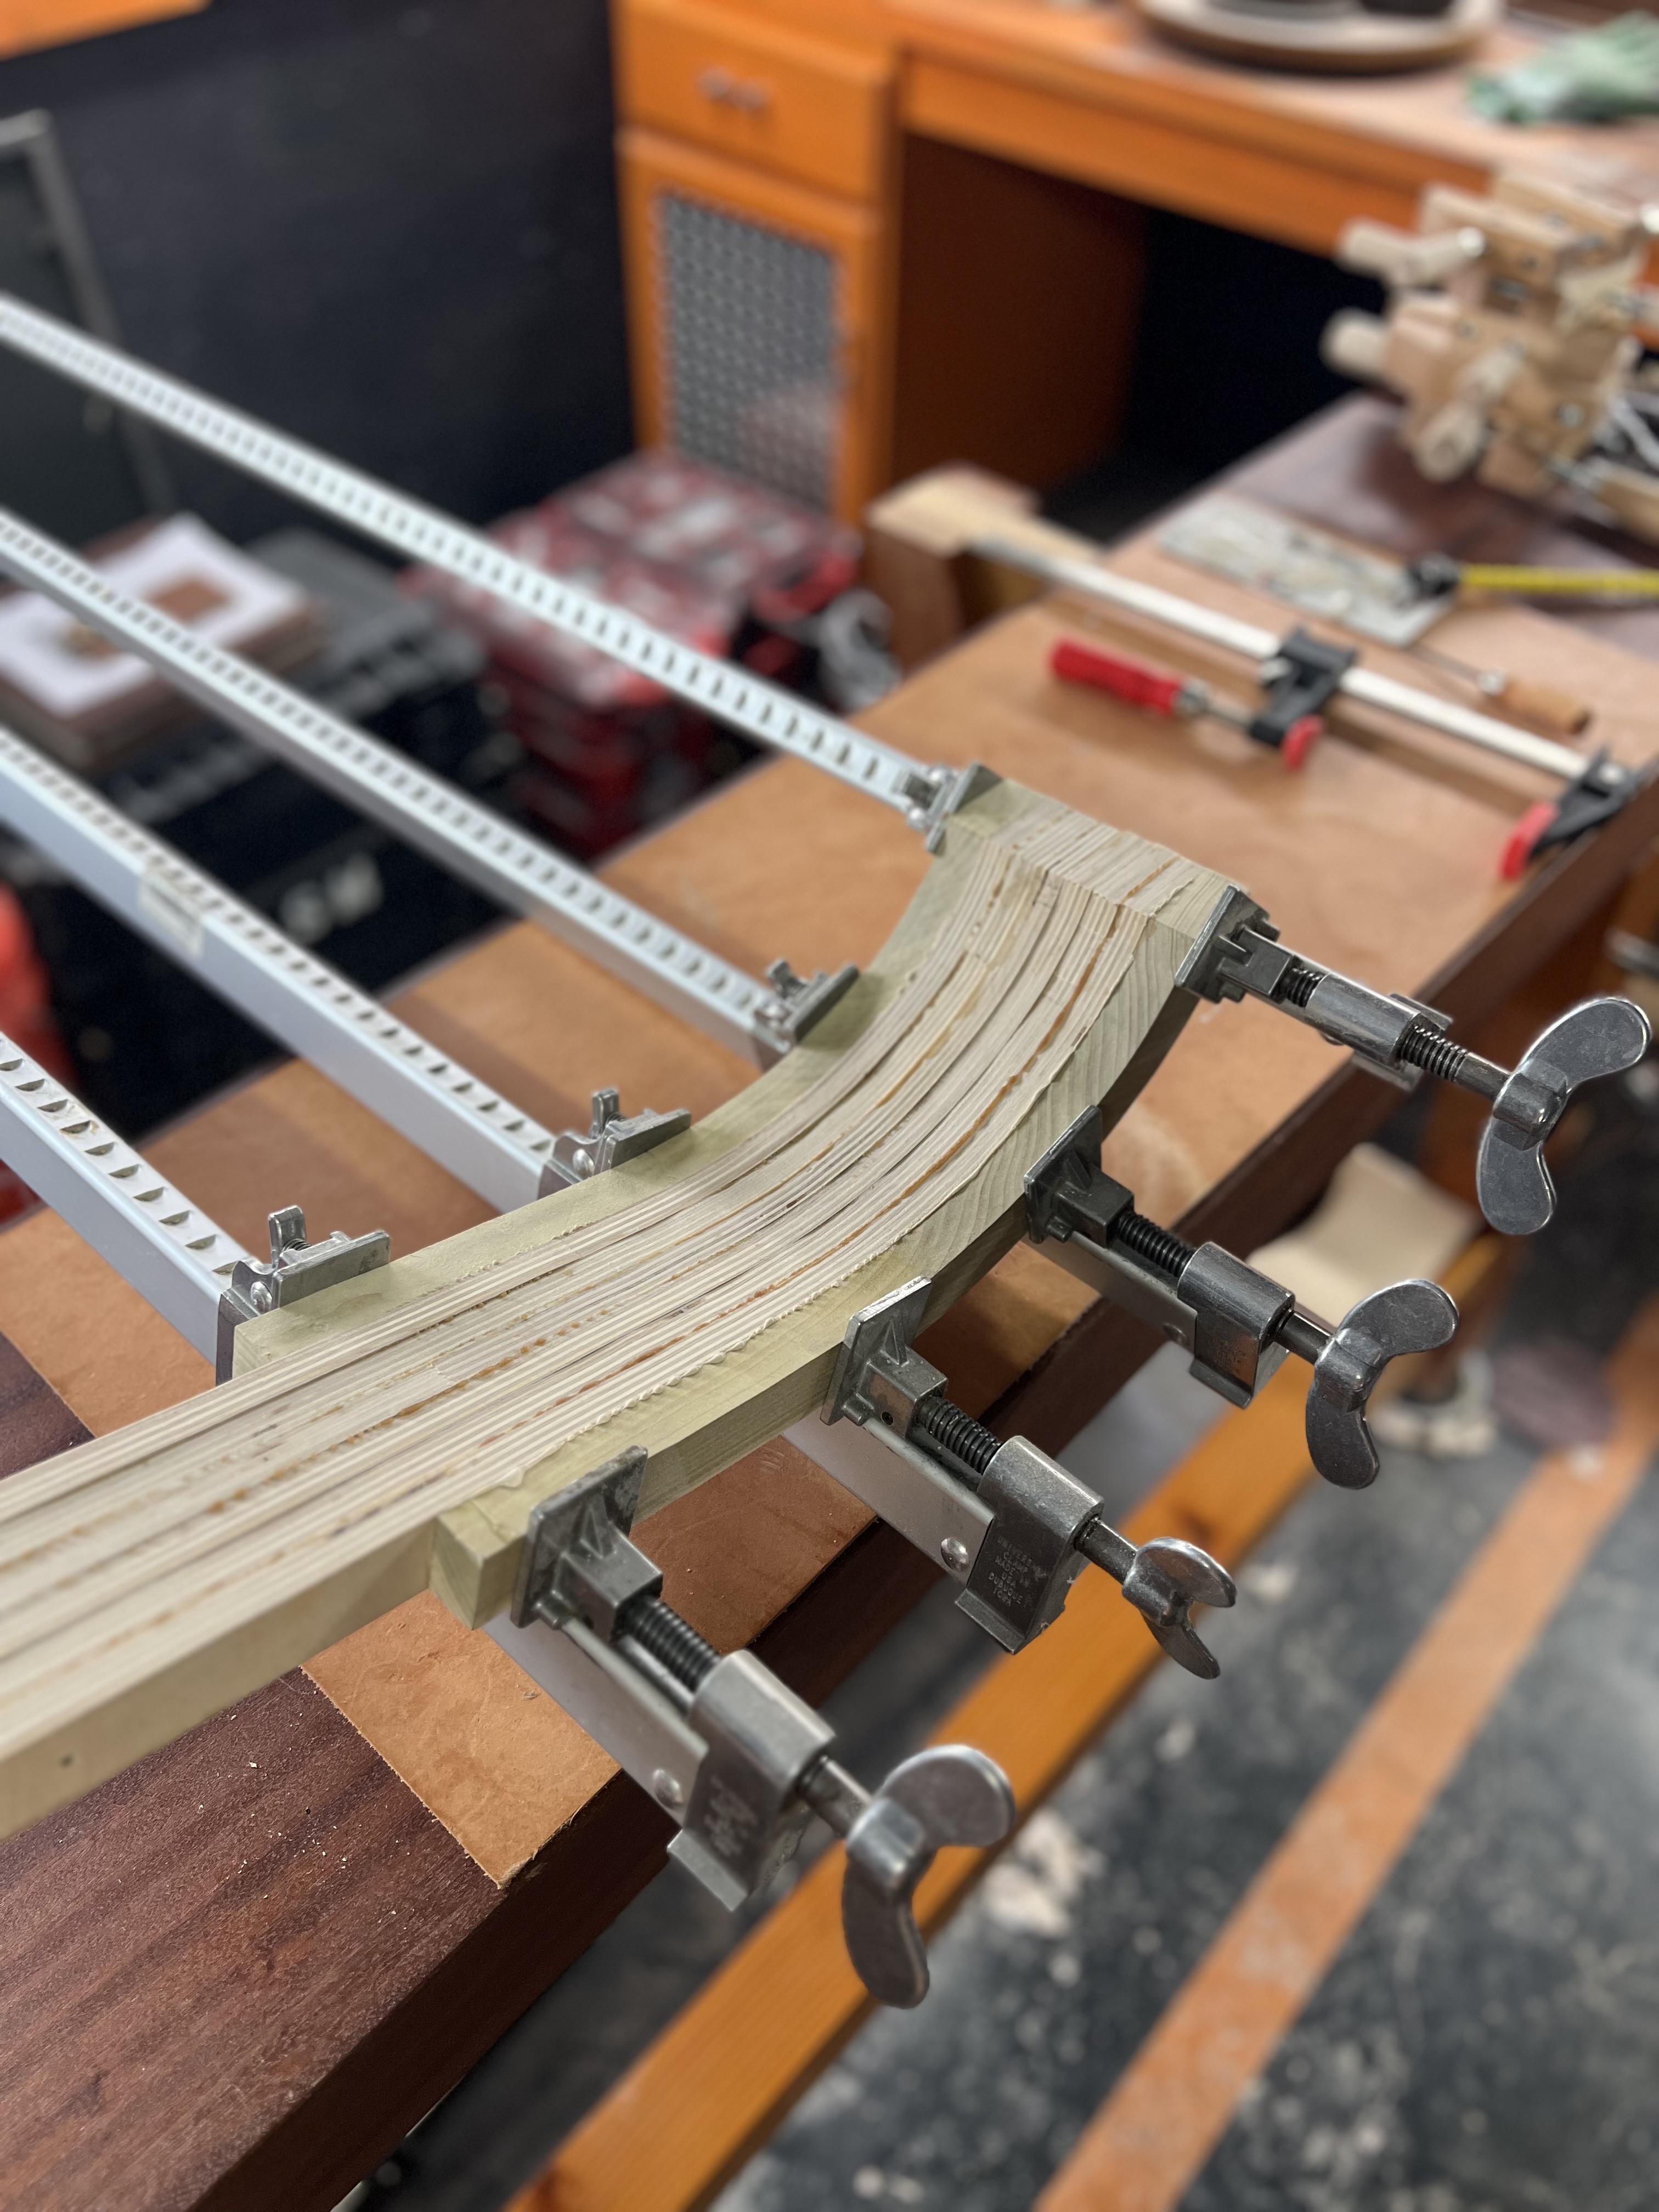

-
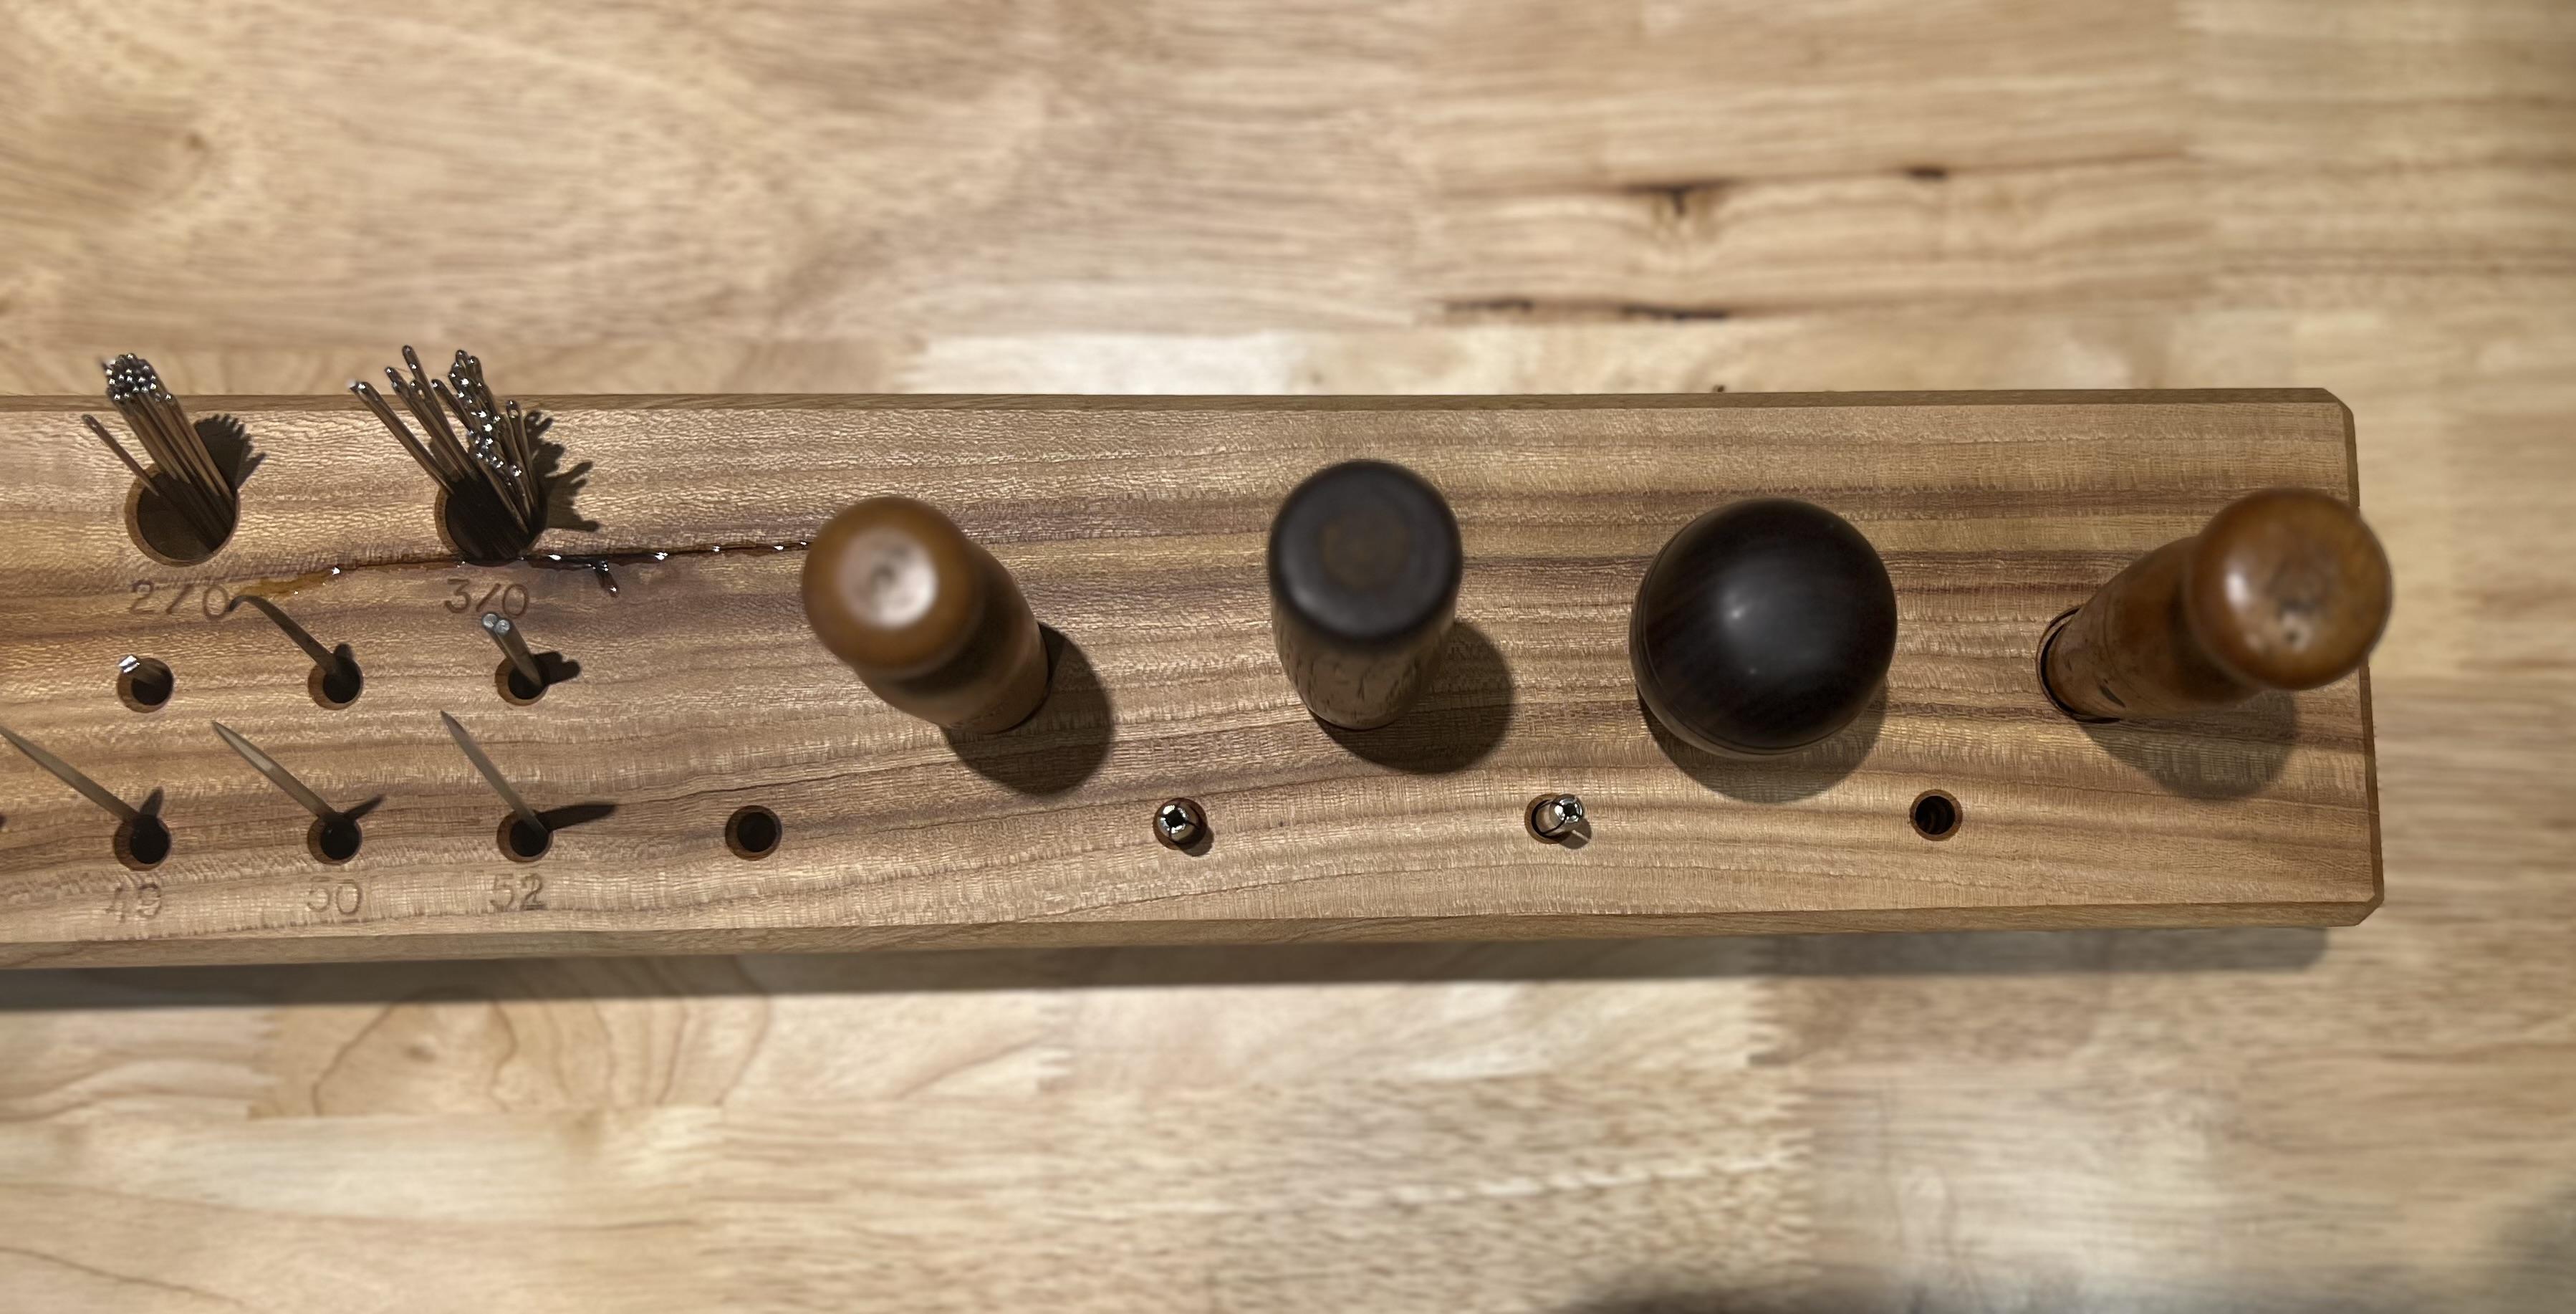
Certainly, regarding getting stuck by the awls. But i can just turn them down and the problem is gone! Im working on resharpening them so i place them down once finished.
-
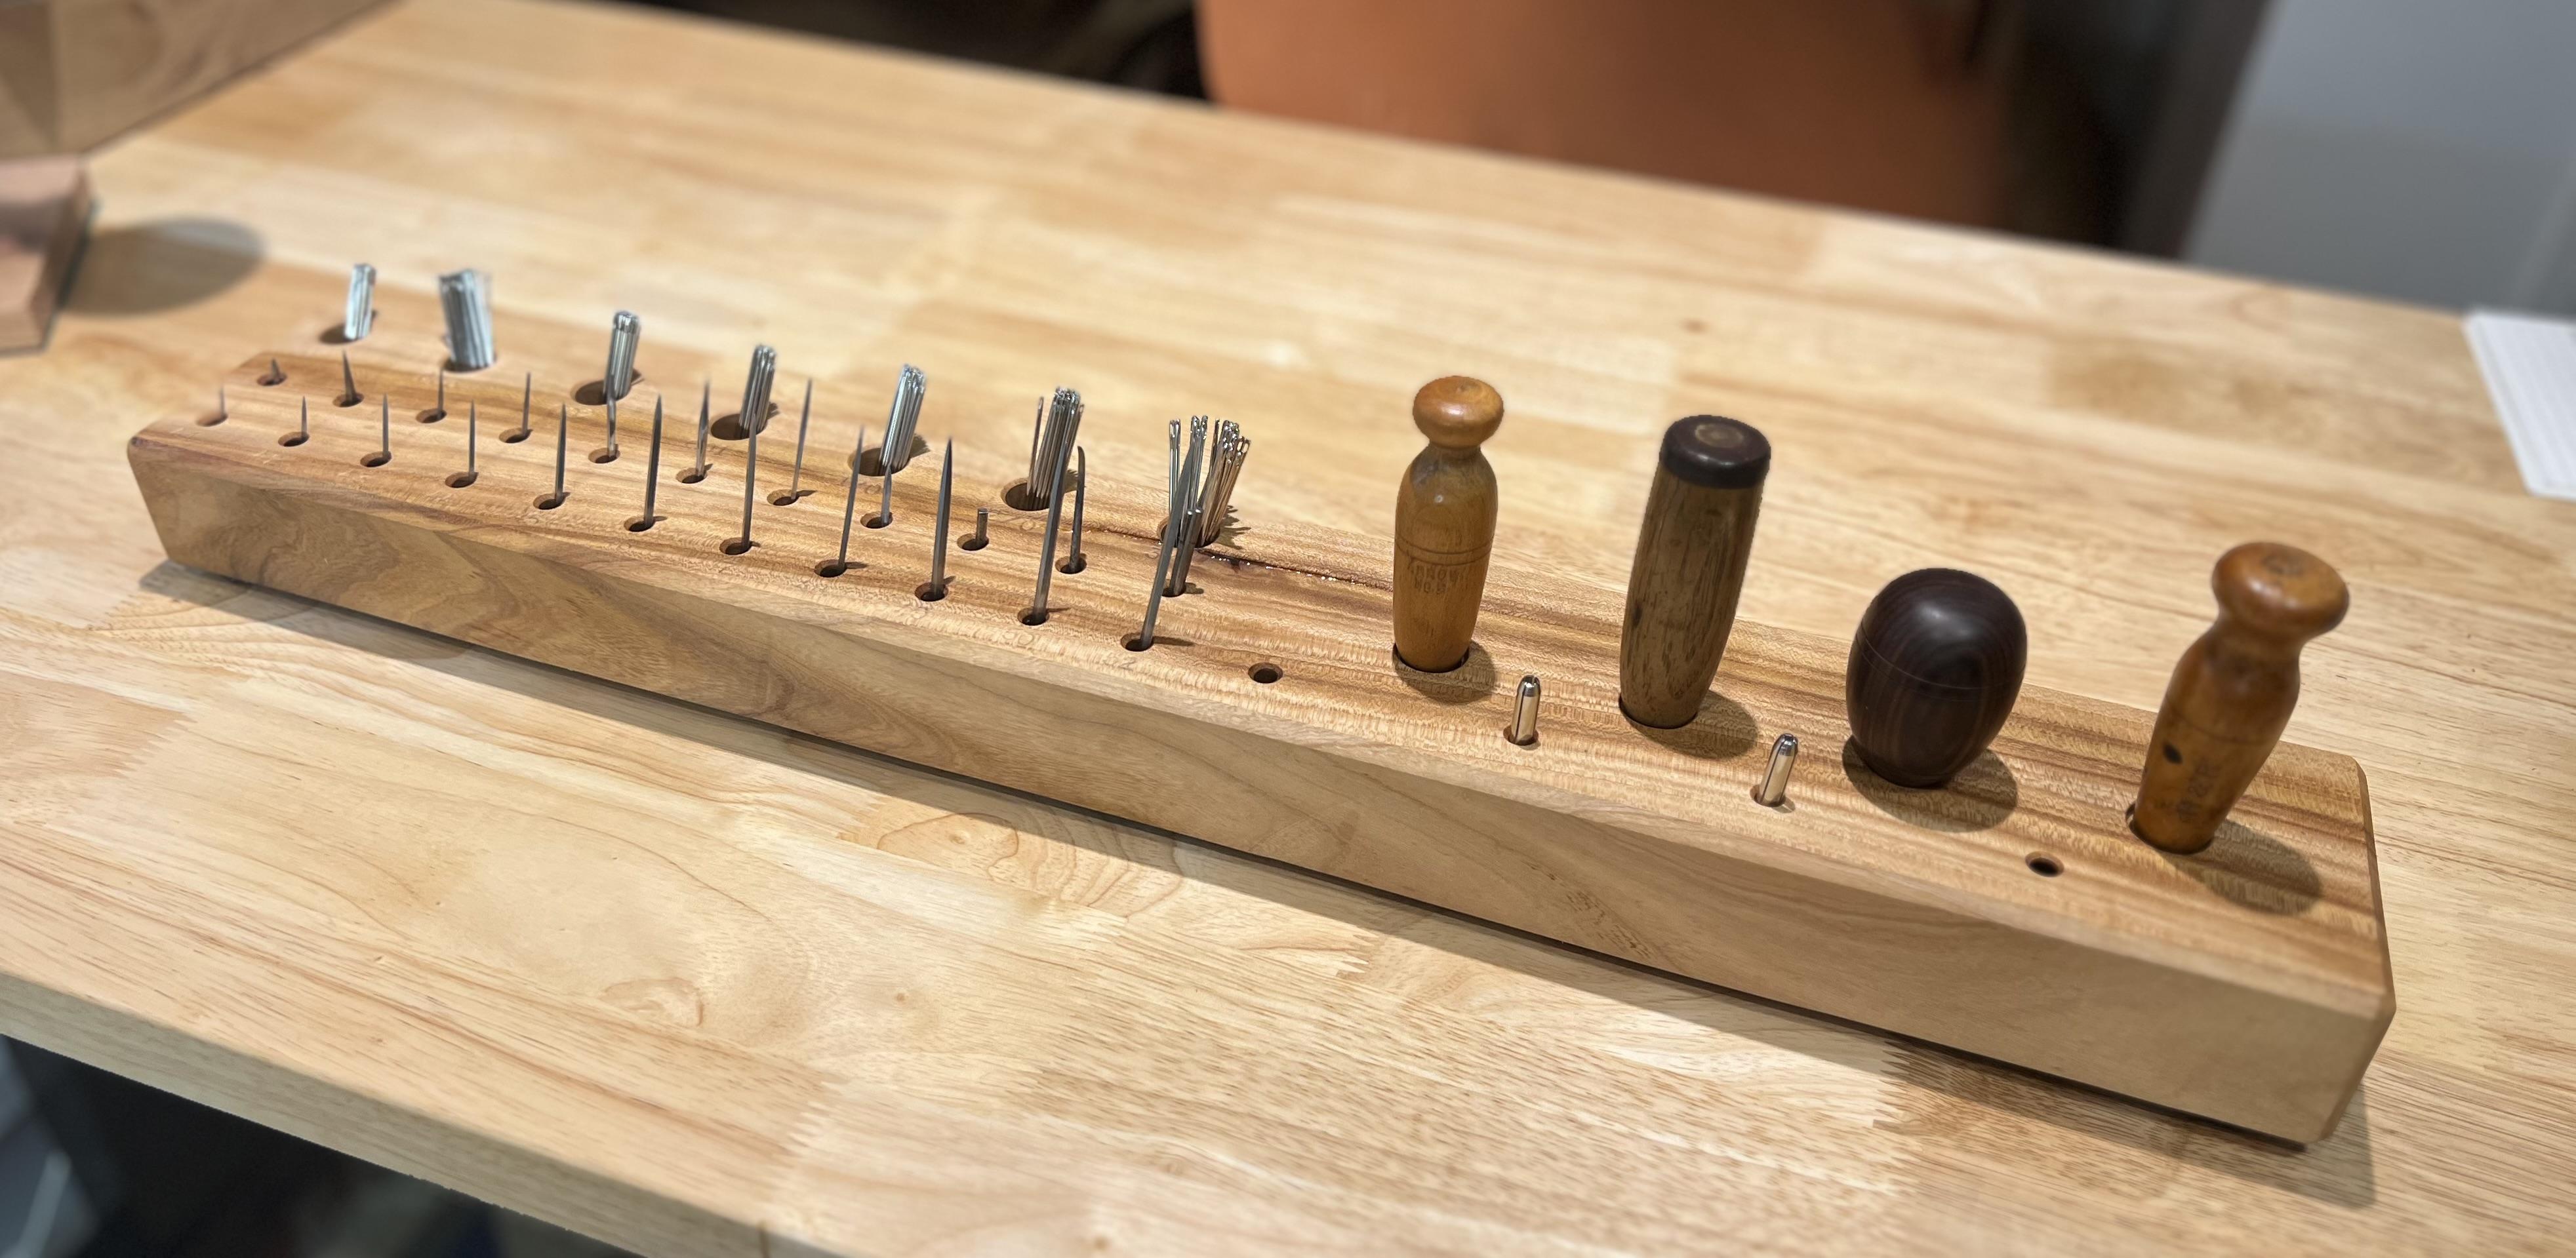
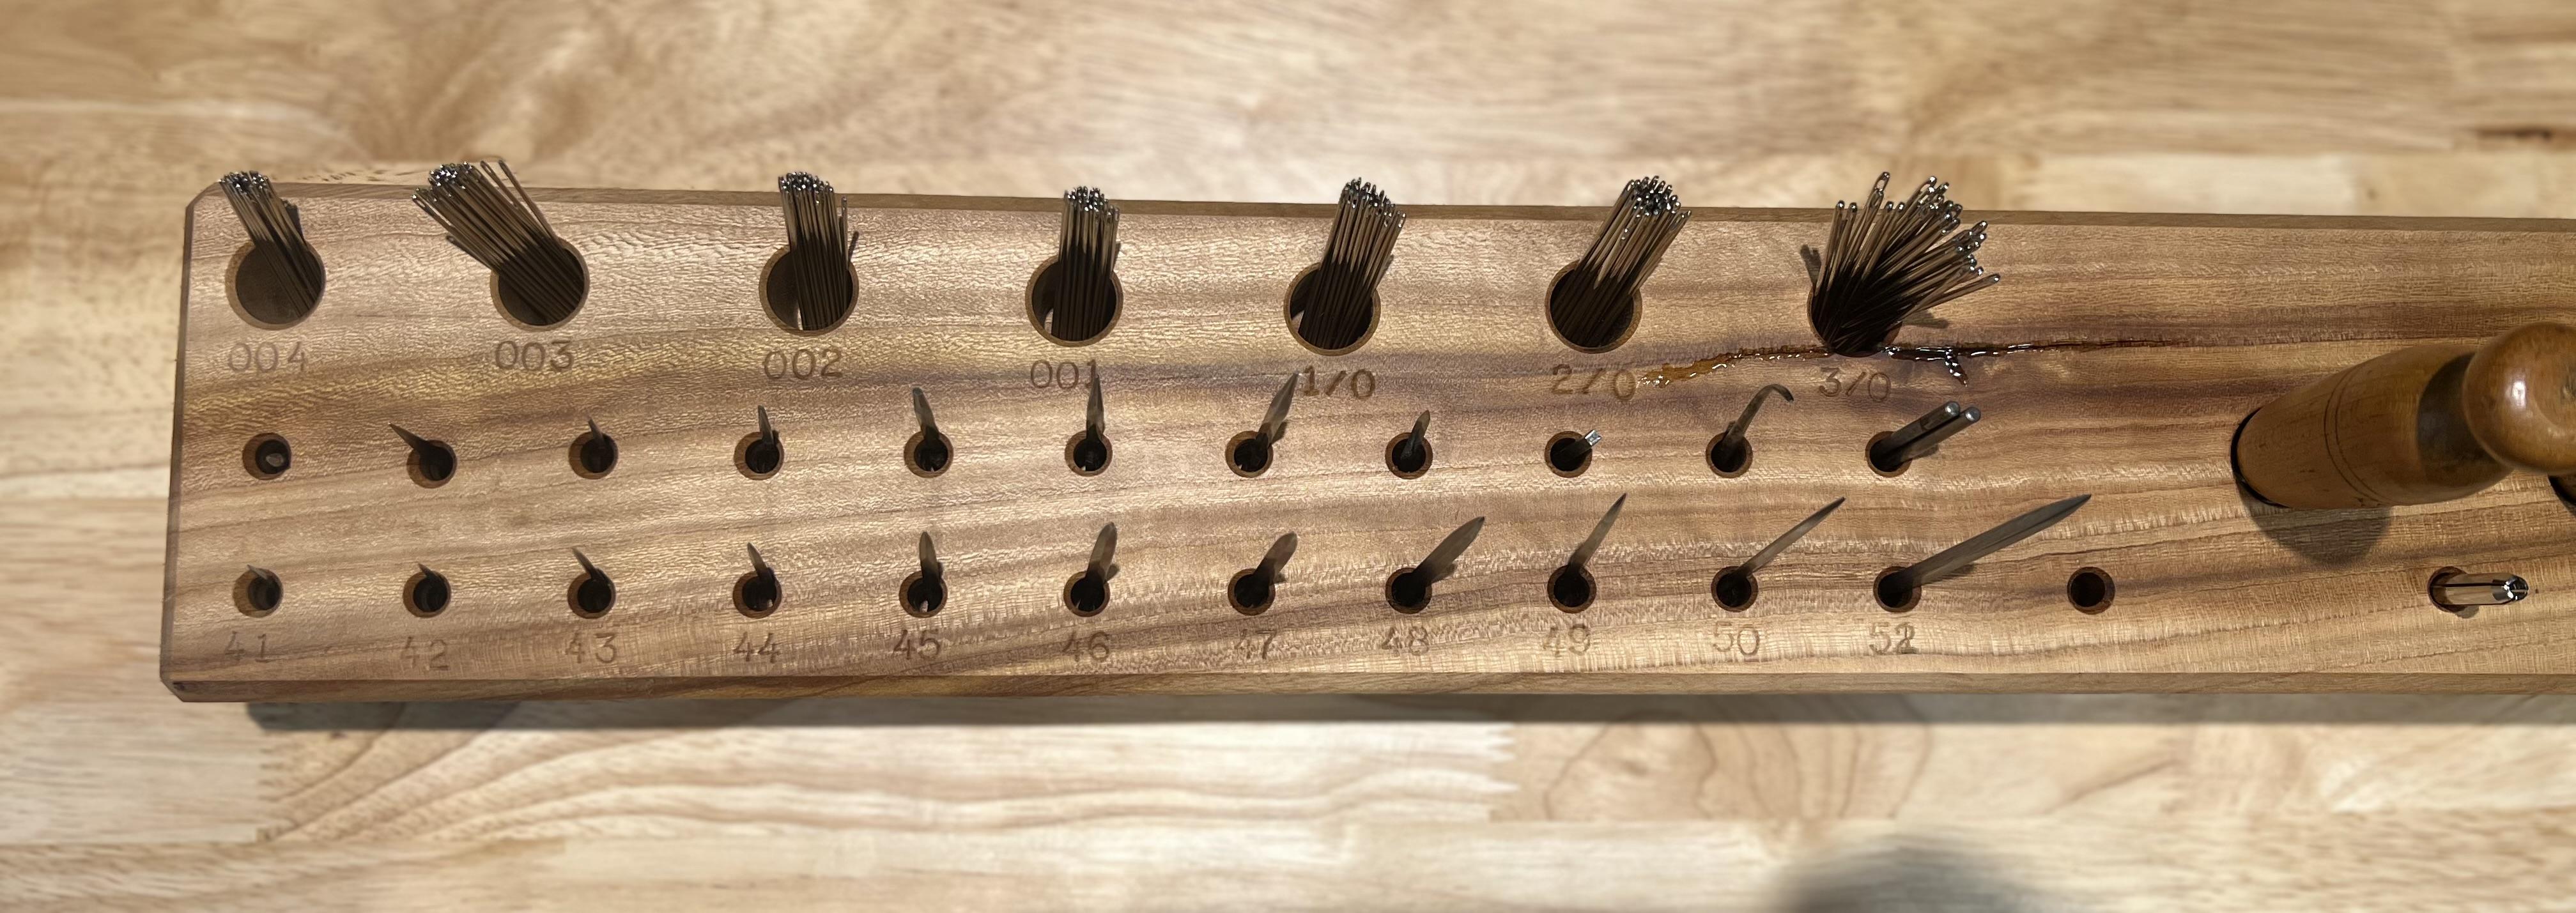
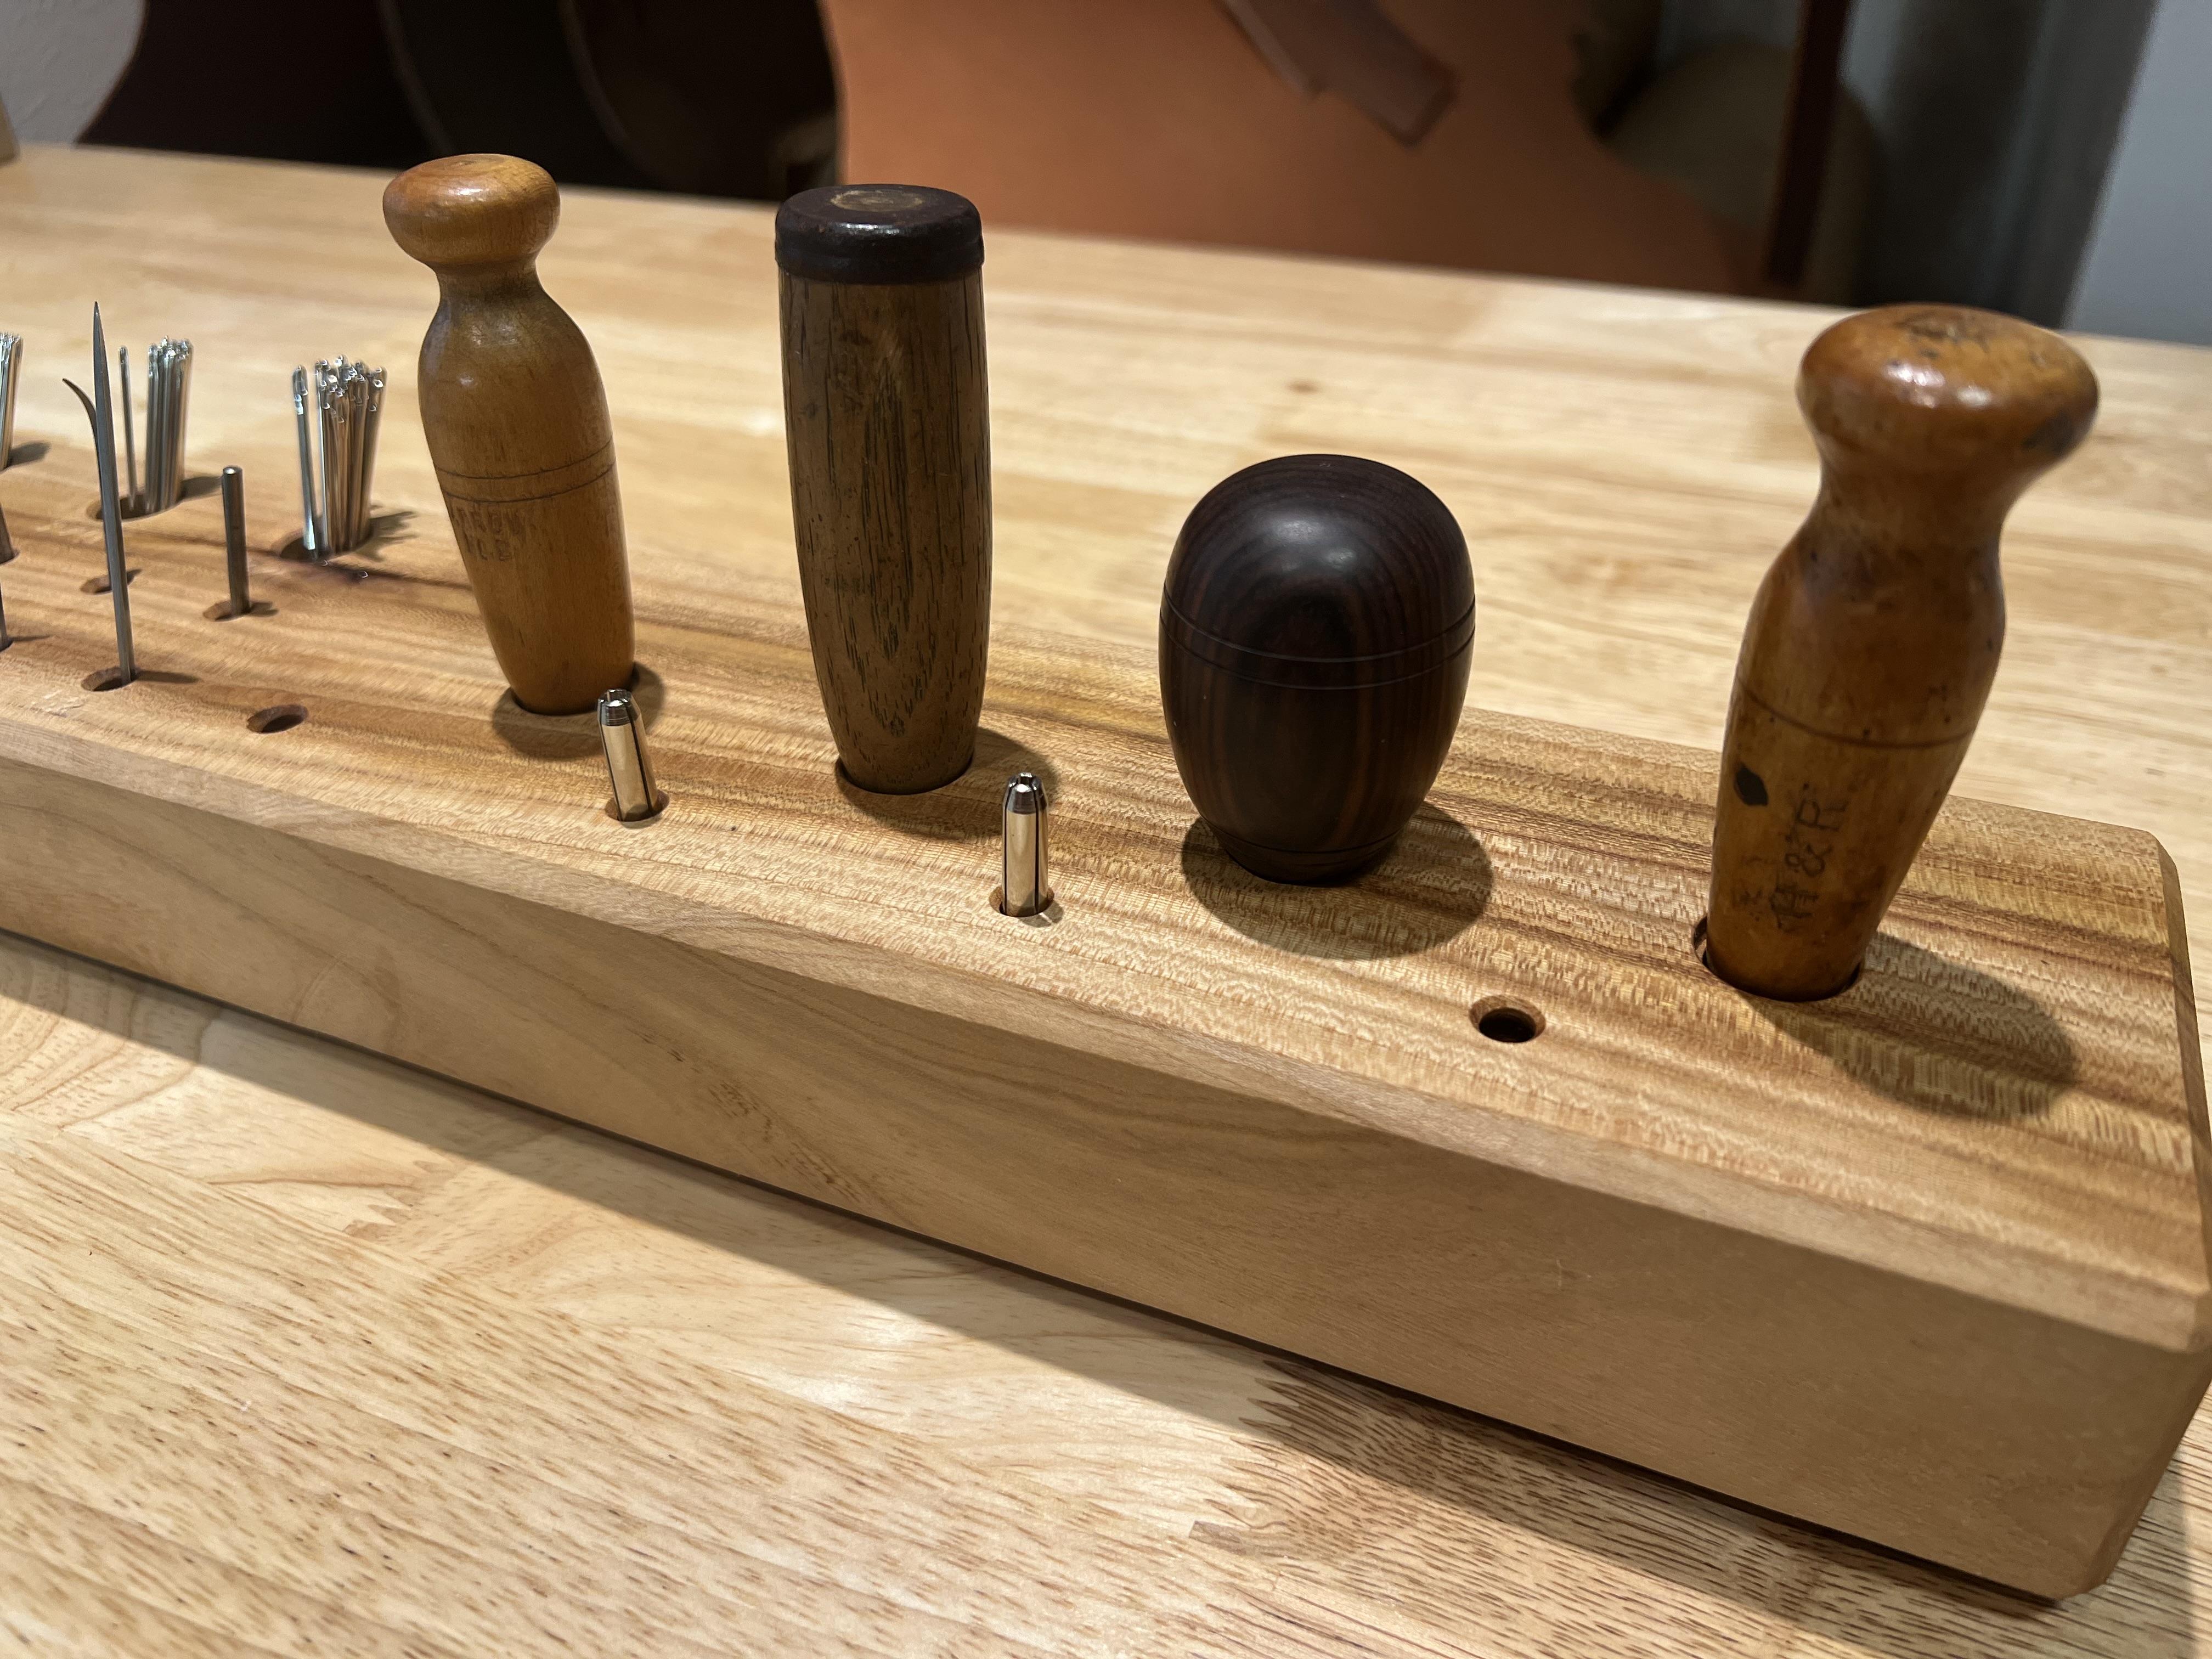
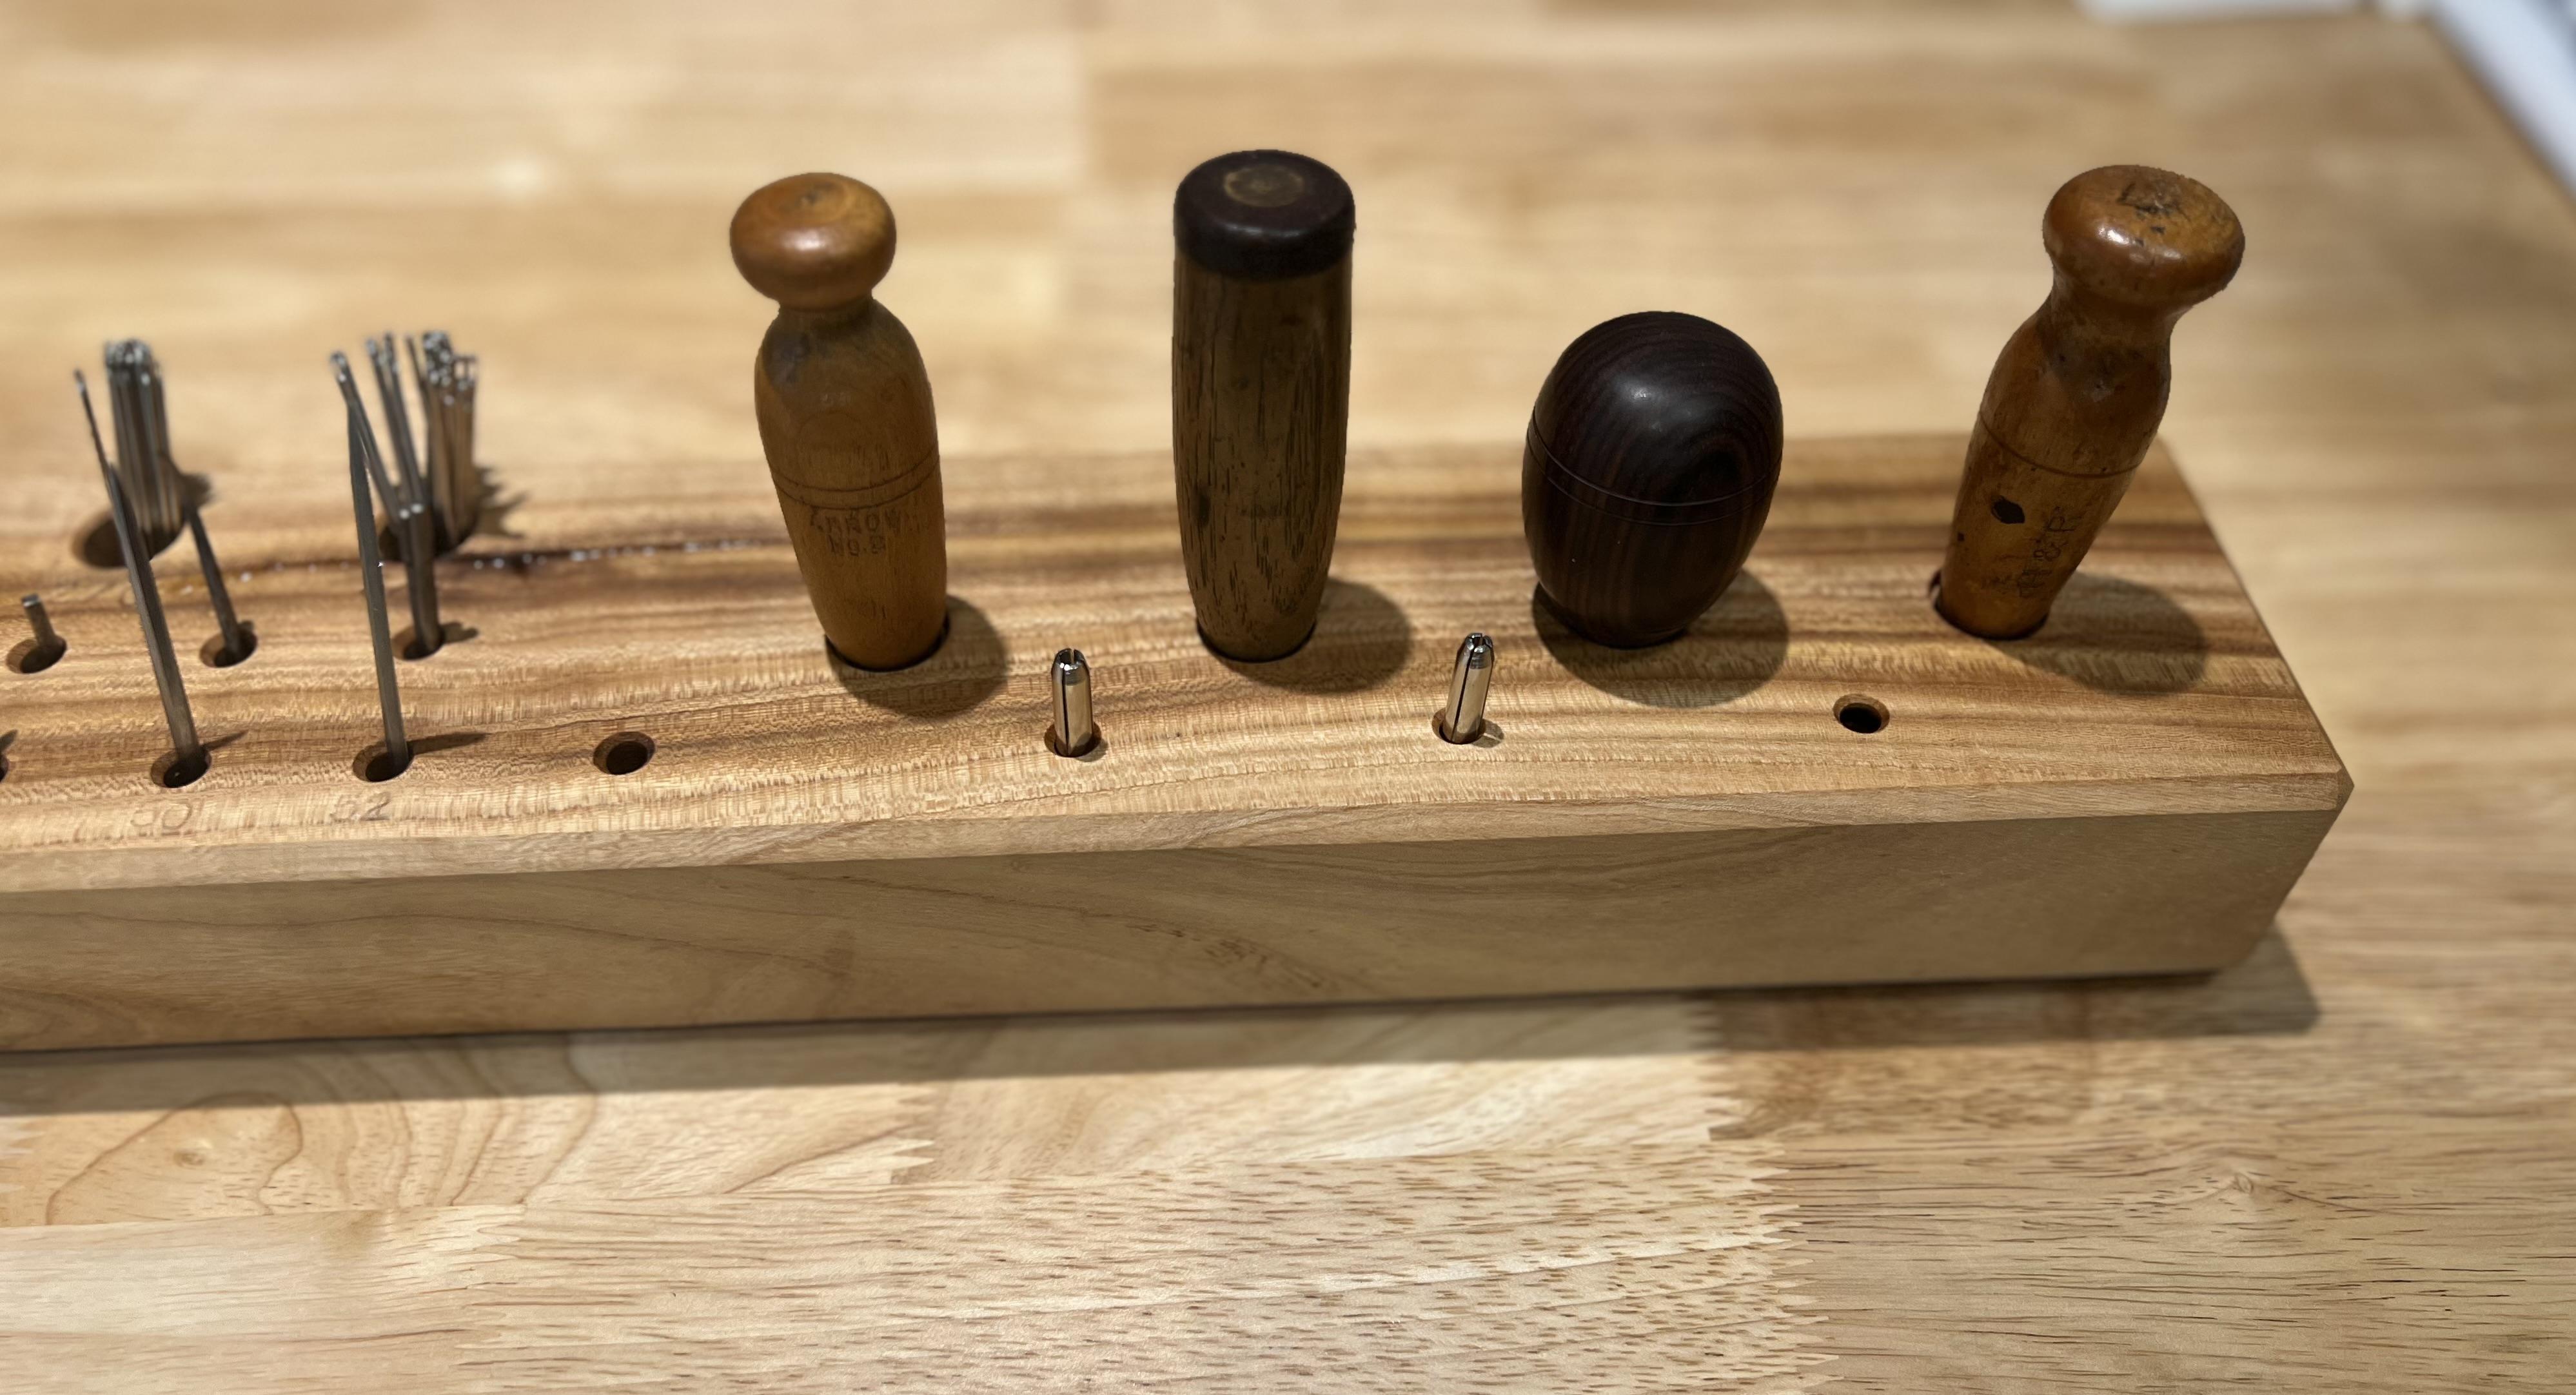
Hi everyone. Made a thing for all of my needles and awls blades. Happened to have space for the awl hafts also. So far it works great. When needing a different awl haft, awl, or needle, it is all in one place. Though I do all hand stitching work, I’m sure this could be adapted for machine applications. It’s practically a horizontal reduced version that a lot of folks keep their tooling tools in. And, made in American elm!


-
Swiss Saddler Clam Drawings
ClaimedVacancy replied to ClaimedVacancy's topic in Leatherwork Conversation
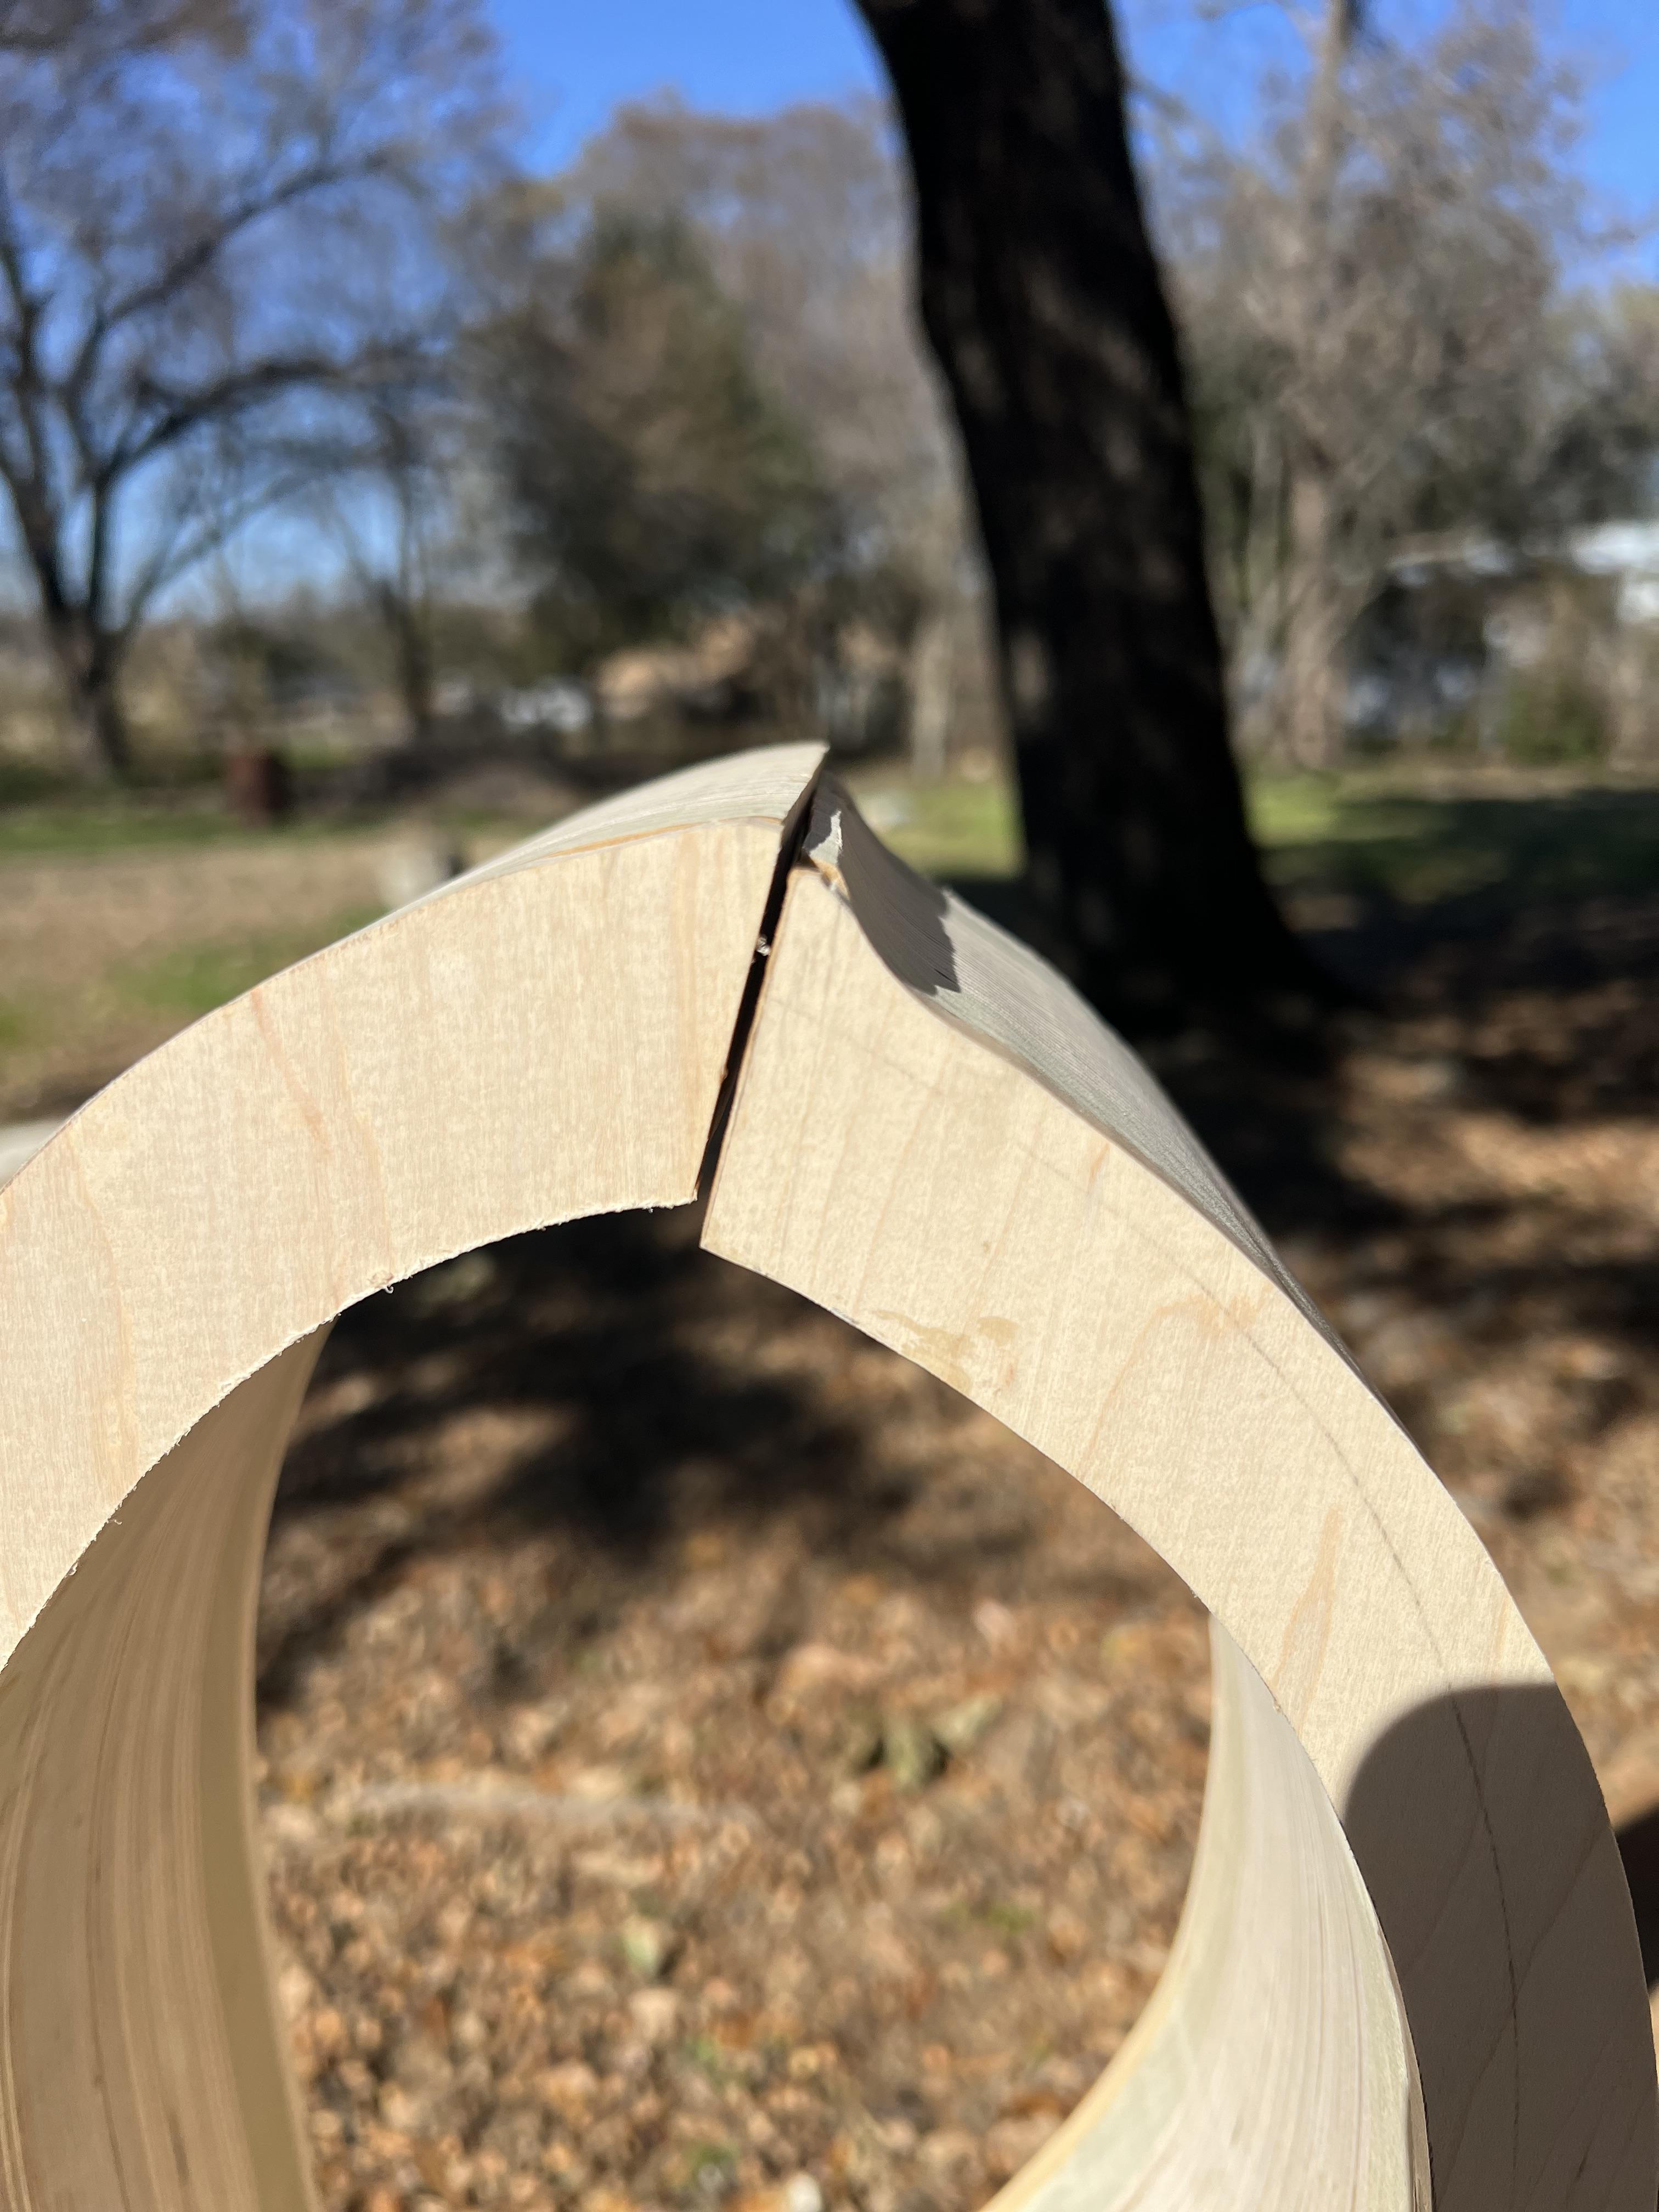
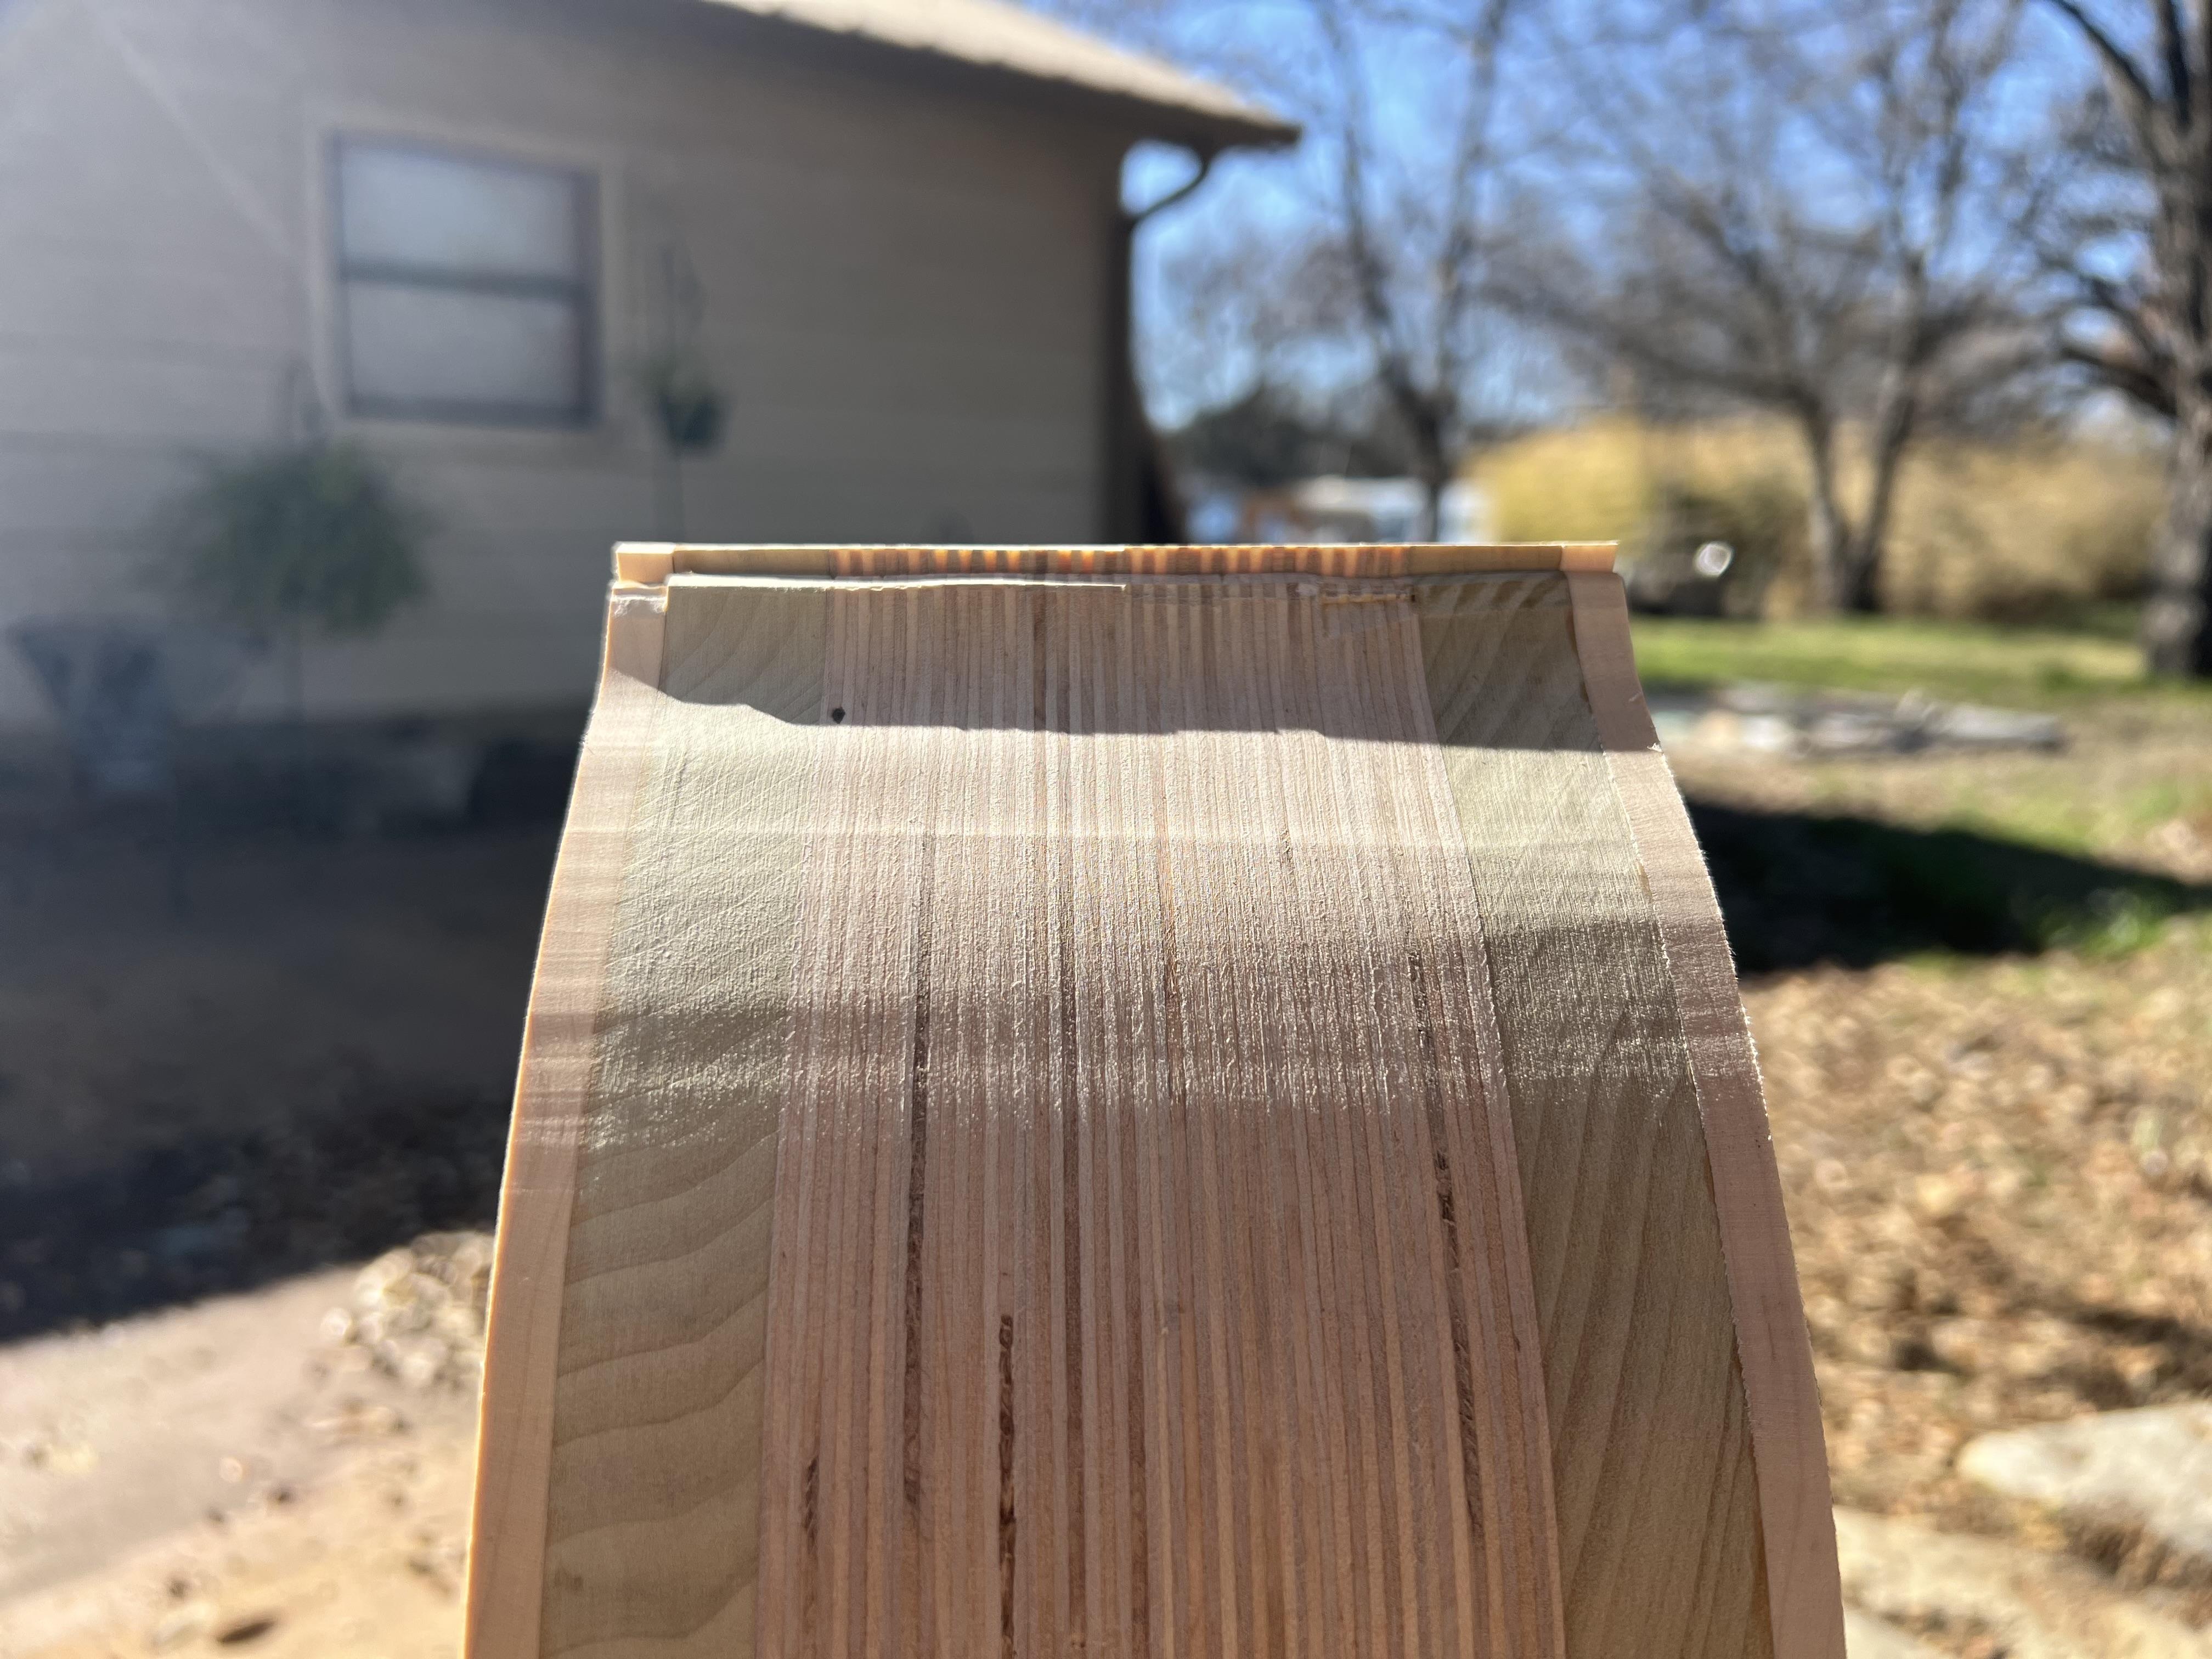
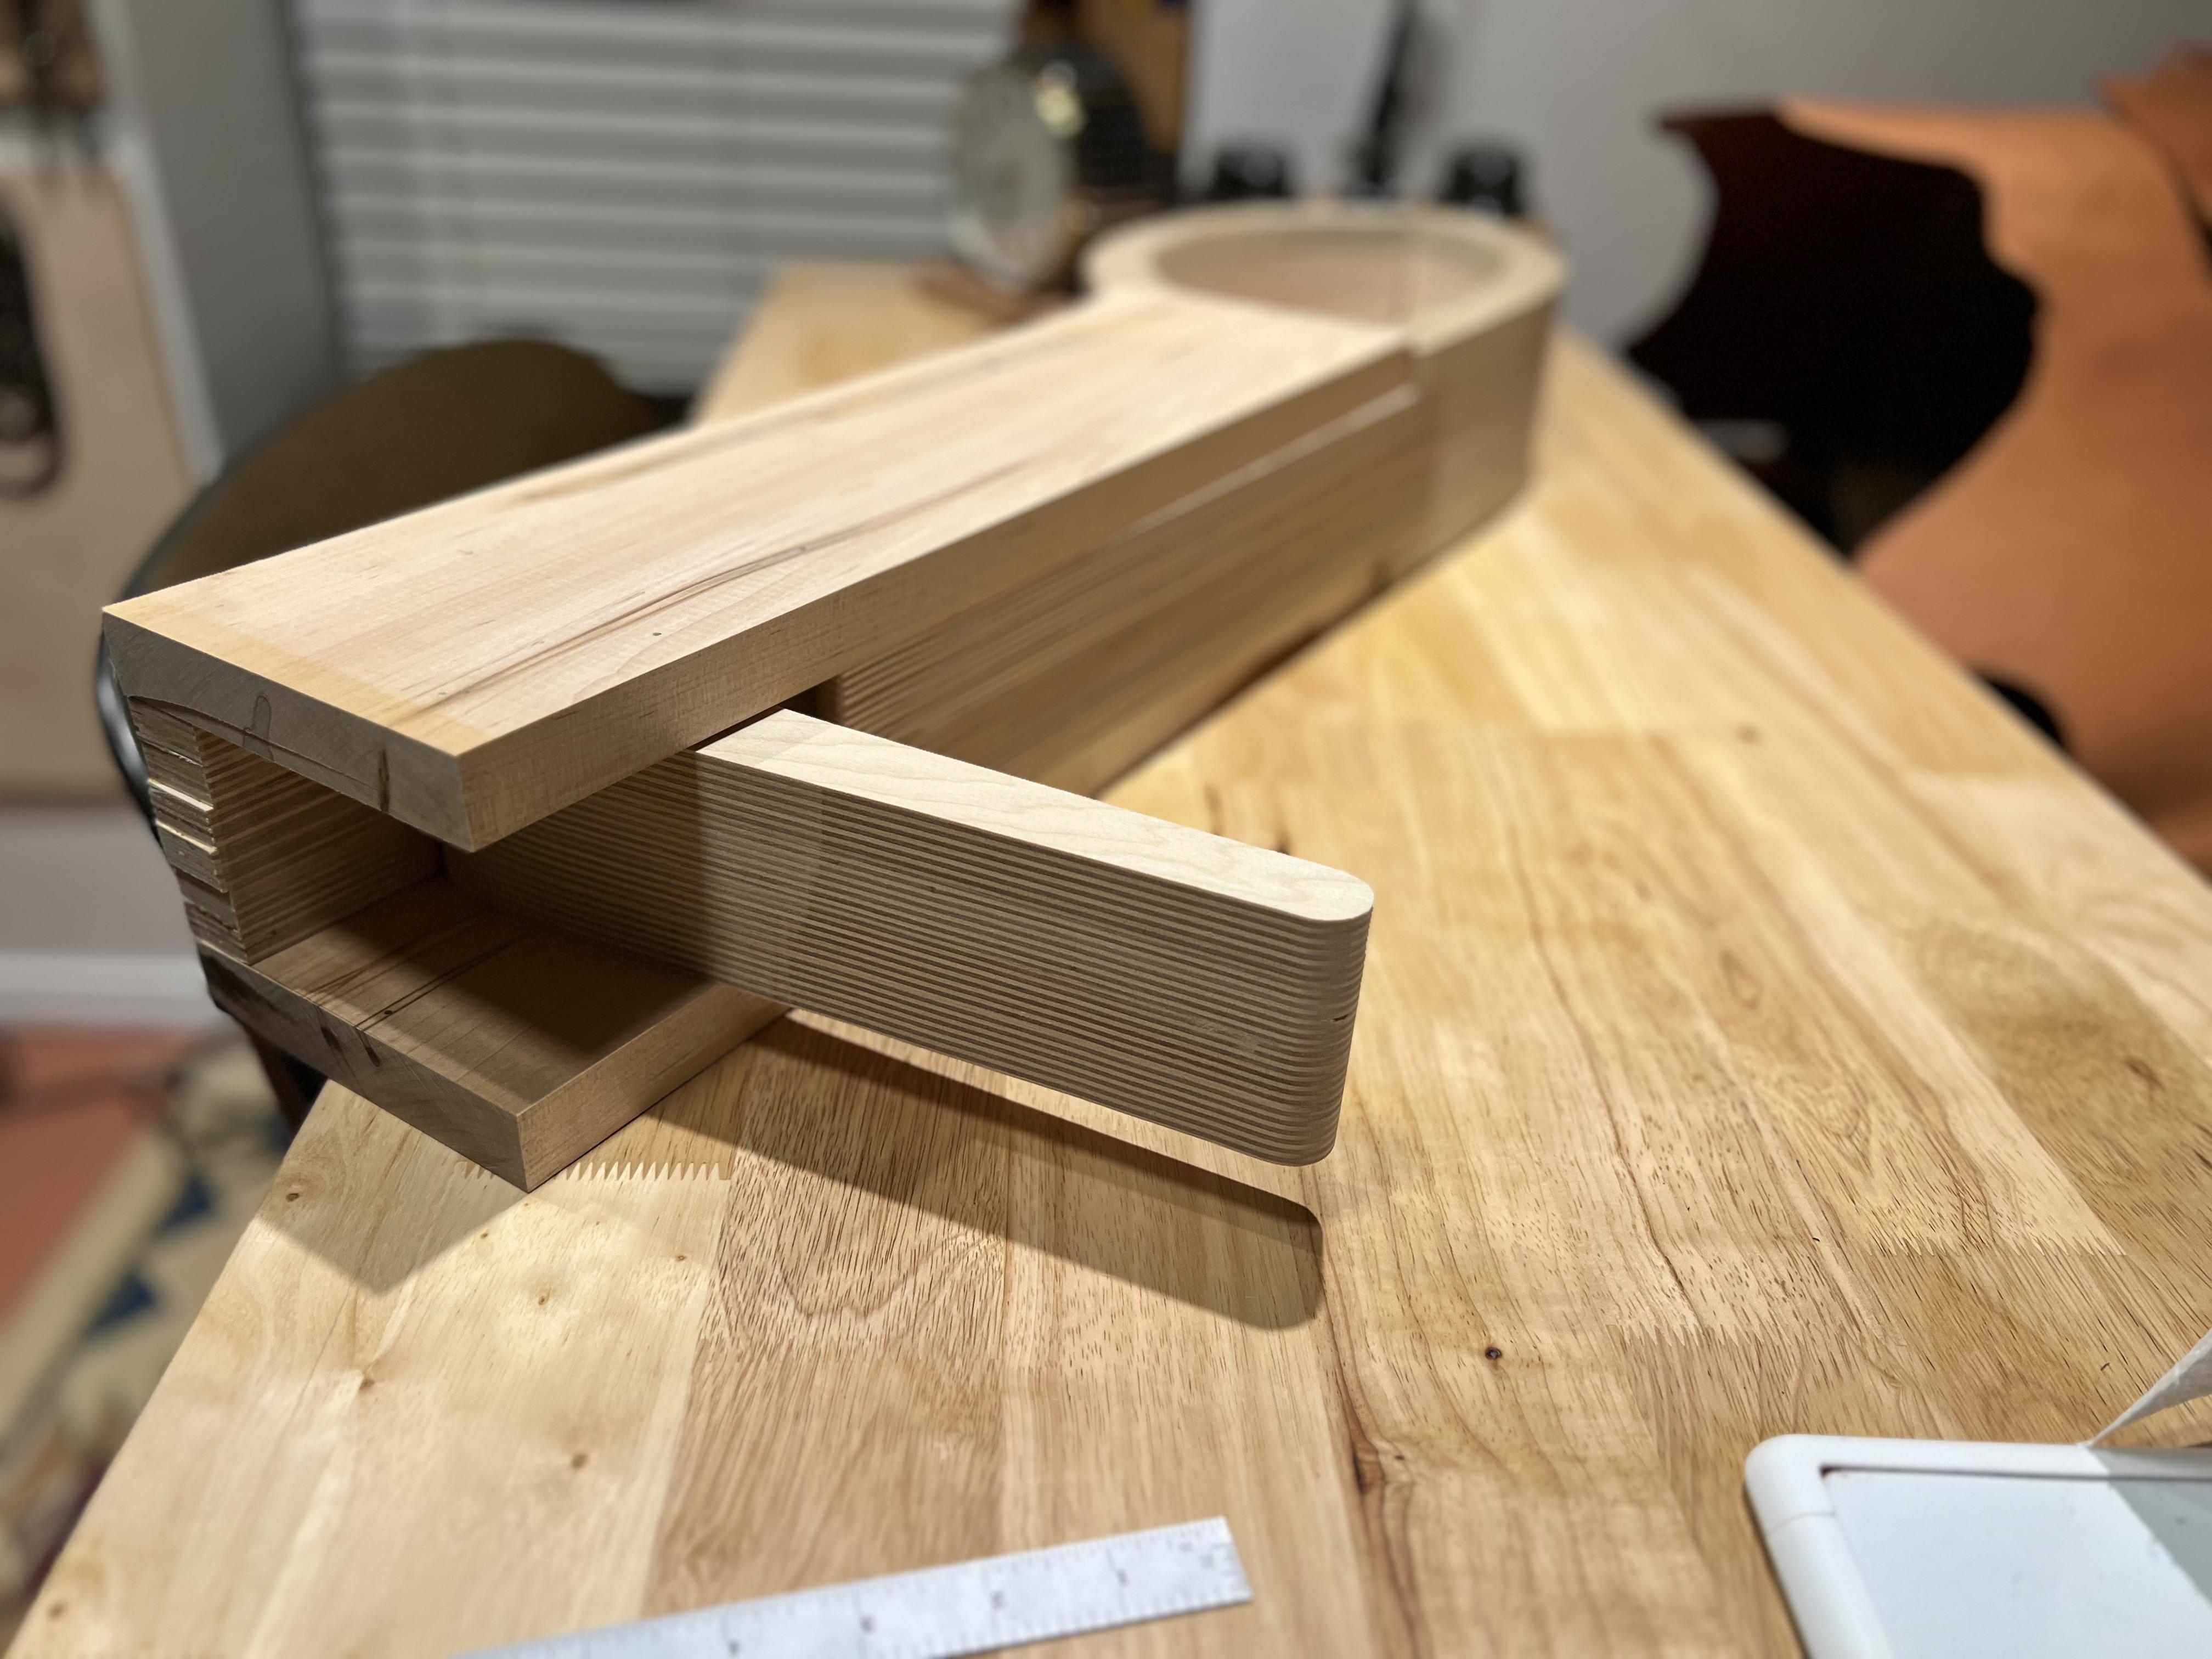
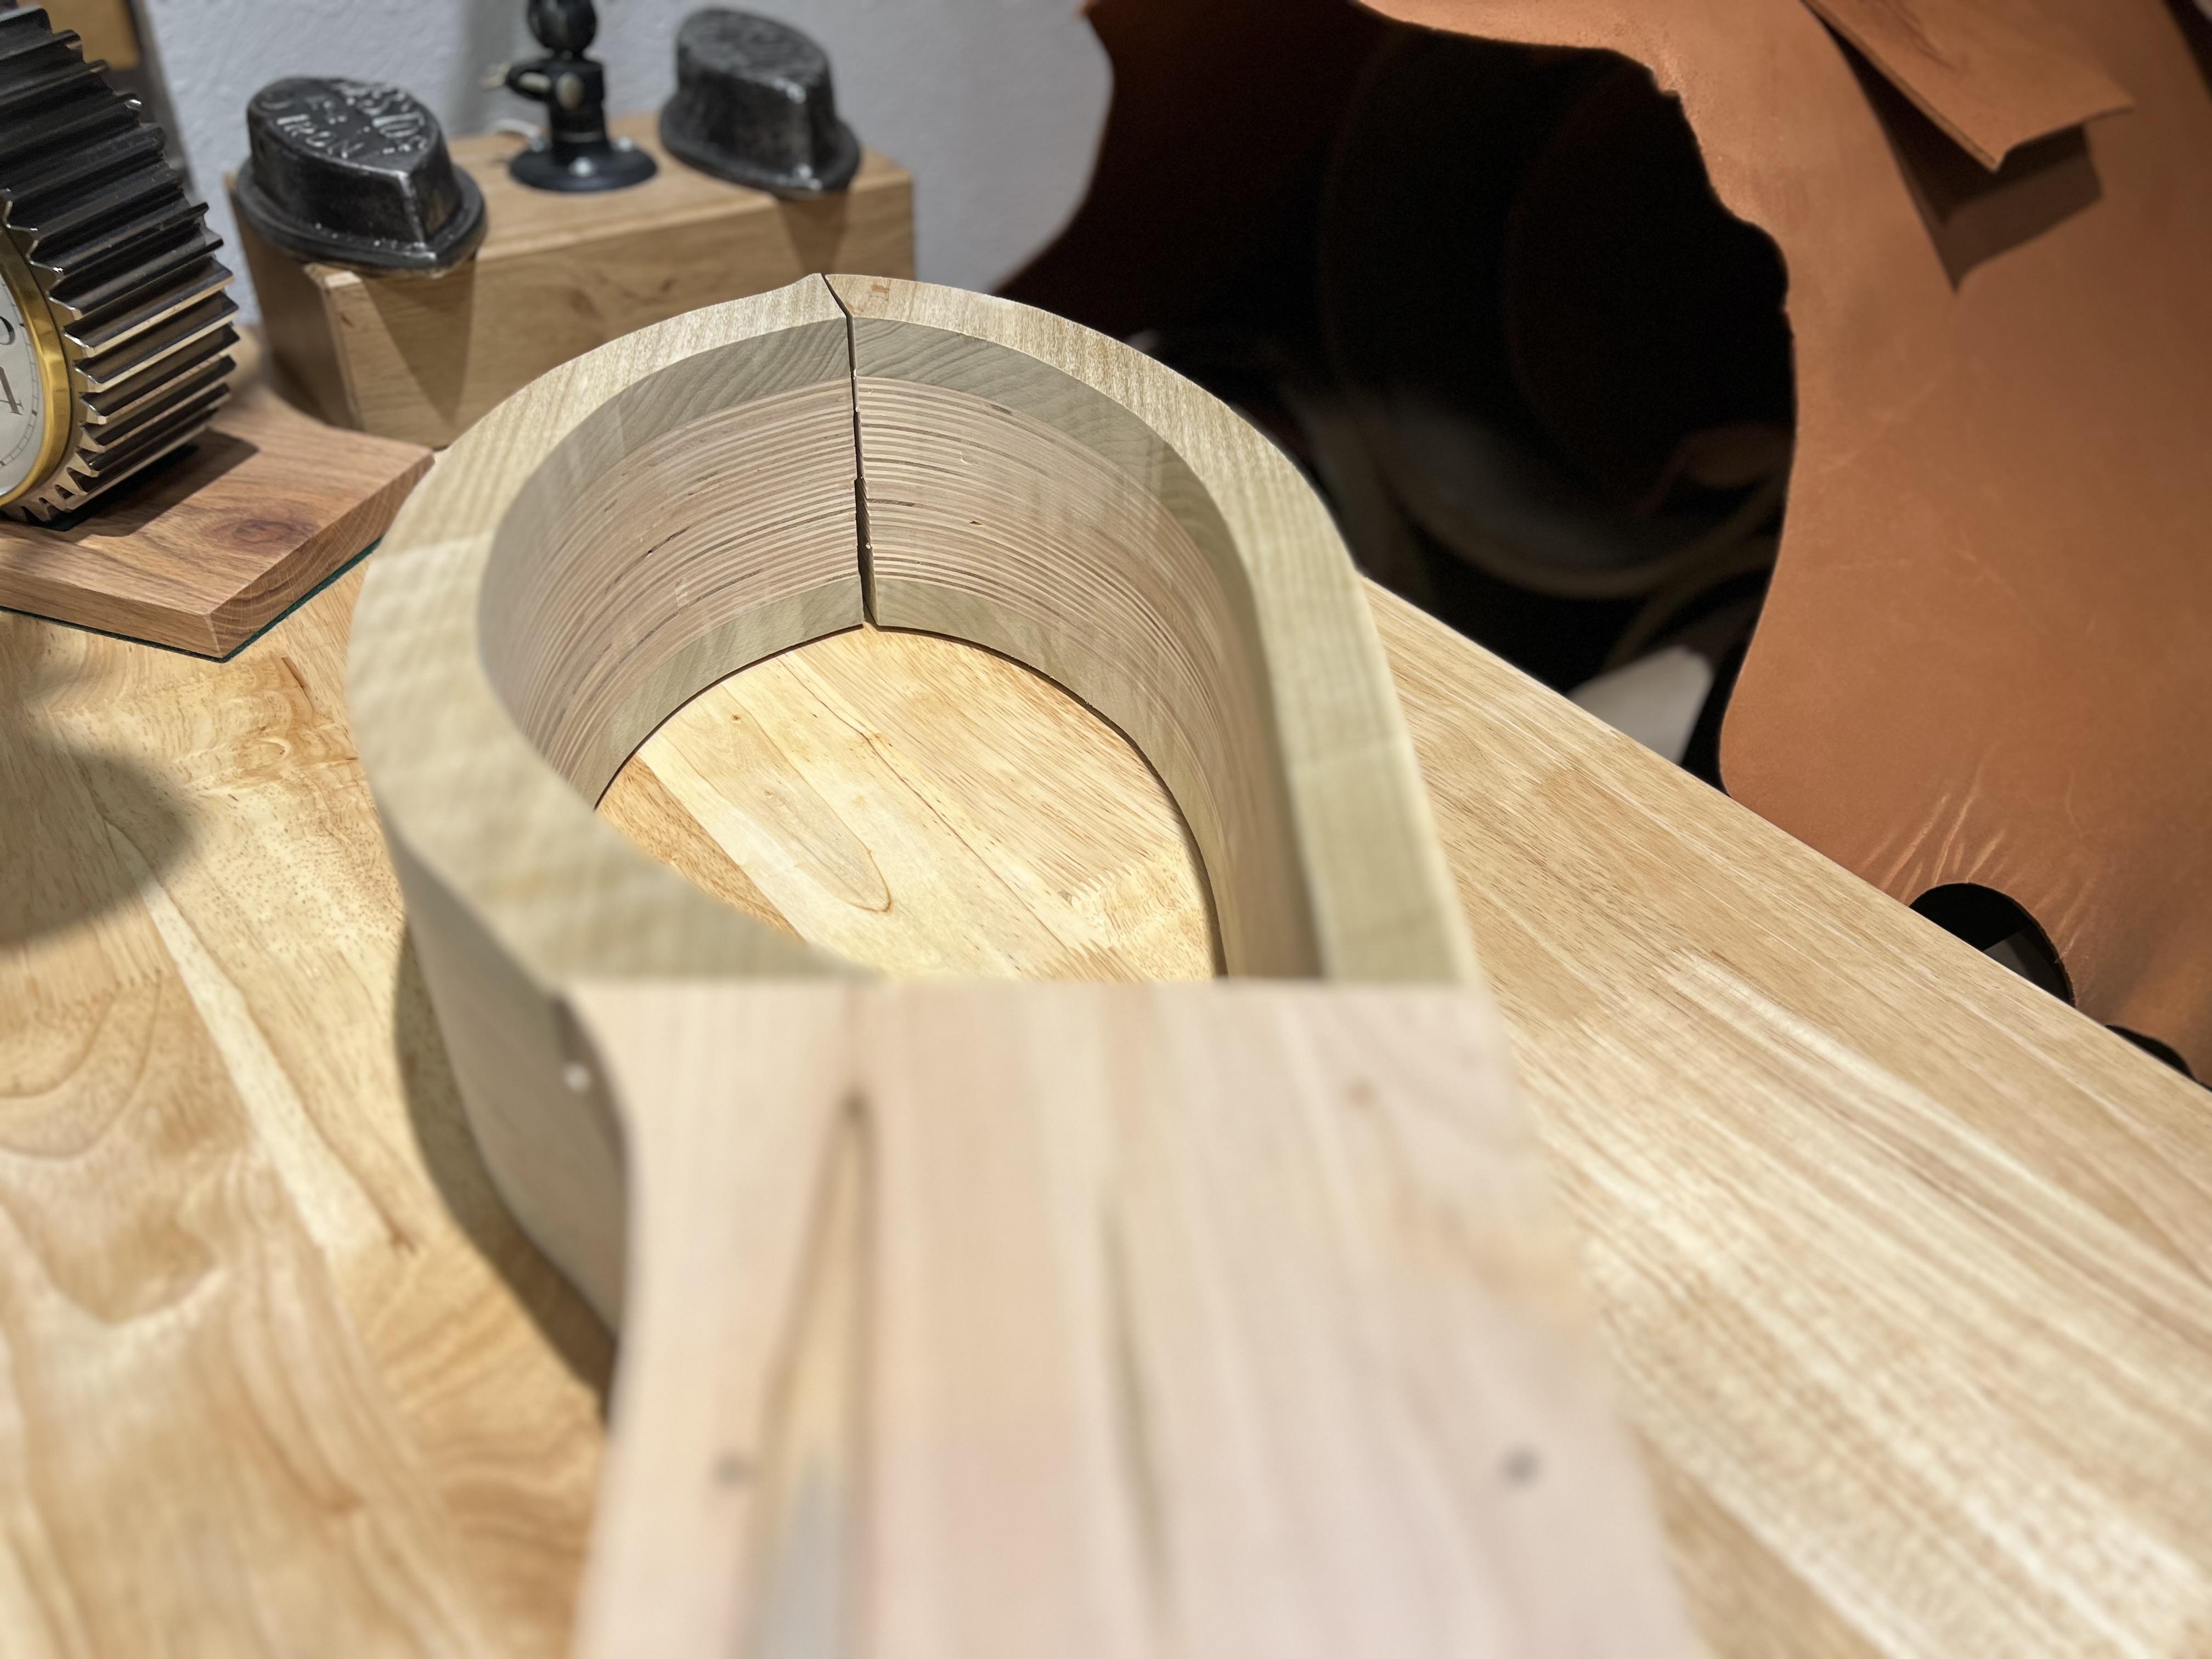
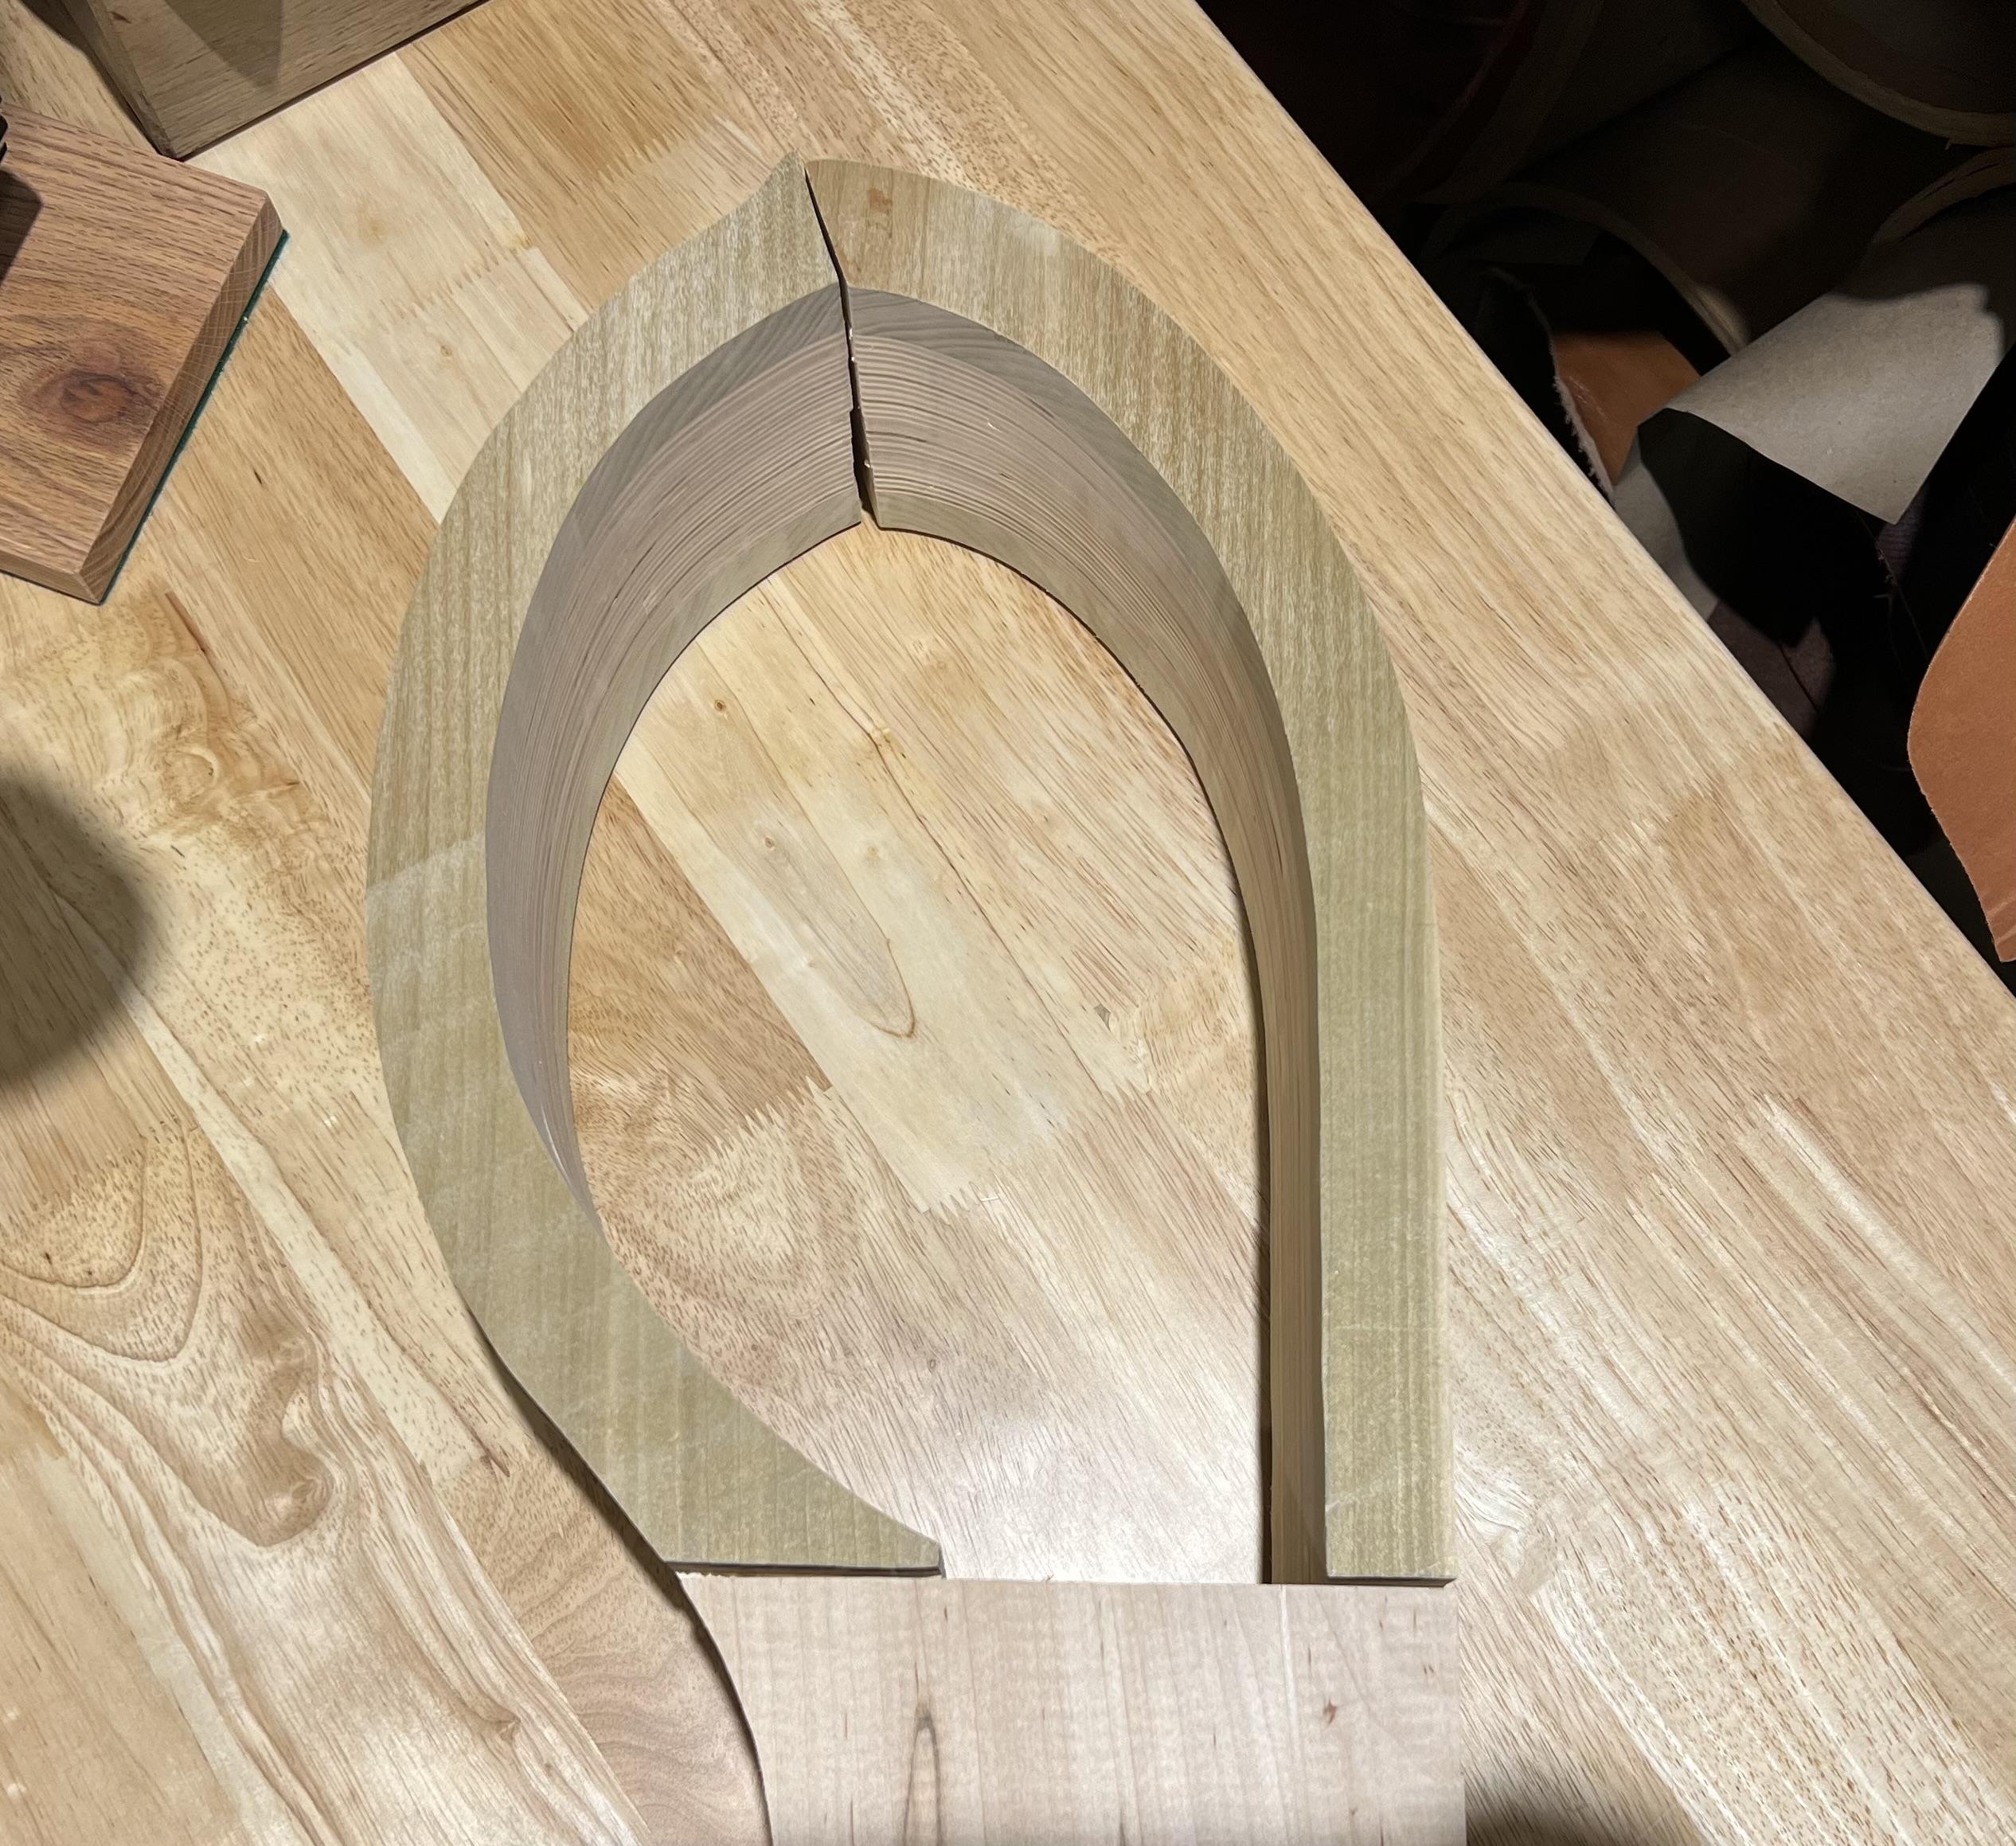
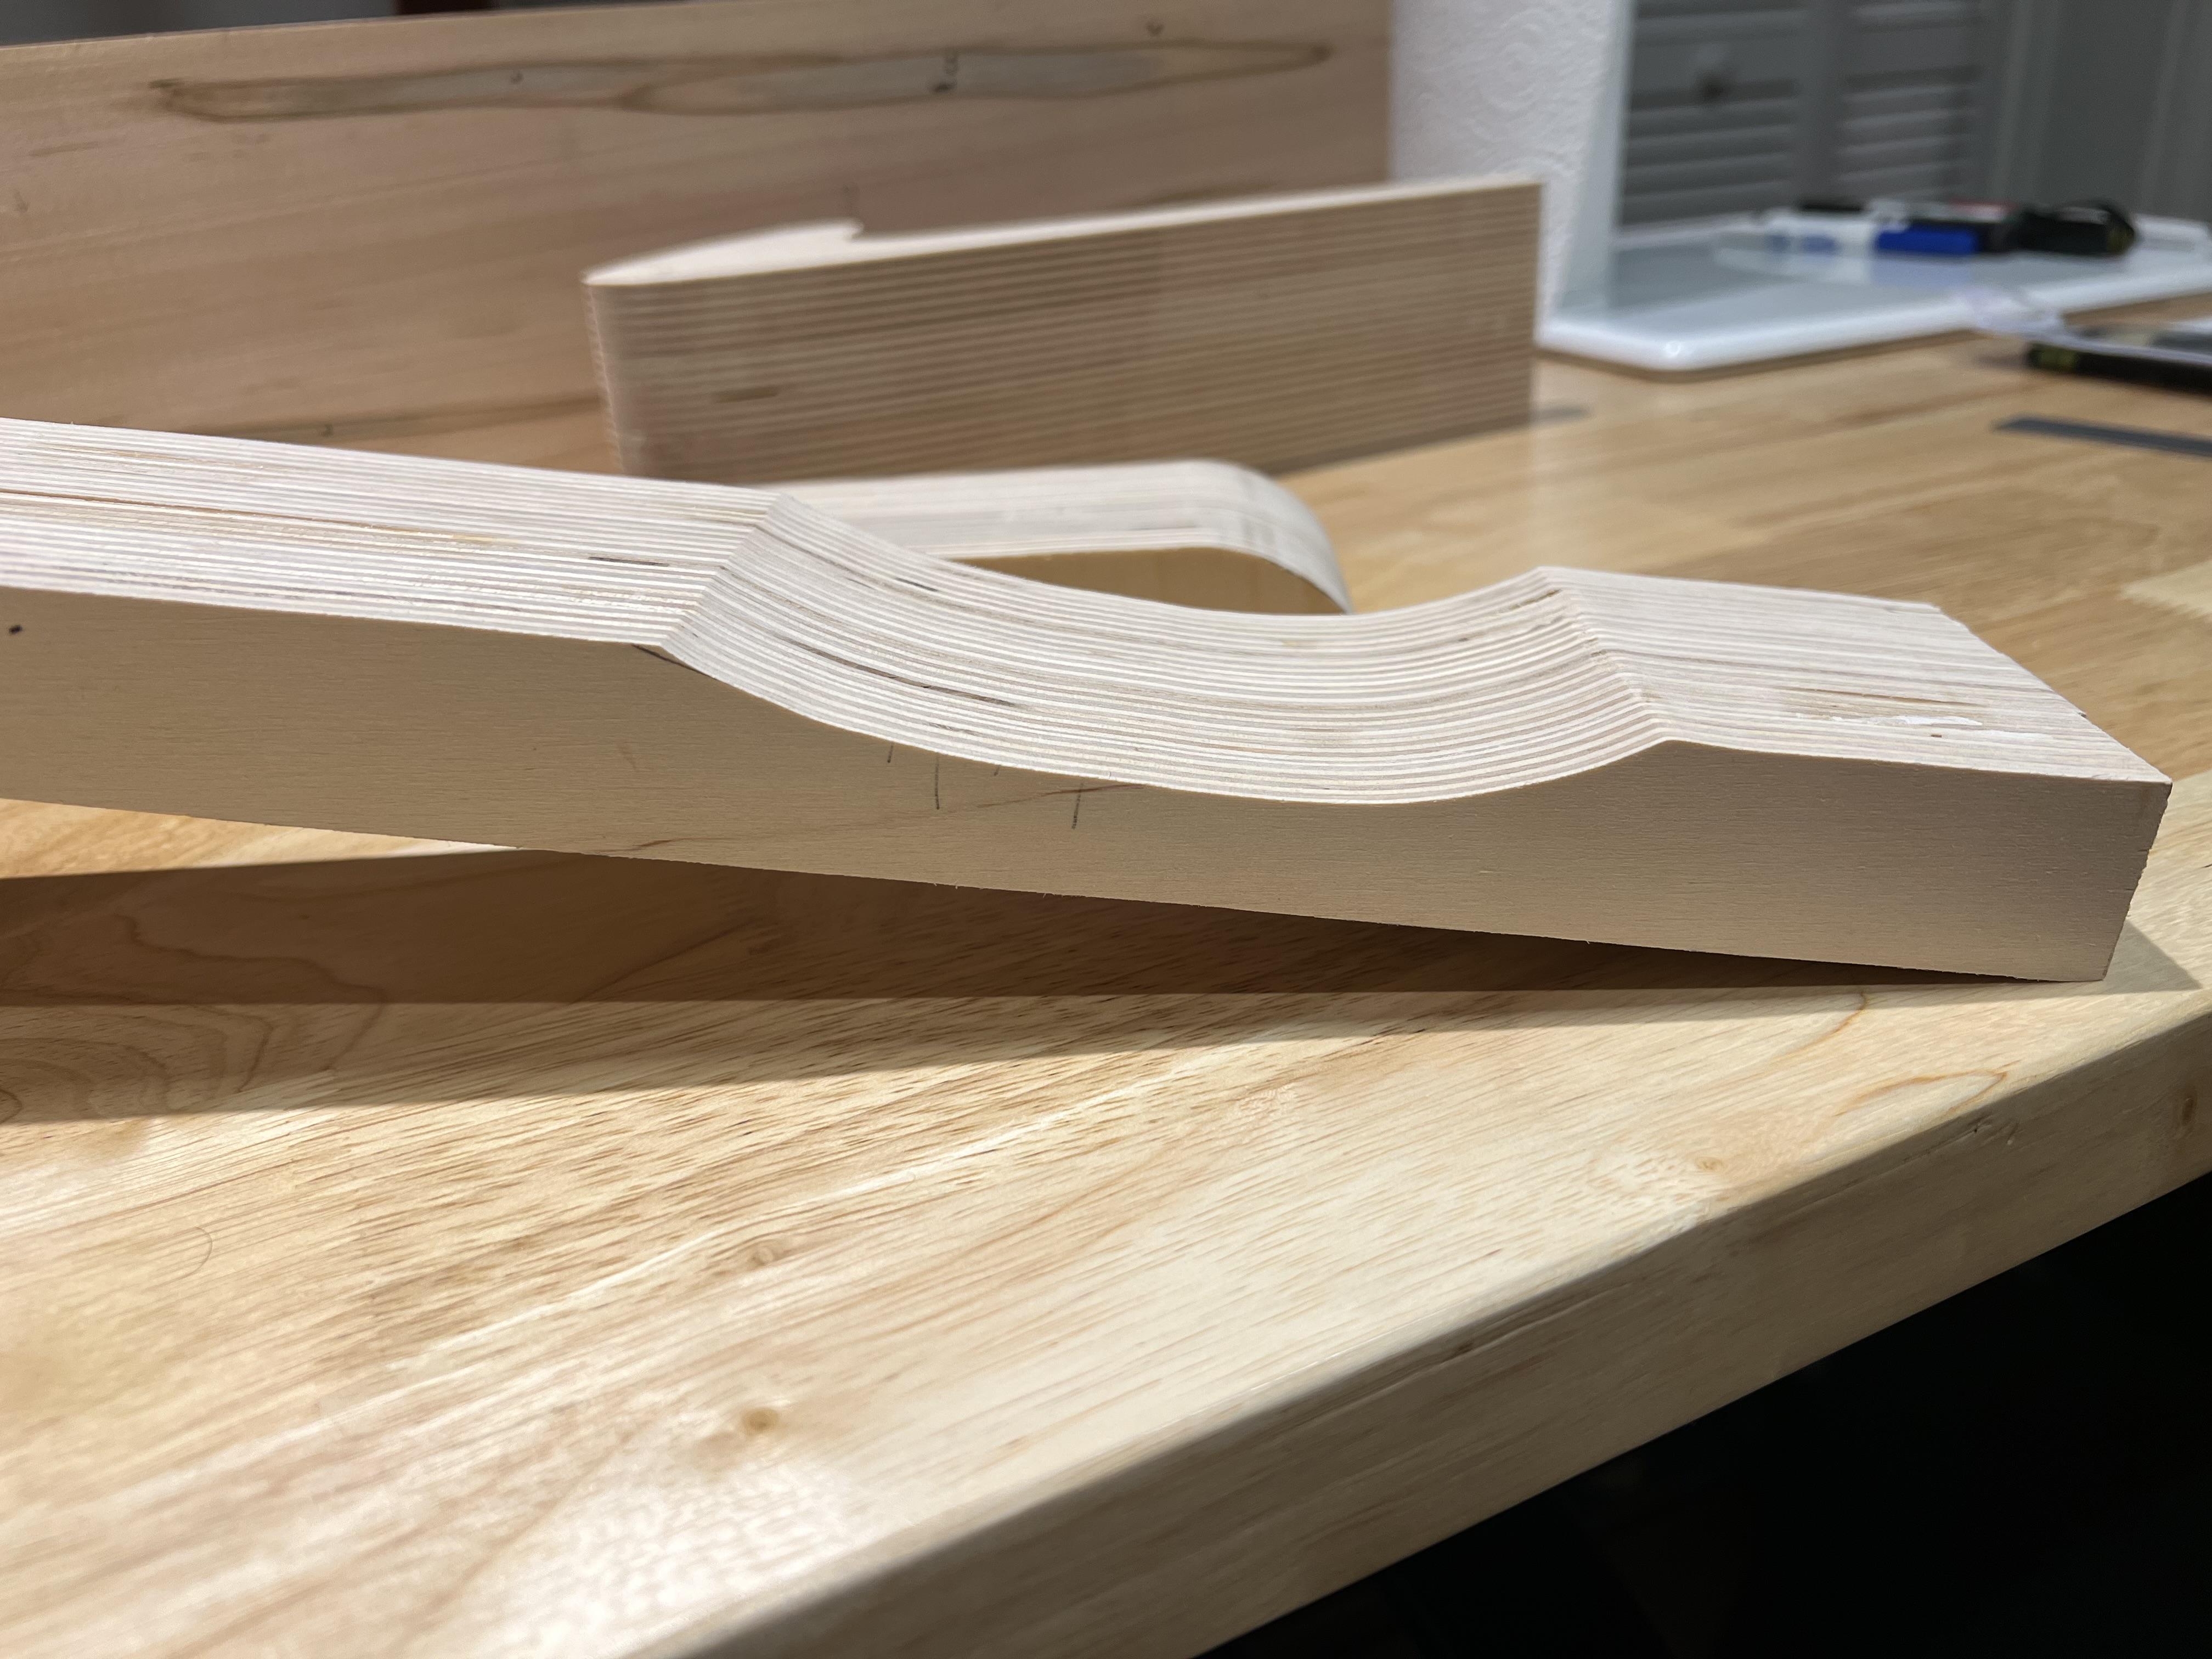
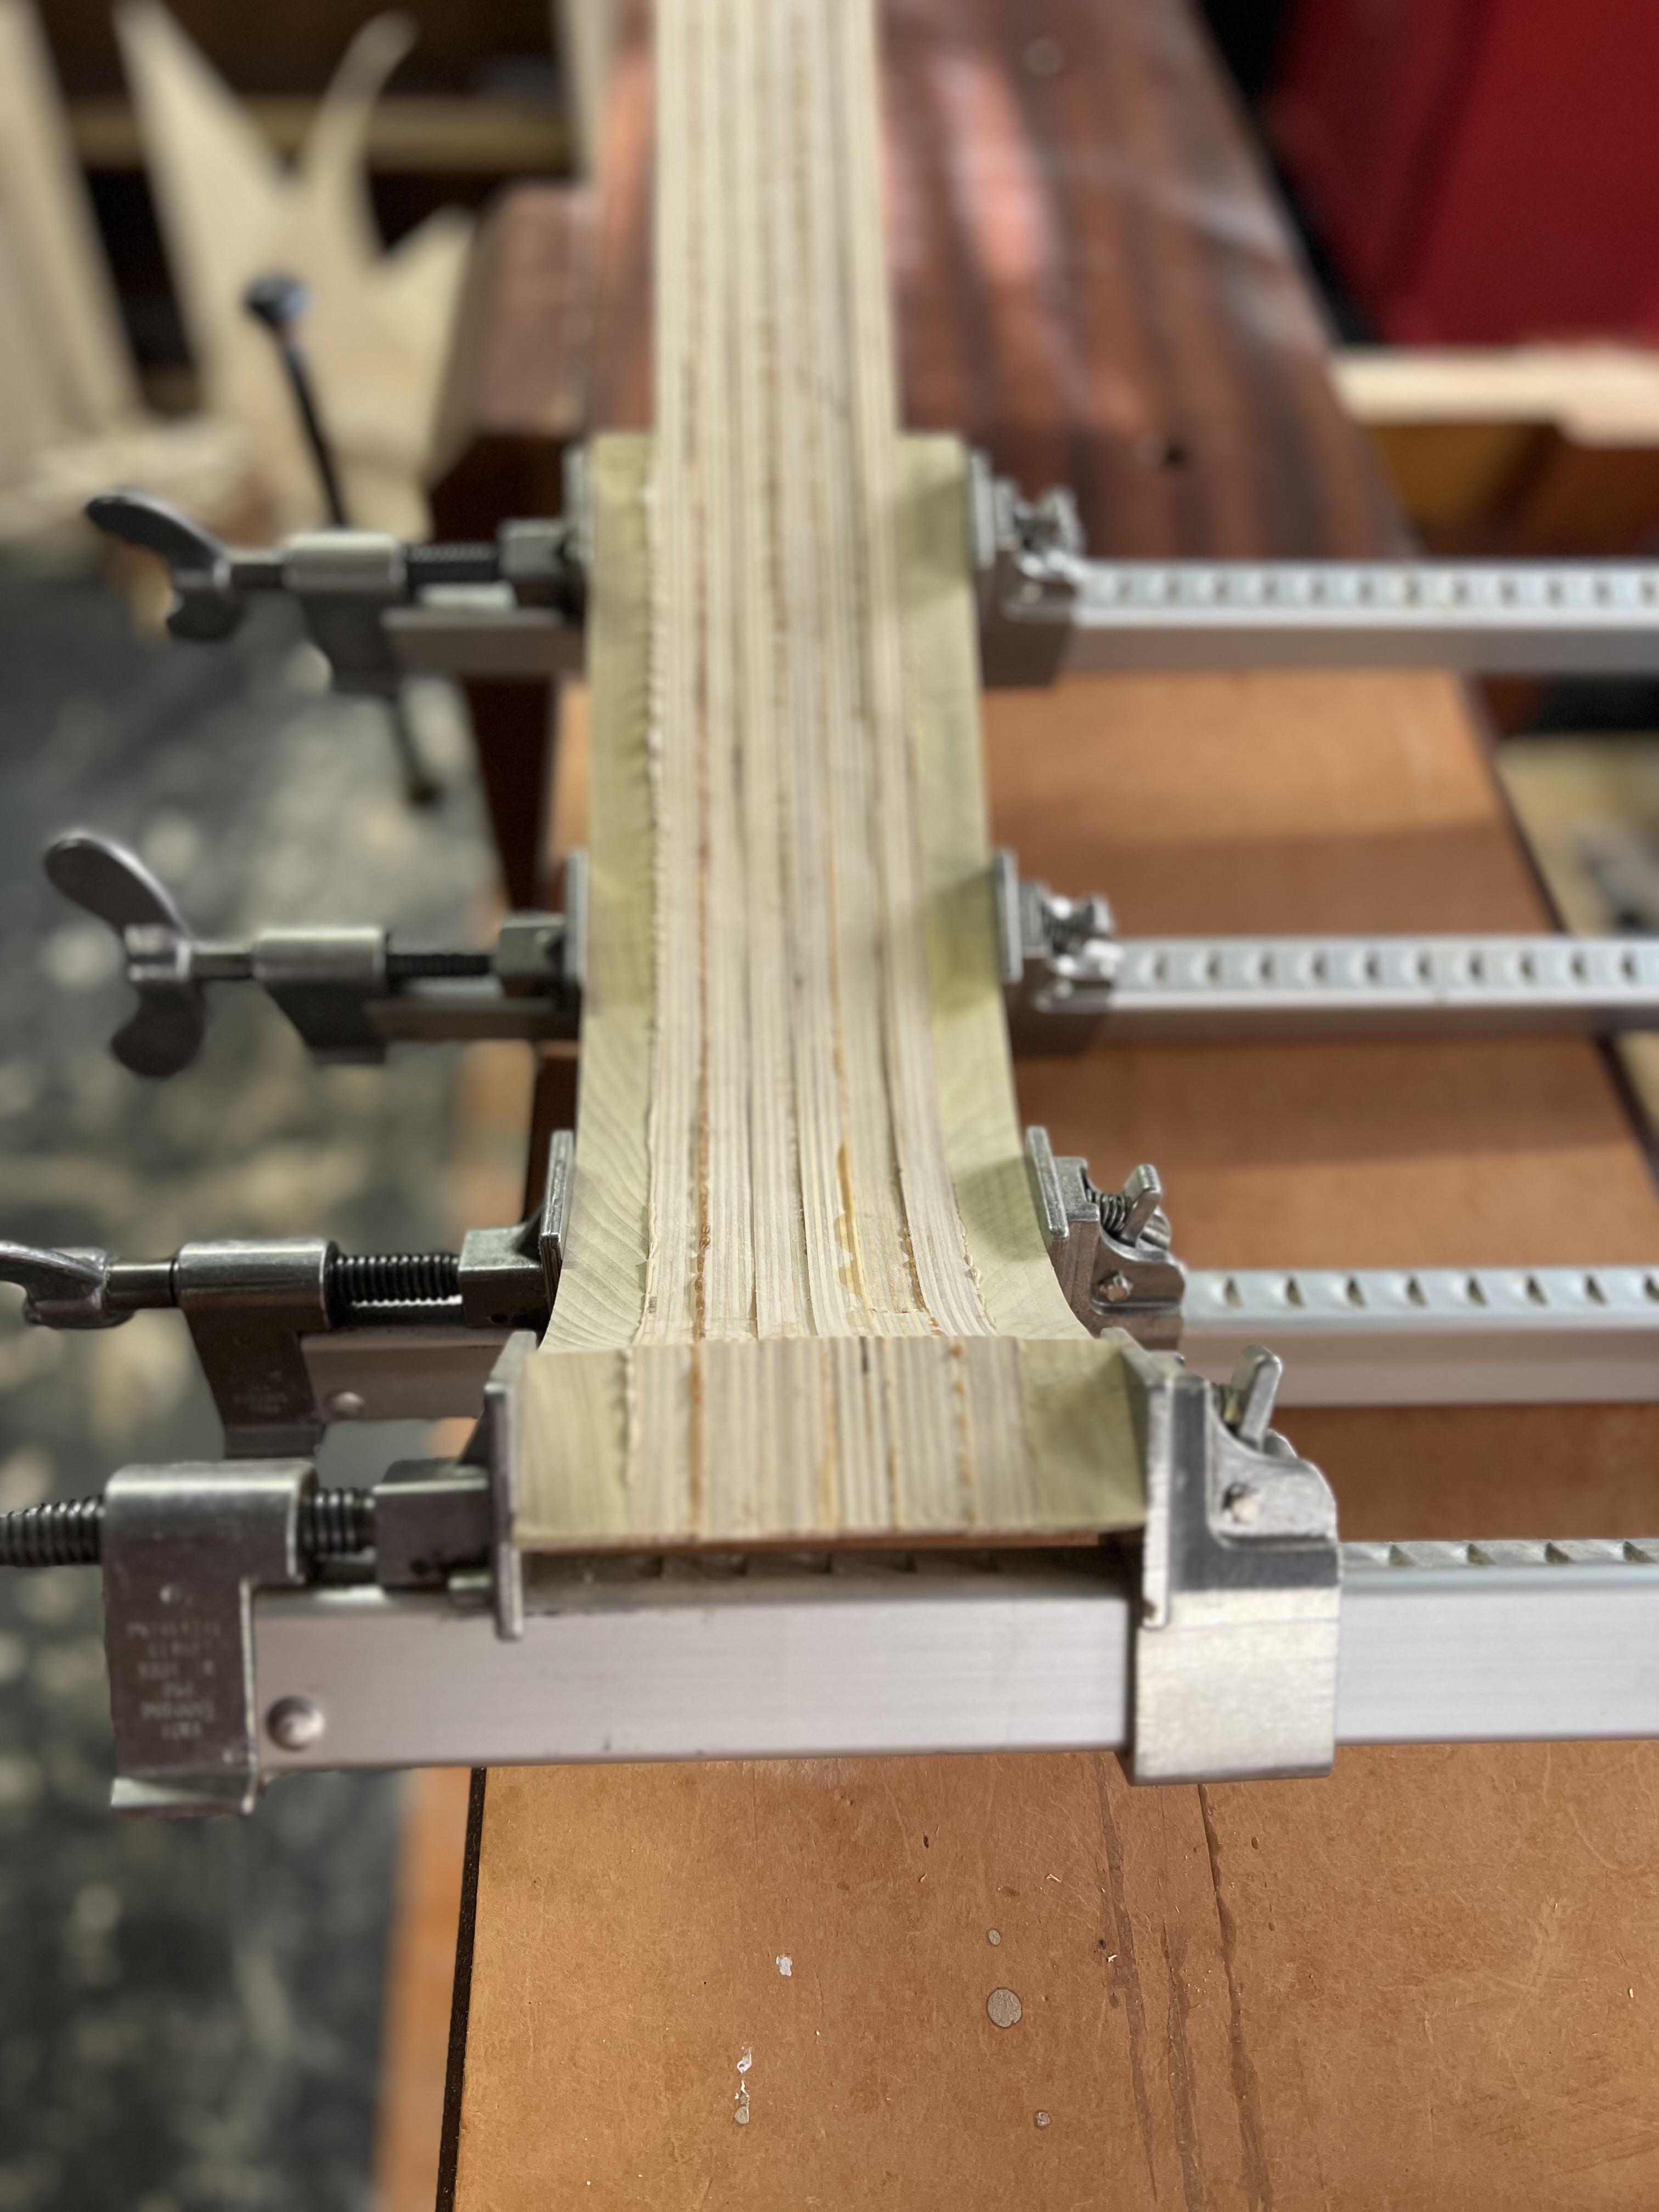
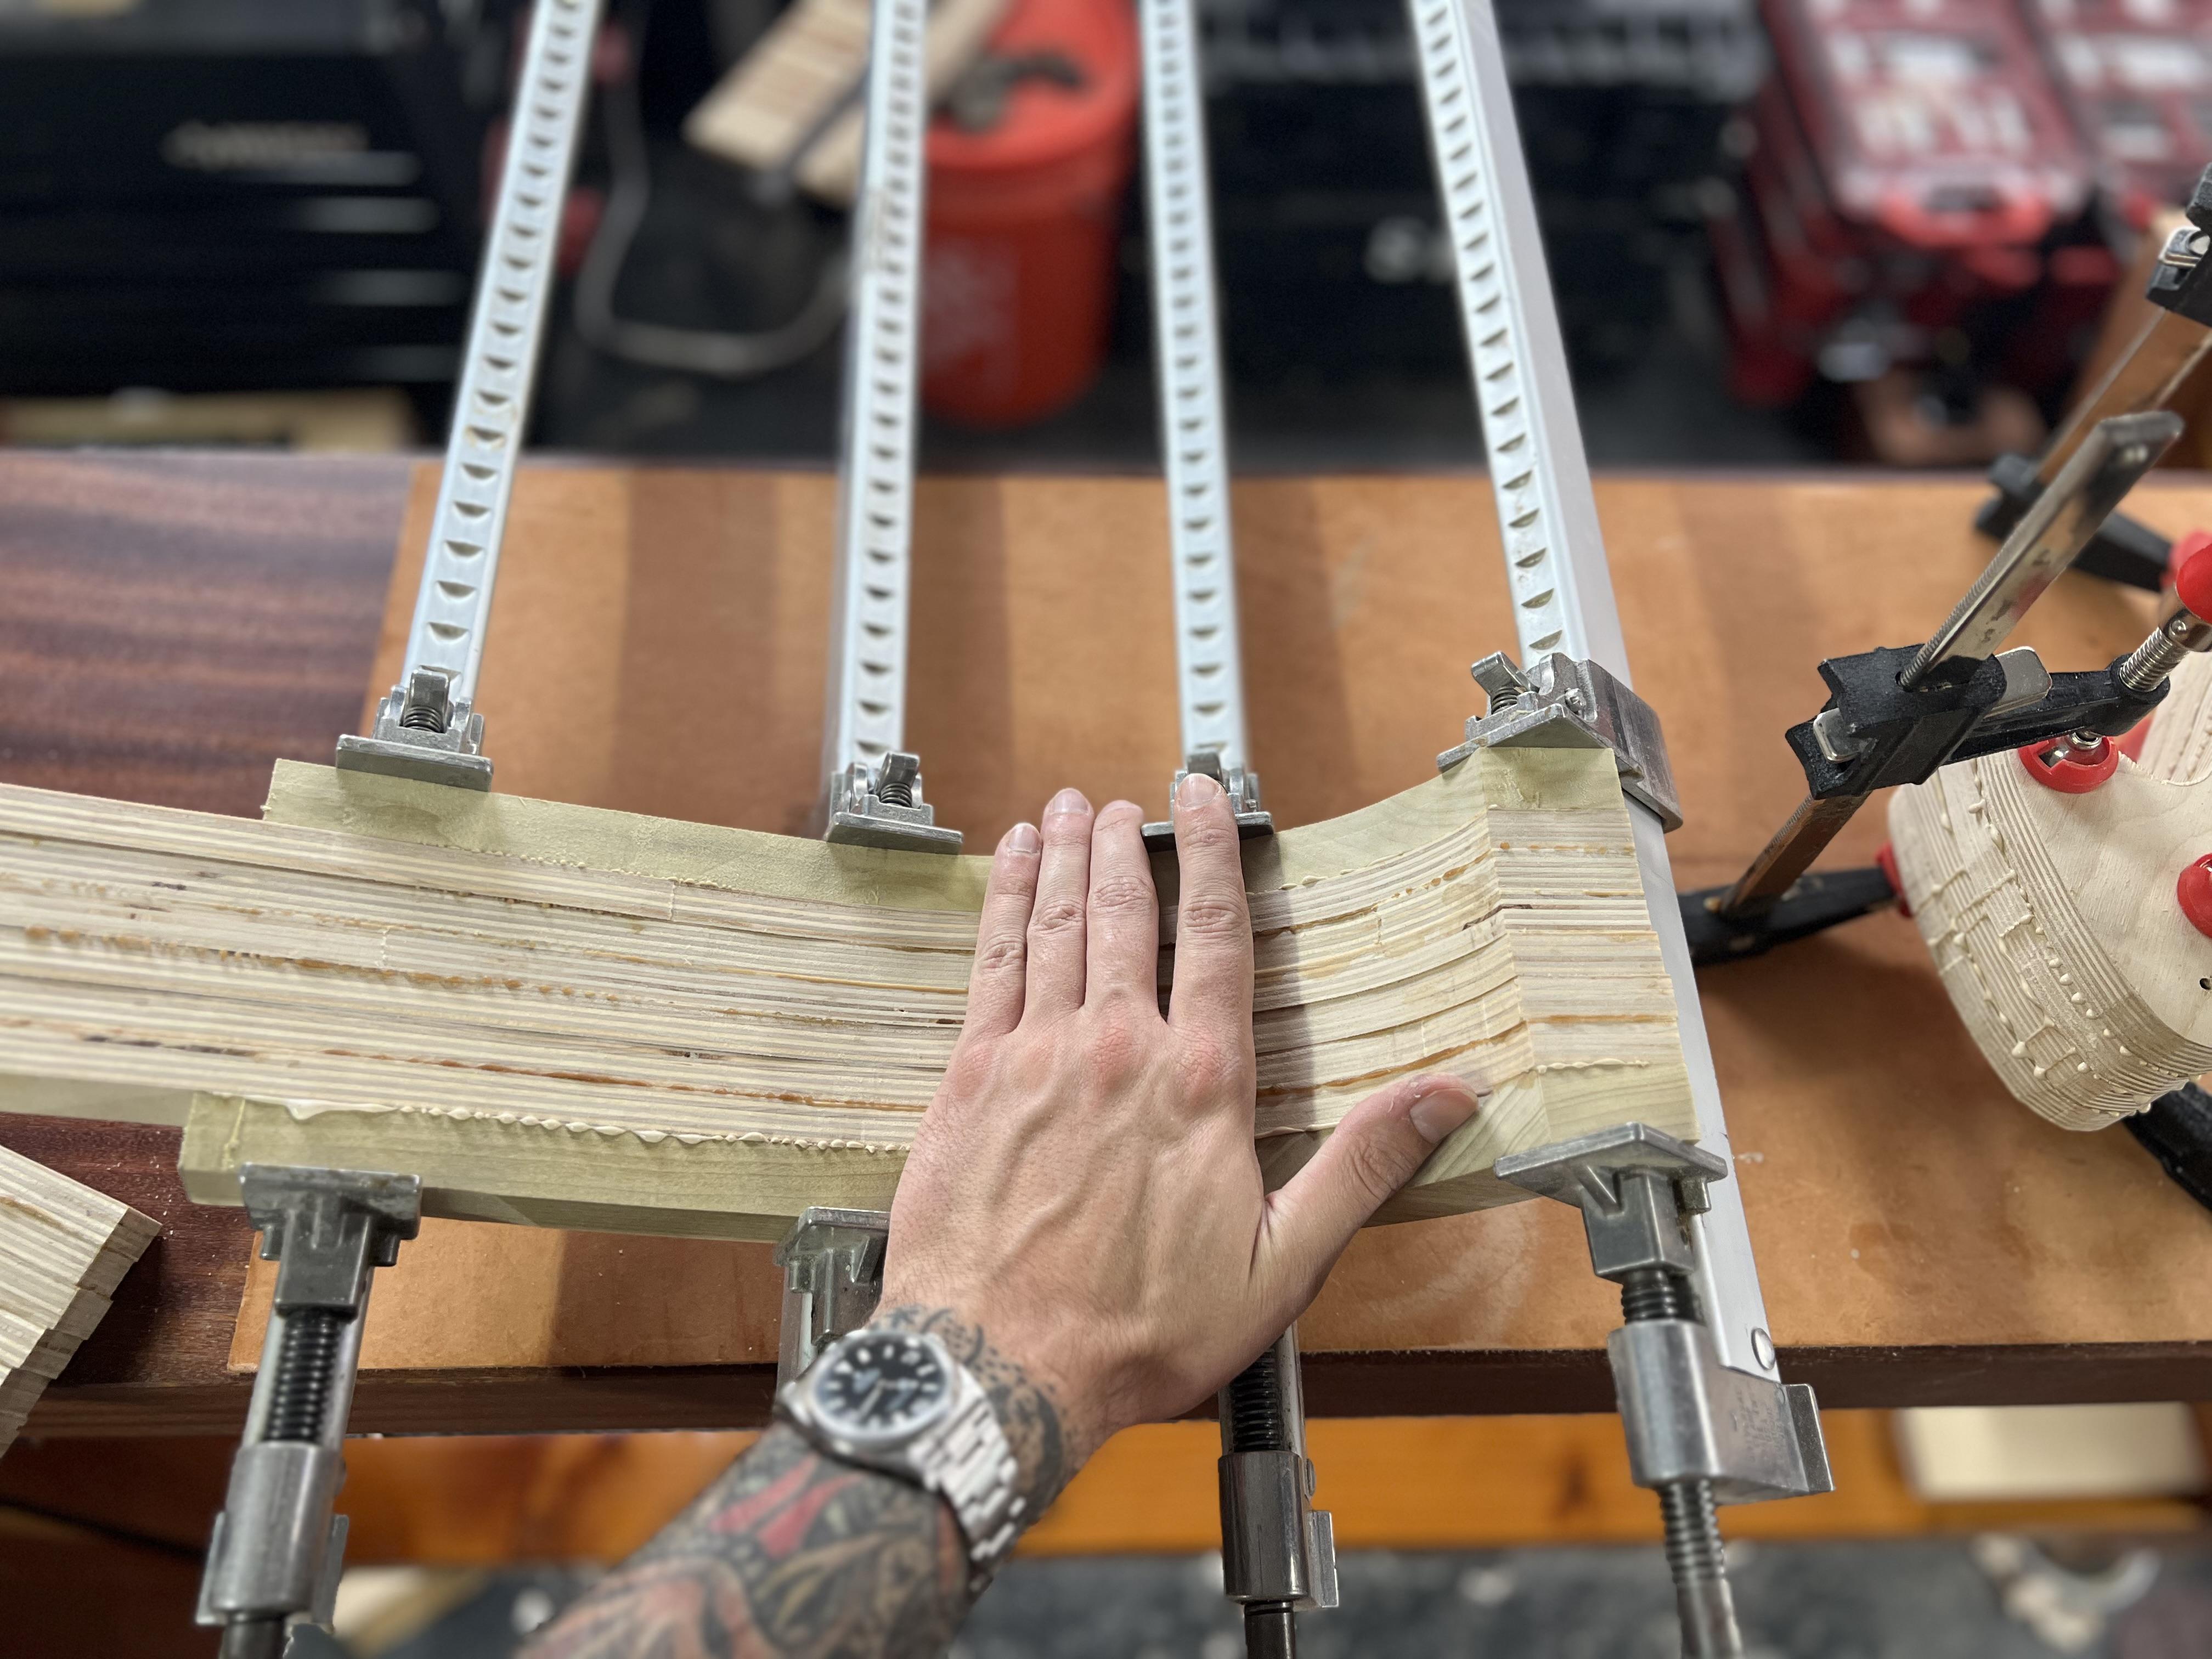
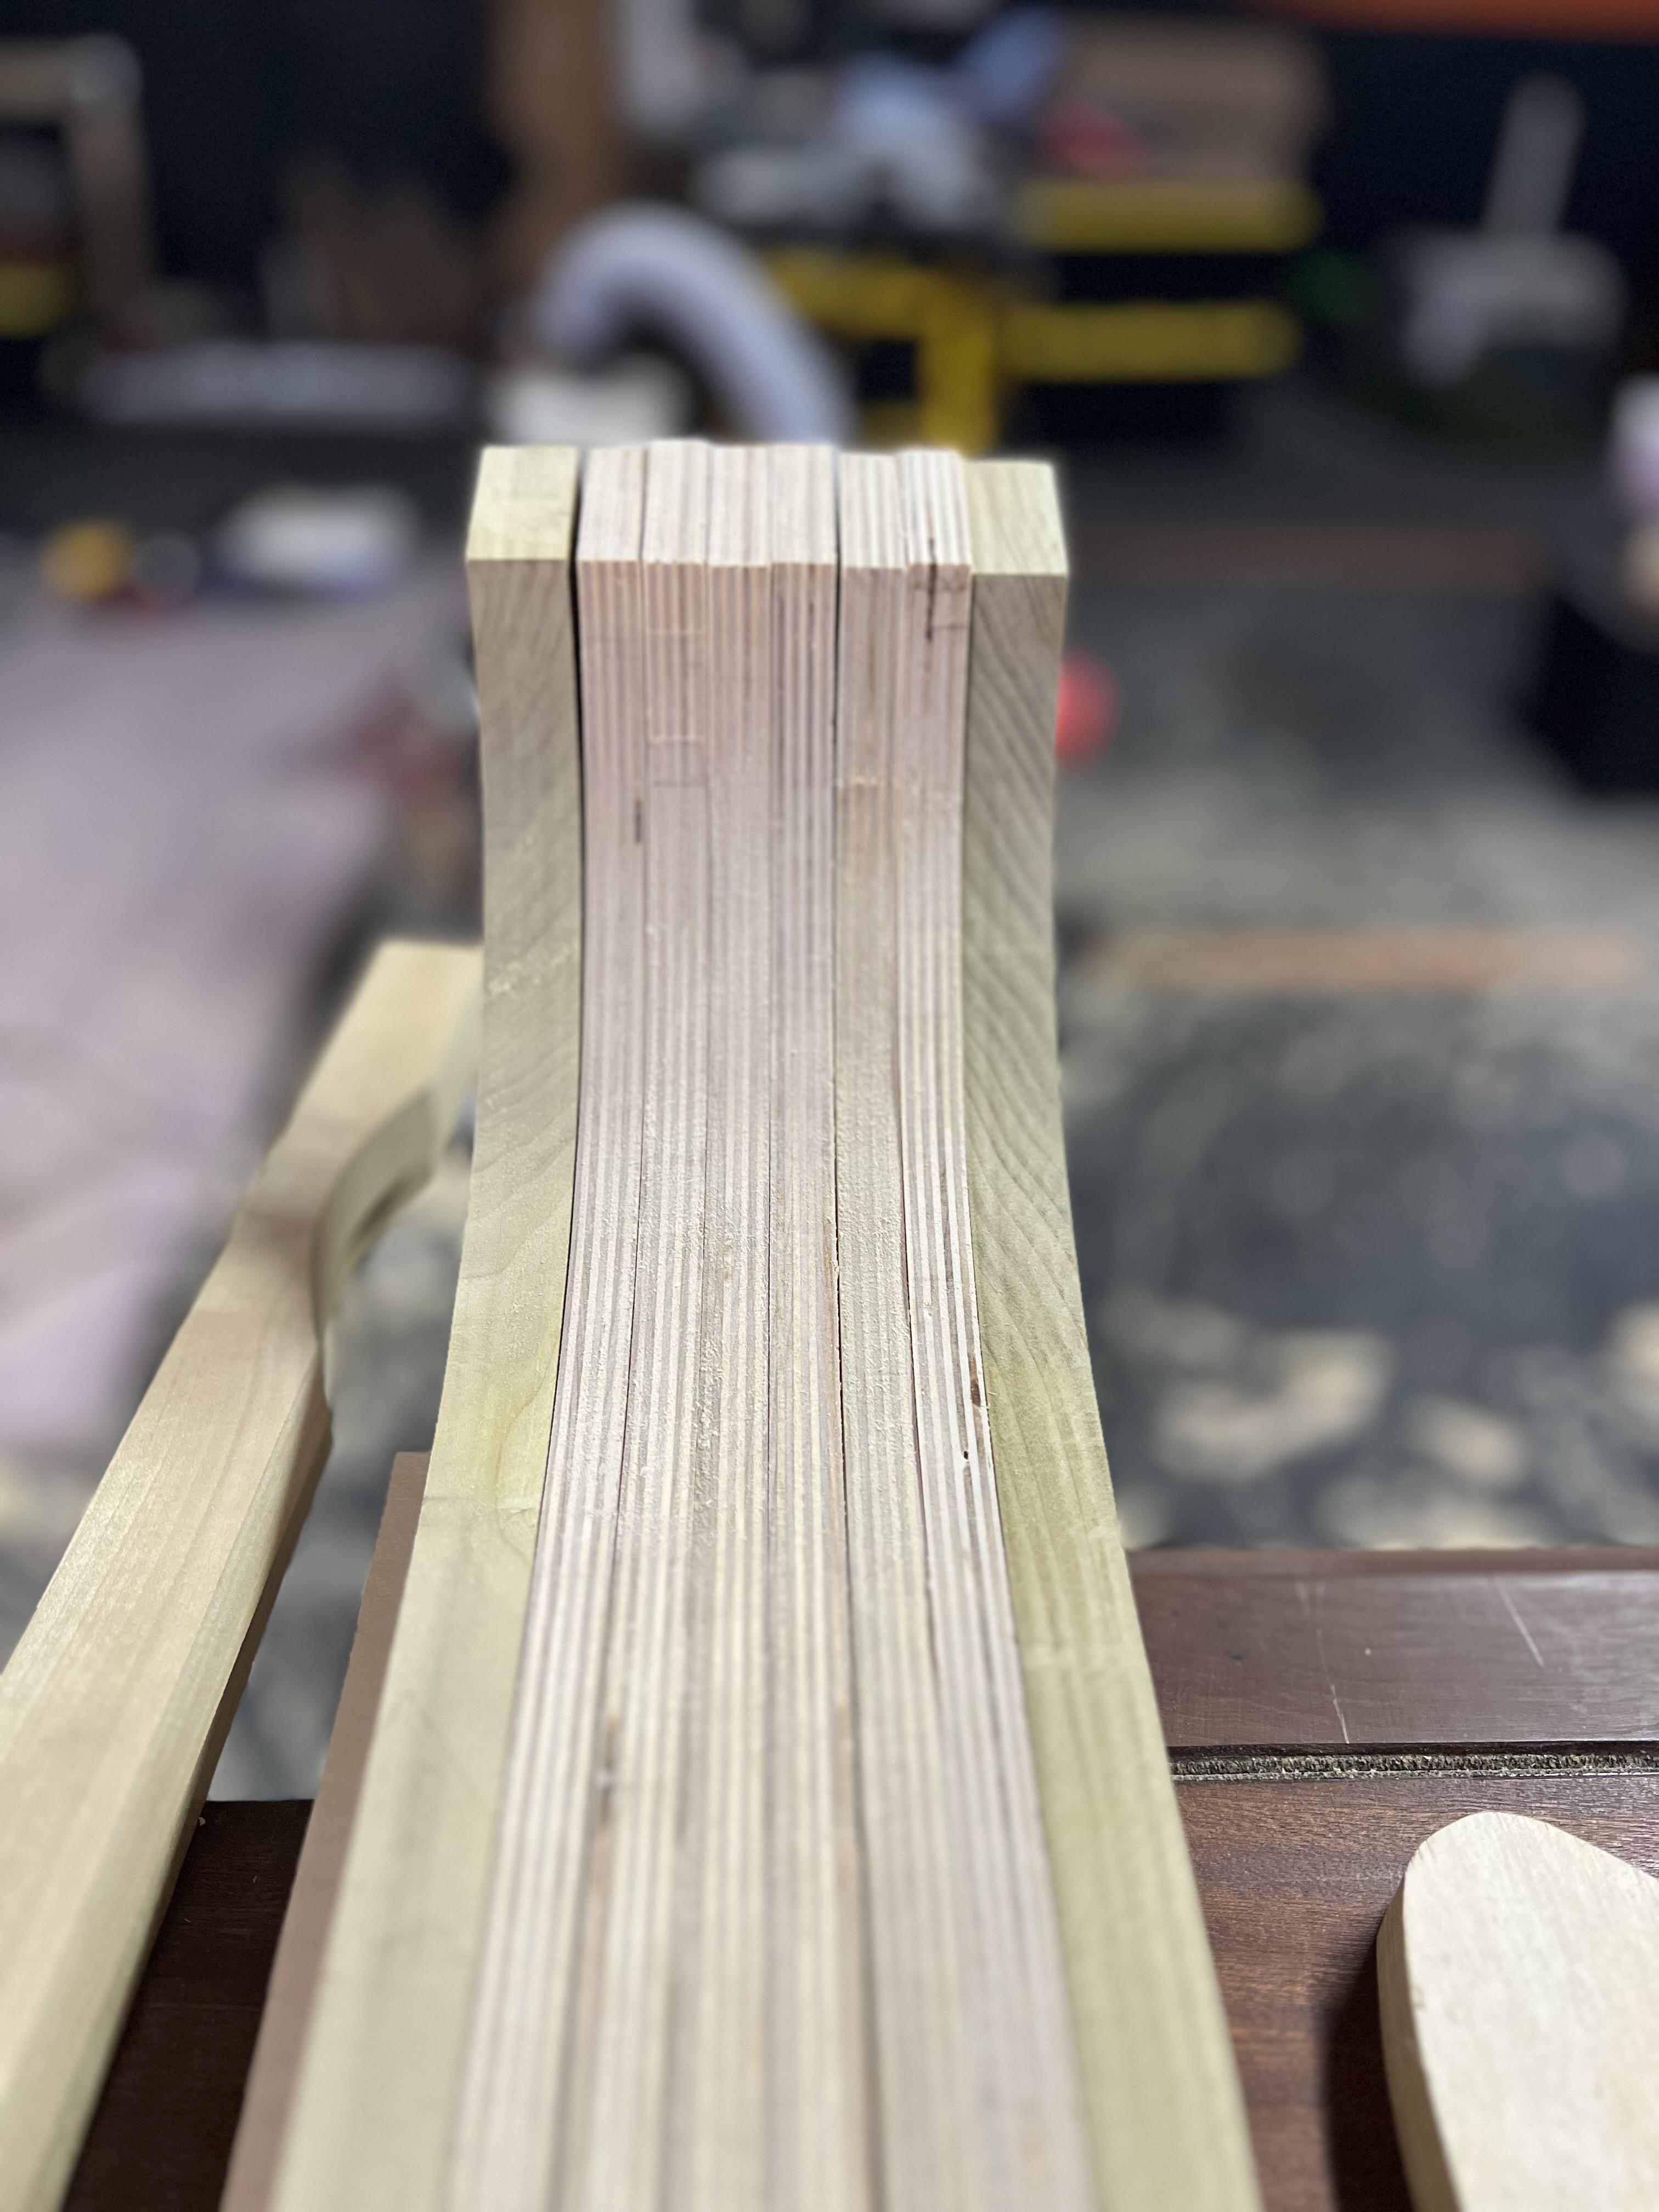
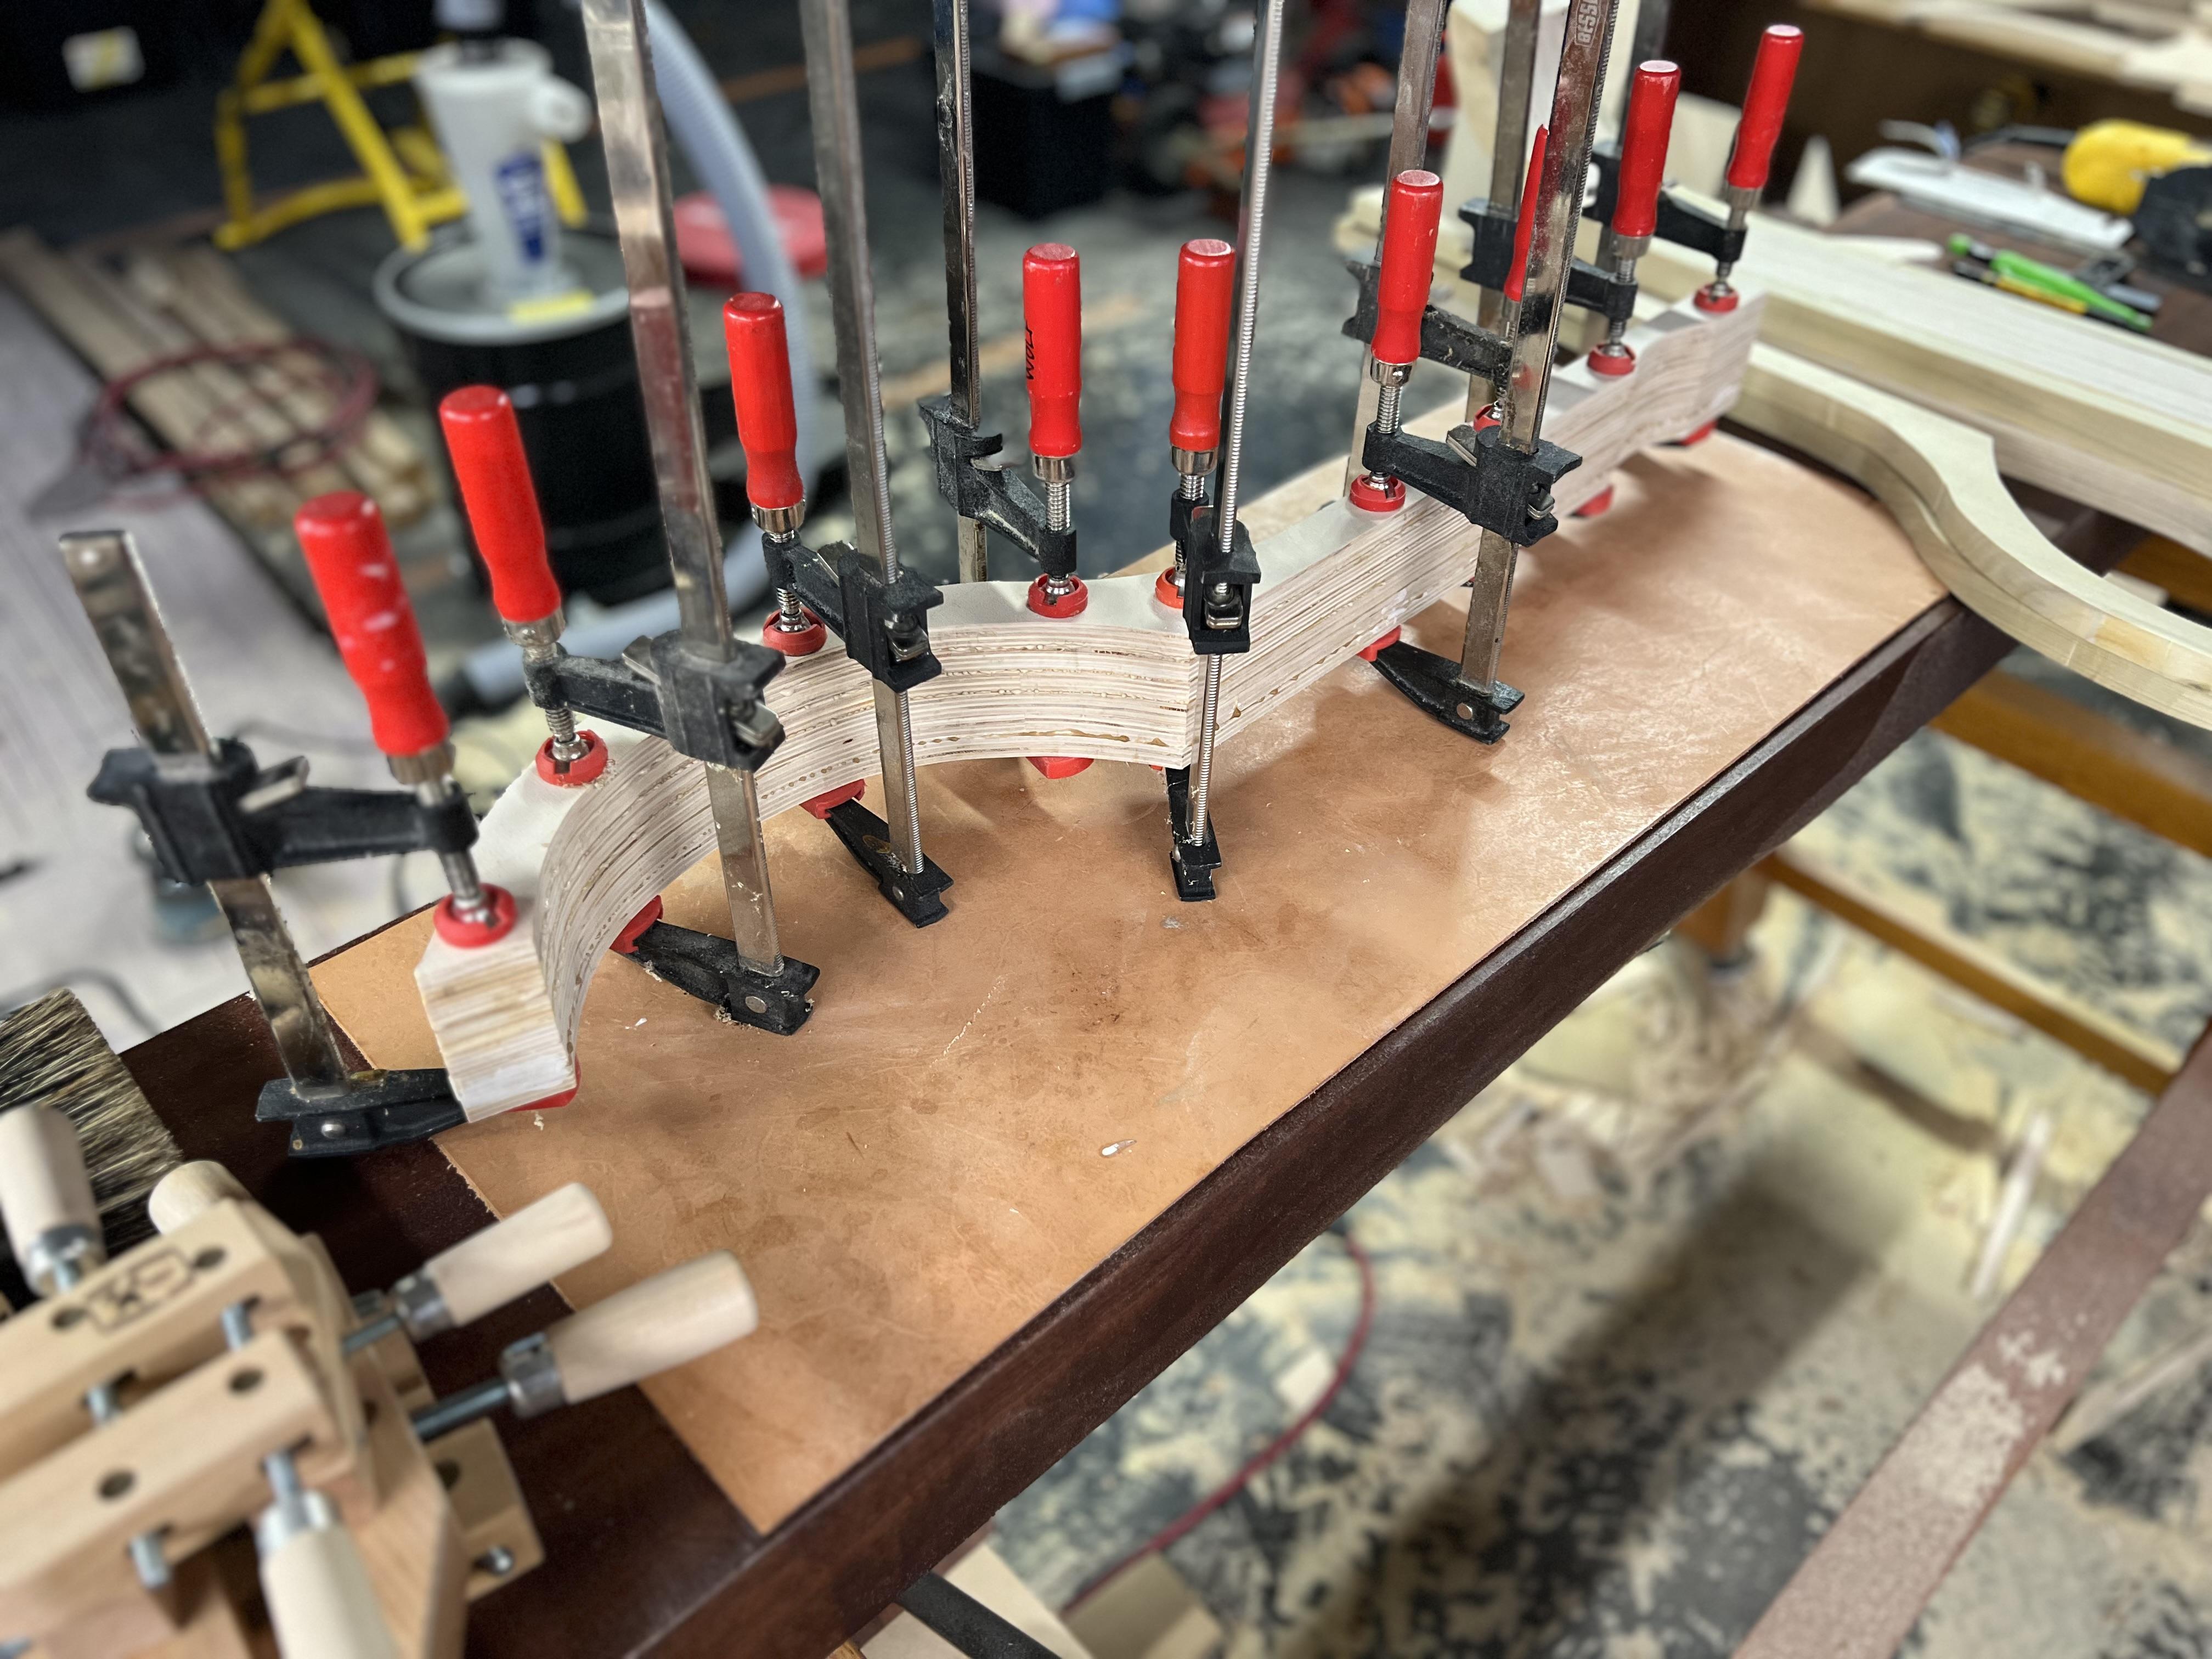
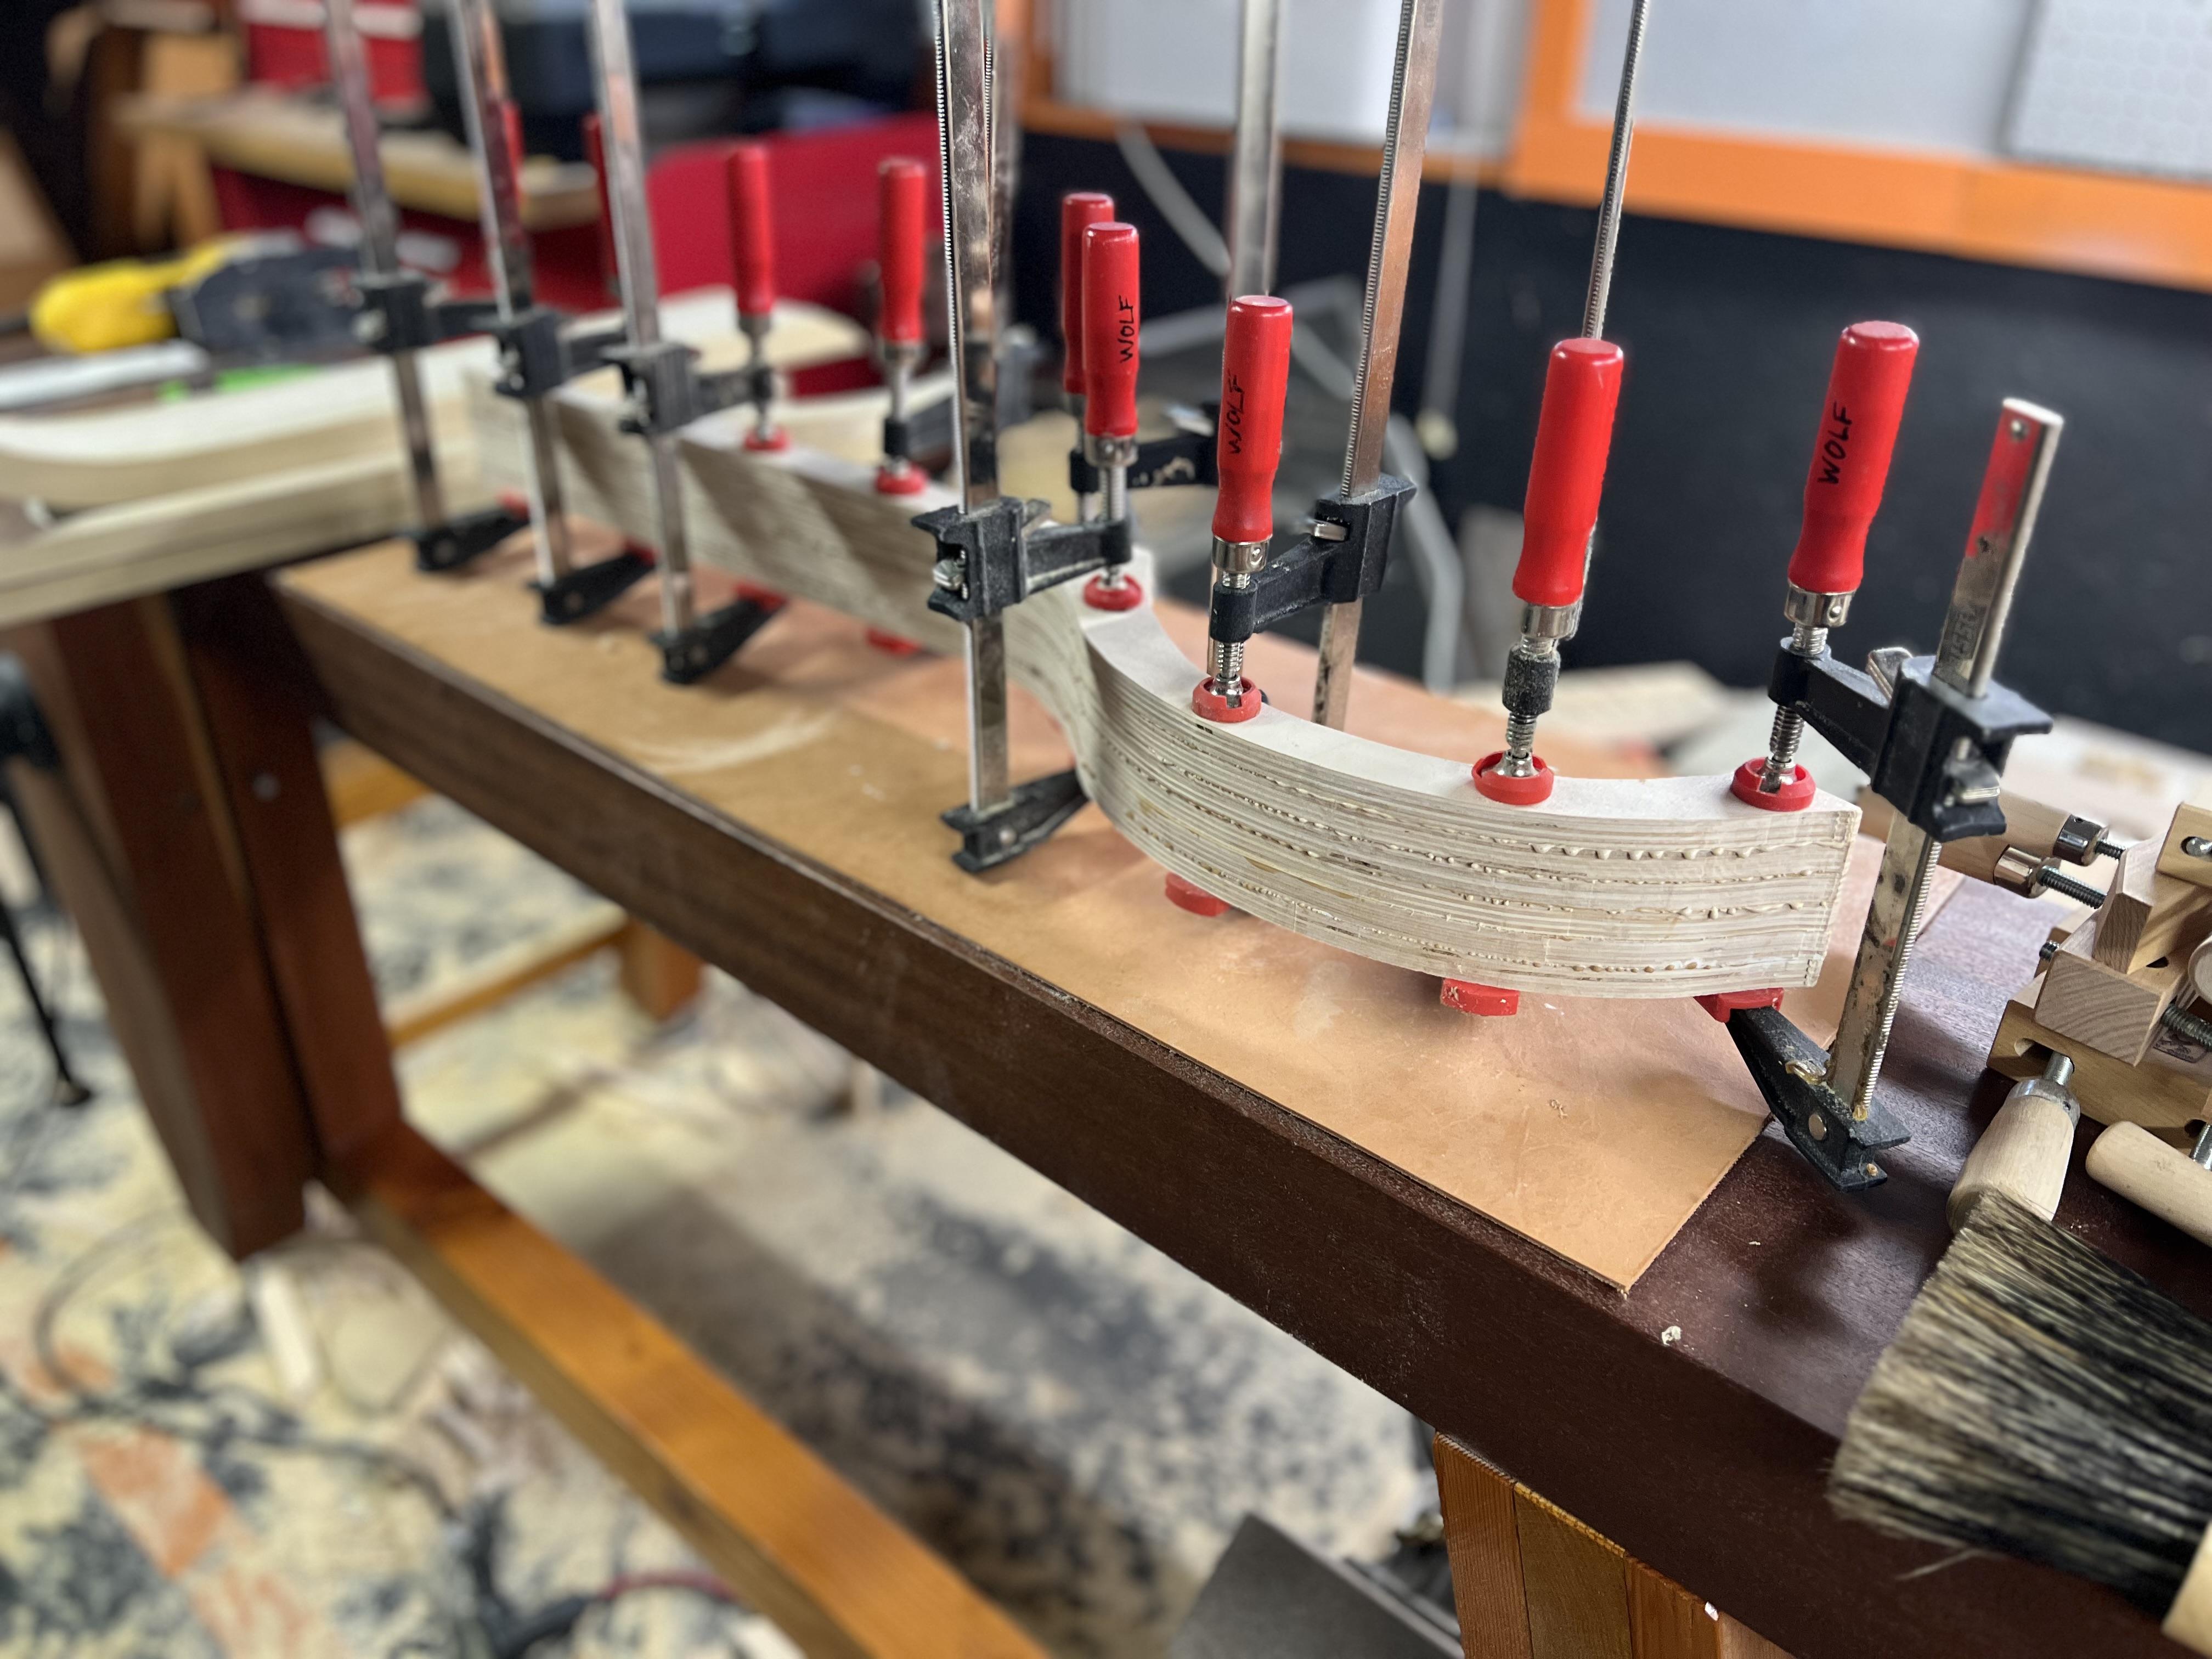
Hey @Trox, is that something you would be willing to share? I would certainly appreciate it. I kinda want this thread to be an archive for the build if anyone ever wants to make one on their own. @fredk haha I’ve had this kicking around for a few years. And then life happened for a few years, and now it’s alive again. Glad you’re here now though. Here is another update for today: All the arm ply pieces have been cut. I’m now starting to glue the arms up. I’m also using tulip poplar for the outer parts of the arm. it’s looking to be about 4.5 inches in width. Was shooting for 6 but that may be overkill. Im thinking the geometry of the cam is off. But I’ll need to get further along to test it. Over all, so far so good.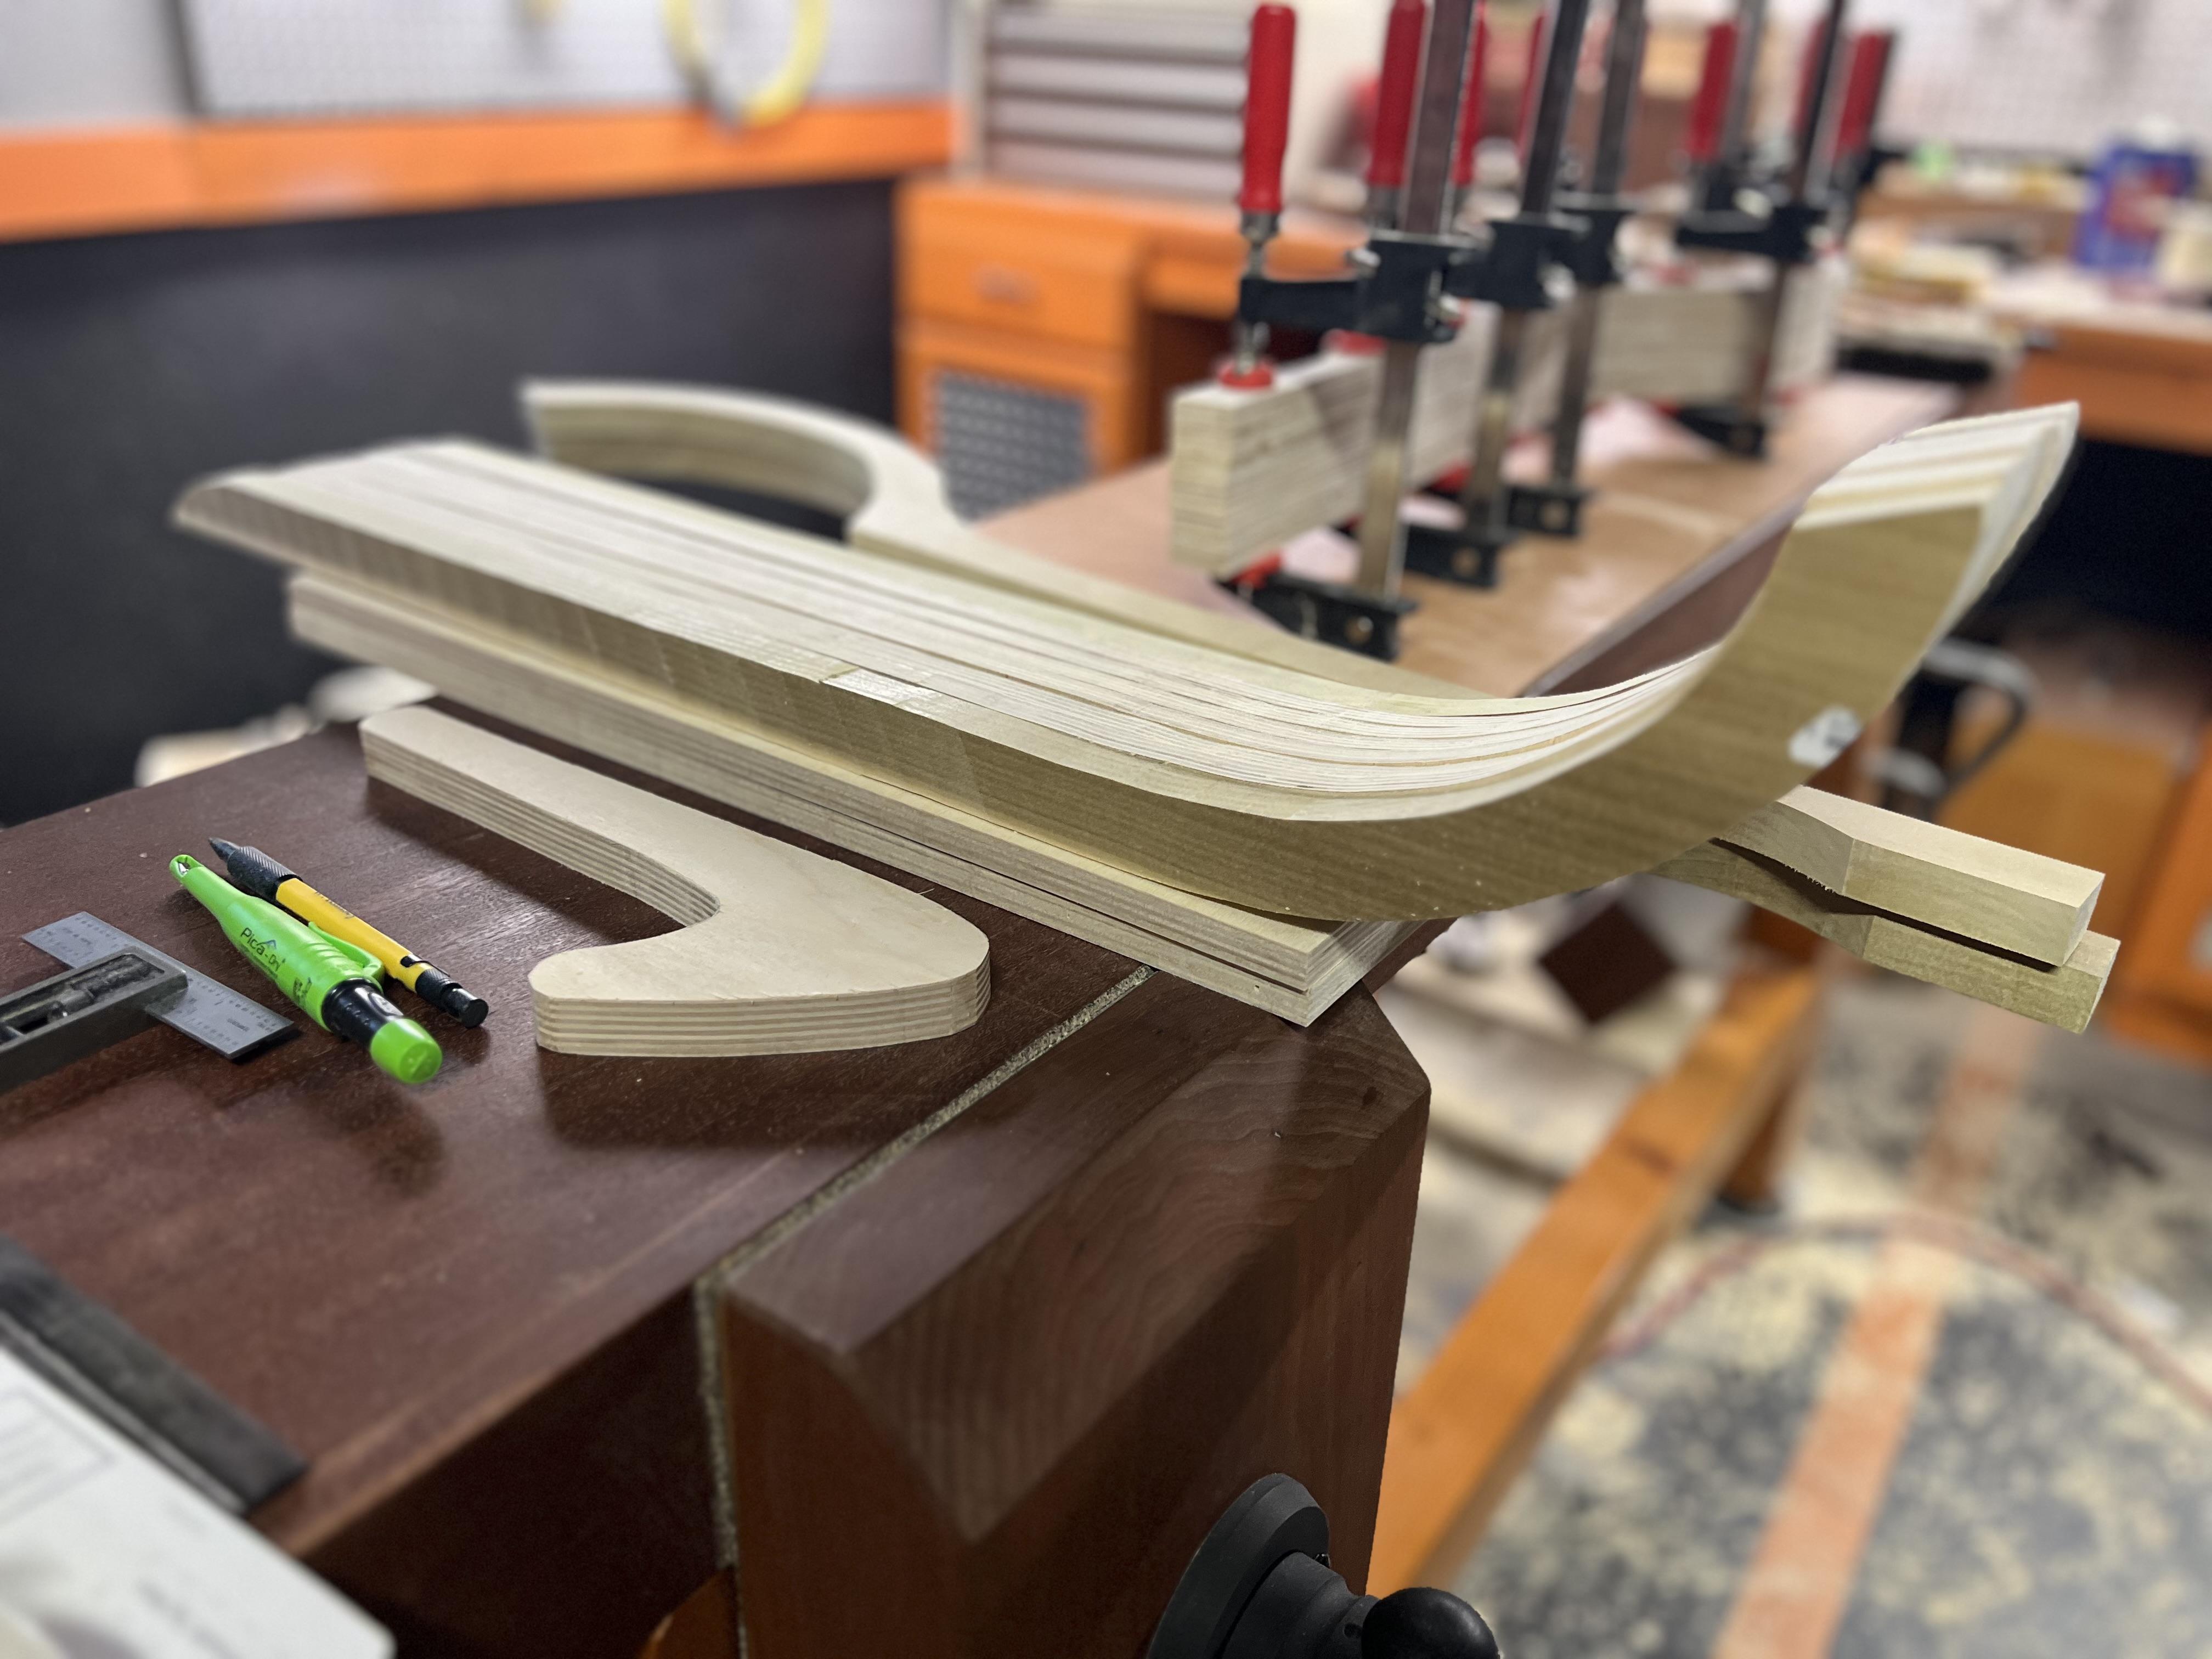

-
Swiss Saddler Clam Drawings
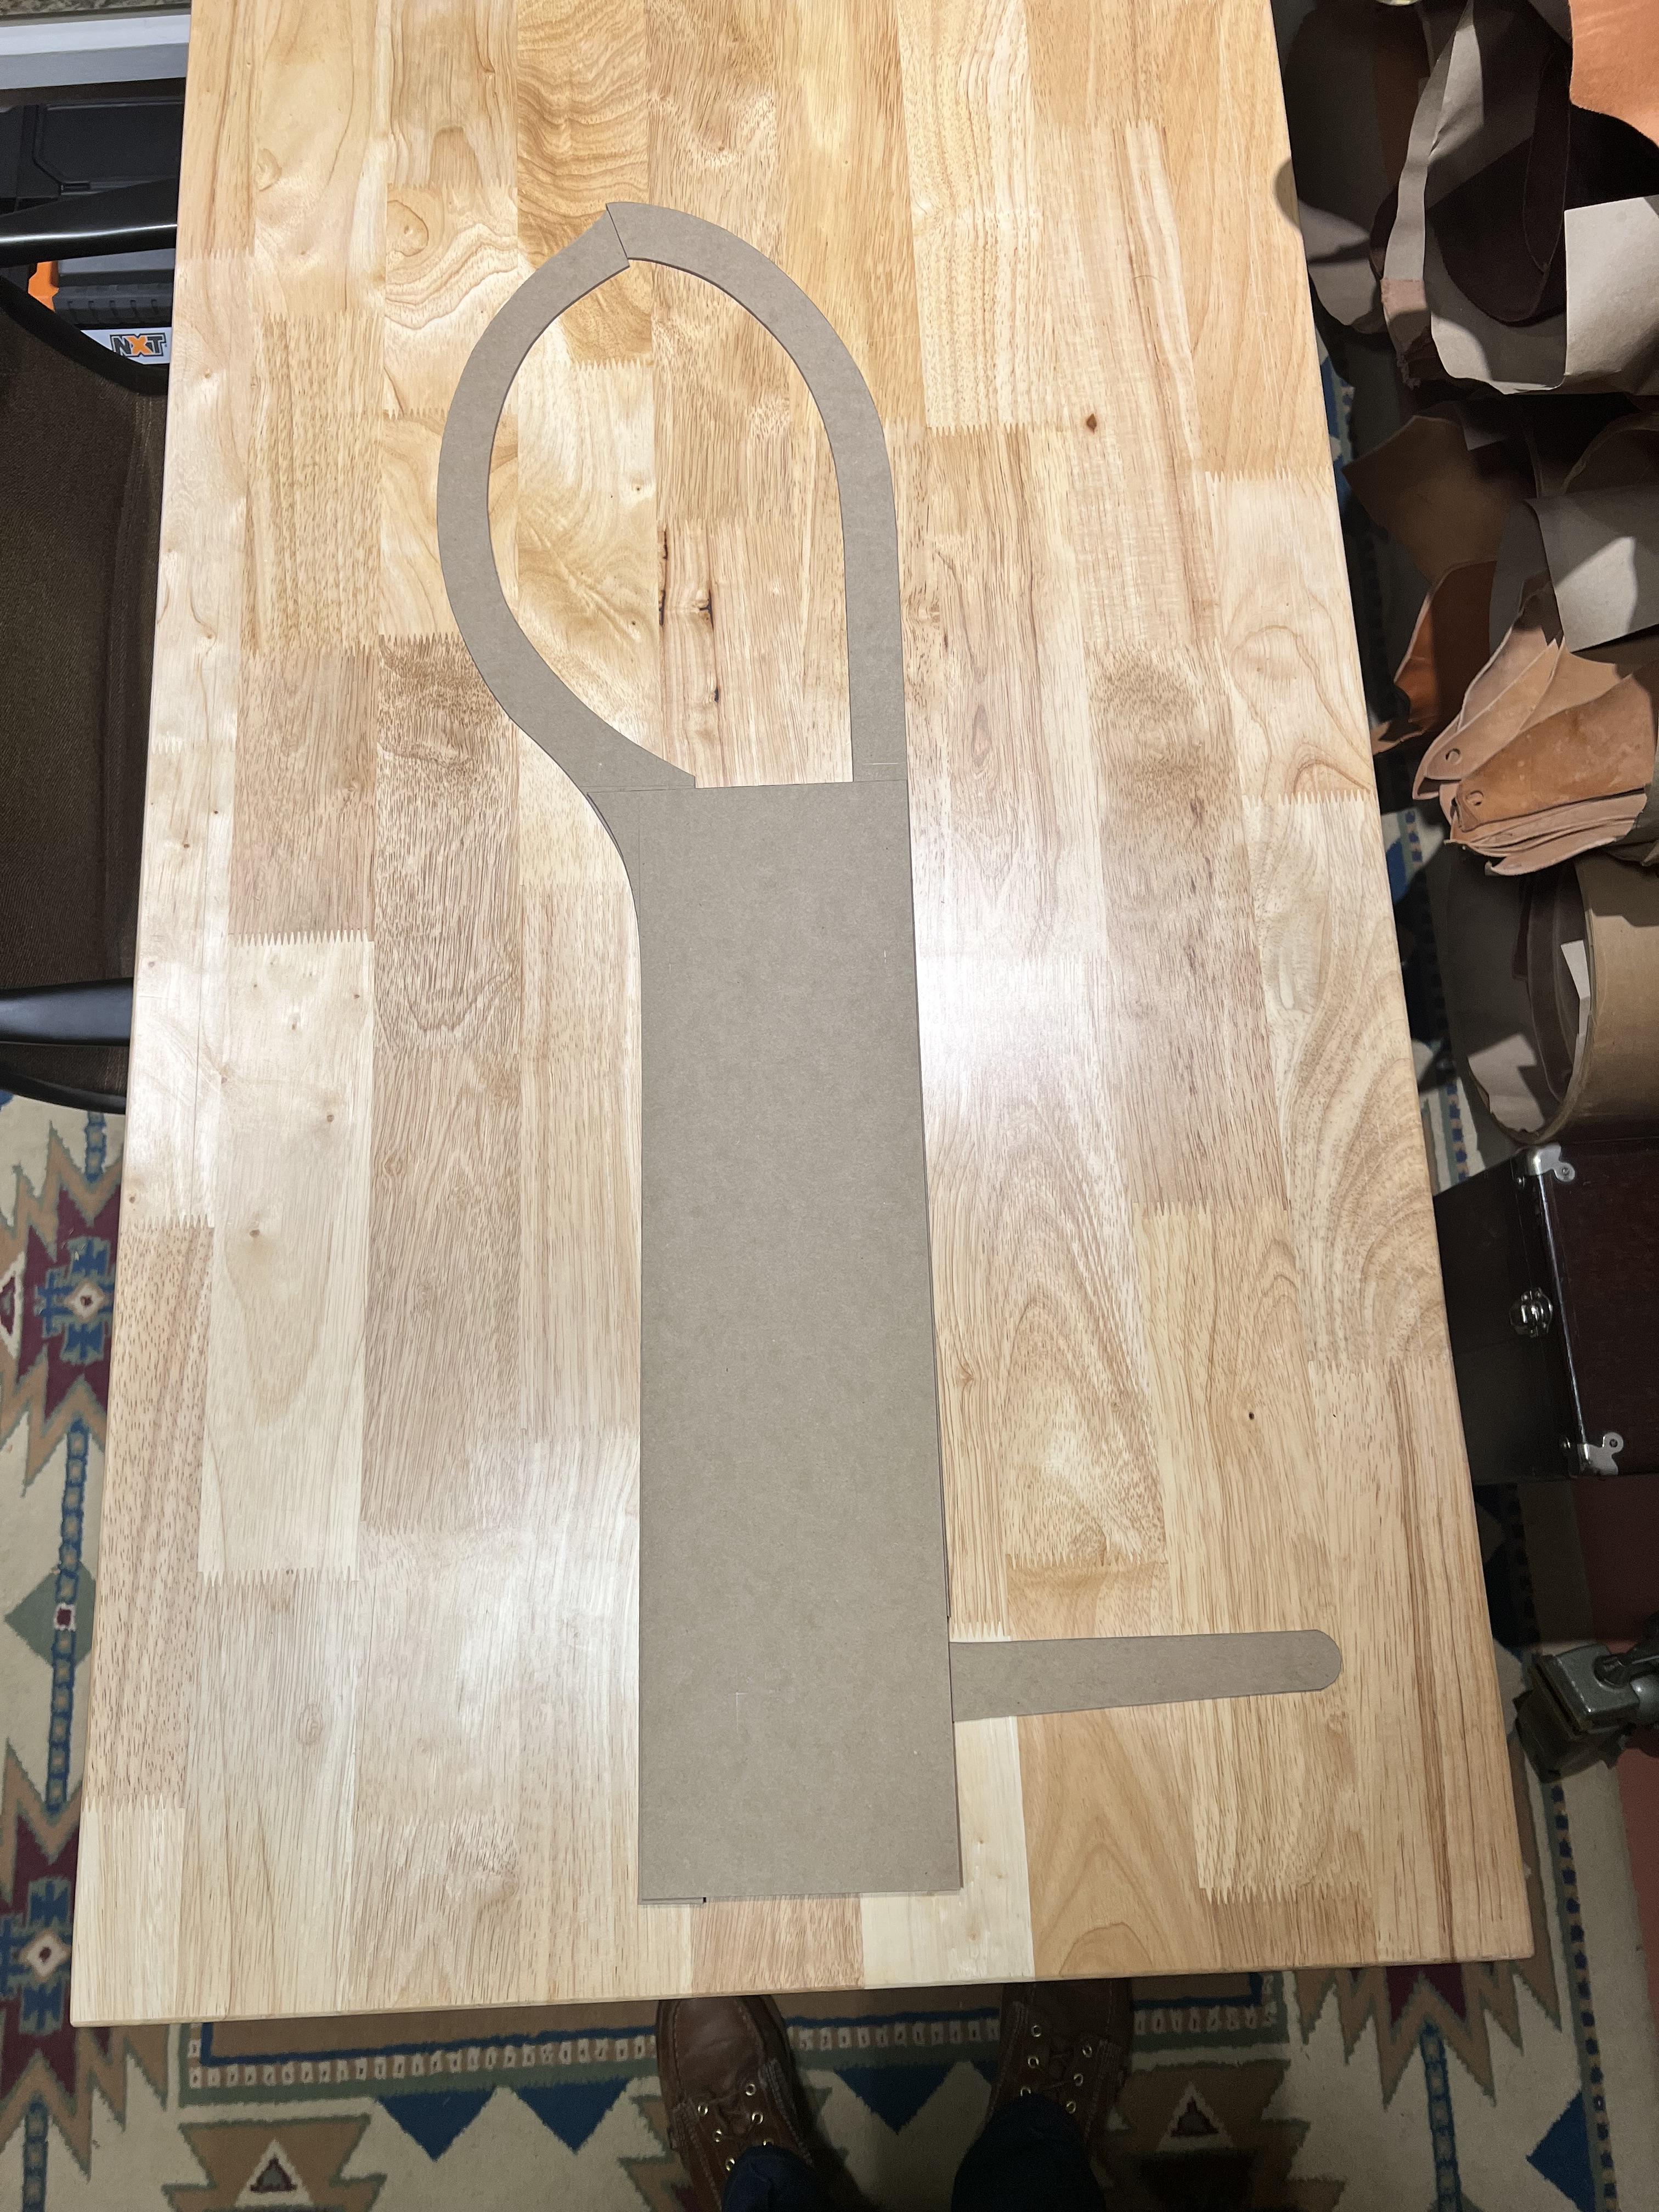
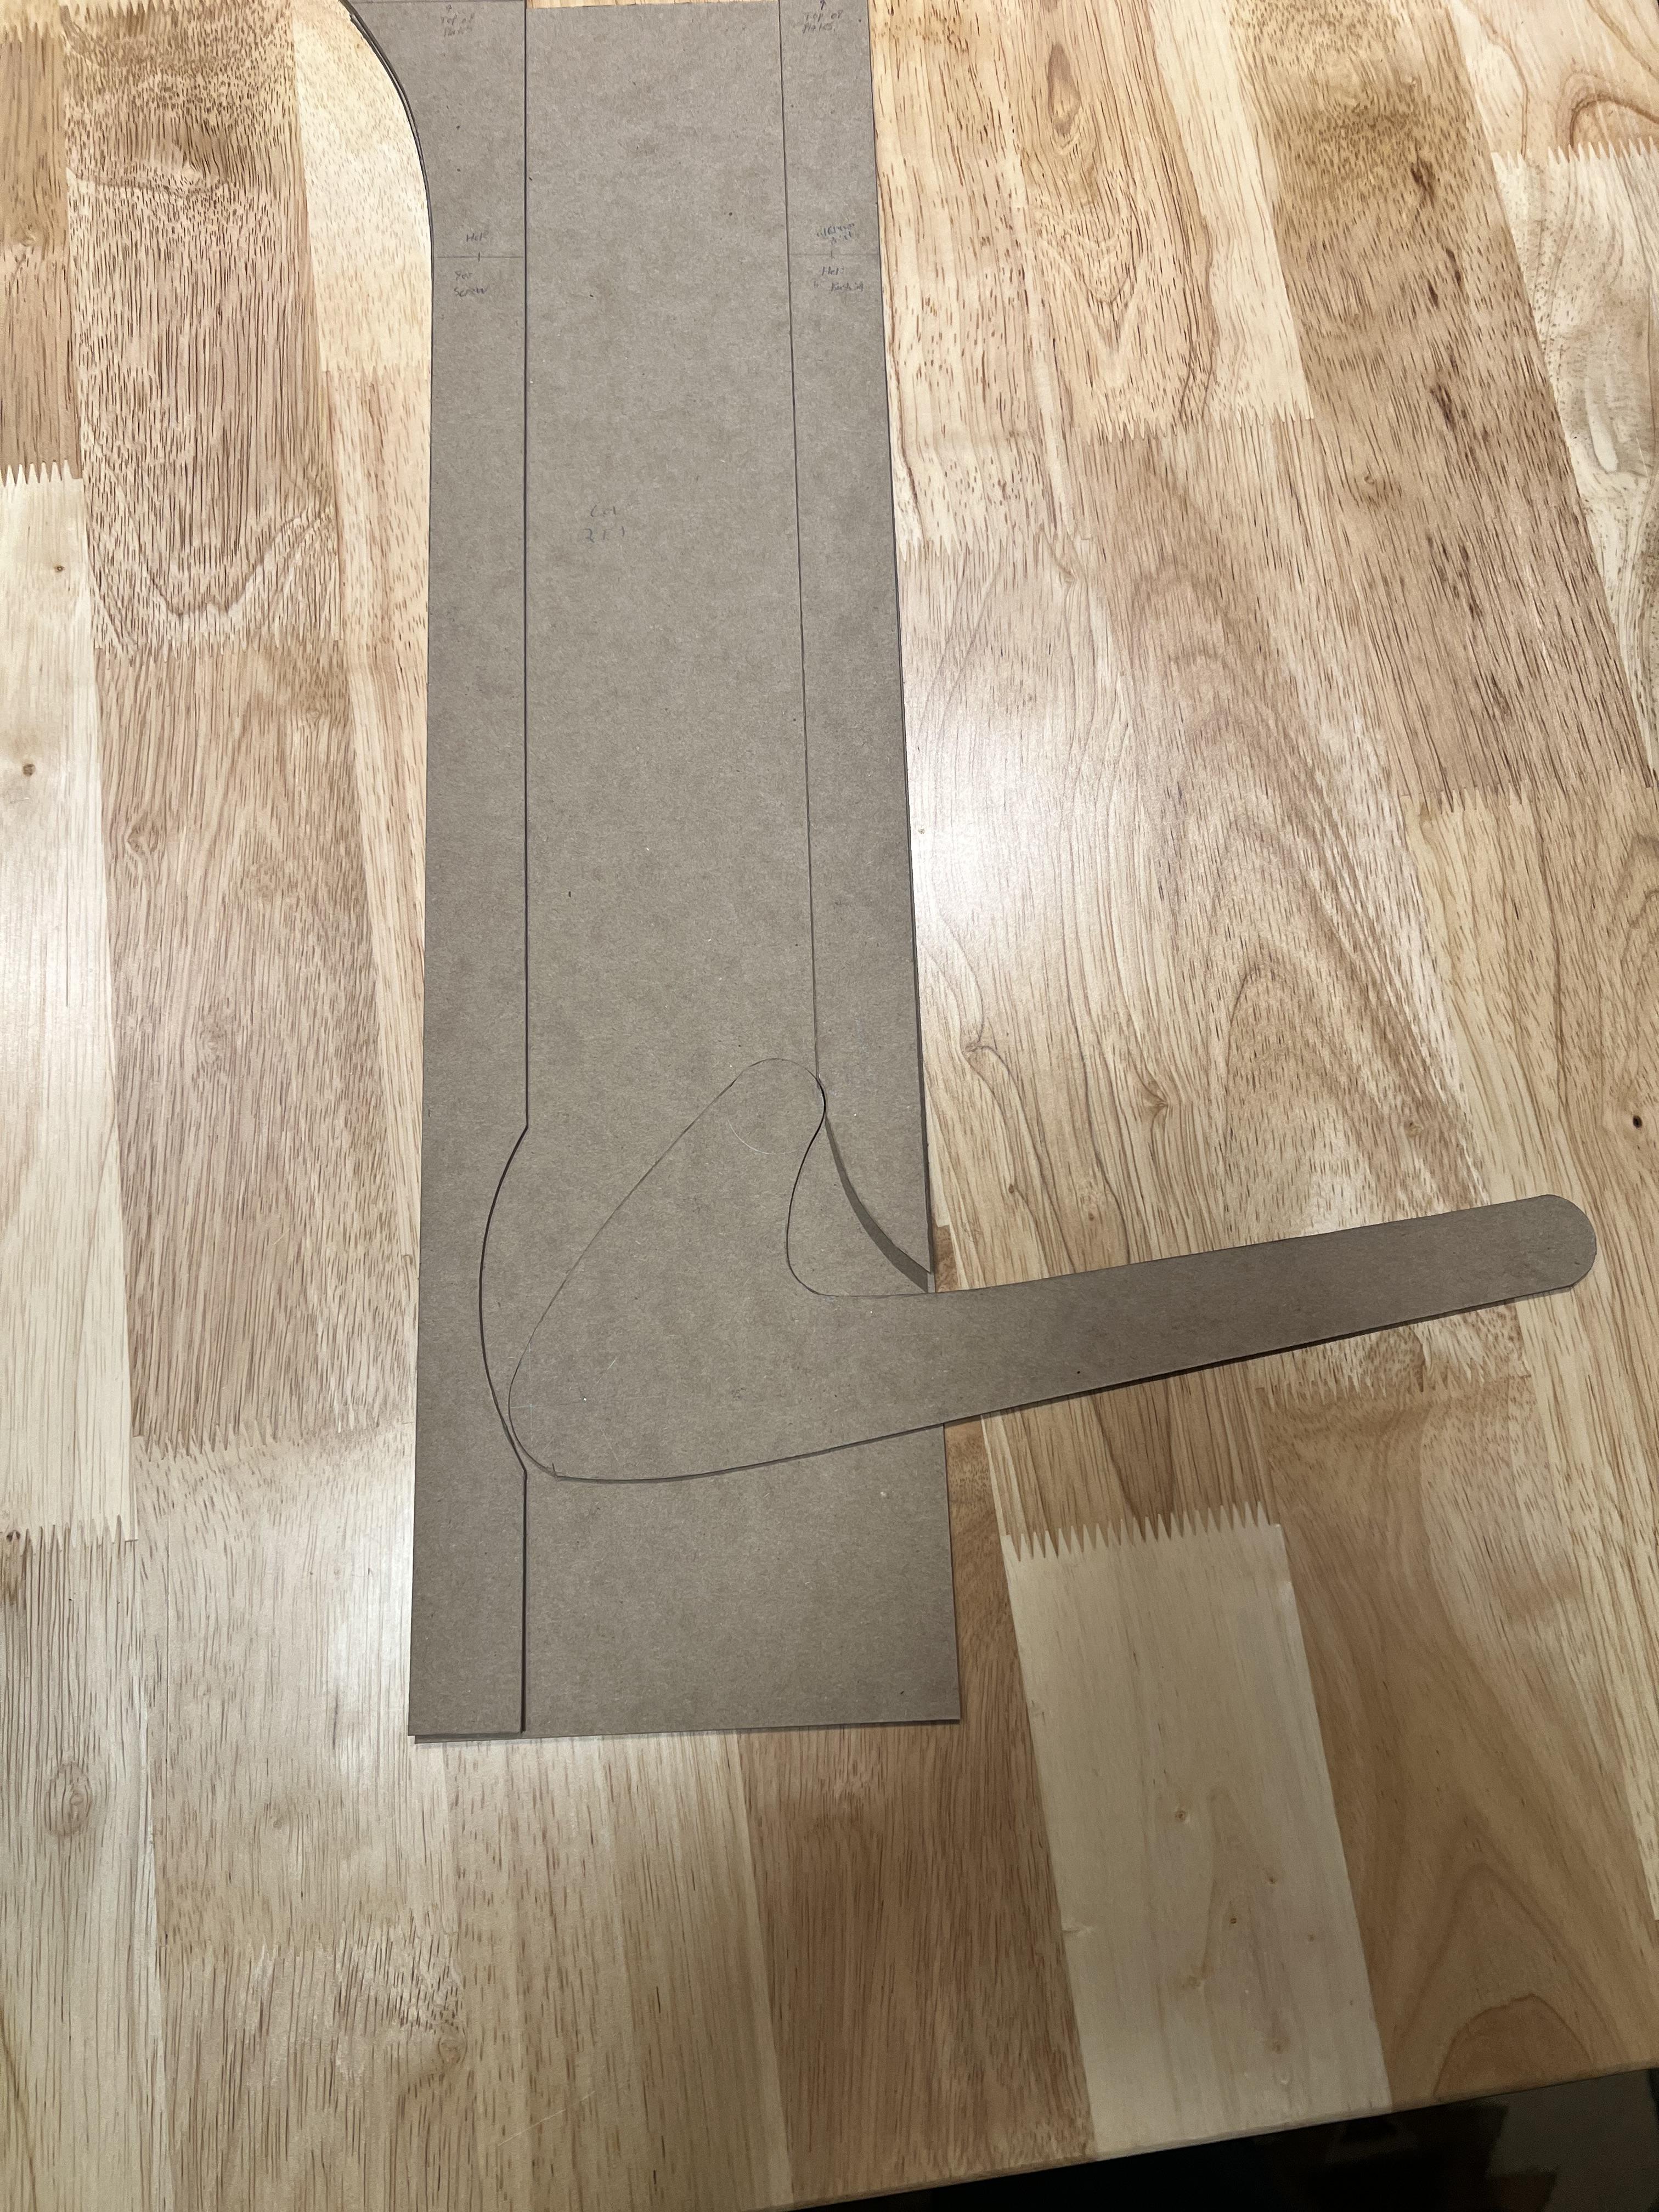
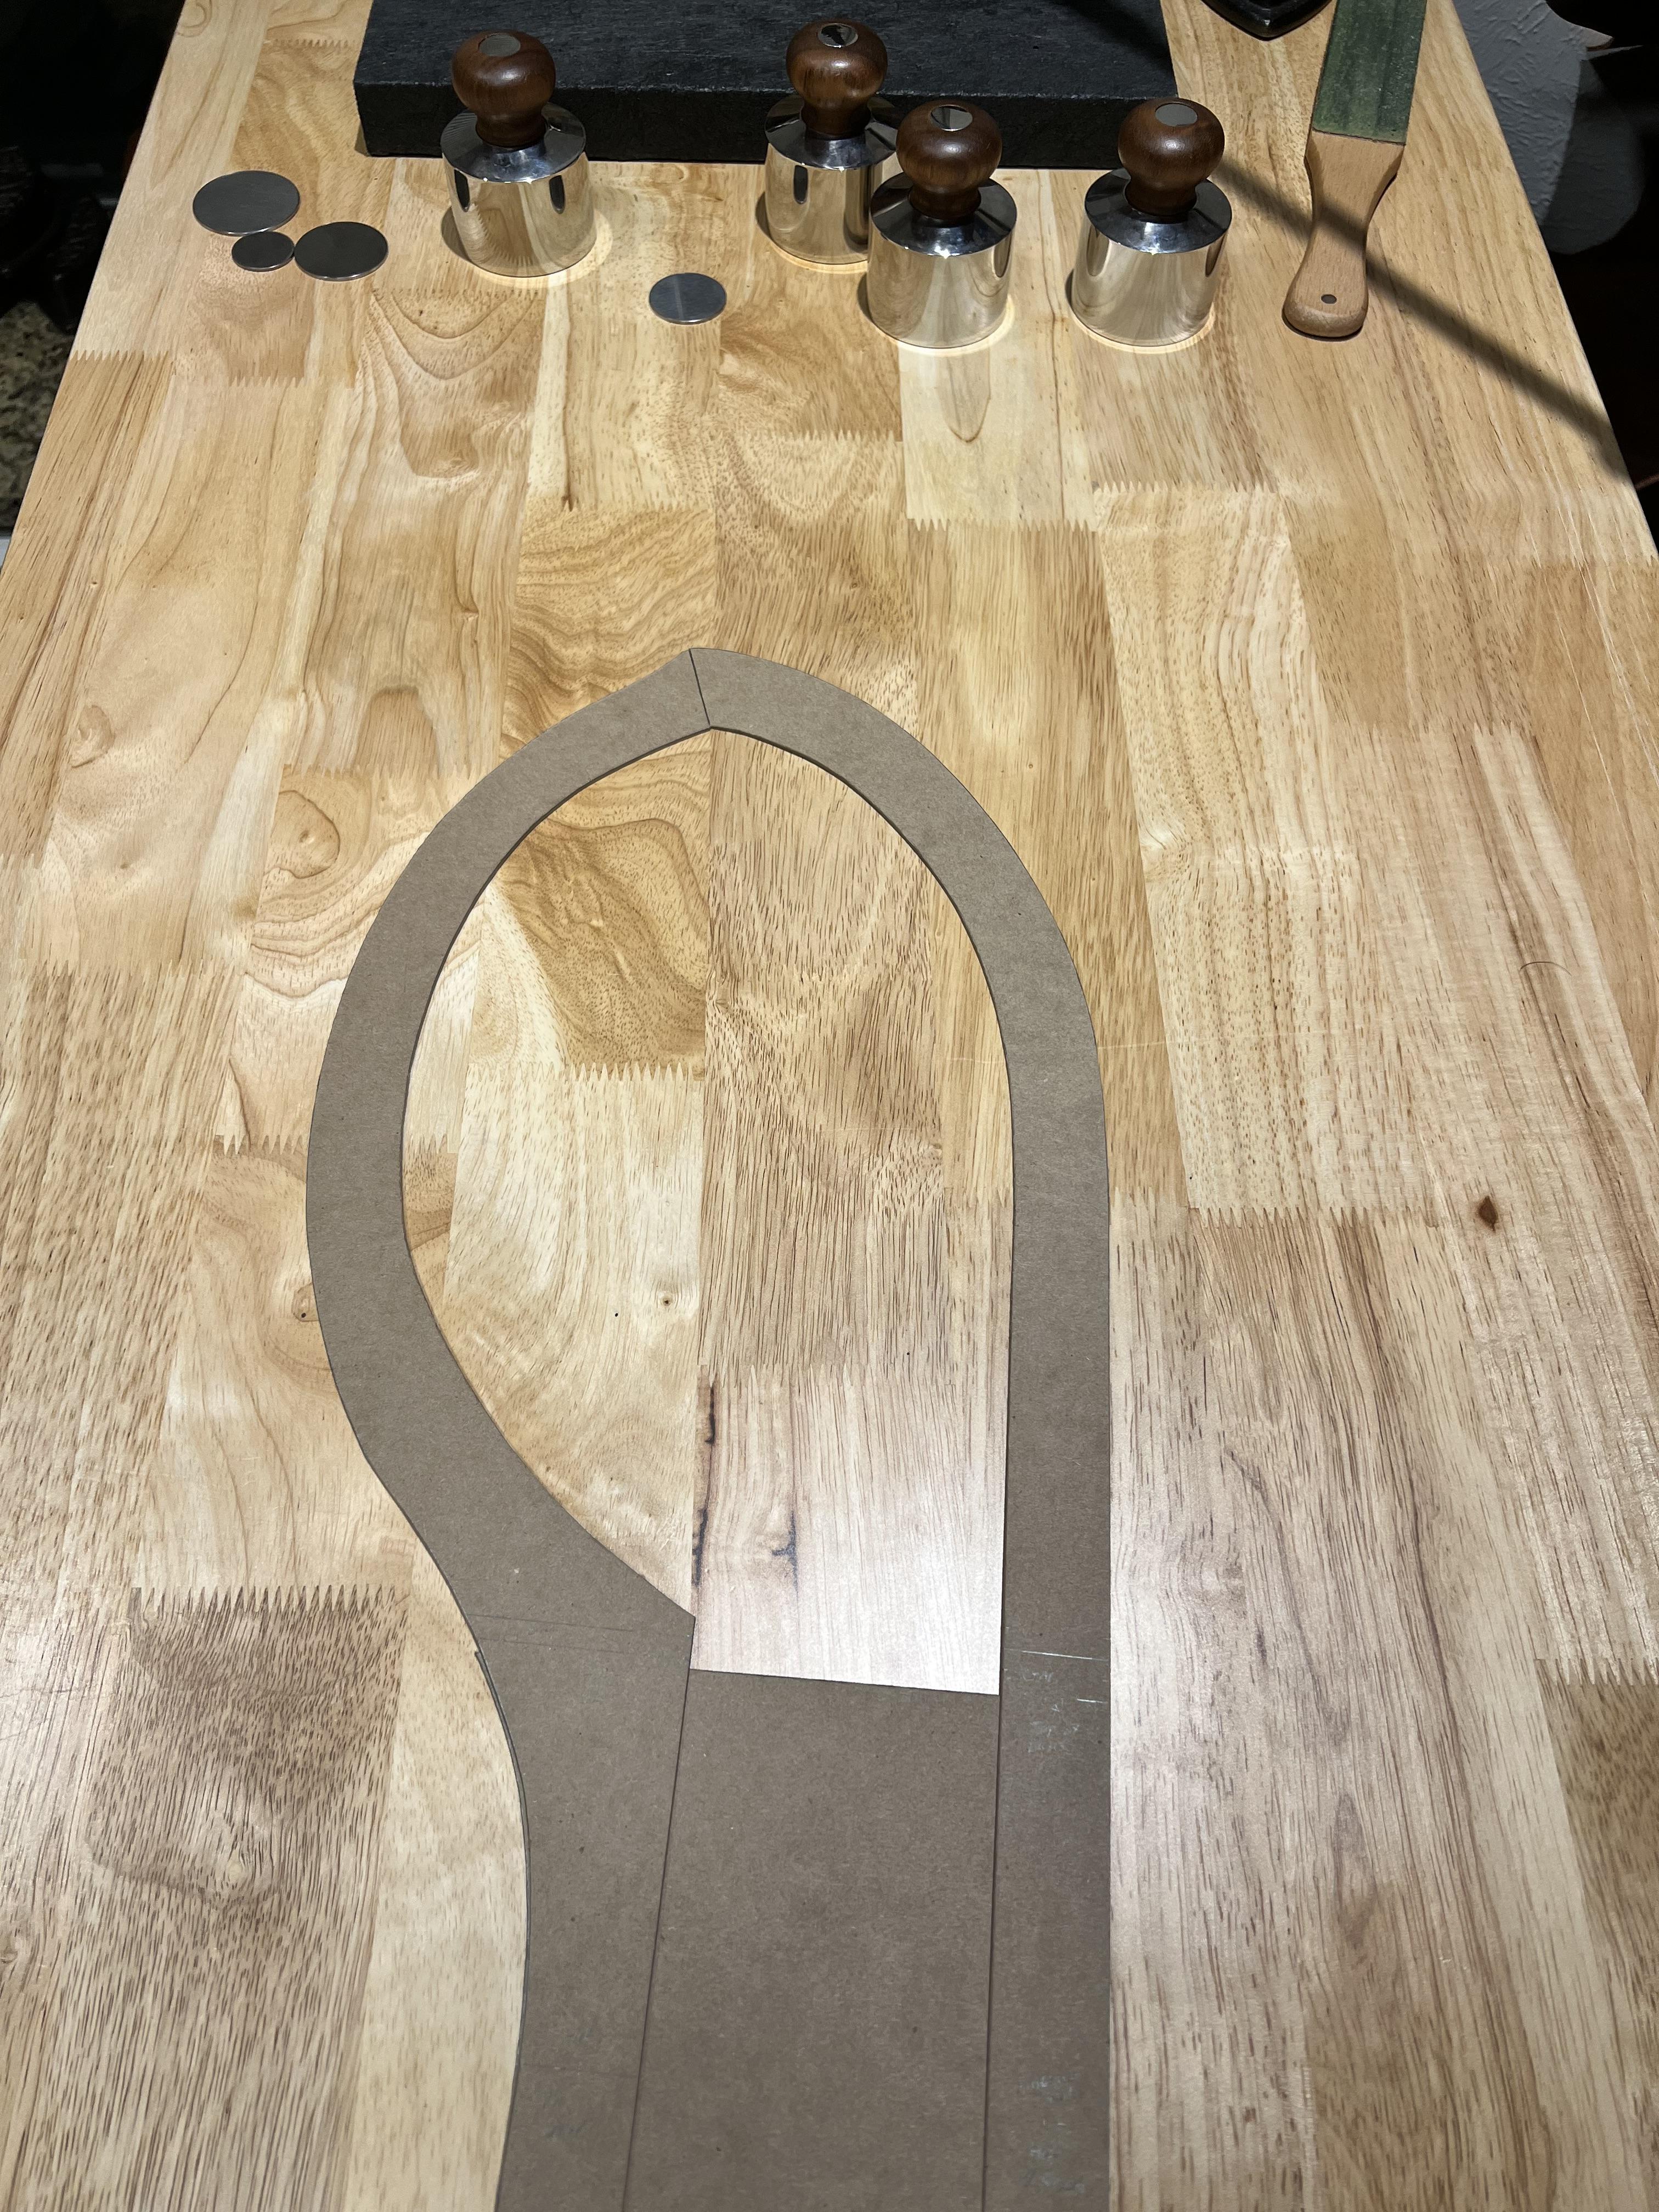
ClaimedVacancy replied to ClaimedVacancy's topic in Leatherwork Conversation
Update: Template has been cut out. Now to cut pieces of birch ply, glue, shape and trim, drill and fixture together. Hopefully everything beds well, but i expect some geometry to be out a bit. Im expecting to use some beryllium bushings for the pivot points such as the right arm and foot lever. That way i can get muchhhh greater life out of the working holes. The left arm is stationary, and the cover plates will affix to them accordingly. Ill need to create the friction lock trip. Ill be making that out of mild steel. Flat stock and just bent at the appropriate areas for the piece on lever. The guide rail at the foot lever ill have to create a mount for that, but its straight forward. The spring at the top, also straight forward. Ill drill holes for a small nub on each arm where the spring will rest. This is what will push the right arm open when the friction lock is disengaged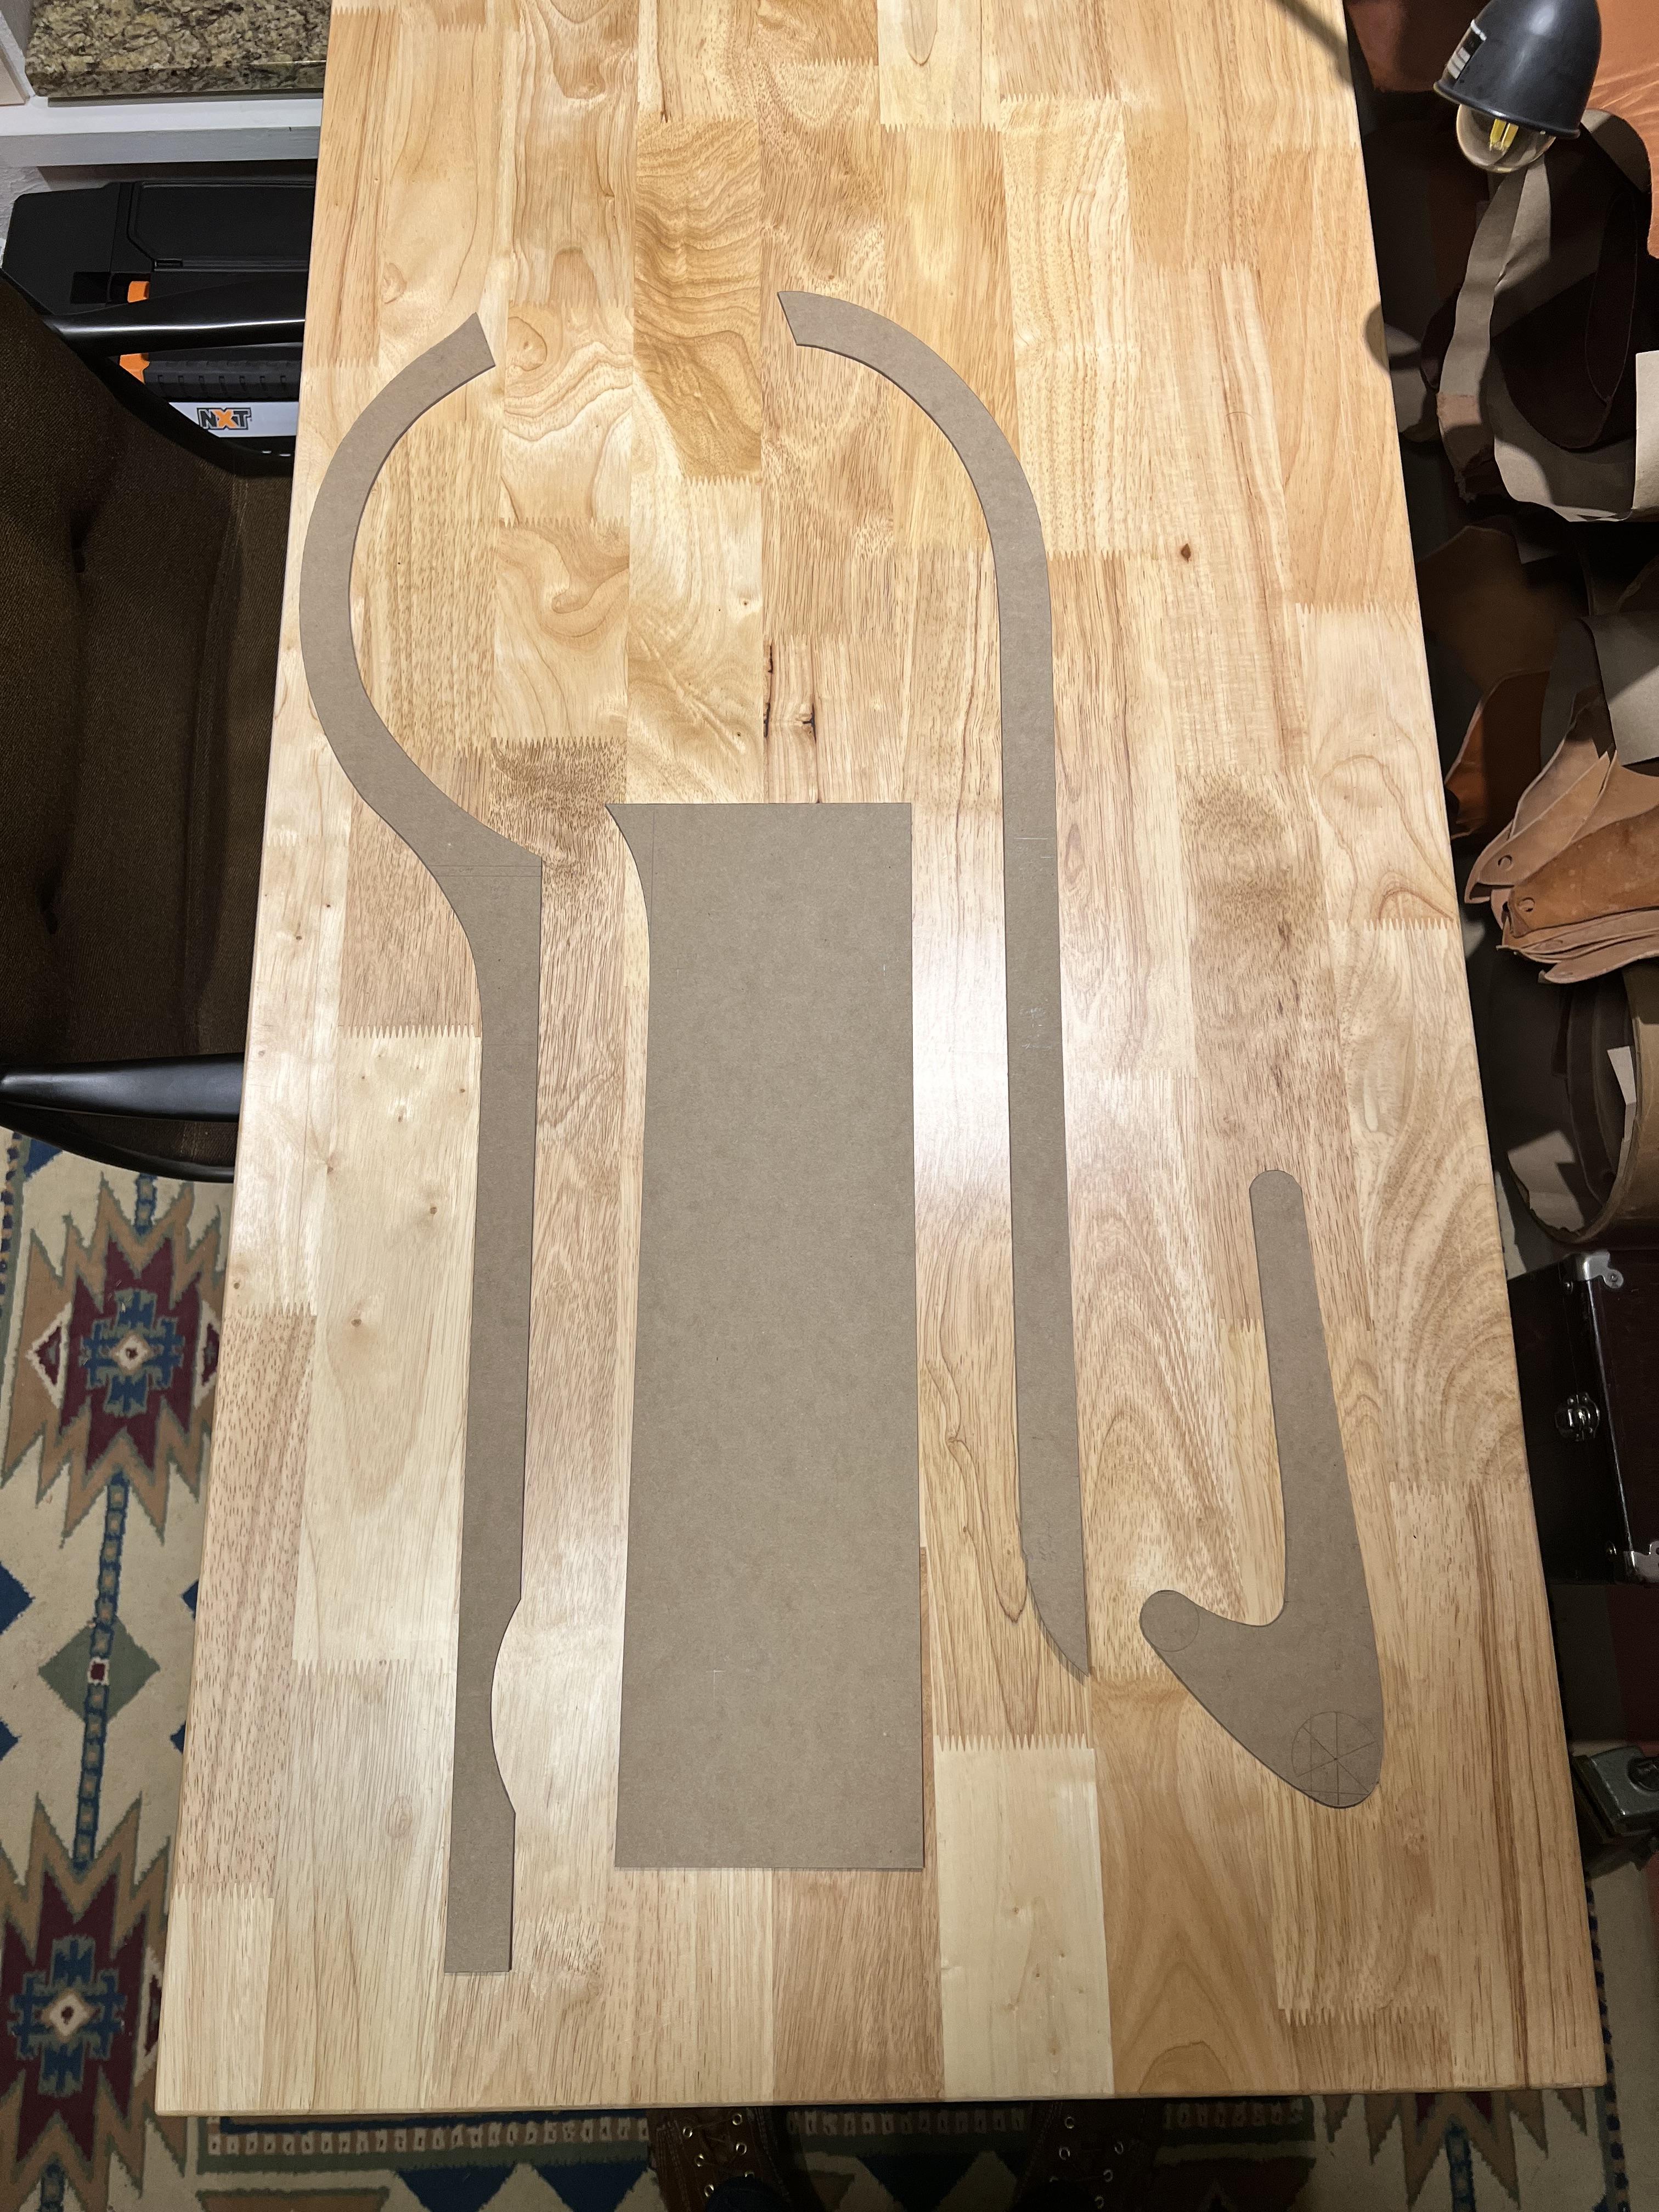
-
@Dwight Looks like I might have inspired ya huh? So the size of the one I posted is 16” long, 11” tall, and 4” deep. Only problem is that it’s not an available template since I had to create it. This book https://archive.org/details/leatherworkingha0000mich/page/128/mode/2up by Valerie Michael has a template in the advanced section that is close to the same size if that interests you. And with the online archive you can just borrow the book versus buying it. If you would rather the Swiss type, you can get one for $50 and take it apart to create your own, or! Just use it as is. This is BY FAR the best price for these bags. Most still have a ton of life left in them too. I’ve purchase from Teskey for years, and they are just down the road from me. https://teskeys.com/collections/salebarn-tack/products/used-vintage-german-leather-saddle-bag-copy-3 This one would be a lot more simple, and it’s about 13-14” long, 9-10” tall, 3-4” deep. I have one and it is fantastic. https://teskeys.com/collections/salebarn-tack/products/used-vintage-german-leather-saddle-bag-copy-1 Take a look on their barn sale page.
-
@revilop Just adding my two-sense since you’ve acquired some of the tools to get you going. Leather working is a life long pursuit for many of us, and growing never stops. Books are fantastic, but which ones you may ask? Here are two: - Leathercraft: Traditional Handcrafted Leatherwork Skills and Projects https://a.co/d/7IBDi6Q -The Leatherworking Handbook: A Practical Illustrated Sourcebook of Techniques and Projects https://a.co/d/g1cVSHy If you need more, say, in the video format I can’t recommend Nigel Armitage enough. https://secretsfromtheworkshop.com After all of that, PRACTICE. And more of that. You’ll shock yourself how far you can get in just a few years with diligent, disciplined practice.
-
@MarshalWill Thank you for the suggestion! I very much so like what you did there. I have experienced some discomfort with the handle at the edge even with it beveled to a #3 beveler. So fortunately i can make the adjustment to it. For the design, it’s fantastic. Once i made all the minor adjustments on the template to account for various lengths of parts, stitching edge distance, etc, it just kinda fell together. The way the Swiss designed this is a huge testament to their craftsmanship. I have three more Swiss bags that I'm working the templates out. All various shapes and designs. I’ll be sure to post once completed.
-
Very clean, and consistent. I wont comment on thread since its been touched on. Very good and neat edge distance. Your thread slant is correct so you’re stitching appropriately with the slant of the hole slit. Apply the same technique to any (most) items such as bags or belts and it will turn out well!
-
Internship and maybe a new start
ClaimedVacancy replied to Tove09Tilda's topic in All About Us and Off Topic
I had a very similar experience leaving the military; internship at a wood shop making furniture, while still being paid by the government (legitimate program!). It works great if the company is great to work for, but i was free labor and made a lot of pretty stuff at no cost to them. of course there is wayyy more vetting of companies now than there was then to prevent that. I learned more about what i don’t want versus what i do, and ended back in my original field of expertise post service. And fortunately it worked out very well. But my path was trades first then college. So a bit in reverse. Best of luck out there! There’s an opportunity out there. PS, we’re experiencing the same problem in the US with applying and being rejected in respective fields. Its became a major problem, and hiring appears to be stonewalled out by some entity (AI usage on both ends?). It’s a weird time that i hope will loosen. -
Swiss Saddler Clam Drawings
ClaimedVacancy replied to ClaimedVacancy's topic in Leatherwork Conversation
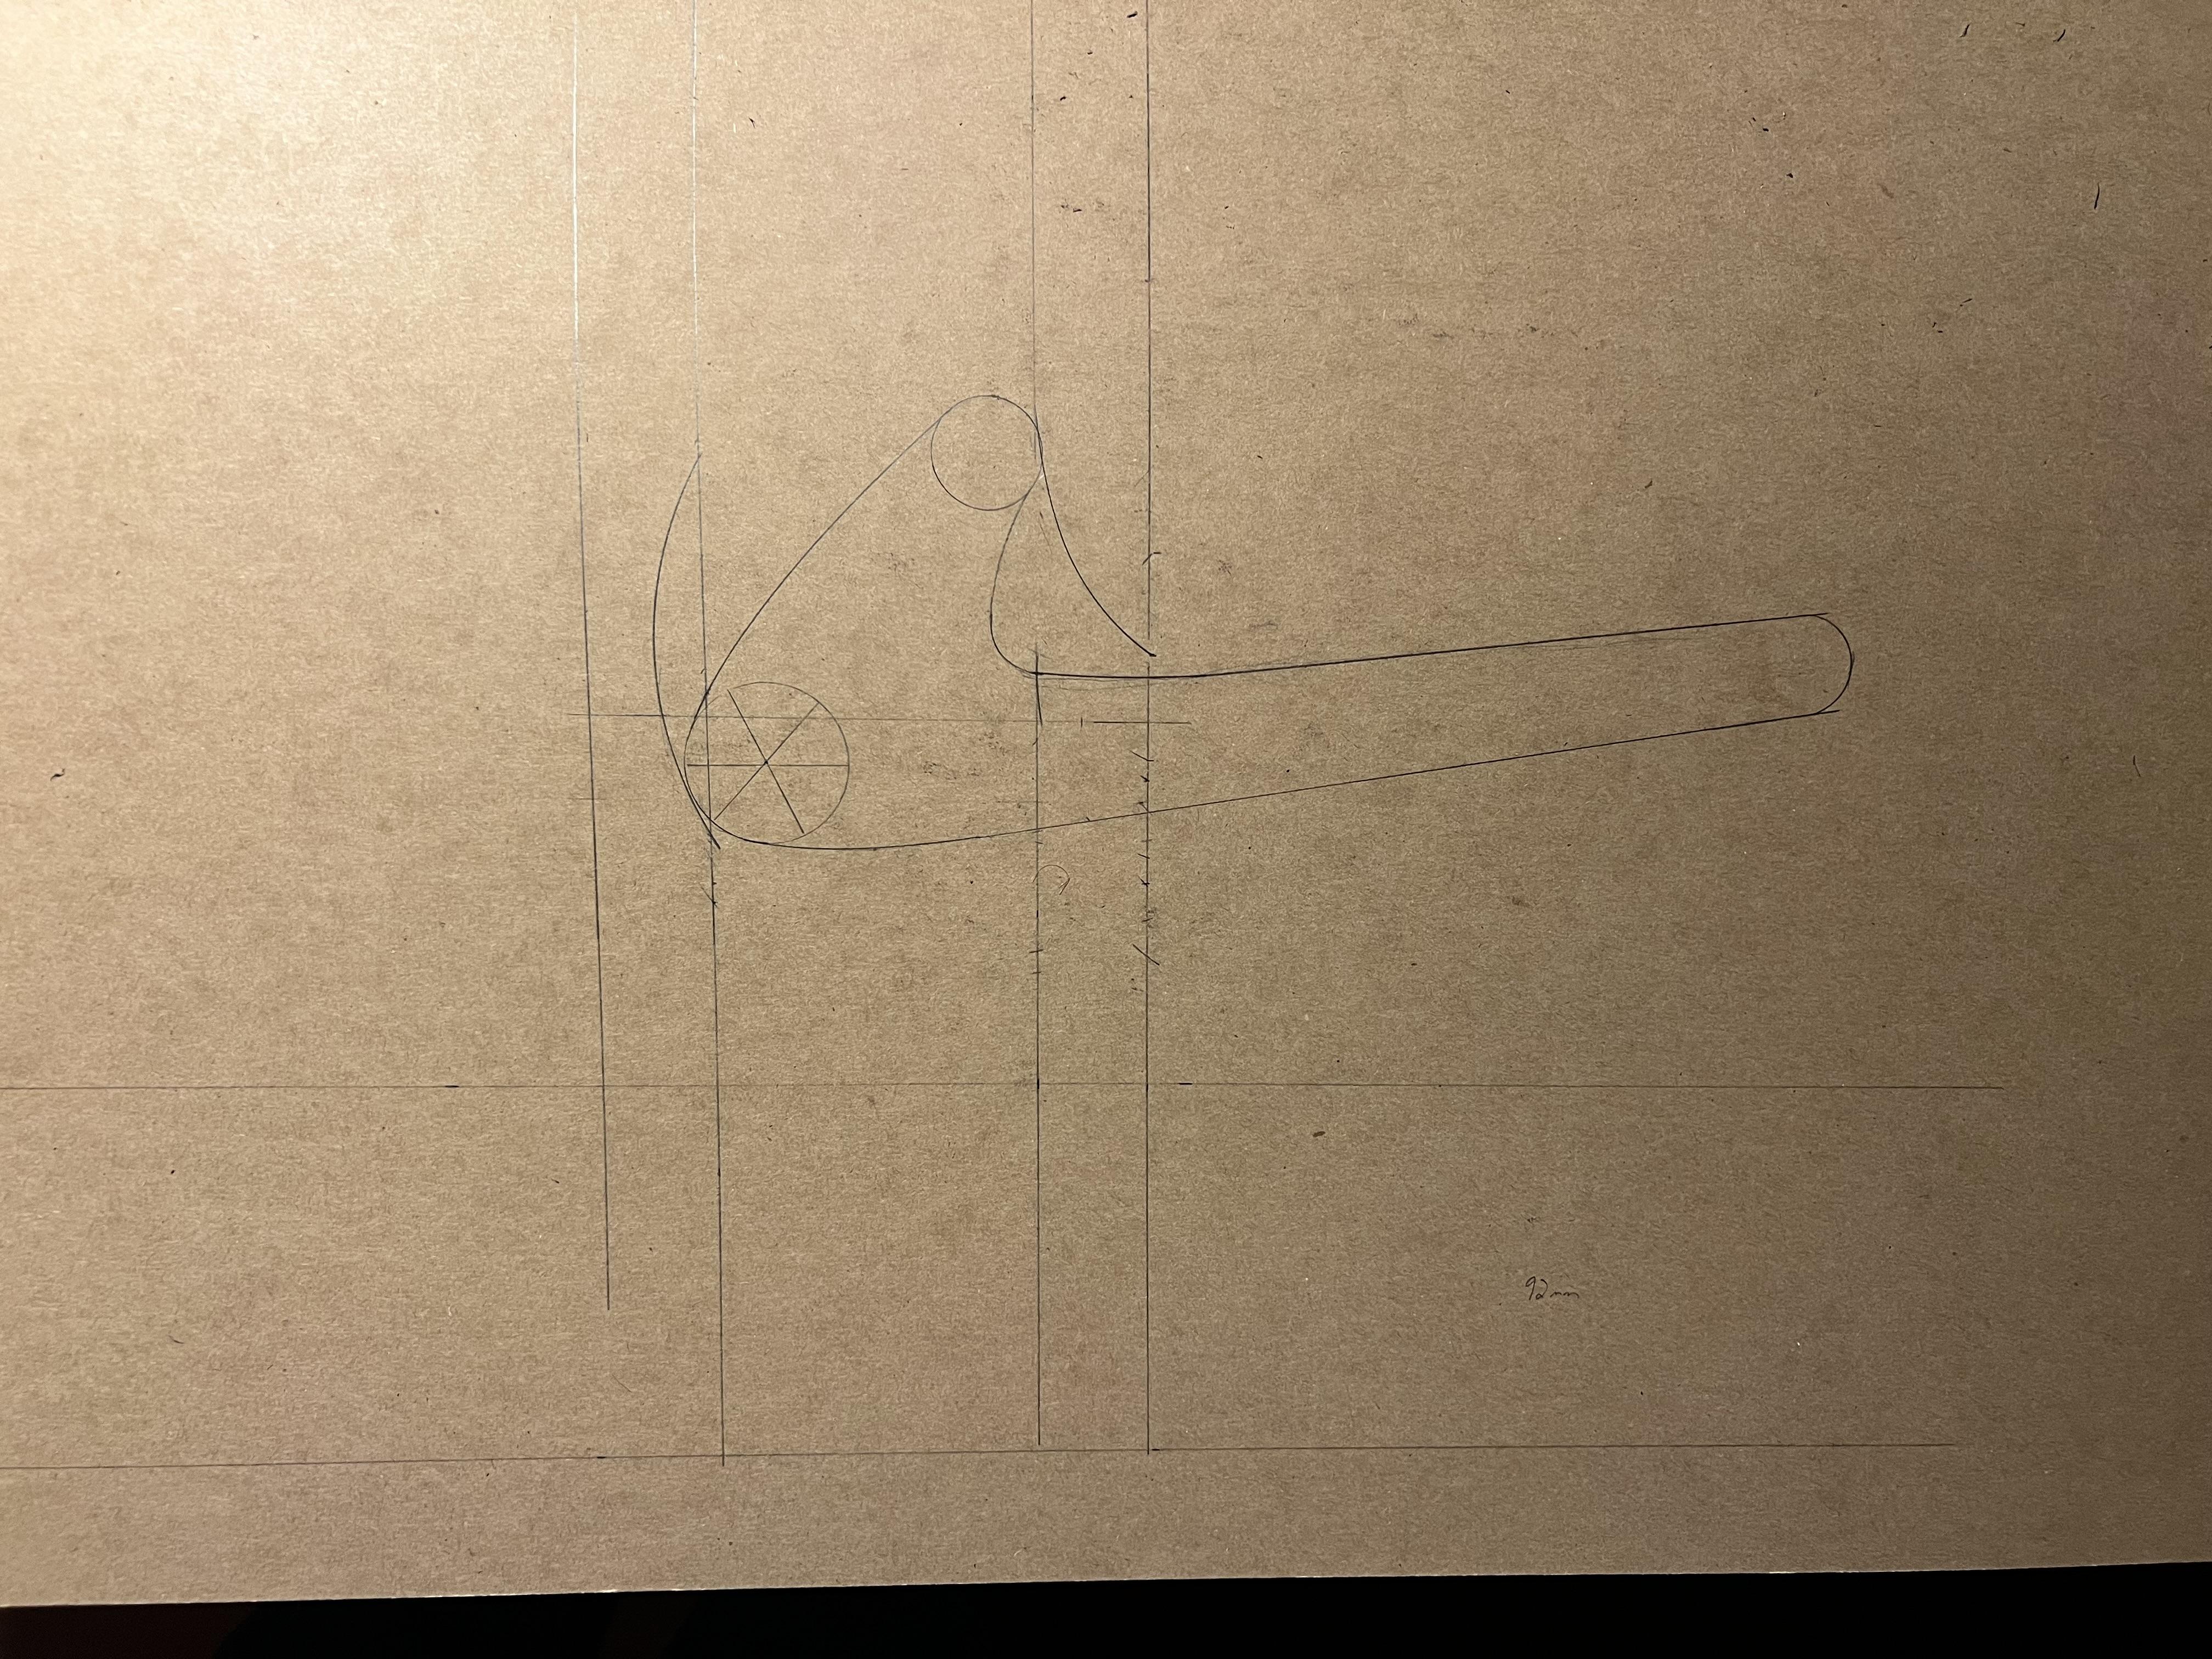
Hey everyone, i never lost sight of the project! Ive really just been trying to procure one but it’s proving very difficult. There is a site in Switzerland that sells them, but they don't ship to the US. They are also around $1,000 and thats just a bit high. It’s the site i posted at the top. Now i can find them on Rocado. But yet again, no shipping. Just local pickup in Switzerland. https://www.ricardo.ch/de/a/naehbock-sattler-lederarbeiten-1236720066/ So, back to the drawing board. Literally. Leveraging some drafting skills from the military, i’m working out the draft. Ill be building this out of baltic birch ply with a sapele base (92mm thick!). Overall, it will come out to around 94cm tall. I may reduce this to around 84 as i have some play around the foot lever cam. I just need to get to cutting pieces and assembling to see of it beds together before doing so.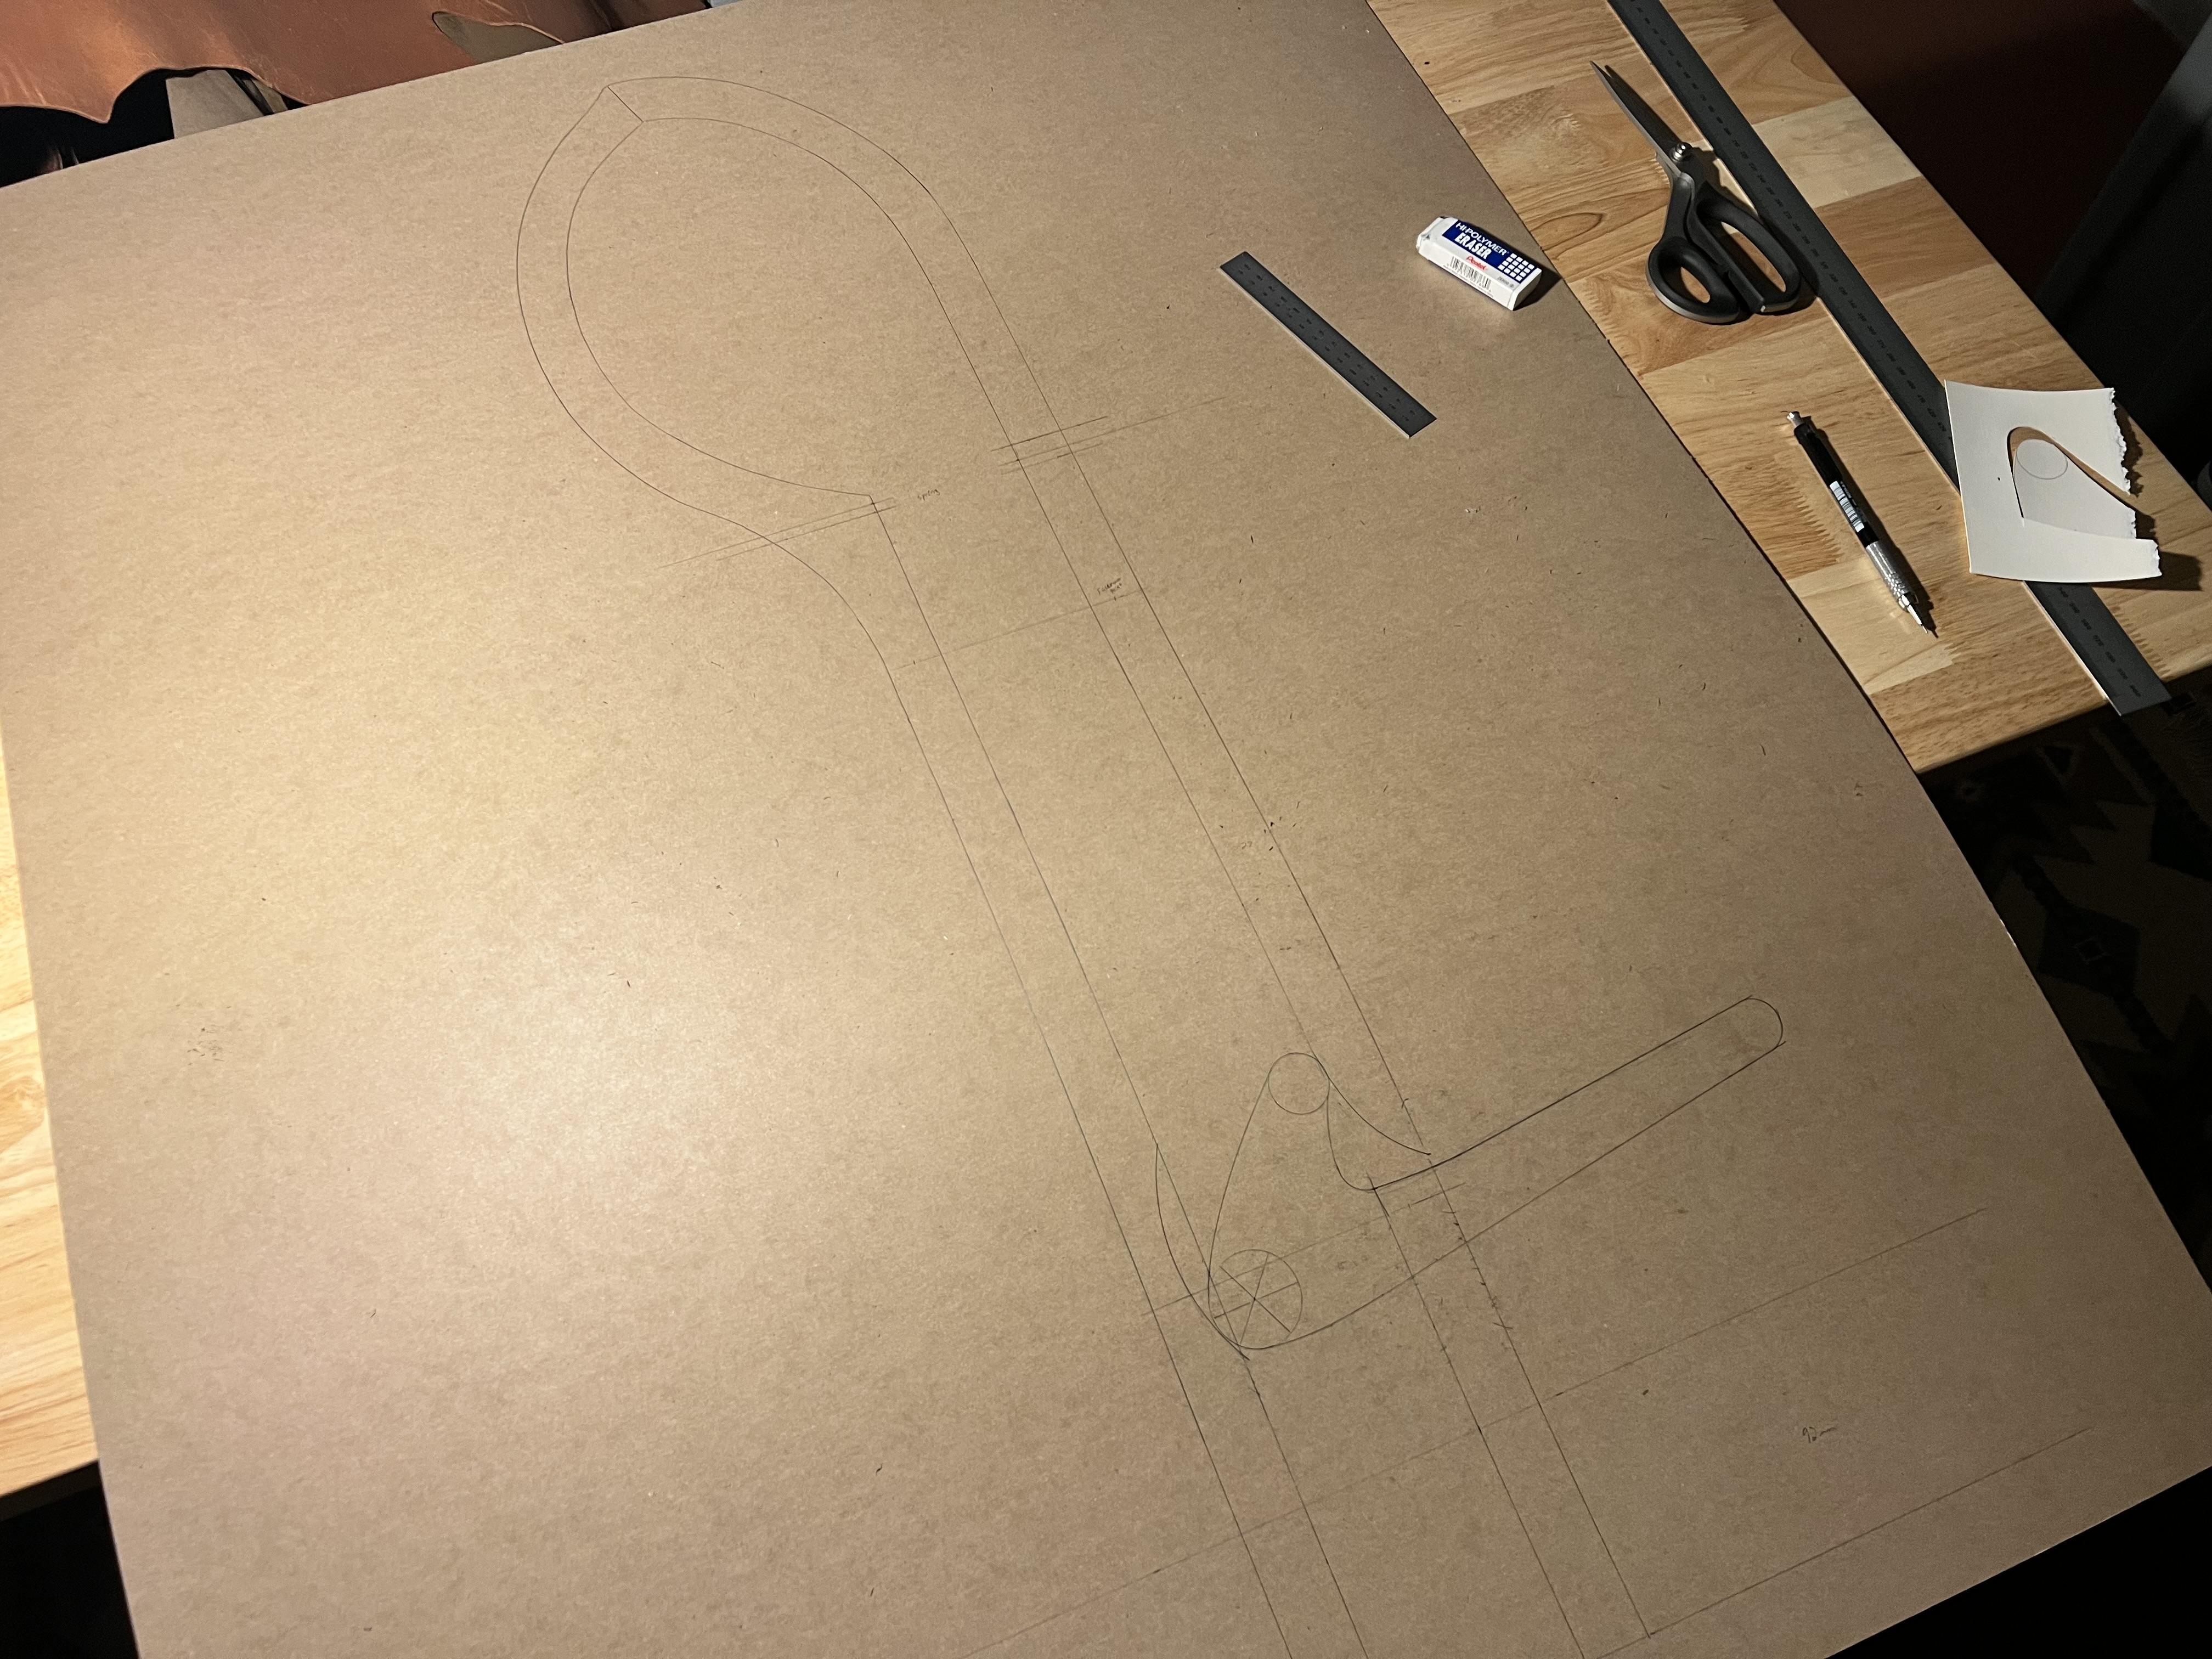
-
@JDFred Certainly! Aluminum is pretty remarkable. It only becomes problematic with contact to dissimilar metals, prolonged water contact, and salts. Or a combination of those. If you ever give them a go and need different head sizes, i would stick with the annealed versions. If they are tempered, they will toenail bad inside the leather since the walls of the hole do not have support against the compression of the rivet. Ive tried mil spec aircraft rivets, and its always a disaster in my applications. I would think if you have enough support around the whole, you could reasonably work with tempered alum rivets on leather. If you are in need of using different metals for the application, check the galvanic corrosion charts to see if they are compatible, too. Stainless and alum should be okay for a good bit, but ill say that depending on the size difference of the parts, and how far apart on the chart they are, the alum rivets would fail over time.
-
@dikman Thank you! Its stout. But not like the motor oil type drinks, more like a Guinness extra stout
-
@BlackDragon Thanks! The interior piped seam is by far the worst, followed by the d-ring attachment pieces. If ya don’t pull the needles excessively when saddle stitching (and use beeswax when hard to pull on the needle!!) its not that bad. You wont singe the tendons and ligaments in your hands. For the harness from W&C, I've got some! But i had to use J&FJ Baker harness for the rigidity of the back and lid. Herman oak harness would be more than sufficient though. It just needs to be real stiff so it maintains its shape. @FrankHester Thank you! It’s been a labor of true love.
-
Thank you both! @Dwight, if you need to get a pattern my only recommendation is get one of the Swiss saddle packs, preferably for “restoration” on ebay. Take it apart, and build your template off that. You can make all your changes and adjustment there, if you’re up to it! @chuck123wapati Haha i certainly could use a thinner weight. Maybe by just one margin. Getting harness in split maybe difficult! I will say though that the weight and how substantial it is has not been a problem for me. The Swiss were really onto something with the weights they choose and how the bag supports itself under a load, even if it’s just my shoulder.
-
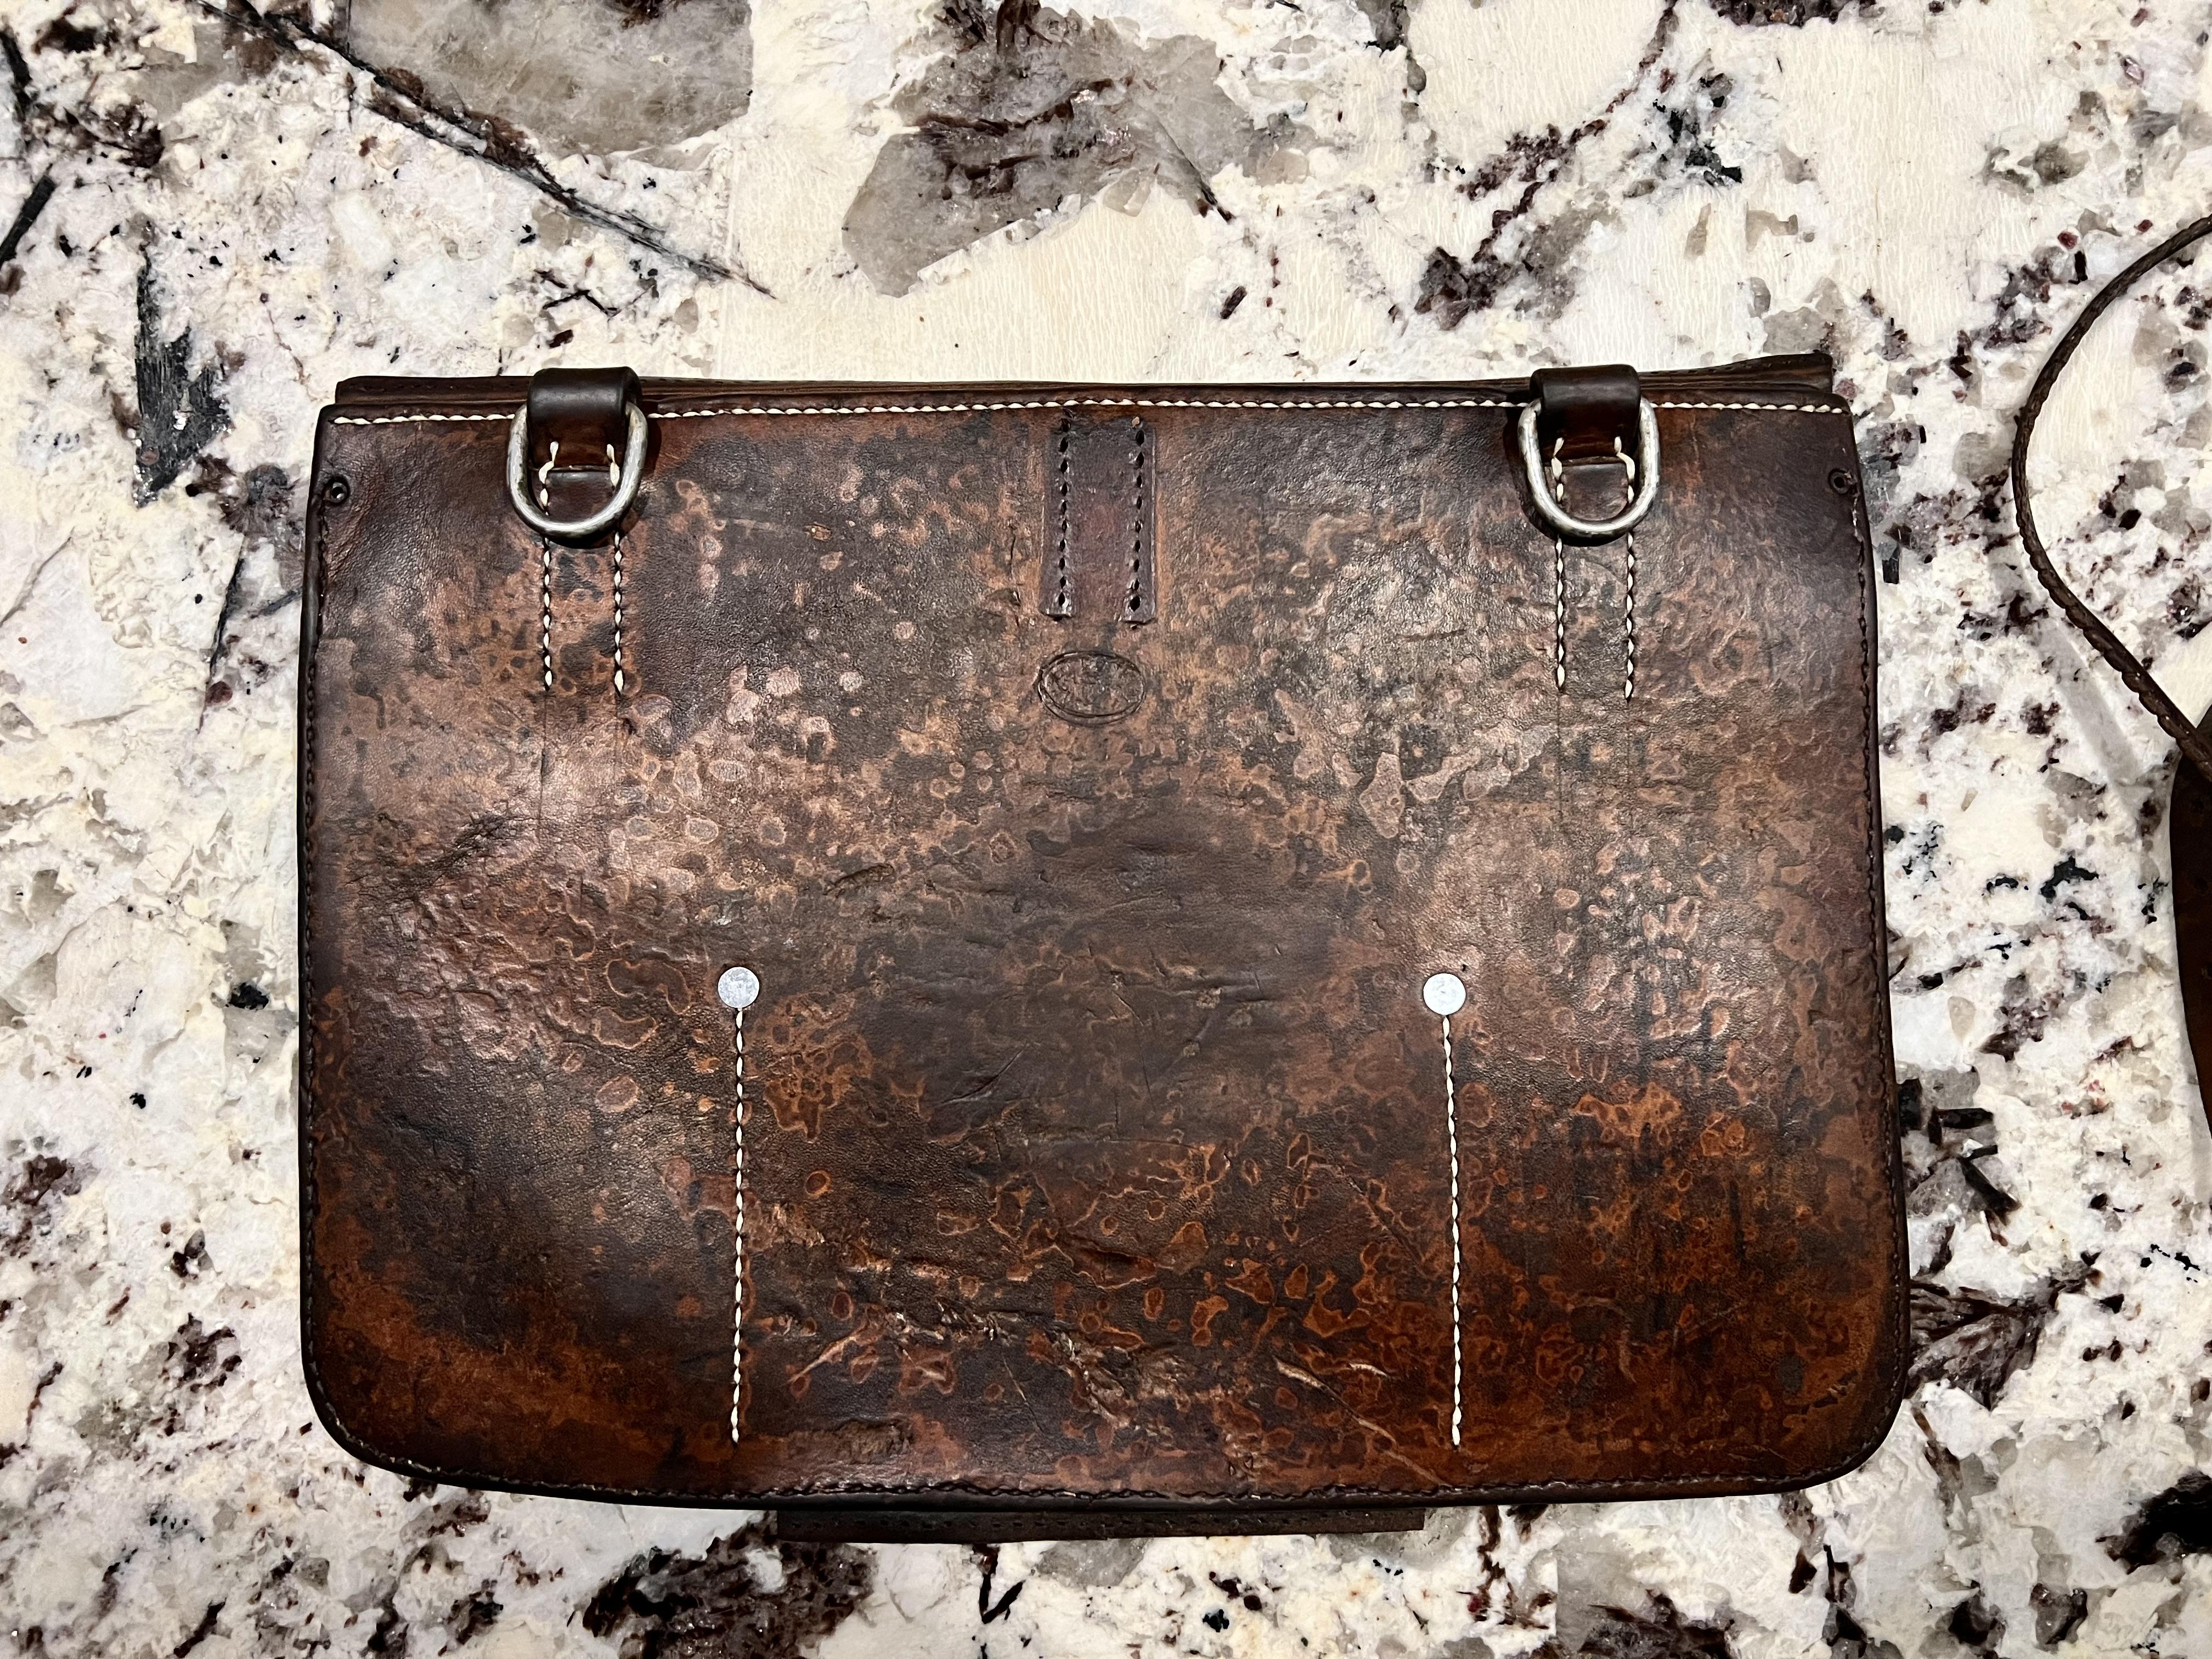
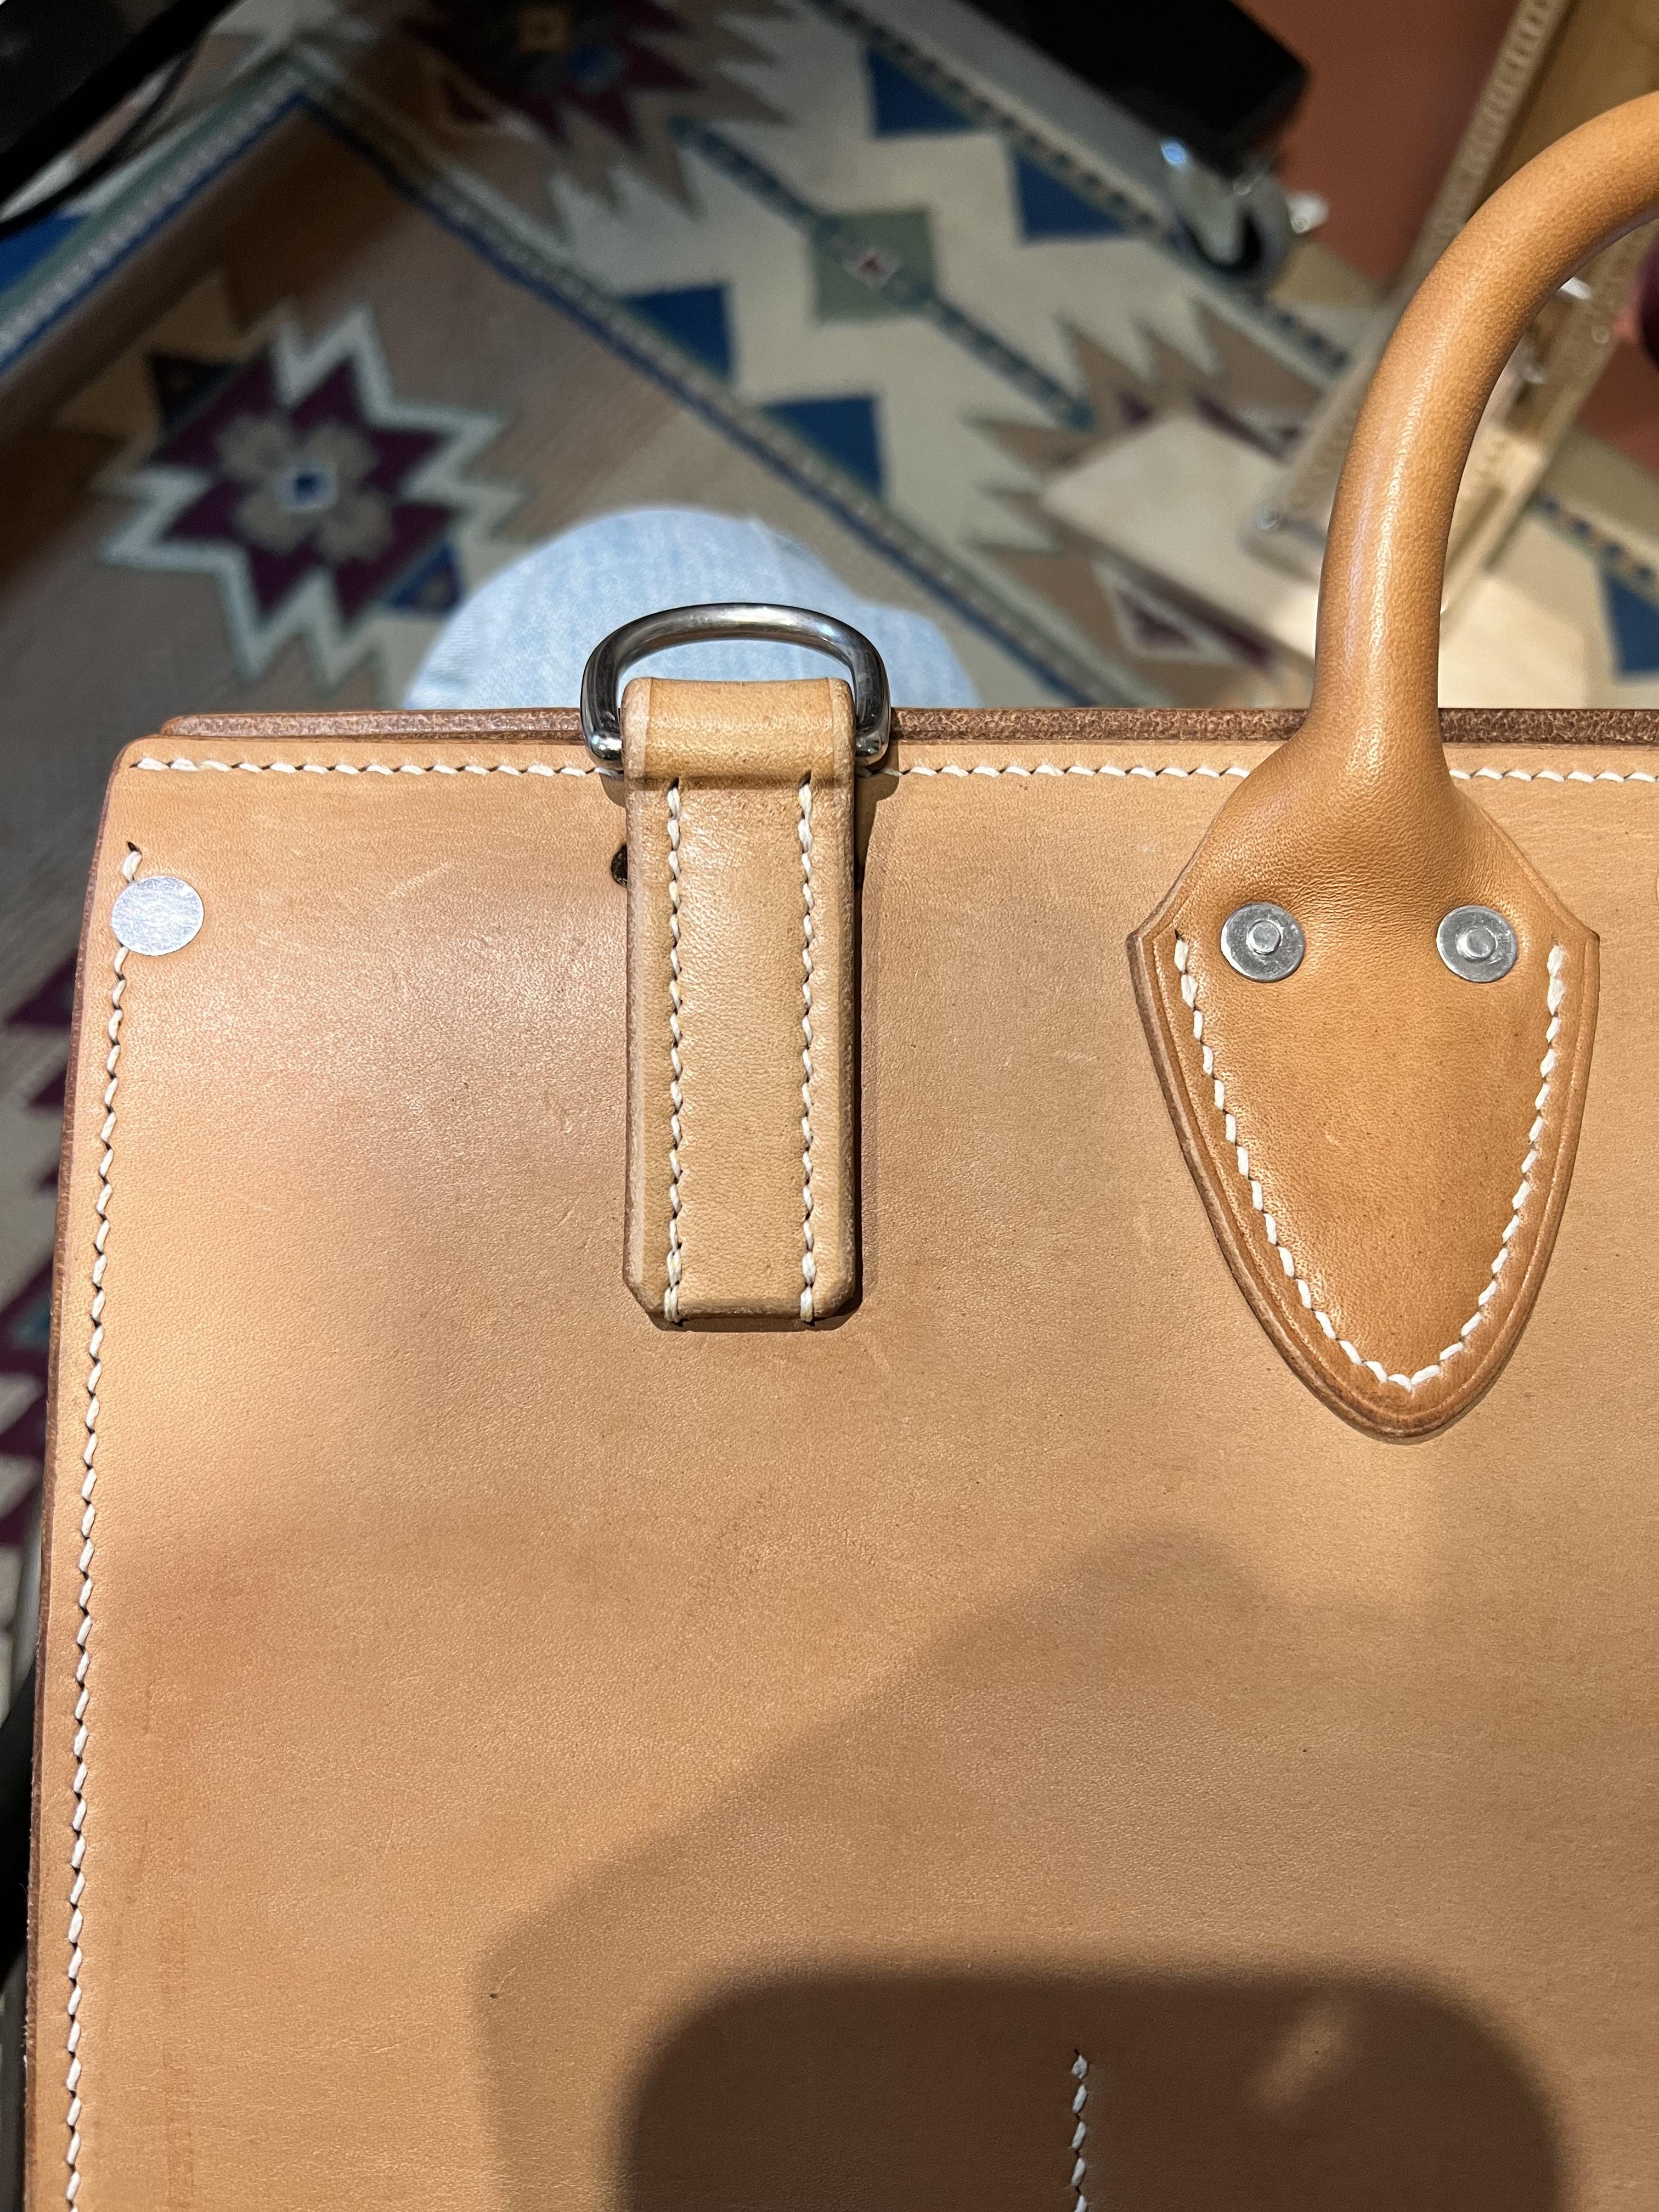
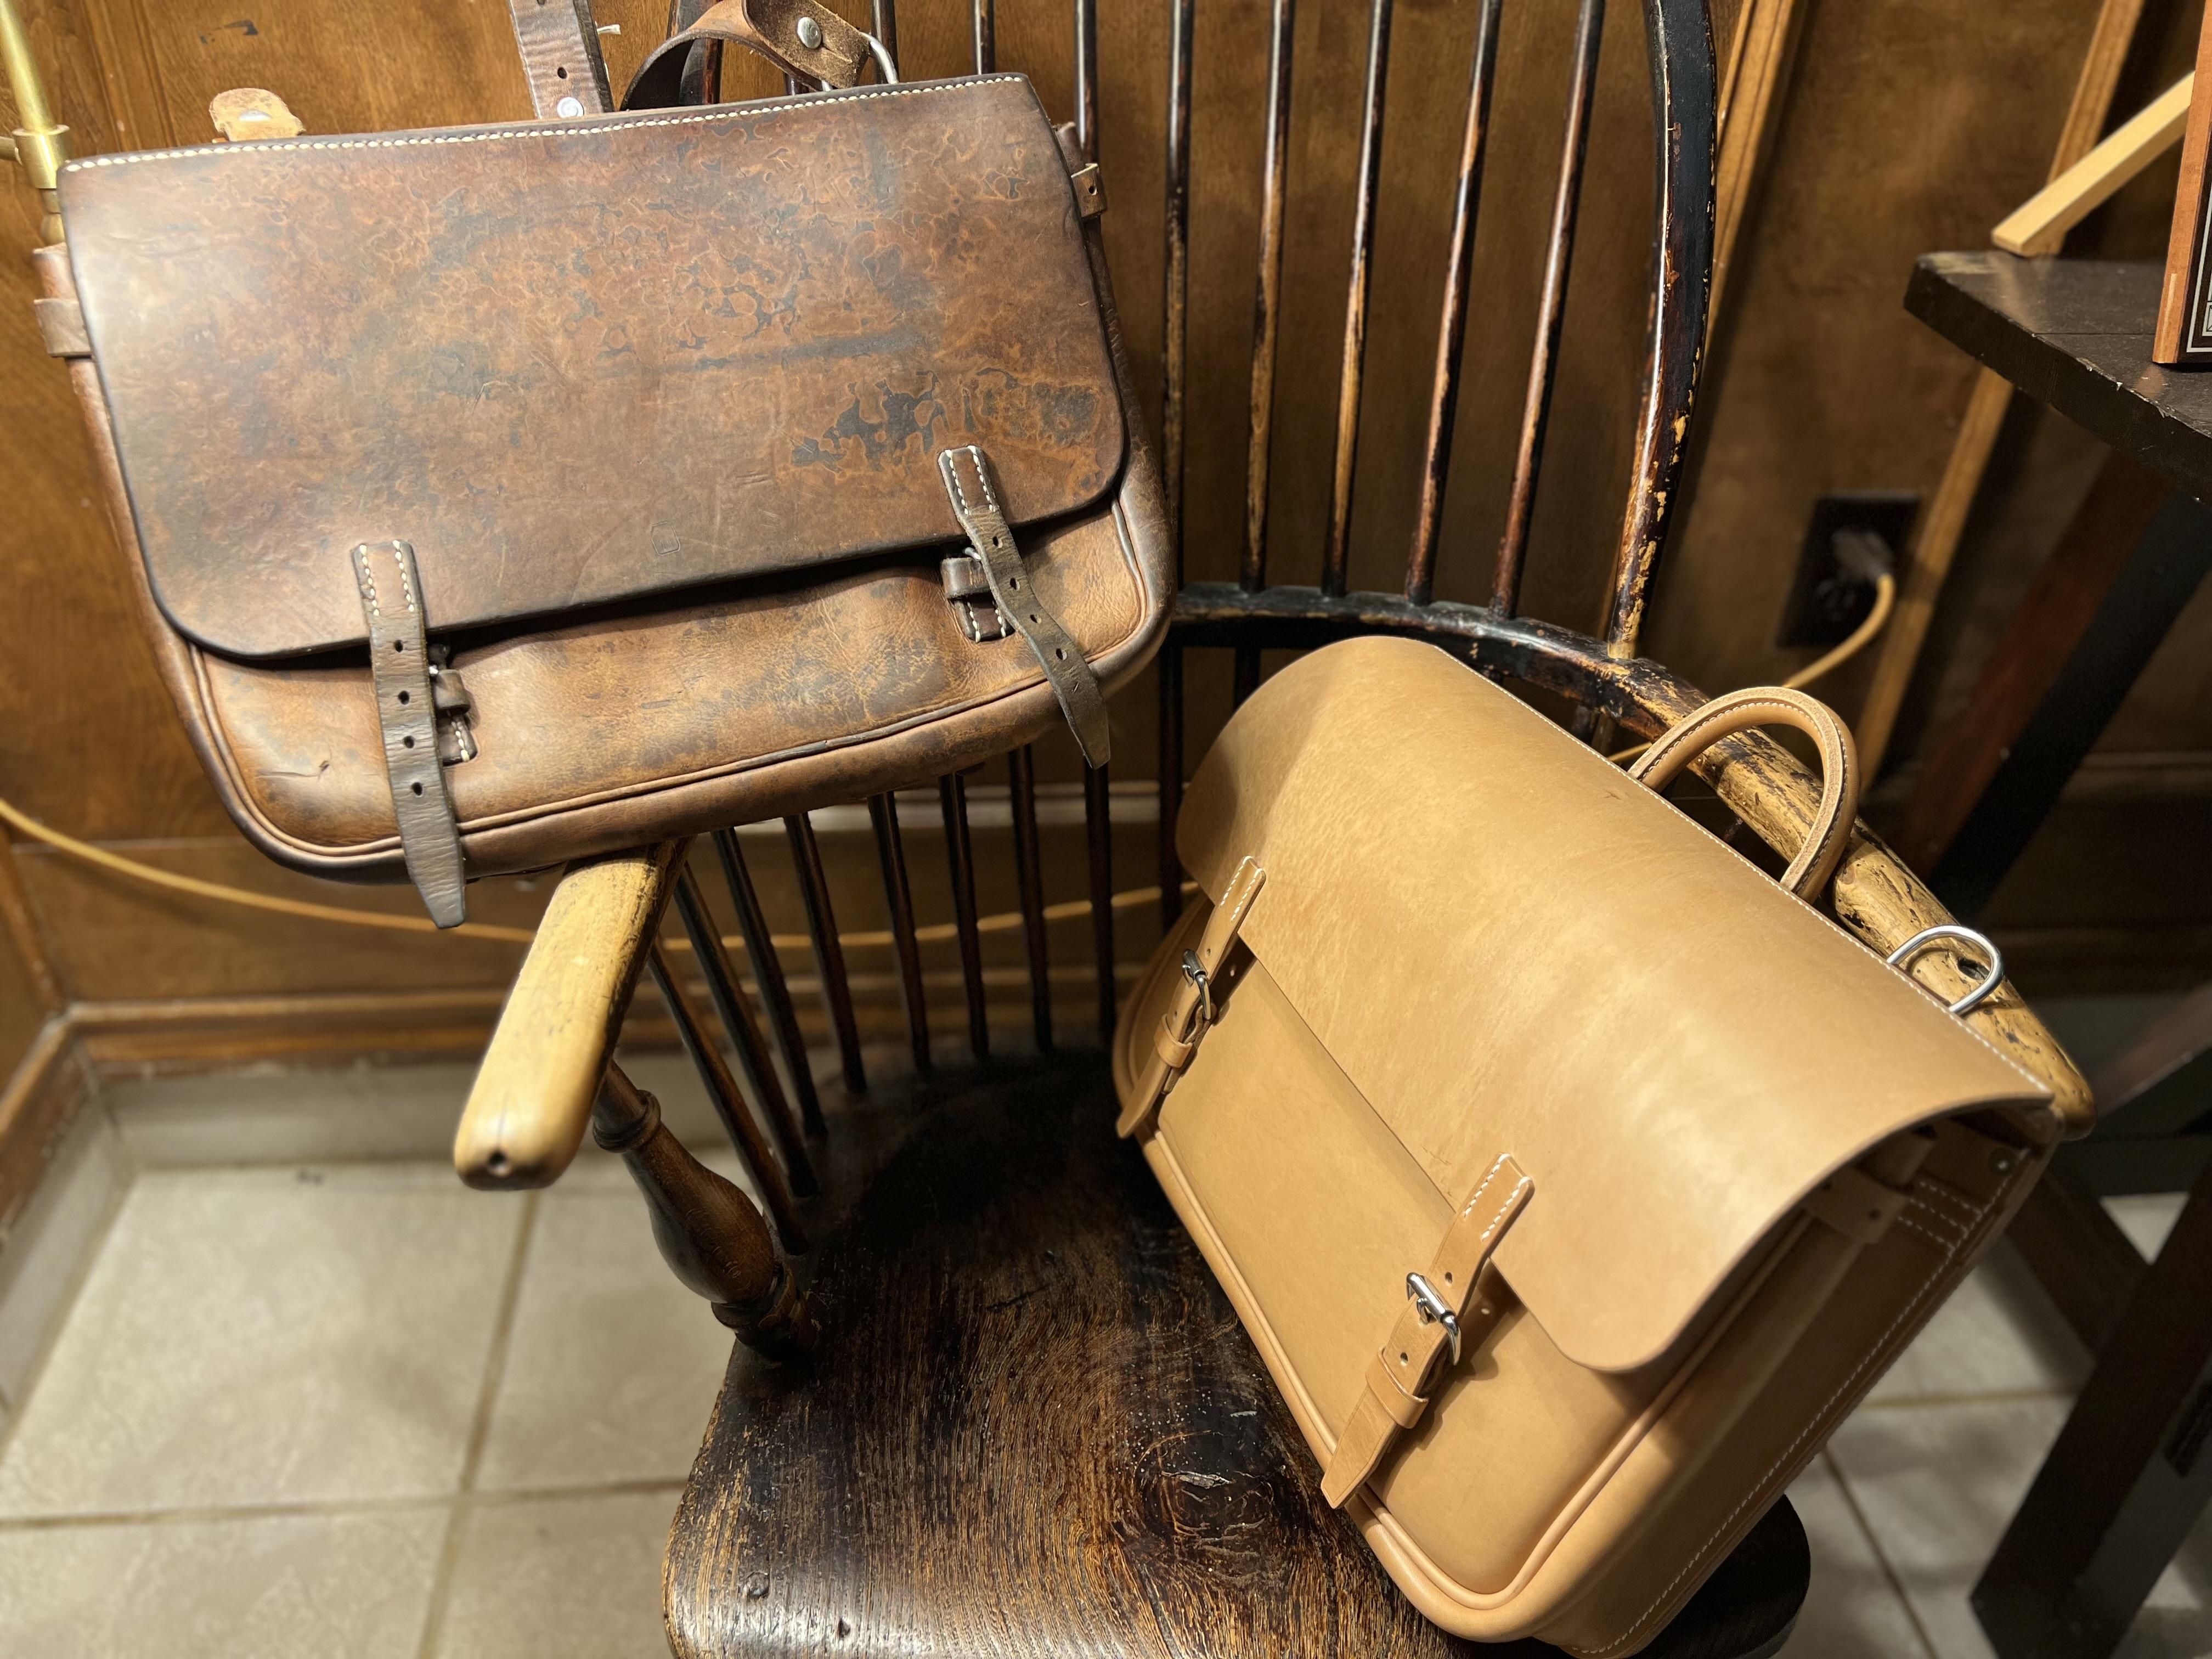
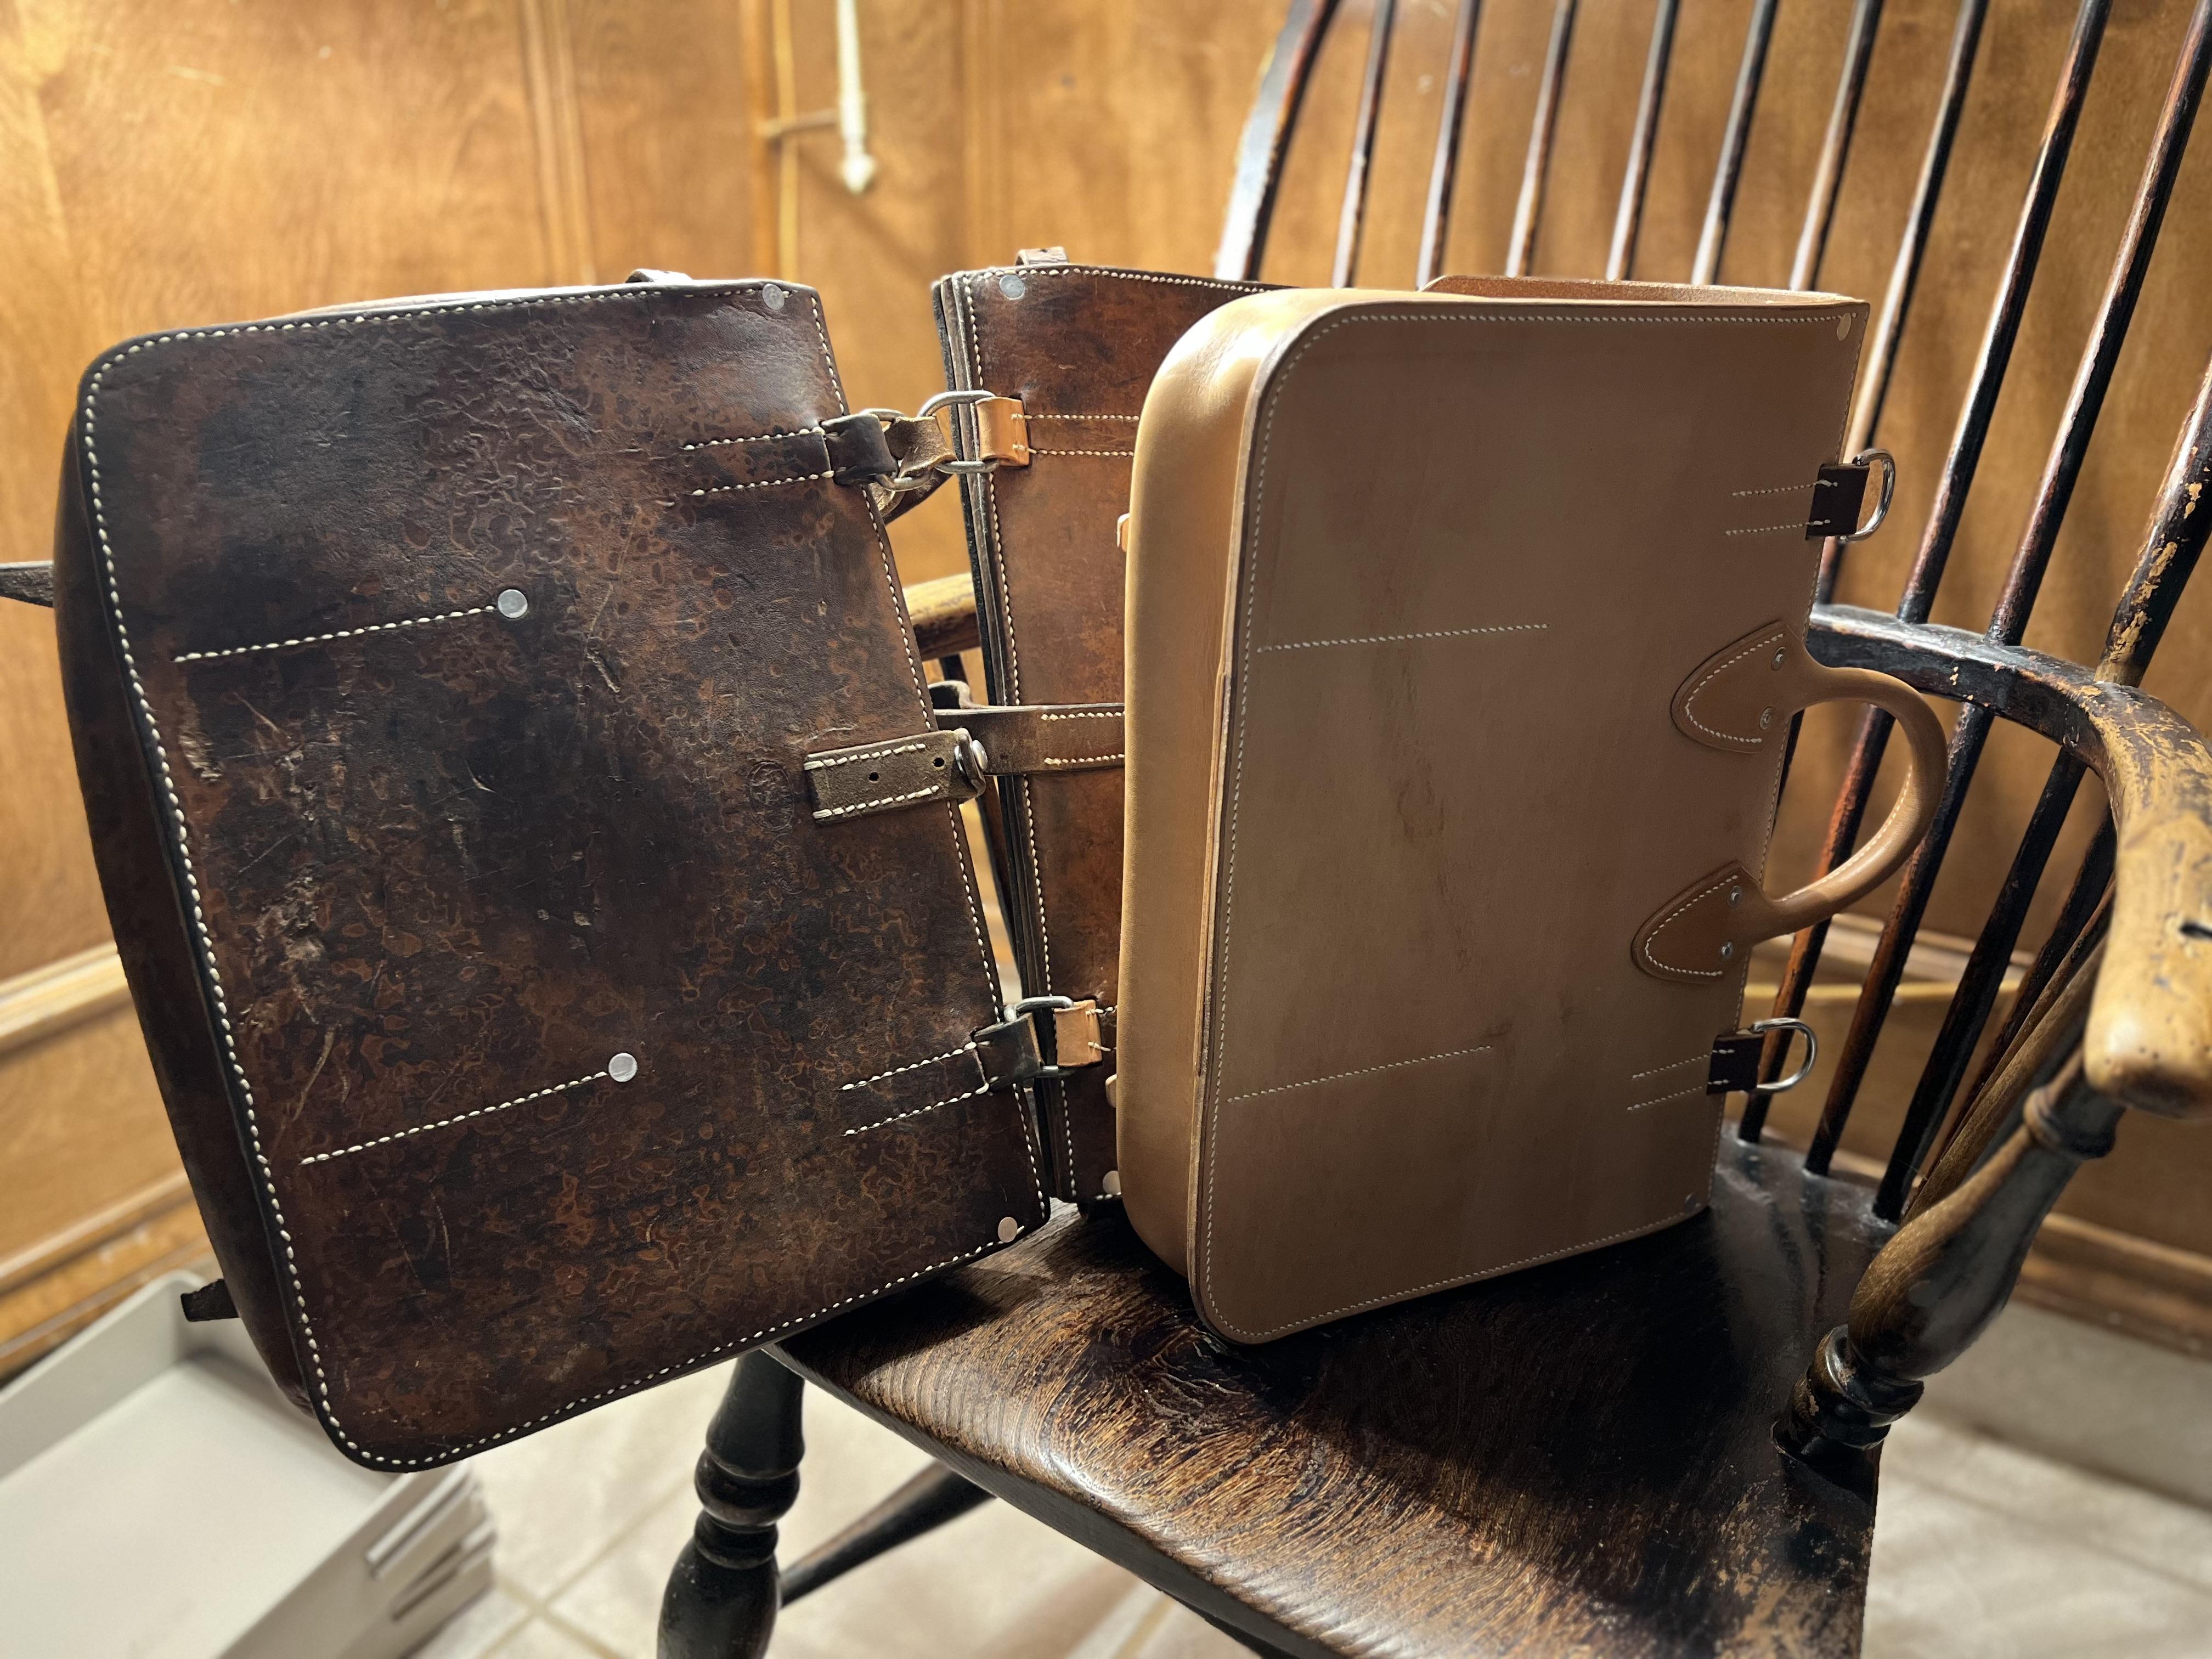
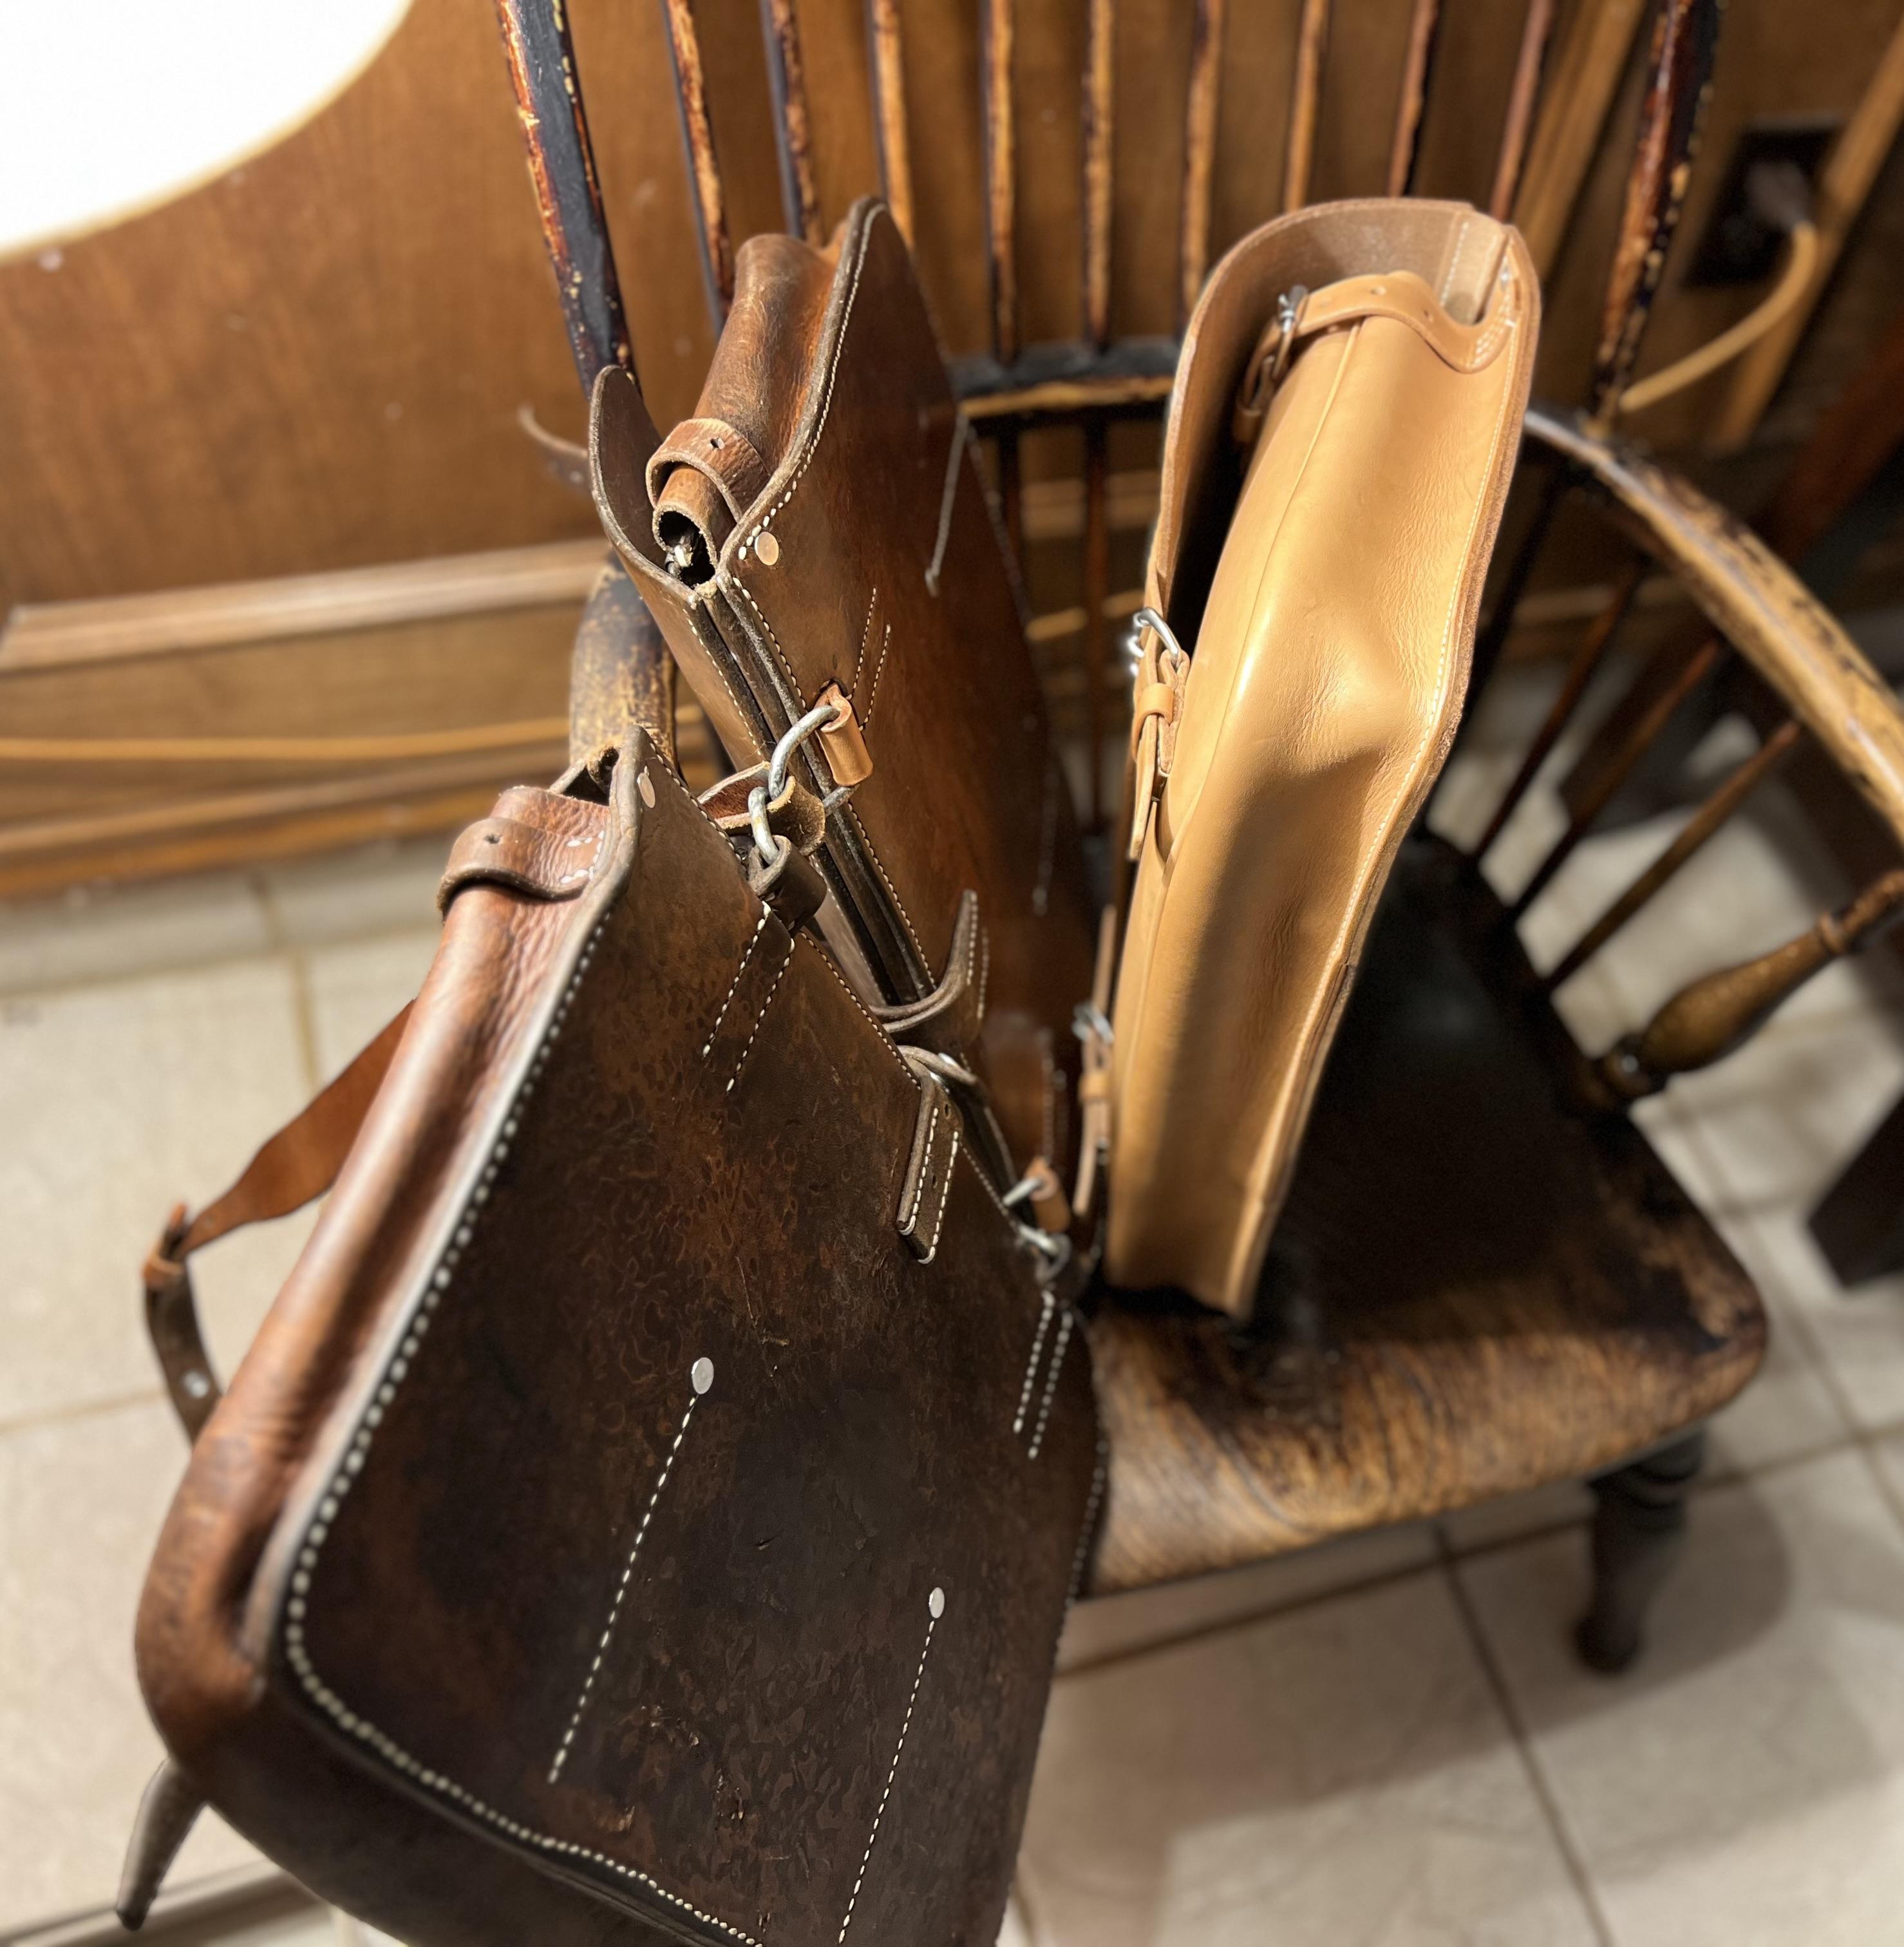
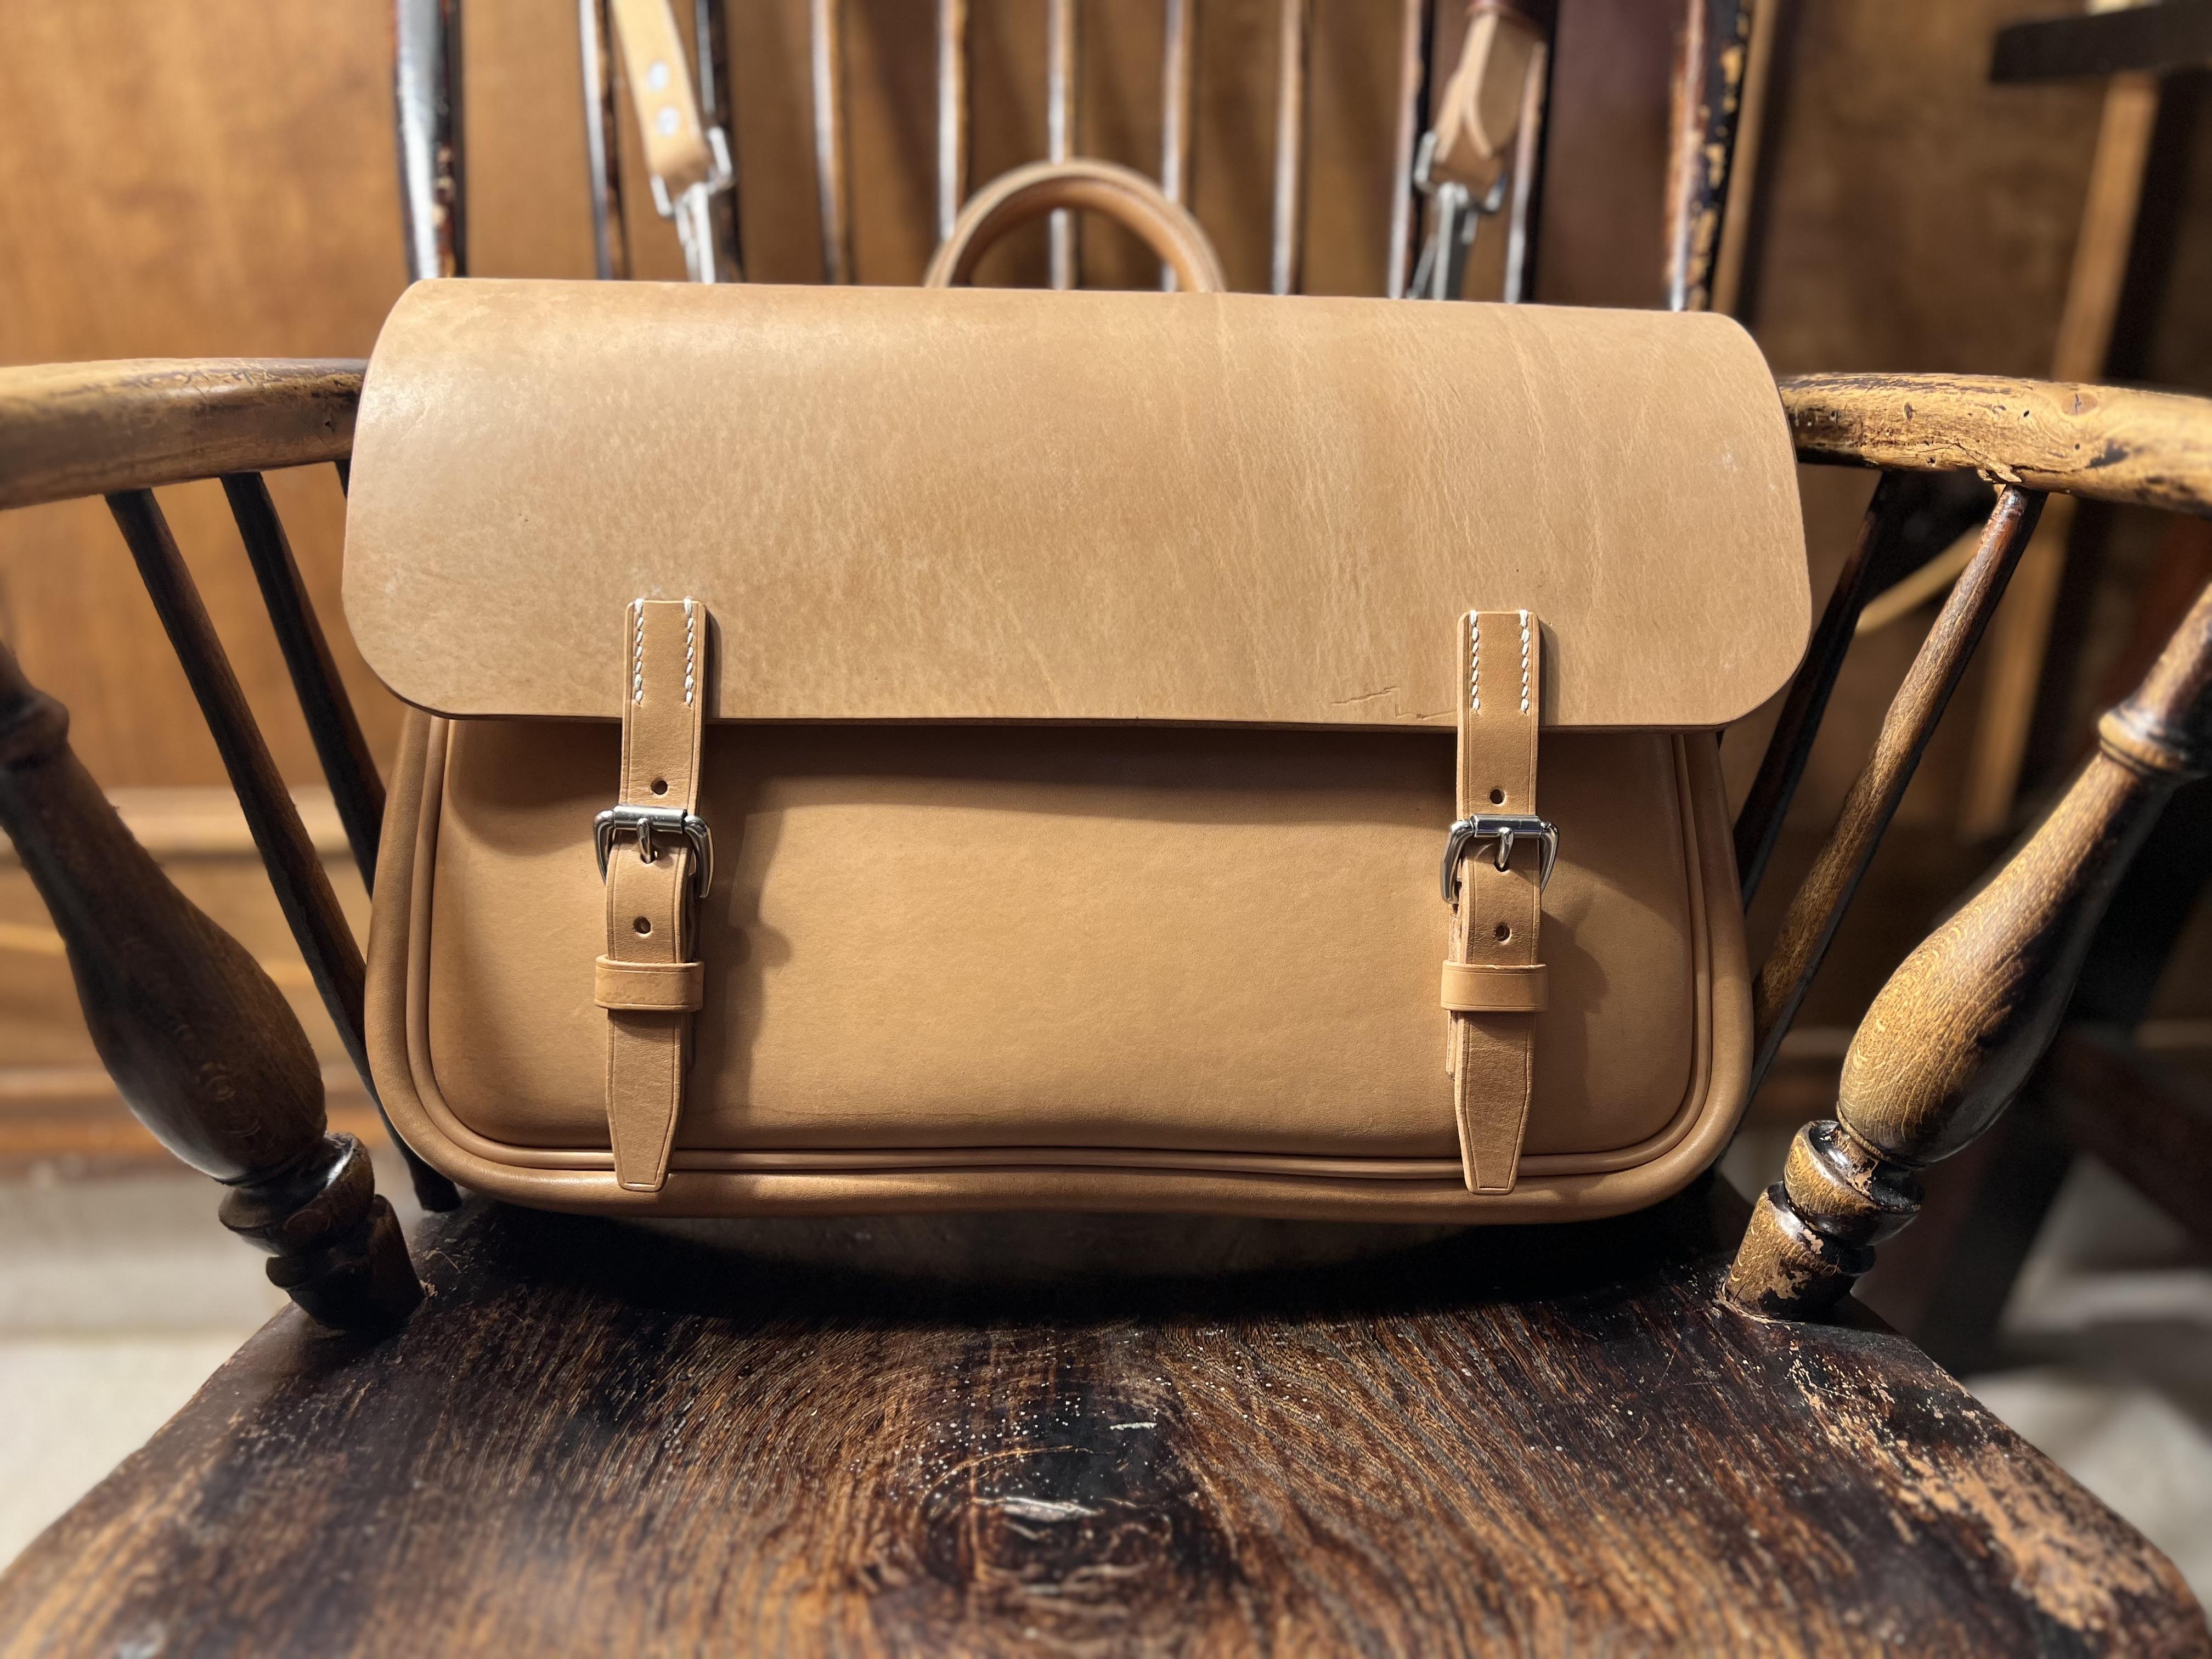
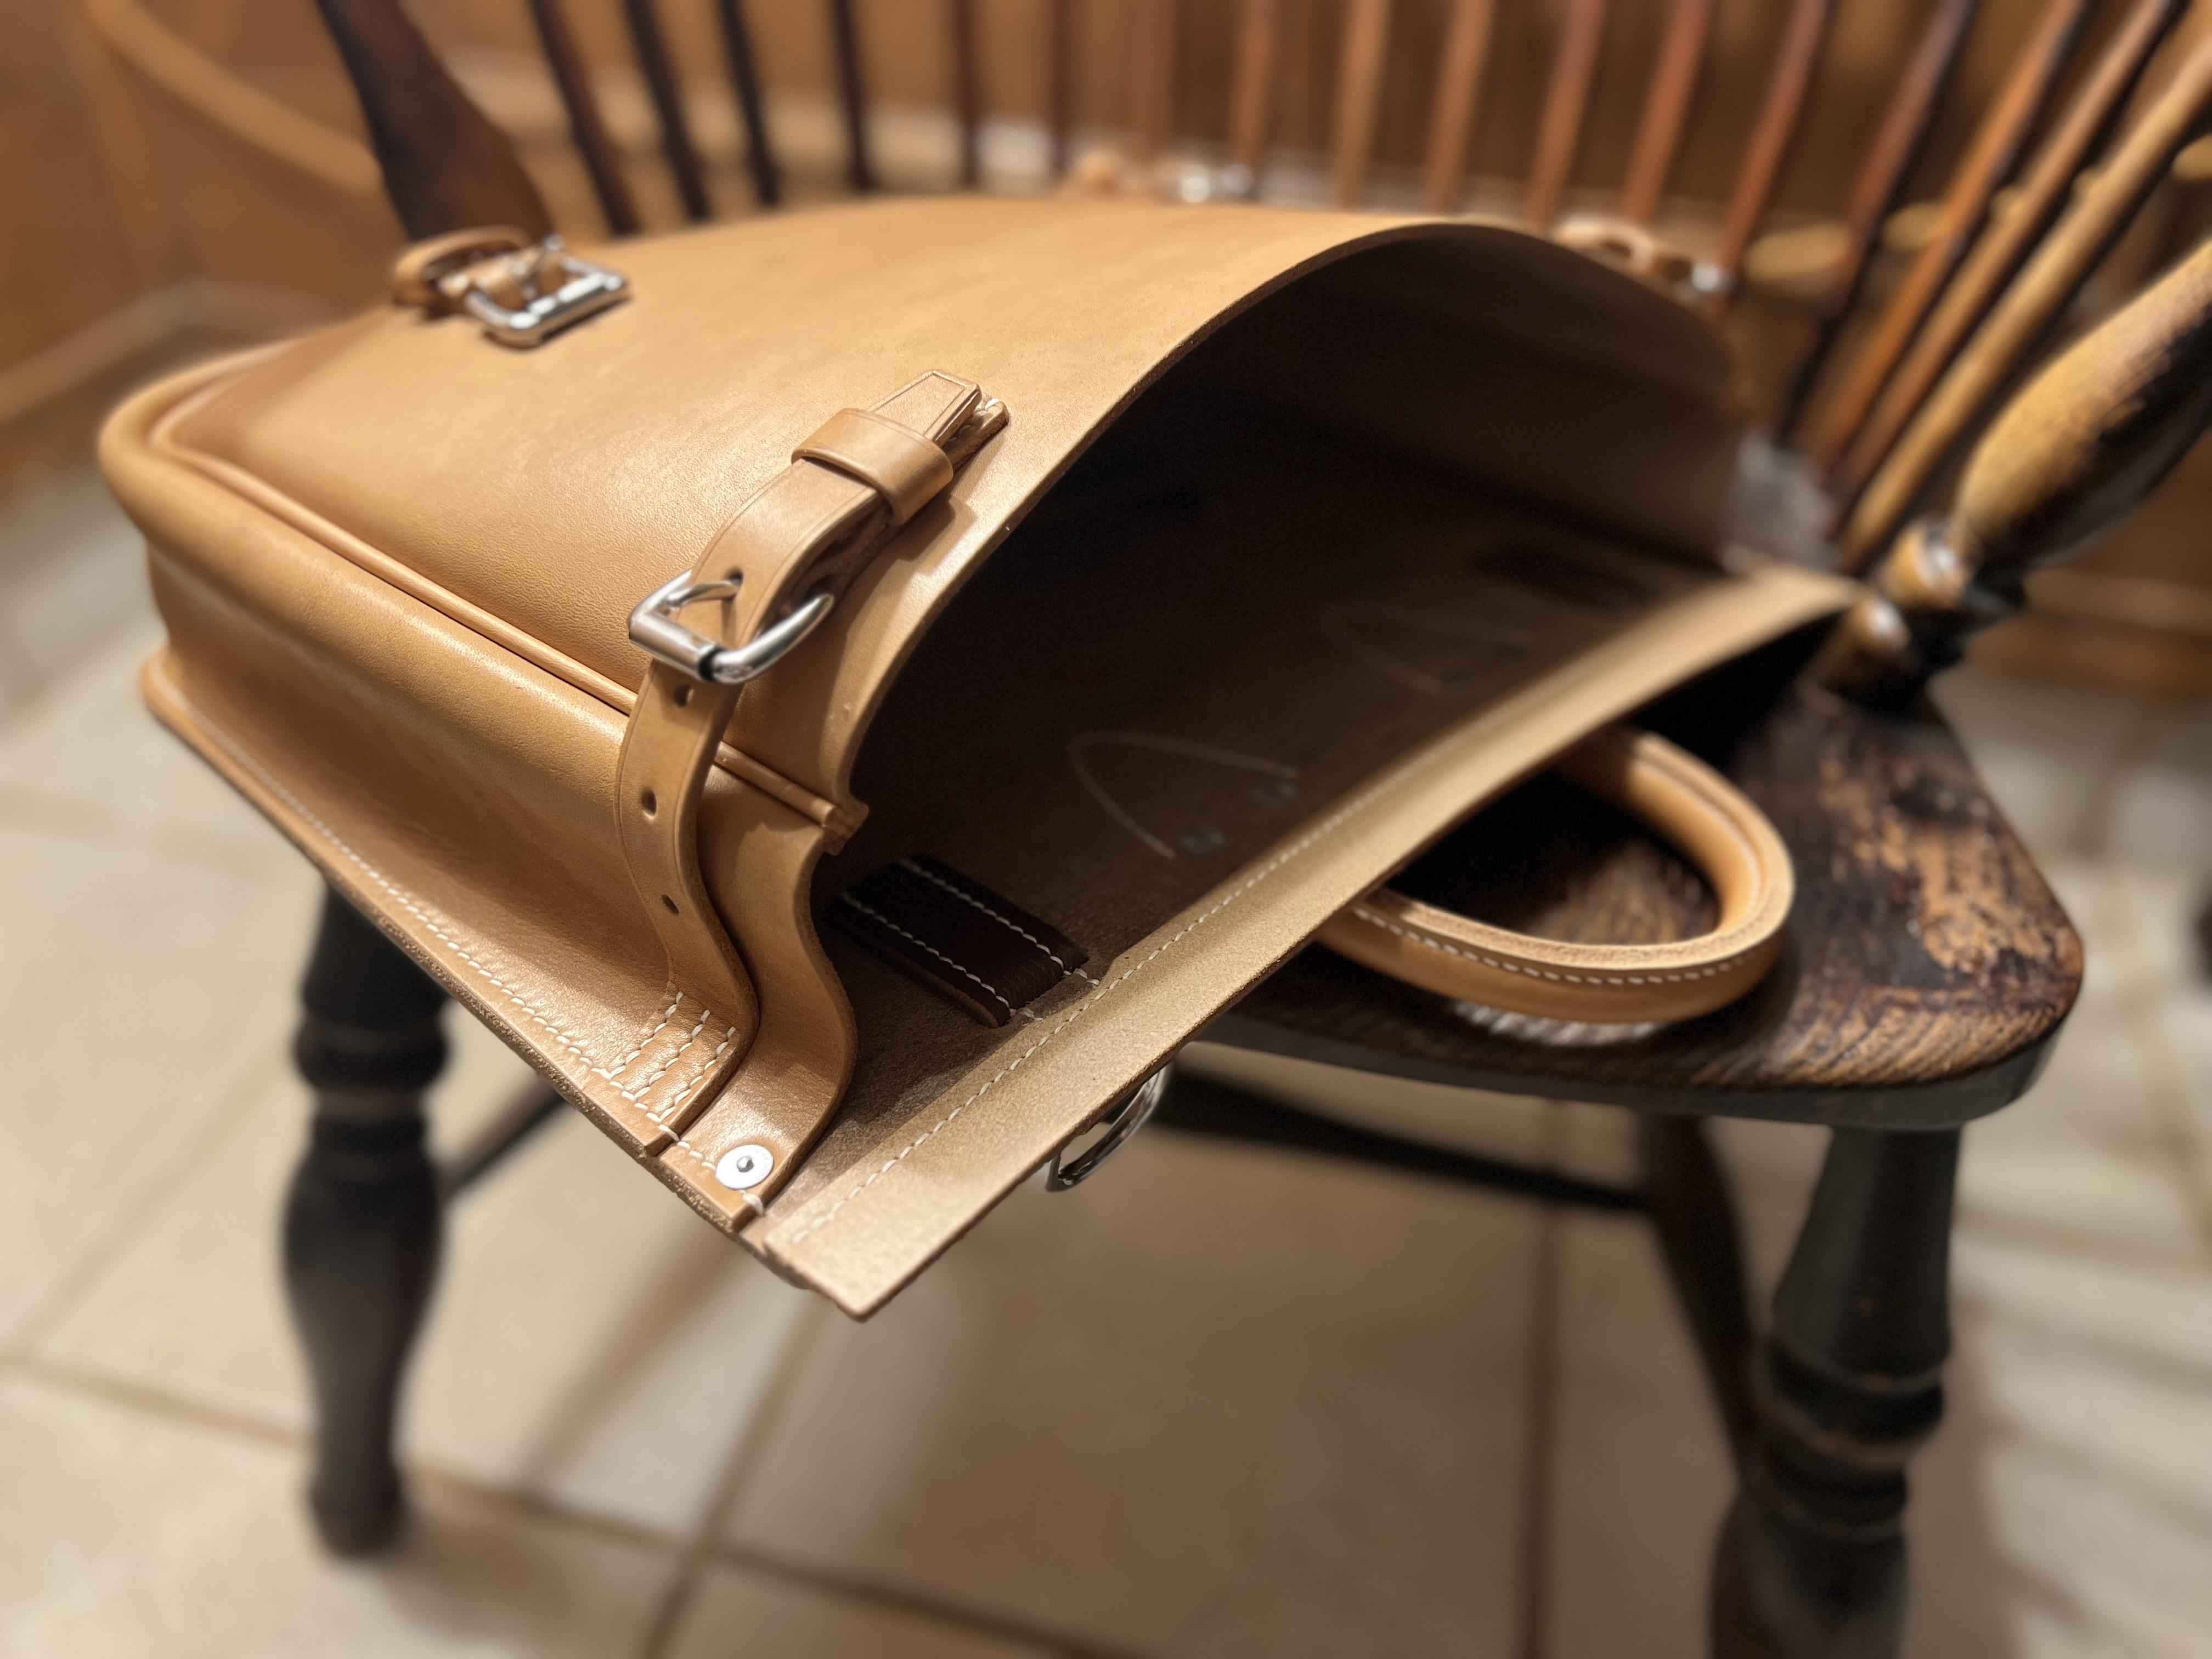
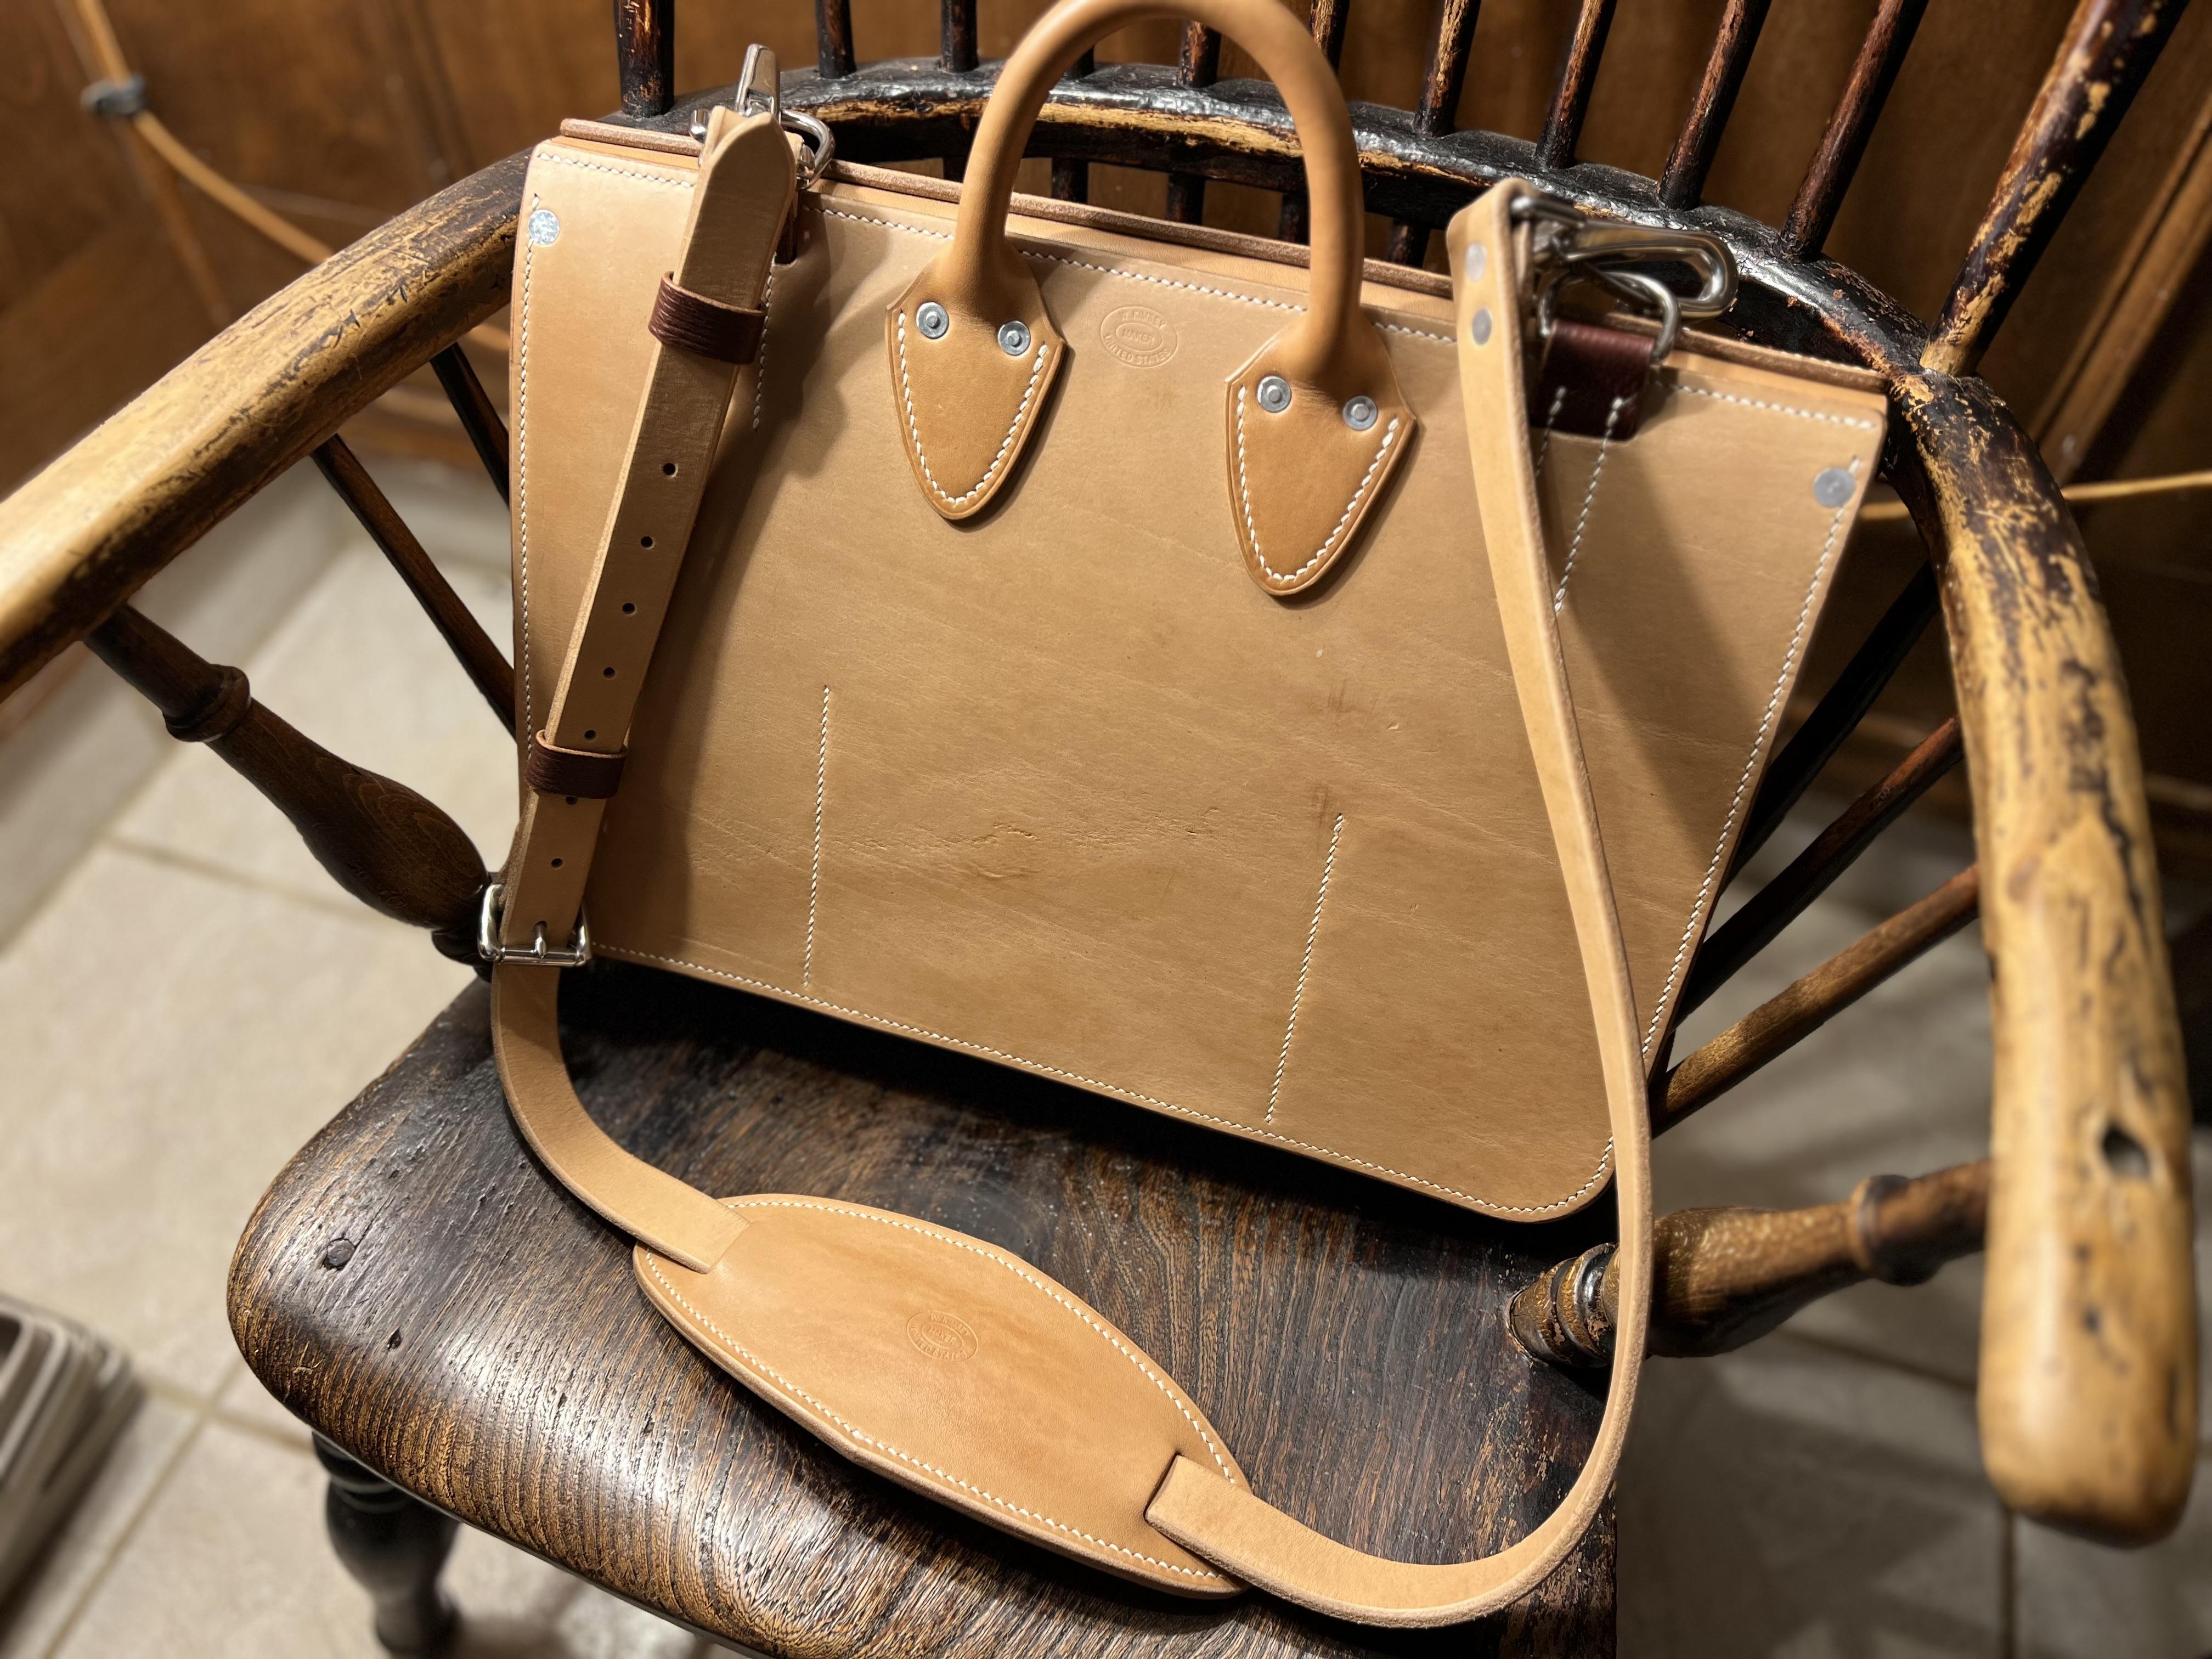
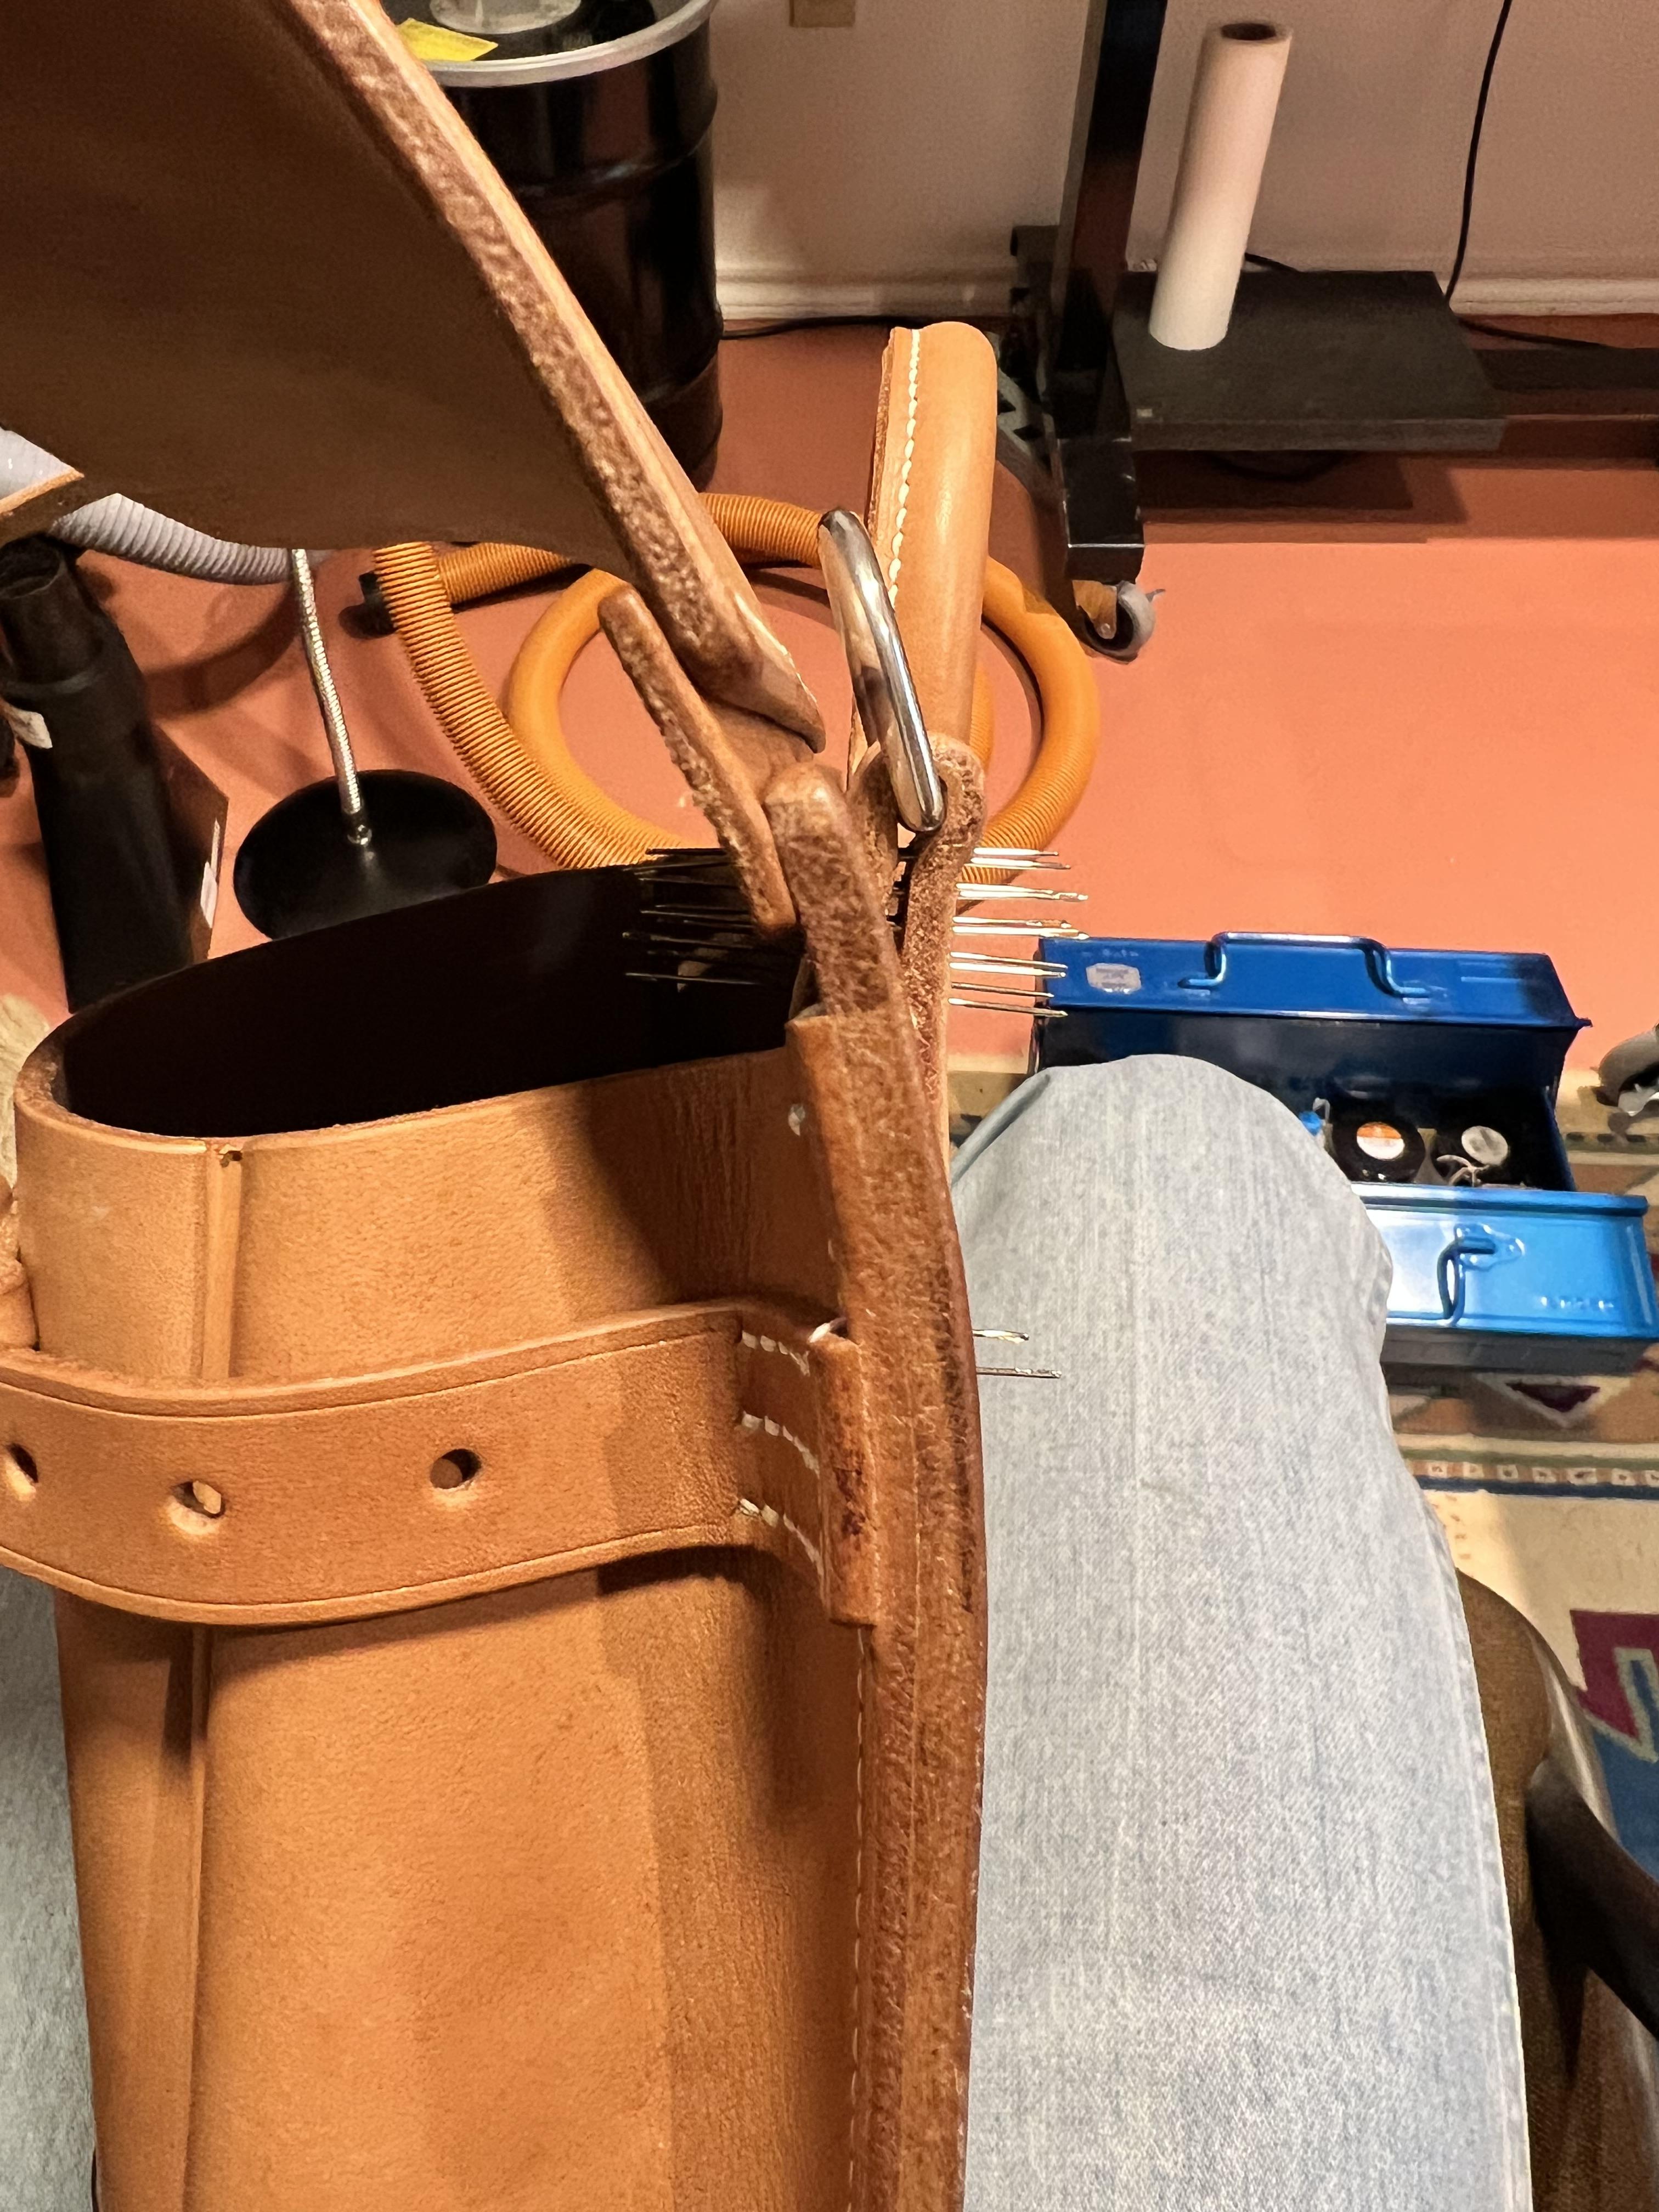
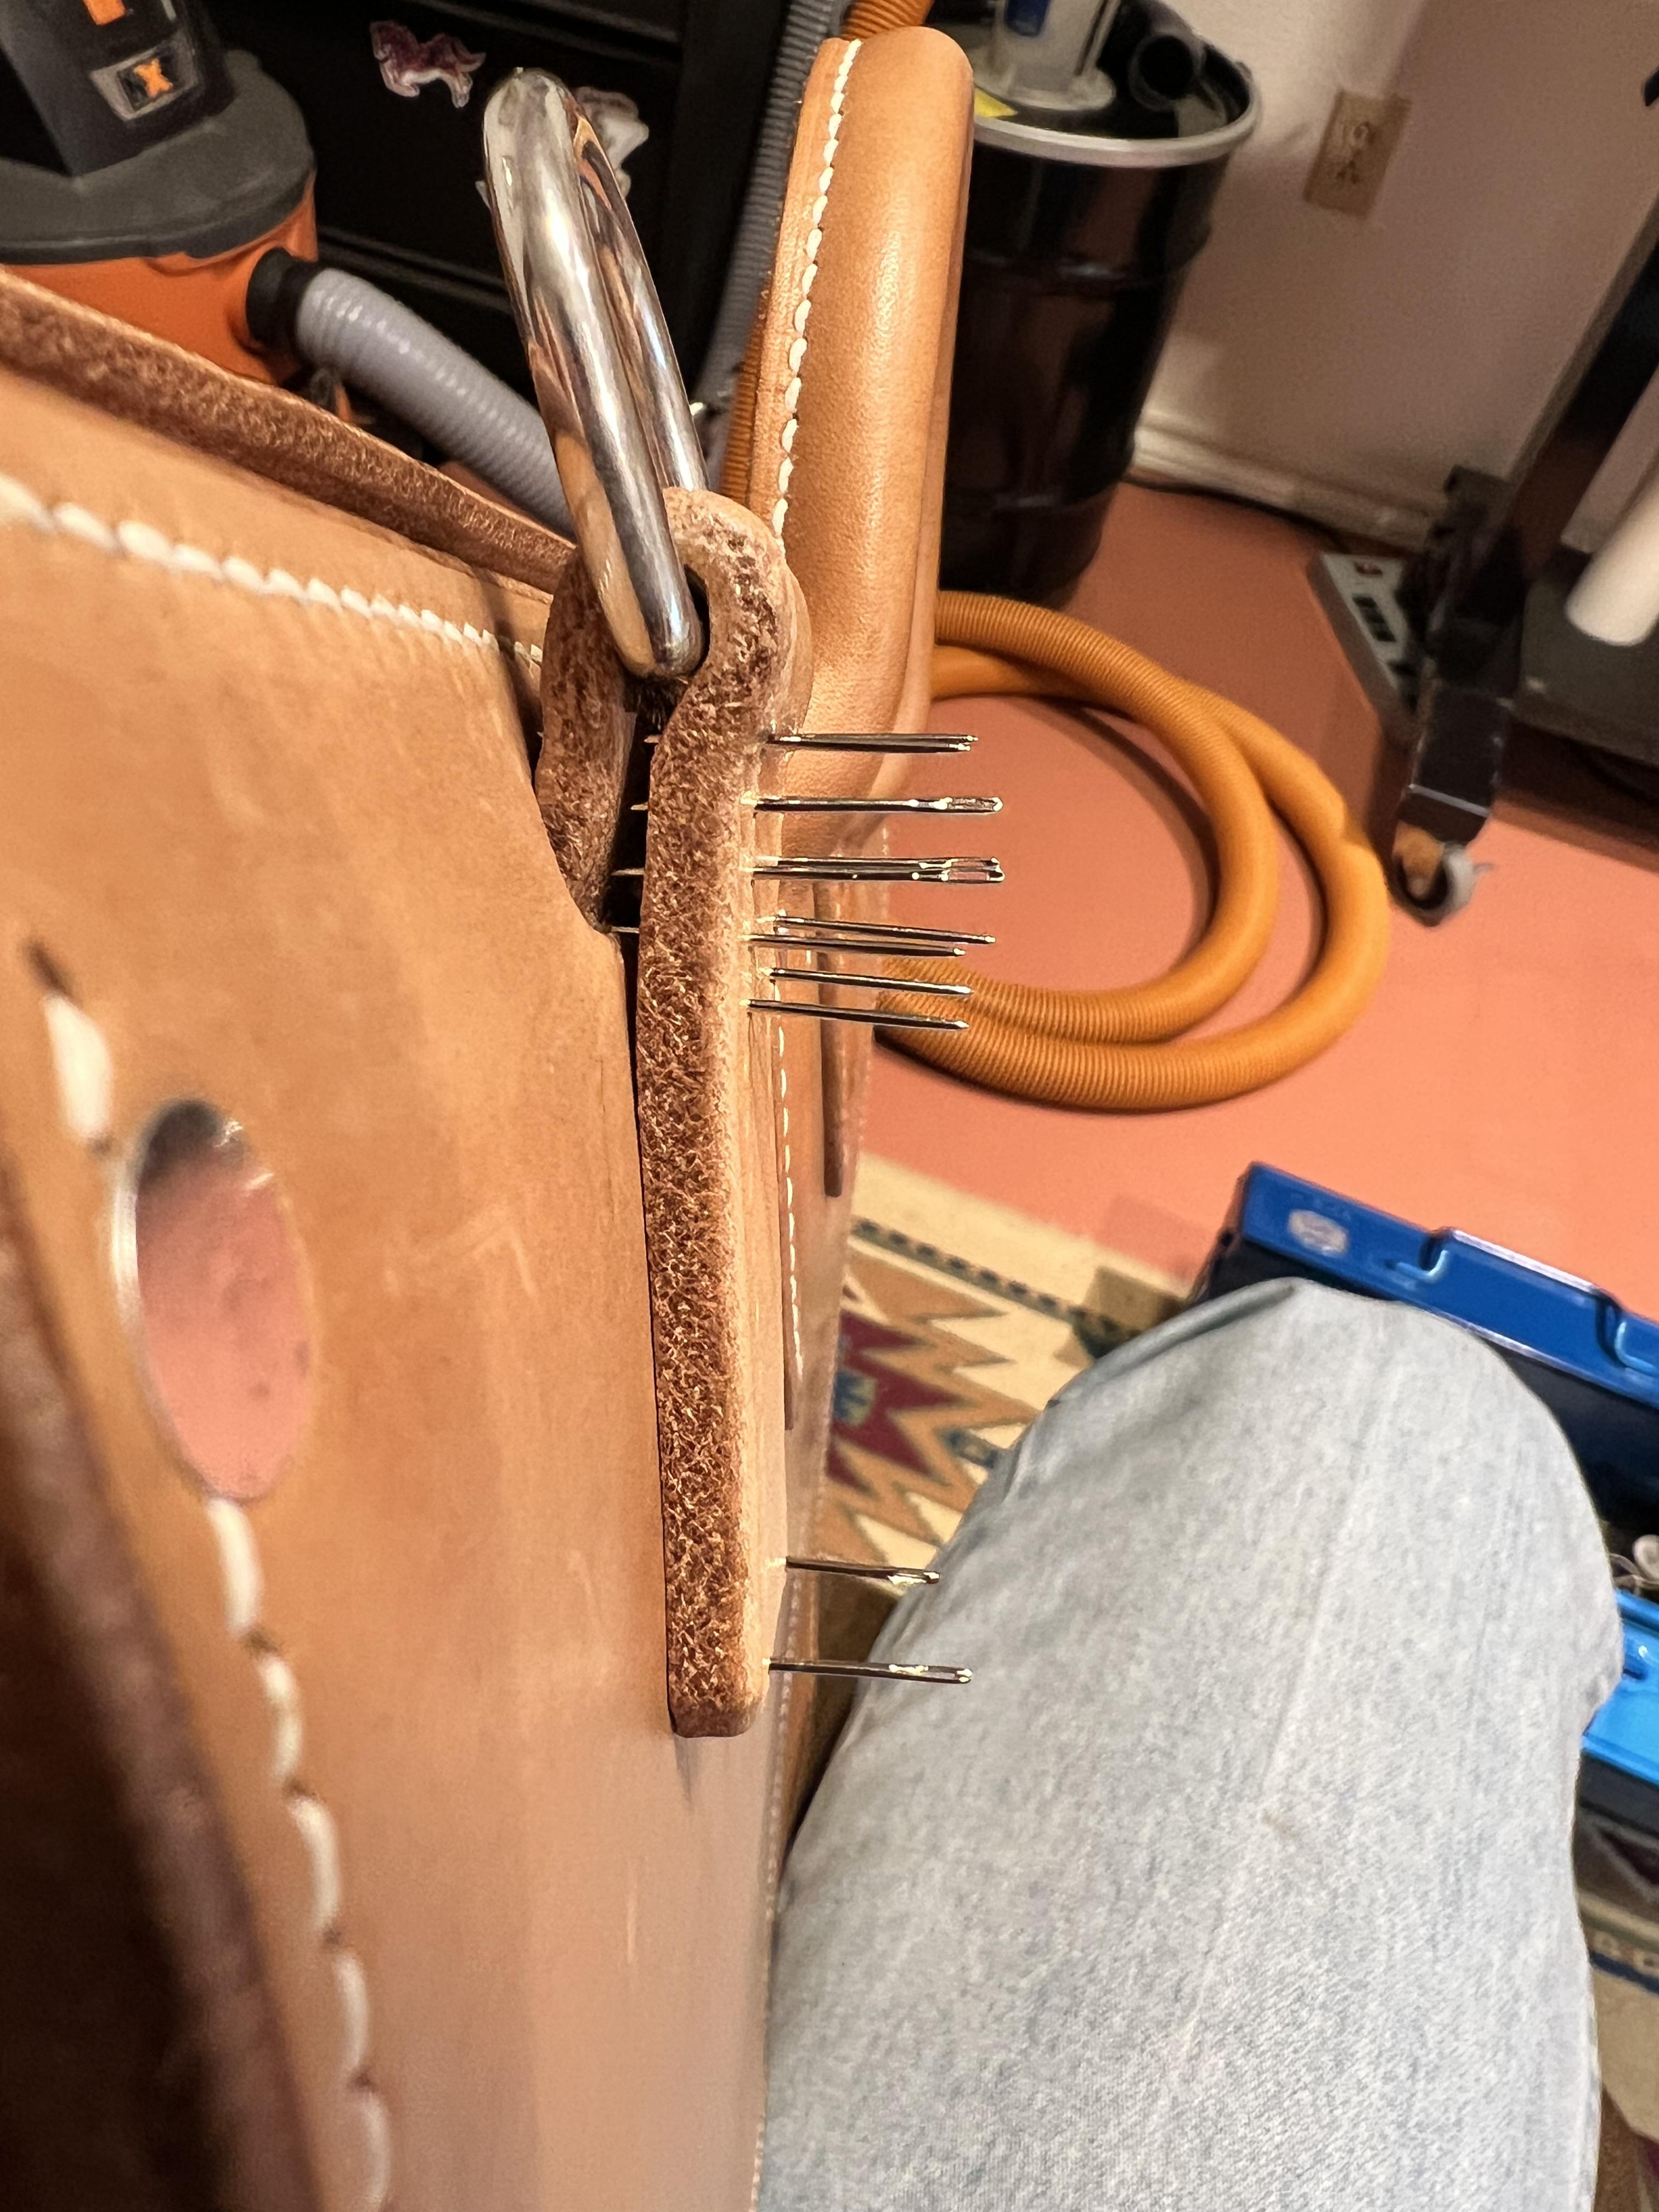
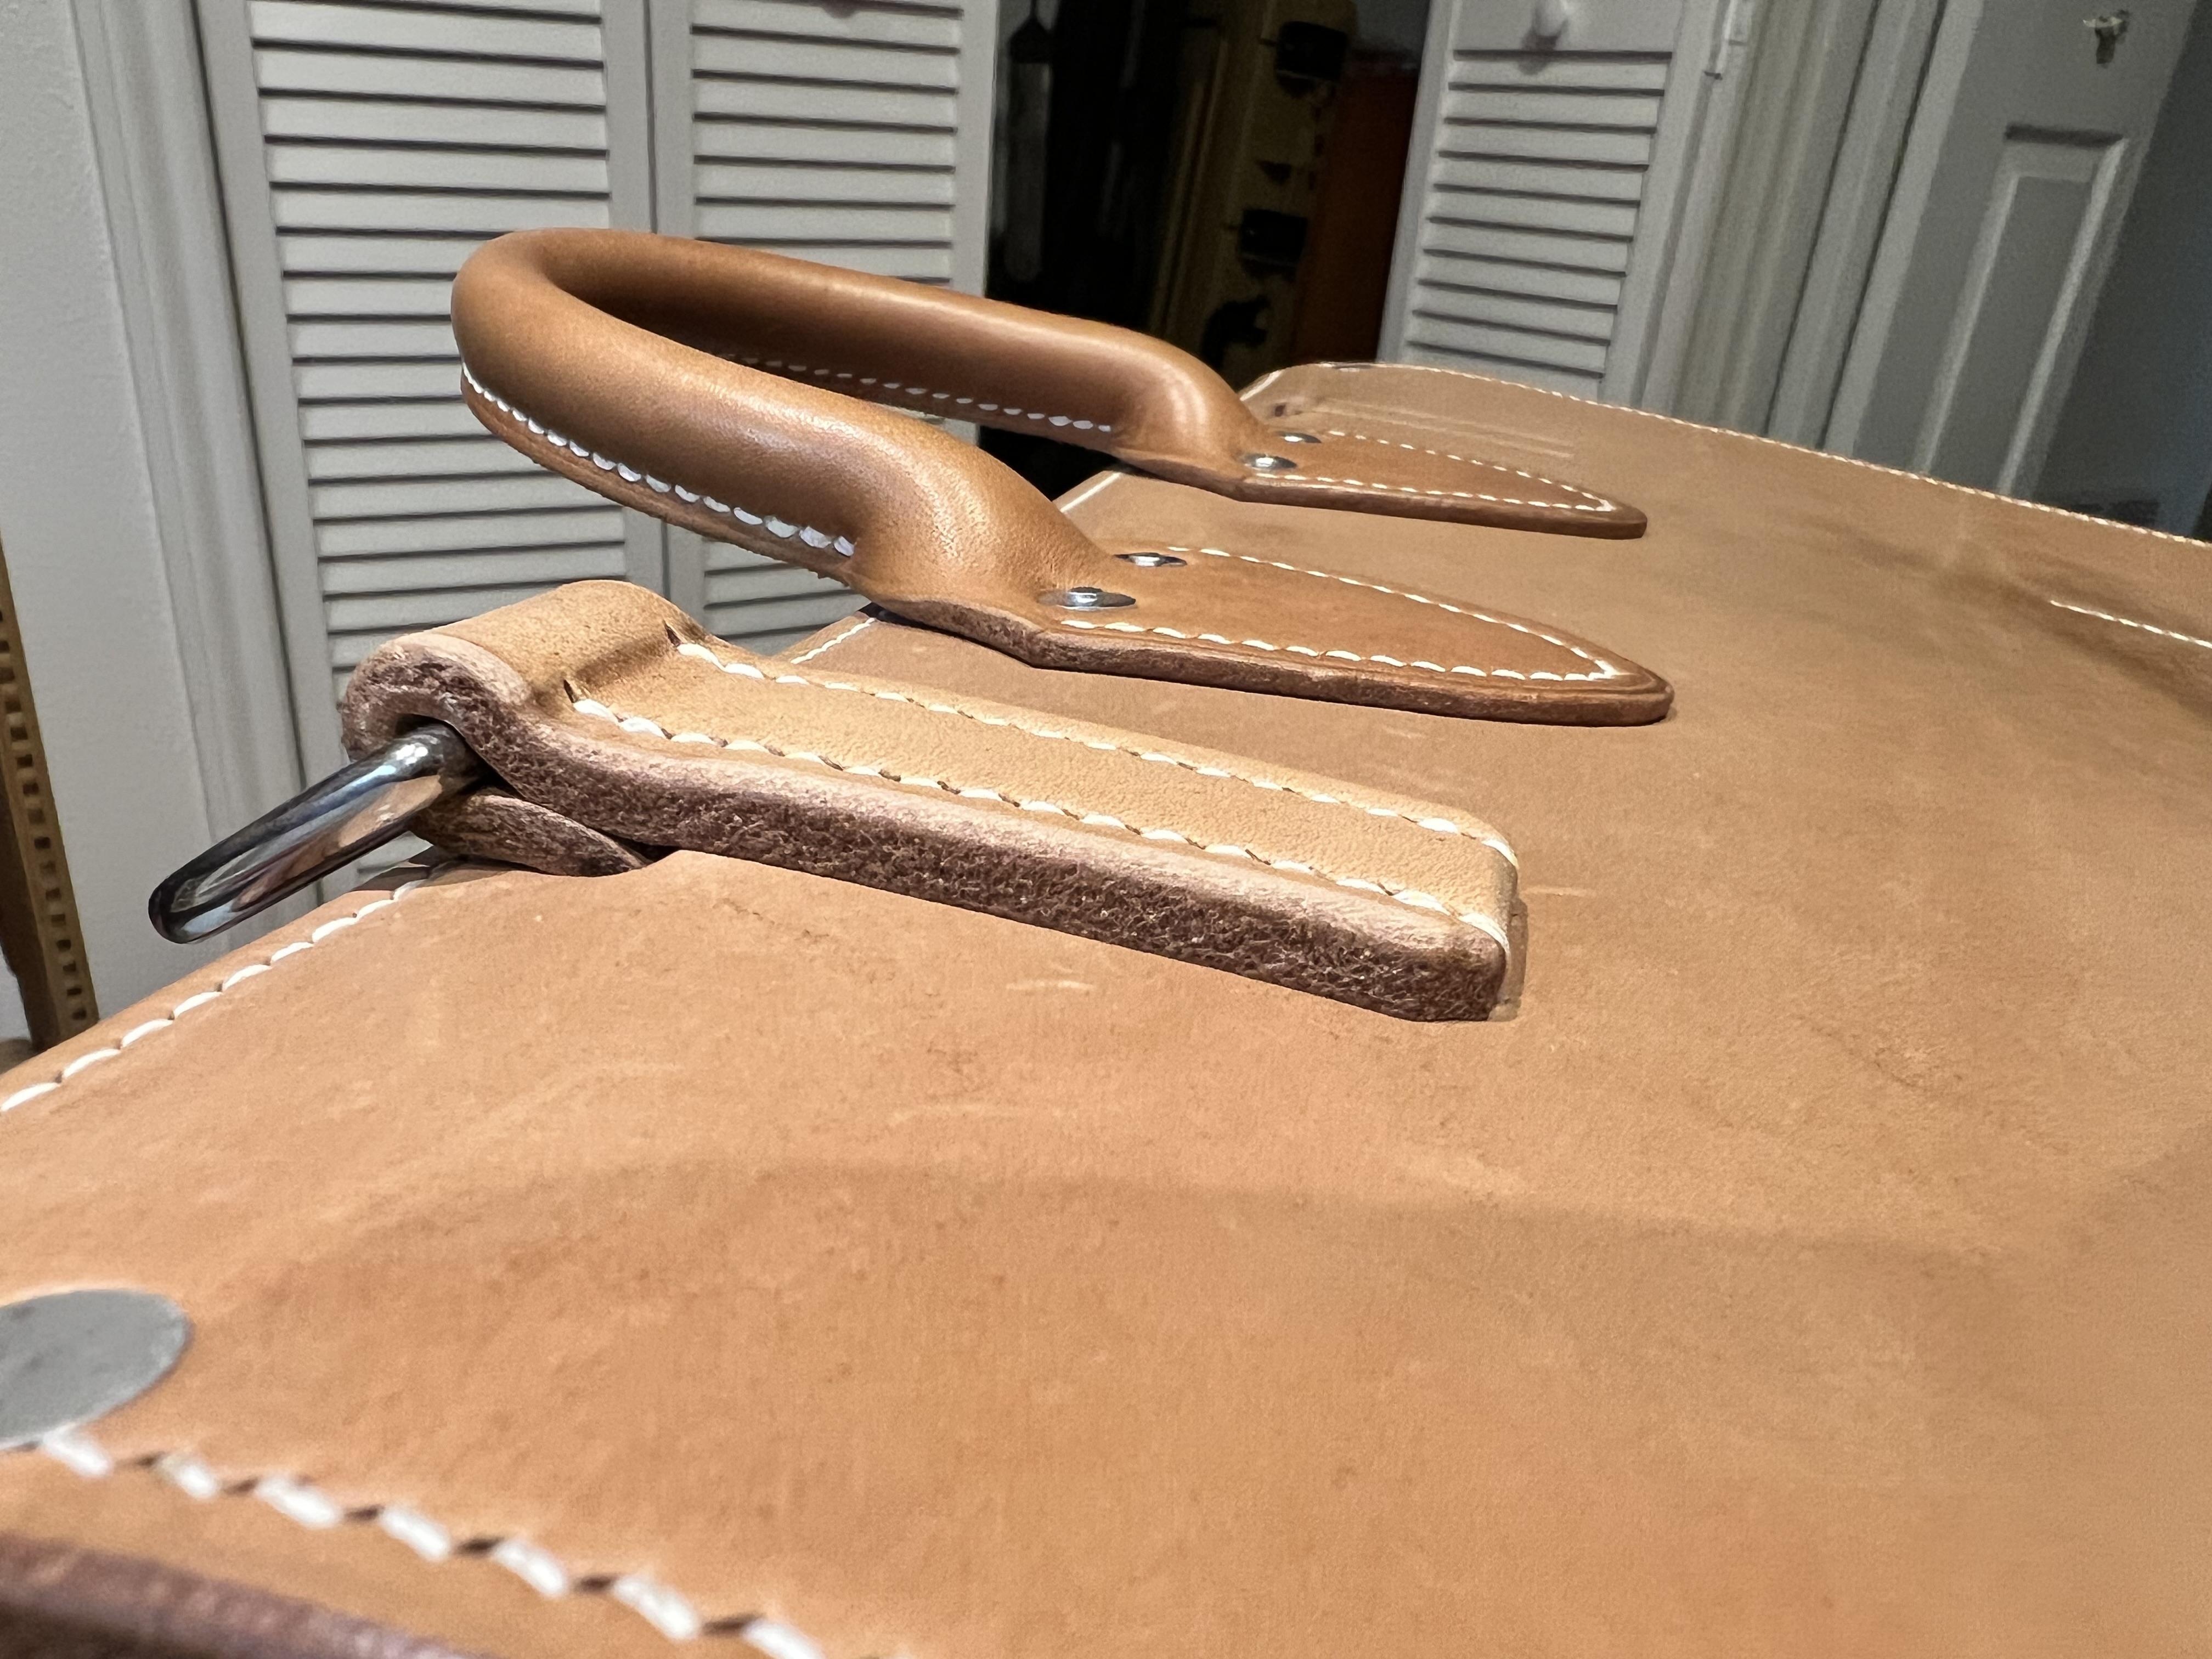
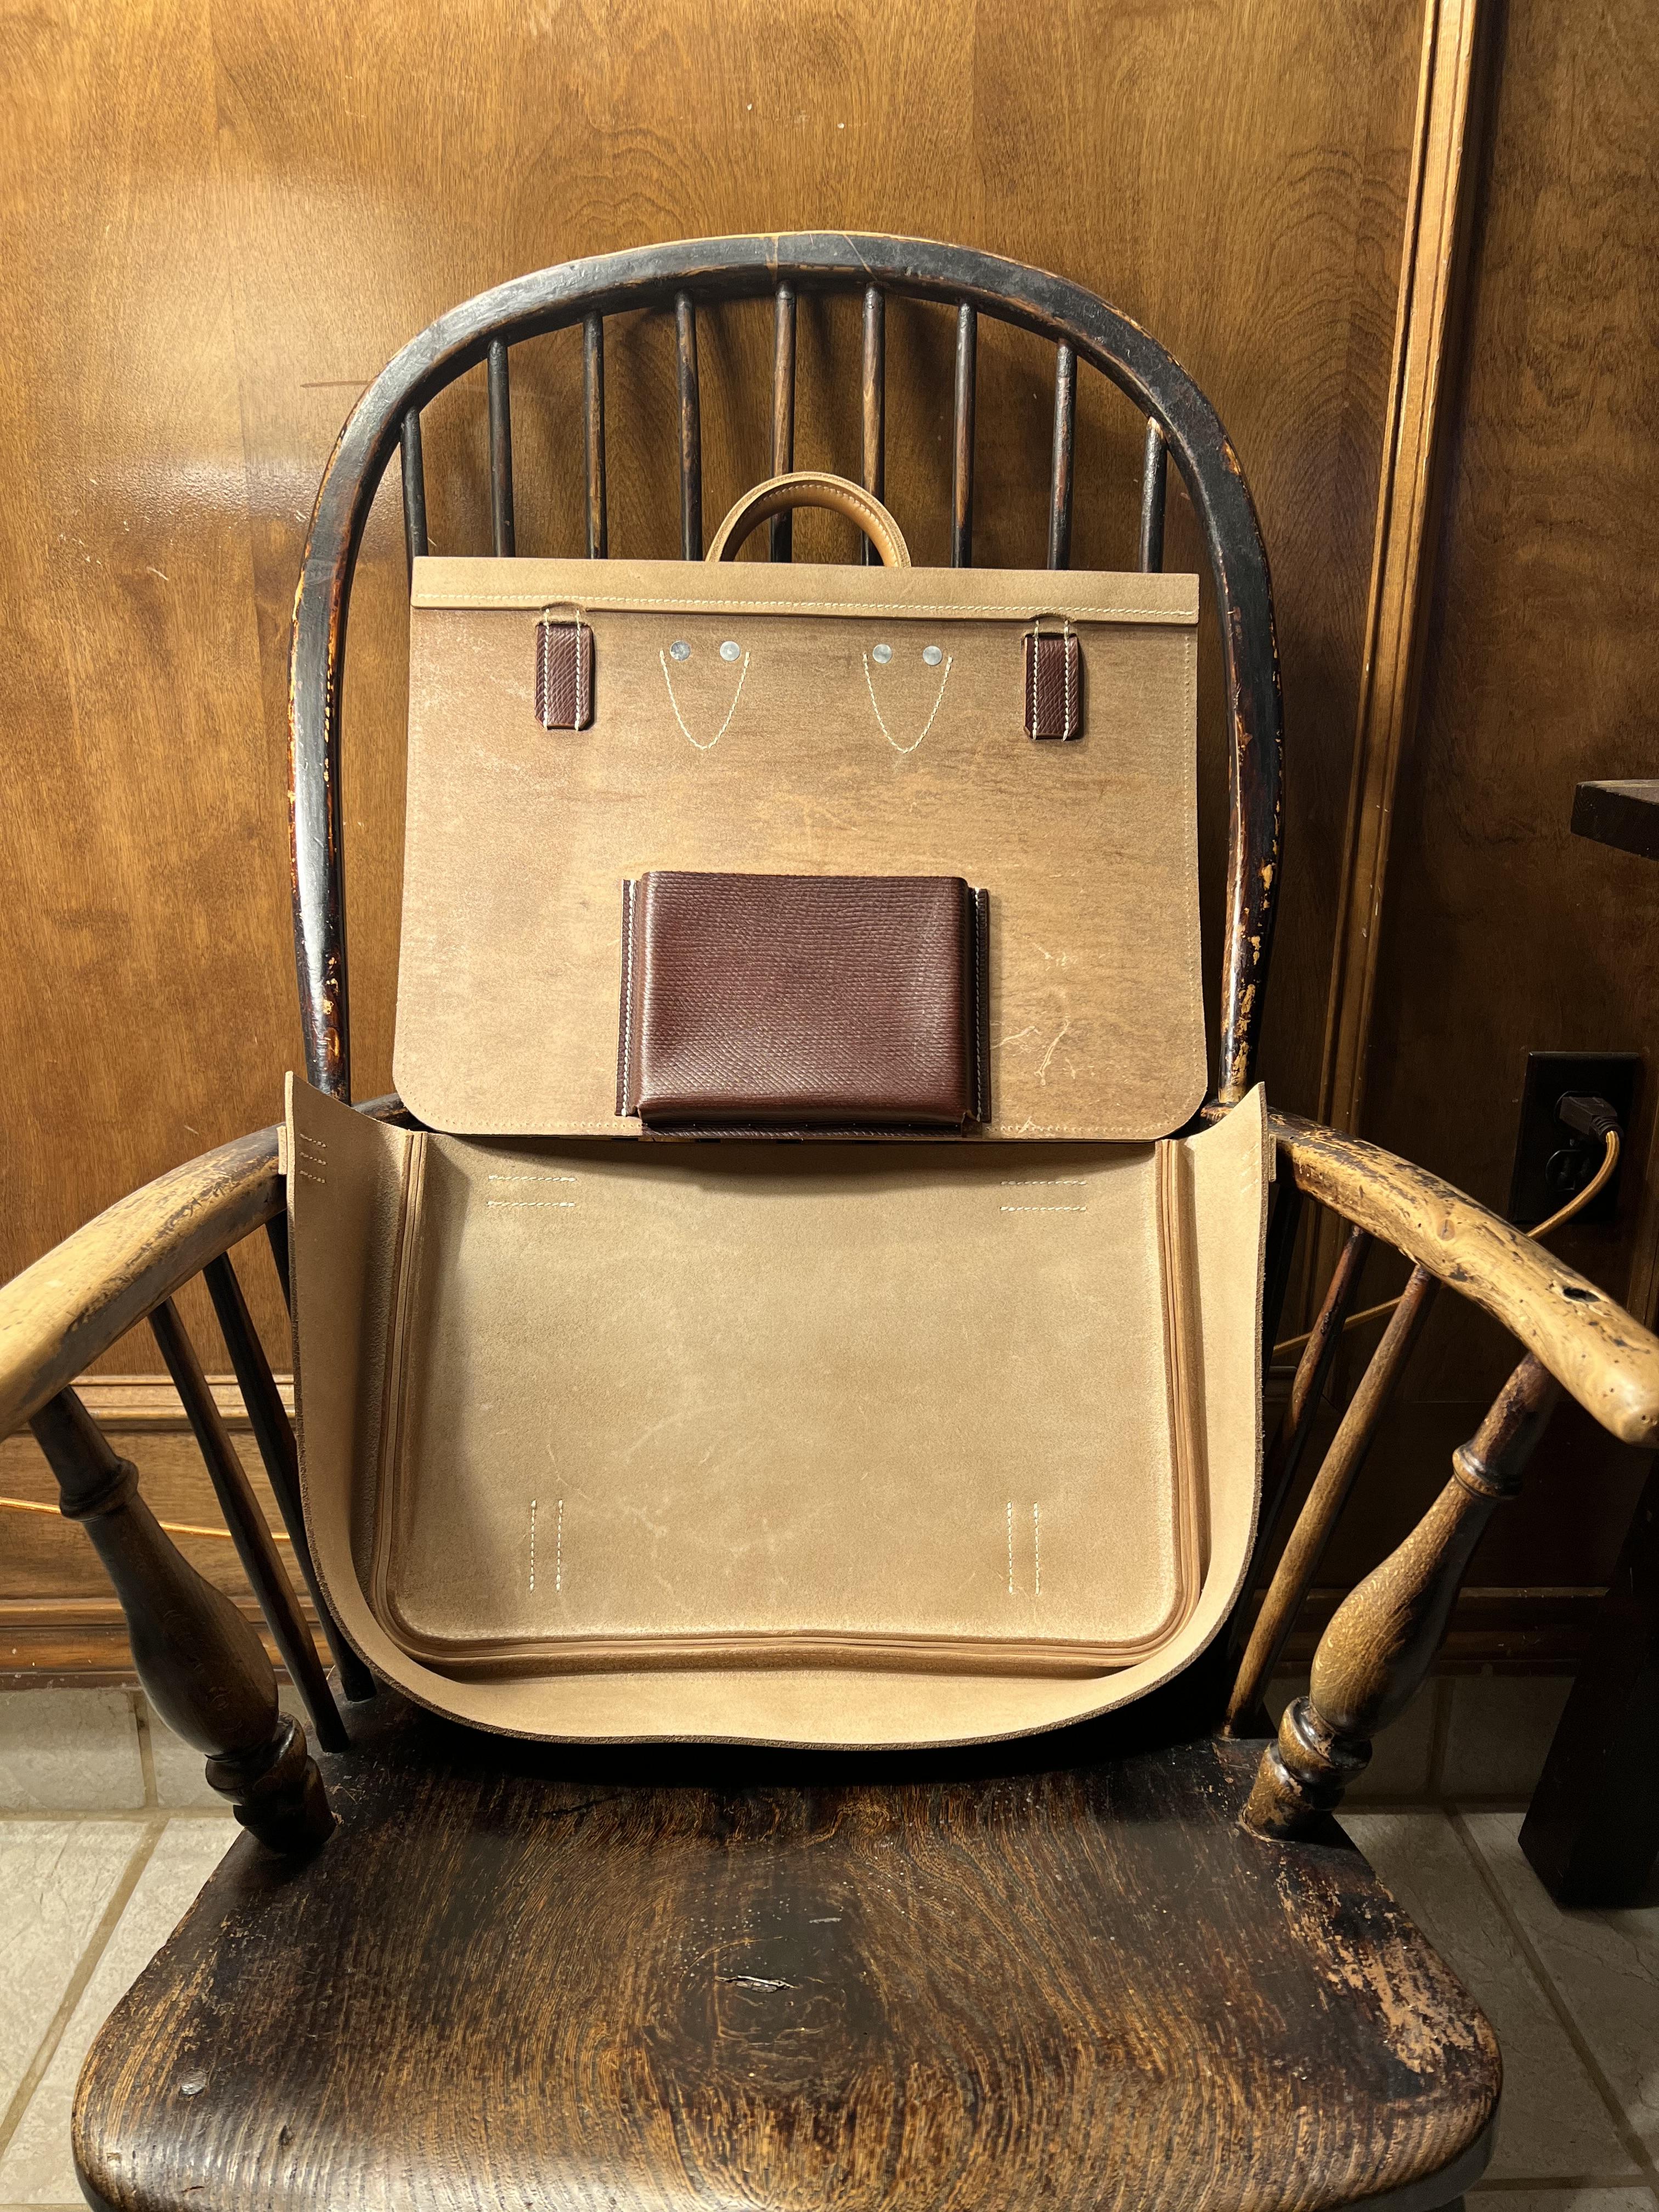
Hi everyone, I recently completed a saddle pack of Swiss design origin. The horizontal type that just so happens to make a fantastic satchel/briefcase. I’ve been battle testing it in the world for four months and it’s been fantastic. I’ve only made one change to the strap area with the d-rings; changing out the thinner Russian calf for a piece of thick bridle (shown in the pictures with the needles for alignment). I stuck with the traditional materials; bridle, harness, and even a bit of Russian calf here and there. Let’s just say that having to get a working pattern took a lot of time and work. Building it took many, many hours. There are parts of the bag that are just shy of 1” thick, and required high degree of accuracy and precision. All of it is saddle stitched, 3.85mm spacing and some occasional 2.7mm spacing on smaller bits, linen thread, stainless hardware, and original Swiss aluminum studs. Does there happen to even be a market for saddle packs and the likes? I’ve yet to find anyone willing to tote a bag with 15oz harness and a shell made of 8oz bridle!


-
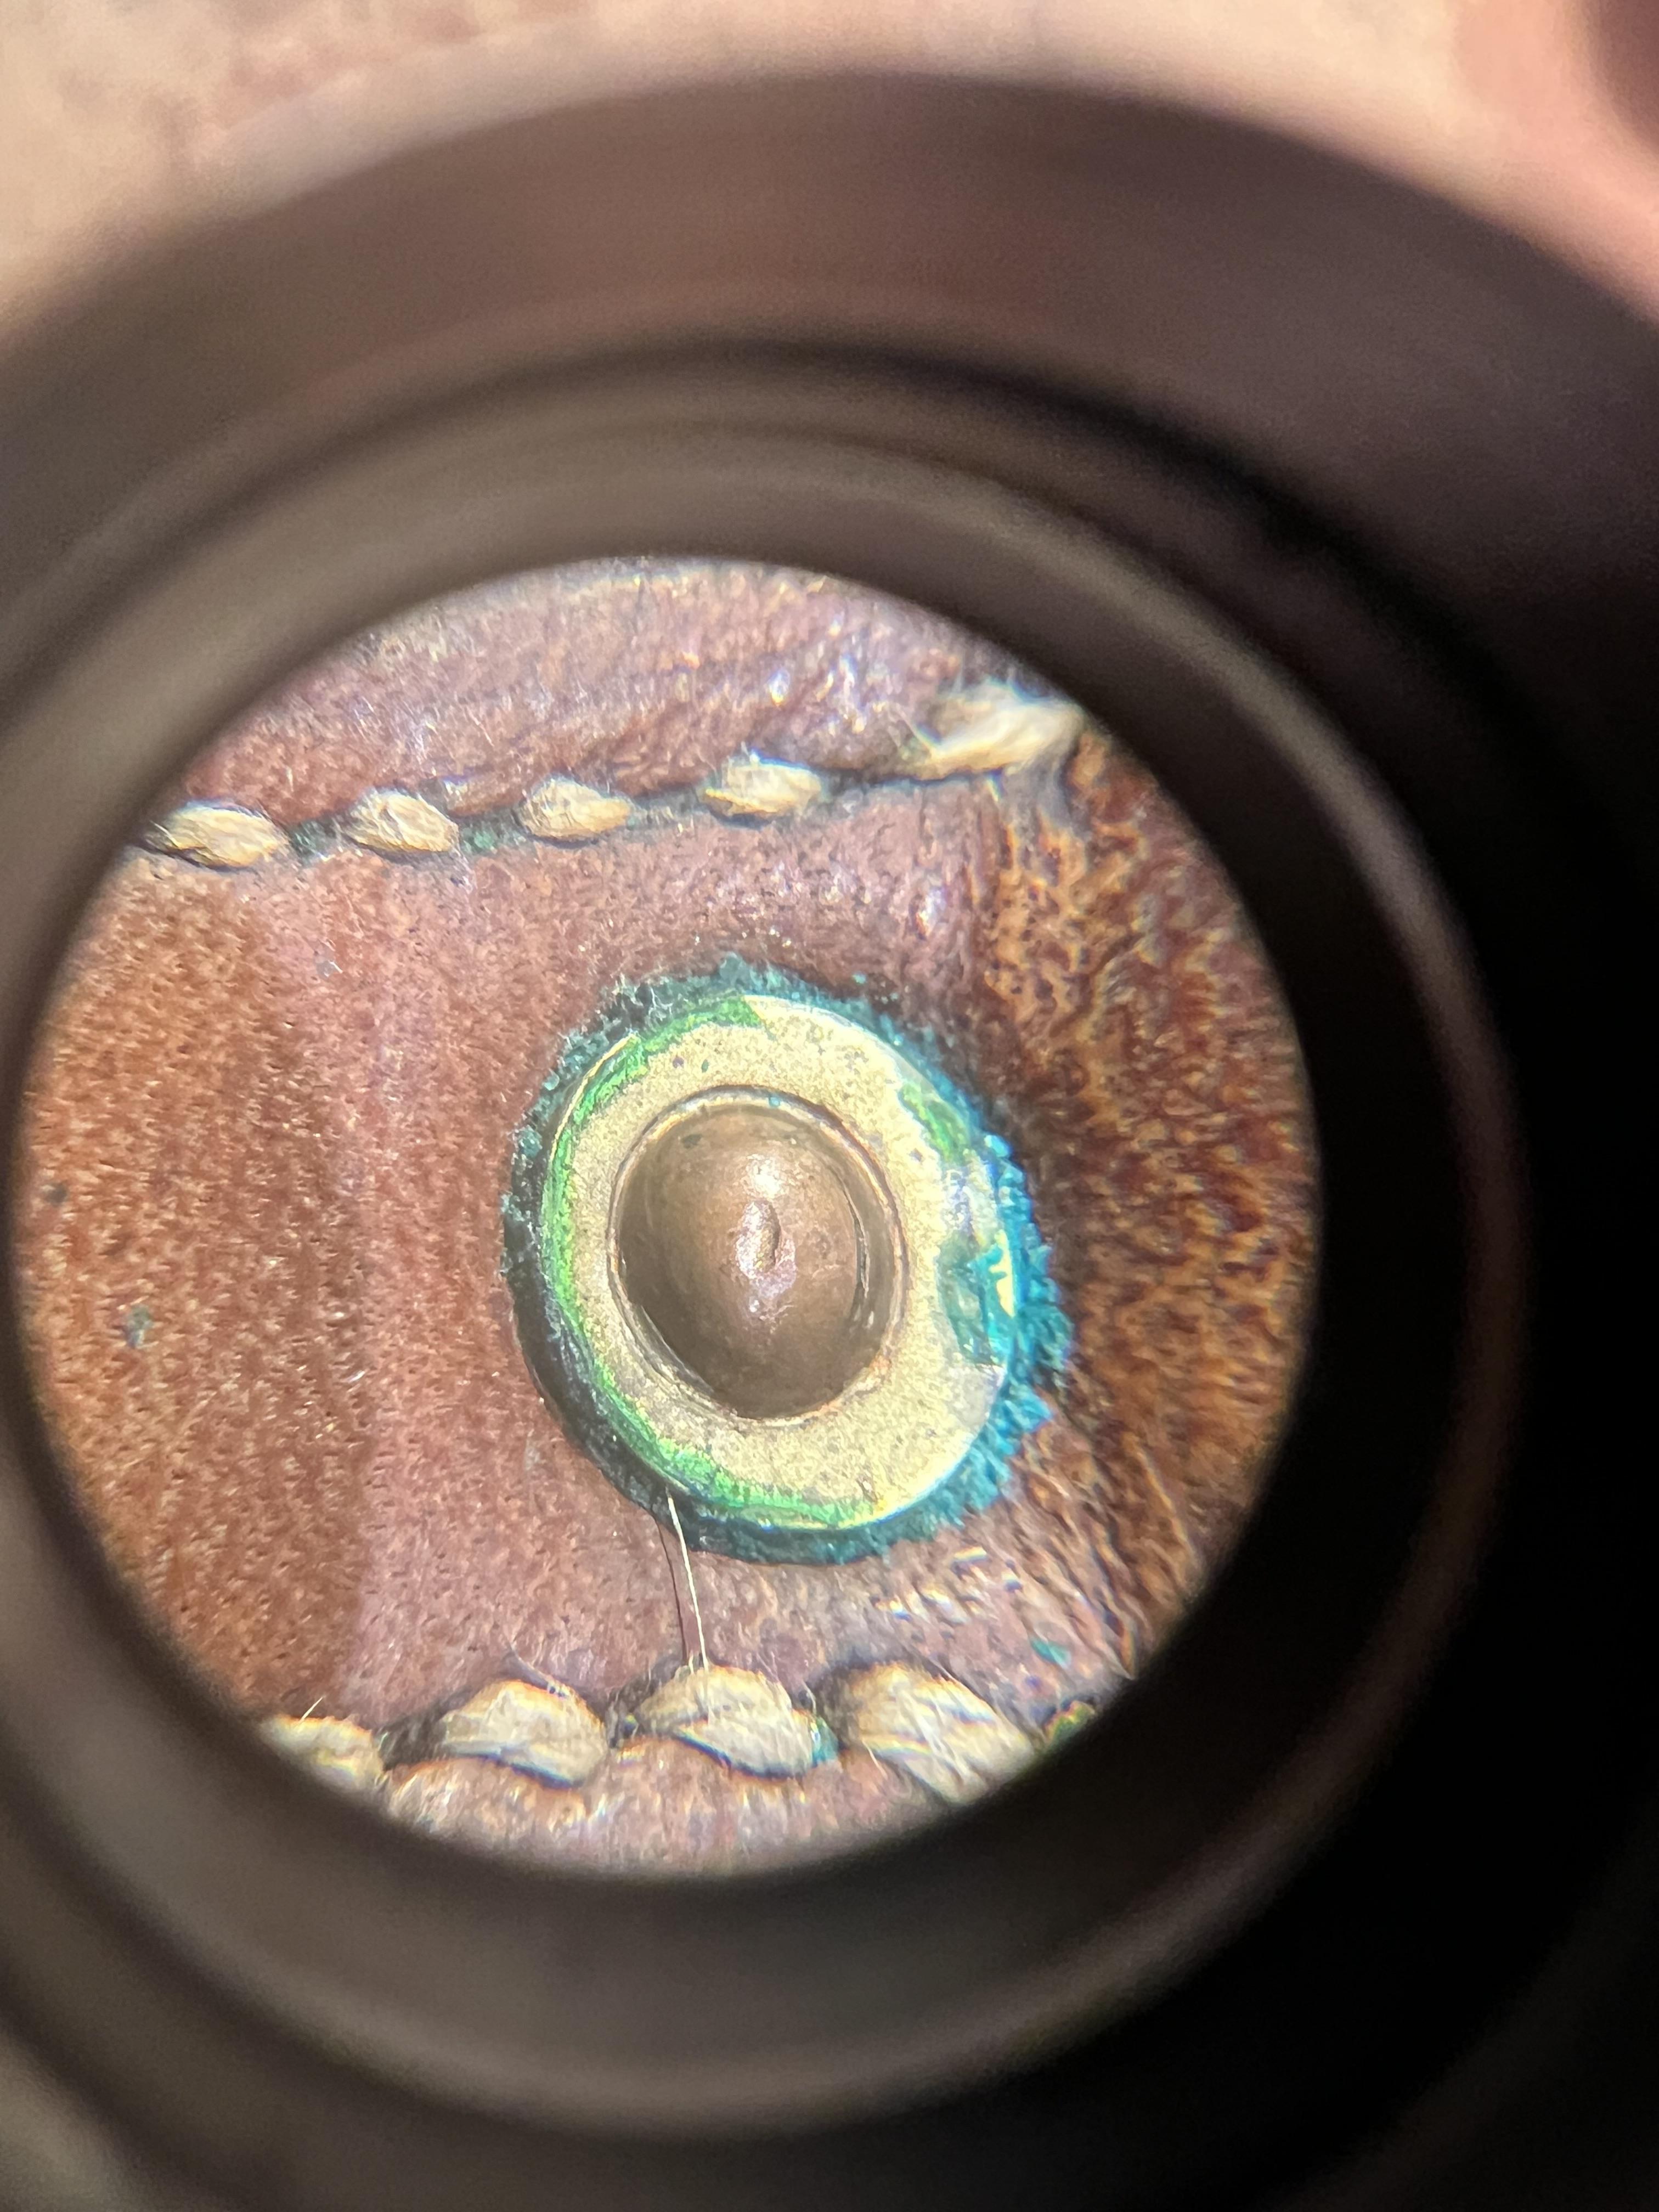
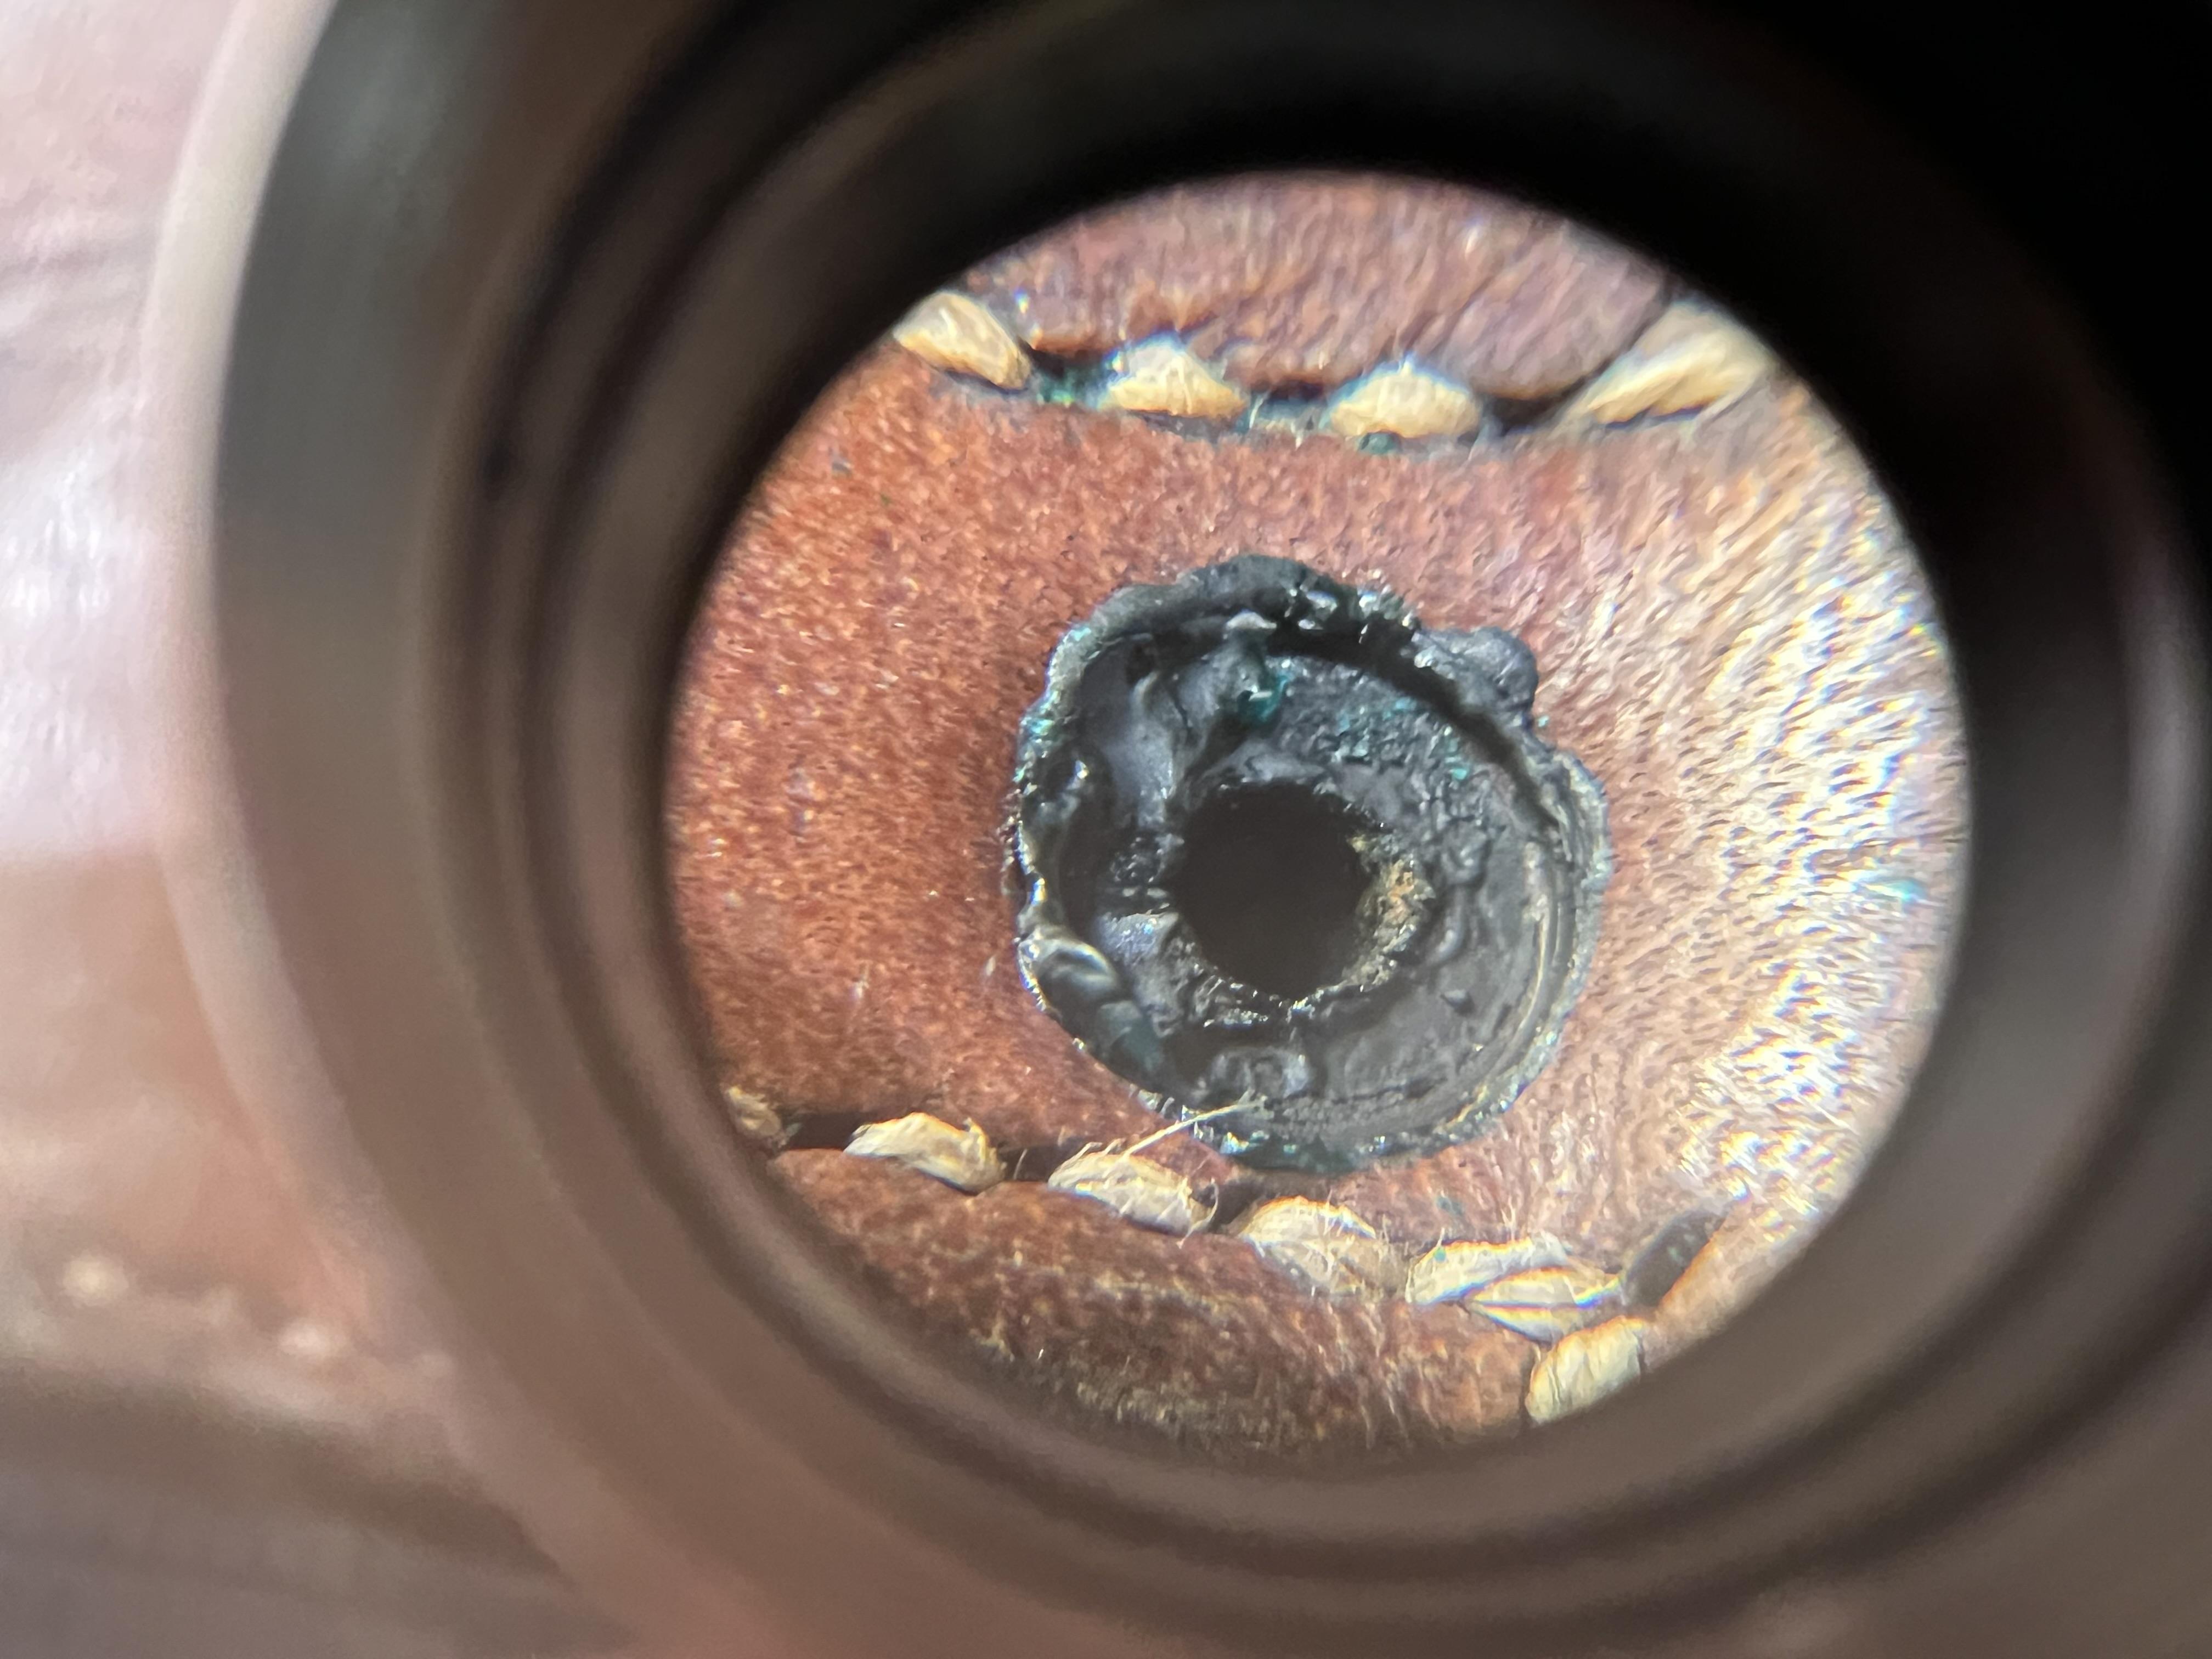
Hello everyone. I’m a bit late to this conversation, but wanted to give some insight on alum rivets. Ive used the Tandy “decorative” rivets with great success. They are annealed and have no temper which is good when swaging them. I’ve used them in restoration of many Swiss saddle packs, as they all originally came with alum rivets and often buckles, etc. Speaking of Swiss gear, take a look at Swiss army leathers such as saddle packs and ammo pouches. They all used aluminum rivets and studs. The oldest one I’ve restored was from 1917, and the aluminum rivets or studs were the last concern of mine. Zero corrosion, no breakage. They hold up remarkably well, and the packs from this time are all fairly hard used. Since the Tandy alum rivets are annealed, this puts them in the 1100 category of aluminum with no alloying agents. This is good because it reduces the amount of corrosion potential. If they were say 7075 series aluminum, you would have a greater corrosion risk. And mixing metal parts will give you mixed results depending on how dissimilar they are (steel vs aluminum for example). When it comes to brass, followed by copper, verdigris will be an issue especially if the item isn’t used for some time, and an electrolyte (water) is present in the air in high amounts. The verdigris is a reaction with the tannins against the metal, and aluminum does not react to the tannins. The only staining you will have is greying from the aluminum essentially being polished from abrasion by the leather. I hope this is helpful! I’ve been in aviation for over a decade, working with aluminum extensively. I’ve also attached two example pictures of aluminum fasteners from Tandy, along with a verdigris issue on a pack I’m restoring currently.