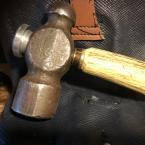
CFM Frodo Posted February 14, 2023 CFM Report Posted February 14, 2023 Double holster cowboy rig it has a few flaws but all in all I like it double 9oz belt that is 4” wide and 48” long fits a 42” waist holsters, only one shown. Are doubled 6oz Quote Singer 66, Chi Chi Patcher, Rex 26-188, singer 29k62 , 2-needles D.C.F.M
CFM Frodo Posted February 14, 2023 Author CFM Report Posted February 14, 2023 Darn no edit the black border bled over the line in a few spots. If anyone has tips on how to stop the black from wicking to where it wants to be. Please , I am all ears Quote Singer 66, Chi Chi Patcher, Rex 26-188, singer 29k62 , 2-needles D.C.F.M
Members Brokenolmarine Posted February 14, 2023 Members Report Posted February 14, 2023 (edited) When I put a black border on things, I cut a line with my swivel knife and then a nice sharp bevel. This leaves a defined edge for the dye. I apply the dye with a detail paint brush and paint it to the edge. I might have to make two or three passes, allowing the dye to dry completely prior to making the next pass, before getting to the "Black" that I want, but it prevents the bleeding you've seen. Or it has for me. so far. You can skip the bevel if it would be obvious, but the cut line will make a huge difference. It can be very fine. Edited February 14, 2023 by Brokenolmarine Quote
CFM Frodo Posted February 14, 2023 Author CFM Report Posted February 14, 2023 Thanks, I will run that next time Quote Singer 66, Chi Chi Patcher, Rex 26-188, singer 29k62 , 2-needles D.C.F.M
CFM chuck123wapati Posted February 14, 2023 CFM Report Posted February 14, 2023 that's a nice heavy duty rig for sure!!!! it looks awesome Quote Worked in a prison for 30 years if I aint shiny every time I comment its no big deal, I just don't wave pompoms. “I won’t be wronged, I won’t be insulted, and I won’t be laid a hand on. I don’t do these things to other people, and I require the same from them.” THE DUKE!
Doc Reaper Posted February 14, 2023 Report Posted February 14, 2023 15 hours ago, Brokenolmarine said: When I put a black border on things, I cut a line with my swivel knife and then a nice sharp bevel. This leaves a defined edge for the dye. I apply the dye with a detail paint brush and paint it to the edge. I might have to make two or three passes, allowing the dye to dry completely prior to making the next pass, before getting to the "Black" that I want, but it prevents the bleeding you've seen. Or it has for me. so far. You can skip the bevel if it would be obvious, but the cut line will make a huge difference. It can be very fine. Hey jarhead, maybe you should give us a couple of pics to clear up the fog Quote Doc Reaper
Members Brokenolmarine Posted February 14, 2023 Members Report Posted February 14, 2023 (edited) The dye in this pic is Dark Brown, but you'll note that at the bottom I don't have the edge properly defined and the dark brown bled as noted in the OPs initial post. The edge on the sides here were sharply defined by the cut and the bevel. I painted the dye up to the edge with a fine artist's brush, then up to the leaves the same way. Nice defined break in the colors. After first pass the dark brown was blotched and uneven, because I didn't try and overload the color forcing it to bleed. After the second pass it darkened it up nicely. This was just a practice panel for MY sling, but I try to do each practice piece as realistically as I can, and even when I make errors, or fail with colors I still try to complete them if possible, as there are still lessons to be learned. In this panel, I corrected errors I made, and took it to the end. Turned out fairly nice, and I was able to decide my design plan for the sling would work. For the edges on the practice panel I used black. I used three coats of dye, taking the black to the edges where the cut kept the black from bleeding. I was careful with the artist's fine brush to go TO the edge but no further. The first coat I took my time and defined the border and didn't worry about a dark black for the rest of the natural leather just got the first pass of black dye on the leather. The second and third coats I made sure I didn't dye the leaves that lay over the edge and didn't slip into the brown background. Three coats did it.. I hope this helps. I am still learning myself, but I use every trick I can come up with to help me make my work look better. I am always open to suggestions. Edited February 14, 2023 by Brokenolmarine Quote
Members Wild Bill46 Posted February 28, 2023 Members Report Posted February 28, 2023 Frodo: I got one coming up as well. Hope it turns out as good as yours did, (even if I did have a bit of bleed) Now since reading the suggestion from Brokenolmarine, I'll try to remember that tip, Thanx; Brokenolmarine but yours still came out really nice. Quote


Recommended Posts
Join the conversation
You can post now and register later. If you have an account, sign in now to post with your account.
Note: Your post will require moderator approval before it will be visible.