Members Josh Ashman Posted April 12, 2013 Members Report Posted April 12, 2013 I've finally finished this outfit and I'm pretty happy with the results. I have my officers model 1911 in it for the pics but it's for a full frame. I'll deliver it today so we'll see what the guy thinks. Thanks for looking and have a great weekend! Josh Quote
Members Eaglestroker Posted April 12, 2013 Members Report Posted April 12, 2013 Josh, I'd say you knocked that one out of the park. Good job! Quote
Members particle Posted April 12, 2013 Members Report Posted April 12, 2013 Holy mackerel!, that's a great looking rig!! Quote
Members mattsh Posted April 12, 2013 Members Report Posted April 12, 2013 Beautiful as always. Great job! Quote
Members Josh Ashman Posted April 12, 2013 Author Members Report Posted April 12, 2013 Thanks guys, I really appreciate the kind words especially considering the talent you all have. Best regards, Josh Quote
Members camano ridge Posted April 12, 2013 Members Report Posted April 12, 2013 Josh that's pretty much a 10 on my DROOL-O-METER Quote
Members Dwight Posted April 12, 2013 Members Report Posted April 12, 2013 Pancho and the US Army together didn't have a rig that good looking. May God bless, Dwight Quote
Members Matt Alsaker Posted April 12, 2013 Members Report Posted April 12, 2013 That rig is very cool Josh. Nicely done. Quote
Members Treed Posted April 13, 2013 Members Report Posted April 13, 2013 Home Run with this one Quote
Frank Posted April 14, 2013 Report Posted April 14, 2013 Outstanding Josh. One of the nicest 1911 rigs I've seen in a while. Quote
Members Josh Ashman Posted April 15, 2013 Author Members Report Posted April 15, 2013 Thanks everybody! Best regards, Josh Quote
Ambassador Luke Hatley Posted April 15, 2013 Ambassador Report Posted April 15, 2013 A very Fine looking -B Q Rig..... Quote
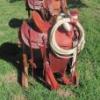
Members St8LineGunsmith Posted April 15, 2013 Members Report Posted April 15, 2013 I love the the integration of the basket weave with the floral design I would like to find that border stamp. Quote
Members Josh Ashman Posted April 15, 2013 Author Members Report Posted April 15, 2013 Thanks again guys, I'm very happy with how it turned out too. My mag pouch design needs improvement because they are a bear to sew together the way I made these but other than that I feel good about it. St8Line, that is Craftool D445. I'm sure there are better stamp makers that have the same basic stamp but I've been happy enough with the Craftool one. Best regards, Josh Quote
Members Treed Posted April 16, 2013 Members Report Posted April 16, 2013 Josh I have to make up some more mag pouches for field use in the next couple of days..... I will take some pictures as the ones I make are heaver but are really easy to make for this type of rig and will post them. Quote
Members Josh Ashman Posted April 16, 2013 Author Members Report Posted April 16, 2013 Thanks so much Bobby, I appreciate that! Quote
Members Treed Posted April 18, 2013 Members Report Posted April 18, 2013 lets see if I can get this to come out the way I intend. This type of pouch is pretty heavy for concealment use. I is great for external ware on hunting belts, wild bunch rigs or BBQ rigs. Tooling or decorative touches can be made to mach holsters and belts. 1st photo is the back pattern I use, the second pattern is just half of the first for the front..... The next photo I cut the leather for both sections.... I now figured out the center of the back and front along with the fold over and how high I want the magazines to set.... I then sew the center line of the pouches.... I thoroughly soak the leather in water until the bubbles stop and place the magazines in position.... I then place the leather and magazines into the jig I have made. The jig is fiber board, one piece is flat for the back half and one cut in U shape to form the front of the pouches. They are clamped in to form the leather and dry it.... After drying the leather and magazines are removed, glue is placed on the outside edges and dried...... I then take it to the machine and sew it up around the outside...... I then trim it up and burnish the edges...... I like to punch in the belt slot as if gives more rigidity to the sides of the pouches..... you can sew around the outside of the pouches, fold over and add a second row of stitches to the bottom making the whole back part of the belt slide.. just my way of doing it....fast and simple Quote
Members c2369zulu Posted May 1, 2013 Members Report Posted May 1, 2013 Great looking rig!!.............Rory Quote
Members EagleScout79 Posted May 5, 2013 Members Report Posted May 5, 2013 I love the blending of the Old West leather with the modern iron. Truly a work of art. Quote
Members Hillbilly tim Posted May 7, 2013 Members Report Posted May 7, 2013 I like the way you are making the mag pouches. Thx for the tut! Quote
Members Steve75 Posted May 9, 2013 Members Report Posted May 9, 2013 I've finally finished this outfit and I'm pretty happy with the results. I have my officers model 1911 in it for the pics but it's for a full frame. I'll deliver it today so we'll see what the guy thinks. Thanks for looking and have a great weekend! Josh Josh that is an awesome rig. Thank you for sharing it. lets see if I can get this to come out the way I intend. This type of pouch is pretty heavy for concealment use. I is great for external ware on hunting belts, wild bunch rigs or BBQ rigs. Tooling or decorative touches can be made to mach holsters and belts. 1st photo is the back pattern I use, the second pattern is just half of the first for the front..... The next photo I cut the leather for both sections.... I now figured out the center of the back and front along with the fold over and how high I want the magazines to set.... I then sew the center line of the pouches.... I thoroughly soak the leather in water until the bubbles stop and place the magazines in position.... I then place the leather and magazines into the jig I have made. The jig is fiber board, one piece is flat for the back half and one cut in U shape to form the front of the pouches. They are clamped in to form the leather and dry it.... After drying the leather and magazines are removed, glue is placed on the outside edges and dried...... I then take it to the machine and sew it up around the outside...... I then trim it up and burnish the edges...... I like to punch in the belt slot as if gives more rigidity to the sides of the pouches..... you can sew around the outside of the pouches, fold over and add a second row of stitches to the bottom making the whole back part of the belt slide.. just my way of doing it....fast and simple Treed, thanks for sharing your tutorial on how to make magazine pouches. Quote
Recommended Posts
Join the conversation
You can post now and register later. If you have an account, sign in now to post with your account.
Note: Your post will require moderator approval before it will be visible.