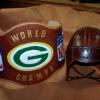
Members Bluesman Posted August 3, 2016 Members Report Posted August 3, 2016 Something I did a while back and never posted. this was a wedding gift. Quote If it ain't moving and should......WD40, If it's moving and shouldn't....Duct Tape. There you have it, now fix something
Members Ironcat4 Posted August 3, 2016 Members Report Posted August 3, 2016 Very nice detail. mike Quote
Members Tugadude Posted August 3, 2016 Members Report Posted August 3, 2016 Love everything about it. I'll bet it has a very pleased new owner. Curious how you did the innards. Quote
Members Bluesman Posted August 3, 2016 Author Members Report Posted August 3, 2016 Just now, Tugadude said: Love everything about it. I'll bet it has a very pleased new owner. Curious how you did the innards. Bought a cheap 3 ring binder, ripped out the guts and installed them with Chi Town screws in this. Quote If it ain't moving and should......WD40, If it's moving and shouldn't....Duct Tape. There you have it, now fix something
Members Tugadude Posted August 3, 2016 Members Report Posted August 3, 2016 Thanks, that is my plan too. Now to find the time..... nice work! Quote
Members OneCrow Posted August 3, 2016 Members Report Posted August 3, 2016 Wow! Great job! Did you use any materials in the covers to stiffen the leather or is the leather thickness sufficient? Quote
Members Sporty1 Posted August 3, 2016 Members Report Posted August 3, 2016 Very nice work! Looks great. Quote
Contributing Member Bob Blea Posted August 3, 2016 Contributing Member Report Posted August 3, 2016 Looks very nice inside and out. You've got that basket stamp running perfectly straight! Bob Quote There are always possibilities.... Bob Blea C and B Leathercrafts Fort Collins, CO Visit my shop at http://www.etsy.com/shop/CandBLeather?ref=si_shop Instagram @bobbleacandbleather
Members Bluesman Posted August 3, 2016 Author Members Report Posted August 3, 2016 Thanks all. I used 7/8 for the top, stiffener from Tandy and then 2/3 piggy on the inside. That basket stamp made my arm numb. Quote If it ain't moving and should......WD40, If it's moving and shouldn't....Duct Tape. There you have it, now fix something
Members Big Sioux Saddlery Posted August 3, 2016 Members Report Posted August 3, 2016 Very VERY nicely executed basket stamp. Good job! Quote


Recommended Posts
Join the conversation
You can post now and register later. If you have an account, sign in now to post with your account.
Note: Your post will require moderator approval before it will be visible.