

Jinglin
-
Posts
36 -
Joined
-
Last visited
3 Followers


Recent Profile Visitors
2,997 profile views


Jinglin's Achievements
Member (2/4)
-
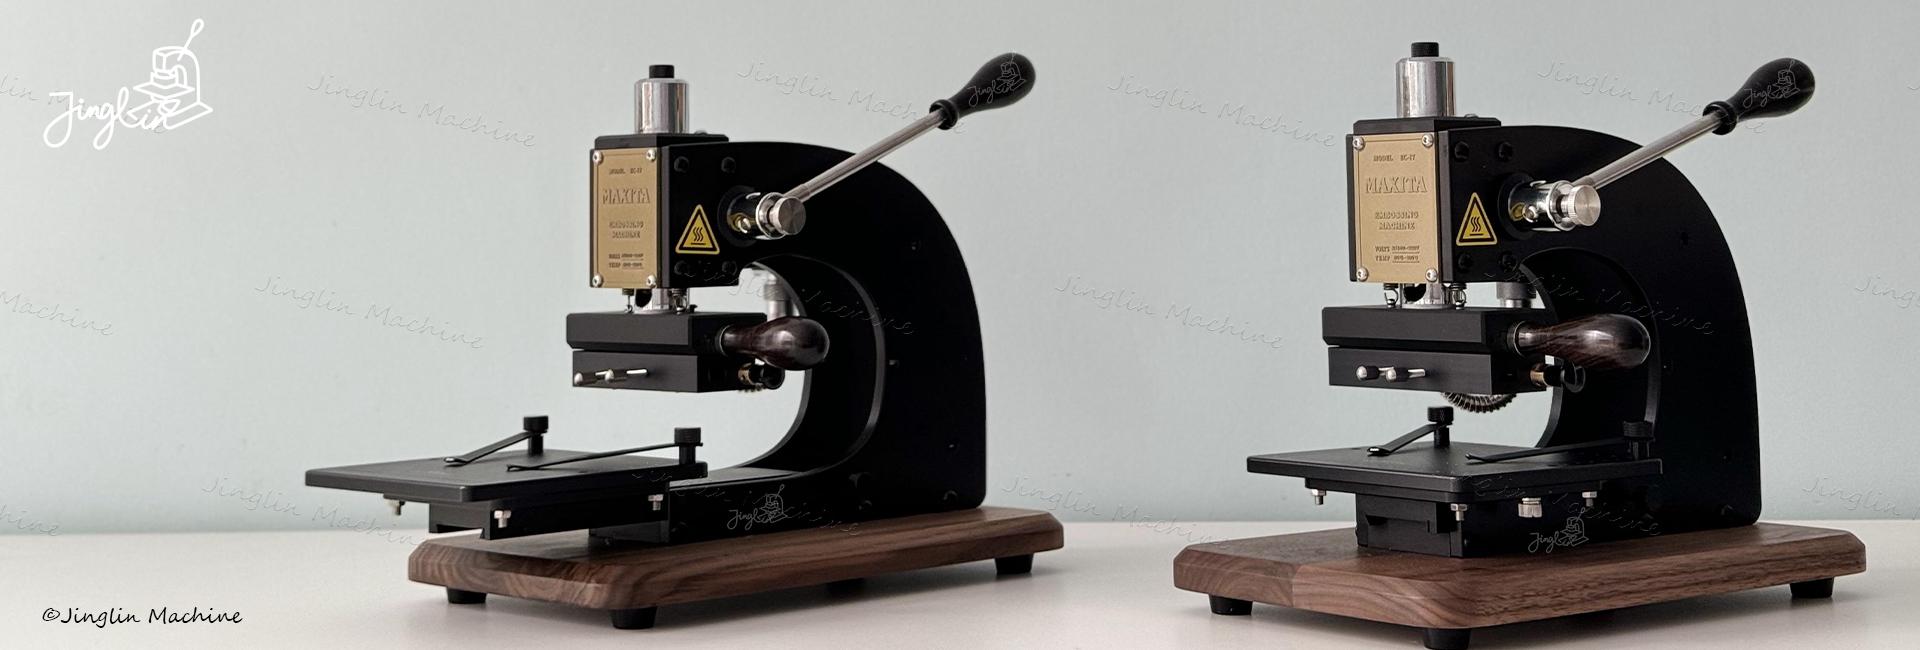
 Beyond the Finishing Touch: The Production Logic of Hot Foil Stamping In the world of professional leatherwork, hot foil stamping is often dismissed as a mere "finishing touch." In a high-functioning workshop, however, the reality is entirely different. For the pros, stamping isn’t just decoration—it’s production logic. It’s about achieving absolute control and repeatability, allowing for high-end personalization without the logistical nightmare of bespoke one-offs. This is where the true value of a machine like the Maxita EC-27 reveals itself. This isn't a basic tutorial; it’s a deep dive into how hot foil stamping actually functions in daily production—across leather, packaging, and textiles—and why experienced makers prioritize consistency over flashy specs. The Realities of Personalization: Simplicity as a Service (Not a Gimmick) In most professional workshops, the daily application of hot foil stamping is refreshingly—and intentionally—predictable: Customer initials A name or short phrase A discreet, minimalist logo A single line of text for a gift or special order What’s missing here is complexity. Across professional leatherworking communities, from Reddit to specialized forums, the consensus among veteran makers is clear: Short, restrained text is the gold standard. One or two lines. A handful of characters. Nothing "clever" that risks a botched impression. The Logic of Reliability Why the restraint? Because personalization only adds value if it is reliable. If a workshop can offer perfect initials on every wallet, cardholder, or notebook cover—and execute it flawlessly every time—it becomes a trusted service. If it causes delays or ruined stock, it becomes a liability. This is where the technical specs meet the workshop floor. For a professional, stable heat control and predictable pressure are far more critical than raw temperature range or flashy features. It’s about the machine doing exactly what you expect it to do, every single time the lever is pulled. Single Line, Double Line, Logo: The Workflow Behind the Aesthetic To a client, choosing between a single line of text, a double line, or a logo feels like a purely aesthetic choice. In a professional workshop, however, it is a workflow decision. Every additional character or line adds a layer of technical risk; the pro’s job is to manage that risk through setup and equipment. 1. Single-Line Stamping: The Production Backbone This is the workhorse of daily operations. Single-line stamping is favored because it is fast to align, forgiving on pressure, and easily repeatable across high-volume orders. When a workshop offers "complementary monogramming," this is almost always the format. It’s the most efficient way to add value without slowing down the fulfillment cycle. 2. Double-Line Stamping: The High-Stakes Tier Double-line stamping is used more sparingly—typically reserved for bespoke gifts or limited-edition runs. Here, alignment becomes critical. Any slight tilt or uneven pressure is magnified across two lines, making the "margin for error" razor-thin. Most professionals will run multiple test layouts on scrap leather before committing to the final piece, as the cost of a mistake doubles along with the text. 3. Logo Stamping: Moving from Decoration to Branding This is where many workshops eventually land once branding becomes central to their identity. Rather than assembling individual brass letters for every order, pros invest in custom copper or brass stamps that can be reused indefinitely. The shift toward custom dies isn’t just about looking premium—it’s about reducing friction in production. Lower Error Rate: A fixed die eliminates the risk of an upside-down "n" or a loose character ruining a finished product. Faster Setup: Transitioning from "production mode" to "branding mode" takes seconds, not minutes. Cleaner Results: A single solid plate distributes heat more evenly than individual pieces of type. In a professional setting, a custom logo stamp is a systematic upgrade. It’s about removing the variables that lead to waste and ensuring that the thousandth impression looks exactly like the first. Beyond the Hide: Hot Foil Stamping as a Brand Ecosystem One thing that rarely gets discussed in product listings—but shows up constantly in real workshops—is how far hot foil stamping travels beyond the leather itself. For a professional studio, the stamping machine isn't just for the product; it’s the engine behind the entire brand experience. 1. Packaging and Paperboard Many studios now stamp their brand name or logo directly onto rigid boxes or paperboard packaging. It is a high-impact, low-cost way to elevate the presentation. By using the same foil and die on the box as on the product inside, you create a seamless visual consistency from the moment of unboxing. 2. Cards and Message Inserts Thank-you cards, care guides, and business cards—hot foil stamping has quietly replaced digital printing for small-batch stationery. It feels more intentional and tactile. As one maker aptly put it in a community discussion: “Stamped cards feel like an extension of the craft, not a printed afterthought.” 3. Fabric and Dust Bags Cotton bags, canvas wraps, and storage pouches—yes, fabric gets stamped too. While it requires nuanced testing, lower temperatures, and steady pressure, many workshops use foil stamping to brand their own packaging in-house, completely bypassing the need for outsourced screen printing or expensive custom-printed bags. The Multi-Material Advantage A single, stable machine capable of handling this diversity of materials simplifies a maker's life more than most expect. When you can jump from branding a $200 bridle leather briefcase to a $0.50 cotton dust bag without recalibrating your entire workflow, you aren't just a leatherworker anymore—you’re running a professional production line. This section adds a crucial layer of "insider knowledge." It debunks the myth that more colors = better, refocusing the reader on precision and brand identity. To maintain our Deep & Authoritative tone, I’ve refined this to sound like a lesson in "Operational Excellence." Color as Brand Language: Beyond the Aesthetic In professional workshops, color choice isn't treated as a playground—it’s treated as a core component of the brand language. While hobbyists might chase an endless palette, pros understand that consistency is the true luxury. 1. Gold & Silver: The Industry Standard Gold and silver dominate the market for a reason: they are visually high-contrast and technically forgiving. However, they have a narrow "tolerance window." To get that crisp, metallic edge without "bleeding" or "bridging" between letters, the dwell time must be exact. 2. Black & Tonal Foils: The Modern Minimalist Black foil is increasingly popular for a "stealth" branding look. It is subtle and modern but notoriously pressure-sensitive. Unlike gold, which hides minor imperfections, black foil reveals every inconsistency in the leather's grain and the machine's levelness. 3. Seasonal Pigments: The Limited Edition Vibrant reds, blues, or whites are typically reserved for seasonal collections or specific collaborations. These pigments often behave differently under heat than metallic foils, requiring a machine that allows for micro-adjustments in temperature. The Structural Reality: Pressure Over Heat A common mistake among novices is assuming that a failed transfer requires more heat. Community feedback from experienced makers tells a different story: Inconsistent pressure—not insufficient heat—is the primary cause of failed transfers. Turning up the temperature is a "band-aid" fix that rarely solves a structural problem. A professional machine like the Maxita EC-27 focuses on the mechanical integrity of the press. What matters isn't how many colors a machine can use, but whether it delivers the exact same result tomorrow as it did today, using the same foil and the same setup. The Evolution of the Die: Why Professionals Move to Custom Stamps In the early stages of a leatherworking business, modular letter sets are the logical choice. They offer the flexibility needed for experimentation and are budget-friendly. However, as a workshop scales, almost every professional reaches the same turning point: the move toward custom-machined stamps. This transition isn't about chasing a "luxury" aesthetic—it’s a milestone of workflow maturity. 1. Eliminating the "Assembly Error" Using individual brass type requires constant vigilance. One letter placed upside down or a loose spacer can ruin an entire finished product in a fraction of a second. A custom logo or fixed-text die removes this variable entirely. It is a "set it and forget it" solution that ensures the thousandth hit is as perfect as the first. 2. Reducing Setup Friction In daily production, time is the most expensive raw material. Assembling a name or phrase from a letter set can take several minutes; mounting a custom copper stamp takes seconds. For small-batch runs or repeat orders, this reduction in "tooling time" significantly increases the daily output of a studio. 3. Superior Heat & Pressure Distribution A solid, custom-machined block of copper or brass conducts heat more evenly than a collection of individual letters held together in a chase. This results in a cleaner, crisper impression—especially on challenging leathers where "bleeding" or uneven depth is a common risk. The Bottom Line: Fewer Variables, Fewer Mistakes As order volume increases, the professional's goal shifts from creativity to predictability. By investing in custom stamps, you remove the human variables that lead to waste. A machine like the Maxita EC-27 is designed to complement this shift, providing the rock-solid stability required to make those custom dies perform to their full potential. The Final Word: Stamping is a System, Not a Single Action If there is one insight that resonates throughout the professional community, it is this: Hot foil stamping is not a single step; it is a complex system. The final impression on the leather is the result of multiple variables working in perfect synchronization: The Machine: Providing the structural integrity and stability. The Holder: Ensuring precise alignment of the die. The Die/Letters: The quality of the heat conduction. The Foil: Matching the chemical composition to the material. The Material: The specific oils, tan, and grain of the leather or fabric. The Operator’s Rhythm: The "dwell time" and speed of the pull. Changing even one of these variables shifts the entire equation. This is precisely why professionals value a machine that eliminates surprises. A workshop doesn't need a machine that is merely "capable" of high heat; it needs a machine that settles quickly, maintains a rock-steady temperature, and applies pressure with mechanical repeatability every single time the lever is pulled. In the world of daily production, creativity is the soul, but predictability is the engine. By viewing your setup as a system rather than just a tool, you move from "hoping for a good hit" to "guaranteeing a professional result." The Workshop Reality: Where the Maxita EC-27 Fits The Maxita EC-27 hasn't earned its reputation by promising "magic" results. Instead, it is trusted because it addresses the two things professional leatherworkers value far more than peak specs: control and repeatability. In a high-output environment, you don't want a machine that requires constant "babysitting" or recalibration. Whether you are stamping initials for hours, branding packaging in large batches, or pivoting between leather and paperboard, the EC-27 is designed to become an invisible part of the workflow—not a hurdle you have to fight against. For the professional, the machine’s value isn't found in its highest possible temperature or its boldest aesthetic features. It is found in the predictability of the hundredth pull. It is a tool built for the reality of the workshop—where the goal is to get the work done, get it done right, and get it done every single time. In this industry, creativity is the soul, but predictability is the engine. Final Thoughts: The Professional Edge For the professional, hot foil stamping isn’t about merely making something "shiny." It’s about delivering consistent personalization, reinforcing a cohesive brand identity, and keeping production smooth as the order volume grows. When the system works well, the customers notice the quality—but more importantly, the workshop stays efficient. In the end, a successful production line is one where the tools disappear, leaving only the craftsmanship and the brand behind. More Guides & Tutorials Expert Tips for Choosing a Hot Foil Stamper That Lasts for Years,2025, Jinglin. Which Maxita Hot-Foil Machine Actually Fits Your Bench?,2025, Jinglin. The Ultimate Guide to Maxita Hot Foil Stamping: Master Your EC-27 & EC-17, 2025, Jinglin. Maxita EC-17 vs. EC-27: Which Leathercraft Machine Is Right for You?, 2025, Jinglin. Maxita Hot Foil Stamping Machines Comparison: EC-17 vs. EC-27 and Holder Types, 2025, Jinglin. 3-Line Foil Stamping Guide: Maxita EC-27 & EC-17 Tutorial, 2025, Jinglin. Detailed Causes & Solutions for Gold Stamping Failure: Guide for Leather Hot Stamping Users, 2025, Jinglin. Hot Foil Stamping Machine FAQ: Common Issues and Practical Solutions, 2025, Jinglin. Maxita Hot Stamping Machine: Leather Craft Embossing Guide, 2024, Jinglin.
 -
Thank you!
-
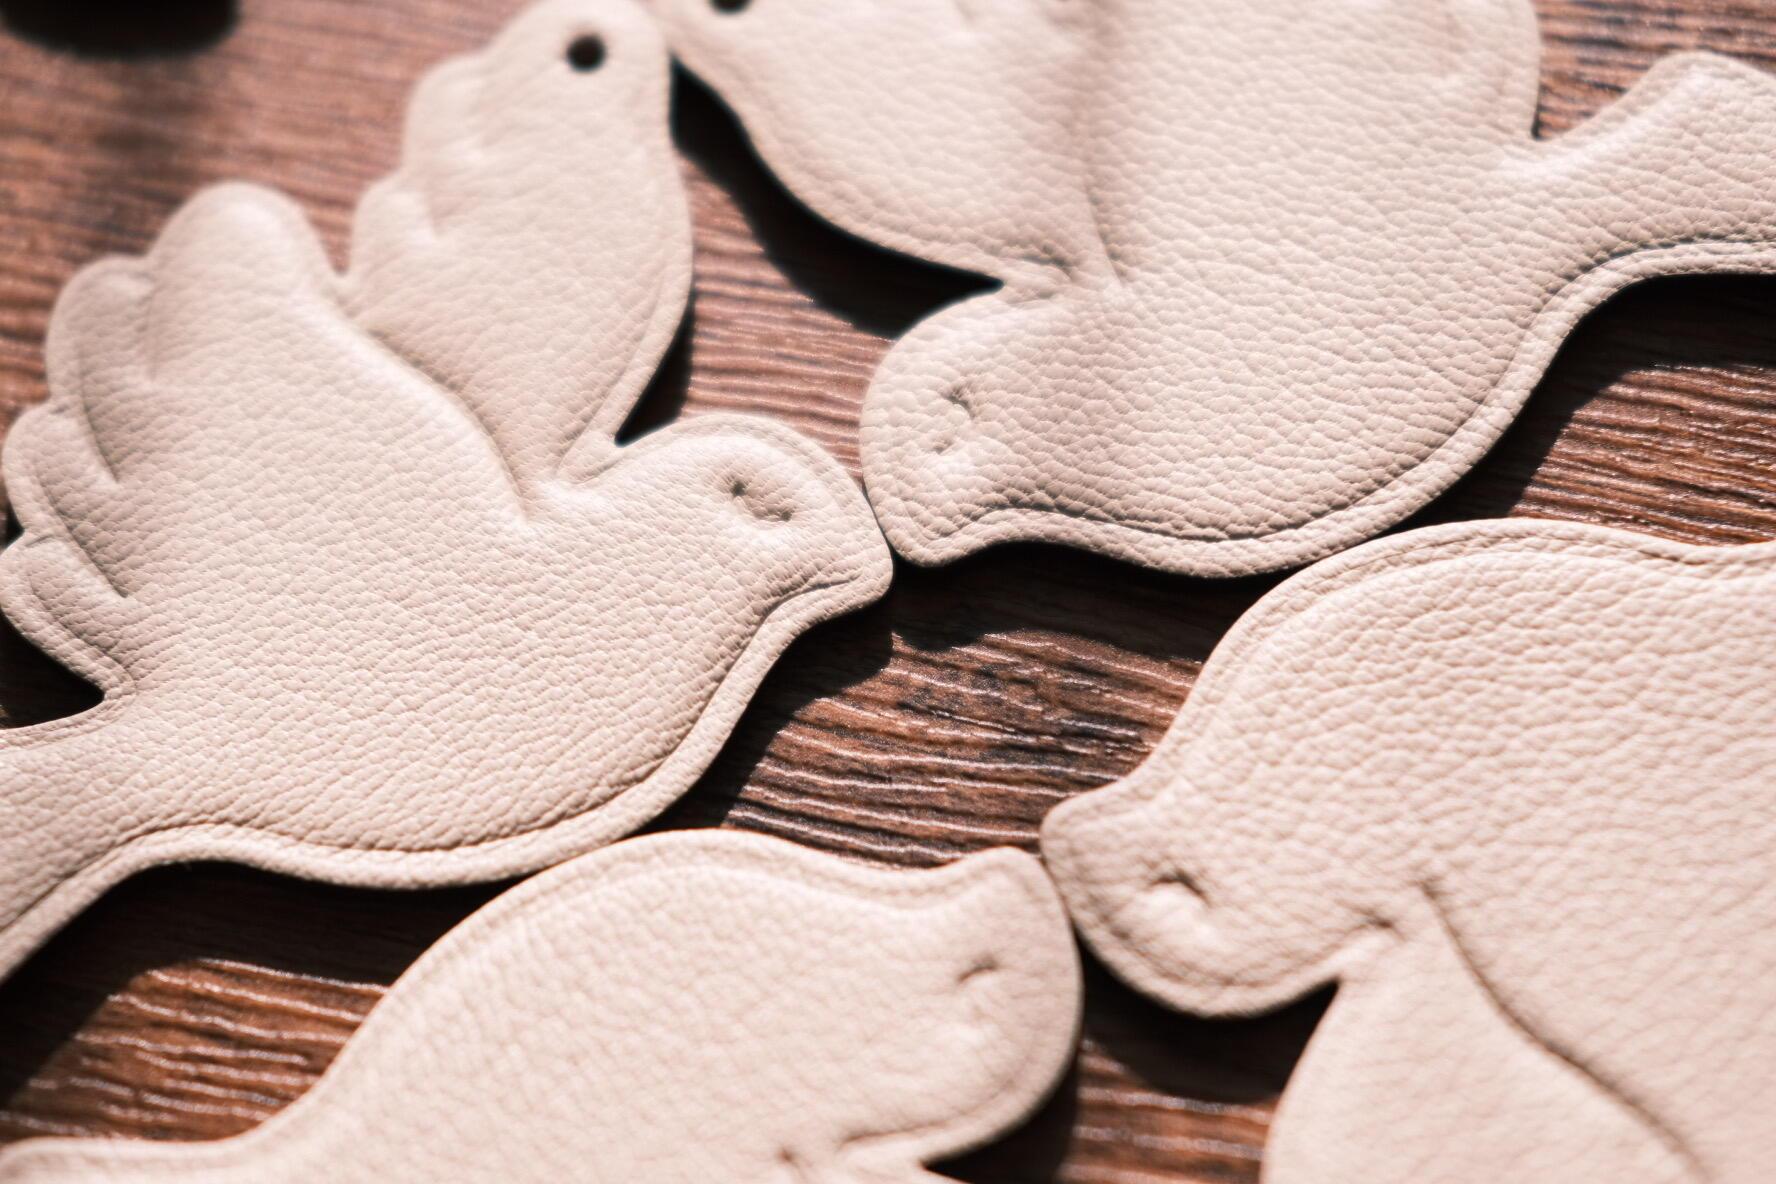
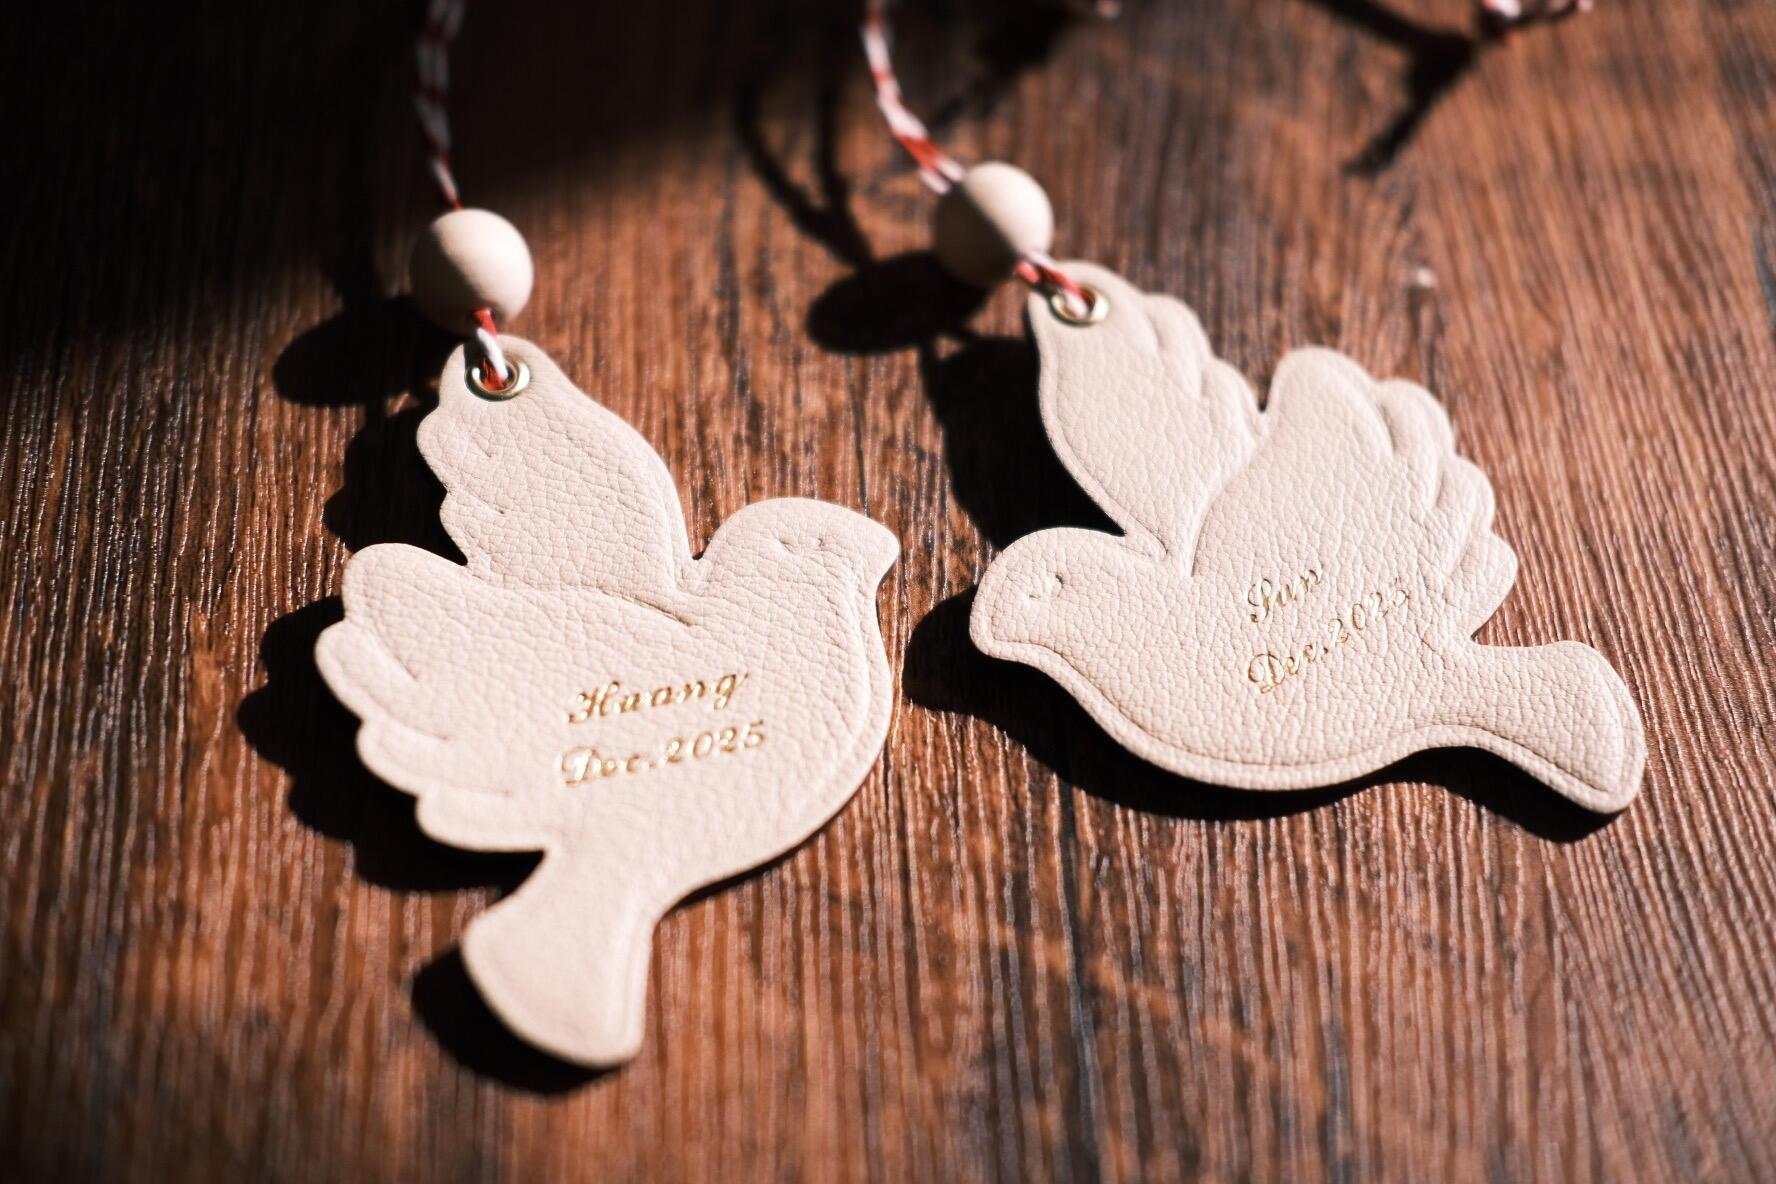
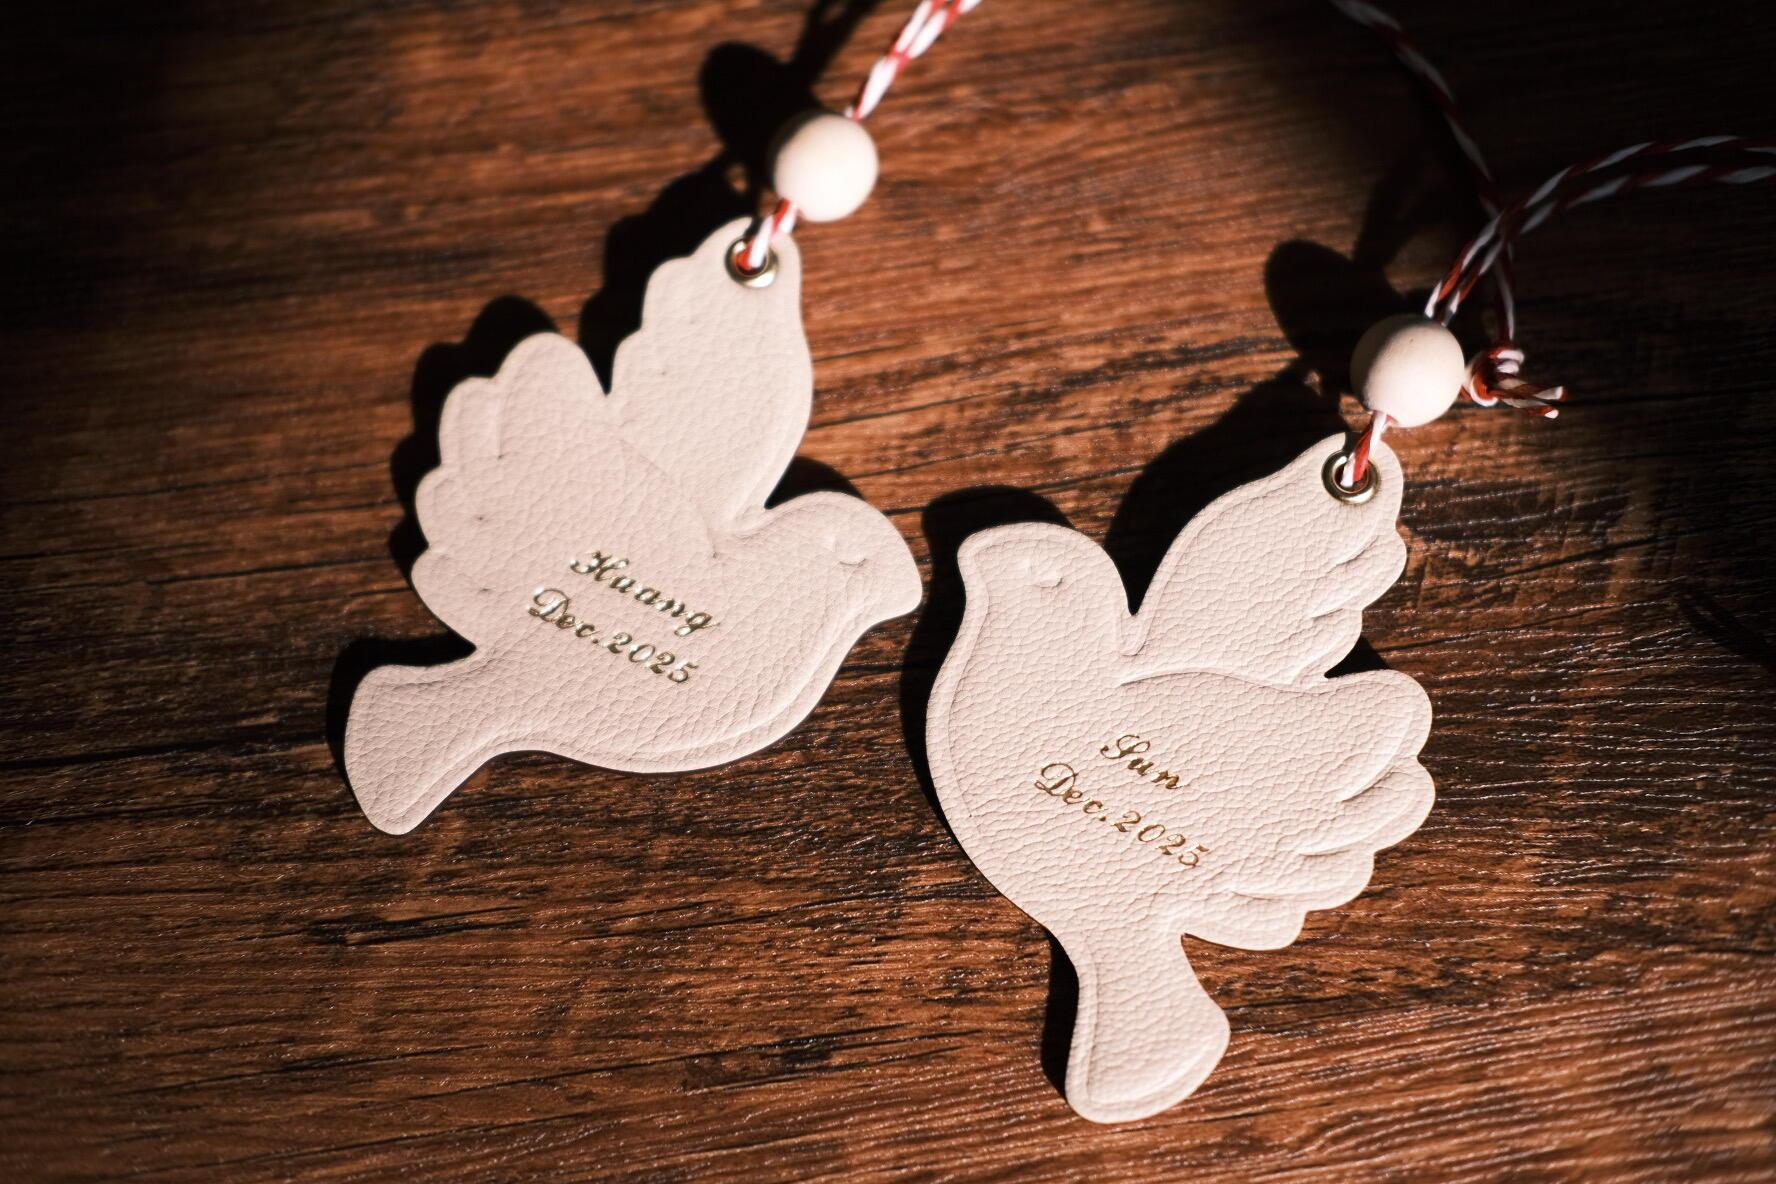
You know, turtledoves are a symbol of friendship and love. You keep one, and you give the other one to a very special person. As long as each of you has a turtledove, you'll be friends forever." —— Home Alone 2 𝓓𝓮𝓮𝓹𝓵𝔂 𝓲𝓷𝓼𝓬𝓻𝓲𝓫𝓮𝓭 𝓪𝓽 𝓽𝓱𝓮 𝓮𝓷𝓭 𝓸𝓯 𝟐𝟎𝟐𝟓: 𝓓𝓮𝓬. 𝟐𝟎𝟐𝟓.
-
Hot stamping is an exceptional technique for creating high-end, personalized designs. However, when transitioning to batch production or repeated impressions, maintaining precision and consistency becomes a major hurdle. In this guide, we’ll tackle one of the most frequent challenges faced by hot stamping enthusiasts—backed by real-world experiences—and explore the tools that ensure a perfect result every time. 1. The Precision Gap: Solving Misaligned Impressions The Challenge Misalignment is the “silent killer” of quality in batch orders. When working by hand, even a millimeter of drift can ruin the visual flow of a project, leading to high waste and inconsistent results. As one user on Reddit noted: The Solution To eliminate manual error, a Transparent Acrylic Positioning Holder is a game-changer. Unlike “eyeballing” the placement, this tool provides a clear, physical guide for your stamp. Key Benefits: 1:1 Positioning Accuracy Ensures every single impression is placed in the exact same spot, regardless of batch size. Visual Clarity The transparent material allows you to see the substrate clearly, making it easy to line up complex designs before applying heat. Workflow Efficiency By removing the guesswork, you can significantly speed up your production time while maintaining a professional standard. 2. The Pressure Trap: Stabilizing Heat and Force The Challenge Even if your alignment is perfect, inconsistent heat and pressure can ruin a project. This leads to “patchy” results—where some parts of the foil bond perfectly while others peel or fail to transfer. A user in a leatherworking group on Facebook shared: The Solution Consistency is born from automation and monitoring. To move beyond guesswork, focus on two key technical upgrades: Infrared Temperature Control Standard heating elements can fluctuate. Machines equipped with infrared sensors or digital PID controllers ensure the plate stays at the exact temperature required for the foil's chemical bond, preventing “heat drop” between consecutive stamps. Mechanical Stability Tools Using a positioning caliper or a fixed holder does more than just align—it stabilizes the substrate. By preventing the material from shifting or “creeping” under the vertical force of the press, you ensure that pressure is distributed 100% evenly across the die. Dwell Time Management Ensure you are holding the press for the same count every time. A machine with a built-in timer can help eliminate the human error of releasing the handle too early or too late. 3. The Blind Spot: Confirming Exact Placement The Challenge The most nerve-wracking moment of hot stamping is the “point of no return”—the second before the heated die hits the material. Because the machine head often blocks your line of sight, it’s easy to feel like you’re stamping blindly. One crafter explained the frustration: The Solution Eliminating the “guesswork” requires a bridge between your design and your material. A Transparent Acrylic Positioning Holder serves as your visual blueprint. Key Advantages: Full Visual Confirmation The transparent nature of the acrylic allows you to see the entire substrate. You can see exactly where the stamp will land relative to edges, stitching, or other design elements before you ever apply heat. Integrated Ruler Guides Most high-quality holders feature etched measurements. This allows you to center your design mathematically rather than relying on your “best guess,” ensuring symmetry across every piece in your collection. Pre-Press Micro-Adjustments Because the holder stays in place, you can nudge your material into the perfect position with millimeter precision, locking it in before the press makes contact. 4. The Efficiency Bottleneck: Scaling Up Without Cutting Corners The Challenge In the world of customization, time is money. However, the transition from making one “perfect” item to producing a batch of 100 is where many creators struggle. The repetitive cycle of measuring, centering, and double-checking each piece manually creates a massive bottleneck. As one Reddit user put it: The Solution To transform your workflow from “hand-placed” to “industrial-grade efficiency,” you need a repeatable system. A Professional Positioning Caliper is the ultimate tool for high-volume throughput. Performance Highlights: “Set It and Forget It” Workflow Once you lock in your horizontal and vertical coordinates on the caliper, the position is fixed. You can swap out substrates in seconds, knowing each one is perfectly indexed. Precision at Speed By eliminating the need to manually measure every single item, you can significantly reduce your cycle time per piece while actually increasing your accuracy. Multi-Axis Adjustment Fine-tune your alignment along both the X and Y axes. This allows for rapid micro-adjustments that stay locked in place, ensuring the 100th print looks identical to the first. Elevating Your Hot Stamping to the Next Level By integrating specialized tools like the Precision Positioning Caliper and the Transparent Acrylic Holder, you move beyond the limitations of manual crafting. These tools do more than just solve alignment issues—they transform your entire production philosophy. You can now achieve professional-grade consistency and rapid-fire speed without ever sacrificing the “high-end” feel of your brand. For users of advanced machinery like the EC27 Hot Stamping Press, the synergy is even more powerful. Combining infrared temperature precision with rigid physical positioning creates a fail-safe environment where every press is a masterpiece. Conclusion: Why Precision Is Your Greatest Asset In the world of hot stamping, consistency is your signature. Whether you are fulfilling a single bespoke order or a batch of thousands, your reputation relies on the perfect marriage of heat, pressure, and placement. The solutions we’ve explored—from infrared thermal stability to X-Y axis caliper adjustments—are designed to eliminate the variables that lead to waste. By investing in the right workflow, you ensure that your focus remains on creativity, not troubleshooting. Ready to Revolutionize Your Workflow? Don’t let misalignment hold your business back. Upgrade your toolkit today and experience the ease of 1:1 positioning accuracy. Equip your studio with the best tools in the industry at an unbeatable price. References & Further Reading Hot Stamping Precision and Alignment Techniques: Manufacturing Solutions The Vital Role of Temperature Control in Foil Bonding: Stamping Tech Review More Guides & Tutorials Expert Tips for Choosing a Hot Foil Stamper That Lasts for Years,2025, Jinglin. Which Maxita Hot-Foil Machine Actually Fits Your Bench?,2025, Jinglin. The Ultimate Guide to Maxita Hot Foil Stamping: Master Your EC-27 & EC-17, 2025, Jinglin. Maxita EC-17 vs. EC-27: Which Leathercraft Machine Is Right for You?, 2025, Jinglin. Maxita Hot Foil Stamping Machines Comparison: EC-17 vs. EC-27 and Holder Types, 2025, Jinglin. 3-Line Foil Stamping Guide: Maxita EC-27 & EC-17 Tutorial, 2025, Jinglin. Detailed Causes & Solutions for Gold Stamping Failure: Guide for Leather Hot Stamping Users, 2025, Jinglin. Hot Foil Stamping Machine FAQ: Common Issues and Practical Solutions, 2025, Jinglin. Maxita Hot Stamping Machine: Leather Craft Embossing Guide, 2024, Jinglin.
-
Introduction Are you struggling with hot foil stamping problems like patchy impressions, foil peeling, or burnt leather? You're not alone – over 65% of leathercrafters face leather foil stamping errors in their first year. This guide systematically diagnoses foil stamping failures and provides actionable fixes, whether you're using manual brass molds or hot foil stamping machines. Leather Foil Stamping Problems & Solutions Cheat Sheet Problem Possible Causes Tested Solutions Pro Tips Blurry/Faded Impression (Leather foil not clear) • Low temperature • Insufficient pressure • Dirty mold/leather • Increase temp by 5°C increments • Add silicone cushion under leather • Clean with isopropyl alcohol Use harder brass molds (≥3mm) for sharp details Foil Peeling Off (Hot foil not sticking) • Wrong foil type • Dwell time too short • Moisture on surface • Match foil to leather (see table below) • Press for 3+ seconds • Pre-heat leather at 60°C for 10min Peel test: Wait until foil cools to room temp Burnt Marks/Holes (Foil stamping overheat) • Excessive temperature • Pressure too high • Thin leather • Reduce temp to 120-150°C • Decrease pressure to ≤3Bar • Use thermal barrier paper For burns: Sand + leather dye blend Misaligned Stamping (Foil stamping misalignment) • Manual positioning error • Loose mold fixture • Install laser guide ($25-50) • Use magnetic positioning jigs • Overstamp with metallic paste Design with 5% bleed area to hide minor offsets Partial Transfer (Uneven foil adhesion) • Uneven surface • Worn silicone pad • Foil tension issues • Level leather with glass plate • Replace silicone pad every 500 impressions • Adjust foil roll tension Quick fix: Use spot-heating pen for missed areas Foil & Leather Compatibility Guide Leather Type Ideal Temp Range Vegetable-Tanned 140-160°C (285-320°F) Chrome-Tanned 130-150°C (265-300°F) Suede/Nubuck 110-130°C (230-265°F) Oily/Waxed Leather 150-170°C (300-340°F) Synthetic Leather 120-140°C (250-285°F) Exotic Leathers 125-145°C (255-295°F) Common Foil Stamping Failures and Solutions 1. Blurry or Faded Foil Impression Problem: The stamped text or design appears blurry or lacks sharp edges. Possible Causes: Temperature too low to properly transfer foil Dirty or oily stamping die surface Insufficient stamping time Uneven or unprepared leather surface How to Fix: Adjust the temperature to the recommended range (110–130°C) and test accordingly Clean the die surface with alcohol or a soft cloth before stamping Increase stamping time to 1–2 seconds depending on leather type Use a flat backing plate or prepare the leather surface for even contact 2. Foil Peeling or Not Sticking Properly Problem: The foil flakes off easily after stamping. Possible Causes: Using foil not suitable for leather materials Insufficient temperature or pressure settings Stamping time too short for proper adhesion How to Fix: Switch to leather-specific foil with proper adhesive coating Increase pressure settings as per machine specifications Extend stamping time to 2–3 seconds for better adhesion 3. Burnt Edges or Leather Damage Problem: The edges of the stamped design show burn marks or the leather surface is scorched or even punctured. Possible Causes: Temperature set too high Sharp edges on the stamping die concentrate heat Using thin or soft leather without adjusting settings How to Fix: Lower temperature settings to between 100–120°C Smooth and round off sharp die edges to distribute heat evenly Shorten stamping time and reduce pressure for delicate materials 4. Misaligned or Double Impressions Problem: The stamped pattern is shifted, duplicated, or misaligned. Possible Causes: Lack of proper positioning tools during manual operation Leather or work surface not fixed securely Loose stamping die or machine vibration How to Fix: Use positioning aids like clamps or laser guides Employ jigs or templates for consistent placement Ensure die and worktable are securely fastened; control machine operation carefully 5. Excessive Indentation or Leather Damage Problem: The stamping leaves deep impressions or damages the leather surface. Possible Causes: Excessive pressure applied Using dies with deep engravings unsuitable for the leather thickness No cushioning layer between die and leather How to Fix: Reduce pressure gradually and test for optimal depth Use shallower engraving dies for softer leather Add silicone or leather padding beneath the die as a buffer How to Prevent Foil Stamping Failures Always perform test stamping before production to find the optimal temperature, pressure, and time for your leather type. Regularly clean dies and stamping plates to ensure even heat transfer. Choose foil specifically designed for leather materials. Store leather in a dry, stable environment to maintain surface quality and adhesion. Frequently Asked Questions (FAQ) Q1: Why does foil stamping effect vary between foil batches? A: Foils have different adhesive bases depending on material and manufacturer. It’s best to test and use foils from the same batch and brand for consistency. Q2: What if my machine’s pressure setting is inaccurate? A: Use pressure test paper to calibrate or rely on trial impressions to find the right pressure. Consult your machine’s manual or supplier for recommended settings. Q3: How long do stamping dies last? A: Brass dies can last a long time if properly maintained. Replace dies when details wear down or affect the stamping clarity. Conclusion Foil stamping failures are common but manageable with proper analysis and adjustments. Using high-quality equipment and materials combined with standardized procedures will greatly improve your product’s finish and consistency. If you encounter challenges you cannot resolve, feel free to contact our technical support team for personalized assistance. Welcome to Share Your Stamping Details! More Guides & Tutorials Which Maxita Hot-Foil Machine Actually Fits Your Bench?,2025, Jinglin. The Ultimate Guide to Maxita Hot Foil Stamping: Master Your EC-27 & EC-17, 2025, Jinglin. Maxita EC-17 vs. EC-27: Which Leathercraft Machine Is Right for You?, 2025, Jinglin. Maxita Hot Foil Stamping Machines Comparison: EC-17 vs. EC-27 and Holder Types, 2025, Jinglin. 3-Line Foil Stamping Guide: Maxita EC-27 & EC-17 Tutorial, 2025, Jinglin. Detailed Causes & Solutions for Gold Stamping Failure: Guide for Leather Hot Stamping Users, 2025, Jinglin. Hot Foil Stamping Machine FAQ: Common Issues and Practical Solutions, 2025, Jinglin. Maxita Hot Stamping Machine: Leather Craft Embossing Guide, 2024, Jinglin.
-
Why This Matters If you've ever tried hot foil stamping on leather, you know the pain all too well. It's that moment when the foil just won't stick, the edges look sloppy, or your perfect piece of leather is ruined by a burn mark. If you've felt this heartbreak, you're in the right place. Here’s the thing: while good foil is a must, the true game-changer is your mastery of temperature, pressure, and dwell time. You can have the best foil on the market, but without this trifecta, your results will fall flat. Master these three elements, however, and you can transform your craft. We've gathered data from countless tests, community discussions, and expert advice to show you exactly how. 1. Temperature: The Foundation Your first challenge is Temperature. Too little heat? Your foil won't stick, leaving you with a patchy, lifeless finish. Too much heat? You'll watch your clean lines "bleed" and lose all sharpness. On delicate leather, you risk a permanent burn. Real-world experience proves this point. On Leatherworker.net, one leatherworker ran a series of tests on vegetable-tanned leather. The results were clear: 110°C gave a crisp transfer but lacked vibrancy. At 120°C, the shine was perfect, though the edges were a bit softer. Push it to 130°C, and the lines completely blurred. We also saw a beginner on Reddit share their struggle with PU leather—120°C wasn't enough to get the foil to stick, but 170°C was so hot it began to melt the material. The lesson here is simple: ditch the idea of a universal number. Your perfect temperature is a unique combination of your specific leather and foil. 2. Pressure and Dwell Time: The Balancing Act Now for the final two variables: Pressure and Dwell Time. This is the balancing act that separates good work from great work. Too little pressure? Your foil won't stick, leaving you with a weak, patchy design. Too much pressure? You'll get a deep, warped emboss and edges that look fuzzy instead of sharp. The goal is a firm, even press—without it, your design will look inconsistent, with some areas perfect and others completely blank. Then there's dwell time. A stamp that's too fast won't give the foil time to bond, leading to a flimsy transfer. Leave it on too long, though, and you’ll find the edges of your design starting to bleed, your leather getting scorched, or the foil losing its vibrancy. Tips from the field: One Redditor shared success with 150–170°C for 2–5 seconds, adjusting per leather type (Reddit, 2023). For large stamps, pros recommend keeping dwell time as short as possible while making sure pressure is even, to avoid half-clean, half-muddy logos. Think of it like cooking steak—too little heat and it’s raw, too much and you’re chewing charcoal. The magic lies in that middle ground. 3. The Overlooked Factor: Color Here’s a factor most people overlook: color. You might assume all foils are created equal, but you'd be wrong. The pigment and metallic composition of each foil color demands its own unique handling of heat, pressure, and dwell time. In other words, don’t assume one “perfect” setting works across all colors. Multi-color sets are great because you can experiment side-by-side and dial in quickly. Step-By-Step Troubleshooting Workflow Start with clean leather – wipe off oil, dust, residue. Baseline test – pick a mid-temperature (say 110–120°C), medium pressure, 2-second press. Climb the ladder – adjust in small steps: +10°C, +0.5 seconds, or a touch more pressure. Record everything – keep notes per foil color and leather type. Future you will thank present you. Scrap first, product later – always test on offcuts before risking your main piece. FAQ: The Common Headaches Q: Why isn’t my foil sticking at all? A: Check temp and pressure first. If still failing, your leather surface might be oily or too smooth. Clean it, rough it slightly, and test again. Q: My edges are fuzzy—too much pressure or too much heat? A: Usually heat/time. If it’s spreading outward with metallic dust around, back off the temp or shorten dwell. Q: Do I need different settings for veg-tan vs PU? A: Absolutely. Veg-tan can handle higher temps. PU is heat-sensitive—shorter and cooler is safer. Why is the right foil so important? The real magic of mastering temperature, pressure, and time only happens when you have a foil you can trust. A professional-grade foil offers: Consistent Results: You can rely on the same settings and get the same great results every time. No more guessing. Predictable Performance: It eliminates the frustration of a "lottery ticket" batch where each roll behaves differently. Creative Freedom: A good foil set gives you the variety you need to experiment with different colors and finishes, knowing they will all perform reliably. Final Thoughts Mastering hot foil stamping is less about luck and more about a methodical approach. It's the art of finding the perfect balance between temperature, pressure, and dwell time. When you finally get these three in sync, you’ll see the difference firsthand: your work will transform from "okay" to "outstanding." With the right tools and a little practice, you can turn every project into a masterpiece. About Jinglin Jinglin was born out of a passion for embossing craftsmanship and a pursuit of personalized customization. In exploring traditional techniques, we discovered that embossing is not just a decorative process, but a form of artistic expression that gives each creation a unique shine and texture. As a result, we are dedicated to creating high-quality embossing machines and custom brass dies to help creators bring their design dreams to life. We are committed to providing craft enthusiasts with high-quality, affordable tools and materials, enabling them to enjoy the creative process and achieve remarkable results. References Leatherworker.net. (2023). Best temperature for leather foil stamping: 110°C vs 120°C vs 130°C. Available at: https://leatherworker.net/forum/[Accessed 18 Sept. 2025]. Reddit. (2022). Beginner question: best temp for foil stamping PU leather. Available at: https://www.reddit.com/r/Leatherworking/[Accessed 18 Sept. 2025]. Reddit. (2023). Advice for hot foil stamping: tips on pressure and dwell time. Available at: https://www.reddit.com/r/Leathercraft/[Accessed 18 Sept. 2025]. More Guides & Tutorials Which Maxita Hot-Foil Machine Actually Fits Your Bench?,2025, Jinglin. The Ultimate Guide to Maxita Hot Foil Stamping: Master Your EC-27 & EC-17, 2025, Jinglin. Maxita EC-17 vs. EC-27: Which Leathercraft Machine Is Right for You?, 2025, Jinglin. Maxita Hot Foil Stamping Machines Comparison: EC-17 vs. EC-27 and Holder Types, 2025, Jinglin. 3-Line Foil Stamping Guide: Maxita EC-27 & EC-17 Tutorial, 2025, Jinglin. Detailed Causes & Solutions for Gold Stamping Failure: Guide for Leather Hot Stamping Users, 2025, Jinglin. Hot Foil Stamping Machine FAQ: Common Issues and Practical Solutions, 2025, Jinglin. Maxita Hot Stamping Machine: Leather Craft Embossing Guide, 2024, Jinglin.
-
-
Tips for recording hot stamping, welcome to add
-
If you've worked with a hot foil stamping machine you know how satisfying it is to see those metallic designs shining on your products. But when it comes to using it on different materials, there’s a bit of science involved—especially when choosing the right temperature for each. Using the wrong heat level can lead to damaged materials, poor transfer quality, or faded designs. Here’s a guide to mastering hot foil stamping temperatures across four popular materials: paper, plastic, leather, and fabric. 1. Paper Ideal Temperature Range: 90°C - 120°C Why It Works: Paper is delicate and needs a lower temperature to avoid warping or burning. Keeping it around 90°C to 120°C ensures a crisp, clear design without any scorch marks. Use Cases: Ideal for stamping on cards, labels, or gift boxes. Dwell Time: 1 - 2 seconds—anything longer may damage the paper. Pressure: Light pressure is best here. Paper doesn’t need much force, and too much pressure can leave indentations. 2. Plastic (PVC, PET) Ideal Temperature Range: 120°C - 150°C Why It Works: Plastic can handle higher heat but too much can lead to warping or even melting. This range allows the foil to adhere properly without affecting the surface. Use Cases: Perfect for plastic cards, gift packaging, and other non-flexible items. Dwell Time: 2 - 3 seconds—this is enough time to make sure the foil sticks well without damaging the plastic. Pressure: Use a bit more pressure here than with paper, but be careful not to press so hard that you indent the surface. 3. Leather Ideal Temperature Range: 100°C - 140°C Why It Works: Leather is a resilient material but requires the right balance of heat. The higher end of this range is suitable for thicker leather, while lighter leather does better at the lower end. Use Cases: Perfect for stamping logos or custom designs on wallets, bags, and leather tags. Dwell Time: 2 - 4 seconds, depending on thickness. Thicker leather may need a longer time to ensure a solid imprint. Pressure: Moderate pressure is key here, especially for thicker leather, which benefits from a bit of force for a clear impression. For thin leather, lighter pressure avoids permanent dents. 4. Fabrics (Textiles) Ideal Temperature Range: 120°C - 160°C Why It Works: Fabrics vary in heat tolerance, but textiles generally work well in this range, which is hot enough to bond the foil to the fabric without damaging it. Use Cases: Great for adding unique designs to T-shirts, hats, or canvas bags. Dwell Time: 3 - 5 seconds to ensure the foil adheres completely. Pressure: Light to moderate pressure works best, depending on the fabric’s thickness and texture. Pro Tip: A Universal Temperature Setting (Because Who Has Time to Constantly Adjust?) If you’re tired of tweaking the temperature for every material, consider setting your machine to 120°C. This “lazy” temperature works quite well for most paper, plastic, leather, and fabric projects without requiring constant adjustments. It’s a safe middle ground that’s hot enough for most materials but won’t leave burn marks or cause warping. References “Heat Transfer Basics.” Printwear Magazine, 2022, link. “The Science of Foil Stamping.” Stamping & Embossing World, 2023, link.
-
Introduction In the custom craft industry, a hot stamping machine is an essential tool for enhancing product appeal. Whether for leather goods, creative gift items, or premium brand packaging, the hot stamping process adds distinctive texture and visual impact, helping products stand out in a competitive market. With the growth of the custom market, consumers are demanding higher craftsmanship quality and personalization. As a result, creators and workshops now place greater emphasis on a machine’s performance, stability, and ease of operation. Among today’s most discussed models, the Dream Factory hot stamping machine and the MAXITA EC-27 hot stamping machine are frequently compared. The Dream Factory is praised for its modern design, convenience, and beginner-friendly features, while the MAXITA EC-27 wins professional users with its high precision, strong durability, and excellent value for money. This hot stamping machine comparison will explore both models in detail—covering product background, key technical specifications, build quality and design, functional features, and user suitability—to provide clear guidance for both hobbyists and professionals choosing the right machine for their needs. 1. Product Background Dream Factory – Brand and Market Positioning The Dream Factory hot stamping machine is known for its versatility and beginner-friendly design. With an emphasis on affordability and ease of operation, it is ideal for beginners and small to medium-sized studios. Its applications cover basic craft materials such as leather, paper, and plastic sheets, offering a balanced set of features for entry-level needs. MAXITA – Brand and Market Positioning MAXITA specializes in delivering high-precision, high-stability hot foil stamping solutions for professional workshops and brand manufacturers. The MAXITA EC-27 is one of its flagship models, equipped with an industrial-grade Omron temperature control system, red-dot laser positioning, and an enlarged sliding worktable—designed for users who value efficiency, consistency, and professional-grade performance. 2. Core Parameters Comparison Item Dream Factory MAXITA Appearance & Finish Simple structure, strong design sense, excellent build quality Dual-base design with modern aesthetics, stable metal structure Machine Positioning Versatile for manual/semi-automatic stamping machines High-precision digital control leather stamping machine Temperature Control Knob mechanical control Omron high-precision digital temperature control system Positioning System Positioning card ruler Red-dot laser positioning + positioning card ruler Holder Font Holder + Stamping Holder Letter Holder + Logo Stamp Worktable Fixed type Push-pull sliding type Applicable Materials Leather, paper, plastic sheets Leather, paper, PU, and other materials Size & Shape Compact model Medium-sized, larger working area 4. Appearance and Craftsmanship Highlights Dream Factory Materials & Structure Body made of brass and powder-coated steel, offering durability and a vintage aesthetic. Support base crafted from SUS 420 stainless steel, ensuring a flat, warp-free surface. The thickened design provides excellent stability. Functional Design Equipped with a swivel column for precise and repeatable stamping at the same spot, with flexible operation. Height adjustment knob is simple to use. Alignment guide paired with a quick-release mechanism allows accurate workpiece positioning. Quick-release attachment interface enables easy switching between different tools, such as movable type, die molds, or punching tools. MAXITA EC-27 Structure & Materials Steel frame with walnut wood accents and matte black powder coating, combining durability with modern aesthetics. Solid steel base with high dimensional stability, paired with a precision sliding work platform for both durability and accuracy. Functional Detail Design 16×20 cm elevated work table (optional 20×30 cm table) provides extra space for handling finished products such as bags. The platform features a high-precision sliding rail system with lockable positioning for improved efficiency and safety. Modular aluminum alloy body allows easy assembly/disassembly and portability. Positioning & Temperature Control System Built-in infrared (laser) positioning system for accurate alignment and improved stamping precision. Equipped with Omron temperature control system (a well-known industry brand), capable of maintaining temperature fluctuations within ±5°C to ensure consistent stamping quality. 5. Functional Details Analysis 1. Temperature Control & Heating Stability Dream Factory: Wide temperature range, suitable for general crafts, but temperature fluctuations are more noticeable during continuous mass production. MAXITA EC-27: Uses an industrial-grade Omron temperature control system combined with a high-power heating core, delivering excellent temperature stability and maintaining precision even during prolonged operation. 2. Positioning Accuracy Dream Factory: Primarily relies on scale marks and manual visual alignment, suitable for projects with low positioning accuracy requirements. MAXITA EC-27: Equipped with a built-in red-dot laser positioning system, achieving ±0.5 mm precision — ideal for brand logos and intricate patterns. 3. Mold Replacement Convenience Both Machines: Feature a detachable holder for quick swapping of logo stamps and letter stamps. 4. Operating Comfort & Stability Dream Factory Operation Feel: Compact structure, short press travel, easy to learn, ideal for beginners. Worktable Experience: Fixed or simple push-pull table is convenient for small items but somewhat limiting for larger pieces or frequent position adjustments. Stability: Moderate weight makes it portable, but under high pressure, slight vibrations may occur, affecting extremely high-precision work. MAXITA EC-27 Operation Feel: Smooth sliding oversized worktable provides ample space for placing and removing workpieces. Worktable Experience: Sliding table moves steadily and includes a positioning lock, enabling fast workpiece changes in batch production. Stability: Solid structure with heavier weight ensures virtually no vibration during operation, maintaining consistency and comfort in long sessions. Summary Dream Factory: Lightweight, portable, and easy to master, but less stable for extended or high-precision work. MAXITA EC-27: Solid build, smooth sliding operation — ideal for batch production and long-term use. 6. Best Choices for Different User Types User Type Recommended Model Reason Beginners & Craft Hobbyists Dream Factory Elegant appearance, intuitive operation, quick to learn; suitable for occasional small-batch production of leather, paper, and similar materials, with low requirements for temperature and positioning accuracy. Brand Studios Focused on Display Appeal MAXITA EC-27 Dual-base design with strong visual appeal, perfect for studios prioritizing brand image in stores or showrooms. Budget-Conscious Users Seeking High Value MAXITA EC-27 More affordable than Dream Factory without compromising on functionality; stable performance suitable for multi-material processing. Professional Workshops & Mass Production Manufacturers MAXITA EC-27 Industrial-grade temperature control, red-dot laser positioning, and large sliding worktable — ideal for high-frequency, long-duration batch production, especially where product consistency is critical. Conclusion The Dream Factory machine provides a well-rounded entry-level solution, equipped with essential features suitable for basic craft projects and occasional use. In contrast, the MAXITA EC-27 Stamping Machine offers advanced technology and robust construction designed to meet the demands of professional, high-volume production environments. When choosing between these models, consider your production scale, required precision, and budget to select the machine that best aligns with your business goals and craftsmanship standards. References Omron Corporation. (2023). Technical Explanation for Temperature Controllers. Retrieved from https://www.ia.omron.com/data_pdf/guide/53/temperature_tg_e_6_4_csm231.pdf Dream Factory. (2025). Product Overview. Retrieved from https://dreamfactory.com/products MAXITA. (2025). EC‑27 Hot Stamping Machine Specifications. Retrieved from https://jinglinmachine.com/products/maxita-ec-27-hot-foil-stamping-machine
-
guide Pencil Hot Stamping Guide
Jinglin posted a blog entry in How Does a Hot Foil Stamping Machine Work?
Introduction Hot foil stamping on pencils is a unique way to turn everyday stationery into eye-catching, personalized gifts. With a metallic finish in gold, silver, or rose gold, even a simple wooden pencil can become a premium keepsake. This technique is widely used for corporate giveaways, school souvenirs, wedding favors, and brand promotions. Whether you are a stationery business owner, a leather & craft workshop, or a DIY enthusiast, this guide will walk you through the complete process of pencil foil stamping—From selecting the right hot foil stamping machine to tips for achieving a clean, long-lasting finish, we’ll cover every step in the process. Read on to discover how you can start creating custom foil-stamped pencils that stand out. What is Pencil Hot Foil Stamping? Hot foil stamping is a printing technique that uses heat and pressure to transfer metallic foil onto a surface. In pencil applications, the foil is applied to the curved surface of the pencil body, creating a shiny, durable design. Unlike flat leather or paper stamping, pencil foil stamping requires precision positioning because of the pencil’s small diameter and round shape. The key to success is using the right jig or holder to keep the pencil steady during stamping. Tools & Materials Needed To start stamping pencils, you will need: Mini Hot Foil Stamping Machine – A compact model with adjustable temperature and pressure (ideal for small cylindrical objects). Brass Letter Stamps or Custom Brass Logo Dies – For names, initials, or brand logos. Stamping Foil – Gold, silver, rose gold, or custom colors suitable for wood and lacquer surfaces. Pencil Holder – Ensures the pencil stays in place and aligned during stamping. Heat-Resistant Gloves – For safe handling of heated parts. Step-by-Step Guide to Foil Stamping on Pencils 1. Design & Prepare the Stamp Decide on your design—this could be a name, logo, or special date. For the best results, use engraved brass letter stamps or a custom brass die. 2. Set Up the Machine Set the temperature between 100°C–130°C (adjust based on foil type and pencil surface). Adjust pressure to ensure firm contact without damaging the pencil. 3. Position the Pencil Place the pencil in a cylindrical holder or jig to keep it from rolling. Align the stamp with the exact position where you want the foil design to appear. 4. Apply Foil & Stamp Insert the foil between the stamp and the pencil. Apply pressure for 2–4 seconds to transfer the foil evenly. 5. Cooling & Inspection Let the pencil cool before removing it from the holder. Check the stamped area for complete foil coverage and sharp edges. Tips for Perfect Results Use high-quality foil to prevent peeling or fading. For lacquer-coated pencils, choose foil designed for coated or painted surfaces. Test on a sample pencil before doing bulk production. Keep the stamp clean to avoid unwanted marks. Creative Applications Personalized Gifts – Names or inspirational quotes. Wedding Favors – Couple’s initials and wedding date. Corporate Branding – Logo and slogan for promotional giveaways. School Events – Graduation year or school name. Common Questions and Solutions (User Pain Points) How to properly adjust temperature and pressure? It is recommended to start testing at a low temperature (around 100°C) and gradually increase to the ideal setting. Pressure should be sufficient to firmly adhere the foil but not so high as to leave indentations on the pencil body. How to avoid damaging the pencil surface or foil bubbling? For painted surfaces, use low-temperature foil and shorten the stamping time to prevent prolonged high heat exposure. Which foil is suitable for wooden or painted pencils? Wooden surfaces can use general-purpose foil, while painted surfaces require special coated surface foil for better adhesion. How to prevent the pencil from rolling during stamping? Use a dedicated cylindrical clamp or V-shaped groove worktable, and assist alignment with red laser positioning or ruler measurements before stamping. What to do if the stamping fails? Incomplete foil transfer → Increase pressure or extend stamping time. Blurred foil surface → Lower temperature or shorten stamping time. Fuzzy edges → Check if the mold surface is clean. Conclusion By mastering these steps and troubleshooting tips, you can achieve precise and flawless foil stamping on every pencil. Remember: slow adjustments, multiple tests, controlling temperature and pressure, and using proper fixtures—these four points are the key to success. -
Yes, I have compiled a table. Please check it out. I hope it helps you too.

-
Foil Stamping Temperature Testing: Finding the Perfect Temperature To explore how temperature affects foil stamping results, I tested the hot foil machine using Gold Foil on 1mm thick vegetable-tanned leather at three temperatures: 110°C, 120°C, and 130°C. Here’s what I found: 110°C: The foil stamp was clear and sharp with clean, crisp edges, but the overall effect looked flat, lacking gloss and depth. 120°C: Depth and gloss improved significantly; the design appeared vivid with relatively clear edges, although slight edge blurring was visible under close inspection. 130°C: The foil was thick and rich, but edges became smudged and showed signs of bleeding due to overheating. In summary, 110°C is ideal for precise, crisp results, while 120°C strikes the best balance between depth and clarity. Depending on the material, intermediate temperatures like 115°C are also worth trying.
-
Foil stamping has taken the design world by storm. Whether it’s elegant wedding invitations, high-end packaging, or custom leather goods, the shiny metallic allure of foil stamping instantly elevates the look and feel of your work. But achieving flawless foil stamping isn’t always easy. If you’ve ever wondered: Why do my foil-stamped edges look smudged or uneven? How can I achieve a foil design that’s sharp, consistent, and has real depth? Why do some stamped fonts appear flat while others seem to melt into the surface? You’re not alone. These questions trouble designers, hobbyists, and professionals alike. In this article, we’ll dive into why these issues occur—and more importantly, how you can overcome them. Let’s break it all down. 1.Understanding the Foil Stamping Process and Common Issues Foil stamping is a printing technique that uses heat and pressure to apply metallic or pigmented foil onto surfaces such as paper, leather, or fabric. When done right, the results are shiny, bold, and eye-catching. Why do foil edges smudge or look uneven? Common causes include: Temperature control: Too low, and the foil won’t stick properly; too high, and it melts or blurs. Pressure: Uneven or excessive pressure can cause oversaturation or poor transfer. Material compatibility: Different materials absorb heat and bond with foil in different ways. Getting these elements dialed in is key to achieving a perfect, sharp foil effect. 2.Foil Stamping Temperature Testing: Finding the Perfect Temperature To explore how temperature affects foil stamping results, I tested the Maxita hot foil machine using Gold Foil on 1mm thick vegetable-tanned leather at three temperatures: 110°C, 120°C, and 130°C. Here’s what I found: 110°C: The foil stamp was clear and sharp with clean, crisp edges, but the overall effect looked flat, lacking gloss and depth. 120°C: Depth and gloss improved significantly; the design appeared vivid with relatively clear edges, although slight edge blurring was visible under close inspection. 130°C: The foil was thick and rich, but edges became smudged and showed signs of bleeding due to overheating. In summary, 110°C is ideal for precise, crisp results, while 120°C strikes the best balance between depth and clarity. Depending on the material, intermediate temperatures like 115°C are also worth trying. 3.The Science Behind Foil Stamping Why temperature matters Low temperature = weak bond, flat effect. High temperature = overactive adhesive, causing smudging. The ideal range is 110°C to 120°C to activate the adhesive just enough for a strong, clean bond. The role of pressure Too little pressure = patchy, incomplete design. Too much pressure = bleeding or distortion. Material selection Different materials react differently to heat. For example, bull leather retains heat differently than paper. 4.Tips for Getting the Best Foil Stamping Results Control temperature: Stay between 110°C and 120°C. Adjust pressure: Ensure it’s even and appropriate. Use high-quality foil: Match foil type with your surface material. Always test: Run trials on scrap material before full production. Summary: Successful foil stamping relies on precise control of temperature, pressure, and material compatibility. Too low a temperature results in poor adhesion and flat designs, while too high a temperature causes smudging and blurred edges. Pressure must be even and appropriate to ensure clean, complete foil transfer. Different materials respond differently, so thorough testing is essential to find the optimal settings.