


Don101
-
Posts
738 -
Joined
-
Last visited
Content Type
Profiles
Forums
Events
Blogs
Gallery
Posts posted by Don101
-
-
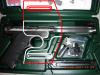
here is somthing you could use the guid lines ive drawn in your pic to make the patern from your box
i hope this helps you out or atleast gives you an idea how you could make the basic pattern, Don
i would leave the back piece straight ..dont cut out the trigger
-
what type of holster do you have in mind pancake, flap holster, and so on and what would you like on it carving stamping ect as a desighn
-
thanks clay for the info now i know how it works and what it is
-
ok i have an idea looking at the pic i could make you a pattern pic just by using the contours of the inside of your box as a reference point, post or send you the desighn and all you have to do is blow it up to the size of your box interior
-
Hi Arts and welcome there is some great stuff there i also like the rose
-
you could always add a small simple pulley system and drop and raise the lighting to suit your needs,
i have three spot lights on the ceiling above my industrial tools a have a large fluorescent light above my table the second will go up when i get around to it and i will rig it up so i can drop and raise it above my table, i also have a small florescent light at the table end above my stamps and three movable spot lights that i can arrange where needed when carving or stamping,
and i wonder why my electric bill is so high ..LOL
-
WoW that turned out really good, i like it, nice job
-
no i dont have that one ....sorry i mainly have all the old west type or for 1911s ... what the hell is it ?
-
Amazing your lucky you didnt lose your finger there it looks so real, would it be possible to see the actual tools you use for the job as it is hard to see what it is some times, like the round one you use on the teeth, or is it just som thing you use to lift with?
-
there are some nice setups there guys thanks for sharing it has given me a few good ideas how i could improve my set up that i have, i like the idea with the boarding with holes in it and hooks
-
very good find and very interesting... how he made it look so easy and boy he works fast
-
nice work i like the saddles there is still and old style look to them
-
i cant really tell what part of a saddle it is from the picture, but if you are going to patch it put the leather piece underneath so all you will see is the stitching on the top piece just an idea
-
nice seat and welcome
-
YO Happy B Day from me too
-
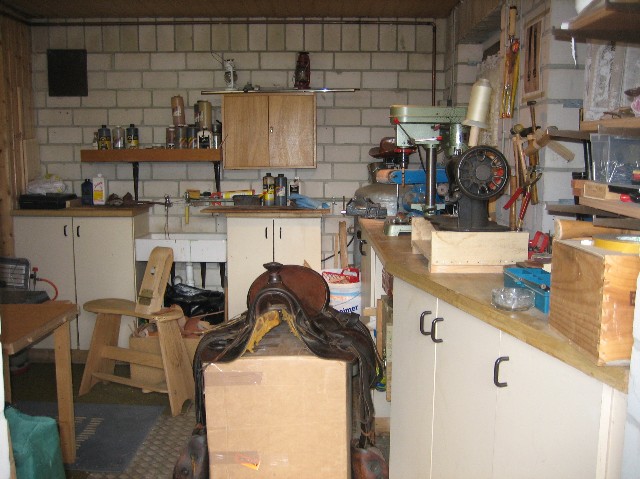
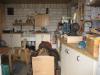 this is the view from the outside door as you can see i have a sink in the middle to the left i have my oiling section, to the right i have my dyeing section, and a long the right hand side a long work area with power tools you will see a beter pic from another angle
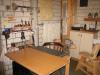 in this picture you can see my stitching horse and to the left my main work area table with stamps cutters and other leatherworking tools, buckles are also hanging on the wall, i also have three movable lamps so i dont have any shadows on my work when i am stamping, i also have central heating and a small gas heater if im only in the workshop for a small period in winter
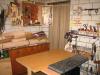 from this view you can see the main table and another entry point from the garage which also leads in to the house, and again more tools on the walls and storage, in the draws i have buckles and rivets and thread glue and alsorts of small items
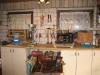 this view is standing in the door next to the table, as you can see i use this work area for the dirty jobs like sanding and burnishing i also have a on the right where i store my rivits in the blue box and in the middle i store my large hammers for the havy duty work, underneath is also alot of storage
 -
nice shop and set up just amazing and so tidy my work shop always looks so untidy ill get in there and take some pics
-
i hardly use them but looking at the picture of the setter it looks like a good tool, another way you could probbably set them is if you have a sturdy drill stand and just use it to conpress the rivets by putting a bar in the drill bit and lowering as if you were going to drill,
dont turn it on ...just kidding
-
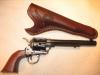
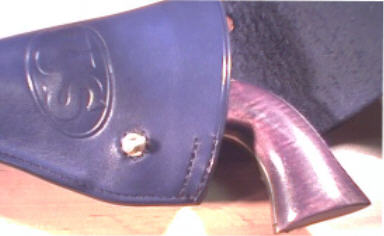
Somthing for fun, i picked up a miniature colt a couple of weeks ago and wanted to build a holster for it so it can sit on the laptop as deco
-
yes there is some stuff in here i dont have my own specialized web page for selling http://www.leatherworker.net/forum/index.php?showtopic=849
-
it too dampen the inside before assembly and polish - buff with wood and bone slicker
-
Hello and Welcome Scott
-
im the same as abn i just run over with an overstitcher for a better visuall affect
-
if it doesnt need a date try this, this is a holster that i made also millitary but they used it on there scabbards you stitch a piece of leather in the insid of the seam and it does keep the scabbard open
it is on the insid of the holster
it is one piece thats about 9oz thick and a slight v shape like a chevron, or you are probabbly better off making the scabbard first and working out what angle you need for the insert, you skim both ends and stitch the bottom line first then the top then stitch the main seam once its pulled together its a little tricky but not all that bad as it sounds
 if you look at this side view you can see why the v shape
the whole view of the holster


Introduction
in Member Gallery
Posted
Hello Valdez welcome to the site .... by the way your name was and is a great film