-
Posts
197 -
Joined
-
Last visited
Content Type
Profiles
Forums
Events
Blogs
Gallery
Store
Everything posted by JustKate
-
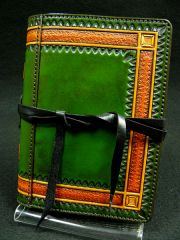
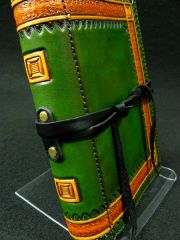
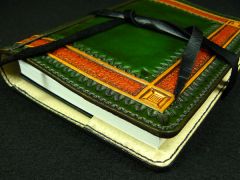
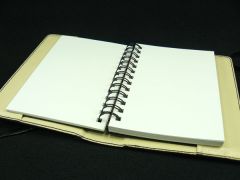
This one took a little longer than usual because I had to start over after it was almost finished, because the dimensions turned out to not be quite right. DOH! And this one turned out with some crooked stitching on the inside that I'm not so proud of. The pigskin lining I got for this is nice, but I had a time getting the needle to go through it. It will stay together, though, and it looks okay on the outside, and since I've already missed my shipping deadline, it's gotta go! Kate
-
Thanks for the responses, guys, I know this is probably a tough one... This one, I've been using for a couple of years to split 6oz down to 3-4oz., and it's been working perfectly up to now, even with W&C leather, which is relatively tough to cut through. That ended up being part of the problem. The set screws had wiggled loose, so I defied the instructions in the manual and played with them. That made it better, but it still has problems with some of the tougher pieces I've got. Probably from those couple of "special" grade sides I got from W&C a while back. That's the other part of the problem. When I put the feed rollers close together and look at the gap between them, I am seeing a slight bow. I"ve actually been seeing that for a while, but I guess it's just now getting to the point where it's affecting how the machine works. Are those rollers just going to have to be replaced, then? Thanks again, Kate
-
Just spent another hour and a half fussing around with it... more sharpening, more adjusting, a few more square feet of trashed leather... Still no luck. I guess if nobody has any ideas, the next stop will be Tuttle Creek Dam. It might at least feel good seeing it hit the rocks on the way down into the water. Kate
-
Okay, now after a little more trial and error with adjusting the roller tension (because there is not thing one in the manual about how to do this properly), the leather feeds equally on the left and the right. But now the middle won't feed. Kate
-
I wonder if one of you guys with any experience with a Landis 30 crank splitter can help me troubleshoot a feed problem I'm having with mine. Here's a photo to show what it's doing: The rollers tend to grab more on the right side than they do on the left, and eventually it just crumples the leather into a useless wad. I have just sharpened the blade, and it's cutting very smoothly, so I'm pretty sure I've ruled that out for now. It appears to me the problem is with the roller tension or something that affects how the rollers move. I've been adjusting the roller tension (and adjusting, and adjusting) for two hours and wasted lot of leather testing the adjustments, but it just keeps doing the same thing. Anyone got clue what might be the cause/solution of this problem? Thanks! Kate
-
As is all of your work, this is gorgeous. Do you make the covers for these books, or cover the existing one with leather? Kate
-
I knew it would be the holster makers who would get it. I kept seeing new topics titled "Latest Pancake" and "New Pancake", etc. I knew they were talking about holsters but it just struck me funny to think one of them could actually be just a pancake. Then I thought, why not, I'll just have a little fun. Anyway, thanks for humoring me. I know it was a groaner! Kate
-
-
Always happy to see a little more eye candy - I love what you did with those scroll holders, Tina. Those are just beautiful!! Kate
-
From the album: Katherine Louise Leather Designs
© © 2011 Katherine Louise Leather Designs
-
From the album: Katherine Louise Leather Designs
© © 2011 Katherine Louise Leather Designs
-
From the album: Katherine Louise Leather Designs
© © 2011 Katherine Louise Leather Designs
-
From the album: Katherine Louise Leather Designs
© © 2011 Katherine Louise Leather Designs
-
New pancake, whole wheat buttermilk, worn IWB. Sorray, couldn't resist the pun. Have a super day! Kate
-
Hiya Baker, We're glad you joined us. Don't forget to bring a camera to class and post photos of your work and theirs. Kate
-

Saddles For My Little Boy And Girl And Their Ponies
JustKate replied to Billy H's topic in Saddle & Tack Maker Gallery
Wow, Billy, you are one cool dad! Those would be the envy of any kid. Kate -

Neat Lac Substitute
JustKate replied to impulse's topic in Dyes, Antiques, Stains, Glues, Waxes, Finishes and Conditioners.
I also use Deft and am very pleased with the results. If it's not available by that brand name, just look for any lacquer-based wood finish product. At the local stores where I live, it's available in quart or gallon containers as a liquid. It needs to go on in 2 or 3 very light coats. I've been applying it with a small piece of lambswool scrap, working it into the carving or tooling, then using a clean piece of lambswool to wipe off as much as possible. Give it 10-15 minutes to dry, then repeat once or twice. Kate -
I've got a lined book cover I made 4 years ago with pockets done this way. The folds have stayed down perfectly well. But I understand your concern. You can substitute the rubber cement with whatever you like better. Kate
-
I have noticed a few questions coming up lately about how to do "rolled" or turned-under edges for pockets and other lined portions of projects such as book covers, wallets, and cases. For another approach to linings and pockets, Kevin King posted a great tutorial on his method of making wallet insides. This demo shows another method of rolling inside pocket edges to give them a smooth leading edge, using a French skiving knife. For this demo, I have a book cover for which I'm making sleeves for the cover of the sketchbook or journal to be inserted into. This is some very light chrome-tanned pigskin split (1.5oz), so it works well to turn the edge under, or "roll" it, to give it more strength and a more professional look. Here's what I'm talking about: The inside edge is the one that is turned under. With it turned under like this, it won't stretch as much with use, and looks more "finished". Sometimes a modeled groove is pressed about 1/8" from the folded edge to give it a nice trim touch, but this particular piece of leather doesn't take a modeled impression very well. If I was using something veg-tanned, like goat or calfskin, I would do that. The outside edges for this particular item are "raw" (not rolled or turned under), but they are burnished to give them a finished look. I learned to do this from one of George Hurst's instructional videos, "Rolled Edges", so if you are interested in more detail about this technique, I recommend getting the video. (http://www.hidecraft...emart&Itemid=35) I start with a piece of leather that is to become the pocket of this book cover. I have the outline of the pocket transferred to the flesh side of it, and have already cut along the line of the pocket where it will face in towards the inside of the book. This is the edge to be rolled. The outside edges I leave uncut for now. First, I use a French skiving knife to start an angled cut along the edge of the leather. A straight edge helps guide the knife and also helps keep the thin leather from buckling as the knife is doing its work. Note: The knife must be extremely sharp, something similar to that of a head knife, especially on this tough pigskin. The knife in this demo is a Hyde French skiving knife I got from Hidecrafter, and it took some time and attention to get it sharp enough to be useful, but now that I've got it really sharp, it does the job nicely. Leather Wranglers also makes an extremely nice (as in, WOW, beautiful and amazing!) skiving knife that I highly recommend. This method of skiving very thin leather can sometimes require a few passes with the knife. With cow hide, I can sometimes cut all the way through in one pass, but this pigskin takes me three. Once cut is complete, the edge of the leather should have a "feather edge", in other words, the thickness should decrease gradually to nothing. Next, I want to make the fold. To make a nice straight and sharp fold, I need to make a crease along the fold line. Before making a crease, it helps to moisten the leather along the fold line. I use a cotton swab dipped in water to do this. Next, I use a modeling tool to press a groove along the fold line. This helps the leather fold neatly along that line. Here, I am applying rubber cement to the fold line to make the fold stick once I fold it. The brush that came with this particular jar of cement is a bit fouled up, so it got a little out of control, but since this surface is not visible, it's not a show-stopper. I do try to avoid that, though, and just put the cement exactly where I need it. Next, I fold the leather along the pressed groove... The groove makes it easy to make a perfect, straight, and flat fold. To flatten it more, I sometimes run a rolling pin over it, but with leather this thin, I was able to just press it flat with my fingers. This is how it looks from the flesh side after the fold is done. Notice how the skived and folded edge blends into the back-side of the pocket to form a fold that is smooth and flat. The pocket is then sewn into the cover. I normally don't trim the outside edges of the pocket until after it's sewn in. This is so I can trim the edges to perfectly match the outer edges of the cover, as the pattern lines rarely match the edges of the outer cover perfectly due to shrinkage and other factors. Kate
-

Sales Psychology: Why People Won’T Pay Your Rates Blog Post
JustKate replied to cem's topic in Marketing and Advertising
It sure is refreshing to find a blogger who actually knows something about which he writes. Thanks for sharing this little gem. Kate -
I like that. Or for that matter, anything that involves furniture and leather. Is the seat frame hollow? (Presuming so, since the leather appears to sink down in the middle.) Thanks for posting. Kate
-
Excellent tip! This will definitely save some stress on a few of the items I make. Thanks for posting. Kate
-
(JustKate -> a.k.a. CitizenKate): I have a set of bevelers from the Hidecrafter Pro Crafter's line. They are a bit steeper than the Craftools, and much, much smoother. The texture of the stem was created by sliding a B-893 along the length of the stem. Glad you asked - I totally forgot to mention that! Kate


