steve mason
-
Posts
275 -
Joined
-
Last visited
Content Type
Profiles
Forums
Events
Blogs
Gallery
Store
Everything posted by steve mason
-
Just for you Gummy From Wikipedia, the free encyclopedia Hutterites are a communal branch of Anabaptists who, like the Amish and Mennonites, trace their roots to the Radical Reformation of the 16th century. Since the death of their founder Jakob Hutter in 1536, the beliefs of the Hutterites, especially living in a community of goods and absolute pacifism, has resulted in hundreds of years of odyssey through many countries. Nearly extinct by the 18th and 19th century, the Hutterites found a new home in North America. Over 125 years their population grew from 400 to around 50,000. The Hutterite community has one of the highest fertility rates.[1]
-
thanks for all the help, I talked with Texas Dies yesterday, seemed like good people. there is a local Hutterite colony making dies, I might give them a try. I am going to get dies for buck rolls, latigo, cinch an hobble carrys and maybe the rope strap buckle end. I don't have a real clicker just a shop press. If I get some dies from the Hutterites I'll let you know what I think.
-
Howdy; I am wanting to get a few clicker dies made to my patterns. Anyone who has some experiance getting dies make could you let me know where some good die makers are and the quality of the dies etc. I believe that Weaver and big Sky dies both make custom dies. thanks for your help Steve
-
I am in Canada so my base will convert to be higher than a lot of makers in the states, with the American $ getting weaker we are about at par for exchange rate, just a few years ago the exchange was around 50 cents so us canadians were quite a bit cheaper once the conversion was done, now we are more expensive than most Americans ever though we did not change our prices. For makers who I would consider of quality, I am in the same base range as most of them up here, $4000. I do not make my own trees, but I use only true custom made trees, by either Rod Nikkle and some by Glen Christman. I have a definite bias towards using true custom trees, I see to many makers using cheap factory trees is there saddles then advertising that they are a custom maker, it just doesn't seem to make sense for me to do this. to get a true custom tree will only cost a couple hundred bucks at the most to get a tree that will make your saddle making life much better, not only do these trees fit horses better but they are much nicer to build on. OK, I'll get off my soap box now. I try use the best of materials in my saddles, hearman oak, harwood hardware, shearling (never the fake crap) etc. In my base price the saddle is ready to ride with latigos, cinches and base stirrups, I also include the flat plate riggin. When I do some Internet surfing I am sometime amazed by some makers who look to building nice stuff but are way to low in their base price. Even at $4000 Canadian, I am not making a killing, I just don't know who some of these guys can charge only $2000 with out sacrificing something in their saddles or their own pocket book. From What I have seen and have been told by some American makers, the average base of good makers is about $3200-$3500 US. Keith, hair on you for getting $6500, you might be one of the only guys getting paid what you should if you compare our rates to other tradesmen, think about what your mechanic or plumber charges you per hour, I'll bet most of us are not getting paid what those tradesmen are. Bob: what is your base at now days?
-
Howdy; the tools are sold, sorry for not getting back to any of you that PM or emailed me. My computer had a brainfart, my wife just got it going tonight.
-
Howdy; I have a set of 4 Bill Woodruff checkered bevelers. These tools are stainless steel. Bill makes some of the best tools I have seen and used. I am selling the set for $100 plus shipping. I would also consider a trade. you can PM me or email me at; flynsaddle @ shaw.ca Thanks much Steve
-
I use the grey apron split that is generally called mulehide, I have been using elktan lately and like using it very much., this will be my regular horn wrap from now on. I am putting it grain side out. the elktan goes on a little smoother and is very nice to rope with, it is a little stickier than mulehide and does not glass up near as quick, it will stretch more than the mulehide. If you call someone like Caledon leathers in Calgary or Sheridan outfitters they usually have both in stock. Weaver has the mulehide, I'm sure there are more sources out there, but I am in Canada so I will use different vendors that you.
-
here is how I put in an inlaid padded seat. - the seat is fit and shaped final and allowed to dry -the inlaid pattern has already been laid out, then the cut out or plug is cut with a straight knife -the inlay leather is fit over the plug (which is on the ground seat) and the edge is shaped with a tickler, then the seat is put over the top fo the plug and inlay leather and spiked into place and I run a bouncer around the edge of the inlay to get a nice crisp edge flush with the seat -the foam is cut large and set on the ground seat, then the seat is spiked into place and I mark out the foam just a little smaller to account for the thickness of the inlay leather -the foam is then glued to the shaped inlay leather, I usually turn the plug upside down and and them put the grain side of the inlay against it to support it while gluing. -then I french edge the bottom side of the seat about 1/2" to 3/4" to account for the thickness of the inlay leather -the seat is stitch marked and the hole edge is slicked -the inlay with the foam already glued in place is now glued to the seat -then I stitch with my machine and trim and french edge the inlay leather smooth -then the seat is glued to the ground seat the same as you would glue in a seat without an inlay this is how I have done inlays for a lot of years now, like I said before I came up with this method from trial and error. If any of you have some tips to improve this method I sure would like to hear them.
-
Saw some interest about putting in stingray seats on Ryan Copes "latest saddle" post. I did not want to take over that post so I started a new one. I have done at least a dozen stingray inlaids over the years and have made a few pair of buck rolls out of it also. I have never had a problem with sewing on my machine. It seemed to sew the same as anything else I stitch. I saw no adverse wear on the needles or anything of the like. Stingray makes a hell of a good inlaid seat or buck rolls, looks very classy. I have not built a saddle with it for a number of years now, I still build most of my saddles with an inlaid seat, I usually use an oiltan chap/boot type leather for the inlays now. the main advise is to cut the ray with an exacto knife as it would be pretty hard on your round knife. (this is the only job I use a exacto knife on other then opening boxes) I also am self taught on putting in inlaid seats, and have never really seen how anyone else does it. I am pretty happy with my method but as usual I would like to speed it up without sacrificing any quality. here is a photo of a sting ray seat.

-
Howdy Ryan; Nice looking rig, thanks for posting the photos. I really like how your carving jumps in and out and around the borders, I have seen this on other photos of your work, you execute this very well. I may have to give it a try some day. Having Chuck go through your saddle would defiantly make the trip worth while, I'm sure you got a ton of good info from him that will better your saddle making abilities, any time someone can get some tips from a master like him is great opportunity. Once again Congratulations. Steve
-
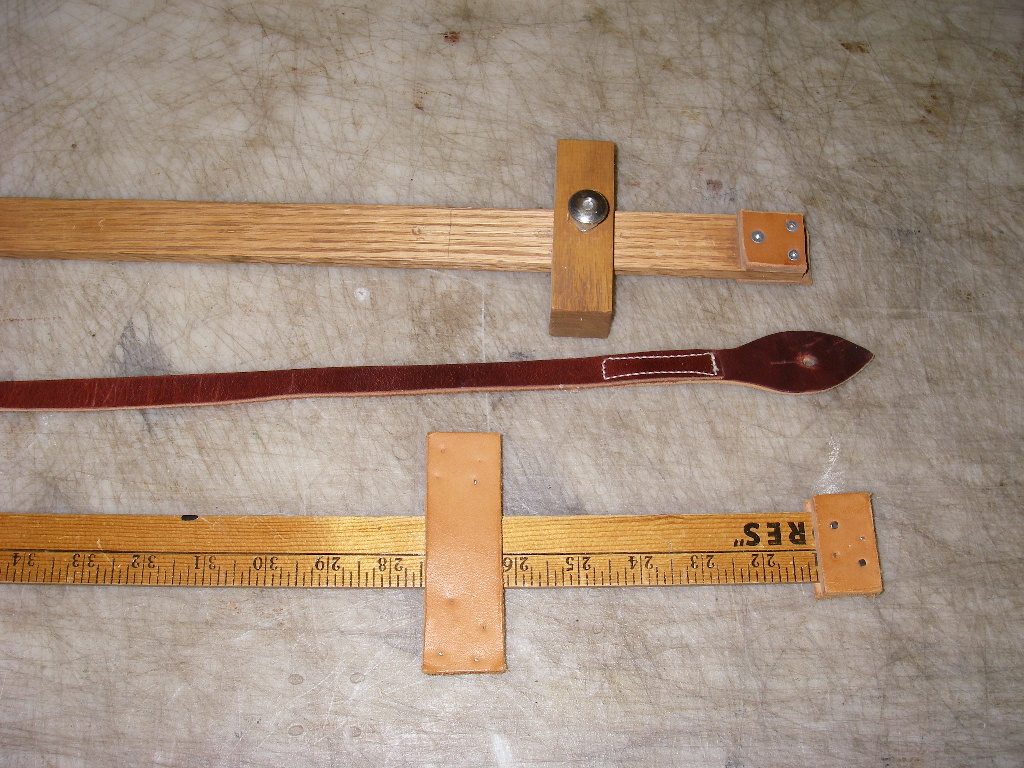
Great topic here. I, like Greg use the ball or rounded part of the bar pad to refer from, since I also have been to the Matt Eberle school of rigging position, that method may have come from Cliff Ketchum since Matt was influenced from him. The ball usually corresponds with the lowest drop of the bar pad or close to it, it is just another reference point although I do have to remember that the drop it is not always Hoyle. I also use the jig for measuring the depth of the rigging plates. I use two jigs, one stays set for the front rig and the other for the back. Instead of a string I use a 1/2" strip of latigo to measure with. I will put a nail centered on the top of the cantle, and in the cantle gullet, I find center there with a center finding rule. Along with these two points of measurement I use Harwood method of measuring from the back bar tips to the front rig plates, the tape will run both over the top of the bar and under the bar pads. Using this measurement I have to be careful since the lacing of the tree can some times interfere with the measurement. I feel like I want as many measurements as possible to make sure that my rig is square from side to side both forward and back and up and down. Here is a photo of the jigs I use to measure depth with. the ruler I made and the all wood jig Matt made for me. ps; Ryan Cope, I heard from the rumor mill that you won the show at Kamloops, congratulations. Do you have a photo of the saddle?
-
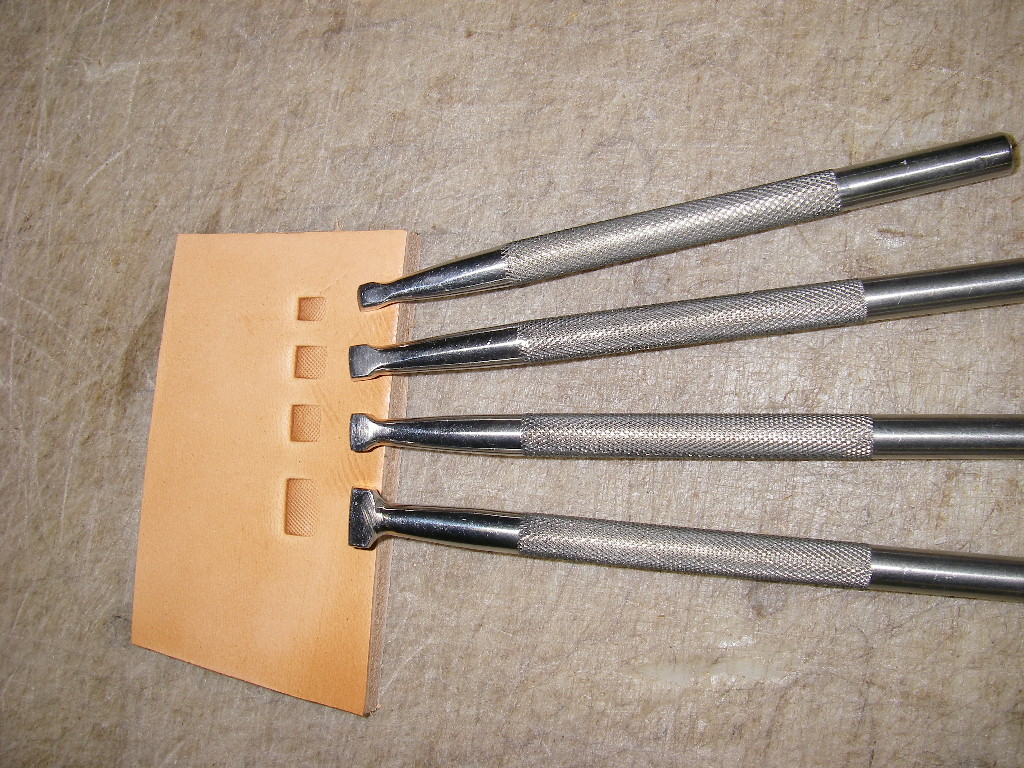
I have one and have used it for years, it works fine for gigantic australian field mouse (kangaroo), I have not used it on rawhide but I don't believe that it would work well for that. It is not the most comfortable tool to use, but it gets the job done. On my last side of kangaroo, I cut to 1" with my draw gauge then cut lace to final size with my Hanson style string cutter, doing this seemed to save me some time and I had better string when I was done. For my limited rawhide experience I do the same with rawhide. As I mentioned with this osborne tool I don't think it would work well with rawhide.
-
If you click on this link http://www.saddleblog.blogspot.com/ it is my blog, go back to the 2007 archives, you will find a few photos of a straight up bind and also some with a cheyenne roll. I do not use the back cantle filler in a straight up bind, only on Cheyenne's.
-
thanks for the tips Keith, I will give them all a try, I appreciate your time and help, look forward to meeting you this spring. Steve I sent you a PM
-
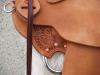
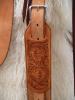
I want my binds as firm and ridged as possible, in my opinion I see way to binds that are loose or floppy when the saddle is new let along years down the road. In my binds there is 4 layers or leather before the final bind is put on, so in total you are sewing through six layers. On the back side there is the cantle back, then you take the cantle back off and install a back cantle filler that is skived to paper thin with only about 3/4 to 1" over lapping the back cantle, then glue the back cantle into place and fold the back cantle filler down. Now finish all your ground work. Then install the front side cantle filler, it should overlap your ground seat from 1 1/2 to 2 1/2" . Then you seat goes on. This will add up to your 4 layers. When you fit the bind put the top leading edge as close to the front edge of the cantle as possible, this will help firm up your bind. Most makers seem to fit the leading edge about a 1/2 to 5/8" back of the front cantle edge, then there will be more bind going out the back therefore easier to flop around. When stitching the bind you will have to angle your awl back with the method I use, if the bind edge is back aways your awl will be running straight up and down. I will post a photo of a finished bind, notice how close the leading edge is to front side of the cantle. Again, throughout all the steps mentioned here is to get me to the final result of a rock hard bind with no movement in it at all.
-
Howdy; thank you all for your kind comments and especially for your constructive criticism, I am here to learn and better my rigs. I'll do my best to reply to all that need one here, this much typing will make my brain hurt, Dyslexics Untie! Jon; everything you said to me I would just have to reply to by saying Dido (which by the way was my speech at my wedding, my new bride said everything that needed to be said so I followed with Dido) I am very impressed with your work. I would look forward to meeting you at Sheridan, I will be the big fat Canadian with a moustache wandering around, an easier way to find me might be if you are at Kings party to ask one of the bartenders in the rope shop to point me out, you would want to talk to Gary Or Dan, they usually tend the bars at the party, they will be able to pick me out. Bob; see you at Sheridan Keith; First off, thank you much for all your comments, it is a real treat to get some tips from a maker of your talent and caliber, we are all very fortunate to have you here. I will give you a little bio on myself, I have been building since 1989, I spent a year at kings, half of that time in the repair shop and the later half with John King, I then returned to Alberta and have been building saddles here. I have received much tutelage/advise/friendship from a local maker here whom I respect to the highest degree, Matt Eberle, I also spent 2 1/2 years working with John Vissor in his shop, we we building the Ray Hunt Saddles for Dale Harwood, this experience was one of the greatest i will have in my life, between what I learned from John and Dale was worth millions in my books. Since then I have been back in High River, Alberta building out home based shop. I have taken summers off for the last 8 years to guide fly fisherman, I an not planning to guiding as much and focusing more on my saddle business as I know it suffered because of the fishing. I am trying to build the business and get some more orders. I think you are on right about the ring position in the plate itself, I will move it up on the next one, the rear dee could be a little higher to get the jockeys to cover it, this has been a problem area with me. The next time I do this rig pattern I will be adjusting it. An interesting thing about this 550 ring compared to what I normally use, 777's, this saddle is made on a tree from a maker that I have not used before, the front bar pads are a lot shallower the the tree I use regularly. my 777's are always set about 6 1/4" to 6 1/2" below the front bar pads, on this saddle the bottom of the rings are about 7 3/8" below the bar tips yet when I saddle up the latigo wraps are in the same place as they were on my last saddle with 777's. i could tell this by the marks on the wear leathers on my 5 star pad. I typically send out saddles with a 32" cinch. I have never creased the edges on a saddle before, but I may give it try in the future. I quite often with run a double cut border or beader whichever you want to call a plain smootout saddle or on ruffouts. here is a photo of a smooth out rig with just the double cut border. I agree this helps the look and flow of plain saddles, in hindsight I with I did that to this saddle. I have only been using this cinch design for a little over a year now, I first on a saddle made by Long & Dewey, I changed the pattern to suit me some more and have been happy with it, I do like the leather consumption because with my parts layout and cutting I find it easier to get the 3 smaller pieces for this flank the I did finding the one large piece I need for my old flank pattern, even though it uses more leather it seems to work better for me. "You should stitch your leather keeper behind the buckle on your rope strap" are you referring to how I stitched the loop on one side then tucked the other side in and brass tacked it, could you please elaborate a little for me. I also wonder if you could explain you method of doming the rivets before you install them, I was talking to Ross Ellis yesterday and neither of us could get it right in our heads, if you could explain a little more I would appreciate it. I will definitely try your tip about the back jockeys, I agree they could be tighter. On our way to Sheridan this year we are planning to come through Cody, I would like to drop by for a visit if possible, would that be a problem and would you be around. I'm pretty sure by the end of that trip my wife will be pretty tired of saddle talk. LOL don101; to answer you question, usually what dictates how a saddle for myself will look is time, on this rig I had planned to make it a full 1/2 breed flower carve, but them I sold the saddle I was using so I had to get this one finished ASAP. As with most makers time is always an issue so I am pretty sure I'll be riding ruff outs for a long time to come. fpotter; good to hear from you, glad your on the site. Getting Harwood hardware is a different for me that you since I am in Canada, but I believe if you call Dale you will get the hardware from him or he will get you in touch with Twain. gtwister09; thanks for the kind comments, in regards to the function aspect of a saddle, that is my number one priority, then balanced lines and clean work. In my opinion if the rig does not function proper, I don't care how nice the finish or carving or even how nice the lines are that saddle is still a piece of crap. I'm sure we all have seen saddles that are the prettiest thing we have ever seen, but you could ride the seat across the yard let alone spend some long days is it. I do know makers that I have met over the years where pretty was more important that function, not in my shop, and I'm sure not in yours either. I new my brain would hurt, this took almost to hours to reply. Thanks Again for all your input and tips. Steve
-
Howdy Bob; there is a lot of good things to note about Keith's shop's shop layout is set up about as good as it gets, there is no wasted steps to get anything, his stand is in the middle, and he just works around it, looks greats. the only tips I could give you on a benches is make them strong so they have no bounce, especially your stamping bench. I have a large rock, 5" thick, my benches all have 4X4 legs with 2 layers of 3/4" plywood, may rock does not bounce at all. My sure your benches are not to low, I am 6'1" and my bench tops are 42-43" high, there no reason to spend al day bent over if you don't have to. In other shops I have worked in I have had benches where the rock is inlaid into the bench which is nice, when I was working with vissor his benches have a 10X10" square cut out of the corner with the garbage barrel under, this was very handy, and I only threw out one tool by accident in the 2 1/2 years I was there. My cutting table is 4'X8', it is nice to be able to walk all around the cutting table but limits of space may stop that.
-
Howdy; found this on ebay, item # 250220850703 , it the the 2006 Steve Mecum TCAA saddle that did not sell, there is a youtube link of mecum talking about this rig.
-
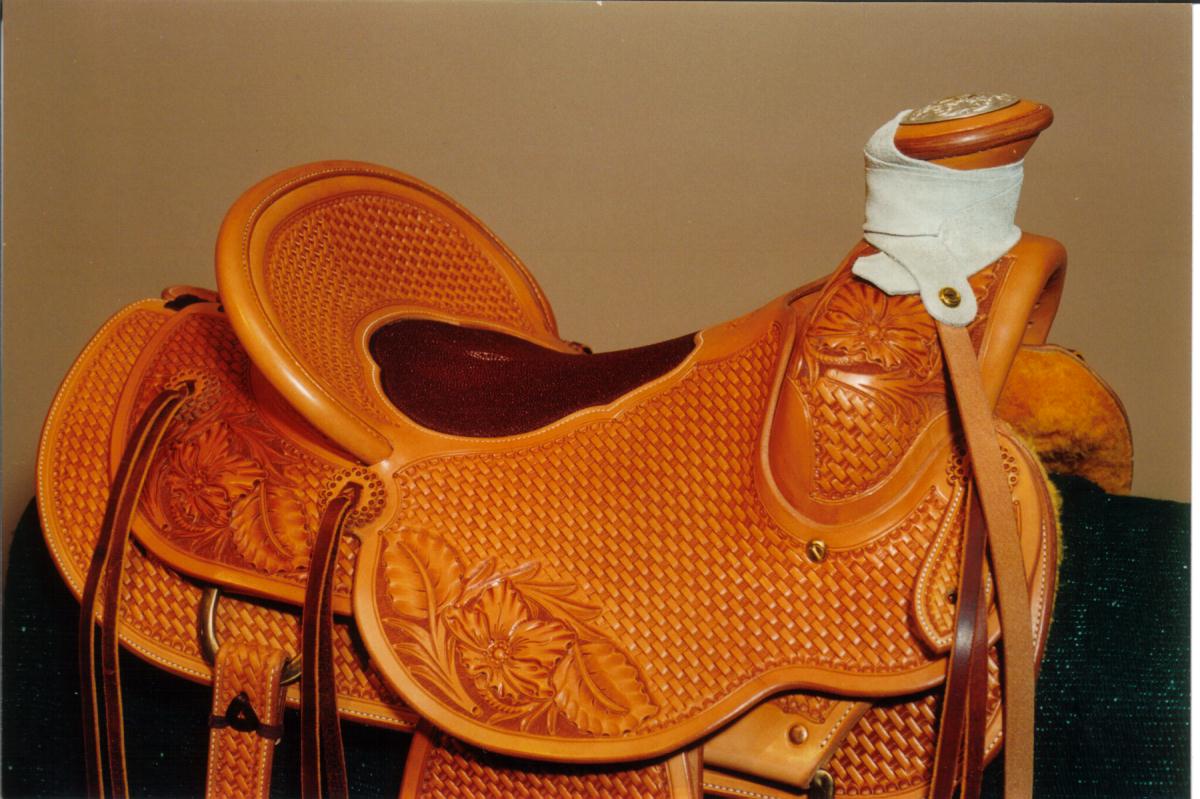
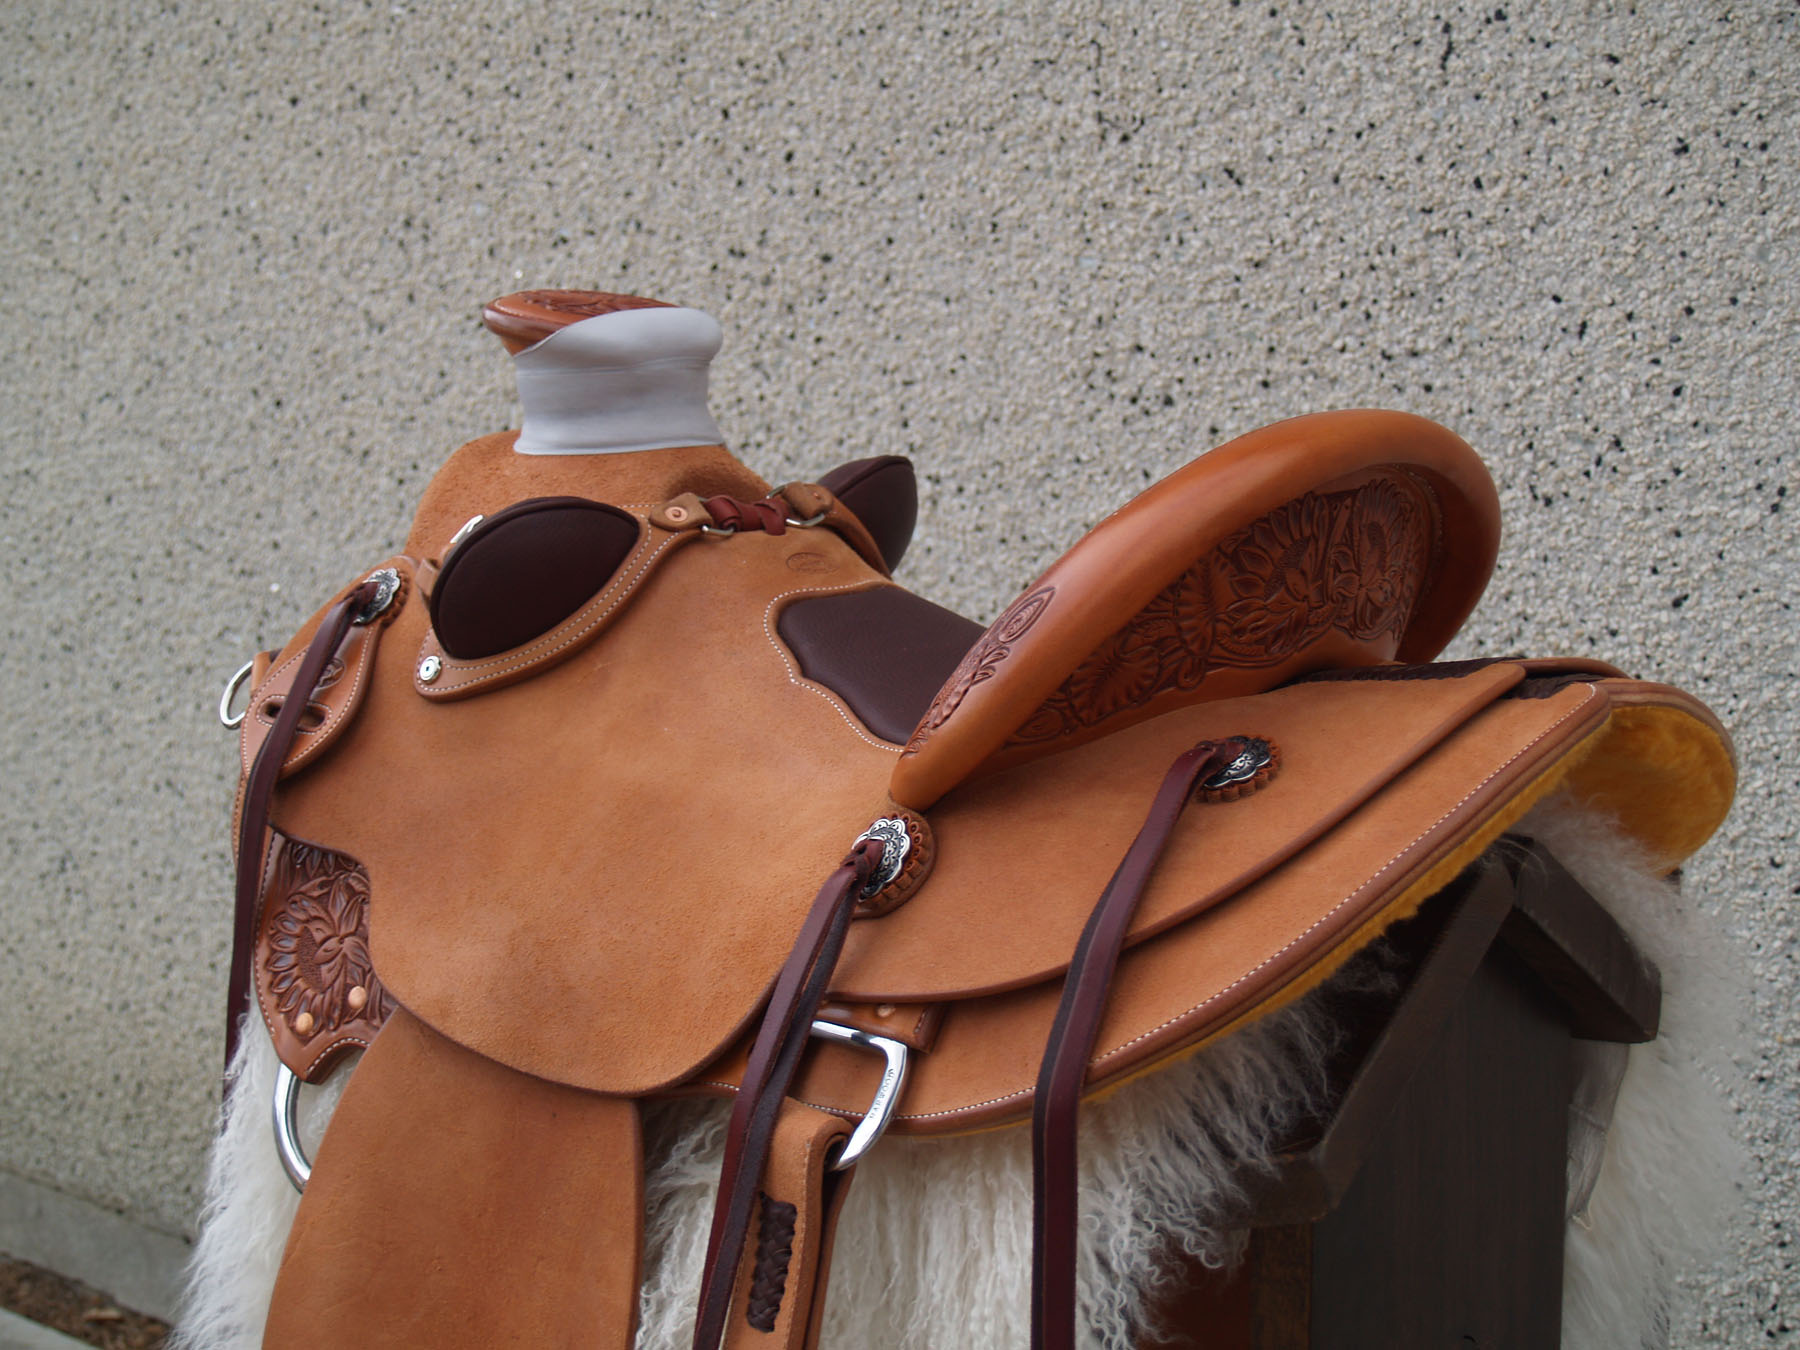
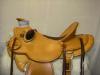
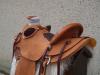
Howdy; I just finished this saddle, a good thing about this one is that it is for me, I am going roping all weekend to I should get some good tracks put in the horn by Sun. I have done some things that I have not done before on this saddle, it is the first time I have use a Warren Wright tree, first time for the flat plate ring riggin, the first time I have carved water lily's on my saddles, and the first time using Jeremiah Watt's Buck roll forms and string conchos. Let me know what you think, I am looking for open honest constructive criticism. Thanks much Steve
-
thanks for the help guys, I kinda wondered about wondered about boiling them. On a side note, I sure don't know how you guys could make any money at this braiding thing. These hondos are some of the first things that have have braided, from making the strings to the end I bet I have about three hours each in this hondo. I'm sure the more string making and braiding I do the quicker I will get. I don't think I'll get a $100 for this hondo like I should with the time I've got in this it, LOL anyways, thanks for the help and keep up the good work guys. Steve
-
Howdy; I am braiding up a few rawhide hondos, I have been to that once they are dry that I should drop them in boiling water for about a 45 sec to a min to firm them up, once dry again that they should be dipped in a spar varnish. Do any of you more experianced braiders have any tips for me. thanks much steve
-
Howdy; I am in need of a 2" bag punch or oblong punch in a big way. If you can help me out let me know. thanks much Steve
-
This happens quite often when getting items shipped to Canada from the States also, I recently ordered a calender which cost $15, then $16 for shipping charges, I checked on how much it would cost to ship it to a small town in Montana that is a three hour drive from here, the shipping was $4.10. I have tried to order another item as a Christmas present and the company would sell it to me since "their bank could not exchange Canadian funds into American funds when I paid with visa" just plain ignorant. I don't think there is much you can do about it other that make sure you always get the the shipping amount before you buy the items. Excessive shipping costs have stopped me from buying many a item from the states. I realize that shipping cost will be more going into another country, but they don't don't need to take advantage of us.
-
Howdy; We are planning to go the leather show in Sheridan this spring, Just wondering if anyone else from the board is going to the show? ps: any word on the workshops schedule?
-
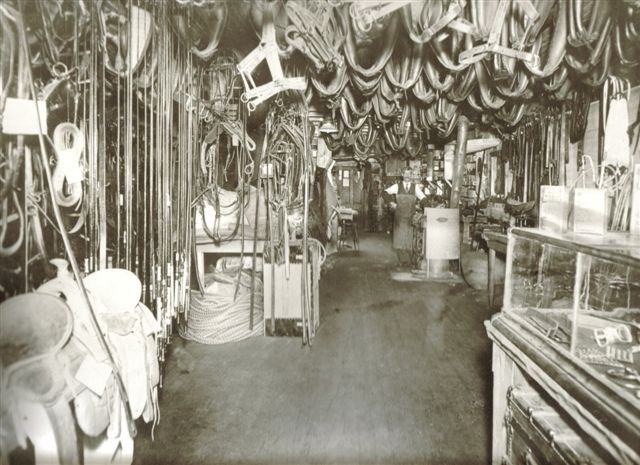
here is a photo of the shop in 1901