steve mason
-
Posts
275 -
Joined
-
Last visited
Content Type
Profiles
Forums
Events
Blogs
Gallery
Store
Everything posted by steve mason
-
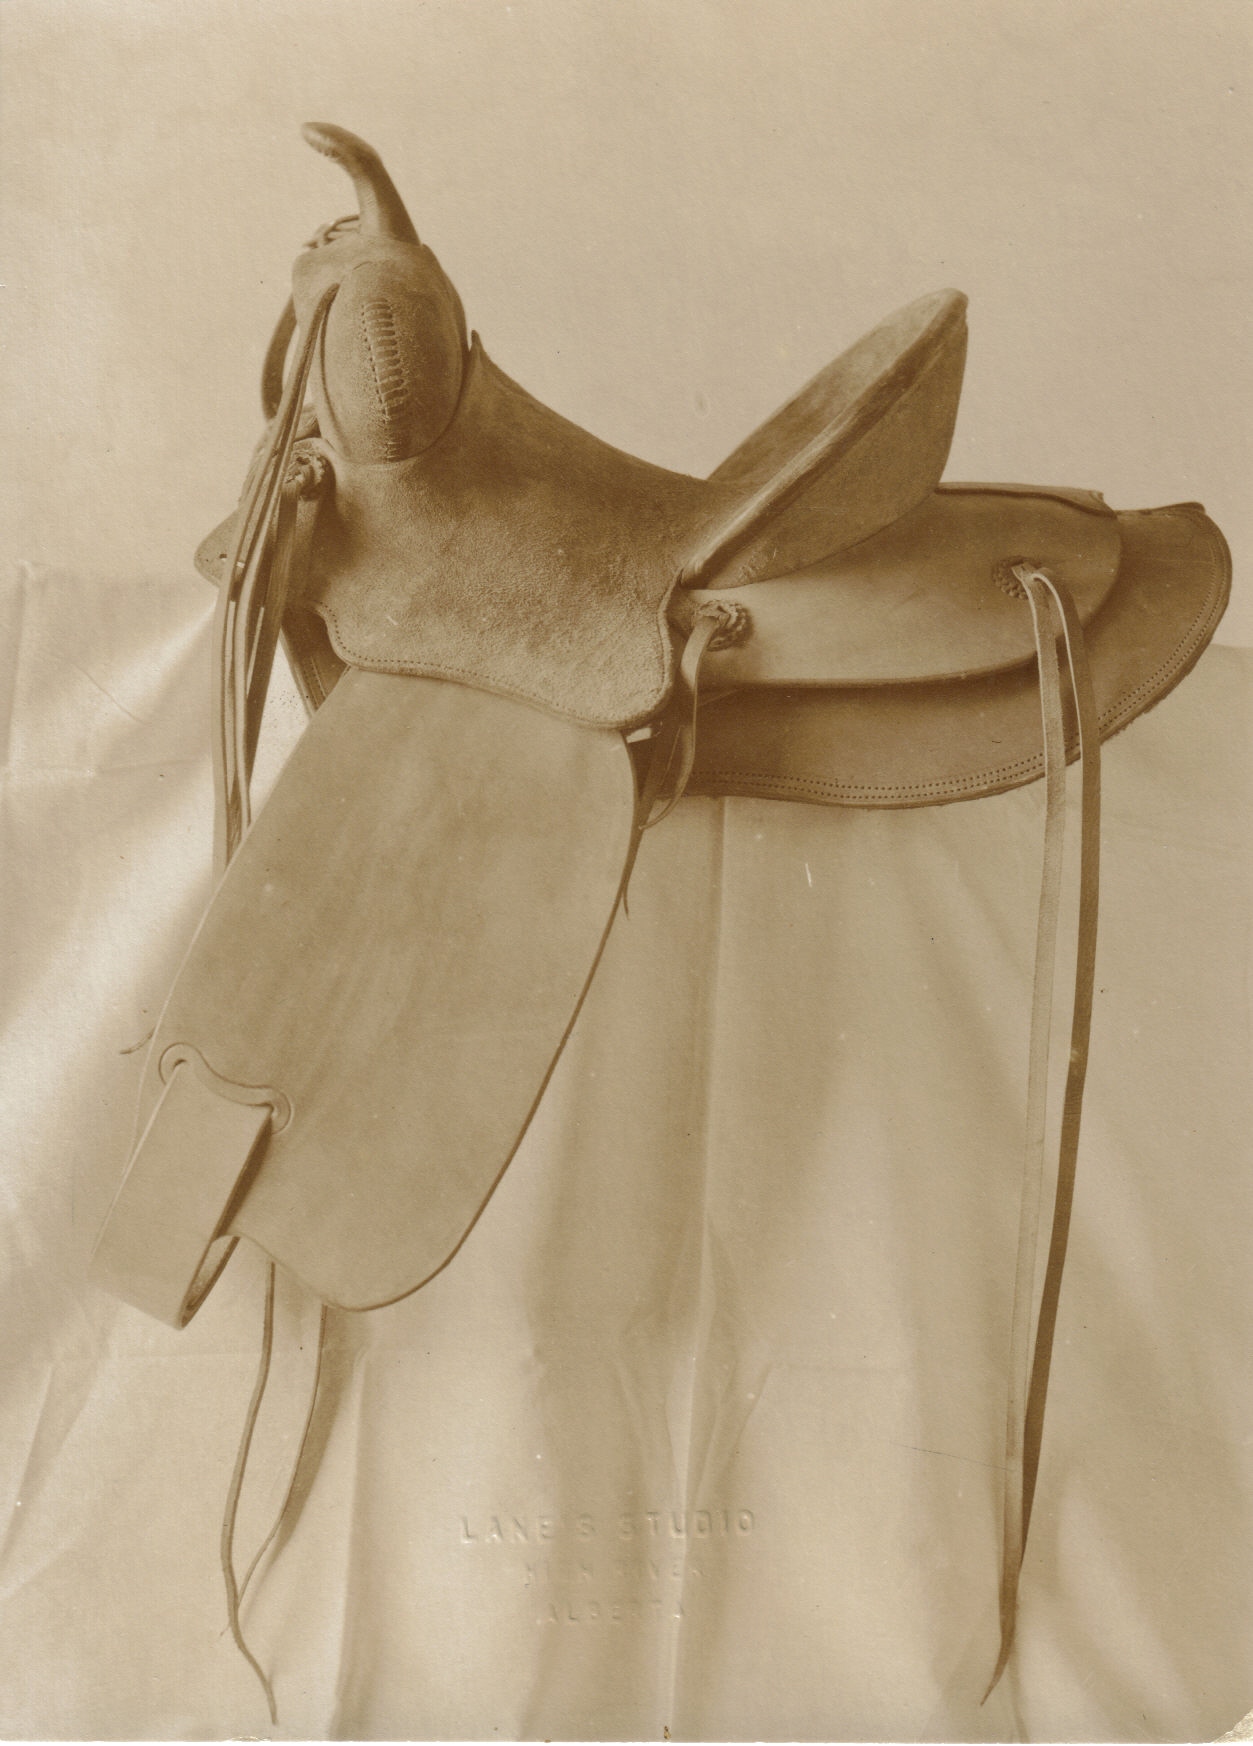
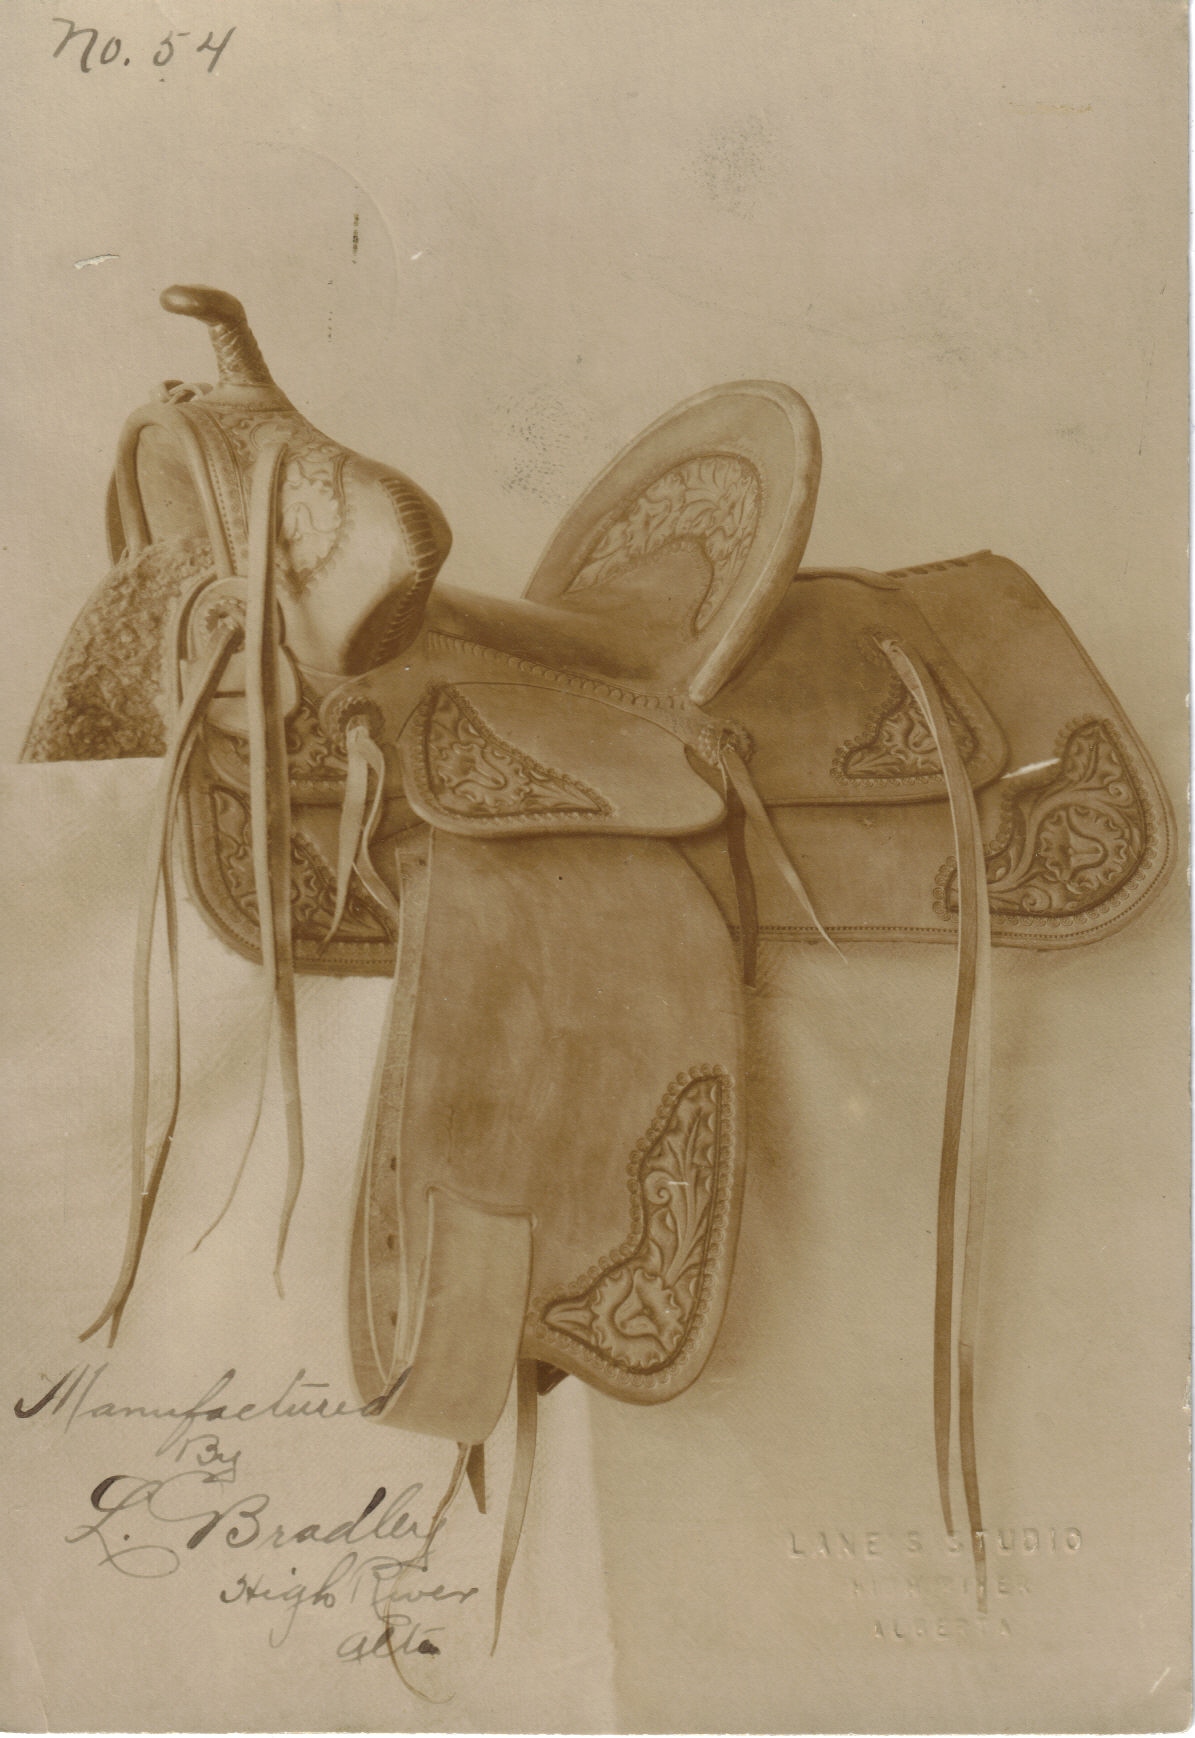
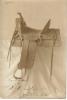
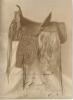
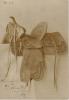
Howdy; I thought I would post a few photos of some saddles that my great grandfather made. I am not sure of exactly when these were made but it would have been between the 1920's to 1940's. His name was Levi Bradley from High River Alberta, he started out making Harness and hand sewn collars. He started his leather career at Hutching and Riley in Calgary in 1898, he and his Brother started a Harness shop in High River in 1900, then my great grandfather bought out his brother in 1902. He started making saddles in the 1921.

-
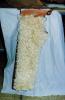
I just finished a pair of buck roll with the inserts. They system is the foam inserts, good patterns, very detailed instructions and a DVD which I did not get. The pattern JW sends is a good buck roll pattern to start with, and for someone who has not made buck rolls before, this is worth the money just instructions sheet. I have made buck rolls for close to 20 years and I learned a couple tricks. Then for the finished product, these are quite simply the firmest buck rolls I have ever made. The are a good shape to the roll itself also. I have packed the rolls with shearling and horsehair which I preferred but I have never had a roll that felt as nice and firm as these do. there is a time saving also, the assembly time is about the same, but you don't have to stuff the rolls so there is a good time saver right there. I would have to recommend this system very highly. I think the only changes I will make to the pattern is a couple small tweaks to make it my own. I think other than the size of the chap body and the size of the hole in the top body you can adapt the pattern to what ever style of buck roll you do. when I get a chance I'll take some photos and post them. Steve
-
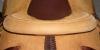
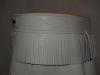
I will stamp the pretty much the same as Steveh does. I think the thing that will help you the most is how you construct the whole bind in the first place. If all the layers of leather that make up the bind are of good quality and installed properly, the bind will be very firm and tight. I use a front and back cantle filler to help firm the bind up, there will 4 layers of leather before I put the final bind on. Then when installing the final bind keep the top leading edge as close as possible to the front of the cantle, then make your mark out to make your final cut depending on what width of a bind you would like. I see to many saddles where the leading edge of the bind is a 1/2" or more away from the front cantle edge, instead of 1/8" away. All this does is make a wider and weaker bind. I think in a perfect world the cantle bind will have no movement or wiggle when new, that way 10 years down the road it will still be a nice tight bind. I have added a photo, notice how close the bind is to the front of the cantle. I believe that this makes a much stronger bind than having the leading edge back another 1/2" or more.
-
I met a saddle maker some years back who had on the back of a few select business cards "If you don't like the prices of this establishment, bring in your wife and we can dicker" (it's been years since I have seen the card so I'm not sure if I got the quote exactly right) He also had another very good quote on the back of his regular cards about hay and oats but I can't remember it.
-
Howdy; I have a corporate order coming up very soon that I need a custom made name stamp with the company's name/logo on the stamp. I have got a couple leads already but I am looking for any other suggestions on where to get such a stamp made. I am also in a bit of a rush for the stamp. thanks in advance for your help. Steve
-
bob; I will not be making it to kamloops this year, it just does not fit into my schedule this year, I would like to go next year if I can. I hope the new saddle show goes well. Who did you order a new knife from? ryan; no problem about the stand, I have made a few pair of woolies, only 4 if I remember right. I did not find them terribly hard to make, but there is a lot more time that regular chaps and the clean up of all the hair was a bugger. I did have some great advise and help with the pattern when I made them, between the pattern help and my grandpas old pair I got it done. I don't really care if I would make any more, woolies was one of those projects that I wanted to do just to see if I could. I get asked once in a while and I usually price them so high that if I was to build another pair I sure would get paid for it. I also think finding good angora that is a long enough hide and with a nice length of hair is pretty hard to do these days. If you need any help when you get around to making a pair give me a call, I'll do what I can to help.
-
Howdy Art; thanks for the compliments Armitas take some more time to make and they take some more leather also, I usually try find a larger side of chap to make the armitas out of. I price armitas higher than my chinks due to the increase in time and materials. For the pattern, you can get the pattern the same place I got mine, from a large sheet of paper and a pencil and eraser. If you already have a chink pattern just adjust it to suit the style of armitas you would like, there are a lot of good armita photos on the web to give you inspiration. If you don't have a chink pattern just make one up out of paper, canvas or leather etc. I feel making patterns to be one of the most important parts of being a leather worker. Learn to make them yourself instead of depending on others to make them for you, it will help you in the long run. If you have any questions about different styles of armitas I will do my best to help you, don't be shy, ask any questions that you would like. Steve
-
Just finished another pair last night, first time for this type of apron pattern, these armtias have snap & rings on the legs. let me know what you think. Steve
-
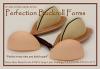
Howdy; I just received an email from Jeremiah Watt about his new bucking roll system that I mentioned in another post. here is what JW had to say and a photo. I will be tying these out for sure, something I will not miss is stuffing buck rolls "Just a quick note to all of you who work so hard at making better saddles each day, to fitting more horses and more riders with each passing day. We just wanted to let you know that we have taken some of the labour out of making Buck Rolls. These new Foam inserts feel like sheepskin or hair pack Buckrolls, but with 1/4 the time to make. And best of all, they do not pack down and are perfect everytime. So now maybe we can increase the profits in our saddle shops, even if it is just a little. Best regards from Jeremiah Watt, Saddlemaker & Designer"
-
My shop has a concrete floor, not good to stand on and hard on tools if they are dropped. I use rubber horse trailer mats, I have used these for years now. they are great to stand on all day, much better for your feet that concrete, and if you accidentally drop a knife or edger you will not hurt the tool. steve
-
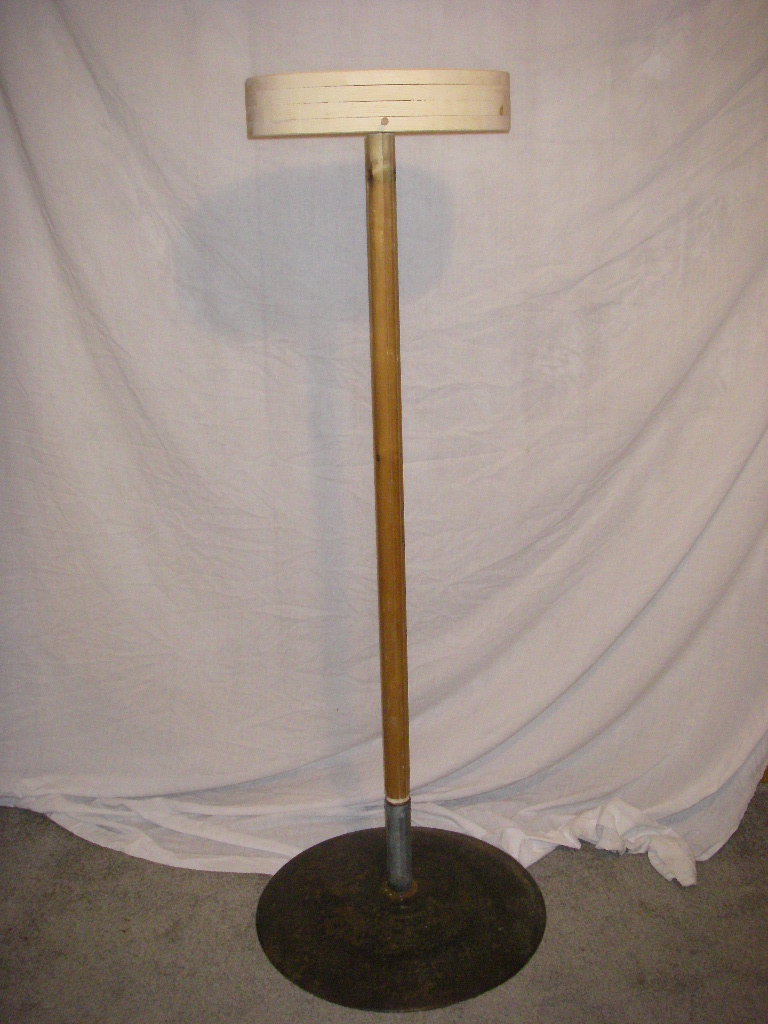
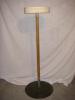
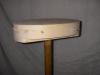
Howdy Ryan; I just made the stand, that is the main reason the pics are posted, got the stand figured I'd better use it. here are a couple pics to show what I did, I have seen many versions of these stands, some out of metal and some from wood. the stand I made has a base that is a disk with pipe welded on top, then a dowel that fits in to thebottom and top base, which is 4 ply of 3/4" pine, the bottom 3 have a center hole cut out for the dowel. I also put one 5/16 dowel on the front center and two on the back to keep the chaps from coming off the stand. I can take apart this stand very easily to take to a show etc.
-
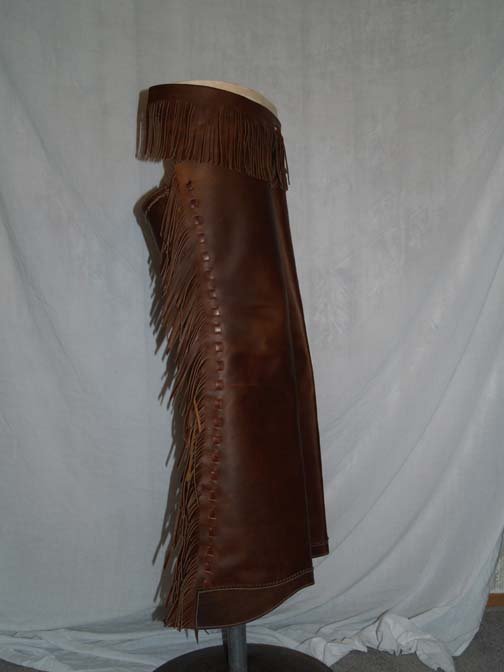
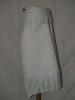
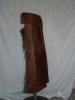
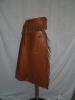
howdy; Here are a couple pics of some armitas I have made latley. One pair of shotguns with a laced in zipper and a armita apron with a buckle on waist. The other pair is a more traditional pair of armitas with rolled leather buttons on the legs and a wrap and tie waist. let me know what you think. Steve
-
Monthly Floral Carving Challenge
steve mason replied to ClayB's topic in Special Events, Contests and Classes
I figured I'd carve up a piece for this also. I printed the pattern this AM and gave it a quick work over to suit my style a little better. I still think the pattern could use some work to suit me, for what I look for in a pattern the flower is to small compared for the leaf and the scroll is to large for the pattern. I was going to just use the same flower and leaf and draw a new pattern. I decided that to keep in the spirit of thing I would addapt the pattern that was given us. So I am nto 100% happy with the layout. anyways let me know what you think. Steve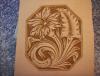
-
Bruce; Jeremiah watt has come out with a new buck roll system, I have not yet seen them but I have heard very good things from my leather supply guy, he saw them at denver market and has some ordered which should be here in the next month. The new buck rolls have a foam insert that you have to cover. No more stuffing bucking rolls !!!! the system comes with a dvd instructing how to build them, pattern and the foam insert. sounds like a great system from what I have been told. As soon as I get it I will post results. later Steve
-
When hand sewing cantles I use "high friction guard tape" from lee valley tools. I just put a few wraps of the tape around my fingers, this way I still have my fingertips to work with. here is a link http://www.leevalley.com/wood/page.aspx?c=...207&p=31213
-
Saddle treemakers-sub topic
steve mason replied to Hidemechanic's topic in Saddle Supplies, Tools & Trees
I am not sure if this would be true, the properties of rawhide covering a tree are incredible, most of the strength in a saddle tree is the rawhide not the wood, although the strength of the wood is important the rawhide is integral to the strength of a tree. I know a few years back a sales rep had a truck liner covered tree he was showing a local saddle maker, he boasted that you could run a truck over the tree, so they had him to so, his tree was was a bunch of toothpicks wrapped by broken and cut truck liner, then they ran over an old used rawhide covered tree, the tree did break, but no where near what the liner covered tree did, and the rawhide was still intact. I believe that the linex is a very durable material that will wear very well against friction and impact punctures which is not an issue since a saddle tree is covered by leather. yet does linex have any strength in regards to reinforce the wood tree, I find it hard to believe that is could be the same as rawhide. just my 2 cents -
Greg, that sure is a sorry list of silversmiths you have there, don't you think you could find a few guys who are at least half handy to do your silverwork???
-
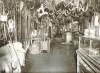
cool photo, I like to look at the shops from days gone bye. here is a photo of my great grandfathers shop from 1901
-
Howdy; Just wondering where you all get your chap leather from. I have been getting most of it locally but I am looking for some good sources of good quality chap leather, either glove tan or oil tan. I am not looking for odd colors or metallics etc. thanks much
-
Howdy; Caledon leather sales has everything you need to make a saddle as does sheridan leather outfitters.
-
I my need to elaborate a little more, for example, if it is a headstall you are wanting to make, by taking a pattern I mean get the measurements you will need and that is it. Do not try to 100% duplicate the item,,, make your own.
-
I mentioned this in another post, a large part of becoming a saddle/gear maker is making your own patterns. Now how you get all these patterns is up to you. Just use some old headstalls that you have or that some friends or family have then take a pattern. It's not really stealing their pattern because it's not your fault that someone else thought of it first. Steve
-
I used to glue and nail a liner in that covered the whole inside of the stirrup, now I glue and nail a tread style liner, I'm not sure if I saw any advantage of lining the whole inside of the stirrup. I do not pre drill the hole, but I do poke a scratch awl into the leather, then the pins will hold in place while I tack them in. I have a large piece of fake sheepskin that I use as a bench cloth so the stirrups do not get marked up. I think that is all fake sheepskin is good for anyways. Steve
-
The best advise I can give is, to become a saddlemaker, you must learn to make you own patterns. Do this right from the start, or else you will end up depending on other for all you patterns. Making patterns is a large part of making saddles. To make a pattern for a skirt is fairly straight forward, first you block one skirt on to the tree, (cut your leather bigger than the finished skirt size) once the leather is blocked in place figure out what measurements you need, for example only measure a 2" from front bar tip, then 3.5" from back bar tip or 6.5" from back of cantle, measure down from bottom of front and back bar pads, then take a straight edge and get your bottom skirt line true to the world,( this is a tricky line to get straight, if you use a straight edge on the bench then block it on the saddle it will not end up straight) now if you are doing square skirts, take your straight edge and mark your front and back line according to your measurements, then use a set circle to make your corners consistent (I use an empty thread spool) use this to make the corners on the skirts and also the rear jockeys and the front seat jockey. Once you are happy with your line sketched on the leather, take it off the saddle, flatten it out and trace it to the other side and then block them both on and you are done. The distance you measure from the bar tips front and back and how far down is up to you the saddle maker, that will determine your line on the saddle, and that is a very individual thing. his method of fitting skirts is the way a large number of custom saddle makers fit their skirts on every saddle they make, if you trees are consistent you can get to the point where you can use a paper pattern that will get the job done for you. another thing to remember is "they make new cows every day" so if you screw it up you can always get a new hide and start over. Hope this helps, if you have more questions feel free to ask.
-
Has anyone used "VCOM Web Easy Professional 7" or do you know anything about it. I have frontpage on our computer, it seems way above my limited computer skills, and I just don't have the time to spare away from the bench to learn how to use it. From what I have read easy web is very straight forward and quick. They advertise that you can have a site up in hours. I do realize that in most cases if it sounds to good to be true that it may be. Thanks Much Steve