BanjoMan
-
Content Count
120 -
Joined
-
Last visited
Everything posted by BanjoMan
-
Recent Holsters
BanjoMan replied to fgabesz's topic in Gun Holsters, Rifle Slings and Knife Sheathes
If you don't mind me asking, what products/process are you using to finish your holsters after you dye them? I am currently using Fiebings oil dye and I'm satisfied with my colors, but I would like to try to get less of a gloss on my finished products. After I dye, I apply a coat of neatsfoot oil followed by a coat of resolene followed by a coat of neutral shoe polish (allowing time to dry between all applications). I really like the matte finish on your holsters and would like to know what you do if you don't mind sharing. My only condition (and the main reason I use resolene) is that my products really need to be somewhat water resistant due to the likelihood of rain exposure during use. Thanks for any help you can offer! -
Throw the Eco-Flo away and stick with Fiebings. Period. When I first started out I purchased a leather kit from Tandy's that included various types of Eco-Flo dye, which is a water based product. I agree, the application was painless, but the final appearance is of very low quality in my opinion compared to Fiebing's alcohol based dyes. I also agree that the smell of Fiebings during use is quite strong, but if you make sure that you are in a well ventilated area and do not hover right above the jar it is a small price to pay for the look and quality that you desire. As far as when to dye is concerned, here is my process: dye, let dry, stitch, wet mold, let dry, burnish edges, neatsfoot oil, let dry, finish (resolene, tan-kote, bag-coat, etc.), let dry, wax (neutral shoe polish). This process is a result of asking questions, research, and trial and error. I also thought at first that it made sense to mold before dying, partially because I was concerned that I would compromise my dye during the wet molding process. I soon found out that I was wrong. If you use a good quality alcohol/oil based dye (such as Fiebings) that penerates well into your leather, it will hold up fine during the wet molding process. I have found that wet molding after dying actually helps me in getting the dyed appearance that I prefer to achieve, which is a less glossy, subtle sheen. Furthermore, the final application of whatever finish you choose to use will also give you another opportunity to create the look that you are going for. The best advice I can give you is to experiment with differetnt products to see what works best for you, because what looks "good" is strictly a matter of opinion and personal preference. However, I strongly urge you to get away from the Eco-Flo line. As far as I'm concerned, you could potentially ruin an item that you have a lot of time invested into simply by using an inferior dye. Hope this helps!
-
Gum Tragacanth Question
BanjoMan replied to drof99's topic in Gun Holsters, Rifle Slings and Knife Sheathes
Fiebings Edge Kote works well on edges that have been finished using gum trag. It doesn't penetrate like dye, but instead it covers similar to paint and leaves a nice looking edge. The only disadvantage is the color will not exactly match the holster color because Edge Kote is only available in black and brown. -
First Horsehide Avenger For 1911
BanjoMan replied to George B's topic in Gun Holsters, Rifle Slings and Knife Sheathes
First off, that is a great looking holster. It looks like you have that style figured out. In response to your question about edges, I definitely feel like the extra time and effort it requires to achieve nice looking edges is well worth the trouble in more ways than one. To me, good clean finished edges are one of the things that separate amateur looking holsters from professional holsters. Not only do they make the holster look much better, but they also help to extend the life of the holster by protecting against premature wear...especially around the throat area where the firearm will likely contact the edges during holstering. If $$ vs. time is a concern, I would try to figure out methods to shorten the amount of time it takes you to finish the edges in an attempt to be more efficient. Also, don't lowball yourself by pricing your work too low. If someone requests a handmade leather holster for their weapon, they most likely already know the costs involved and are willing to pay for such an item-don't sell yourself short. If I may make a few suggestions, I would consider using Fiebings Edge Kote (or something comparable) on your edges to dress them up a little more after you burnish them. They offer it in black and brown and it really makes a difference in the final appearance of the edges. Also, as someone mentioned earlier, I would not put the model (1911) stamp on the outside of the holster. I would instead put that on the backside where it can't be seen during use. I would however put your maker's stamp on the outside instead of the inside. It is very common to see maker's stamps on the outside of custom holsters and there is nothing wrong with putting your mark on something that you made and are proud of (and it is free advertisement). Overall, that is a good looking holster and your customer should be proud to own and wear it. Good luck! -
Second Holster (Mexican Loop)
BanjoMan replied to Samalan's topic in Gun Holsters, Rifle Slings and Knife Sheathes
Beautiful work! Did you say that is only your second holster? -
First Holster Question?
BanjoMan replied to whitewolf81's topic in Gun Holsters, Rifle Slings and Knife Sheathes
I agree with Particle on the order of steps to take in building a holster. As far as dying prior to molding goes, it's fine. The water applied to the leather during the molding process will not affect the dye, as most dyes penetrate the leather and will not "wash" off with moisture. Also, not to discourage you, and not to say it can't be done, but I have had no success in wet molding a holster that has been carved and tooled. I have seen western style holsters with extensive tooling that have had a gun "set" into them, but when you start wet molding, or "boning" the shape of a gun, I think it would be almost impossible not to compromise the tooling in areas that require molding. With that said, the best advice I can give you is to just try it and learn as you go. I have learned more from my mistakes than anything else and quality holster building just takes practice. Good luck! Post pics when you're done! -
Pancake Holster For Ruger Lcr
BanjoMan replied to BanjoMan's topic in Gun Holsters, Rifle Slings and Knife Sheathes
Thanks Rayban, I appreciate the compliments! You're right about the retention, it worked out nicely. I was concerned at first because the gun did not fit as snugly as I prefer when the holster was not on a belt. When I wet molded the holster, I did not want to form too much above the cylinder because I did not want the gun to hang up when being drawn. Later I realized that once the holster was actually worn, the belt assisted with retention and the gun fit perfectly. I am about to use the same pattern to make a holster for a S&W 642 J frame. I think everything will fit the same-hope to post pics soon. Thanks again! -
Just finished this pancake holster for a Ruger LCR. Made from 9/10 oz. veg tan, hand dyed with Fiebings dark brown and hand stitched. I had to make the pattern for this holster, so any suggestions for changes or improvements are welcome. Please let me know what you think! Thanks!
-
Just finished these two holsters for a Seecamp 32 auto. Also included are pics of two recent badge holder orders. Please let me know what you think! Thanks!
-
That is a good looking holster! How do you keep your tooling from becoming distorted when you wet and fold the holster during assembly? Also, if you don't mind, what products do you use to dye/finish?
-
Ruger Blackhawk Holster
BanjoMan replied to BanjoMan's topic in Gun Holsters, Rifle Slings and Knife Sheathes
Thanks for the compliments! I know the flesh side could have used more attention, but I'm still in the learning process as far as that goes. I did edge both sides prior to assembly, but by the time it was finished, the "fuzzies" were back. I also agree that it should be open on the end and I will do that on the next one. I had to make this pattern myself, but I used Al Stohlman's pattern for a Ruger Single Six as a guideline. I also think that I may stay away from the clear-lac next time. It seems like it provides a good protective finish, but the results are more glossy/plastic looking than I prefer. Has anyone had any experience with tan-kote or bag-kote? I wonder how it would work out if I used dye, neatsfoot oil, bag-kote, followed by a coat of neutral shoe polish? -
Just finished this holster for a Ruger .357 Magnum Blackhawk. This is only the second western style holster I've attempted, so comments and suggestions are welcome. This holster is made from 9/10 oz. veg tan leather, unlined. It is hand stitched and burnished. Finish consists of Fiebing's dark brown spirit dye, neatsfoot oil, clear-lac, resolene, and a coat of neutral shoe polish. Please let me know what you think!
-
I have a Galco concealable (pancake style) holster with a matching belt that I've worn daily for about a year. I ordered these items from Galco in their "havana brown" color and the more I look at the color, the more I dislike it. It has too much of a red hue for my taste. I am considering stripping the holster and belt and refinishing them in a color that I like better, such as Fiebing's walnut or something similar. Does anyone have any experience in doing something like this? I am considering using deglazer to strip the existing finish off, then dying with Fiebing's regular or pro-oil dye, applying a good coat of neatsfoot oil, and finishing with satin sheen or resolene. Would anyone else do this differently or does anyone have any suggestions?
-
So you actually use saddle soap and resolene on the inside of your cuffs as well as the outside? How does the flesh side of the leather accept these products and do you have to do anything to the flesh side before you treat it? I have dyed the inside of holsters before, but never done anything more than dye. This is the first project I've taken on where I have to be concerned with dye rubbing off on clothing...
-
Hello everyone! I am currently in the process of making a guitar strap and I have a question. If I leave the strap unlined and dye the back side (flesh side) with Fiebing's leather dye, will the dye rub off on clothing when the strap is used? If so, how do I prevevnt this from happening? I really want to line the strap and I have some beautiful maple colored glazed pig skin to do it with, but I do not have a sewing machine and would have to stitch it by hand which would take a very long time. I haven't completely decided against it, but I am considering my options at this point. Any help would be appreciated! Thanks!
-
I am currently working on my first western style holster and I am using Stolhman's holster book for templates, tips, etc. The farther I get into this project, the more questions I have about how to do certain things when making this style of holster. I am used to making pancake style holsters using two flat pieces of leather and wet molding to fit the weapon. This is my first experience with using one piece and bending it around to meet itself. I guess the main issue I've had is my tooling stretched and became distorted when I folded the holster for assembly. HOW DO YOU PREVENT THIS FROM HAPPENING?! Obviously, you have to do your tooling and carving when the leather is still laid out flat. And you must moisten the leather to allow it to bend during holster assembly. What is the big secret on how to moisten and bend a piece of leather without compromising your tooling? Another big mystery to me is how one would go about antiquing a holster like this. Same as with carving, I would think that the leather would need to be flat in order to apply antique properly. If that is the case, then you would apply clear lac (or equal) then apply antique paste. The problem is, once you apply clear lac to the leather, wouldn't it prevent moisture from penetrating the leather when you got ready to bend the holster prior to stitching? I've seen holsters such as this with some pretty intricate carving and it blows my mind how this is done. I know it's probably just a trick of the trade, but it's one that I don't know! If anyone can shed some light on this, I would greatly appreciate it. If anyone is familiar with making this type of holster, I would really like to know the steps you take as far as carving and tooling, assembly and finishing (what you do, when). Thanks!
-
I've been working with leather for a little while now and am still confused on the difference in certain finishes. I've tried resolene, satin sheen, bag kote, tan kote, and leather balm with atom wax. I know that resolene and satin sheen are acrylics and resolene creates a high gloss result that I dislike. What finish is the best for a little to no gloss look but also provides the best moisture protection? I know that none are "water resistant", but some protect better than others. And what is the difference between bag kote and tan kote? I also generally apply a coat of neutral shoe polish on top of whatever finish I use, which is usually satin sheen. Is this a good idea or does anyone have any better suggestions?
-
Need Some Input!
BanjoMan replied to Spidey2011's topic in Gun Holsters, Rifle Slings and Knife Sheathes
Spidey, I think overall it is a good looking holster. I'm not going to pick it apart, but as far as color goes I will give you my opinion. If I needed to make a holster(s) to put on a shelf somewhere and did not have a customer to tell me exactly what he wanted, I would stay away from generic colors, i.e. black, saddle tan, etc. Most of the big name holster makers offer only two or three different color options, including those mentioned above. I feel like if you went with a less common shade of brown, such as Fiebings Walnut or Dark Brown dye, it would give the holster more of a custom made look and ultimately make the owner more proud to wear and show off! That's just my opinion, but I feel like the little details like this are what separate high quality custom holsters from something that anybody could order out of a catalog. Each handmade holster should be different and unique, and careful choice of dye color and finish can assist in achieving this. Also, if you haven't already, you should really consider a maker's stamp for the back of your holsters. Looks good, keep 'em coming! -
Does anyone know if a wet molded holster made for a KelTec P3AT will accept a Ruger LCP? I know that some more generic Holsters will interchange between the two, but unsure about a custom holster.
-
Thanks Sharon! Will do!
-
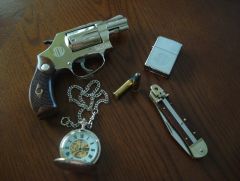
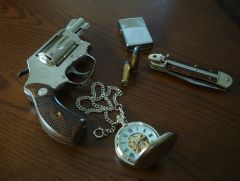
Random leather projects, guns, and other cool stuff
-
-
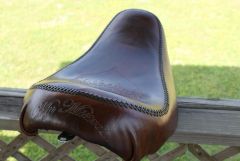
From the album: Random pics
© © leatherworker.net
-
From the album: Random pics
© © leatherworker.net
-
From the album: Random pics
© © leatherworker.net