-
Posts
128 -
Joined
-
Last visited
Content Type
Profiles
Forums
Events
Blogs
Gallery
Store
Everything posted by jimmy eng
-

First Attempt At Making A Bag. (Gusset Questions)
jimmy eng replied to mrtreat32's topic in How Do I Do That?
If you're going to use thick leather then it'll be best to have the seams face out and make it a feature, not in. Turning thick leather won't give you a great seam when it's bagged. But it's as Kustom described and it's that easy. -
Looks like heavy weight glossy cardboard.
-
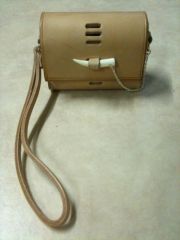
Need a photo of the back. It seems like it's the top piece is wrapped over the edge then a shorter back piece is glued on top then both are stitched together.
-
Don't know what type of glue but I'd skive the skin side of the leather where you want to finish so when you glue it, the glue sticks better to the end of the roll. And the loop part, I'd stitch to the beginning of the roll and then glue at intervals when you roll so the tassel won't unravel as easy.
-
I do the same as CST and press the stamp directly but if I need to do multiple copies I use a bit of my contact cement to keep it on (and stamp on a bit of scrap to set the stamp in place and prevent any slippage). I've found that thinner leather needs a thicker piece of scrap leather under it whereas I only need a steel base for 8oz or higher to get a clear mark. The biggest I've ever used on my 1 ton arbor is a 50 x 50mm stamp. I also mark in permanent marker the centre of the image on the stamp to help alignment.
-
I've only had the back stitch come out once on my own wallet after a year or so but I back stitched two holes instead of three and cut flush. Use more wax on your thread? You could try tying a double overhand knot in between the layers.
-
You don't have to knot it. Once you've gone through the hole a few times pull the thread in between the layers and cut it there (leave a 'tail') so the end is hidden. If you want to knot it, cast the needle around the thread that's in the layers and do a overhand knot.
-

Finishing Technique For Buttonhole Edging
jimmy eng replied to knavarette's topic in How Do I Do That?
The Claire Shaeffer book Nuttish suggested is awesome, I have the non updated hard copy. Since you've already made the cut I'd suggest a welt buttonhole (also called a bound buttonhole). http://www.sewalongs.com/anise/anise-tutorial-bound-buttonholes It's suitable for leather and much more stronger than a typical machine/hand blanket stitch style. If you want the typical buttonhole look though, hole punch the ends of your slit and blanket stitch by hand so it helps if from ripping at the weakest points (the ends of your cut). Use a upholstery or denim thread for this method. Use a sew-in intefacing if you think youd need more strength in the area. -

Modified Embossing Not Making A Strong Impression
jimmy eng replied to jimmy eng's topic in How Do I Do That?
I didn't want to admit it to myself I guess. Cheers electrthon. I'll buy an arbor press to do the job, use this one for printing or something.- 8 replies
-
- emboss
- drill press
-
(and 3 more)
Tagged with:
-

Modified Embossing Not Making A Strong Impression
jimmy eng replied to jimmy eng's topic in How Do I Do That?
The topic is meant to say 'Modified embosser not making a strong impression', stupid phone correction!- 8 replies
-
- emboss
- drill press
-
(and 3 more)
Tagged with:
-
I've got a round bar with a threaded countersunk plate on one end made for my drill press hoping it would convert it to a dedicated embossing press but the impressions are very weak. So far I can only get it to make a okay impression on veg tan if I wet the surface. Any suggestions would be appreciated to try and get a better result from it. My housemate said drill presses don't really exert pressure, so I guess that's my issue. I've tried to put different sized bricks underneath to see if the spring will compress more but it doesn't. I wanted it to do quick stamping jobs.
- 8 replies
-
- emboss
- drill press
-
(and 3 more)
Tagged with:
-
Any leather will emboss, you're only pressing a hard metal stamp onto a surface. I'm assuming by saying pre finished you mean a chrome tanned leather with some kind of gloss or matte look. You need to provide more details; how thick is the cover going to be, how are you stitching the leather (are you top stitching on a machine/hand sewing, bagging out, linging it?...) .
-

Keeping Linen Thread Looking Slick And Tidy
jimmy eng replied to KiwiLeatherLearner's topic in How Do I Do That?
Muslin isn't stretchy, it's a thin loose weave cotton fabric (the fibres are not woven tight together so they let through a lot of air) so it could seem to be stretchy. -
This fella John has asked me to make him a three quarter length coat in a few crocodile hides he's prepared (he hunts, taxidermies and tans leather of crocs and smaller animals in Australia and Papua New Guinea and gold prospects in PNG too) but they're about 4-5mm thick (10-12 ounces). I didn't get the ruler flush with the leather in my photo. To make a garment I'd need it to be at last half that or ideally a quarter of that thickness. I've never used a splitter before so I don't know how it would go with the scales of the skin side. I'm going to ask the companies Packer and Maclace in Australia and also thought you guys would have a great idea on how to do it. To do it myself, John suggested I could sand it off, he tried by hand but it's too laborous for him. A mate knows someone with a splitter with the width of 700mm so that should be sufficient so they'll get back to me. I'd cut off the limbs on the hide so it would be flat I reckon. On a side note regarding the job: To make the coat John wants the scales in the centre of the back of the coat and that's the only requirement. The rest of the garment would look better using full belly pieces which are smooth and flat but I reckon he wouldn't have any hides cut down the back so the belly isn't divided down the middle so they'll be a lot of seams in the coat. If it ends up being only split half thickness I'd have to sew the seams on top of each other, without a seam allowance.
-

Keeping Linen Thread Looking Slick And Tidy
jimmy eng replied to KiwiLeatherLearner's topic in How Do I Do That?
Cheers for the local term update bluey, muslin in Australia is cheese cloth! -

My leather work so far
Images added to a gallery album owned by jimmy eng in Our Leatherwork Galleries
-
From the album: My leather work so far
© Sada Sata 2013
-
From the album: My leather work so far
© Sada Sata 2013
-

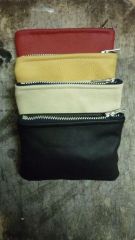
Coin purses made from scrap upholstry leather
jimmy eng posted a gallery image in Our Leatherwork Galleries
From the album: My leather work so far
Easy use off scrap pieces. Two pices of leather and a zip.© Sada Sata 2013
-
From the album: My leather work so far
© Sada Sata 2013
-
From the album: My leather work so far
This is how I set up for a market I do called the Suitcase Rummage in Brisbane, Australia (I also am the market coordinator). The concept is to sell our wares from a suitcase so each stall is set up on the ground, no racks or tables.© Sada Sata 2013
-
From the album: My leather work so far
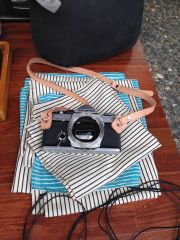
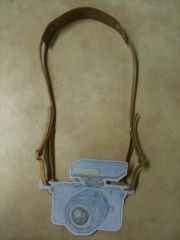
Adjustable camera strap with o-ring guard for cameras with lug nuts.© Sada Sata 2013
-
From the album: My leather work so far
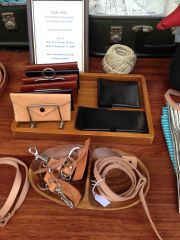
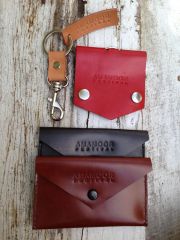
Five card slot wallet made with two pieces of leather. I made this design for a Kombucha workshop I taught using dried Kombucha peticle as a naturally grown leather but used it in this photo for my housemates' music festival merchandise.© Sada Sata 2013
-
From the album: My leather work so far
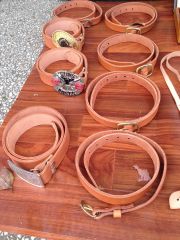
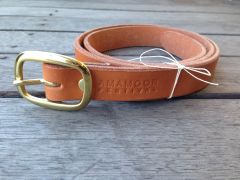
I sun tanned the leather for 7 days before making this belt.© Sada Sata 2013
-

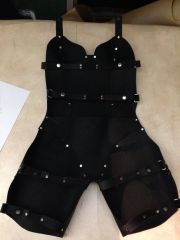
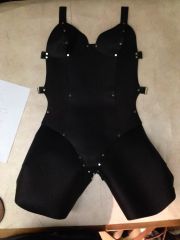
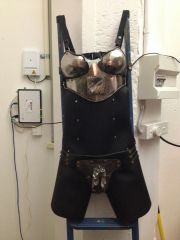
Sample custom body protector for performance artist, Tiger Lil (back)
jimmy eng posted a gallery image in Our Leatherwork Galleries
From the album: My leather work so far
The back has multple adjustable straps with elastic.© Sada Sata 2013


