jimmy eng
-
Posts
128 -
Joined
-
Last visited
Content Type
Profiles
Forums
Events
Blogs
Gallery
Store
Everything posted by jimmy eng
-

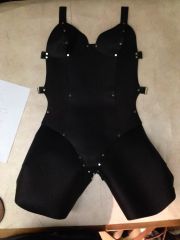
Sample custom body protector for performance artist, Tiger Lil (front)
jimmy eng posted a gallery image in Our Leatherwork Galleries
From the album: My leather work so far
I riveted the pieces together, no time to sew it. The final one will be sewn.© Sada Sata 2013
-
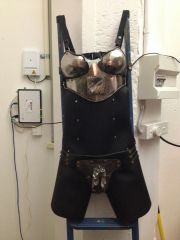
Sample custom body protector for performance artist, Tiger Lil
jimmy eng posted a gallery image in Our Leatherwork Galleries
From the album: My leather work so far
My friend Lil does a angle grinder act in her performances where she uses a grinder onto the metal pieces in between her breasts and on her crotch to create sparks. She needed a leather protector underneath the metal outfit and this is the protoype for it. She used this one at the opening of the remake of the Mad Max movie in Sydney, Australia.© Sada Sata 2013
-
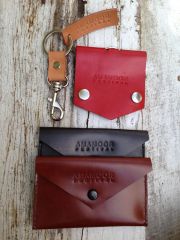
Some merchandise i made for my housemates' music festival 2013
jimmy eng posted a gallery image in Our Leatherwork Galleries
From the album: My leather work so far
I used some cement glue to stick my metal embossing plate (6mm thick lettering) onto a bench vice and hand cranked it. Turned out well, lining up the leather was a little trouble as the press is horizontal.© Sada Sata 2013
-
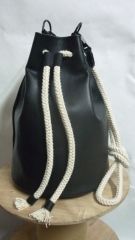
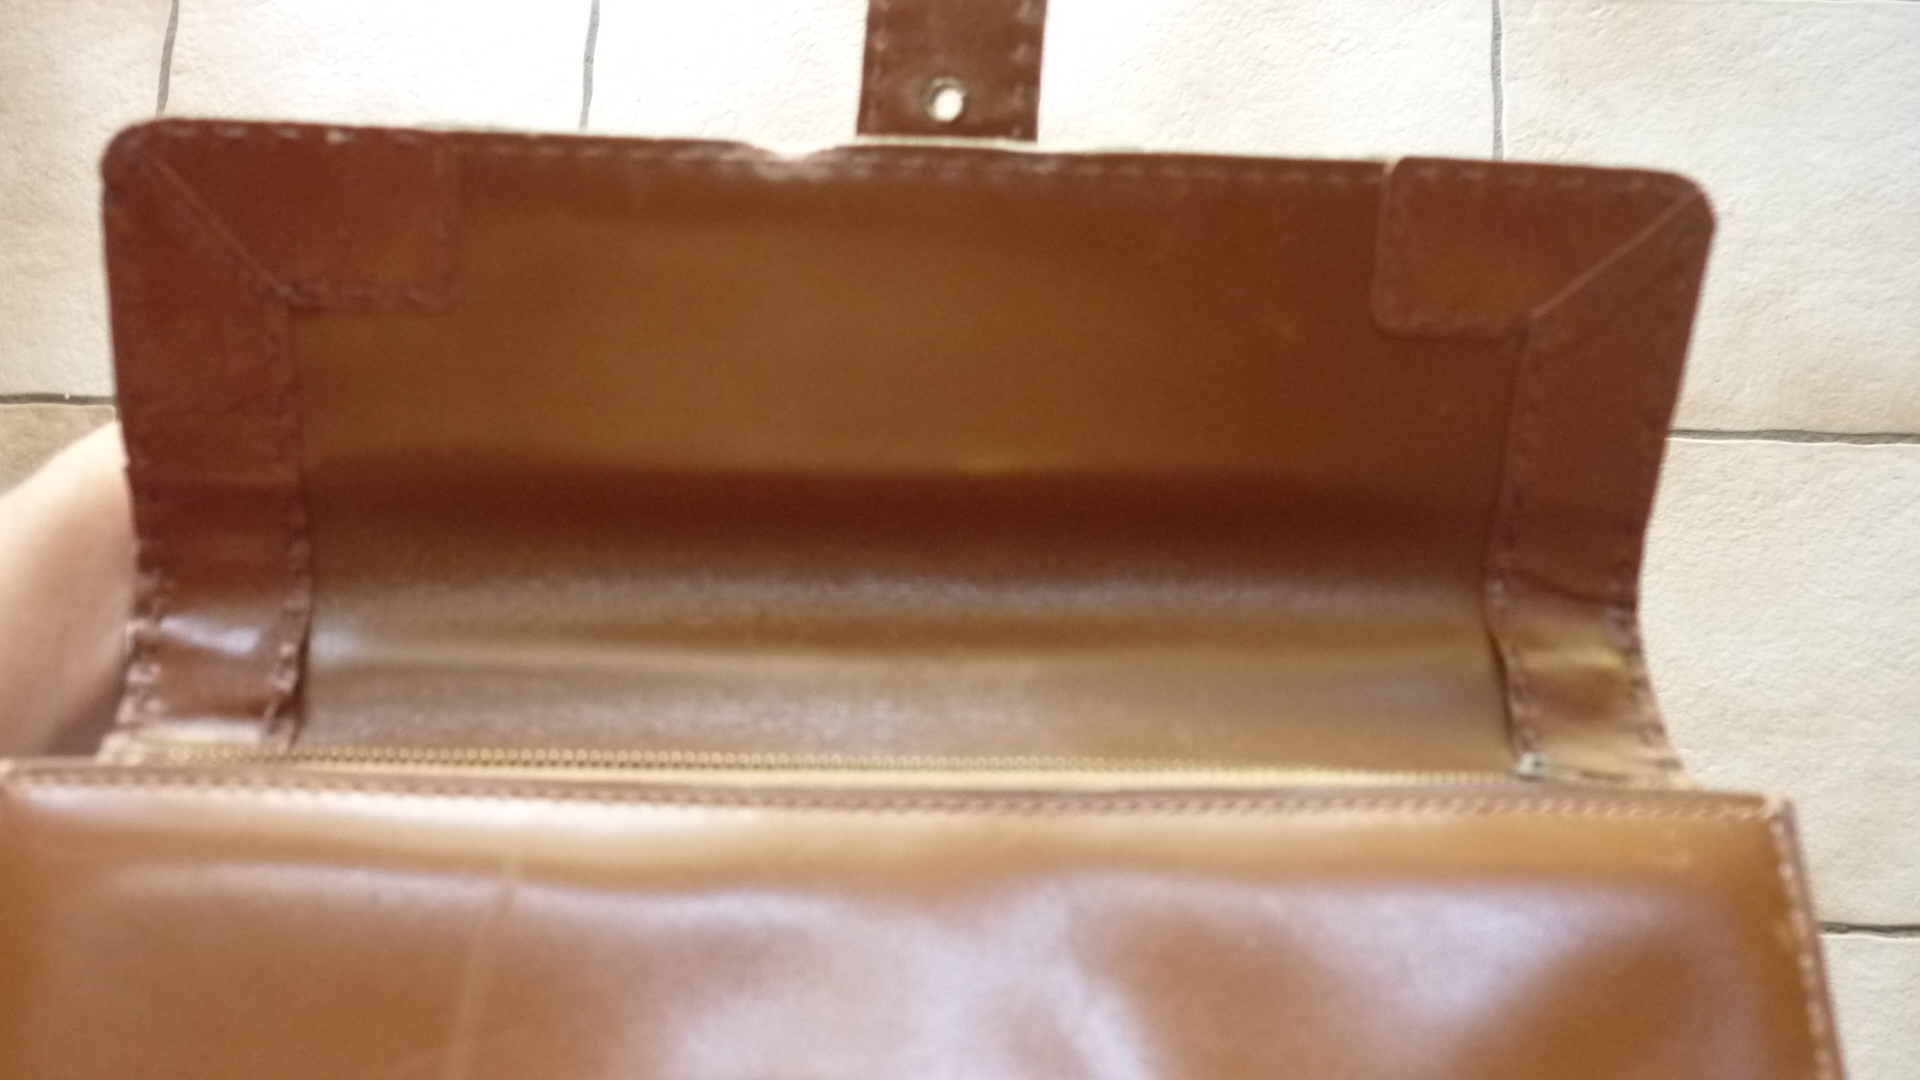
From the album: My leather work so far
My first large bag. Pretty simple, just two rectangles for the main piece (Iwanted two seams for symmetry) and a circle for the base.© Sada Sata 2013
-
I'd do what Feraud said. Get a large hole punch and punch a few circles out of a scrap and then punch a hole in them the same size as you rivet to make a washer.
-
Keeping Linen Thread Looking Slick And Tidy
jimmy eng replied to KiwiLeatherLearner's topic in How Do I Do That?
I use the same thread (cord 3 = literally three cords of thread wrapped around each other) and beeswax to coat it. It doesn't take much, I put the thread around a post, pull it taut and give a few light rubs of a block of beeswax then get a piece of calico (or anything else you want to use) and rub it up and down the thread until it feels smooth and slightly stiffer. After sewing I use a flat head hammer to flatten the stitching on both sides and run the stitching wheel over the work to straighten up the stitches. Calico is a cheap unbleached loose weave cotton fabric, smells like musty dampened cloth and looks like it too. I use it a lot as I'm a dress maker by trade and use it to make clothing samples, you can find it in every fabric store. Any natural fibre I imagine would give the best results as synthetics aren't great with high heat. -
How To Get Cocobolo Burnisher From Staining Edge
jimmy eng replied to jimmy eng's topic in How Do I Do That?
Thanks heaps for the replies, I'll contact proedge burnishers and do a patch test stripping the oil with acetone. Cheers folks.. -
You get a metal stamp made and use a heavy press to make the imprint. The first one is embossed from the skin side and the other one looks to be from the flesh side (probably has a negative plate on the other side to keep the shape better).
-
Keeping Linen Thread Looking Slick And Tidy
jimmy eng replied to KiwiLeatherLearner's topic in How Do I Do That?
1/ Do you rub a calico cloth up and down the waxed thread? It should heat the wax enough to 'set' the coating so it covers the entire surface and doesn't raise the thread fibre. 2/ Do you use a stitch groover so the thread sits level with the leather surface and not on top where it rubs on surfaces? Do both if you don't. Those would be my first two thoughts to fix your issue. -
A client has given me a cocobolo burnisher that attaches to an electric drill to use on his chrome dyed card wallets but it leaves a yellow stain on the edge when I've burnished them. Is there a way to reduce this from happening? I've read that the wood tends to stain hands with prolonged handling so I guess it's the nature of the material. From the photo it looks like the colouring will strip down after use but it would be great if there was a way to get rid of the issue with some kind of stripper of some kind. A issue I thought would occur was that if I used some kind of stripping solution is that it would raise the grain of the wood so it becomes rough on the surface. But if it's part of the woods characteristics will it even do anything?
-
Laminate two layers of heavy duty kitchen aluminium foil glued together, it's strong enough to resist bending in general use and not testing it to extremes. I'm making card wallets for a guy that uses this technique for his and it makes them removable too. I've also tried gluing the foil into the outer and lining but that could be more prone to breaking.
-
Didn't think of this before, great idea. Coincidentally I've started buying a few letterpress printing blocks for no other reason than that the designs were attractive. I'll definitely give this a go.
-
I was just thinking aloud and wondered if anyone who uses letter stamps knows what font they have on their sets.
-
The main LV logo products (the monogram and damier check) are a waterproofed canvas. They do have a few leather lines such as the Epi line, which has tight ridges/slubs on the surface. You most likely would get it in Thailand but it's very hard to procure a roll of the material. When I went to a few south east Asian countries on holidays with my family, they'd be a few badly made fakes at the markets in Thailand (ones with the wrong symbol on the monogram etc) but I think it was in Malaysia/ Laos where we got driven literally to a place in the middle of nowhere, it was a barren landscape, and they had a warehouse full of higher quality fakes. I wasn't paying attention to how we got there or why unfortunately. It was a bit frightening, you could feel the nervous and secrective tension in the air.
-
Seeking Japanese Bag/satchel Patterns/ideas
jimmy eng replied to ATLeather's topic in Patterns and Templates
Two Japanese books I use to base bag designs off are Carry Me: 20 boutique bags to sew by Yuka Koshizen (you can find the book at Amazon) and 'something' Lesson by Ezura Yoshimi. I translate it to 'Bazuge' Lessson but that's not a word and Japanese for bag is baggu; my Japanese is practically non-existent these days. The ISBN is 978-4-579-10890-9. They're basic style bags, not particulary traditional Japanese looks, but most of the designs have a Japanese aesthetic. The first book (Carry me) are all fabric bags and a couple of them have leather handles but I use the patterns (the book has some full size ones in the back) and the designs in leather. The most Japanese style is a market tote that has a Azuma bag that goes with it. The Azuma is a single rectangular piece of fabric/ leather sewn to make a triangular bag with a knot in the carry strap. The desginer Martin Margiela has done one in leather with a snap in the bottom to convert it into a bucket style bag. I've made this one before in denim, in leather would require a lot of it. Here's a tutorial for it: http://coco-stitch.b...g-tutorial.html There is one bag design that has a lot of snaps in it so the body of the bag can expand. Pretty clever. The other book has a lot more leather bag designs (all leather bags). They're very minimal looks but very attractive and incredibly easy to sew/ hand sew. I have the Carry me book in English but the other one isn't so I don't know if it's available in English. Both are recommended though because they each have something to offer in terms of thinking about shapes and function. Here's a link to a bit of info about Ezura Yoshimi and some of her bag ideas http://www.handmadejapan.com/e_/features_/eft006_01.htm Hope that all helps! -
Are you using a block inside the bag when you're sewing? It helps immensely constructing anything 3 dimensionally to have something to hold the shape you want. Without seeing the issue, it seems it could be two reasons: (1) The pieces have shifted before the awl has exited. A block helps with that. And/or you can sew a single stitch at the beginning and end of the curve so it stays in place. Once you sew to the curve then you can snip off the single stitch and continue on sewing. It's much better than having a clip that can shift around. (2) The awl isn't going in the same way and parallel to the edge. From a birds' eye view the leather and awl should make a right angle (that makes sure your stitch length is even), from there you can adjust how the awl exits anyway you need to. So if the stitch groove lines don't match, change the angle of the awl when you exit. You can enter one piece of the leather from one height and exit the other in another which brings the pieces and your stitch lines level (either by angling the awl and stabbing both pieces or entering and exiting each piece individually). You also need to slow down. When you feel the awl is coming out from the other side of the piece, check that the hole is in the correct position. If not, pull it back and exit where it should be. Since the awl point is a diamond shape, if each stitch hole isn't in the same direction then that creates crooked stitching as well. Like Gump has said, using a backing so your awl has somewhere to hit helps too. When I'm on the stitching horse I use a block of beeswax or a eraser for that purpose when it comes to fiddly sections that my hands can't completely control. It also helps in tight corners/bends where you don't want to scratch other pieces of leather where your fingers can't get to. FWIW, I'd use the overstitcher on both sides of the pieces (start at the same position) so you get an indication of where the exit hole should be and I'd do it while the bag is in pieces rather than glued. Once you've finished sewing, tap both sides of the stitches with a hammer and run the overstitcher along the seam. It helps keep the stitches aligned. I haven't attempted a large bag yet, but it's on the cards.
-
I Dont Like Change Not One Bit !
jimmy eng replied to bluesman1951's topic in Feedback and Suggestions
I really like the lighter colours, makes the site easier to read. I haven't noticed too much difference yet but because I use Facebook a lot, it reminds me of it and it's a bit more familiar. I'd love to see a new Leatherworkers' banner and the return of the flags on the side of the posts too (and breaks in the posters' profile list). -
In regards to the raw seam, are you talking about Louis Vuitton handbag edges? They use a kind of shellac that's a shade specifically made for them. It's one way to tell a fake if it's the wrong colour.
-
Isn't that just a machine that burnishes/ polishes at high speed? Maybe the difference is that it's specific for chrome tanned leather but usually my finishes on veg tan look the same if I take my time with it.
-
Cleaning Leather With Oxalic Acid Crystals Or Lemon Juice
jimmy eng replied to LNLeather's topic in Leatherwork Conversation
I've used diluted vinegar and diluted dish detergent (separately) to clean bags with mold because it stops it from forming and removes a lot of it so my question is if the crystals will do the same thing. -
How to make a box pocket with a wrap around zipper.
jimmy eng replied to JohnBarton's topic in How Do I Do That?
Does the extra leather have to be in two pieces or can it be one piece that rounds the corner? It's a good 'trick' -
That will be a fun project since there's no sewing involved and the challenge will be the shape of the whole thing. Does the other post you got it from say anything about how 'practical' it is? (ie how it feels on, does it slip off/ flap about....) Making it adjustable will improve it unless you want a total recreation for cosplay or something.
-
Cutting Lacing With A Strap Cutter - Video
jimmy eng replied to Ann McGrath's topic in How Do I Do That?
I remember stumbling onto your videos about using the strap cutter a few months back, they're really great! I definitely need more practice with it. -
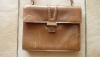
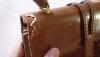
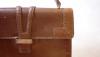
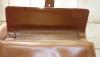
Thanks fellas. The only issue I have with what leather I've used is that it will age differently to the rest of the bag. But I doubt that she'll use the bag that often seeing that it's still scratched up. But I sent her the photos of it and she loves it so now I just have to make a wallet for her boyfriends' Christmas present.
-
I told my mate Nissa what the options were and she said to go ahead with patching the missing pieces but don't bother with the whole restoration so I made a border with a corner miter for the sides and stitched it on today. I think it suits the shape of the bag. I didn't have the exact shade and I haven't learned how to dye well yet (just concentrating on stitching at the moment). My handling is a bit rough so I guess it contributed to making it look apart of the bag! Plus I'm pretty hungover. What I used was kangaroo leather and bulked up the chewed areas with two pieces of leather slotted into the flap then loosely cemented the front and back patches onto the flap and did a running stitch along the pieces. One thing I didn't anticipate was the bag handle has a metal bar bracing it to the bag and had to do improvised stitching on where the metal bar was in my stitching path. I only stitched on the top patch and not through all the layers and then stitched only on the bottom patch and then continued to sew through all the layers (sort of a z formation from the side). Then I glued the 'fake' stitching areas down since they weren't holding anything down and tapped the stitches with a hammer. Is this what you would have done?