Cyberthrasher
-
Posts
2,397 -
Joined
-
Last visited
Content Type
Profiles
Forums
Events
Blogs
Gallery
Store
Everything posted by Cyberthrasher
-

The Key To Cutting Straight Edges?
Cyberthrasher replied to Cowgirlup8807's topic in How Do I Do That?
scribe your line with a scratch awl then cut slowly. Sounds like you're relying on your straight edge too much. Those things have a tendency to move around. Use it to scratch your line then trust yourself to follow it. Go slowly first to get a top cut, then go back over it again to cut all the way through. The knife will follow your first cut you made. -
Thanks. That's something I was trying to do, but the lizard piece I was using was so thick I had a heck of a time getting it to push up. I actually ended up wet molding it around the cutout pieces in order to get it as far as I did. The way it turned out, it kind of bubbles up so that the center of the lizard is the same level as the top leather. I just have to remember to choose a thinner piece next time I think.
-
That's basically it. You need something to "fix" the color (as in attach it) to the leather. Since the sharpie itself will just rub off, you need something over the top of it that won't.
-
I was just informed that not only did the kid's jaw drop when he opened it, but his Grandfather had the same reaction and wants me to make a bunch for his 10 or so knives that don't have sheathes. Makes me feel a lot better about the big discount I gave him - advertising cost
-
Not to sidetrack from the topic too much, but how do you like that knife?
-
Imagine if you had an airbrush I got nothing to add to the tutorial though as far as questions.
-
Template Source For Bike Gear
Cyberthrasher replied to IngleGunLeather's topic in Motorcycles and Biker Gear
I'd just pull your bags off and make up a template like Chancey's to fit the space on yours, just to have something to go off that will likely work for someone else as well. Be sure to go through the first couple pages of this pretty well. You'll see it all mounted up on the second page there. http://leatherworker.net/forum/index.php?showtopic=39818 -
Template Source For Bike Gear
Cyberthrasher replied to IngleGunLeather's topic in Motorcycles and Biker Gear
When he said it was for a swingarm bag, I assumed softail swingarm, since a hardtail doesn't have a swingarm and good old swingarm frame with shocks in your face doesn't have any real place to mount a bag like that. -
Thanks guys. I have to check with the guy who wrote the tutorial I based it on to see if I can post it up here. I think it would be pretty handy for a lot of people. The best news is that I got a message from my friend this morning saying that his son LOVED it, so I call that mission accomplished I punched the holes with my spaced 3/32 lacing thong. I wanted the coverage of 3/32 holes with 1/8 lace, so that part worked out well. The problem was that all the pieces put together ended up being too thick for the punch to make it through. I ended up punching the holes in the top 4 layers and then marking the position into the back piece and punching it separately. But, I still had to ream out the holes quite a bit as I was lacing in order to make it through each hole twice. Really could have used 1/8 holes to start with, but oh well. Renee, for your problem, if you're talking about joining up with your starting point, I find it best to start loose so that when I come back around to it I can match it up better. Also, it's easiest for me to lace up the ending joint really super loose with lots of slack and then tighten it all up once you're done to pull the slack out. I've spent lots of times pulling out my ending splice and doing it over, so I know what you're talking about there.
-
5 hours of lacing - time for a beer
-

or two!
-

and one for me and then a phone call to your client for Christmas:) Sorry dude Chancey got me drunk your leather has to wait until after the holidays:) MERRY CHRISTMAS BRO! I tried calling you on skype yesterday!
-
Oh yeah, I need to remember to turn that thing on. Sorry Bro. Hope you had a great Christmas!!
-
-
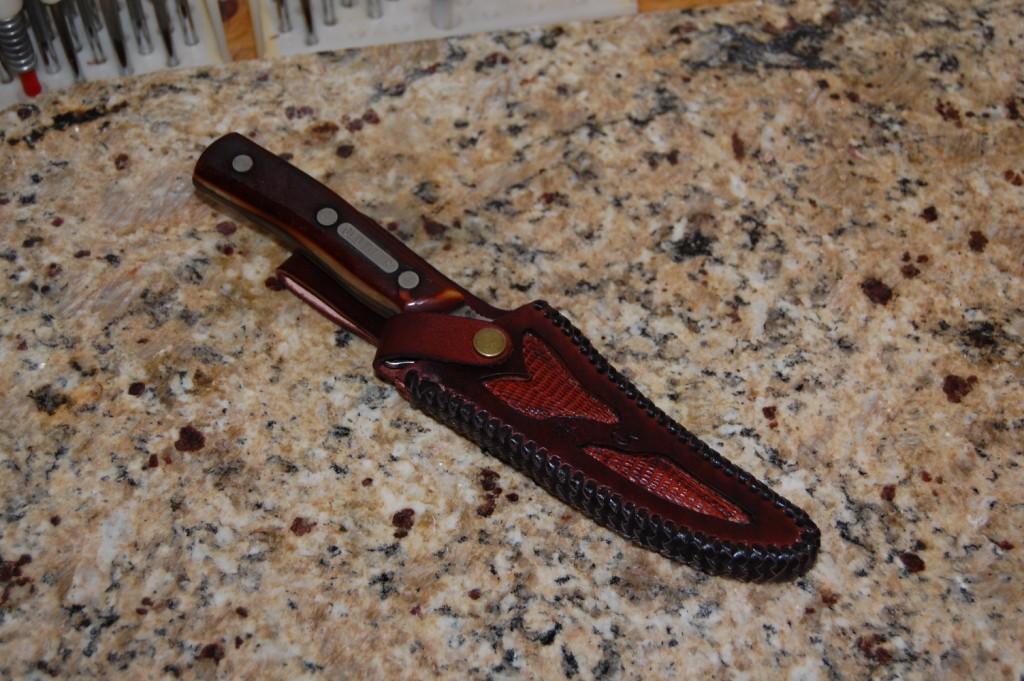
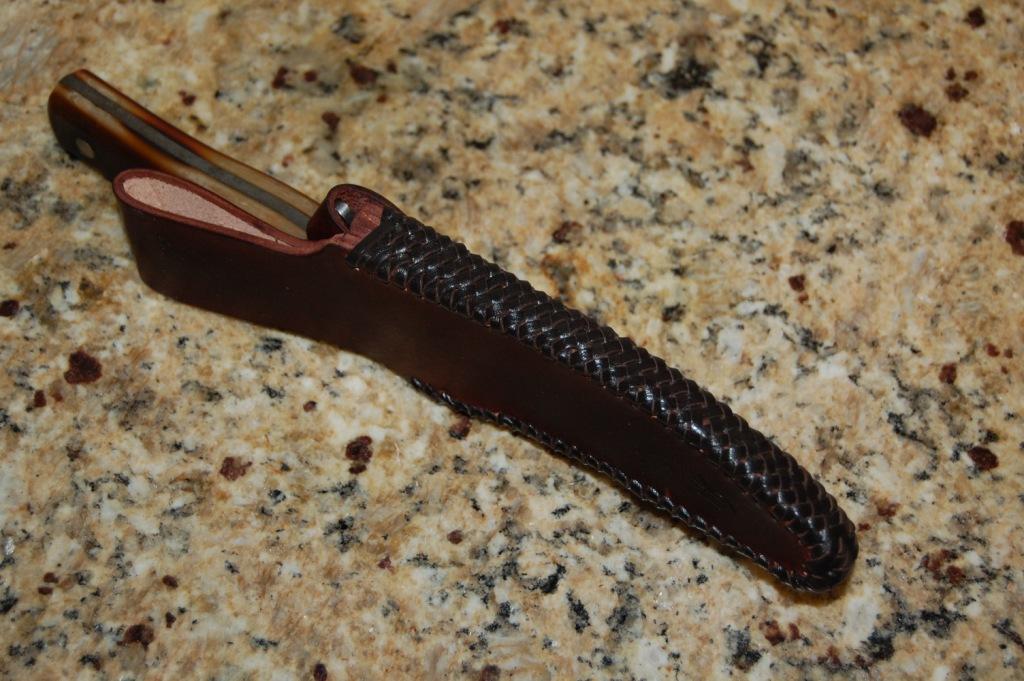
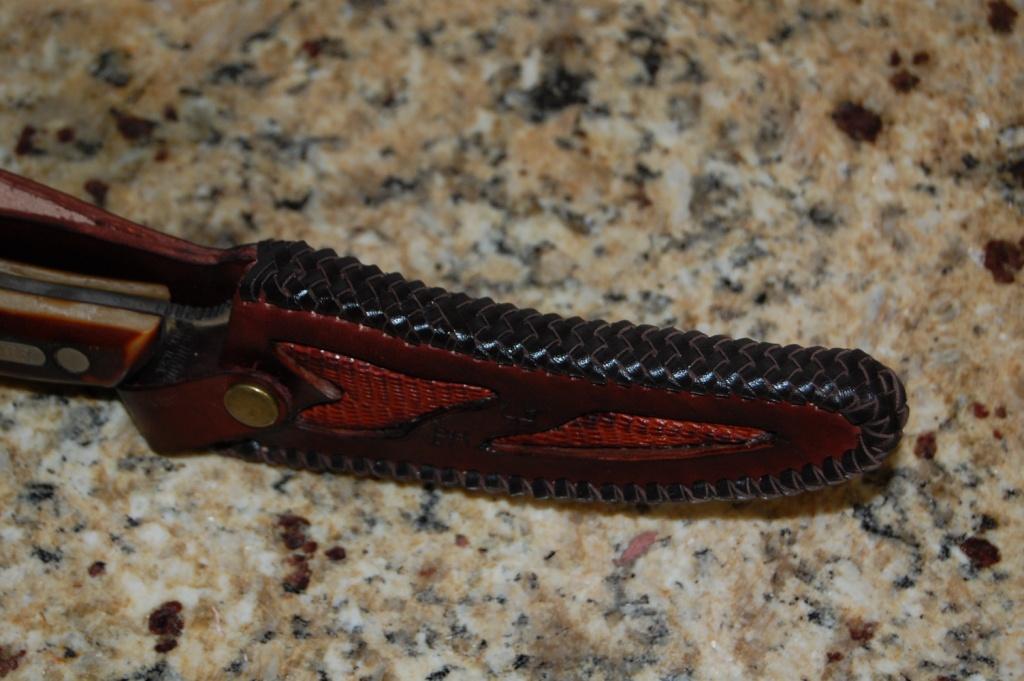
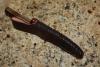
Just got my first sheath done. It was an extremely last minute Christmas order. Normally I would have said no, but a friend was really wanting it done. He didn't even expect me to make it in time like I told him I would. So, this has 8 oz front, back, and welt with a 5 oz backing to the lizard and a another guard spacer. That's one thick piece of leather. Did kangaroo basketweave too so it would cover the edges better, but that was a real pain getting through that thick chunk of leather two times per hole (not counting the bottom corner). Let me know what you think. I'll even take some criticism since it's the holidays There's a couple things I wish I could have taken some more time on, but all in all he really loved it and I'm proud of it.


-
Genuine Or Fake Alligator
Cyberthrasher replied to Oakley's topic in Exotics, Reptiles, Furs and others
I think you nailed it with this one. I thought I had seen a couple of reversed sections originally, this just proved it. Cound the square sections that come off that point toward the round spots, then you can line that up with the little points in between. it is a PERFECT match. Nature is pretty good at symmetry, but I've never seen it that close. -
Template Source For Bike Gear
Cyberthrasher replied to IngleGunLeather's topic in Motorcycles and Biker Gear
Yeah, the only thing to keep an eye on with the tool bags is fork width and where they'd like it to mount. A solo saddle bag really should be made to fit the bike it's going on. Frame shape and sizes differ across the board and you want to make sure it's free of any obstructions from the clutch pack or any passenger pegs, plus who knows what else has been put on the bike in that area such as the latest doo-dad or even side mount license plates/tail lights. You'll also need to know if it's right or left hand drive and if it's going to clear any pipes, etc.... -
Genuine Or Fake Alligator
Cyberthrasher replied to Oakley's topic in Exotics, Reptiles, Furs and others
I was thinking the same thing when I was looking at it and couldn't find anything that repeats. But, that's not to say that it could be just the right cut that you can't see anything repeat either. -
Template Source For Bike Gear
Cyberthrasher replied to IngleGunLeather's topic in Motorcycles and Biker Gear
walmart, leatherup.com, amazon, etc.... Just find the cheapest one you can, tear it apart and use it as a template, then reuse the hardware if it's any good at all. Tool rolls aren't really all that complicated - just roll up a piece of leather and put a gusset on each end with flaps to lay over the inside. There's a good tutorial here to show how to make a saddle bag. A couple of them actually. They're right at the top of this section of the forum. " http://leatherworker.net/forum/index.php?showtopic=39818 http://leatherworker.net/forum/index.php?showtopic=2161 -
A Plastic Material Used For Tablet Leather Cases Production?
Cyberthrasher replied to alan83ogz's topic in How Do I Do That?
What kind of case are you going for? Sleeve or notebook style? The easiest style would be a sleeve. In that case, i wouldn't even worry about any plastics. Just use some heavy weight (8 - 9 oz) and line it with some felt material for protection. -
We gots lots of tool buyers here. post up what you have. If you're not sure about what something is, just ask and one of the pros will probably chime in.
-
Looks like it's about $8.99 USD a square foot and you have about 16 square feet there. I don't do any work with latigo, but I would expect it to be in very clean usable condition to buy from a private party at full price. If you'd like to sell it here, we have a "for sale" section further down the page on the main forum page, with a specific sub-heading for leather for sale. That might be a good place to start if you'd like to get rid of it. Remember to show some pictures of it if you go that route, so that people can see what they're getting.
-
Getting ready to do my first knife sheath and exotic inlay all in one. Probably not the best idea on a customer order, but I know they'll be pleased

-
if it's neatsfoot or EVOO, just apply a light even coat to the entire piece. You could even test on some scrap if you're not sure. Remember, neatsfoot is a conditioner that replenishes the natural oils that are already present in the leather.
-
Nice!
-
I don't have a creaser yet since I've been doing just fine using my wing dividers followed by my swivel knife and then finish it off with a nice double bevel using my plastic swivel beveler (that's a mouthful). I've used a stitching groover on some items before, but on most I don't like the look. I've been wanting to try the "lil wizard" out too, since it would knock a step off my process, but I'll probably buy a creaser before I buy that. http://springfieldleather.com/29104/Edger%2CLil%27-Wizard-Border/
-
I hadn't thought about it, but that's exactly what happened with some of mine too. They help advertise me more than my own wife does
-
Hell, I'll start!!! I love it (as always). But, I'm curious how the snaps ruin pants. I've never had that happen (until I just said that.....).
-
Biltwell are good seat kits to get started on, and they're very well liked in the industry. Plus, the pan is built right for durability. http://www.biltwelli...ct_detail&p=121 MAKE SURE that you get a pan with some structure built into it. There are a lot of really cheap pans out there that won't hold up for anything. If it's just a straight piece of metal, walk away. it should have some visible reinforcement. If you want to get a cheap one to try it, fine, but keep in mind that anybody you sell it to in the future may get really upset down the road if they weren't informed of the cheap construction ahead of time.