


Spincycle
-
Posts
59 -
Joined
-
Last visited
Content Type
Profiles
Forums
Events
Blogs
Gallery
Everything posted by Spincycle
-
 Beaverslayer, thanks for the props. This has been one of my favorite projects to date. Yes it is legal. As to what classification I don't know. I'd have to ask the owner.
 -
Just figured I put this in a new thread. I changed the retention strap as the single strap let go too easily. This two strap method holds the gun quite well. The cartridge belt is a separate piece. It has another belt loop in the center behind the holster. It's all meant to be worn with jeans and woven through any belt up to 1.5". The customer has the leg strap. I will try to post a pic of it being worn. Thanks for looking. Here's the original post http://leatherworker.net/forum/index.php?showtopic=45502&view=&hl=&fromsearch=1
-
A Long Leftie
Spincycle replied to Spincycle's topic in Gun Holsters, Rifle Slings and Knife Sheathes
Dwight, that holster looks great. It's a lot of leather and a lot of work. Electrathon, I agree with the longer pocket. It's unfortunately not what the customer requested. Thanks for your input. -
A Long Leftie
Spincycle replied to Spincycle's topic in Gun Holsters, Rifle Slings and Knife Sheathes
Your right. All you have to do is grab the gun and pull. It draws very quickly. So far the customer is ok with this. I think though that it won't be long before he asks for it to be better secured. I was thinking of machining a 1" long stainless steel post to put under the snap on the holster body. It would act as a stop for the gun and reduce the leverage angle in the retention strap. Of course I would have to shorten the retention strap, which is no big deal. What do you think? Any other ideas? -
So this is my first holster. Its for a Rossi Ranch Hand. This was also my first time doing any wet molding. All in all it was a good experience. Its two layers folded over. There is a loop area at the top to thread a belt through. I am starting a matching cartridge belt next. This was also my first commissioned work and the customer is happy with the results for the price. Yes the leg strap is the wrong way in the pics.
-
All In One Motorbike Seat And P Pad
Spincycle replied to leatheroo's topic in Motorcycles and Biker Gear
I'm at a loss for words. Ditto what everyone else said. One of the nicest seats I've ever seen. I wish I could have seen you color it. -
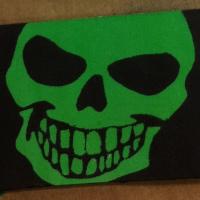
Background Paint Color
Spincycle replied to cercyonis's topic in Purses, Wallets, Belts and Miscellaneous Pocket Items
I personally would like green. Black would make the legs look too thin unless you left a slight space all around the spider with no color. But hey I'm just some guy. -
Key Wallet
Spincycle replied to LeatherLegion's topic in Purses, Wallets, Belts and Miscellaneous Pocket Items
That's a nice looking piece of leather. Also nice work on the wallet. I'm curious when fully loaded with keys if the keys would tend to poke out the open side under the snap strap? If so that would drive me nuts! Perhaps another side beside the keys or the snap strap to extend to the bottom like a "biker wallet" flap? Just some thoughts for ya. -
Leather Portfolio (No Zipper)
Spincycle replied to Solofalcon's topic in Books, Journals and Photo Albums
Nice work, I like the color on this one. Did you put anything in between the leather layers to stiffen it up? -
Looks cool. I like the font and the stylized beveling around the letters. What does "strike ak strike" mean?
-
Biker Wallet
Spincycle replied to Chief31794's topic in Purses, Wallets, Belts and Miscellaneous Pocket Items
Looks good. What type of finishing did you use? I'm asking because it looks just oiled yet the tooling and stamping lines are black. Also what's the configuration inside, pics? -
Forgive me for my ignorance but couldn't you just cut the window in the vinyl yourself? If your cut is clean and well rounded it wouldn't rip. You could use a large oval punch.
-
Tiara, your projects look good. Nice use of color. Thanks for the info. Where did you obtain the spring cuff blanks? Let us know how your glow in the dark glazing works out. That will be a neat project.
-
Gum Trag is a finish top coat type product. You want to use it to finish off the edge by sealing it. You can slick by rubbing in both directions if you like, it's up to you. It all depends on the level of quality your trying to achieve. As your probably starting to notice there are very few hard and fast rules in this hobby. Try different methods and see what suits you best.
-
Hi Tiara. I'm curious as to what you ordered, and what type of projects your planning. I did a couple of cuffs with the glazed carp. I posted them in the collars, cuffs, leashes and leads section. I found that the holes in yhe fish skin made by my sewing machine needle didn't close back up again like it does with leather. I was using a needle for leather as I backed the fish with leather. I used a thicker thread to try to fill the holes more. It was refreshing to do the fish cuffs as there was no dyeing or finishing involved. I'm looking forward to your input.
-
Soldiers, buffalo Soldiers!!!! LOL
-
I'm gonna say slicking after gum trag is what's causing the fuzzies. Having said that if your not using vegtan that could also be your problem. I basically use Bobs method but slightly modified. This is what works for me, starting from raw edge: 1) egde bevel if desired 2) wet edge with water, slick. Use smooth plastic like a sharpie if you don't have a slicker) 3) rub glycerin bar soap into edge 4) lightly slick again for glass finish 5) apply edge sealer 6) (optional) gently rub parrafin wax along edge and slick with fingers or synthetic fabric like pantyhose. Tips: -slick and apply product in one direction only for entire process -apply dye before starting if possible. If not apply after gycerin slicking and before sealer. I find it lifts the glycerin a bit. You can re-apply glycerin after dye but it will rub off color onto your soap and slicker. -apply sealer in the same direction as slicking. I started using bobs method but found that the saddle soap didnt really do anything for me. I dropped it and am more than happy with the results. Let us know how it turns out
-
I made another fish cuff incorporating what I learned from the first one. This one is for me. Here is the result.
-
Card Wallet
Spincycle replied to Spincycle's topic in Purses, Wallets, Belts and Miscellaneous Pocket Items
Thanks all. I like the feel of the pig skin. It makes me feel like there's more "money" in my wallet than there actually is! -
Thank you. I don't think the Janome likes this type of work. But it's what I've got. Thank you. Yeah the Janome took it. I won't be able to do any contrast stitching though. I had to help it along a fair bit. I could always try my camera but I'm too lazy to use my computer instead of my phone.
-
Ok. This is my first attempt at this "French edge" business. I did learn a lot, and the next will be better. Unfortunately my iPhone refuses to portray the actual color of this carp skin as it is a royal purple not blue. I also tried this hidden snap for the first time. Thanks for looking.
-
The exterior of this wallet was one of my first tooling and stitching projects. I made it almost 2 years ago. I was using it with vinyl inserts but they were toast. I just finished making the new inserts. They are made from thin pig skin that I found in the remnant bin at Tandy Leather. I made the "pin" that holds it together when I made the wallet. It's just two washer head screws that I faced in the lathe with a pin that is threaded through. I suspect that one could use some sort of Chicago screw setup.
-
Nice work buddy. Right up my alley. Did you take pic's of the underside? If not how is it attached? Did you cover the existing seat or "re-upholster" it?
-
Collar For My Other Kitty
Spincycle replied to Spincycle's topic in Collars, Cuffs, Leashes and Leads
Thanks everyone for looking and your comments. Beaverslayer, the gold mounted stones didn't work out for this one. I really wanted to finish the collar so I went with what I already had on hand. Thanks for plating the buckle and dee ring. I will use them on another collar or project. Sangmort, there's no safety feature. Honestly I don't really buy into the safety feature thing. I realize the potential, but I think that could be said for dogs as well as other potential pet hazards. This is only my opinion though. -
All acrylic paint sealed with Resolene. Calf liner.