


Trevor
-
Content Count
206 -
Joined
-
Last visited
Posts posted by Trevor
-
-
Hi there.
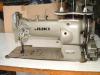
I own a JUKI LU 563 and the difference Im pretty sure is the size of the bobbin. THe 562 has a small and the 563 has the large. Other than that the same machine I think.
I still love mine and have owned 3 of them over the years. Still sews faithfully and is OK.
Cheers
Trevor
"Way Down Under"
-
Hi there again AKRaven
I have been thinking about the machine that you have been writing about and my advice to you is this.
Dont buy anything unless you have tried it out on your own leather.
Dont buy anything that is old and appears cheap.
Save up your hard earned dollars and buy a Toro machine or similar brand new. There are plenty around and they do often come up 2nd hand occasionally on the web. even better.
I know as I have been there done that. I currently own 6 leather sewers and the one I use the most is a Juki LU563 and the Toro 3000. Even though the Toro is a chinese version of the Juki it is the best sewer I have ever used for the heavy stuff. OK if you are making holsters and sheaths and are going to flog it to death then get the very best (a real Juki or Adler) and a small mortgage.
If you are like me and make the odd holster and the odd knife sheath get the toro or similar. They sew fantastic and are easy to use. and the price is very easy to swallow.
Think hard before you leap and regret what you have bought.
Cheers and good luck
Trevor
"Way Down Under"
-
Hi there.
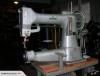
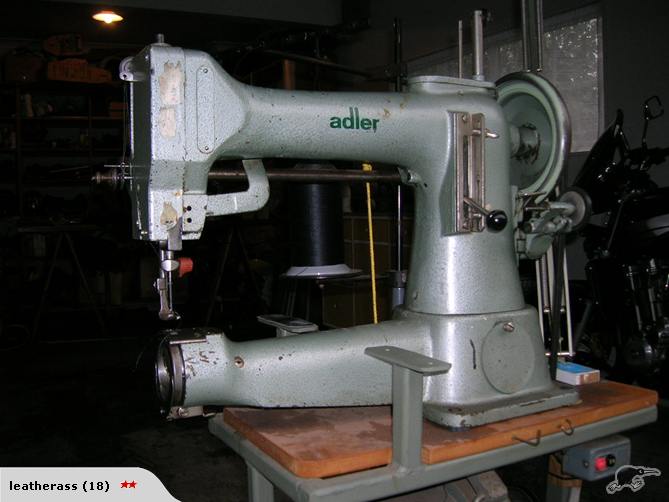
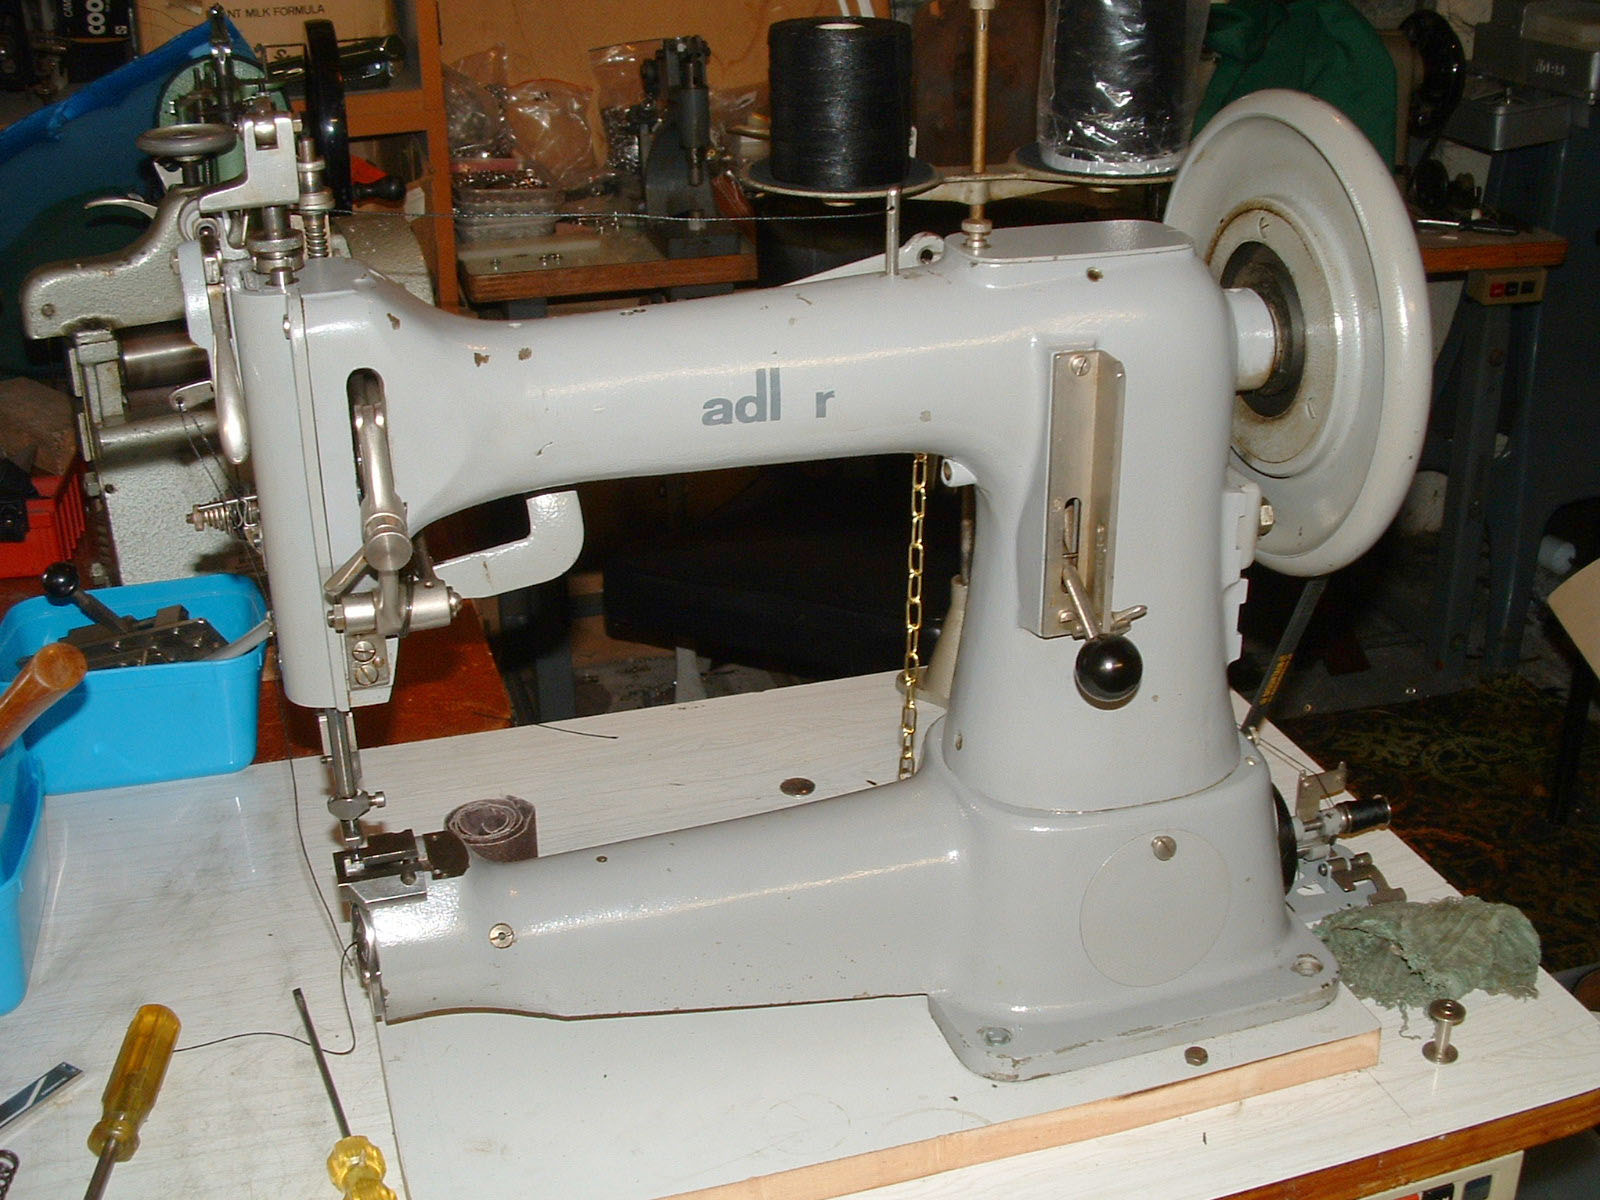
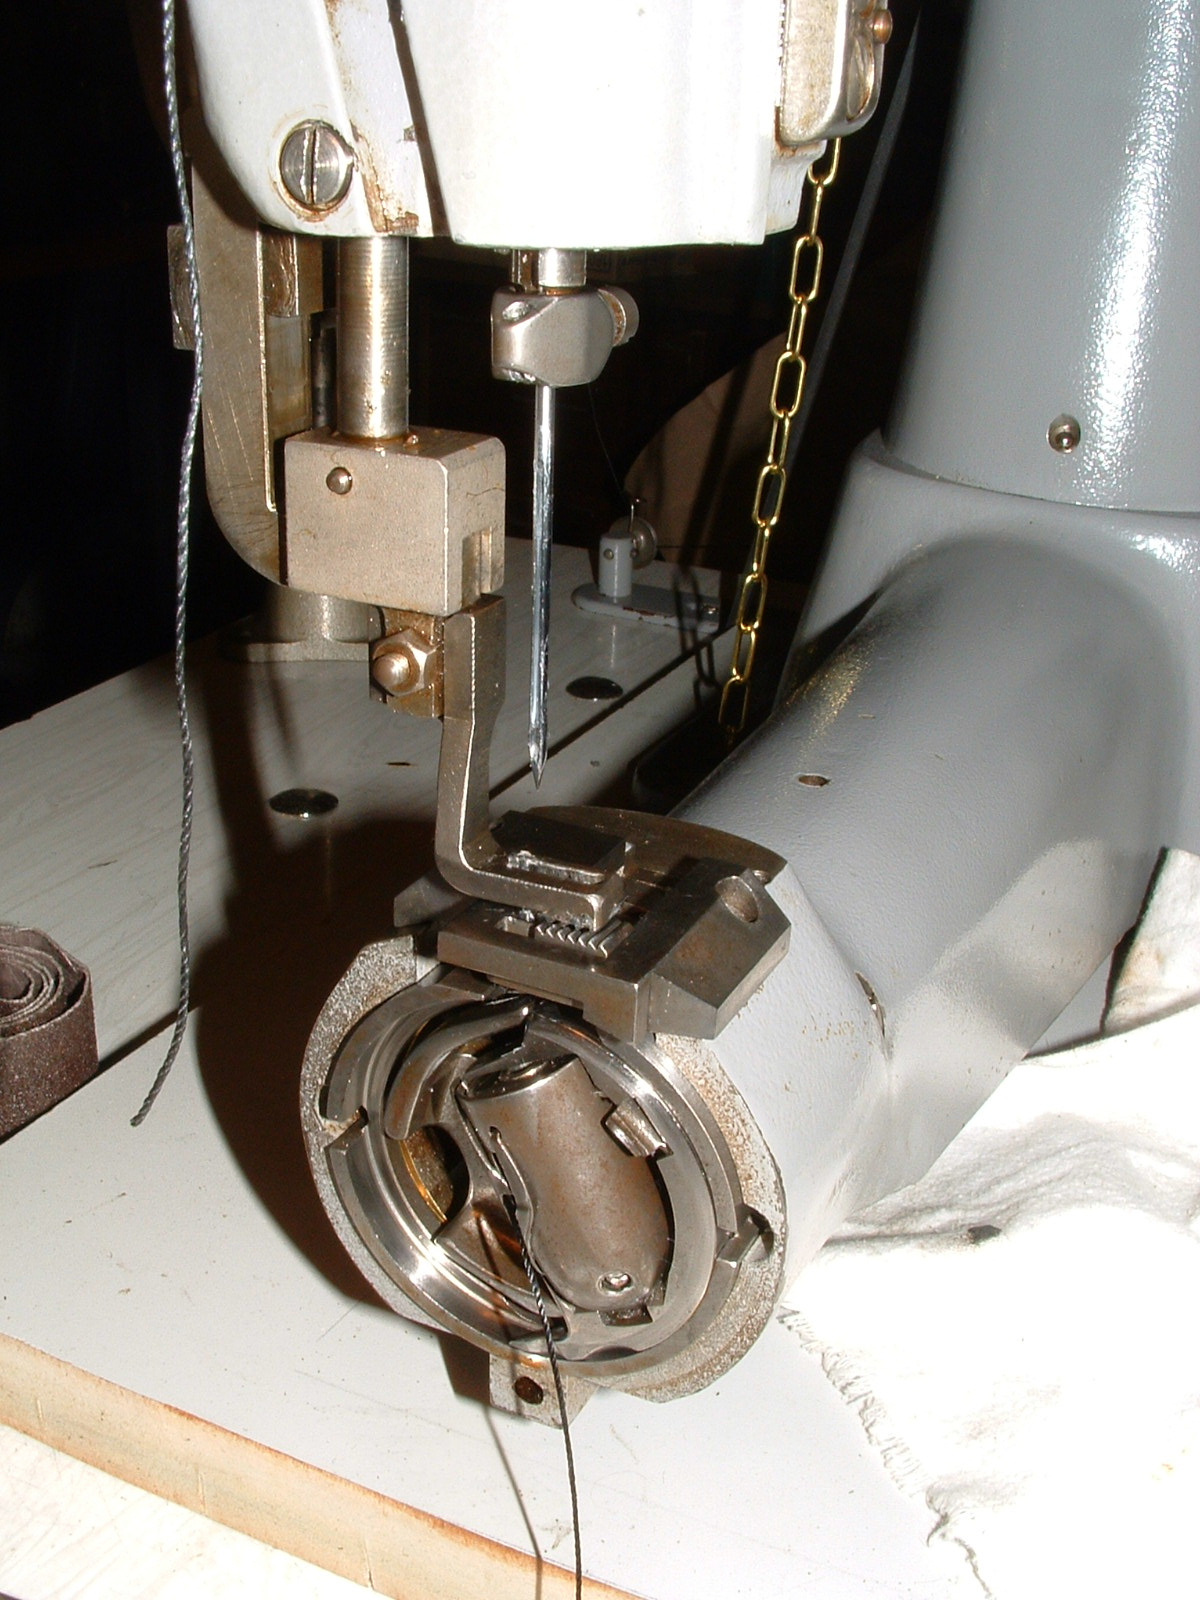
Yes I agree it looks very much like a 105 something Adler cylinder arm machine. This is a single foot (as compared with a full walking foot which has 2 feet) machine that will punch through about 10 - 12 mm of veg leather (with the correct needle of course) but when the foot comes up there is nothing to hold the work in place. I have one in my Garage but seldom use it any more. Because of this foot issue there are some very big teeth on the top foot which can make a bit of a mark on the work. (I sanded mine back a bit to reduce the marks)
If that doesnt matter then thats fine. I eventually found my one (a 105-SP75 converted to normal it was a moccasin making stitcher) made a good sewing job but just didnt leave a good finish on the leather. I now have a Toro 3000 and its the best thing I have ever bought apart from my LU 563 Juki.
So if its cheap and has had a needle bar adjustment for the 794 needles and you dont care about a few teeth marks in the top of your stitching then go for it.
Put a couple of pics for you to check out as well.
Happy sewing
Trevor
"Way Down Under"


-
Hi there Guys
I am a current serving proffesional front line FF in Auckland City New Zealand. I also have made a number of shields for American helmets. They are not easy. Anyway after reading your article I was surfing around and found a little Yo tube video of the making of leather helmets.
Thought you may be interested.
Cheers
Trevor
Way down under
-
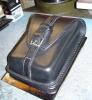
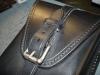
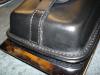
Hi there all.
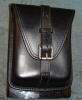
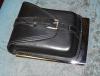
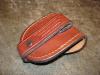
Just finished this accessory pouch for a client and he was very happy with the finished item.
Pouch is a 4mm, Black Dye-thru veg, wet block moulded and heavy stitched (toro3K). Metric 8 thread used around base.
SS buckle no rivets.
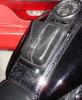
Cheers 1 shot of it on the bike (Wet)
Trevor
(Way down Under)

-
Hi there
I would say that if it is a true contact cement that you are using then yes the heat will reactivate it and it will come apart.
A lot of shoe manufacturers use it and they will apply it during a early part of the production line then re-activate it when ready to stick together to another component part.
Cheers
Trevor
Way Down Under
-
Hey guys,
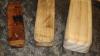
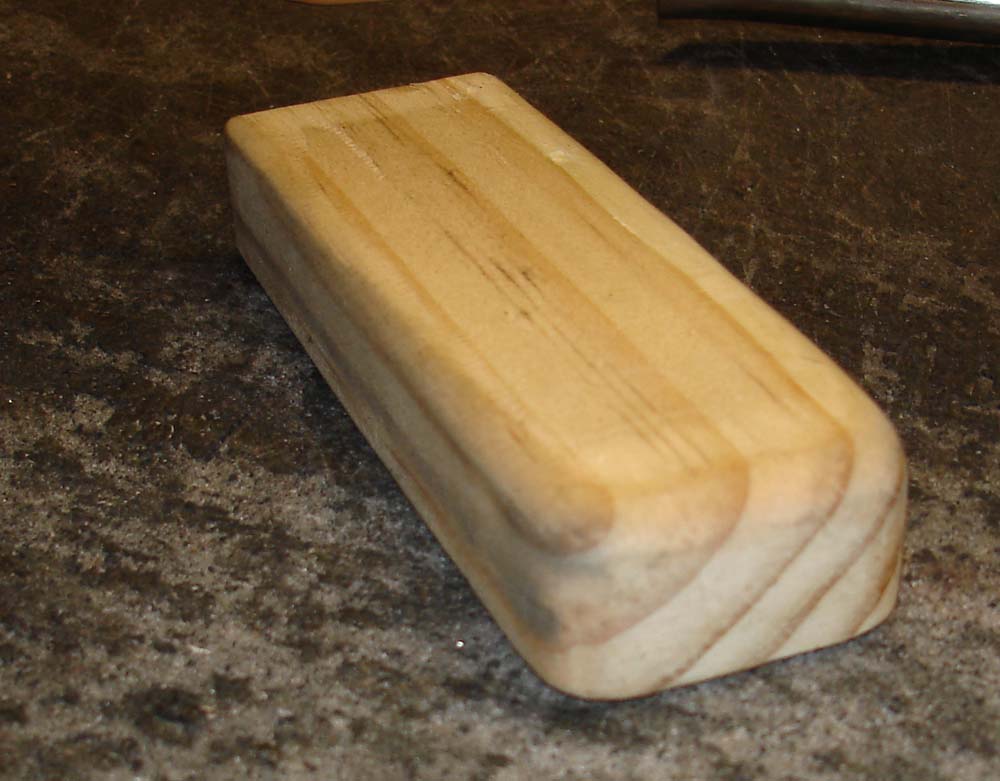
I have been making moulded stuff for years now and have managed to sell all of it. It really and simply comes down to the mould itself as to how good your project will turn out. I use some plastic and some wood. When I say wood i mean some cheap almost firewood say pine or any sturdy wood you can lay your hands on and the other is some good sturdy plywood. The plywood is great because it will handle the stress of being pressed or squashed. I will include some photos of the hand made moulds that I use.
I have moulded light chrome and heavy Veg tanned leather. The difference being how much care you take of it during the drying prosess. anyway to start we take the shape of the item that you need to make a pouch for. This can be anything from a watch pouch to a pocket knife ir a small handgun etc etc. It alwys pays to have the item on hand also. This will make life very easy.
Lets start with a pocket knife pouch which is simple and easy to make. Firstly make a shape that is simple and with rounded edges the same size and just bigger than your item. cut and shape the wood (made easier with a sander of some kind) this can be longer than required but must be high enough and wide enouh to house the object. see photo.
You will want the edges to be rounded but not by too much. The base should be flat.
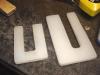
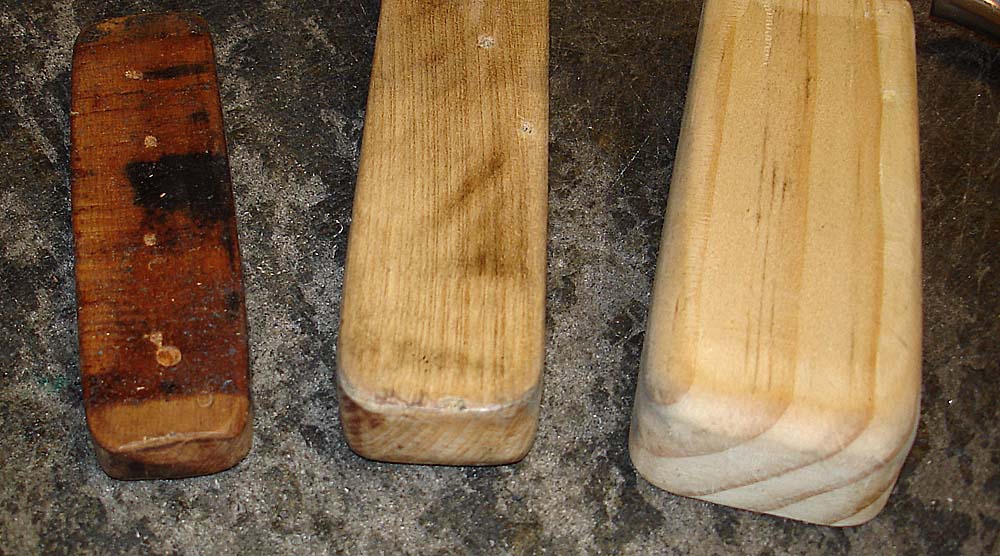
Secondly make the top of the mould. Just look at the picture and you will see what I mean. Now I have used some cutting Nylon board but plywood is the best. Say about Half and inch thick is ideal. The thinner it is the more likely it could break.
The sharp edges that will touch the leather (ie around the inside of the top) need to be smooth because they will mark the leather when pressed.
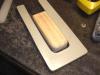
Will post the rest soon. T

-
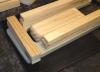
And the last photo
Cheers T

-
last one that didnt come out
-
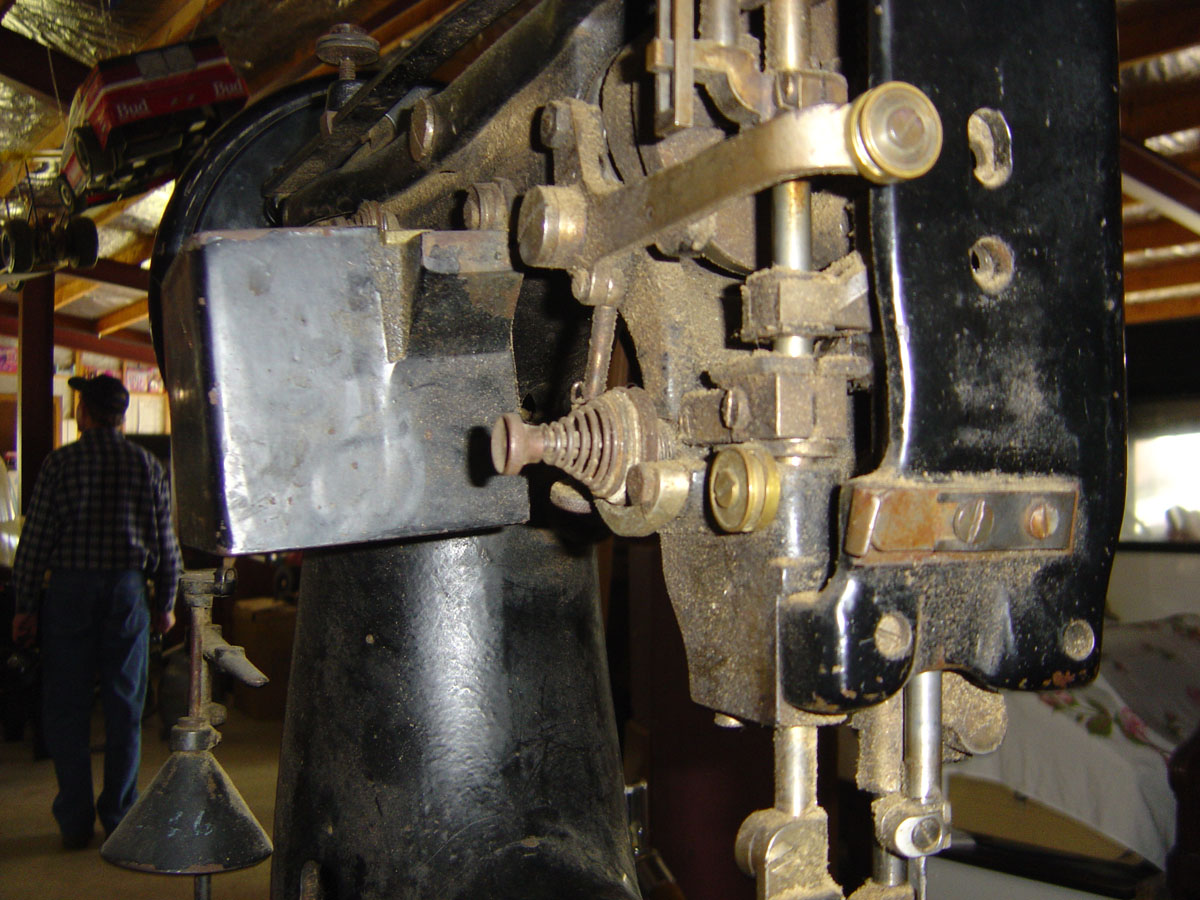
OK guys.
Heres the pics that I took in the Wanaka Transport museum of the Singer 97-10. My mrs thought I was nuts talking pictures of some old boat anchor sewing machine but I secretly thought that I wish I could own it and fancy it up and get it to sew something big.
Anyway I dont think the museum would have sold it anyway. (I didnt ask)
enjoy the pics
Trevor K
Way Down Under
and the rest...
Regards Trevor K
-
Hi there Davy
I found one in a museum once in Wanaka New Zealand. I was very intrigued by this bohemouth of a thing and took several photos of it. Also did a little research and found they were made in the states around the WWII area and shipped around the world. The Smithsonian Institute had some info on them.
It reminded me of the Golf bag stitcher that I once obtained and it was another huge heap of steel and it was a Puritan Golf bag stitcher that did a fancy stitch not a lock stitch.
If you are intersted to see the photos I will post for you.
Cheers Trevor K
Way down under
-
Hi there Randy
I have a Toro 3000 and decided to grind off the skeg as you have talked about. It leaves an annoying mark so I decided to get rid of the thing. Sews beautifully now with no marks.
If you suddenly decide that you needed the groove just pick up another foot.
Remember that if you do grind it off to polish the bottom of the foot nice and shiney with no trace of the skeg.
Cheers
Trevor
"Way Down Under"
-
Hi there
All you need to do is make sure that
1. Your drill bit is sharp.
2. The drill needs to be made from "High Speed Steel" marked "HSS" on the shank.
3. Be aware of the heat that the drill will generate which could damage the leather.
Good luck
Trevor
"Way Down Under"
-
Try this link.
I see there are minimum orders though.
http://www.dotfastenersdirect.com/index.html
Cheers Trevor
"Way Down Under"
-
Hello again Handstitch.
You mentioned that the marks were from the bed side of the machine. This mark is the feed-dog claws coming too high out of the bed and combined with too much foot pressure will make an ugly pattern on the underside of the item being sewn.
You may find that the dog height can be adjusted a little to ease the amount of how much comes up out of the bed. This will have to be done from inside the bobbin hole.
Maybe contact the guys that you got it off and see if they know how to do it. If not any good sewing machine mechanic should be able to do it for you.
Just check also that the top plate is all screwed down properly too.
Good luck
Trevor
"Way Down Under"
-
Hey there Handstitch.
This is very annoying I must say. I have been sewing leather for years and this issue doesnt seem to happen to me.
Sometimes when the leather is slightly damp the machine will leave footprints in the path of the stitches. Check that first. Sew dry is the best unless it doesnt matter.
Firstly my initial thoughts were that the foot pressure is too great. The thickness that you are sewing (I assume two layers of 3.5 = about 7 or 8mm maybe) should be easy to sew on any "Leather" machine. When you get to 12 mm or more then the machine will soon tell you whether it is ok to sew that thickness.
there are a number of things that you need to check out. You need to try and figure out which of the two feet is making the mark. and make adjustments as required. You can adjust (Most machines) the pressure on the needle foot and the presser foot as well.
The needle foot adjust is usually on the top left hand side of the machine and just screws left and right. The presser foot adjuster will be at the back of the machine and it will change the height, of the presser foot, when it does its cycle and a stitch is formed.
Check and see if the feet are contacting the leather dead flat. a slight angle of either foot can cause a big mark. This would be unlikely though.
Check that the tensions are all as they should be. You should be able to pull the top thread through when you left the foot up. it should have a bit of pressure but not too loose or tight.
The bobbin thread should be constant and light to pull through at any time.
Have a good look at the finished stitch. this can often tell you what is wrong
anyway good luck in WA
Cheers
Trevor
"Way down Under"
-
Hey there Don
nice work my friend. The tan contrast is OK as well.
I did a similar alteration once and I had to put a V shaped gusset in the side of a pair of womans high boots with elastic to make room for a bigger calf muscle. That was a mission I can tell you. Turned out good though. Couldnt have dont it without the boot patcher though. Marvelous invention.
Cheers
Trevor
"Way Down Under"
-
Randy
I pondered over this for a couple of days as well. I eventually decided to very carefully grind off the small skeg and polish the foot so it is now smooth. I assume this is to form a small groove or channel to lay the stich into and therfor make it sit flat and flush with the leather surface. (You may want to check with the ARTISAN guys of course)
I found on corners and when using a needle that can lay the stitch (ie a reverse twist) with an angle pattern, and not a straight line, the groove will still form a straight line and it all looks a bit messy.
I am very happy now that it has been removed.
Regards
Trevor
"Way Down Under"
-
Not sure wether the tannery closed because of economic downturn (probably had something to do with it) or just plain not making enough money here and off shore.
I spoke at length with the sales manager and he says several things one being viability with such a run down plant and a not so friendly chemical industrial plant in the middle of built up New Lynn, Waitakere, (Auckland).
When I looked around the place the machinery was all old stuff and the building is getting quite old. I guess to modernise all of this you may as well start again out in the country somewhere. It needed all new clean and modern machinery and the leather markets to make it profitable. They had some very good customers and while I was there they were doing a couple of containers full for a crowd in New York and another for Canada. THis was all good black and brown Veg worth many dollars. But I guess you need to have the skins to, that will produce the quality leather.
The salemanager mentioned the quality of the liming and how it has delcined over the last few years and how this affected the finished product.
So all up I guess a number of things have contributed to there demise but to pin point this is very difficult.
God only knows what or where the locals will get thier leather from now on. Me included.
PS I found this poster from the tannery back in the 80's. Though Id share it with you.
Cheers
Trevor
"Way Down Under"
-
Hey there my friend.
Yes its very sad indeed. I went down there in May and ordered heaps of stock which nearly broke the bank.
Some of the staff down there tell me to keep a look out for NZ Leather suppliers Ltd which they will be setting up now as we speak and will be importing veg tanned crust from south America or wherever they can get it and colouring it hear in Auckland then selling it. They bought some of the machinery from Astley.
I have enough at present but will need to look at this further down the year or maybe next year.
Fern Country (who have also moved) said I should see them when I need some veg which sounds like they may have a supplier somewhere in the world ready to fill in also.
You can still buy Astley veg at very big prices from Taurus Leather. They bought a heap as well but watch the price if you are to buy from them.
So thats it at present DJ. But yes very sad to see a tannery fade away after so long in the business.
I took a few photos the day I was down there if you are interested.
Cheers
Trevor
"Way Down Under"
-
Thanks all very much for the nice comments.
Will be starting a black one soon.
Cheers
Trevor
"Way Down Under"
-
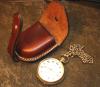
Here's some more pics...
THanks
Trevor
-
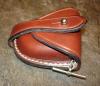
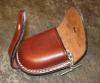
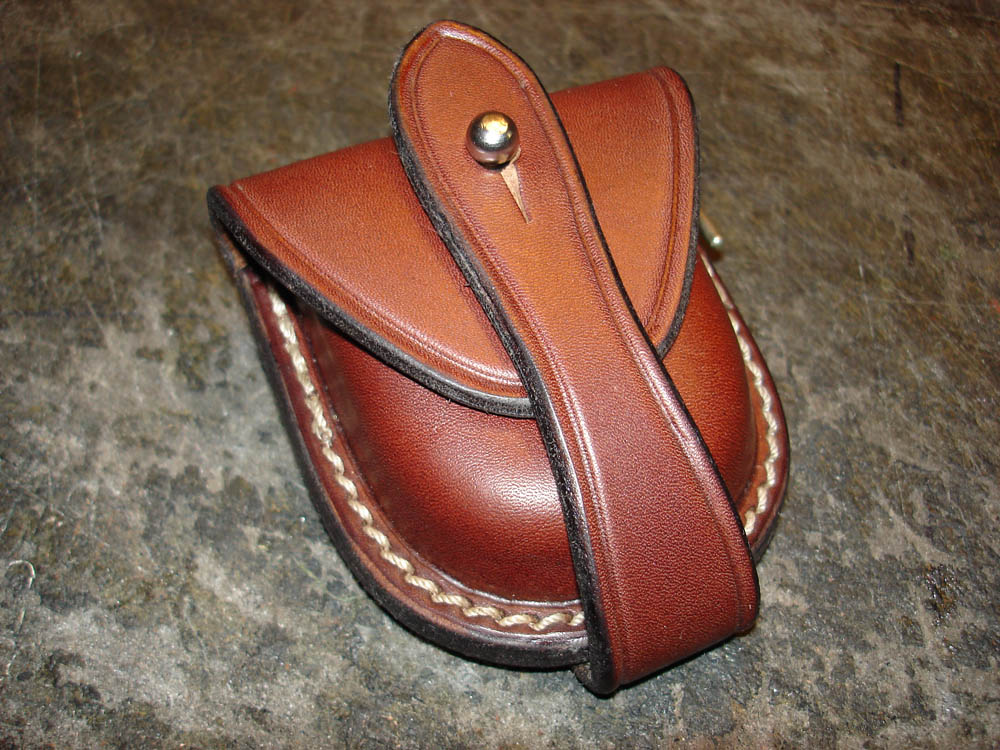
Hi there
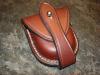
Just thought I'd show you all the Fob-Watch pouch I finished the other day.
Im quite happy with the results.
Thanks for looking
Trevor
"Way Down Under"
-
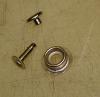
Hi there All
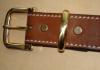
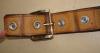
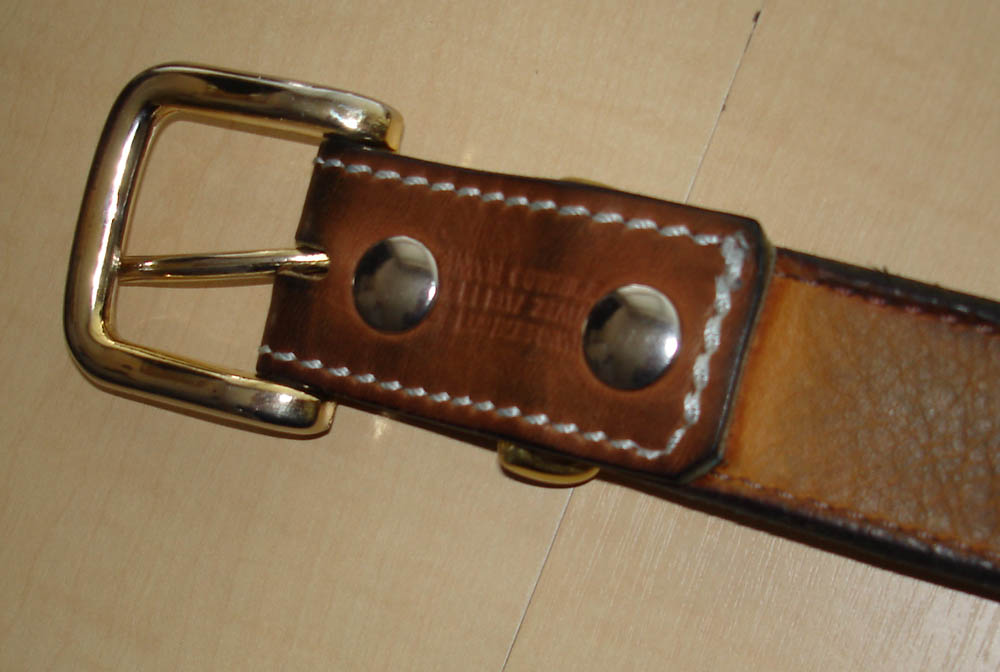
Thought Id chuck in my method of doing the snaps for belt blanks thing.
Its real easy and quite good if you want to change the buckle at any time. Works well with the trophy buckles that have no slot as well.
Firstly mark out where your two snaps need to go. Allow plenty of room back from the fold of the leather otherwise the snap will easily come undone. Also allow enough space between the snaps so the keeper can fit. This belt in the photos has about 1 1/2 " between the centers.
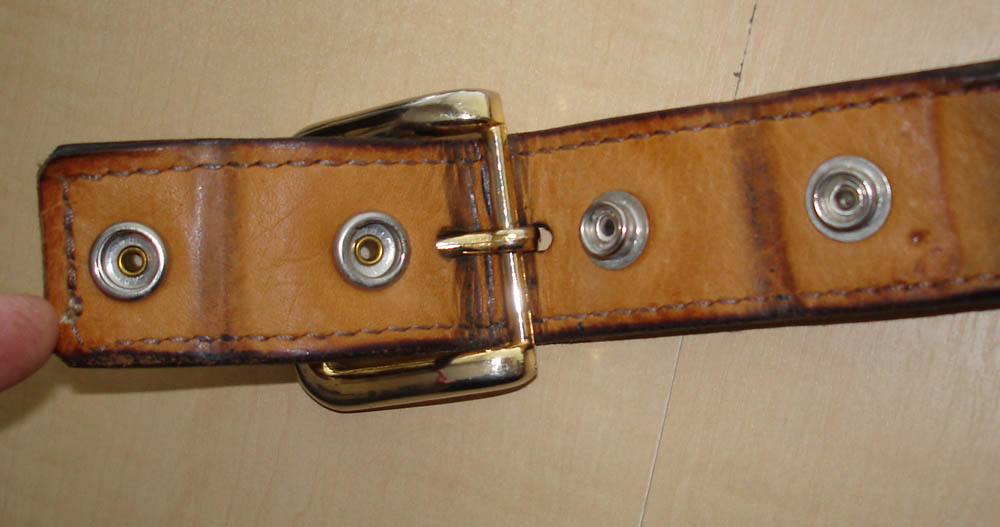
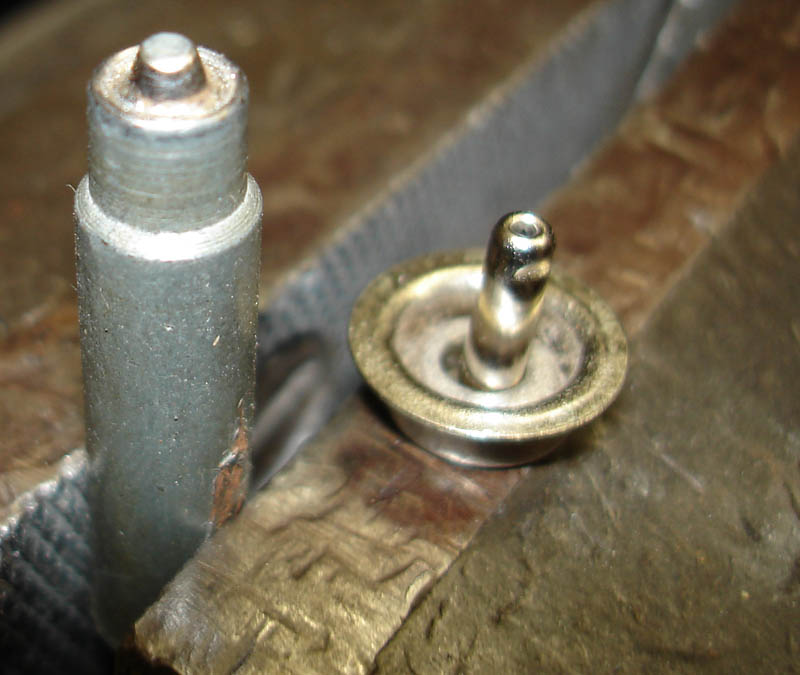
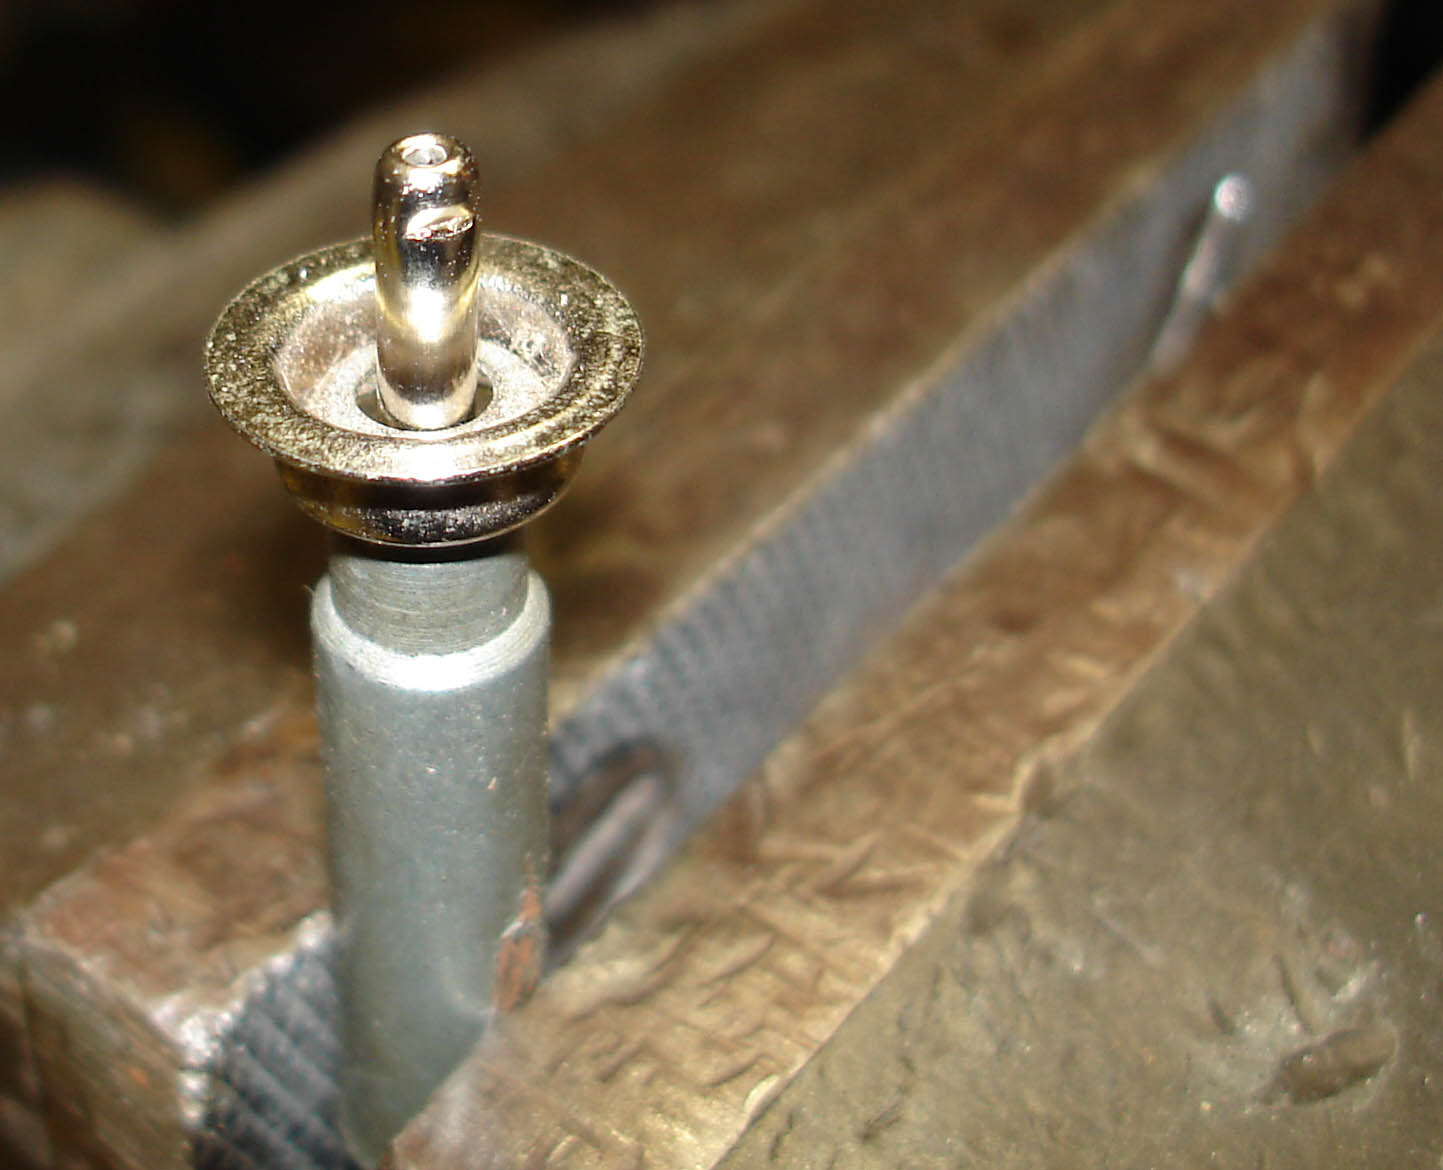
Next install the tops first in the fold over piece and set as per normal. (by hand setter or machine.) Next fit the keeper to the belt and press together by hand to mark the leather where the snaps actually sit. This will leave a tell tale mark on the leather to show where to put the next hole.
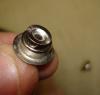
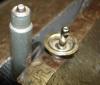
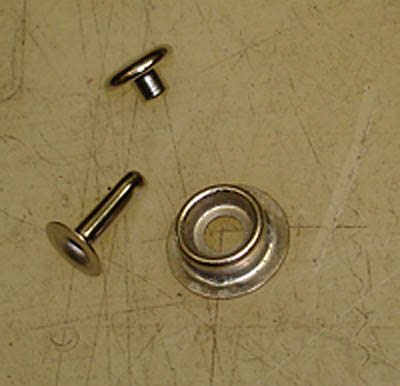
Next make a small hole (big enogh to get a 10 -12 mm) rivet through. then put the (Jiffy rivet I think you call them) through the hole in the eyelet and then into the hole on the belt.
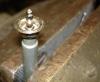
This is where you actually rivet the eyelet onto the belt. Mount your setter upwards in the vice and place everything on top.
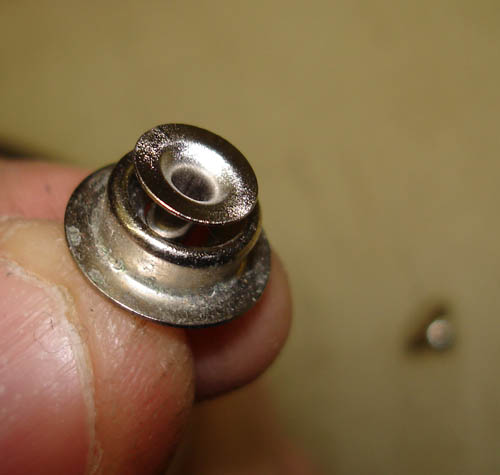
Then put the cap on to the rivet end and hit with the hammer. Set as per normal.
Note the rivet will form itself into the cup on the eyelet. This will allow the snap to work properly.
Good luck
Trevor
"Way down under"


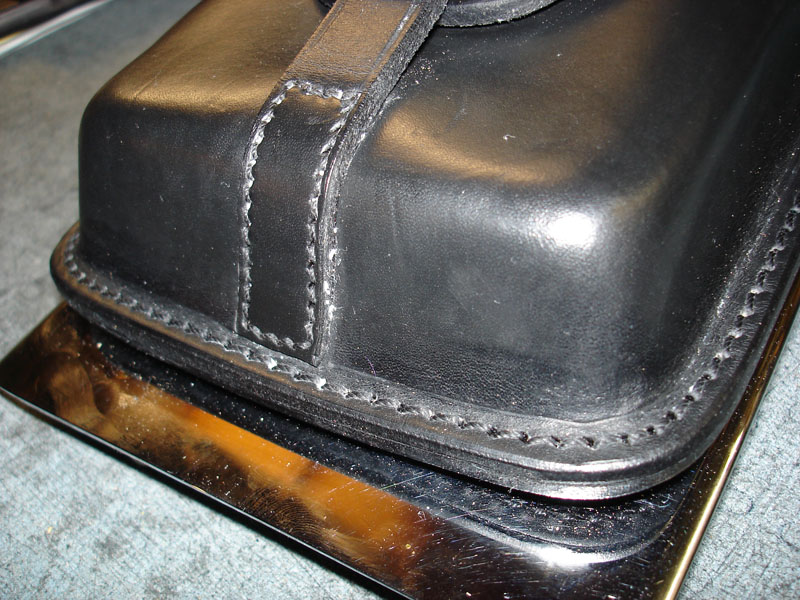


How to achieve this type of stitch?
in Sewing Leather
Posted · Report reply
Hi there
This stitching looks to me to be machine stitched. Why:
The marks on the leather are tell tale of the feet walking on the leather.
The stitches are too perfect to be hand done.
I believe that the stitching can be achieved with a little careful planning. The thread has to be the right size and the bottom thread chosen to match. I usually go one size down for the bottom thread. The machine needle (used on the picture) I believe is a twist or LR which is an unusual leather point (cutting) needle that puts a diagonal cut and the thread will lay diagonal when sewn. I believe that this can also be achieved by other ways but this is the easiest way I know of. Be sure to match the right thread with the right size needle as well.
Most of the time I only use (unless for a good reason) the LR or twist needles. Both in the Toro and the Juki where that sewing pattern to me looks really cool. I would only use the diamond head if I knew that thickness was going to upset the path of the needle and skew it off in the wrong direction other than straight down.
One last thing the machine that you use should be working perfectly ie the timing and foot/feet should be set at the correct height as well.
Just my thoughts
cheers
Trevor
"Way down under"