


Trevor
-
Content Count
206 -
Joined
-
Last visited
Posts posted by Trevor
-
-
Caroline.
I have a 335 as well which has been converted from a binding machine to a normal walking foot.
When I saw your request I had a look at mine and the feed dog only has a small enough hole for the needle not a slot. It seems to move in the same timing sequence as the needle, meaning when the needle moves into the dog, the dog travels at the same speed and alignment, until the needle comes out. The dog follows the needle all the way back. The dog should be timed to move forward and back with the needle.
Make sense ???
Cheers
Trevor
"Way Down Under"
-
Hi there
Scan your new or altered document and save to the desk top as a jpg file.
then download cute pdf from here http://www.cutepdf.com/products/cutepdf/Writer.asp
Once downloaded and installed
open the pictures of your documents or whatever they may be and select print. then when it says which printer click cute pdf.
This will then activate and make a pdf of your document and you can save as whatever you like (file name) and save it anywhere you wish on your computer.
then write a new email and attach (using the attach button) the pdf file you wish to send.
bingo all done.
good luck
Trevor
"Way down under"
-
Hey Guys
Ive always got my clips from this supplier. use the slim ones for phone cases and radio pouches and the bigger ones for other stuff.
Think he's in California somewhere.
http://www.lowyusa.com/metal-fasteners/belt-bag-holster-hardware
Good luck
Trevor
"Way down Under"
-
I would cut the thread and pull back several good stitches enough to have a few inches of thread to tie a knot.
Then re-sew in the machine with the same needle and thread, then finish and leave the same few inches (of thread) again at the other end.
Then pull all the threads (long bits)through to the back and tie a reef knot. Being particularly careful to tie the opposite threads to each other. You should end up with 4 strands of thread at each end all at the back. No threads showing in the front.
That is "left over right" then "right over left". (Just an overhand knot L over R then the reverse. R over L.
This will not come undone if it is tied correctly. (If you tie this incorrectly it will be a Granny knot and come undone.) Once tied, pull to tighten the knot into the leather.
Cut the loose ends and then Melt carefully with a cigarette lighter and press with something flat, This will flatten the knot and seal it forever. Dont set fire to your workshop either. If your machine drops stitches it means the timing is a little out or the needle is not meeting the hook at the right (and very precise time). or your hook is not hooking properly.
good luck.
Trevor
"Way down Under"
-
Hi all
I owened both the singer 132K6 and the DY253. The Mitsi had reverse the singer didnt.
they have inter-changebale parts and fit in the same bench and sew about the same with the spring "walking foot".
OK if you want to sew not too thick a material but no good on heavy stuff.
my pick is the 411 clone (Artisan or Cowboy etc) marvelous...
Trevor
"Way down under"
-
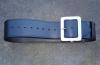
I reckon the flap part (under the buckle) has a slot in it running the width of the belt. That way the belt flap goes around the buckle and into the slot then gets sewn (buy hand) back and around like the picture. May as well sew the keeper into place as well.
It makes no difference what the belt is for.
Cheers
Trevor
"Way down under"
-
Hi there Silver star.
I have a Adler 105 sp75 and the machine is a beast.
Firstly it will sew a good stitch and isnt too bad.
Wont sew too thick. I would say max about 15mm. Just over half and inch. With the foot supplied it will leave a tread on the top leather. (Not good).Does not have walking foot and sometimes the needle will bind in the material and lift up with the single foot.
If I were you forget the adler and get a cowbot,Cobra or Artisan machine that is full walking foot not just the one foot like the Adler machine.
good luck
regards
Trevor
(way down under)
I am thinking about buying a used Adler 105-25 MO from another member here. I know very little about this machine and I was wondering if anyone could give me some advice. I just need to know what the advantages or disadvantages are. I know the Adler machines are high quality..just need info about this model. I have researched it online but can't find much about it. I will be doing saddle work and maybe some straps and tack with the machine. Any help would be greatly appreciated.
-
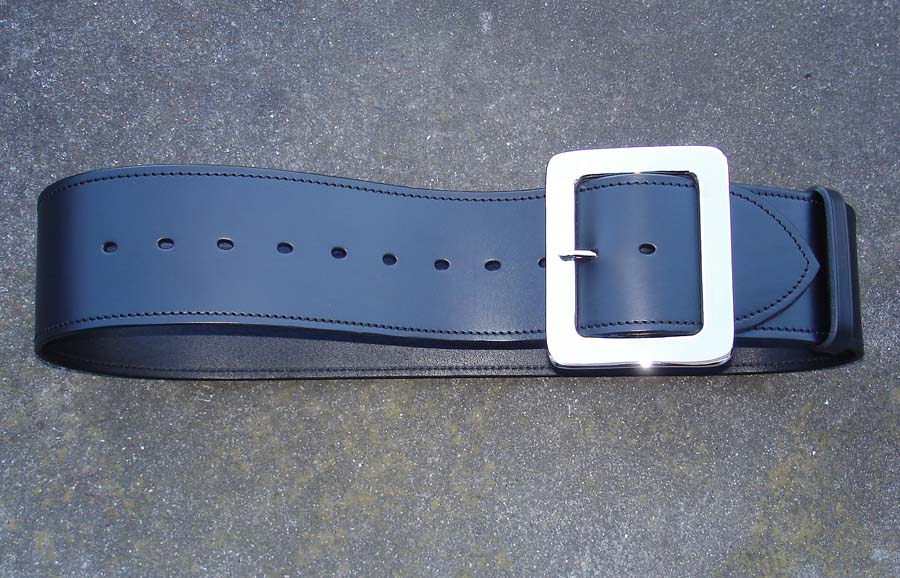
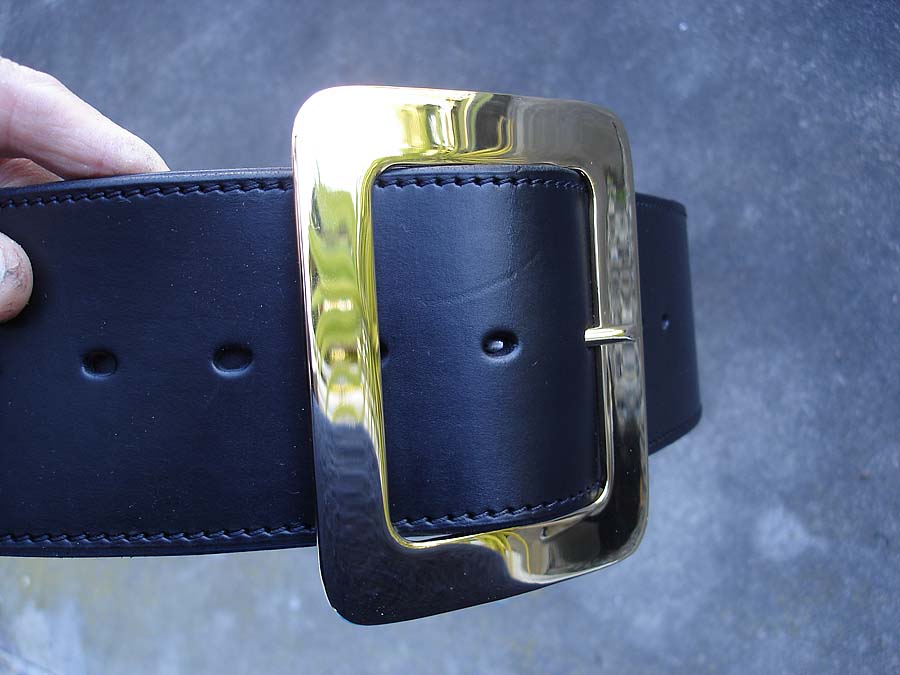
Hi there Grizz,
Here are some pics of the belts that I made recently for santa. My customer wanted the best so thats what she got. I had the buckles made locally (Auckland New Zealand) and had one plated gold and the other in Nickel.
The nickel came out the best I think for looks but the gold was very flash and a bit "blingy" I think.
I got the steel man/knife maker to make a rectangle shape with the centre cut out then weld a rod across the center and used a heavy nickel pin of another buckle. Worked great.
Cost the lady about $NZ120 all up for the belt as well.
The belts are 3 1/2 inches wide.
Im happy to get made here and ship to you if you wish up in the US. otherwise just copy the pics and make yourself.
Cheers and Good luck
Trevor
"Way down under"

-
Hi there Rhome and others
The word "line" comes from another word called ligne. It was used and still is around the world by button makers. It refers to the diameter of the button not the srength of the socket. There is a site called http://www.smartcart.com/scovill/catalog/ and here you will find what you want. The socket is called easy action. Not normal or tight. Carr (Australia) durables as we call them are good as well but not sure if they are available in the states. Would pay to check anyway.
Good luck
Trevor
"Way Down Under"
-
Nice work lady friend !!!
been busy I see.
TK
-
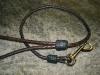
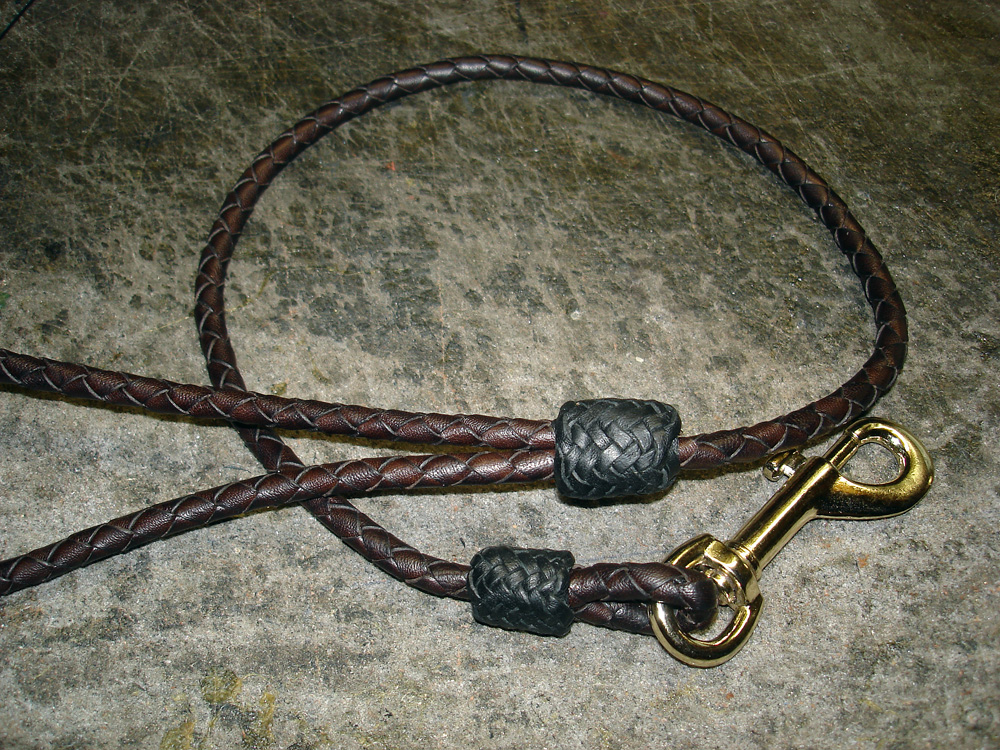
Hello there from NZ
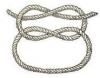
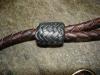
Just wanted to show off a braided dog lead with a brass snap hook that I finished this evening.
Fully braided in Kangaroo (4 plait) onto a nylon inner and some great looking 13 part 12 bight 2 pass pineapple knots in miniature.
Very fidely to do. But I think they look great.
Cheers
Trevor
Way Down Under
-
Yeah Im not sure what he listed himself as. He used to make lino flooring embossed rollers and soap embossing tools etc. The brass is durable and he said it would last for ages. I suggested tool steel but he said the brass would be fine.
Cheers
Trevor
"Way Down Under"
-
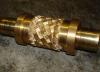
Hi there one and all.
I had the desperate need to get a basketweave pattern wheel made a couple of years ago and I found the man who could do the job in the Yellow pages. He was a very talented chap and I asked him many many questions of how this could be achieved.
Firstly I gave him the two basketweave embossing stamps (the Basket and the scallop) and he made large copies of these in plastic. Im talking the size of the palm of your hand.
He then worked out mathematically how many of these baskets (rows) would fit into a circle of brass.
He then used and Industrial pentograph machine to simply copy the engraved model in negative (the large plastic ones) onto the brass roller. This of course takes some skill to get the depth and angle and continuity perfect.
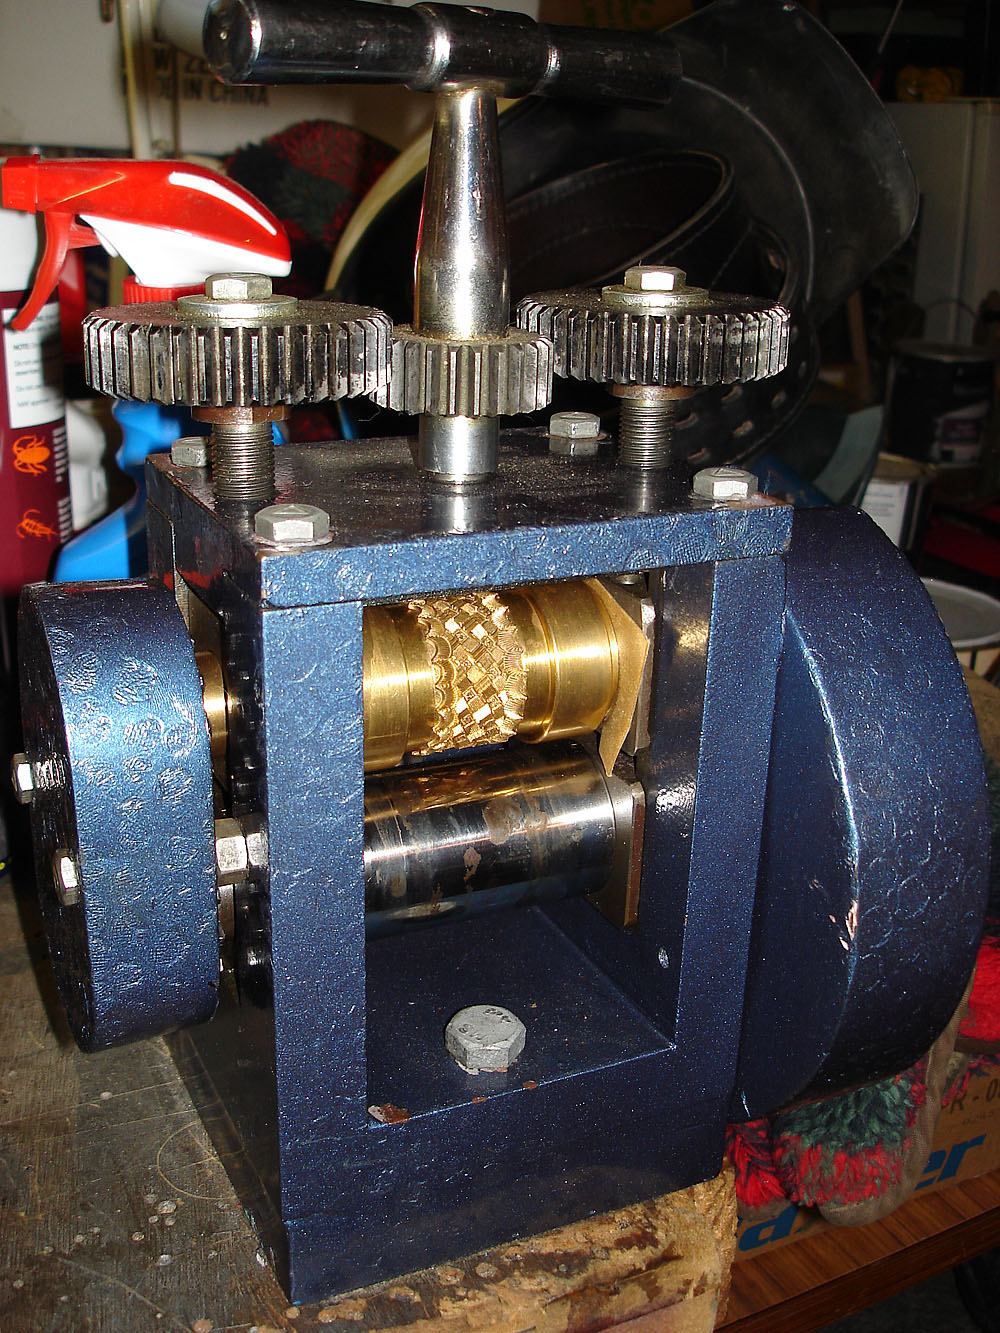
Below is a photo of the roller and what it can do. I have two now which does 2 1/4 belts and 1 3/4 belts.
These wheels are no good unless you have the guides to align the leather onto the roller. He used a collett at both ends. Also I found a cheap jewellers rolling mill from India and the rollers fit into this and work perfectly. I simply wet the top of the VEG leather and feed the leather in one end and out it comes the other end.
I no longer have to sit and basketweave my belts by hand.... Fantastic
Cheers
Trevor
"Way down under"
-
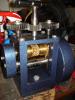
Hey there speedbuggy
This is a boot or shoe patcher machine and no substitute for a real sewer. I mean this will sew leather and be a very good addition to any leather workshop but it will not be the same as a proper walking foot plain stitcher. Firsatly the top foot does all the pulling. That means than there will be marks on the leather made by the foot and you may not be able to get rid of them off your work.
Secondly these machins are made to sew in any direction. Hence no feed dog to pull the work along. You will find it quite hard to sew anything straight.
This machine(pictured) is not a Claes which are very expensive and well made. There are a lot of copies out there.
Make sure you know what you are buying if this is your first machine.
Cheers
Trevor
"Way Down Under"
-
Hello there Animagusbc.
I specialise in heavy duty leather goods and can make thoses collars if you wish. I am located in Auckland, New Zealand. I have about thirty years of leatherwork experience and have good stock of the right kind of leather. I have brass buckles and rings and can emboss etc. Heavy stitching and finishing edges also.
Give me a PM private message if you wish to talk further.
Cheers
Trevor
"Way Down Under"
-
Hi there Butch.
I too would love a copy thanks.
trkillip@ihug.co.nz
Cheers and thanks
Trevor
"Way Down Under"
-
Hey there Ruthless.
Try this site in the USA
http://www.kmsinc.net/index.htm
Best of luck
Trevor
"Way Down Under"
-
Hey there UK Ray.
I have looked closley to your problem and reckon I have figured out what you want.
It looks like the upright stud is indeed a lift the dot Screw stud in some form or another. The thing that I also see is that to attatch a dome fastener to the top of this is impossible without a thing which looks like this.
This means that the dome will attatch to the post. BUT !
your picture is not one of these at all or anything near it. I reckon the snap head only serves to go over the top of the stud (Pointed piece or screw stud) and when the flap is closed and the book closed and dommed shut the loose pages will not come out unless ripped out. The dome head only covers the pointed shaft stud, not actually snapping onto it.
Thats my theory
Have fun and Regards
Trevor
"Way Down Under"
-
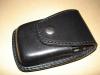
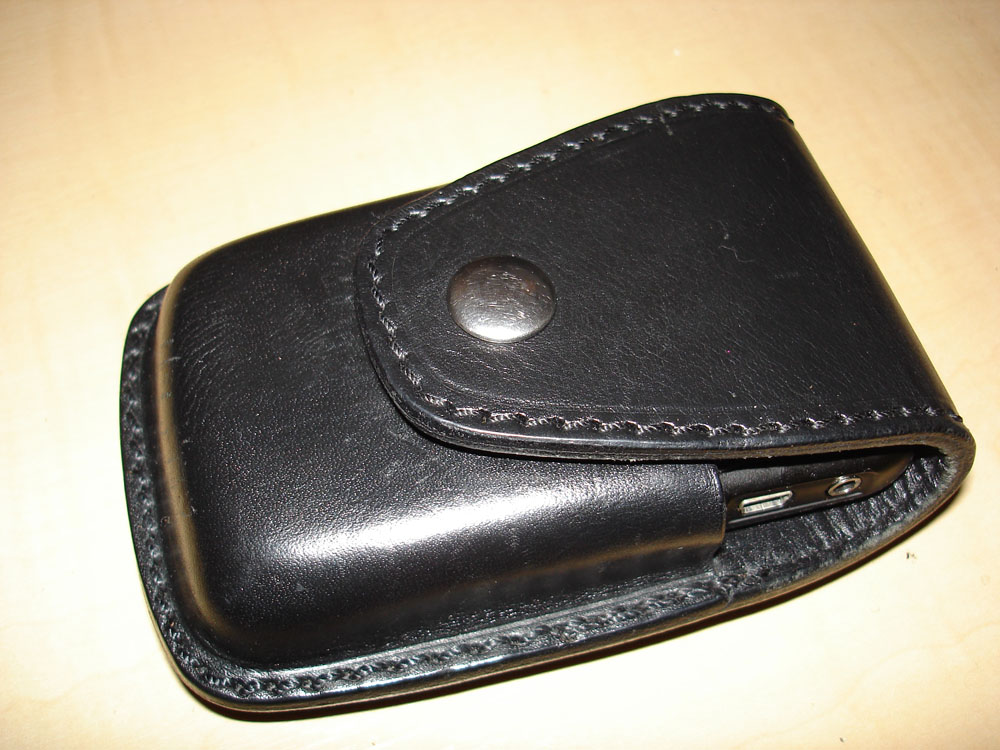
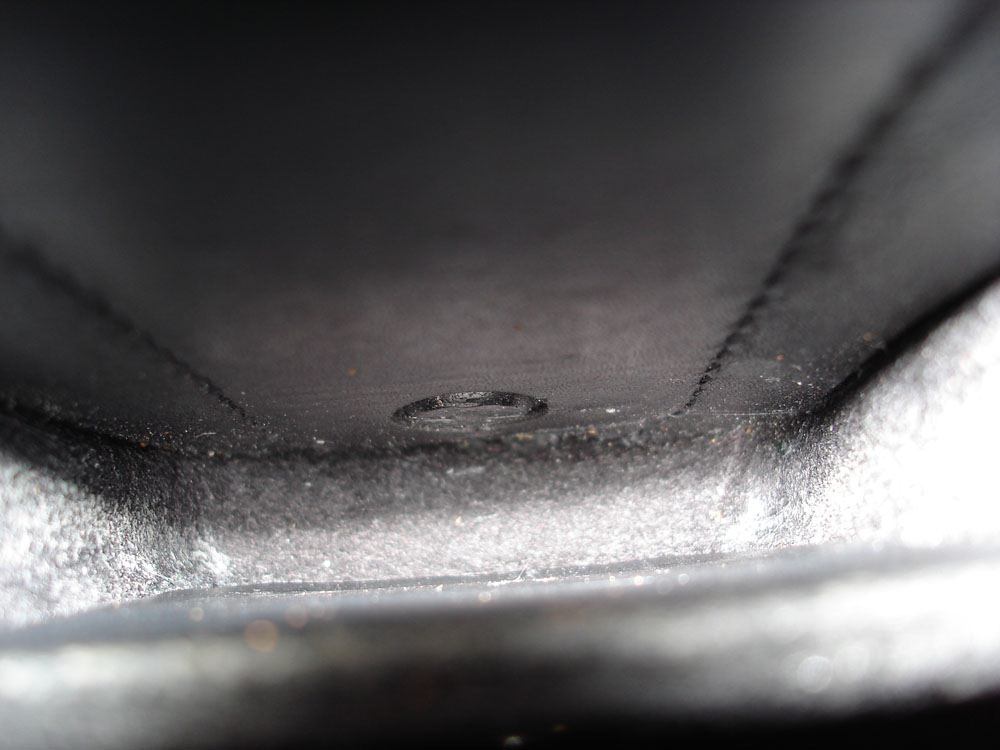
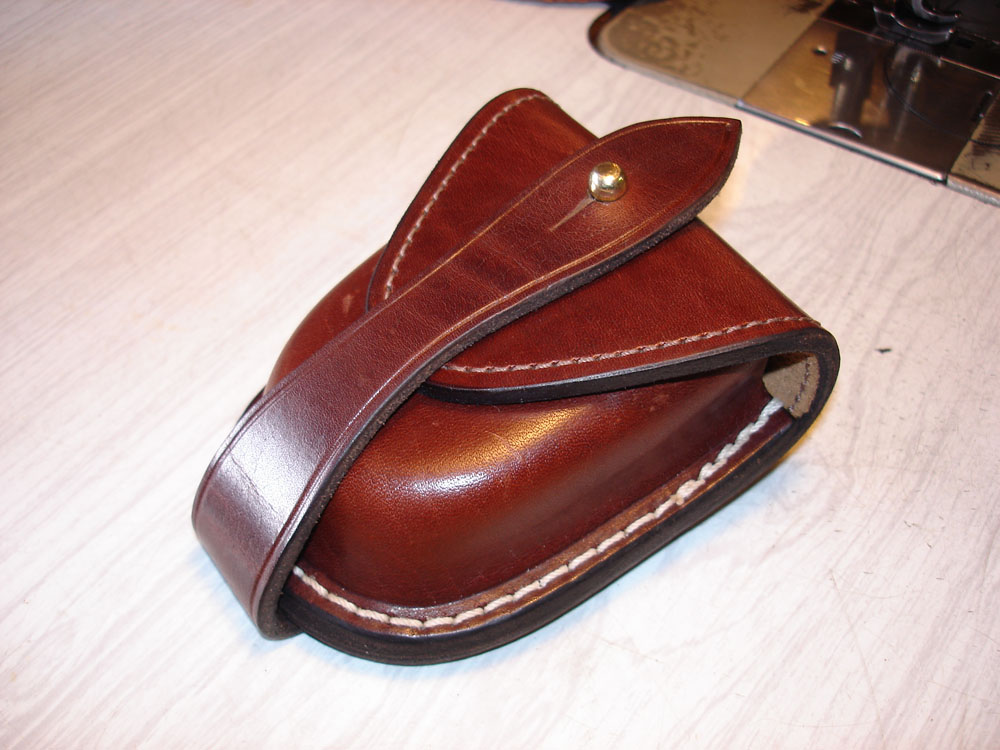
Some very nice work there. I too have made myself a BB phone holder and used a small rare earth magnet hidden in the back of the pouch. I glued it in place on the back part of the pouch (where the phone would pass over it and activate) and then covered the magnet only in very thin leather, just enough to cover the magnet, then lined the inside leaving a hole where the magnet can do its job but is still leather covered to allow no scratching of the phone. I have put up a couple of my pictures for you to look at and a few others.
Cheers
Trevor
Way Down Under


-
This is a foot as Steve rightly said used to get real close to the edge of the work being sewn. ie Some people call them ZIP feet where they can sew a zip in place easliy without the machine having to walk all over the zipping. Can be helpful to have one of each (Left and right) in your box of bits for when you need it. The other tool he had attatched to his macine was a drop down edge guide roller. He could then sew at reasonable speed without worrying about the stitches being not straight.
Cheers
Trevor "way down Under"
-
Hi there
Weaver Leather and Ohio travel bag have what you need but I belive that the best buckles come from Custom Metal Supplies for which I have given you the link.
Cheers
Trevor "Way Down Under"
http://custommetal.thomasnet.com/item/buckles/z-4430/pn-1111?&forward=1
-
Its sure is a queer looking rooster.
How about a photo of the other side....may reveal what it is
Cheers Tk
-
Hey there Noah.
Ive been putting in rivets for a long time and we have an aluminium rivet which is very similar to the copper rivet and burr that you see available. But
the aluminium is much easier to set and looks great. All those rivets that you are talking about will be very hard to set against leather. It will only take so much pressure. and a steel rivets could rust and look like crap.
If you want I can show you some pics of the aluminium ones and maybe ship them up to you. They come in two sizes which is about half inch and three quarter inch with a washer.
simply put the washer on.....hammer the end so the rivet fattens slightly and then use the setter to force the washer all the way down and stay down, then cut off with side cutters and finish with setting the head with the rounded side of the tool.
I use them for heaps of jobs that need a good solid and very sturdy rivet which looks OK.
Get back to me if you are interested
Cheers
Trevor
"Way Down Under"
-
Hi Again guys
Its been years since I owned these machines but I do remember that the mitsubishi you had to open up a plate and put the screwdriver into the mechanism and then adjust the stitch length then re-tighten the whole thing. It was an absolute pain in the neck to adjust.
I still have (as a collector) a Zig Zag walking foot singer 47K1. big old black thing Not sure whether it would still run or not but It has some historic value here in Auckland. It was used by the Blind Institute for years to make and sew door mats. Blind people were considered as 2nd rate citizens then but that has all changed now of course.
Anyway cheers and thanks
Trevor
"Way down Under"


Help With Clicking Press!
in Leather Sewing Machines
Posted · Report reply
Hi there,I read with intrest your pending purchase of the clicking press in the picture. You must be at a stage in your leather work business that a clicker is next on the list. I have looked at these picytures and said to myself this guy is nuts if he buys this boat anchor. Firstly it is a very dangerous piece of kit in that it will cut your hands off if you make a wrong move and using only one hand to activate your other heand better be out oif the way because a moments in-attention will be years of injury. Its not a hydraulic press . It works on inertia and with the wheel turning at the back drives the head downwards and creates a vertical inertia. The motor has unprotected belts and also the wheel is uncovered and is unsafe. My opinion is to look around and find an old hydraulic two button swivel head clicking press . Pay the money and get the good gear. You will not regret taking a little time out to think. I purchased a small single handle press and it gave me heaps of trouble. Clicking depth was the main trouble. It just wouldn't play ball no matter what or who I got to service it. Cutting depth is very important and when you have good clicking knives and good cutting boards this will take its toll. Anyway good luck with whatever you get. Cheers TRK