thekid77
-
Posts
435 -
Joined
-
Last visited
Content Type
Profiles
Forums
Events
Blogs
Gallery
Store
Everything posted by thekid77
-
Dye Lightening Along Stitched Seam Lines...
thekid77 replied to thekid77's topic in How Do I Do That?
Sting, I have only been leather working since last December. Since then, I have been working on small projects (knife sheaths, dice cups, etc) to try to develop the fundamental skills (pattern making, finishing edges, stitching, dyeing, etc) necessary to build a billiard cue case (which is my long-term goal)... This point of this project was to put all of those skills together to attempt to make a case on a very small scale----the point was to give it a try from start to finish and see what I liked and what I didn't like in the end. That is the reason that I went ahead with the stitching and did not start over.. I glued the project after I dyed it, so there is no chance of the glue acting as a resist to the dye. The leather was clean before I dyed it. The only thing I can think of is that I made the stitch groove before I dyed the leather. The discoloration runs along both sides right alongside the groove. I'm thinking that maybe having the groove in the leather caused the dye to "wick" away from the edges on both sides??? oh well...i don't know the answer -
Dye Lightening Along Stitched Seam Lines...
thekid77 replied to thekid77's topic in How Do I Do That?
Thanks for the reply sting, I stitched it because, aside from the contact cement, the stitching is what is actually holding the tube together.. I used Tandy water based dye-eco flo java brown...i applied it with a wool dauber and I used 6-7oz veg tanned leather...thanks again!!! -
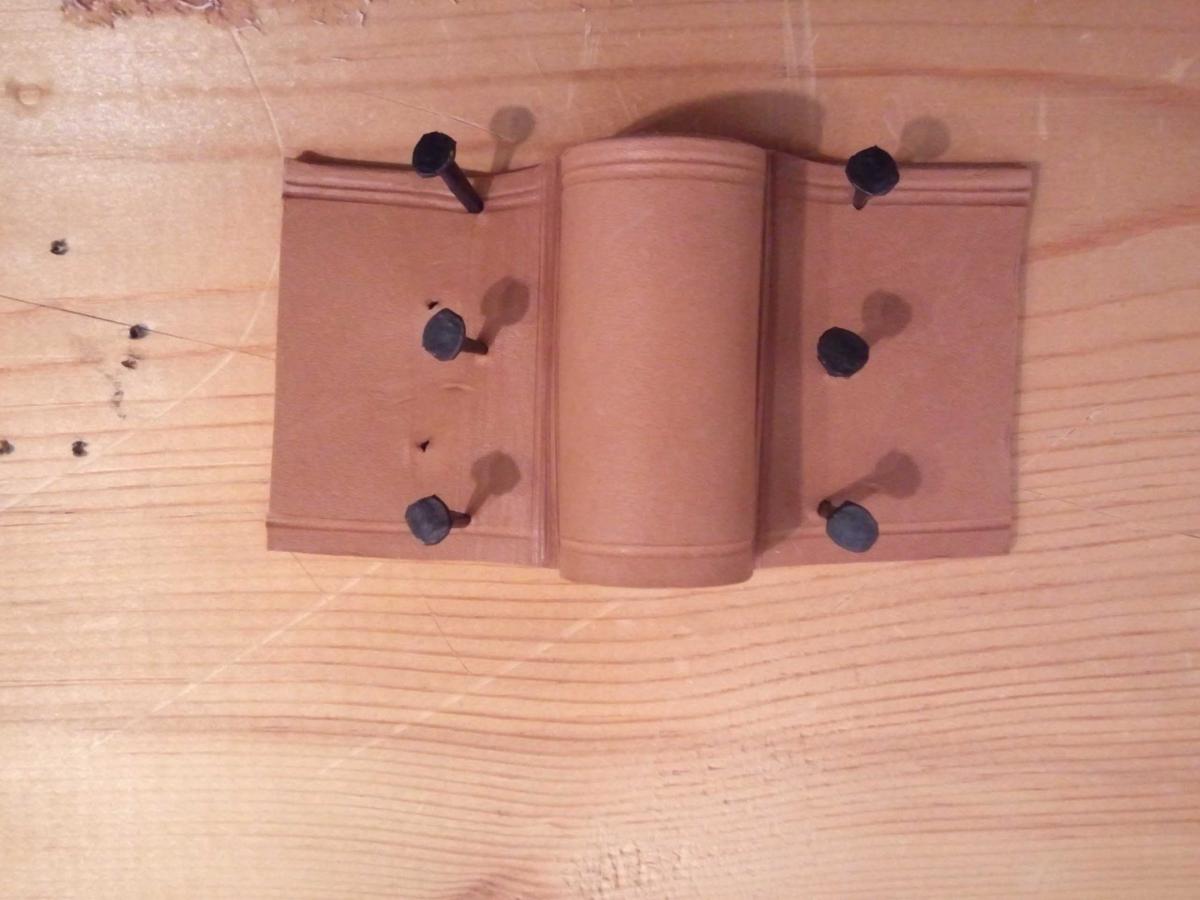
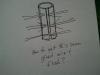
Hey friends, Recently I stitched a leather tube...the dye seems to be lighter among the edges... At first I thought the lightening may have been due to the stitching....but the dye along the edges was lighter than the rest of the tube before I stitched it... Any thoughts? Thanks everybody
-
That's a great idea Dwight, I will follow all of you guys' suggestions and will share the result soon!!! Thanks again everybody
-
Thank you all for sharing...i can't wait to try out your suggestions....you guys are always so helpful!!! :D
-
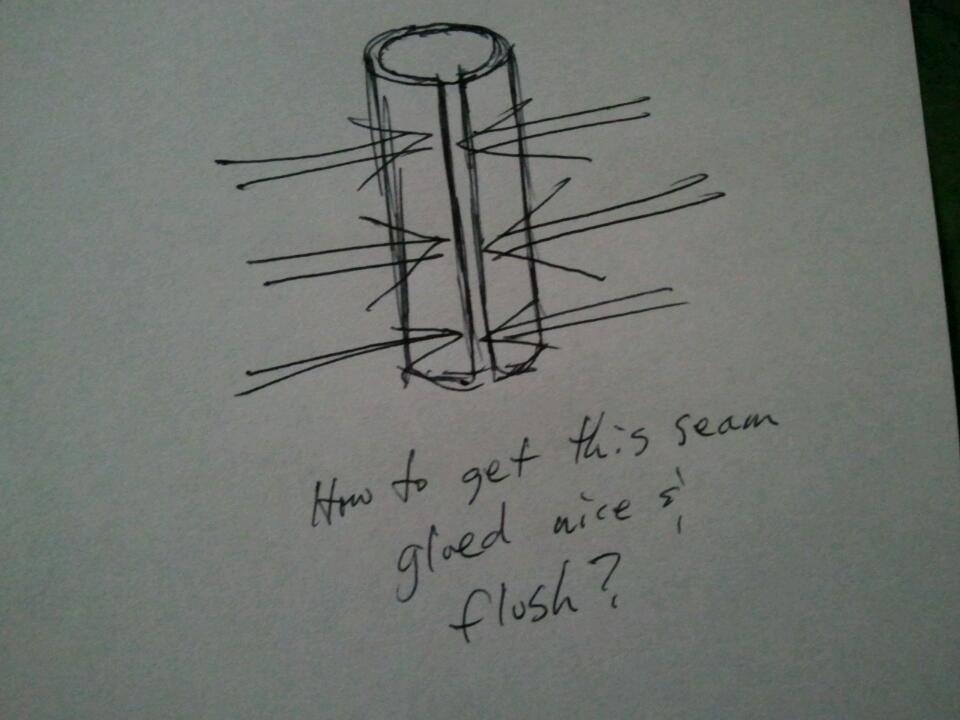
Hi friends, Does anyone have any suggestions for gluing the seam of a leather tube evenly? I'm wrapping the leather slightly damp around a piece of pvc to get the shape, but it seems like no matter what I do the top edge of the seam (nearest the grain) doesn't wan't to come together...i haven't cut the leather piece too short, it's just the round shape that seems to make it difficult to get adhesion near the grain side. Any suggestions are appreciated, thanks!!!
-
Brian, see Nigel Armitage's video at the link below: This is a great video tutorial about how to make holes through multiple layers of leather. Nigel is a true master of the art
-
Managing Leather Distortion When Casing...
thekid77 replied to thekid77's topic in How Do I Do That?
Thanks for the suggestions everybody I don't mind more work to achieve better results, I was just confused as to the way I should go about making this project work, and your input greatly clears things up!!! Thanks again!!! -
Managing Leather Distortion When Casing...
thekid77 replied to thekid77's topic in How Do I Do That?
I will try my best, just think it will be difficult to do the decorative lines (ie, using a creaser or groover) once there are curves molded into the leather.. -
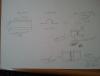
Hey friends, I am making a simple holster for a small flashlight. I cased the leather for the top piece and pu a couple of decorative creases along the edges. My question is, when I went to mold the leather to the flashlight (basically a cylinder, the leather became distorted as shown in the picture (which I have exaggerated a bit so you can see the effect)... Any suggestions? This is what I did: -case leather -crease -wet form using the bone folder Thank you all in advance!!!

-
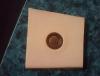
Thanks Alvetjarn, I'm certainly no expert but I believe it can take 10-20+ years before copper develops the green patina under "normal conditions"...somebody please correct me if I'm wrong I've heard that the process can be sped up by using certain chemical solutions on the copper but I don't know much else
-
Thank you all again....just thought I'd share a pic of how it turned out thanks to your advice
-
Hey guys!!! I knew I could count on you for excellent advise!!! Chief-ok, great, that's a relief! Raven & Tom-I have been using a much lighter weight ball peen hammer and have had awesome results so far ) Dirt-I'm snipping the rivet post as close as the nippers can get (1/8" or less) Dwight-I'm using the Tandy setter/domer, and the ball peen has been working great for establishing the initial mushroom... Thanks everybody, God bless you all for sharing your knowledge of this wonderful trade ))
-
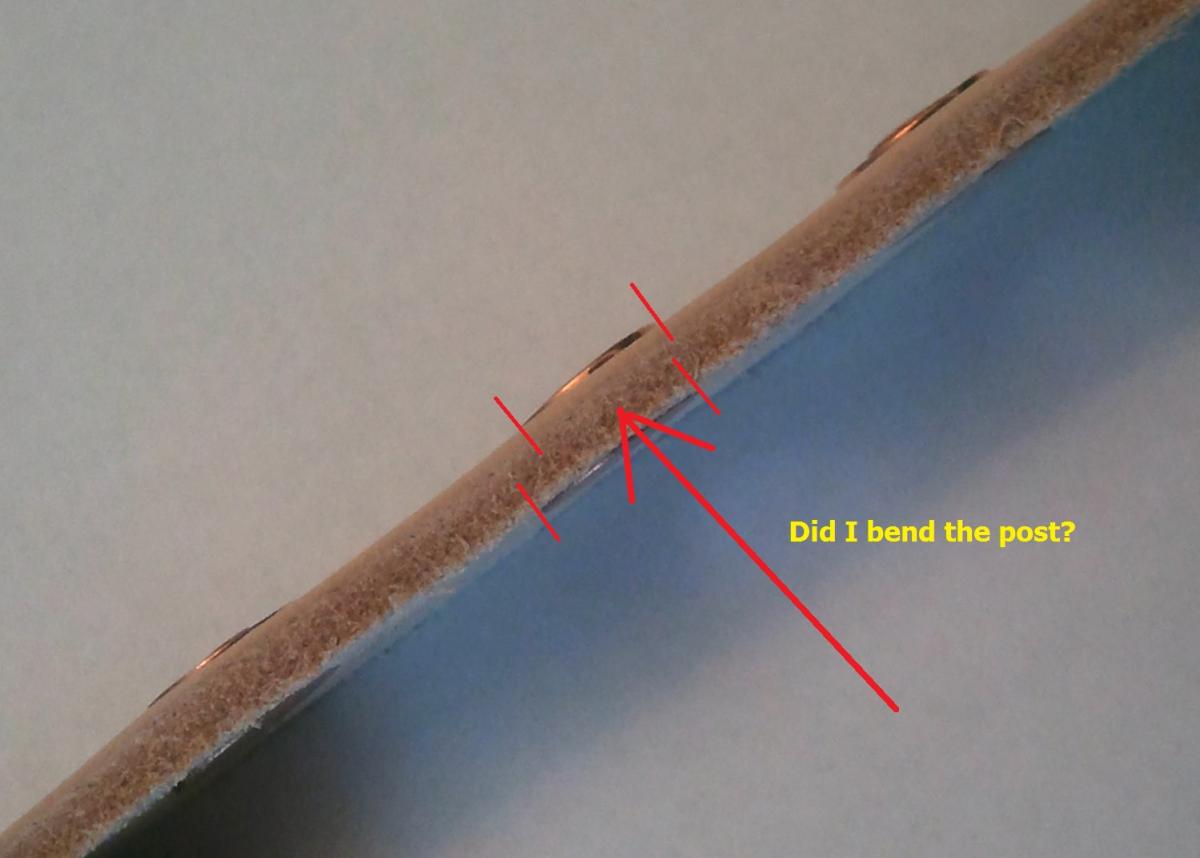
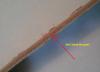
Hey friends, I need your help... I am learning to set copper rivets and have run into a problem... I seem to be bending the post when I am peening it down. This is my workflow for setting the rivets: 1. Punch the hole (1/8") so there is no play between the leather and the post. 2. Insert the rivet and place the washer on. 3. Use the setter tool to push the washer down tight. 4. Use nippers to clip off the excess post (I leave about 1/8" of post sticking up above the washer) 5. Use ball peen hammer to spread the post over the washer. Here is a pic of what happened--I noticed that the washer on top is offset in relation to the rivet head on the bottom. The only thing I can think of is that I am bending the post as I'm hammering it down over the washer...I wasn't having this problem before when I was using a lighter hammer. I switched to a heavier hammer and this started happening. The reason I switched to a heavier hammer is because I read about copper "work hardening" if you hammer it too much, so I switched to a heavier hammer hoping to get the job done in less strikes to avoid this... Thanks in advance for all of your help!!!
-
Edge, If you are looking for a good starter set for tools, contact Bruce Johnson out of Oakdale, CA. I just started leather working at the beginning of last month and I told him the kinds of projects I'd be doing--he put together a fantastic tool set for me for a great price.. Don't skimp on your tools. Bruce is a stand up guy who is always willing to help. Many of the tools he has are decades old, and work like the first day they were made. His website/contact details are all on this web site: http://brucejohnsonleather.com/content/ Good Luck to you!!!
-
Thanks for taking the time to share your experience Mr. Chavez =)
-
Thanks Bruce and Matt for your input, it's much appreciated
-
I would just like to know, from a fundamental perspective, is casting the thread over the needle correct when hand stitching? I am referring to the practice of looping the thread over the needle when pushing it through to the back side of the project... Stohlman didn't mention it in The Art of Hand Sewing Leather, but I have seen some talk about it... What do you guys think in terms of advantages/disadvantages?
-
Thank you Mike and Tom, I followed your advice and it worked out PERFECTLY!!!
-
Does anybody have any tips/techniques on how to keep glue from oozing out on top of the leather when making a seam? I find it difficult to get both edges of the leather completely covered with glue without the glue oozing out on top in some places. Thanks!
-
Thanks Sylvia and Dirt, this is definitely a great learning experience!!! Much appreciated, thank you for sharing
-
Thank you, Spin and Putnam, I will continue to experiment. I really appreciate your advice!!! :DDD
-
Hi guys, thanks for the replies... Mike, I would have posted pics but my phone hasn't been cooperating with me lately.. Spin, i'm sure it's vegtan, and forgive me if i'm mistaken, but I was under the impression that I was supposed to slick after applying the gum trag?? Forgive me, but how do I slick in one direction only?? I thought slicking was what burnished the edge and was accomplished with a back/forth motion with elbow grease?? Thank you for the advice friends, and for your patience...i'm a newbie
-
Hi friends, I am finishing the top edge of a dice cup and have dyed it, applied saddle soap and rubbed it, then tried slicking with gum trag...i followed Bob Park's tutorial, but it seems like I just can't get all the fuzzies to lay down... I have read all the posts on burnishing, but nothing seems to work...can anyone offer any advice? Thank you ))
-
Hi Cheryl, here's a link to a picture of the resolene matte finish http://db.tt/3Y2Ew7Dk ....my phone wasn't cooperating with attaching the pic directly to the message The finish turned out better than I thought it would. I was messaging around and discovered that as long as you get a thin enough layer of finish, the actual texture of the leather grain will provide the matte finish texture. If you apply it too thick, the resolene will just gloss over the grain and be shiny... I think i'm going to apply with an airbrush based on what i've read from other's experience. Happy New Year