
.JPG.4e1168cf7a6fb5a83ffe216cc6d17428.JPG)

Tim Schroeder
-
Content Count
768 -
Joined
-
Last visited
Posts posted by Tim Schroeder
-
-
Hi @Johanna, I haven't had an edit button for a long time. I'm on a computer with Windows 10. couple
-
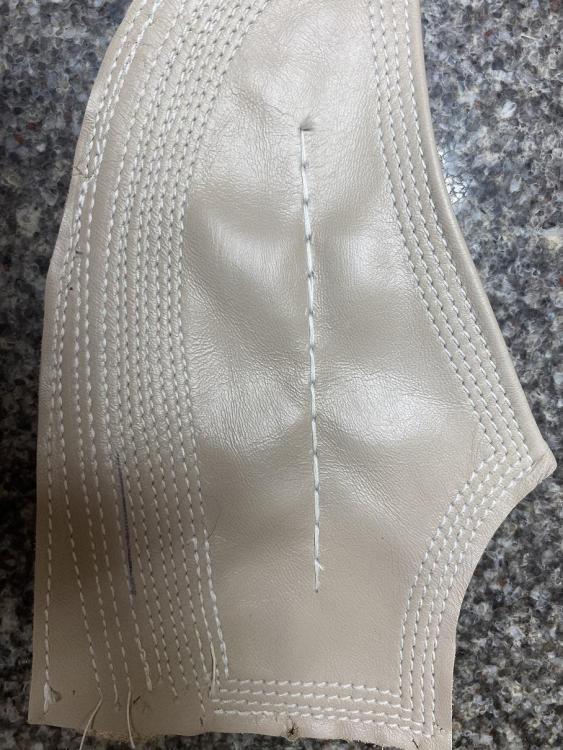
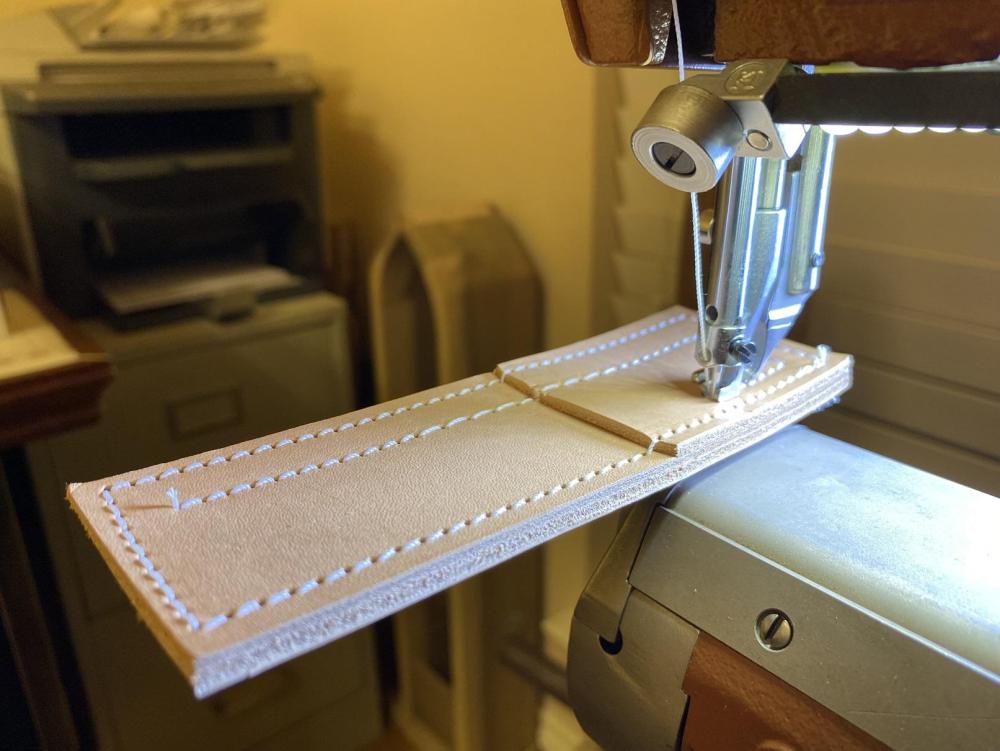
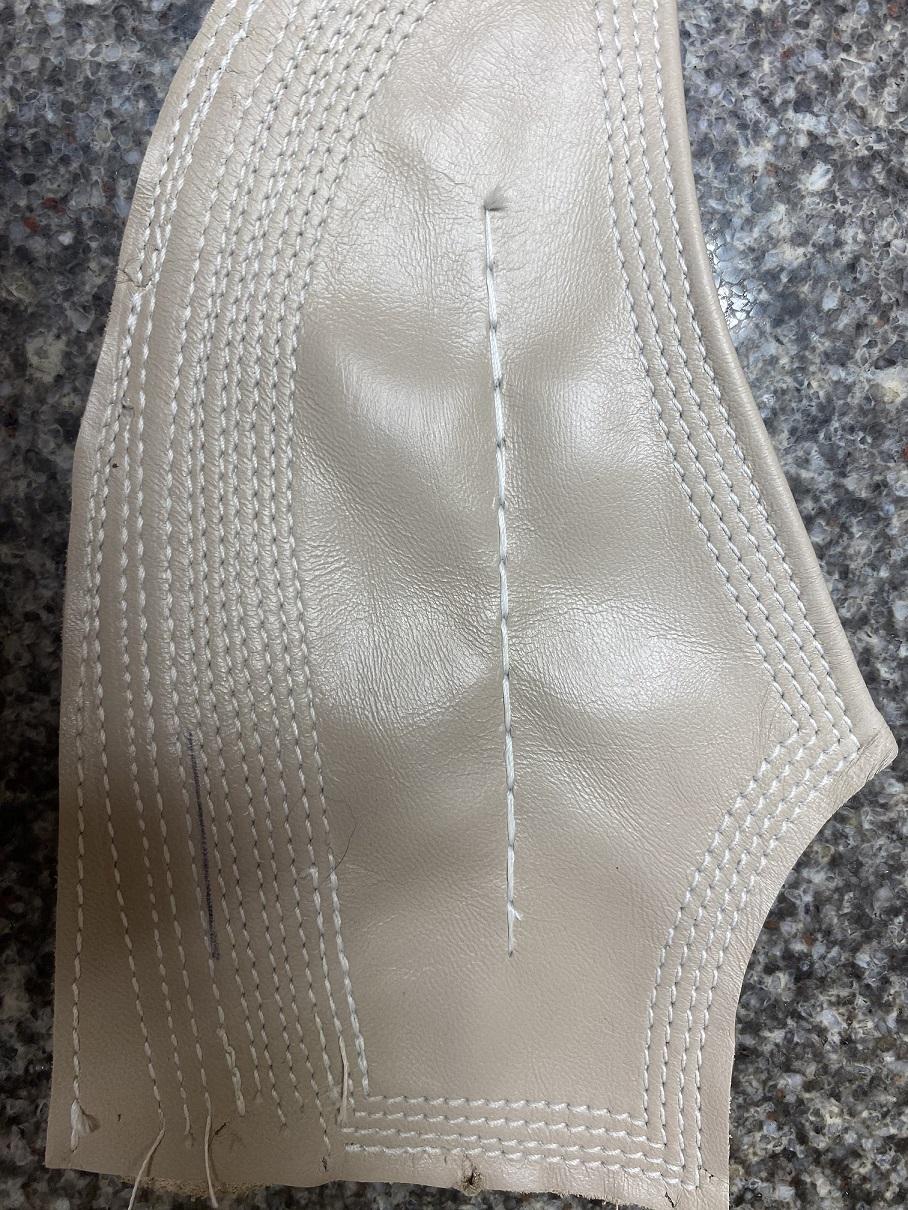
You can make these machines sew backwards in the same holes. Here's 13 stitches forwards at max stitch length then backwards then forwards again. This is 2 layers of 2/3 oz. chrome tan with #138 thread using HE&P #25 needle plate and feed dog. The back looks pretty much the same. This the only machine I have been able to make stitch backwards in the same holes and the back looks like the front. Not sure how the little slide plate that comes in the top of the stitch length adjuster works but I removed it and started shimming the bottom until I got it right.
10 hours ago, DieselTech said:I keep finding with 138 thread I need to increase bobbin tension & then back my tension disc's off to almost nothing, when switching from 277 to 138 thread
Just curious if you are going thru the eyelet then around the tension disc and then back thru the eyelet again like Cobra says to thread machine. That creates unwanted tension you can never get rid of. Try threading the machine without going back thru the eyelet on both the top and bottom tension disc.
-
HE&P heprecision.com
-
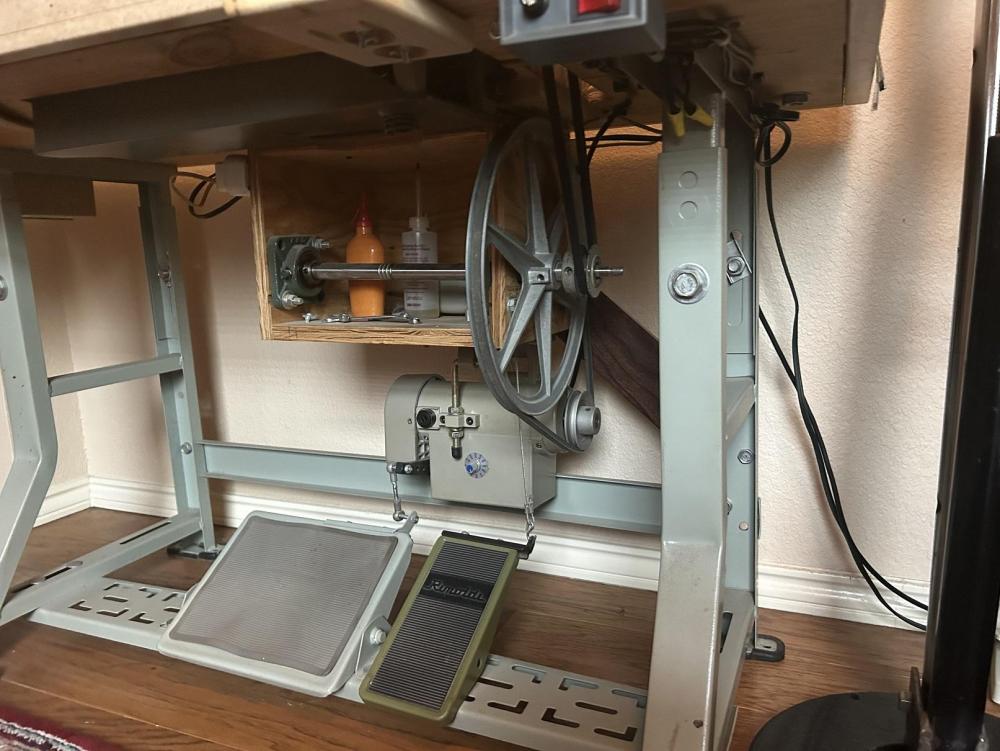
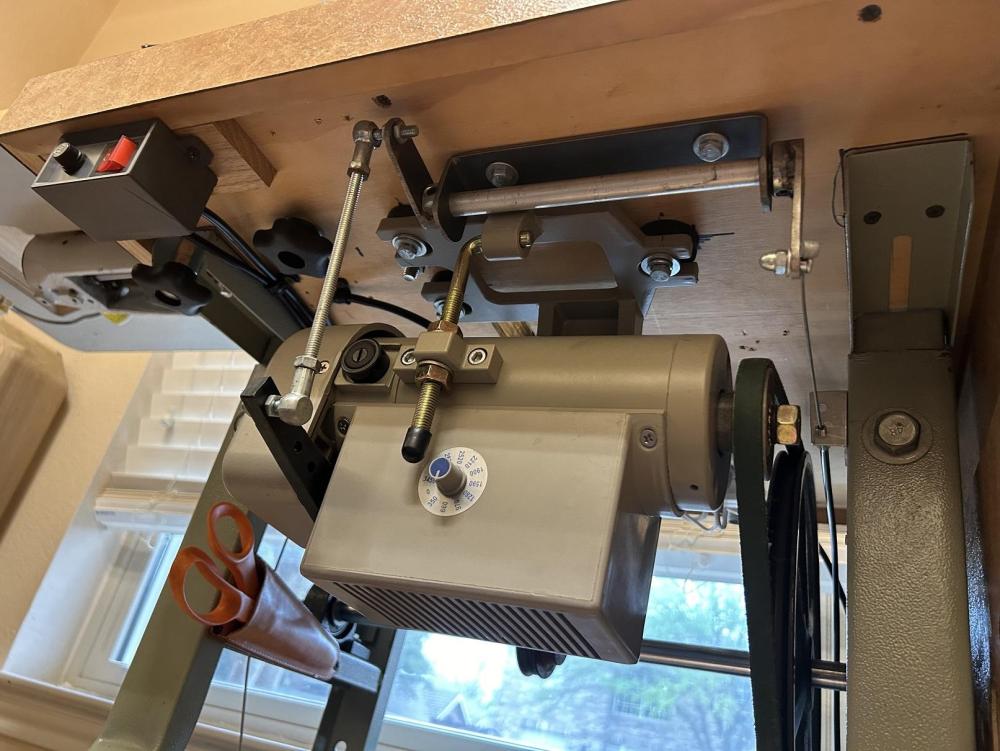
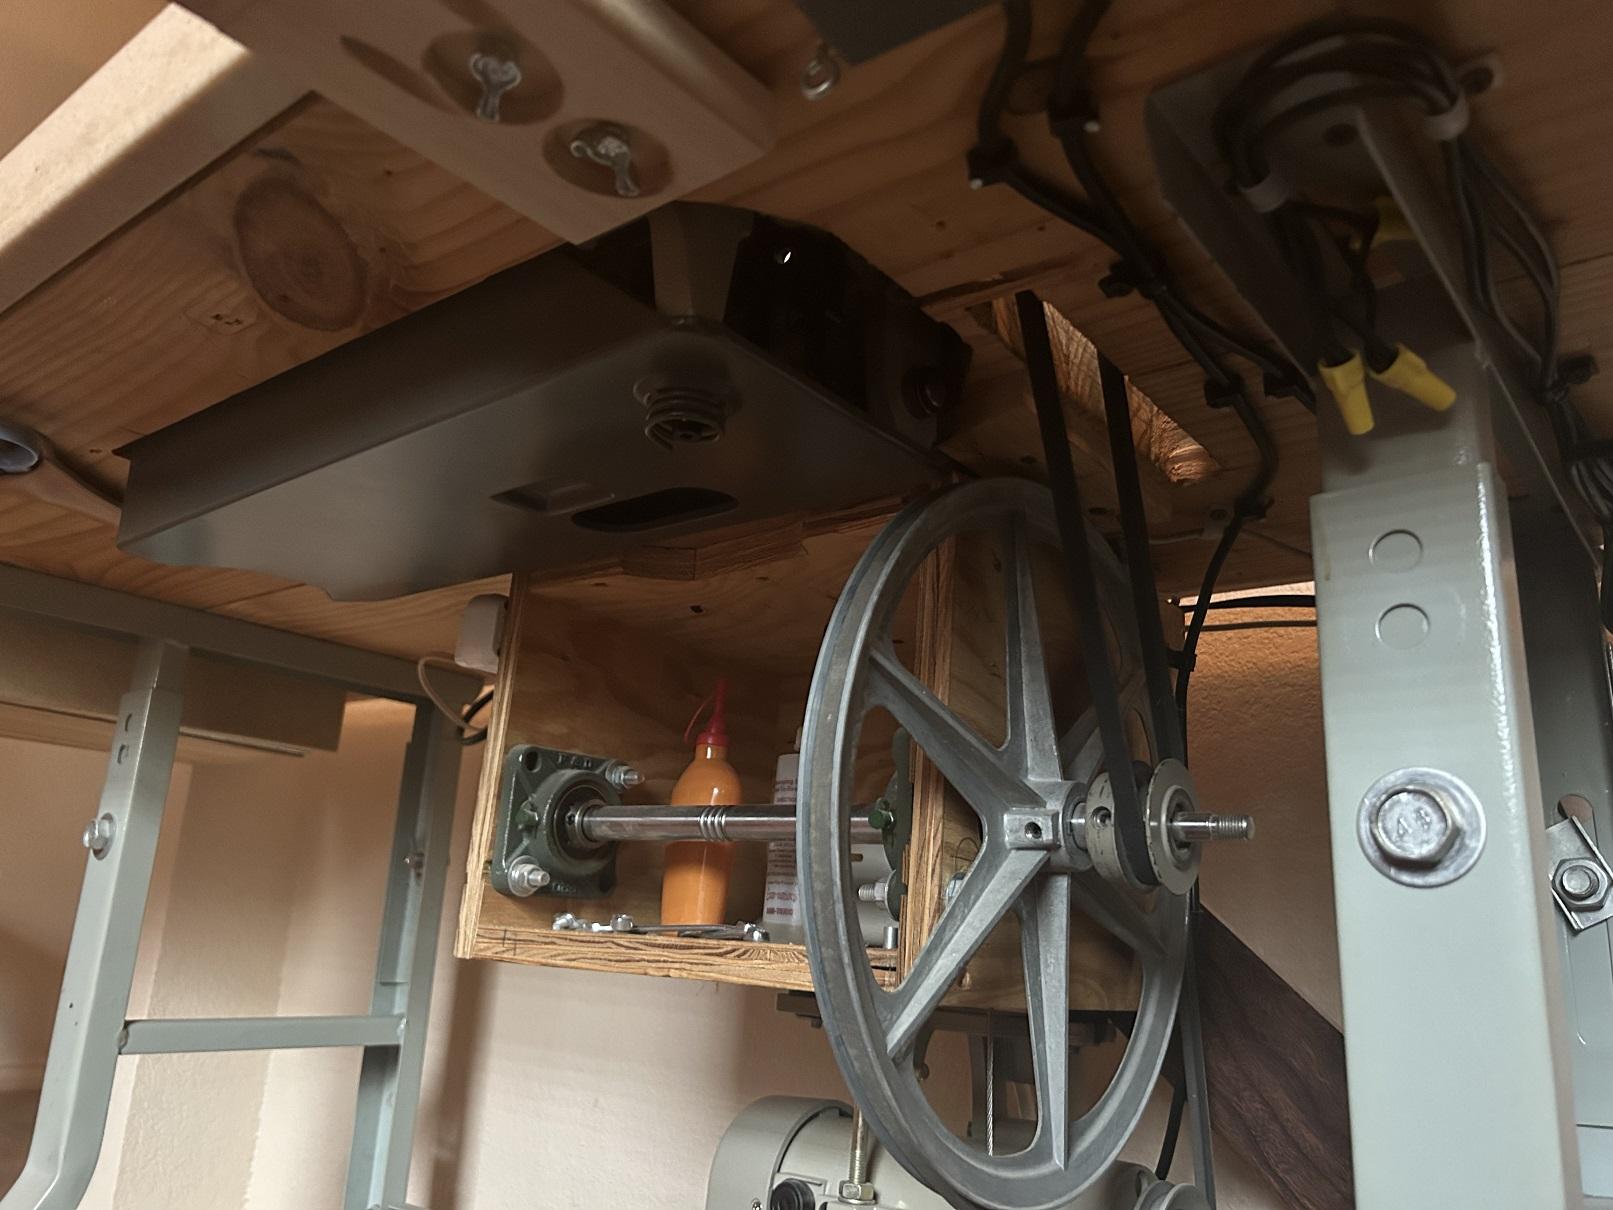
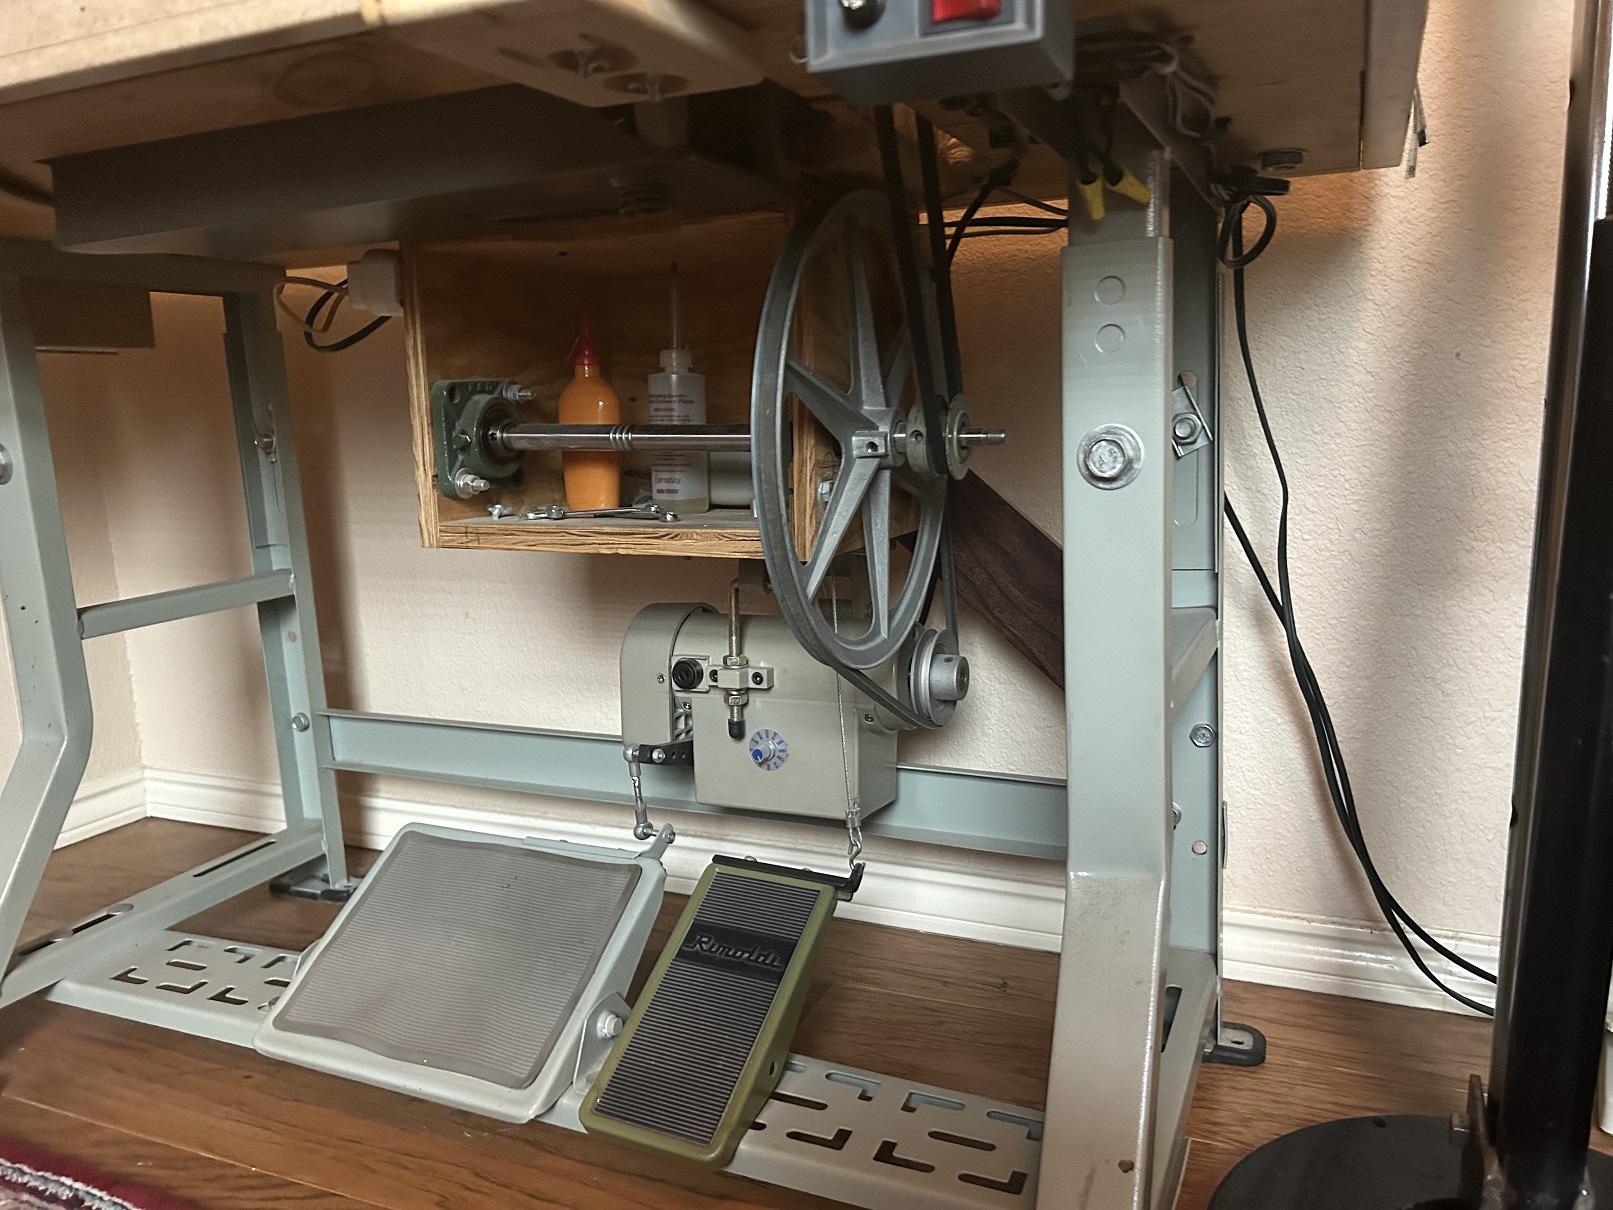
@dikman It was more about torque. Well really about money. This has always been a hobby. Speed reducers were $175 and I have around $50 in the flat bed table speed reducer I did first. Motor is turning twice as fast as with speed reducers you can buy at the same sewing speed giving me more torque than with those speed reducers. Before I built the speed reducer I would try to sew slow with just a servo motor and it just didn't have the torque or punching power at the slow speed. Now full pedal is the fastest I would ever sew anything creating a lot more variable speed control in the foot pedal. It's not so sensitive to tiny movement. I'm not sure about the servo motors today but I was using one of those old grunting noisy servo motors in the beginning. Repurposed it for a Naumkeag on my boot sanding machine.
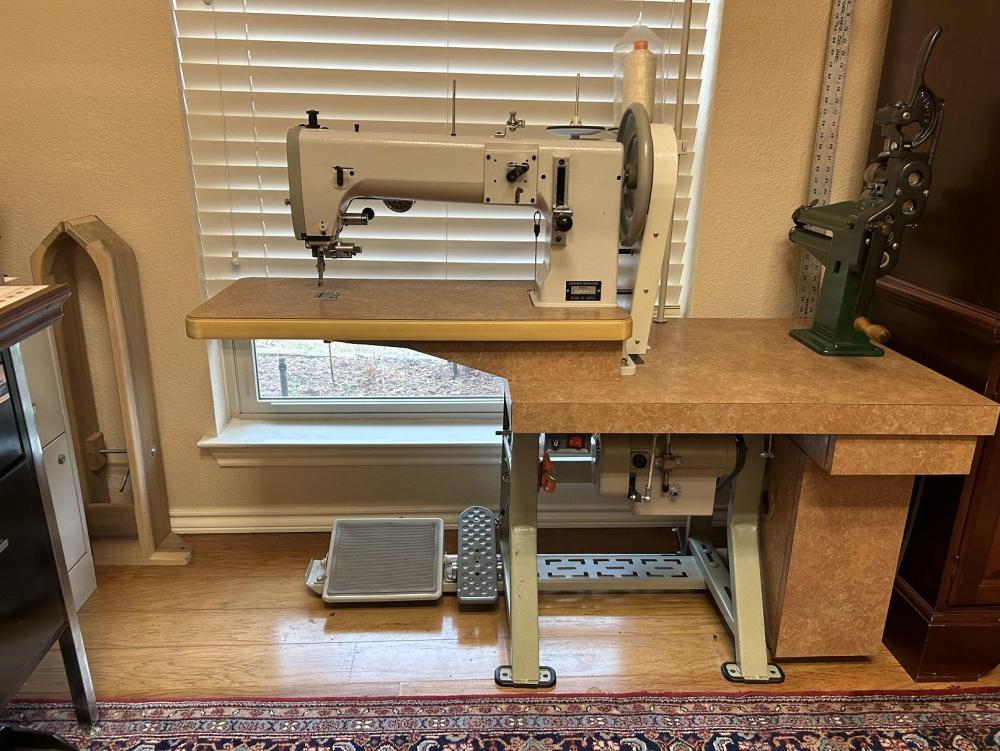
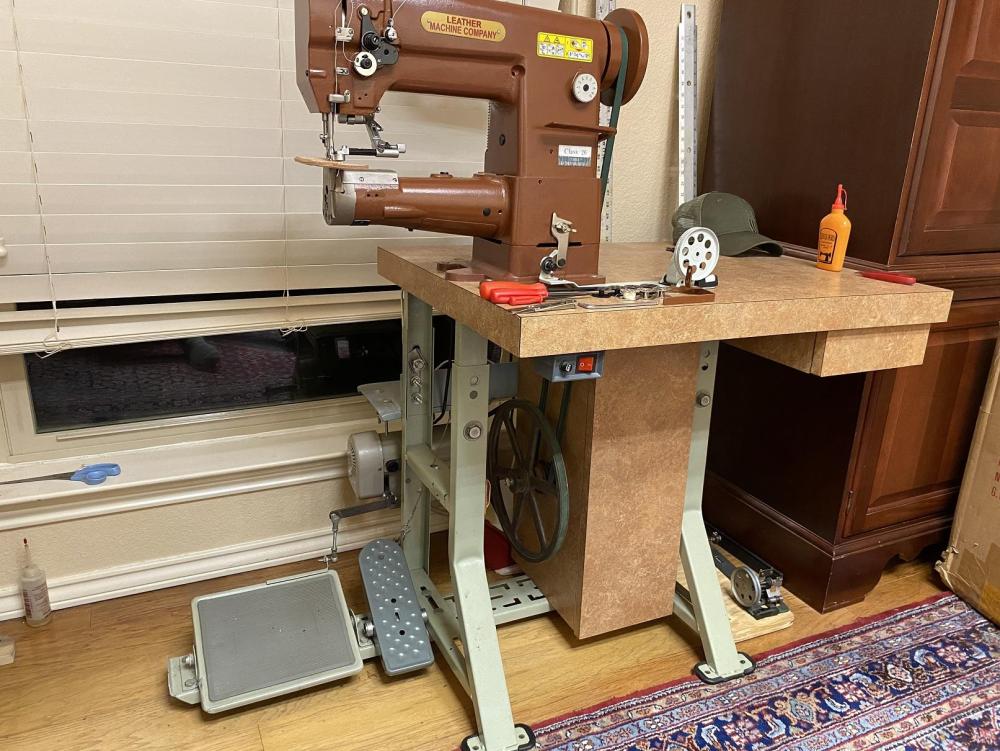
@Southerngunner Really handy to be able to build your own table. $1200 for the Class 26 I had for sale and $500 for a table with a new motor and speed reducer and somebody could have been in a New Condition Class 26 for $1700 and a little work and that's with a flip down roller guide and includes all shipping. That table is a lot more sturdy than the pedestal stands.
-
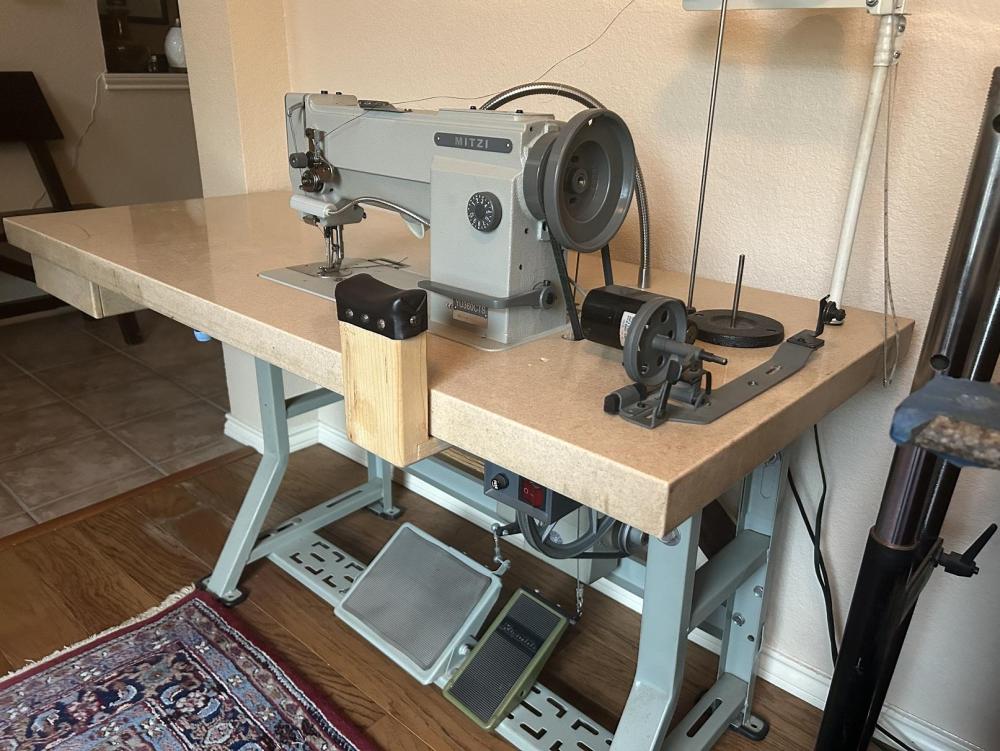
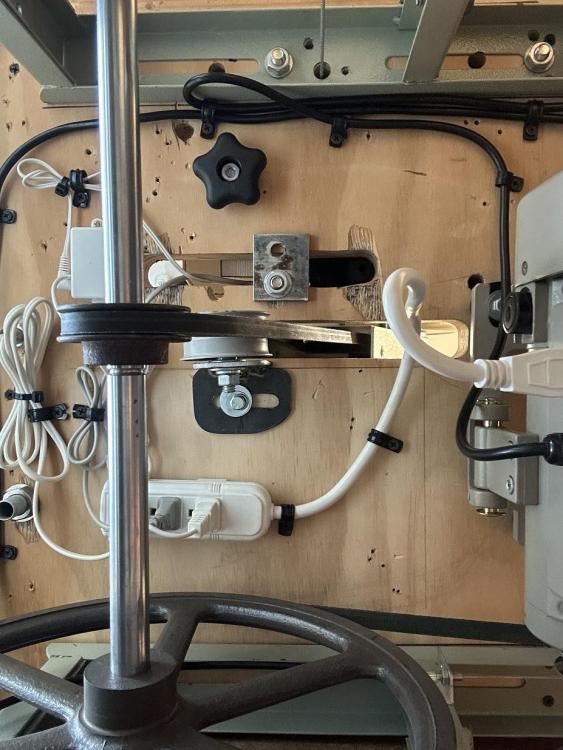
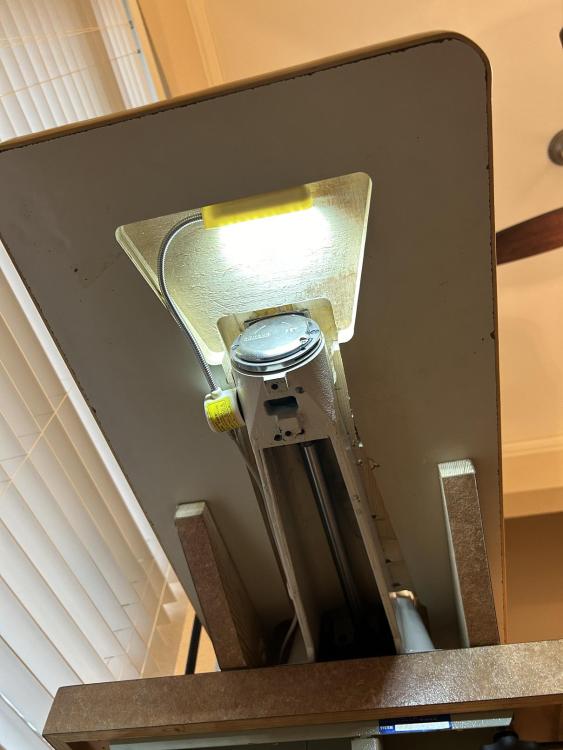
This is my other sewing table. Corion top from an ice cream shop I remodeled. I put a lot more room to the right of the machine to set up a bobbin winding station. A little home sewing machine motor with a bobbin winder tire on the pulley. Winds 441 bobbins as fast as you want it to. As little as 5 seconds if you aren't careful. I also have a Singer 31-20 with a roller foot I use in this table for sewing boot tops. That's what the arm rest bolted to front of the table is for. Lots of hand wheeling sewing boot tops.

-
2 pcs of 3/4" Birch plywood glued and screwed with a 3/4" band running all the way around the outside would look like a solid chunk of wood for the table. No plywood edges. Done right and you can hardly see the seam.
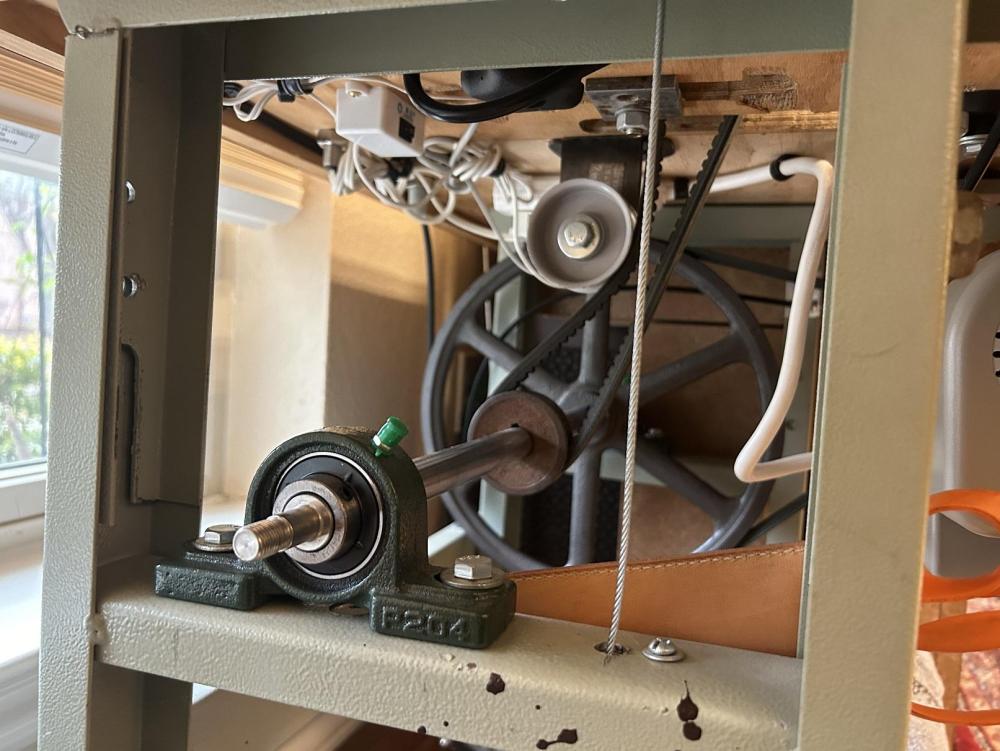
Being able to build your table can save you a lot of money. This table is a work in progress. Had a Singer 108W20 then a Singer 153W103 then a Class 4 then a Class 26 and now a Sewing Machine GA441. The flat bed table is a Cobra Class 4 flat bed with the rest of the scrap Formica . All the scrap Formica came from a job I did. Came up with a faster and stronger method for attaching it. No tools needed. Big hand knobs from underneath with threaded inserts in the bottom of the flat bed table legs to hold it place. Last two pictures are the original motor and speed reducer set up. This set up will move closer to the wall because of the new location of the motor.
K legs $100
Presser foot lifter pedal $20
Plywood & 1x3 for the lower top & and thread cab $40
Motor $129
Speed reducer 12" pulley off Ebay $31
2" pulley (Dad's garage) 0
Bearing Blocks (Amazon) $13
Mercury Outboard 3/4" shaft 0
Idler pulley (Tractor Supply) $12
Aluminum shafts and brake cable $35
Lights $25
Full extension drawer guides $14
Cable for presser foot lifter $9
Rubber feet for legs $7
Belt for speed reducer $12
3 way plug $4
Table, Motor and speed reducer $451 + a lot of head scratching and work.


-
Sold
-
Yes.
-
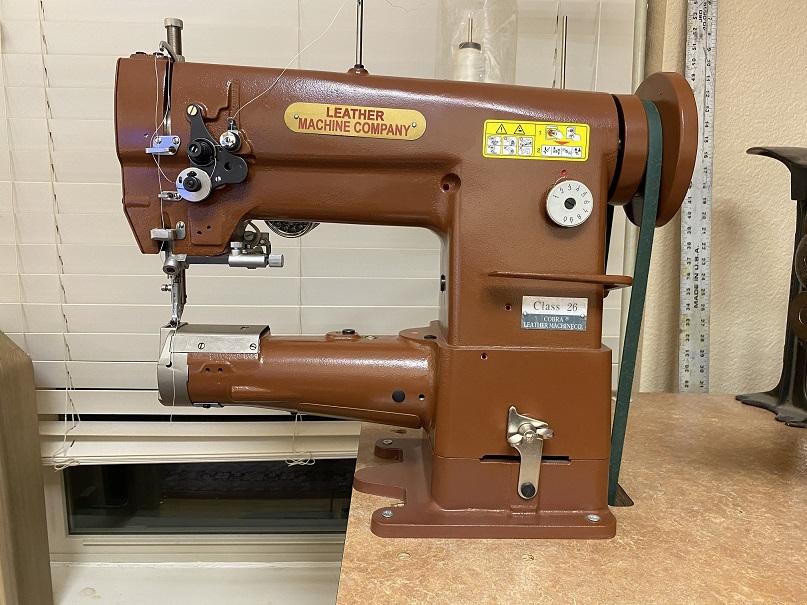
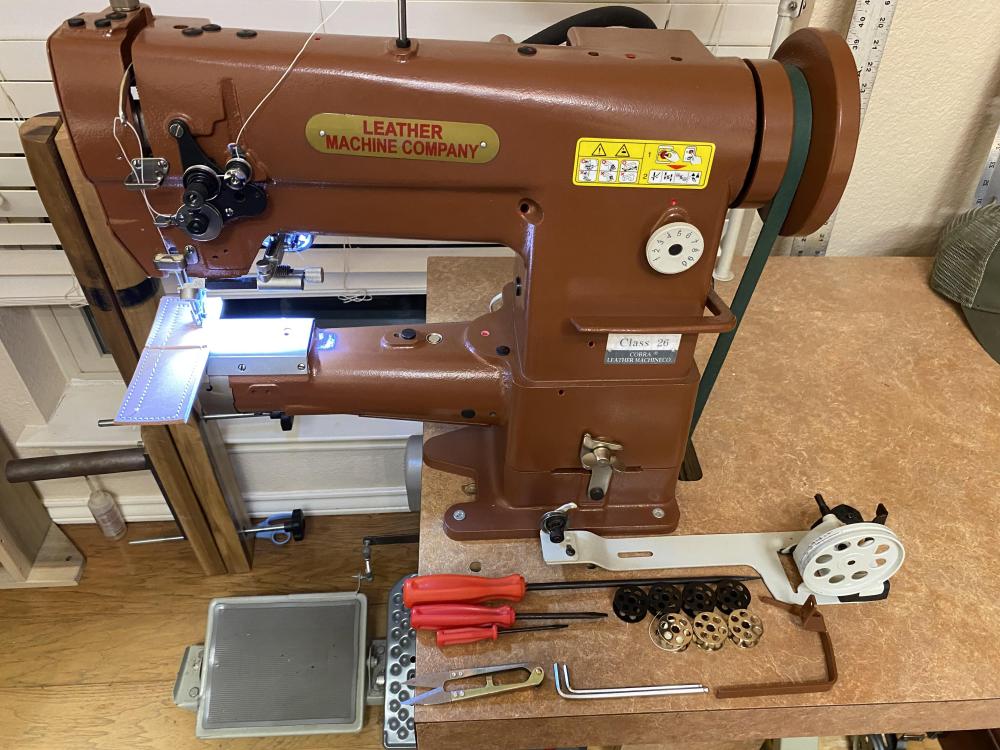
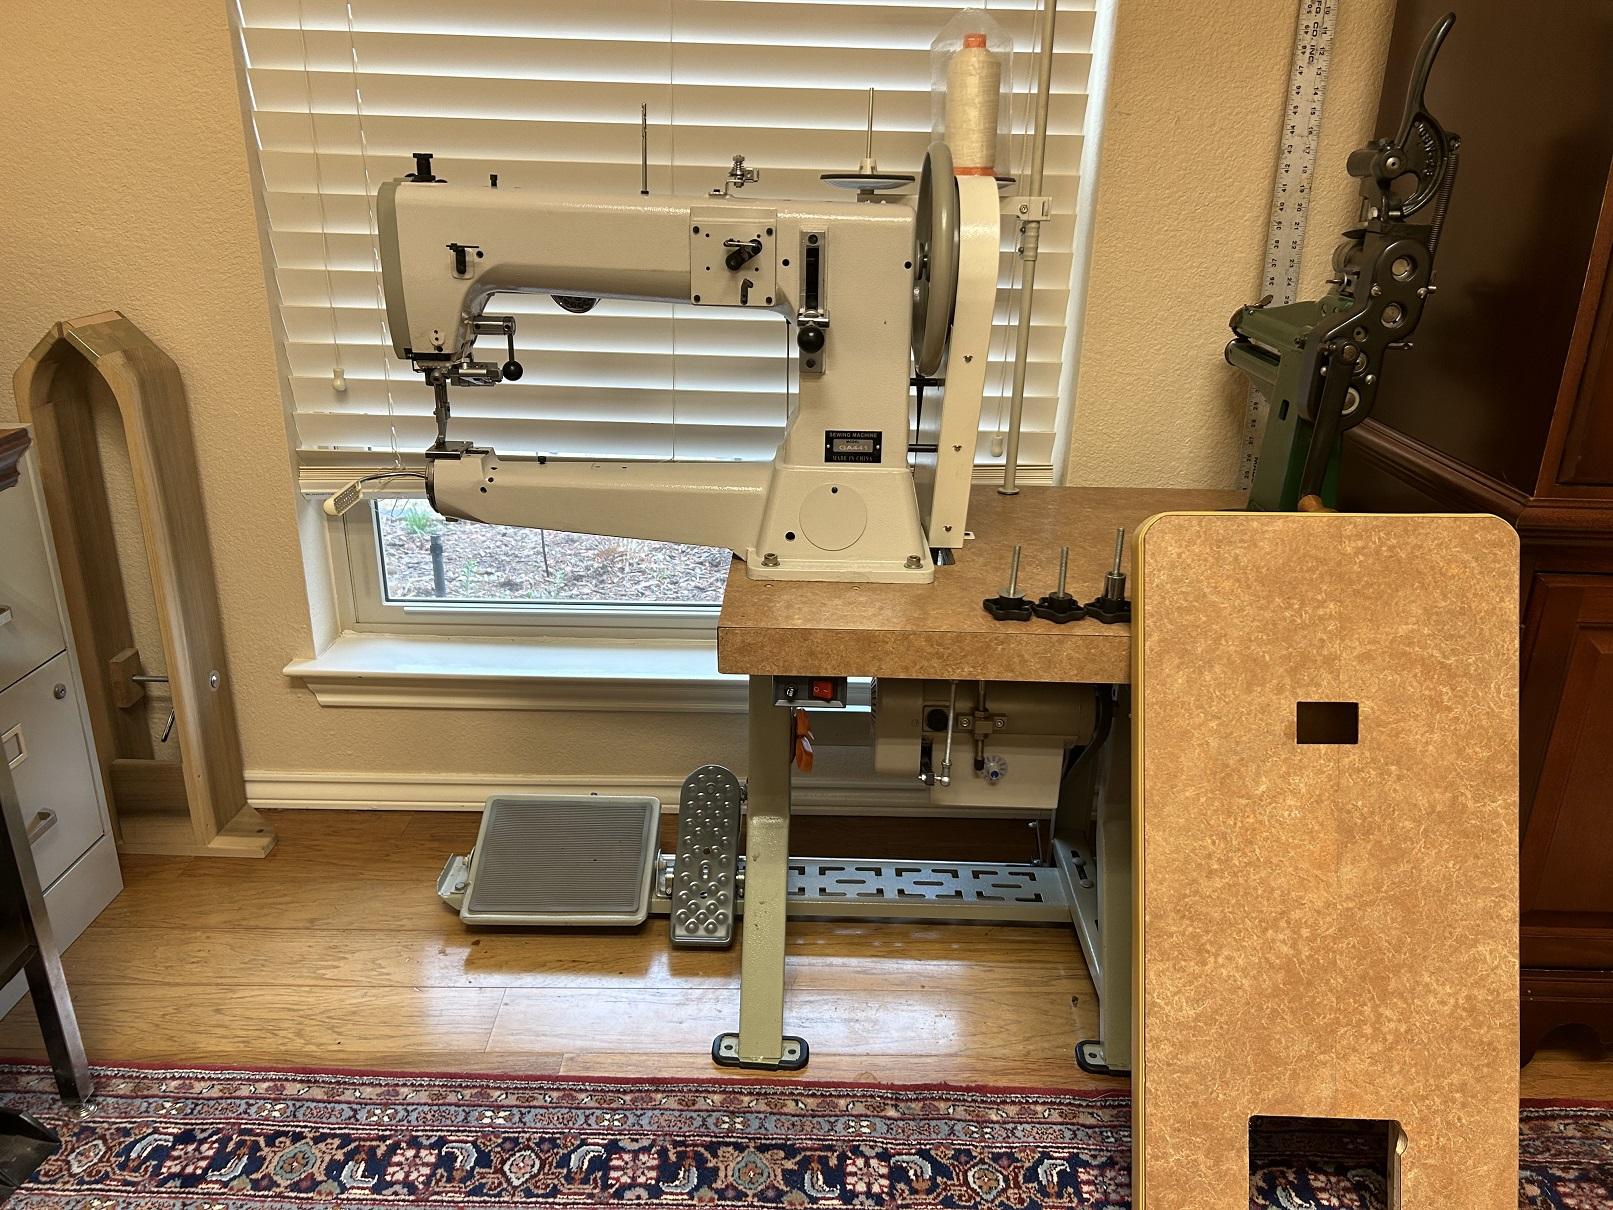
Cobra Class 26 in like new condition. $1000 plus $200 shipping to lower 48. HEAD ONLY NO TABLE, NO SPEED REDUCER, NO MOTOR. I sewed one project on this machine. Then my sewing machine buddy called me saying he had these 441 Clones new unopened box straight of the boat for $1200 cash. (machine only) Took a lot of work to get it right but still half the price of Cobra or Cowboy machines. I have a machine identical to the Cobra Class 18 machine. Those are the reasons for selling this machine.
Third picture is 207 thread. I think that sample is still in the machine. It is already boxed up and ready to ship.
Located near Dallas, Tx.
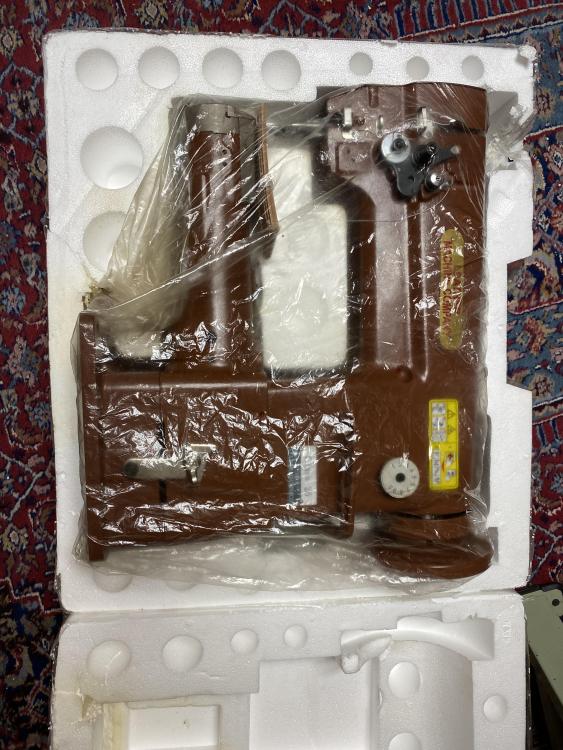
Machine will be shipped in original box with everything that came with it. THIS FOR MACHINE HEAD ONLY
Machine is $1000 plus around $200 for shipping to anywhere in lower 48.
Here is a list of what you would need to set up machine and have it working.
Speed reducer from Toledo Sewing $150 includes shipping
Servo Motor from Toledo $150 includes shipping.
A really nice sturdy cylinder arm machine stand with tops for $400 includes shipping. I found it on Ebay. Might could get one of the pedestal stands from Cowboy or Cobra.
Foot pedal for presser foot lifter, belts, thread stand and lights less than $100
So for about $2000 you can have all the pieces shipped to your house ready to assemble. If you are handy you can build your own stand and save another $200 or so. If you can build your own speed reducer you can save another $100 or so.
-
yes
-
yes
-
Yes still available. Head only, no motor, no table, no speed reducer.
-
This machine is still for sale
-
I’ll email you this evening
-
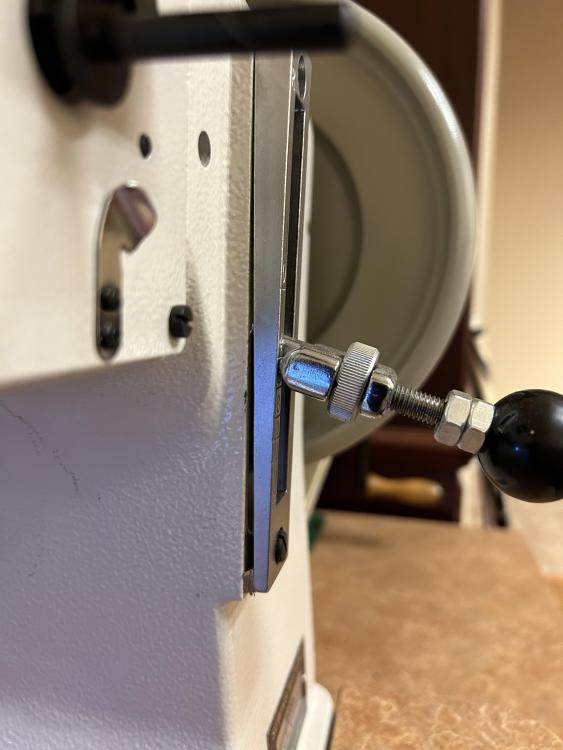
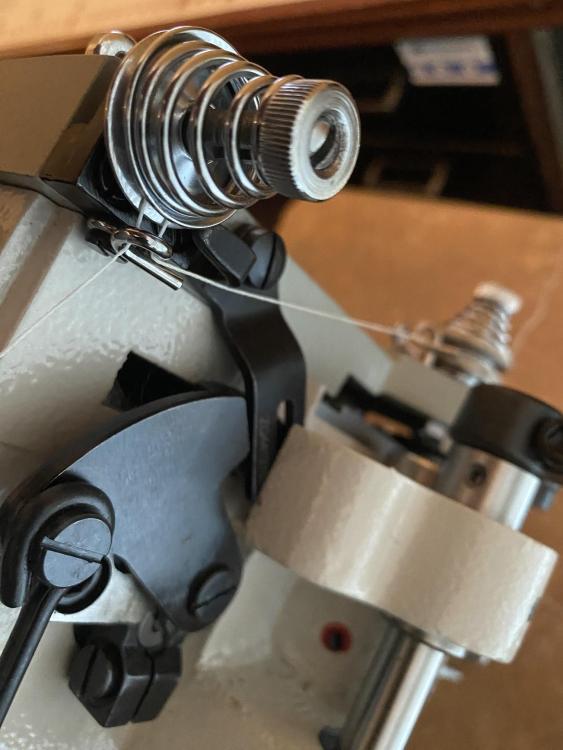
Thats where Cobra puts there's. Yes I put mine there as well. It's mounted on the #24 bolt. I had to use some needle nose to open up the hole a little to get the #24 bolt thru it.
-
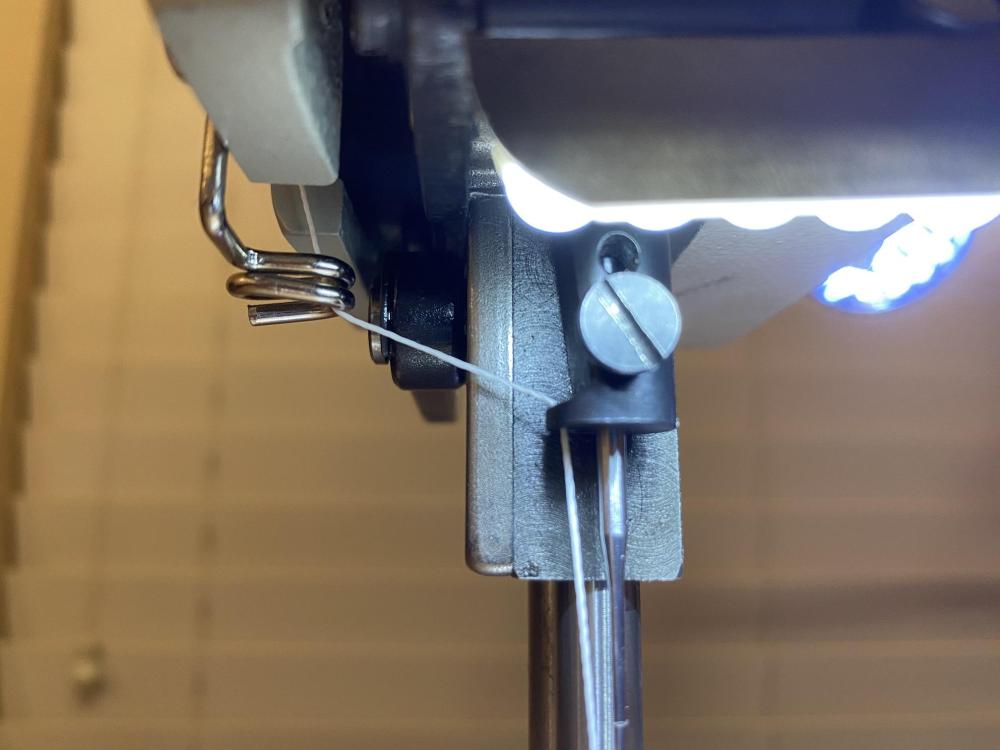
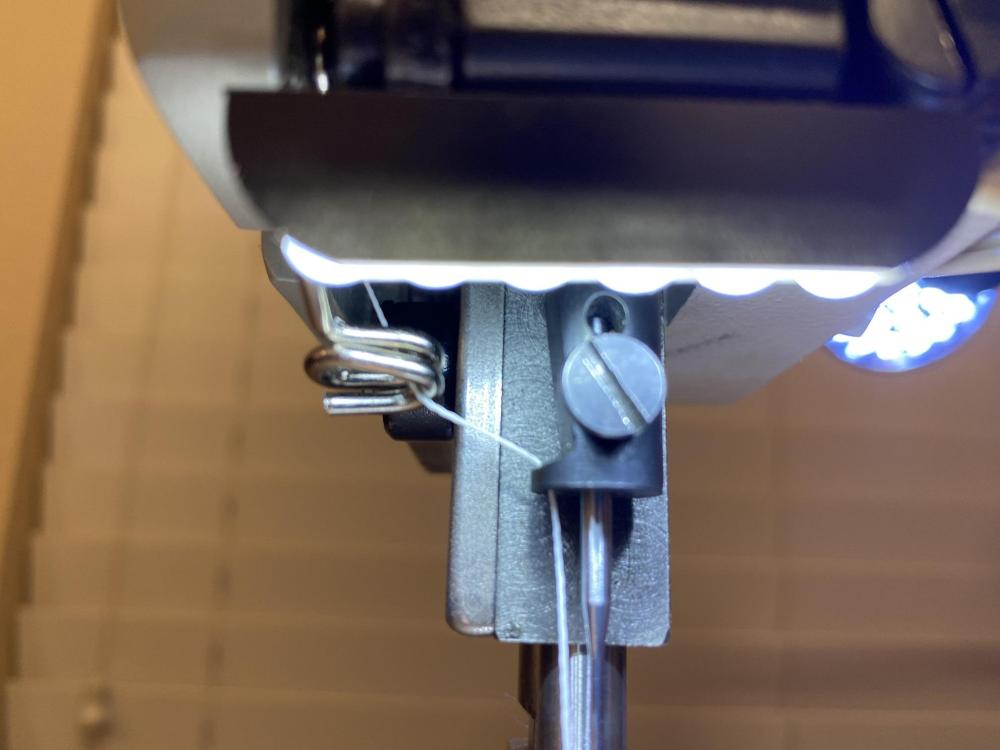
Here you can the path of the thread with last thread guide in the 3 different positions. I have found videos on YouTube where they would skip the last thread guide completely.
-
Going thru the bottom eyelet before wrapping around disc 1 1/2 times creates upper thread tension you can't get rid of. I looked up every manufacturer I could find, and Cobra is the only one who goes thru the eyelet before going around the disc. It is OK on bigger thread and needles but will never let you loosen the top tension enough to sew on the lighter end capabilities of this machine. You don't need another piece of leather.
Don't go thru the bottom eyelet before going around the disc 1 1/2 times and tighten the bottom tension.
I would still move the last thread guide to the inside of the faceplate.
-
Simple fix. The diagram is in the thread RockyAussie is quoting. When you loosen set screw #31 it allows you to push part #30 over either way if you needed to. Once you move the needle bar over you will be able to straighten up the center walking foot.
-
Good Looking work Bob. How you like that new Cobra.
-
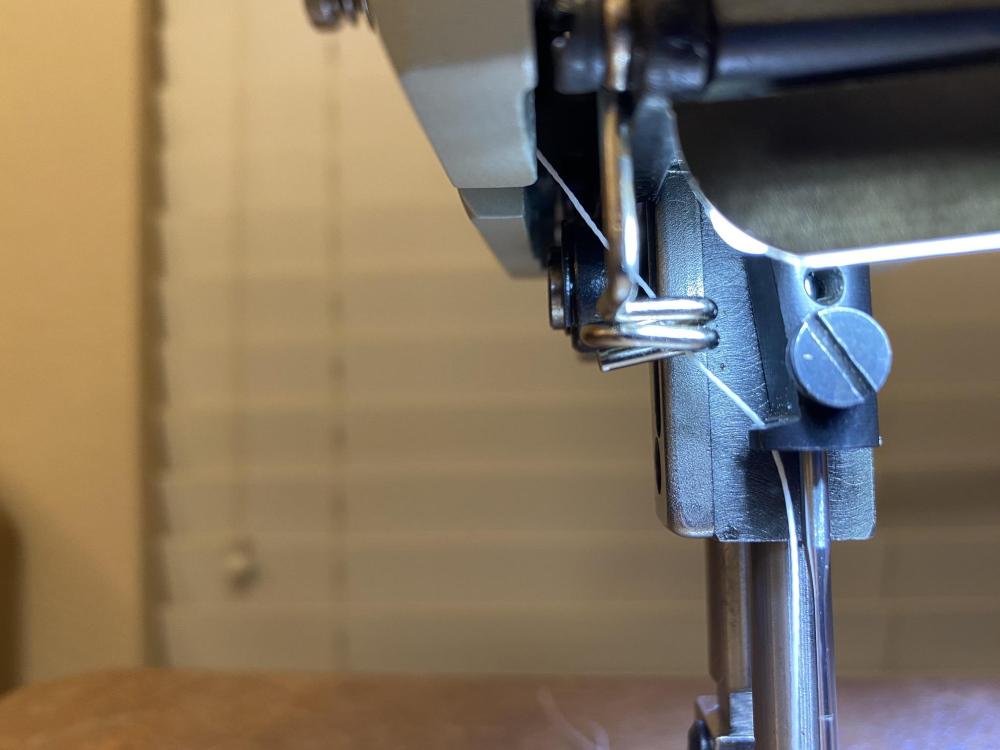
I went back and threaded my machine like Cobra does, and the thread is rubbing on the tension release arm/lever after exiting the first tension eyelet. I wouldn't think that would be correct. It obviously doesn't make any difference to the Cobra people. The original Juki machines aren't threaded this way.
Anybody figure out why our edit button disappeared? Anybody that lost their edit button running Windows 11?
-
I think exiting thru the first eyelet and then going thru the second eyelet before wrapping around the second tensioner just adds unwanted tension. I looked up every 441 clone I could find and Cobra is the only one who threads their machine this way.
-
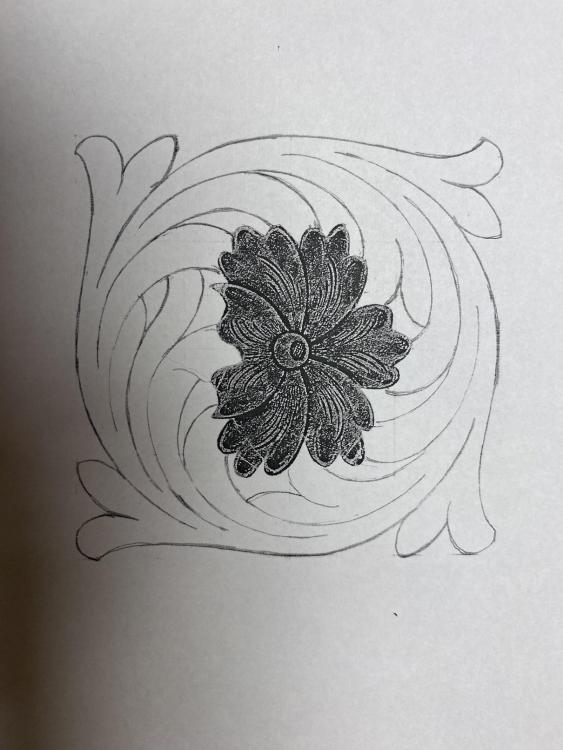
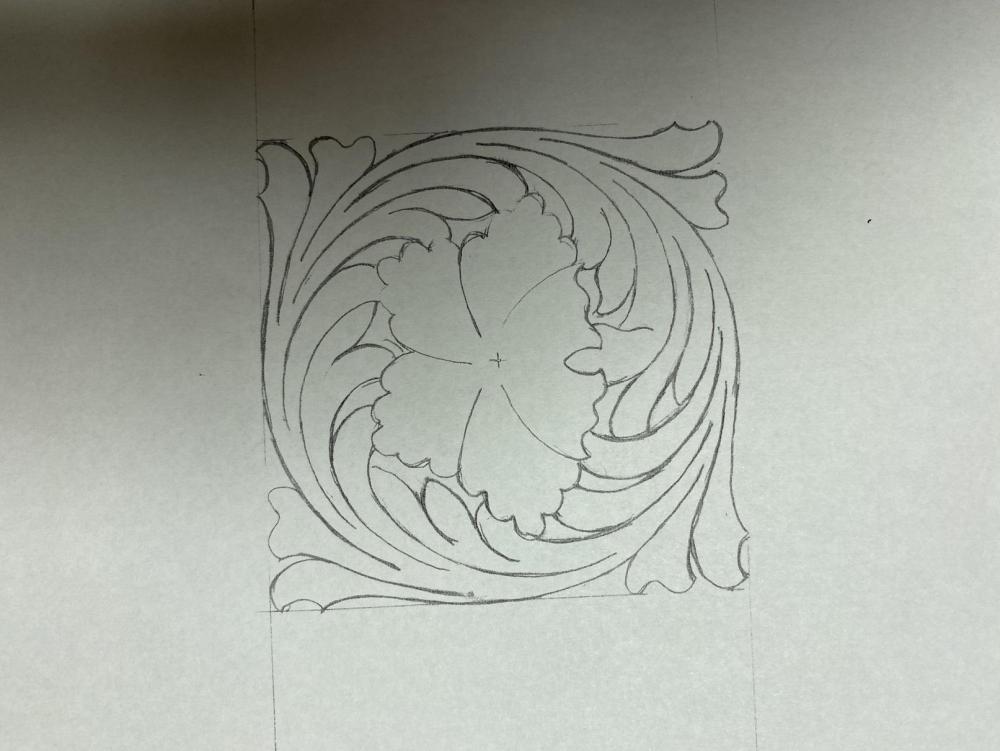
Much easier practice pattern.
-
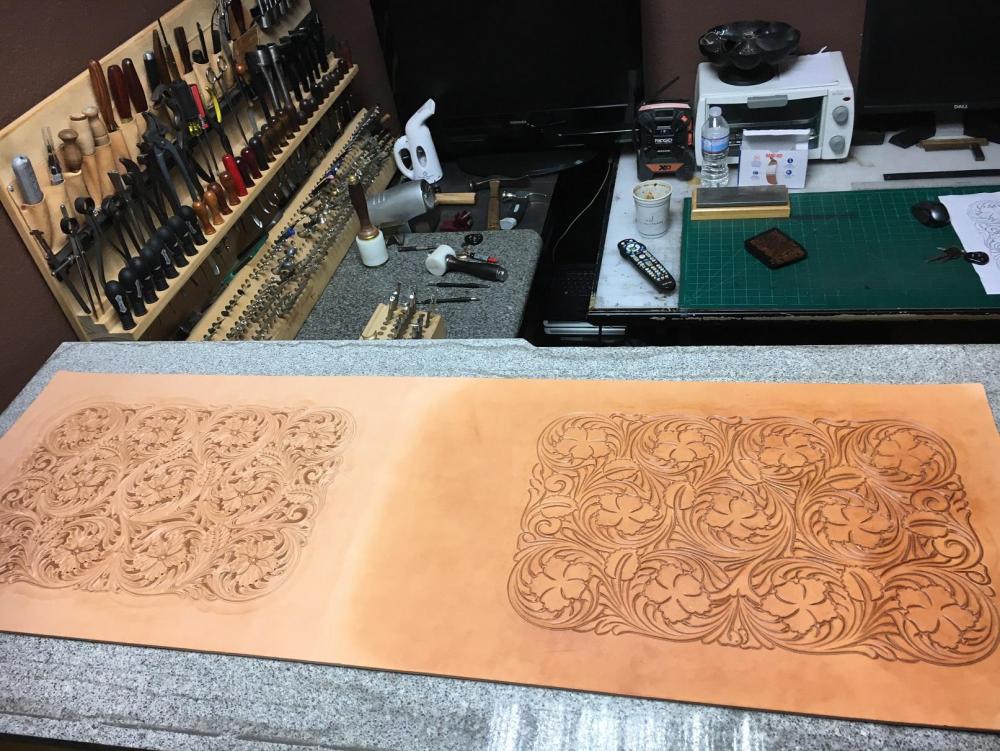
Try to feather everything. Shaders, bevelers and decorative cuts. Everything starts deep and feathers to nothing. When you cut the pattern try not to let any lines touch each other. I try to cut a little less than half way thru the leather and then bevel firm not hard and not soft. You can fine detail the inside corners with the background tool and modeling spoon. Point the shaders towards the middle of the flower and the center of the leaf or whatever they are. You can walk the shaders like the bevelers. A little tap tap tap as you are moving the beveler or shader. Bevel all the lines that run into another line first then bevel the ones they run into.
Try to make the background area as small as possible. It's a lot easier to make a small area look good with bargrounders or a regular background tool. I trace outside my lines and then by the time you cut and bevel the background area will be the size it is in the picture.
I do use some special swivel knife blades. The blade I cut the pattern with is a Leatherwrangler that has been ground down to .040 and decorative cuts with one ground down to .025. Standard is .0625 You can still make it look good with a standard blade.
Depending on the leather you are using the tool imprints should be darker like burnishing. Especially the beveler and shaders. Usually if it's not leaving a burnishing color the leather is still to wet.
-
Here's a tracing pattern and a picture to look at. Tool it as many times as it takes to get where you want. Use the same pattern every time. Eventually you will make those tools do what you want. A picture of what it should look like after beveling.


Edit button gone?
in Feedback and Suggestions
Posted · Report reply
I have the same CFM under my name and no edit button. Can you tell me what the CFM stands for?