

Brazos Jack
-
Content Count
34 -
Joined
-
Last visited
Everything posted by Brazos Jack
-
You're more than welcome. Not to toot me own horn, but this book is a great guide to creating your own patterns for all sorts of projects - not just the ones shown! Any and every pattern I have ever made, published to personal, from mug wraps to cat muzzles were made with the same methods shown in the book. (Yes, I said cat muzzles.) It's easy to read and follow with a lot of my twisted wit and humor included so it doesn't get boring after two pages. Not to mention that my door is always open for questions about the content. Enjoy, Jim
-
Sadly I no longer have a website but Double K leather sales carries my book and some of my patterns. Follow this link to the Book of Leatherwork. http://doublekleather.com/images/stories/virtuemart/product/6082-02.jpg Jim
-
Keep in mind that all knives are NOT created equal, so I'm sending the basic "How To" on laying out patterns for knife sheaths. This is from a chapter of my first book and gives all the details for a variety of sheath designs. It gives the details for the basic outline, welts, and retainer straps. The rest is up to your imagination in the "how it's gonna look" department. Holler if you have any questions. Jim Knife Sheaths.pdf
-
Take a look at this one. You can adjust the hole spacing as needed. Jim Belt Layout.pdf Belt Layout.pdf
-
Try this out for size. I formatted it for letter size so you can print at home. Now, the belt width can vary from the shown template, so adjust as you need to. This is just a good start. Jim Dress Belt Layout.pdf Dress Belt Layout.pdf
-
This is one made for a friend of mine. It was a great chance to try our some basket weave. If you need it, I will gather the information on how to lay out the pattern and welts for the sheath. Holler at me. Jim
-
Oh how I love topics like this one. It reminds me of my humble beginnings back in the mid 1900s and some of the hot conversations of how this and that can't work because nobody does it that way. Well, that don't hold water because this cowboy was doing that way and it worked! What my experience in this trade has taught me is that if it works it's an acceptable method. Whether it's belts, boots, holsters, or cat muzzles; if it works - go for it! As for traditions, well I'm about as UNtraditional as a guy can get and is why at any gathering or convention I'm the one you see in the corner talking to a lamp. Reason is simple; most folks like to belong to a click that follows one or another way or method so they have others to converse with about the topic. (Lamps by the way are good listeners.) My point in all this is this - you are ALL right! Why? Because it works. And Alex reminds me of how I learned things in this trade and made it as far as I have - TEST FIRST - CUT LAST! You go Alex. Hot conversations like this one keep ideas flowing and going and is what makes the world go round. I love it! As for the way I make a belt, well, if it holds my pants up - it's a good one! God Bless America and the Republic of Texas! Jim
-
Well darn it, I don't have a photo of the back, but the good news is that it looks just like the front. As for the inside, the Chicago Screws go thru the holes in the journal and then thru the paper and the retainer is laid on top with the caps passed thru to screw into the sockets. This way, the cover opens completely away from the paper so to allow easier writhing without having to fight with it being in the way. If you look closely at the pattern, all this becomes clear. Once you get it assembled, it becomes evident how everything works. Jim
-
I'm gonna let you in on a little secret: when I set these out at craft shows I sold out by the end of the day. Besides that, I carry one on my chemical truck to keep up with chemical usage and well reports. The come in handy. Jim
-
By your post, I figure you have your pattern pretty well worked out. So with that said, forgive me if I'm intruding This is a pattern I made a few years ago that uses the 8 1/2 x 5 1/2 paper usually found at Walmart or some printing supply stores. It uses 1/2 inch Chicago Screws to keep the paper in place with the help of a retainer. Please feel free to download the pattern for your own use. Just keep in mind that when it is to be printed on the 11 x 17 sheets, keep the Page Scaling to NONE. If it is set to Fit the Page, the scale will be too small. Enjoy, Jim Here is a photo of the Journal Journal Layout.pdf
-

Are Patterns And Templates Protected Under Copyright Laws?
Brazos Jack replied to Ian1783's topic in Patterns and Templates
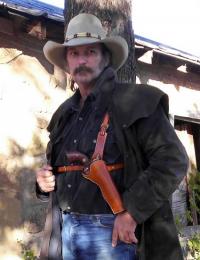
By golly, now there is a sure nuff Brazos Jack Shoulder Holster! And it looks like you followed the instructions to the letter on the shoulder strap. Well done Sir! Just makes my old heart glad. -
Are Patterns And Templates Protected Under Copyright Laws?
Brazos Jack replied to Ian1783's topic in Patterns and Templates
Lan, These fellers are on the right track for sure. Speaking as an author of books and patterns published for the leatherworking community I can tell you that if you purchase a pattern from Tandy, Etowah River, or anyone else; it's yours to use as you please. Making and selling the item is legal. Problems arise when one chooses to reproduce and distribute the pattern itself without the express written permission of the person holding the copyright. The only time you need to worry about selling a particular item is when it has a patent mark. So, keep on crafting! Jim -
Civil War 1863 Pattern Holster
Brazos Jack replied to Brazos Jack's topic in Gun Holsters, Rifle Slings and Knife Sheathes
As a point of fact, the holster is worn on the right hand side, butt forward. Oddly enough, the reason for this is so the Officer could pull the pistol with the left hand or pull his saber with his right hand in the heat of battle. Also, if you have ever looked closely at photos of Cavalry Soldiers on horseback, the holsters set at a more comfortable angle in that position as opposed to the straight draw. Even at this seemingly odd position, the pistol comes out very easily with the right hand draw. Jim -
1841 Pistol Box Instructions
Brazos Jack replied to Brazos Jack's topic in Gun Holsters, Rifle Slings and Knife Sheathes
Thank you for that kindness. I feel fortunate to have been able to find and study military items actually used in the Civil War. I made extensive notes and took every effort to make them as close to the "real deal" as possible. Knowing Re-enactors as I do and being on myself, accuracy is everything. Also, these patterns are not available anywhere else and therefore is the reason I created and published them; for folks like you. Jim. -
Civil War 1863 Pattern Holster
Brazos Jack replied to Brazos Jack's topic in Gun Holsters, Rifle Slings and Knife Sheathes
Funny you should ask . . . . Check out my next posting. Have fun! -
As requested, this is the Patterns for the 1841 Pattern Ammo Box used in the Civil War. Remember, they are on 11 x 17 sheets so when you have them printed, tell them to set the Page scaling to NONE. Otherwise, the patterns will be smaller than to scale. Be sure to download the instructions from the next post. Have fun, Jim Pistol Box Pattern.pdf
-
These are the Instructions for the 1841 Pattern Civil War Ammo Box. Enjoy, Jim. Pistol Box Instructions.pdf
-
Here are the Instructions for the 1863 Holster Pattern. Be sure to download the patterns. Jim CW Holster Instructions.pdf
-
After a good deal of work, trial, and error I finally got this pattern and the instructions sized down to fit on the web site. The downside however, is the Instructions are on the following post. So, please go to both and download the complete set. This 1863 Civil war Holster is on of my early pattern sets and, any several folks have contacted me looking for it. Honestly, I don't even know who or if anyone is offering it for sale. So, I decided it's time to post it for you historic leather workers to download and enjoy. Oh, by the way - these patterns are on 11 x 17 sheets. So, when you take them to a print shop to be printed, be sure to have them set the Page Scaling to NONE. if they set it to "Fit the Page" the patterns will come out too small and out of scale. Don't forget. Have fun. Jim CW Holster Holster Pattern .pdf
-
I have a stack of unpublished patterns sitting on the shelf but they are too darn big (file wise) to post on the forum. Mexican Loop Holsters, Shot Shell Slides, Bullet Slides for Cowboy Action Shooting, and the list goes on. My wife talked me into going to the gun show here in Snyder a couple of weeks ago and met up with some Cowboy Shooters and got persuaded to sign up and shoot. It was a great chance to pull my gun rig out of retirement and made another shot shell slide last week end to get fully geared up. Last friday I went to Dudley, texas and bought myself a genuine Henry Repeater in .45 Long Colt. He ordered a Coach Gun for me to pick up as soon as it gets here, so looks like I'm coming out of retirement for leatherwork cuz now I need some scabbards! Enough rambling though, But when I can figure out how to down size the file size, I will be posting mor pattern for you fine folks. And thanks to everyone for your continuing support, Jim
-
Am looking forward to see the photos. Did everything work the way it should? Jim
-
I am really looking forward to see some pictures of finished bags and want to see what y'all do with the carving patterns. Caint wait, caint wat, caint wait.
-
1860 Army Black Powder Rig
Brazos Jack replied to Rogueshadow's topic in Gun Holsters, Rifle Slings and Knife Sheathes
That is a sweet, sweet rig! The leather looks like it has an aged look as if you reached back and took it from the past. Love it. -
I used 8 ounce leather and recommend that wieght for the pouch and flap. The gusset can be made of the lighter 6 - 7 ounce. Jim
-
My 1St Buscadero Style Gunbelt
Brazos Jack replied to prc77ro's topic in Gun Holsters, Rifle Slings and Knife Sheathes
Nice, nice job! Neat, even stitching. Of course I'm partial to hand stitching being as I've never used a machine. The advantage when making the holster is that you can roll the leather over to sew the seam without having to fold it and flaten out the holster pouch, especially when the holster is lined. This keeps the leather in a "natural state" and makes a better holster. It is in my humble but hard earned opinion, that you will keep 'em coming back when you deliver a quality product. So, sew them holsters by hand! Great job, I made a Buscadero style once, they ain't easy. Jim