rawcustom
-
Posts
328 -
Joined
-
Last visited
Content Type
Profiles
Forums
Events
Blogs
Gallery
Store
Everything posted by rawcustom
-
I think you are confusing strength for toughness. But again you would be wrong. Toughness as in impact strength can be greatly increased with alloy elements beyond iron and carbon, strength as well. Chromium is just one of many alloys, that can be added to a steel. Edge retention is sharpening resistance. I guess you could argue the point of a good knife sharpens quick/ dulls quick, and that we'll just have to disagree. Well carbon steel doesn't really specify anything. Remember I quoted simple carbon steel which is just iron and carbon. Price point and tradition are strong followings. Many can assume a steel works "good enough" for it's intended purpose that they don't feel a need to upgrade. They have been making carpenter tools for the last few thousand years. Modern high alloy powder metallurgy steels haven't been on the scene more than about the last 50. Also Chromium is more than cosmetic, and corrosion resistance is an important attribute to many applications of steel. And check the components of stress critical, again they aren't simple carbon, and again I wasn't commenting on strength, as that implies structural properties more common to bridges than knives.
-
You are right Art "knife steel" is not an official term, much like "sniper rifle" doesn't imply anything other than a rifle a sniper has used. In my use of it I am referring to a steel intended for knife use that is generally a high carbon (0.7%+) that has a few extra alloys, the most common is chromium, but often include molybdenum, vanadium, tungsten, etc. You are also correct that application has a lot to do with choice of steel selection, it also has a lot to with HRc settings as much as the chosen steel itself. Depending on the knife I could use the same alloy at 58rc or 62rc. Some alloys can handle higher HRc better than others. Some have to have HRc considered with edge geometry to work, but alas the position of this post is to educate people beyond stainless and high-carbon advertising common to the craft. So to avoid confusion I'm not inventing a knife steel by using the term, I'm just using it to better classify steels that are appropriate for knife making since the terms stainless and high-carbon have very little reflection on a steel suitability for knifemaking. Also you're proving my point with the Osborne 1065 steel. It's a simple steel that cheap and easy to work with and get a good heat treat. This means consistency, adequate performance, and lower cost.
-
Before I begin I'll give a brief background of myself. I've been a knifemaker practically all of my life, and have had the opportunity to work with and talk with some of the bigger names over the years. I have made knives, tested knives, sharpened knives, read about knives, and done enough studies and research in metallurgy that I should have probably declared that as my major back in college. That being said I find plenty of misconceptions strewn about for the average consumer who is looking to purchase a knife. Some ideas, right or wrong, are held onto tight and I realize some people can get worked up to hear something contrary to their held ideas. So if you can't read a view contrary to your own without getting upset, than please don't proceed reading. Just consider that I've done my homework and have born out theory through experience for some time on this. Since this topic could go on for an extreme length I will limit this particular discussion to one of my favorite misconstrued topics: Stainless vs High Carbon steel To start with, the term “stainless” only defines chromium content in steel, with a steel containing 13-14% or more chromium being considered “stainless”. By this same criteria we have everything with less chromium considered “non-stainless”. The term “high-carbon” references a steel that has 0.3% or more carbon content. Realize that most any suitable high-carbon knife steel will be at least 0.8% carbon. So you can use “high-carbon” steel that is in fact totally unsuited for knife making, a great example is the HC stamped RR spike. So a steel can be high-carbon stainless, or high-carbon non-stainless, or low-carbon stainless, or low-carbon non-stainless. The most important fact is that by these labels alone you cannot determine a knife’s performance. Think of it this way, the ingredients in the steel is sort of like putting in your ingredients for some breakfast muffins. The purity of your ingredients, the ratio of your ingredient, and your consistency in always adding the same amount each time are all critical to your end result. However, your ingredients are what I call the potential, not the realization. The next step is how the ingredients are mixed, and lastly how they are cooked. Steel is very similar that the mixing and forming of the alloy is crucial to the grain and performance, and the heat treat (cooking) must be exact to complete the realization of the added ingredients and mixing. So a steel with all the right ingredients means little if it were processed crudely and/or heat treated incorrectly. Conversely a steel with substandard ingredients mixed exacting and heat treated correctly will outperform a steel that had better ingredients (potential) but failed on realization. So why all the trash talk on “stainless” you may ask? I think this traces back to the fact that many, many cheap knives are using substandard stainless steel, not a knife grade steel. They also put little investment into the heat treatment and may be dealing with a foundry that runs very loose specs on its formulation, and is likely using older mixing and casting methods. So they essentially start with poor ingredients, put little effort into mixing, and are trying to flash cook them or may skip that step entirely. They still can label it “stainless” and the uneducated consumer thinks stainless = knife steel. Stainless knife grade steels require a very drawn-out, multi-step heat treatment, that must be exacting for success. So why all the hype over “high-carbon” you may ask? Well for starters most people marketing high-carbon are dealing with simple steels. Remember steel is only iron + carbon. More alloys can be added of course, but that is all it takes to be a steel, and is commonly called a simple steel. High carbon simple steel is much cheaper than it’s stainless or alloyed counterpart. It also can be produced as decent quality with less technology than an alloyed/stainless steel. Lastly, it has a much simplified and easy heat treatment process compared to stainless. So with limited ingredients, they mix with less effort, and the cooking process is more like a toaster, very simple and fool proof. In short, the high-carbon simple steels are much easier to achieve realization from than a high-carbon stainless steel, or a high-carbon high-alloyed steel. This is why you will find more simple steel knives that are effective even at low price points than you will with stainless or alloyed knives. However, they are no match in performance in any respect to a properly alloyed or stainless high-carbon knife steel with an appropriate heat treat. They can be out-performed in edge retention, toughness, corrosion resistance, you name it, except price. Anyway I hope this is useful for those wishing to learn more. I could go on and on and on, so if the response is positive maybe I will continue with my second favorite myth out there.
-
The owner is member on here and a great guy to deal with. I have a drill press burnisher and use it all the time. I also have one of his mauls and absolutely love it. Both are top notch in quality of fit and finish, and function beautifully. They are also extremely reasonable on price. I tend to make a lot of my own tools, and I can say that these would have cost me more in $ and a healthy dose of time for me to try to make.
-
 Thanks Jim!
 -
.jpg.babe74dc3b93b458e3978610fca5aa17.jpg)
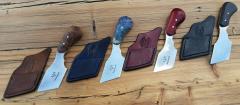
From the album: Knives and Sheaths
-
From the album: Knives and Sheaths
-
From the album: Custom Leatherworking Knives and Tools
-
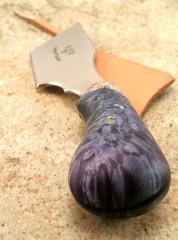
From the album: Custom Leatherworking Knives and Tools
-
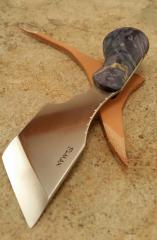
From the album: Custom Leatherworking Knives and Tools
-
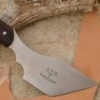
From the album: Custom Leatherworking Knives and Tools
-
From the album: Custom Leatherworking Knives and Tools
-
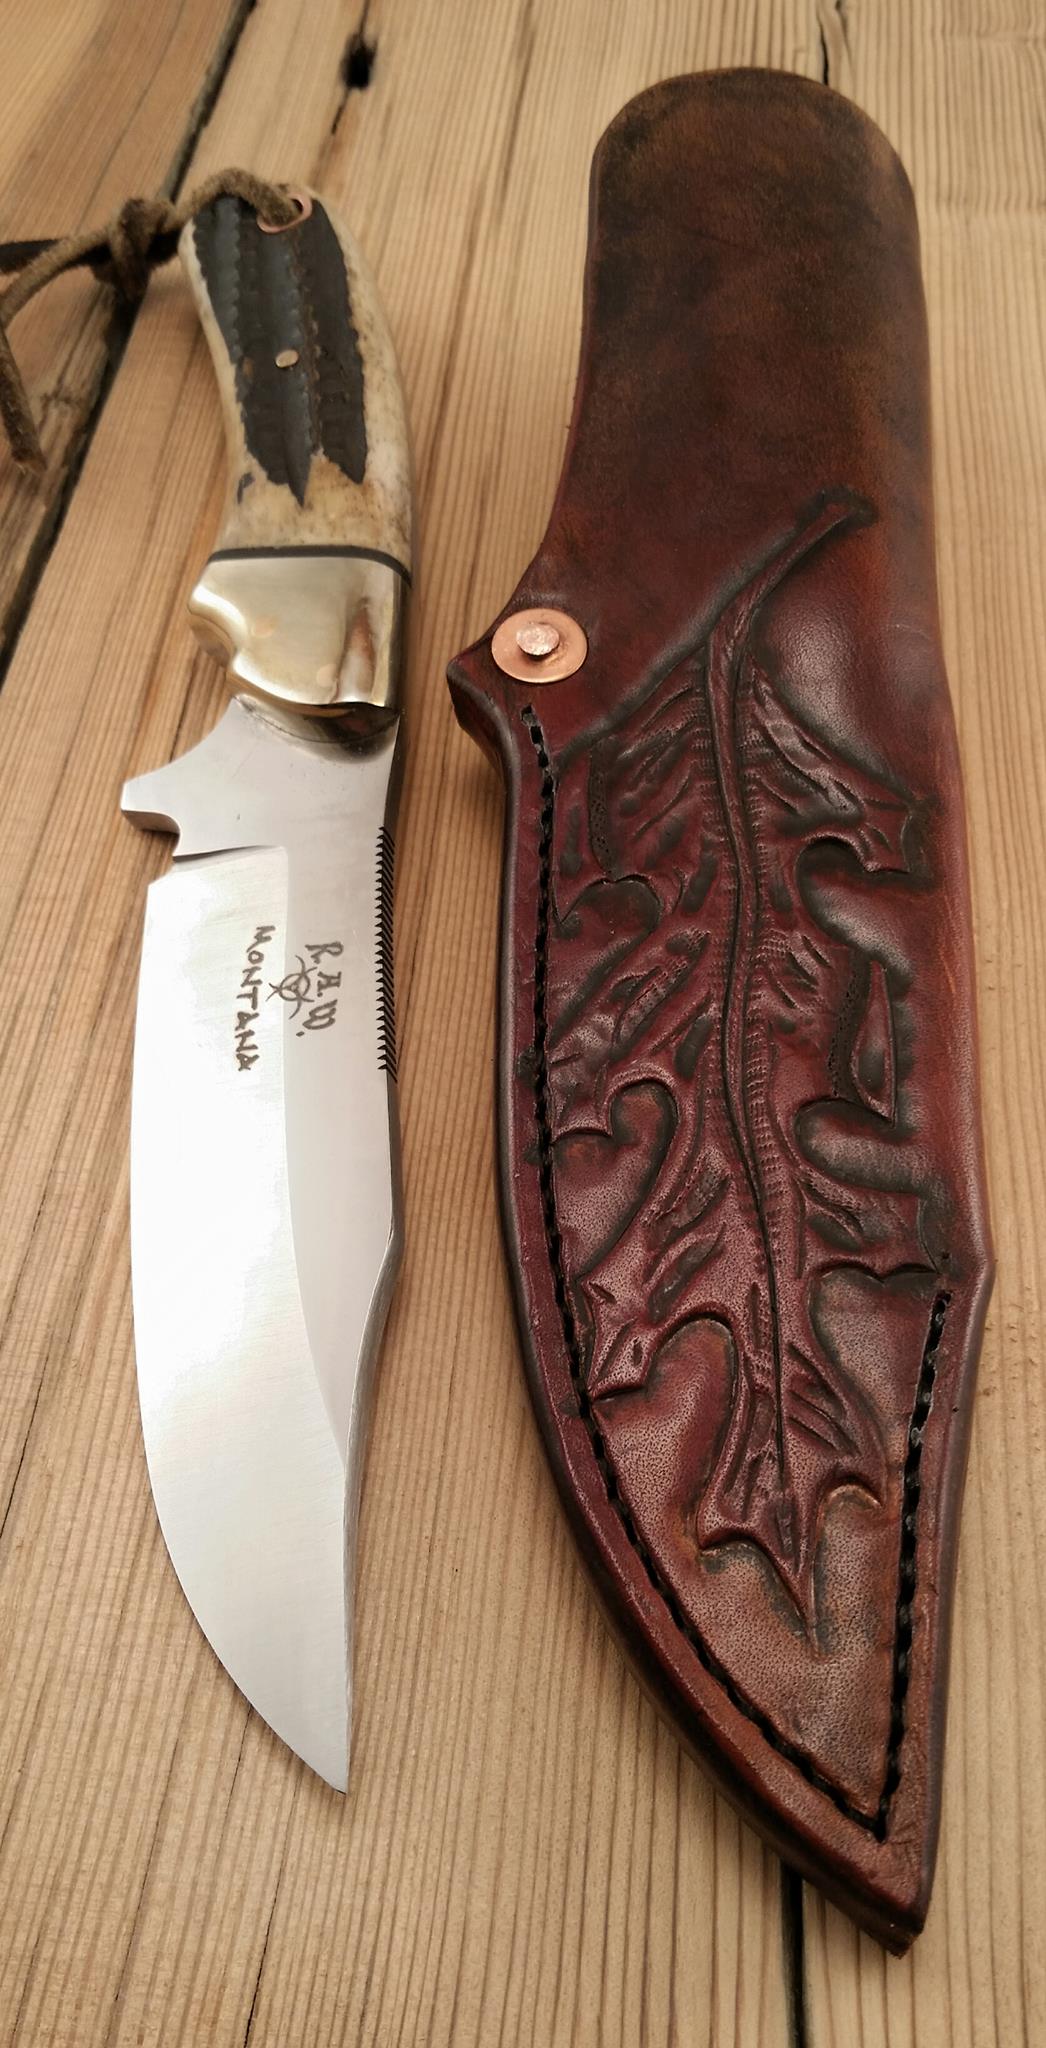
Hunting Knife with Sheath
rawcustom replied to rawcustom's topic in Gun Holsters, Rifle Slings and Knife Sheathes
Sorry, didn't take any of the backside and this knife is already shipped. I'll try to get a picture of the back of the next one, although for my pouch style sheaths they're plain and simple. -
Hunting Knife with Sheath
rawcustom replied to rawcustom's topic in Gun Holsters, Rifle Slings and Knife Sheathes
M390 -
Hunting Knife with Sheath
rawcustom replied to rawcustom's topic in Gun Holsters, Rifle Slings and Knife Sheathes
Thanks. It was a sequential dye starting with red, than diluted dark brown, than antique black, than dark brown highlight, than sealed. -
Three holsters finished today
rawcustom replied to Rohn's topic in Gun Holsters, Rifle Slings and Knife Sheathes
Nice holsters Rohn! You have far more patience than me to stamp those weaves out so crisp and even. Well done. -
Very nice!
-
Clip point hunter with bone handle and carved skirting leather sheath.

-
Leather Recommendation for Knife Roll
rawcustom replied to rawcustom's topic in Leatherwork Conversation
That is a point. I was actually more concerned with the vegtan holding too much memory, that it would resist being rolled/unrolled. But I do agree with everything carved and stamped, sometimes and some items, less is more. -
Hello all, I've decided on a project for myself, to make a knife roll for my butcher knives. I have been looking at pictures and have some ideas on assembly, but I'm wondering what would be a good choice for leather. Most of my work deals with vegtan tooling leathers, but I'm thinking this project might be best suited to an oil tan or harness leather. I'll attach a couple pics from the internet on what my basic idea will be (my pattern will be a bit different but you get the idea), and appreciate any suggestions.


-
I have not had a problem with "dry" leather for tooling/carving, but I have experimented with using an oil before tooling. If there was a gain from the oil, it wasn't enough for me to make much notice of, compared to proper water casing. I was more curious if a very light coat of oil would aid in carving by providing some additional lubricant to the SK blade on the leather, and help prevent the small oil stains that can happen when handling. I don't think you would ruin a hide with sparing use of oil, as the leather already has oil's in it, but of course you wouldn't want to soak it in EVOO or similar. My experimentation was a very limited use of oil (tried both before and after casing), pretty much just a single wipe of an oil rag over the top to add an even, but small amount. It may be more of a benefit on the dry leather you have, it didn't cause any negative affects on my projects. It seemed to have the best affect prior to casing in that I think it allowed the oil to distribute better in the leather.
-
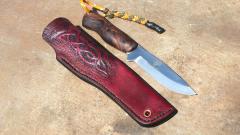
Knife with Carved Sheath
rawcustom replied to rawcustom's topic in Gun Holsters, Rifle Slings and Knife Sheathes
The handle is exhibition grade rosewood. Halitech, the eyelet is well within a welt. The sheath is squared on the outside, but the interior welt matches the profile of the blade. -
Just like the title says. Scandinavian style knife, seemed like something celtic or viking would be fitting.

-
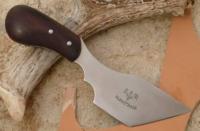
This one is easy for me. Headknife, skiver, trimknife, stitching awl, awl diamond blade, are all my own design and build since I'm a knifemaker. I'm a bit of an edge head so I use the best steel and the best heat treat for excellent edge retention and performance. For other vendors I really like my Osborne sewing palms, and there is a good chance I will invest in a decent SK in the near future as well. I have toyed with plans to make one for over a year, but it's hard to take the time off of other knife builds for my own and would be close to a wash on price compared to many commercial options.
-

From the album: Knives and Sheaths